Task 4: Explore Various Network Scanning Techniques using Hping3
Task 4: Explore Various Network Scanning Techniques using Hping3
Hping2/Hping3 is a command-line-oriented network scanning and packet crafting tool for the TCP/IP protocol that sends ICMP echo requests and supports TCP, UDP, ICMP, and raw-IP protocols. Using Hping, you can study the behavior of an idle host and gain information about the target such as the services that the host offers, the ports supporting the services, and the OS of the target.
Here, we will use Hping3 to discover open ports and services running on the live hosts in the target network.
To launch Parrot Security machine, click Parrot Security.

In the login page, the attacker username will be selected by default. Enter password as toor in the Password field and press Enter to log in to the machine.
If a Parrot Updater pop-up appears at the top-right corner of Desktop, ignore and close it.
If a Question pop-up window appears asking you to update the machine, click No to close the window.

Click the MATE Terminal icon at the top of the Desktop window to open a Terminal window.

A Parrot Terminal window appears. In the terminal window, type sudo su and press Enter to run the programs as a root user.
In the [sudo] password for attacker field, type toor as a password and press Enter.
The password that you type will not be visible.
Now, type cd and press Enter to jump to the root directory.

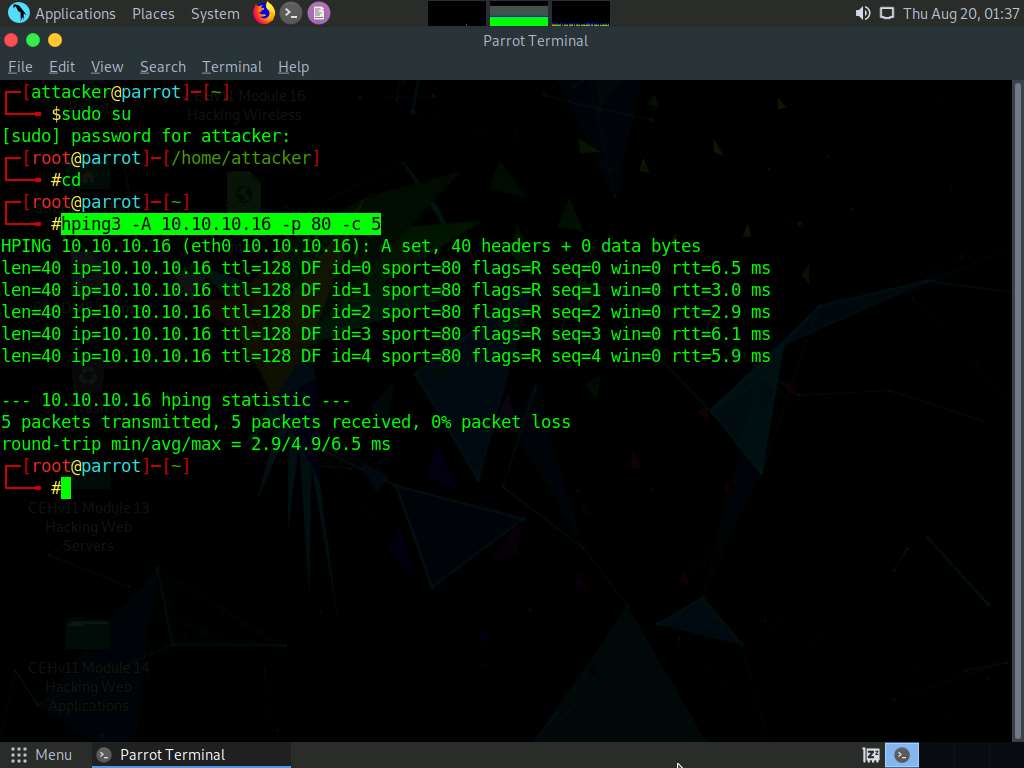
A Parrot Terminal window appears. In the terminal window, type hping3 -A [Target IP Address] -p 80 -c 5 (here, the target machine is Windows Server 2016 [10.10.10.16]) and press Enter.
In this command, -A specifies setting the ACK flag, -p specifies the port to be scanned (here, 80), and -c specifies the packet count (here, 5).
In a result, the number of packets sent and received is equal, indicating that the respective port is open, as shown in the screenshot.
The ACK scan sends an ACK probe packet to the target host; no response means that the port is filtered. If an RST response returns, this means that the port is closed.
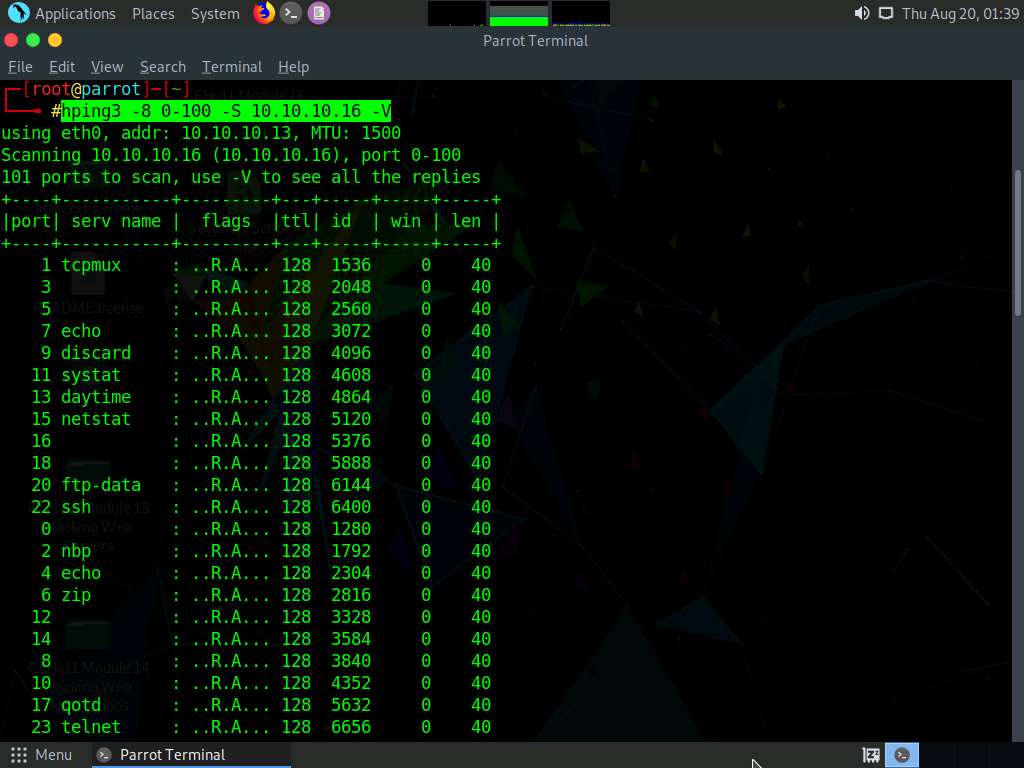
In the terminal window, type hping3 -8 0-100 -S [Target IP Address] -V (here, the target machine is Windows Server 2016 [10.10.10.16]) and press Enter.
In this command, -8 specifies a scan mode, -p specifies the range of ports to be scanned (here, 0-100), and -V specifies the verbose mode.
The result appears, displaying the open ports along with the name of service running on each open port, as shown in the screenshot.
The SYN scan principally deals with three of the flags: SYN, ACK, and RST. You can use these three flags for gathering illegal information from servers during the enumeration process.
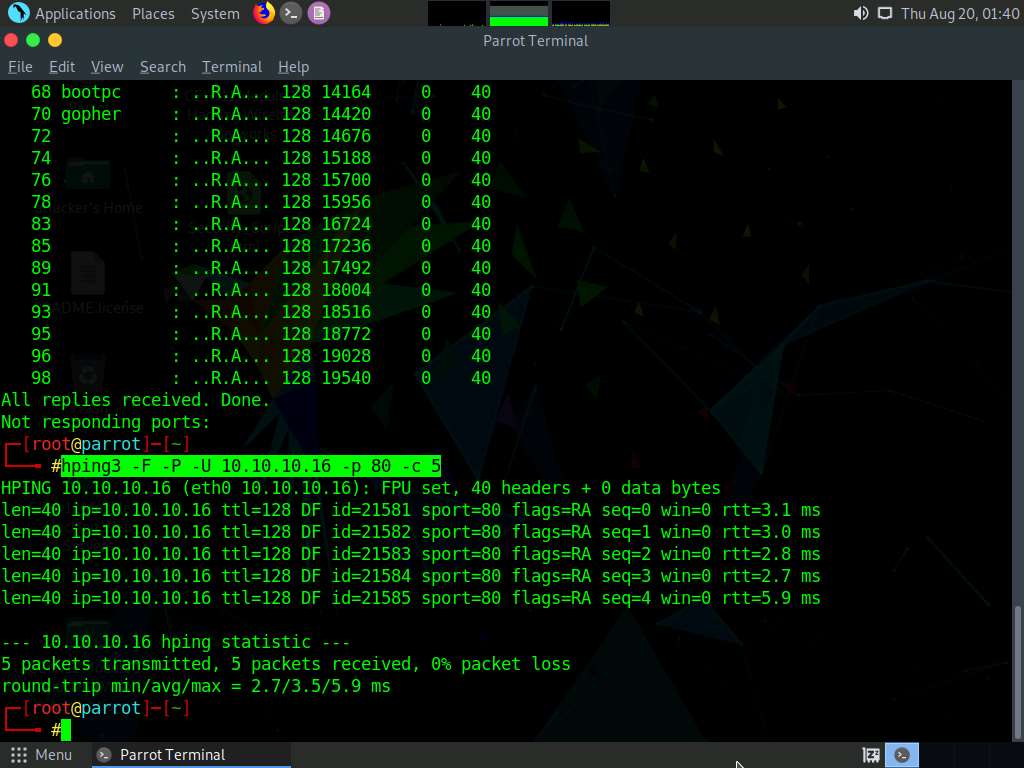
In the terminal window, type hping3 -F -P -U [Target IP Address] -p 80 -c 5 (here, the target machine is Windows Server 2016 [10.10.10.16]) and press Enter.
In this command, -F specifies setting the FIN flag, -P specifies setting the PUSH flag, -U specifies setting the URG flag, -c specifies the packet count (here, 5), and -p specifies the port to be scanned (here, 80).
The results demonstrate that the number of packets sent and received is equal, thereby indicating that the respective port is open, as shown in the screenshot.
FIN, PUSH, and URG scan the port on the target IP address. If a port is open on the target, you will not receive a response. If the port is closed, Hping will return an RST response.
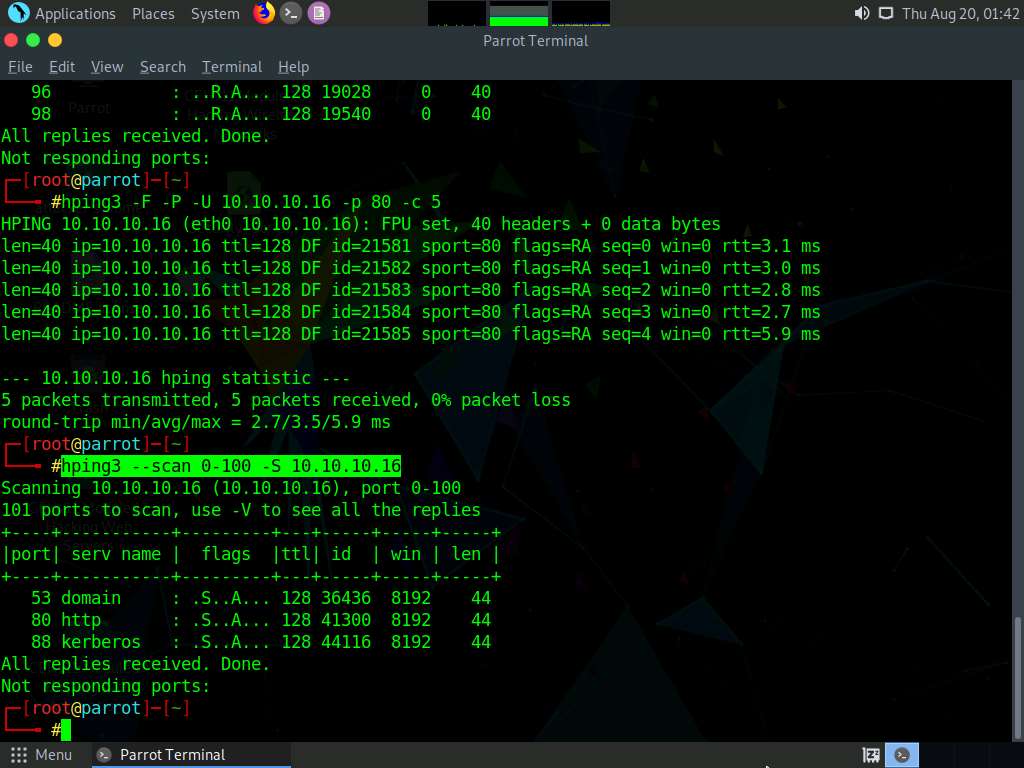
In the terminal window, type hping3 --scan 0-100 -S [Target IP Address] (here, the target machine is Windows Server 2016 [10.10.10.16]) and press Enter.
In this command, --scan specifies the port range to scan, 0-100 specifies the range of ports to be scanned, and -S specifies setting the SYN flag.
The result appears displaying the open ports and names of the services running on the target IP address, as shown in the screenshot.
In the TCP stealth scan, the TCP packets are sent to the target host; if a SYN+ACK response is received, it indicates that the ports are open.
Apart from the aforementioned port scanning and service discovery techniques, you can also use the following scanning techniques to perform a port and service discovery on a target network using Hping3.
ICMP scan: hping3 -1 [Target IP Address] -p 80 -c 5
Entire subnet scan for live host: hping3 -1 [Target Subnet] --rand-dest -I eth0
UDP scan: hping3 -2 [Target IP Address] -p 80 -c 5
This concludes the demonstration of discovering open ports and services running on the live hosts in the target network using Hping3.
Close all open windows and document all the acquired information.


Comments
Post a Comment