Task 3: Explore Various Network Scanning Techniques using Nmap
Task 3: Explore Various Network Scanning Techniques using Nmap
Nmap comes with various inbuilt scripts that can be employed during a scanning process in an attempt to find the open ports and services running on the ports. It sends specially crafted packets to the target host, and then analyzes the responses to accomplish its goal. Nmap includes many port scanning mechanisms (TCP and UDP), OS detection, version detection, ping sweeps, etc.
Here, we will use Nmap to discover open ports and services running on the live hosts in the target network.
In the Windows 10 machine, navigate to the Desktop and double-click Nmap - Zenmap GUI shortcut.

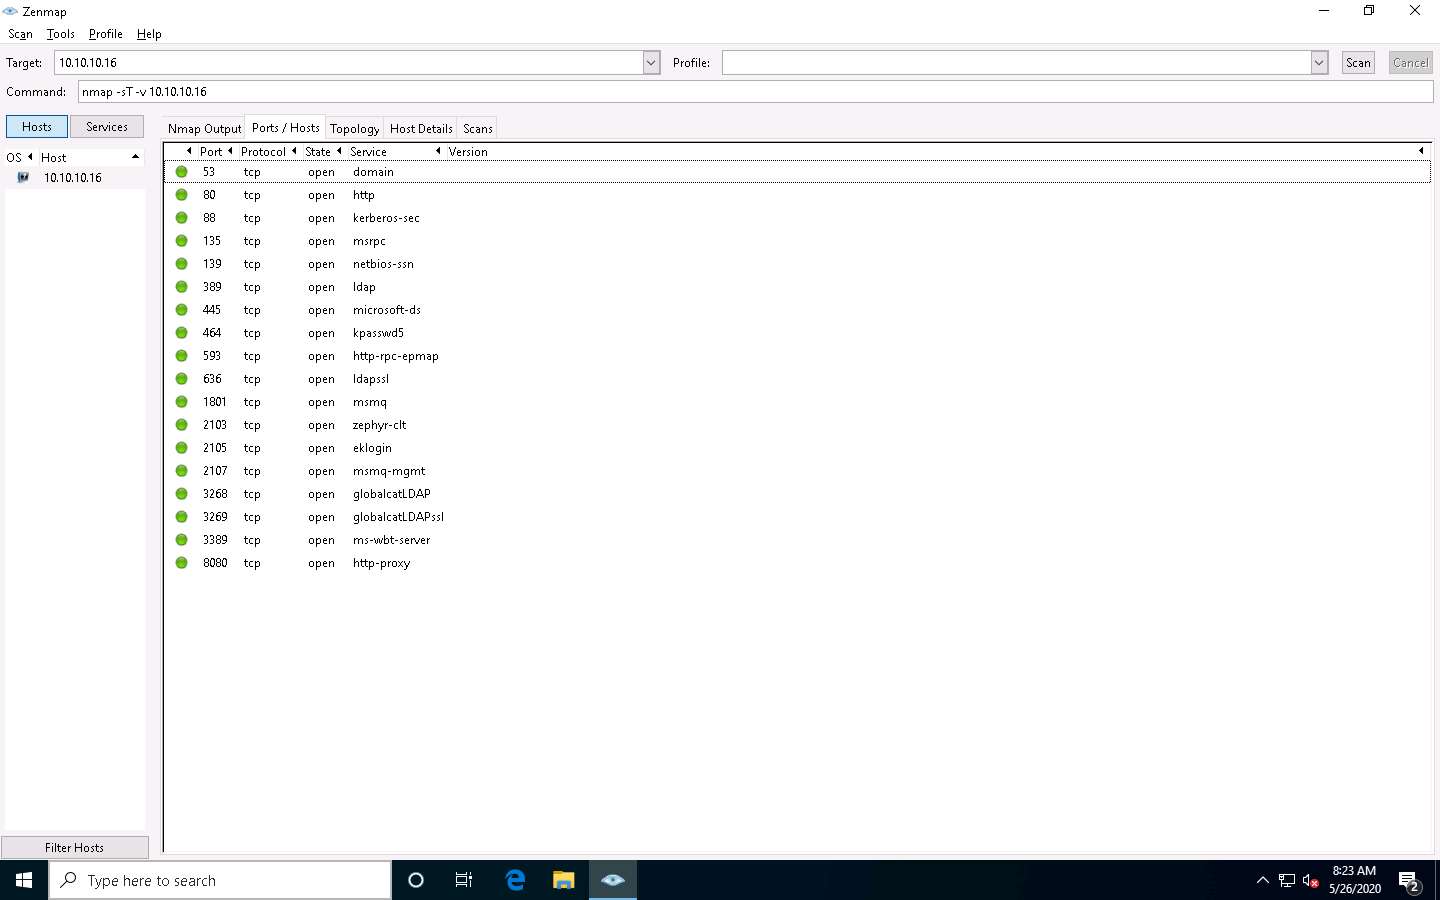
The Nmap - Zenmap GUI appears; in the Command field, type the command nmap -sT -v [Target IP Address] (here, the target IP address is 10.10.10.16) and click Scan.
-sT: performs the TCP connect/full open scan and -v: enables the verbose output (include all hosts and ports in the output).
The scan results appear, displaying all the open TCP ports and services running on the target machine, as shown in the screenshot.
TCP connect scan completes a three-way handshake with the target machine. In the TCP three-way handshake, the client sends a SYN packet, which the recipient acknowledges with the SYN+ACK packet. In turn, the client acknowledges the SYN+ACK packet with an ACK packet to complete the connection. Once the handshake is completed, the client sends an RST packet to end the connection.

Click the Ports/Hosts tab to gather more information on the scan results. Nmap displays the Port, Protocol, State, Service, and Version of the scan.
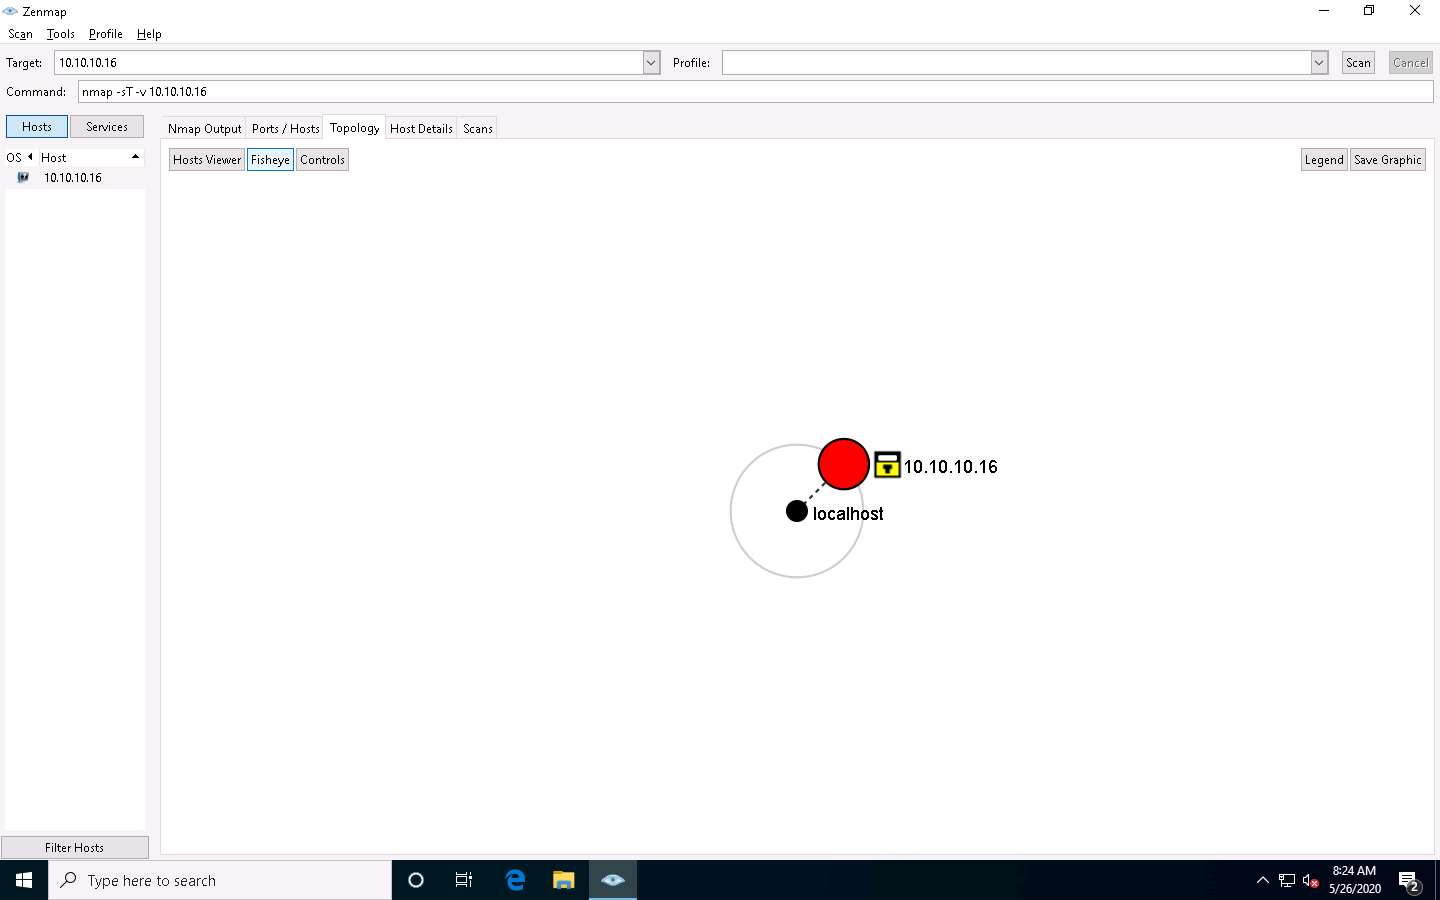
Click the Topology tab to view the topology of the target network that contains the provided IP address and click the Fisheye option to view the topology clearly.
In the same way, click the Host Details tab to view the details of the TCP connect scan.
Click the Scans tab to view the command used to perform TCP connect/full open scan.
Click the Services tab located in the right pane of the window. This tab displays a list of services.
You can use any of these services and their open ports to enter into the target network/host and establish a connection.
In this lab, we shall be performing a stealth scan/TCP half-open scan, Xmas scan, TCP Maimon scan, and ACK flag probe scan on a firewall-enabled machine (i.e., Windows Server 2016) in order to observe the result. To do this, we need to enable Windows Firewall in the Windows Server 2016 machine.
Click Windows Server 2016 to switch to the Windows Server 2016 machine.
Click Ctrl+Alt+Delete to activate the machine. By default, Administration user profile is selected, click Pa$$w0rd to paste the password in the Password field and press Enter to login.
Alternatively, you can also click Pa$$w0rd under Windows Server 2016 machine thumbnail in the Resources pane or Click Type Text | Type Password button under Commands (thunder icon) menu.
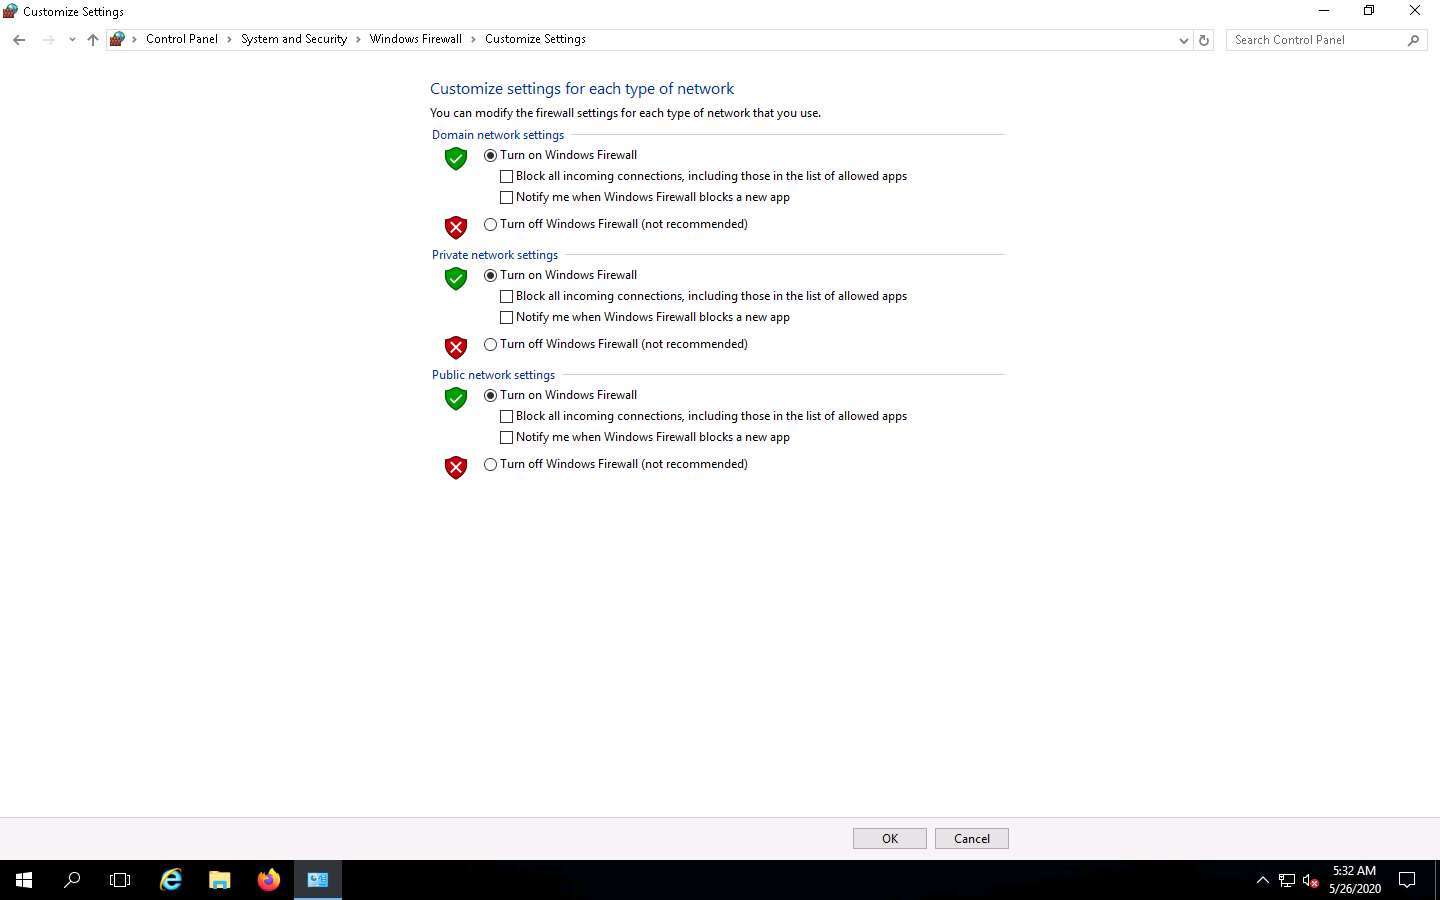
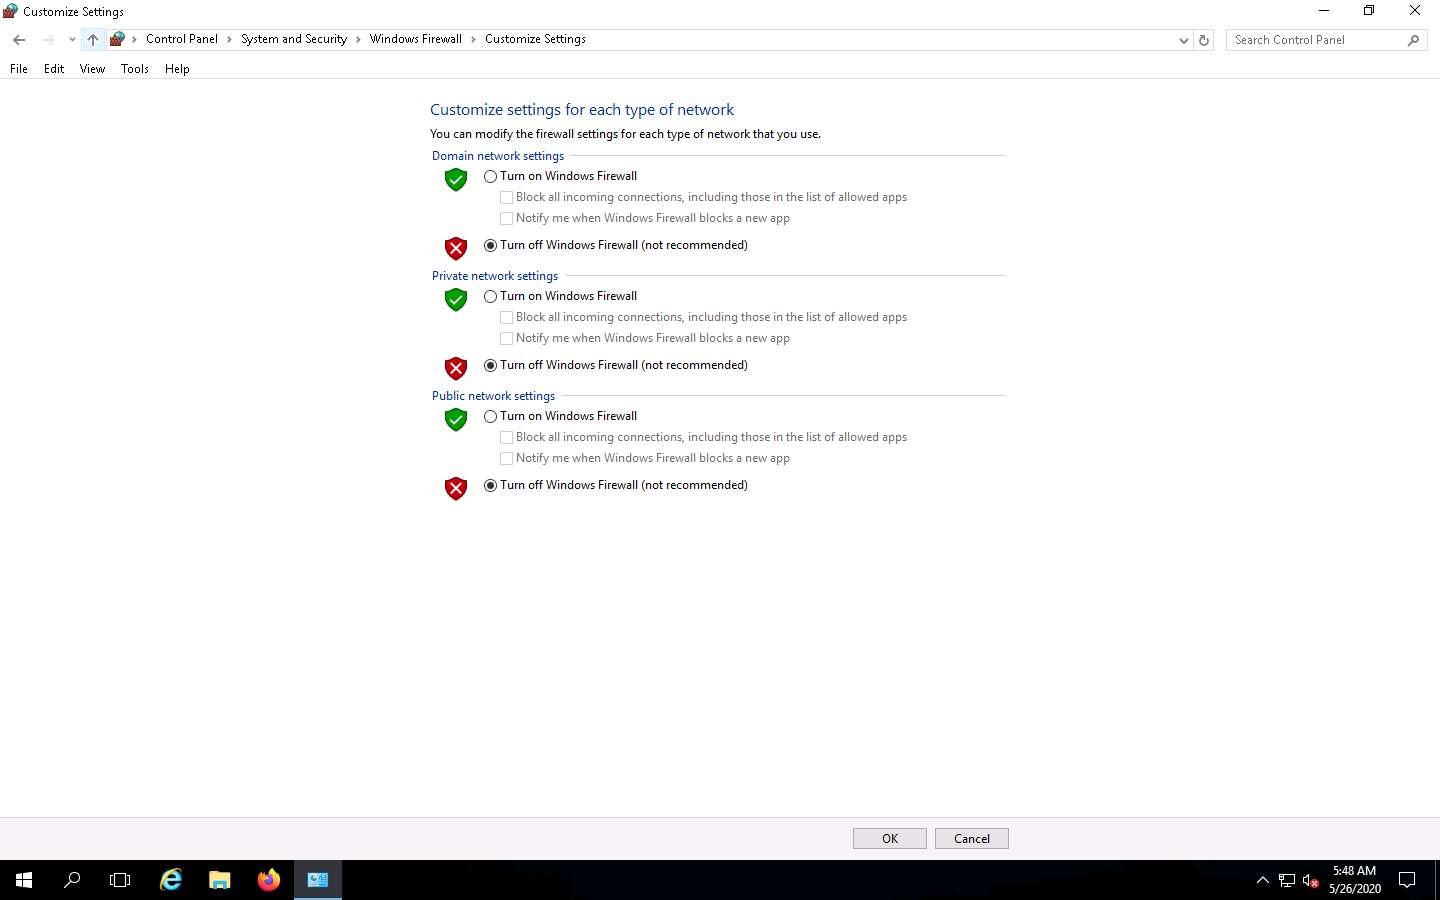
Navigate to Control Panel --> System and Security --> Windows Firewall --> Turn Windows Firewall on or off, enable Windows Firewall and click OK, as shown in the screenshot.
Now, click Windows 10 switch to the Windows 10 machine. In the Command field of Zenmap, type the command nmap -sS -v [Target IP Address] (here, the target IP address is 10.10.10.16) and click Scan.
-sS: performs the stealth scan/TCP half-open scan and -v: enables the verbose output (include all hosts and ports in the output).
The scan results appear, displaying all open TCP ports and services running on the target machine, as shown in the screenshot.
The stealth scan involves resetting the TCP connection between the client and server abruptly before completion of three-way handshake signals, and hence leaving the connection half-open. This scanning technique can be used to bypass firewall rules, logging mechanisms, and hide under network traffic.

As shown in the last task, you can gather detailed information from the scan result in the Ports/Hosts, Topology, Host Details, and Scan tab.
In the Command field of Zenmap, type the command nmap -sX -v [Target IP Address] (here, the target IP address is 10.10.10.16) and click Scan.
-sX: performs the Xmas scan and -v: enables the verbose output (include all hosts and ports in the output).
The scan results appear, displaying that the ports are either open or filtered on the target machine, which means a firewall has been configured on the target machine.
Xmas scan sends a TCP frame to a target system with FIN, URG, and PUSH flags set. If the target has opened the port, then you will receive no response from the target system. If the target has closed the port, then you will receive a target system reply with an RST.

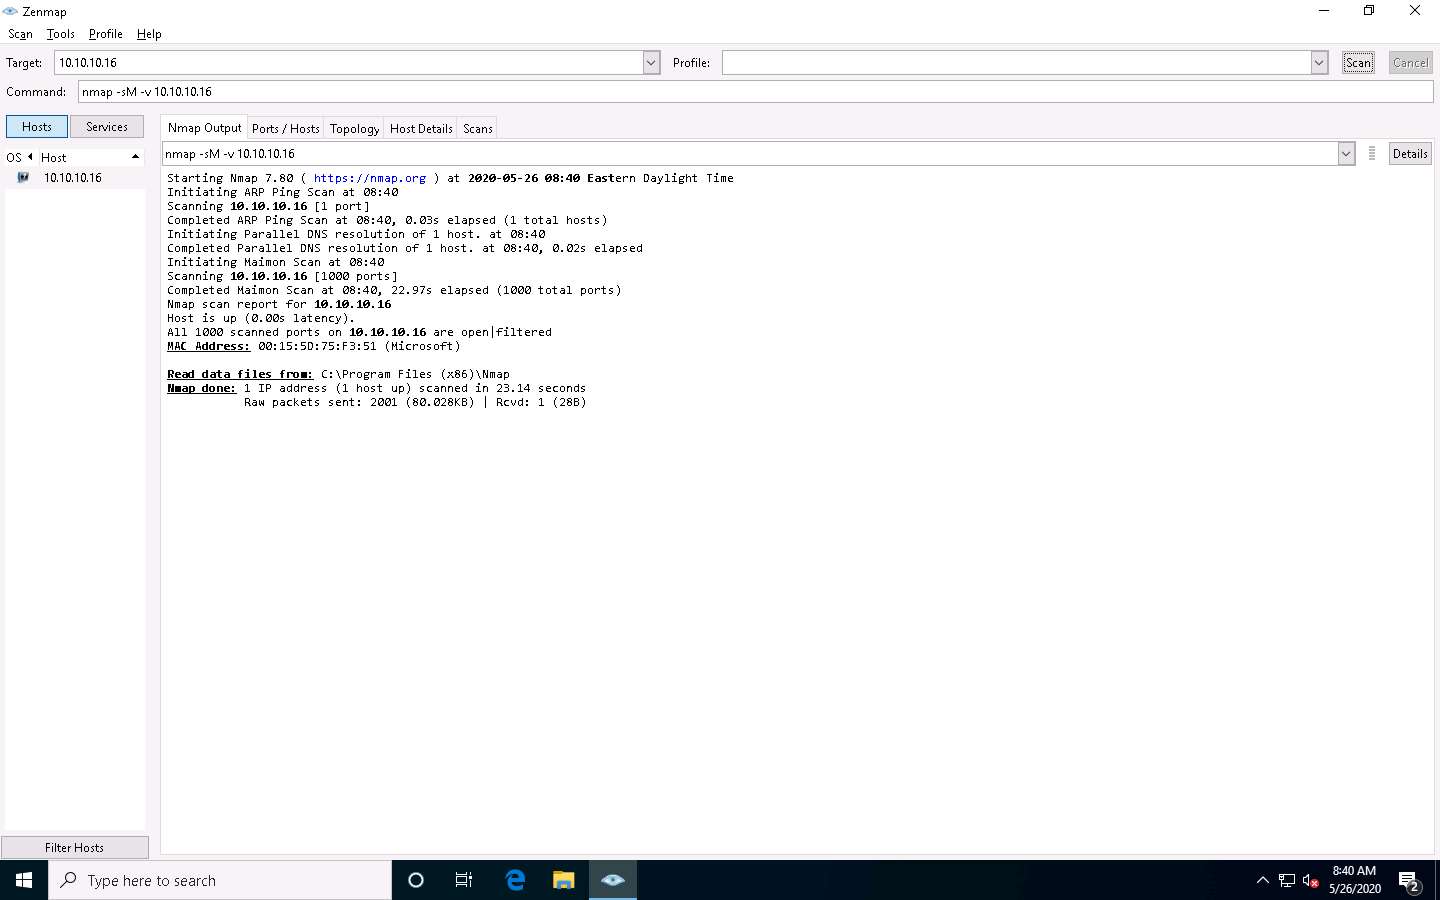
In the Command field, type the command nmap -sM -v [Target IP Address] (here, the target IP address is 10.10.10.16) and click Scan.
-sM: performs the TCP Maimon scan and -v: enables the verbose output (include all hosts and ports in the output).
The scan results appear, displaying either the ports are open/filtered on the target machine, which means a firewall has been configured on the target machine.
In the TCP Maimon scan, a FIN/ACK probe is sent to the target; if there is no response, then the port is Open|Filtered, but if the RST packet is sent as a response, then the port is closed.
In the Command field, type the command nmap -sA -v [Target IP Address] (here, the target IP address is 10.10.10.16) and click Scan.
-sA: performs the ACK flag probe scan and -v: enables the verbose output (include all hosts and ports in the output).
The scan results appear, displaying that the ports are unfiltered on the target machine, as shown in the screenshot.
The ACK flag probe scan sends an ACK probe packet with a random sequence number; no response implies that the port is filtered (stateful firewall is present), and an RST response means that the port is not filtered.

Now, click Windows Server 2016 to switch to the Windows Server 2016 machine.
If you are logged out of the Windows Server 2016 machine, then click Ctrl+Alt+Delete to activate the machine. By default, Administration user profile is selected, click Pa$$w0rd to paste the password in the Password field and press Enter to login.
Alternatively, you can also click Pa$$w0rd under Windows Server 2016 machine thumbnail in the Resources pane or Click Type Text | Type Password button under Commands (thunder icon) menu.
Turn off the Windows Firewall from Control Panel.
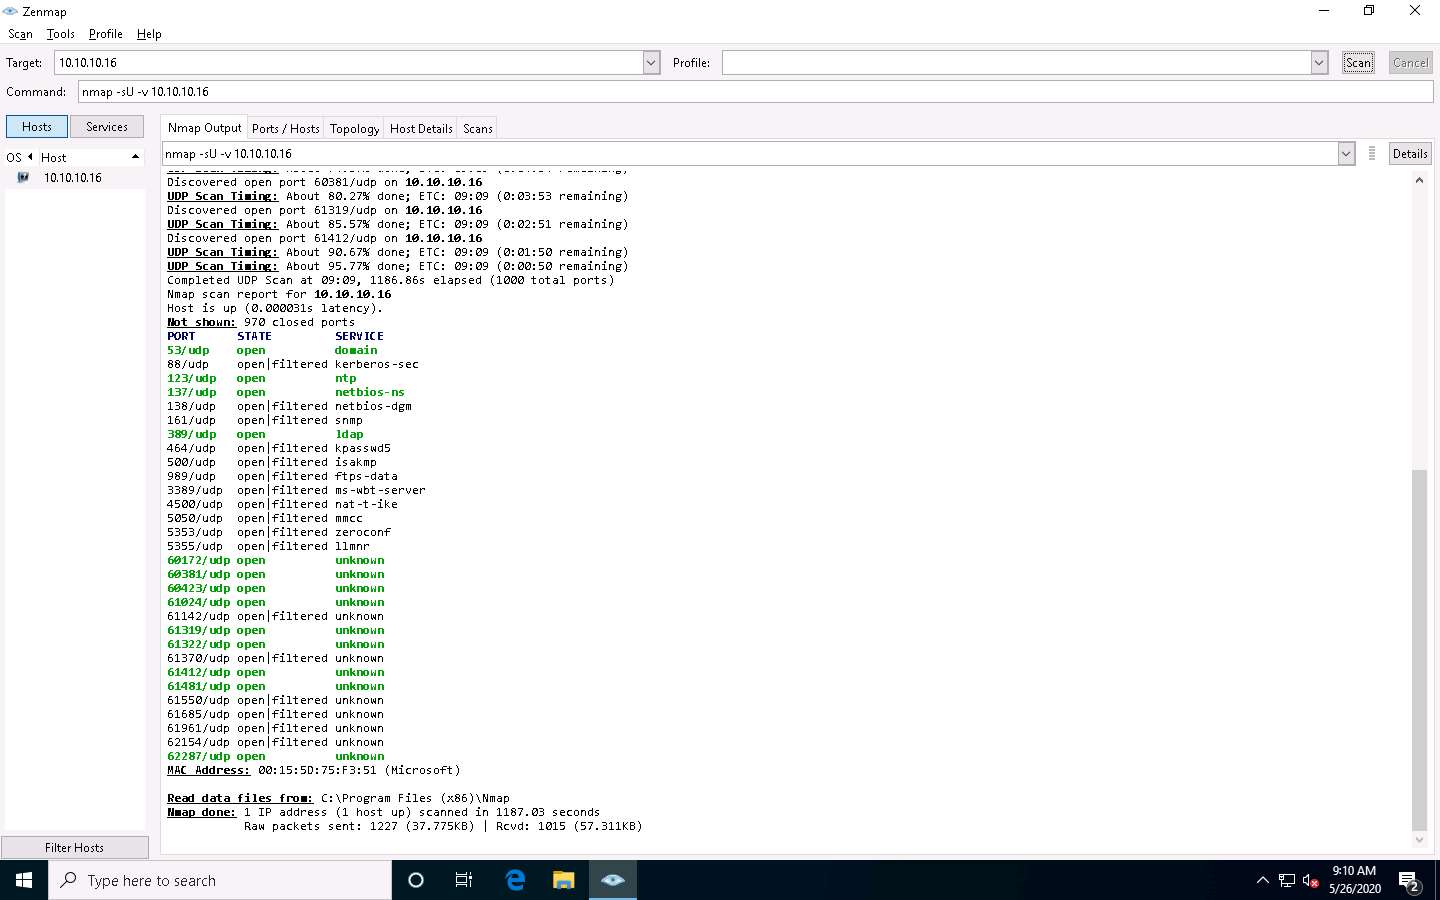
Now, click Windows 10 to return to the Windows 10 machine. In the Command field, type the command nmap -sU -v [Target IP Address] (here, the target IP address is 10.10.10.16) and click Scan.
-sU: performs the UDP scan and -v: enables the verbose output (include all hosts and ports in the output).
The scan results appear, displaying all open UDP ports and services running on the target machine, as shown in the screenshot.
This scan will take approximately 20 minutes to finish the scanning process and the results might differ in your lab environment.
The UDP scan uses UDP protocol instead of the TCP. There is no three-way handshake for the UDP scan. It sends UDP packets to the target host; no response means that the port is open. If the port is closed, an ICMP port unreachable message is received.
Close the Zenmap window.
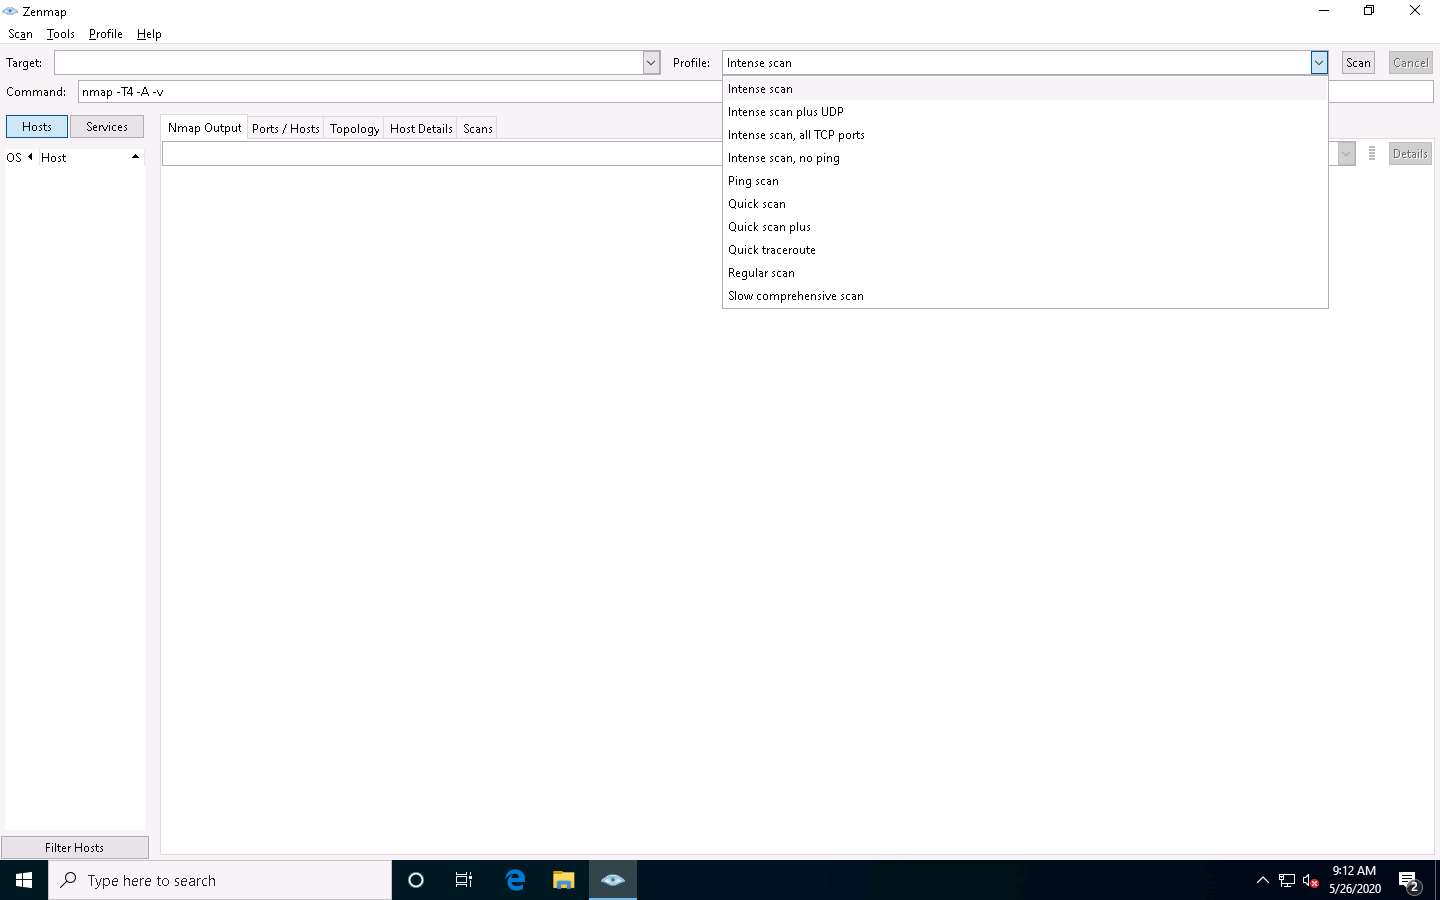
You can create your scan profile, or you can also choose the default scan profiles available in Nmap to scan a network.
Double-click the Nmap - Zenmap GUI shortcut from Desktop to launch Nmap.
To choose the default scan profiles available in Nmap, click on the drop-down icon in the Profile field and select the scanning technique you want to use.
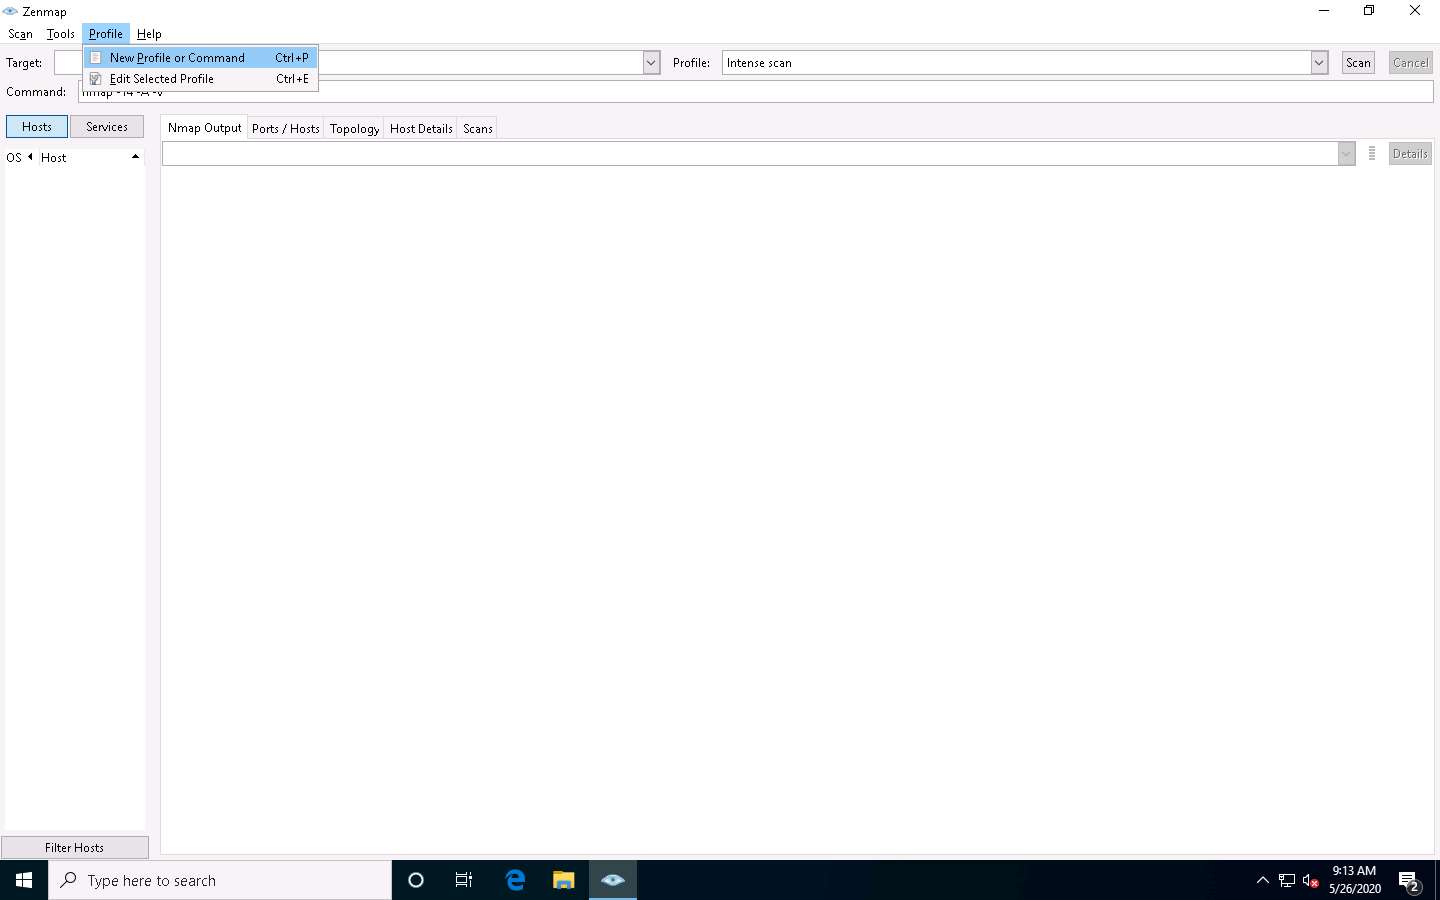
To create a scan profile; click Profile --> New Profile or Command.
If a User Account Control pop-up appears, click Yes.
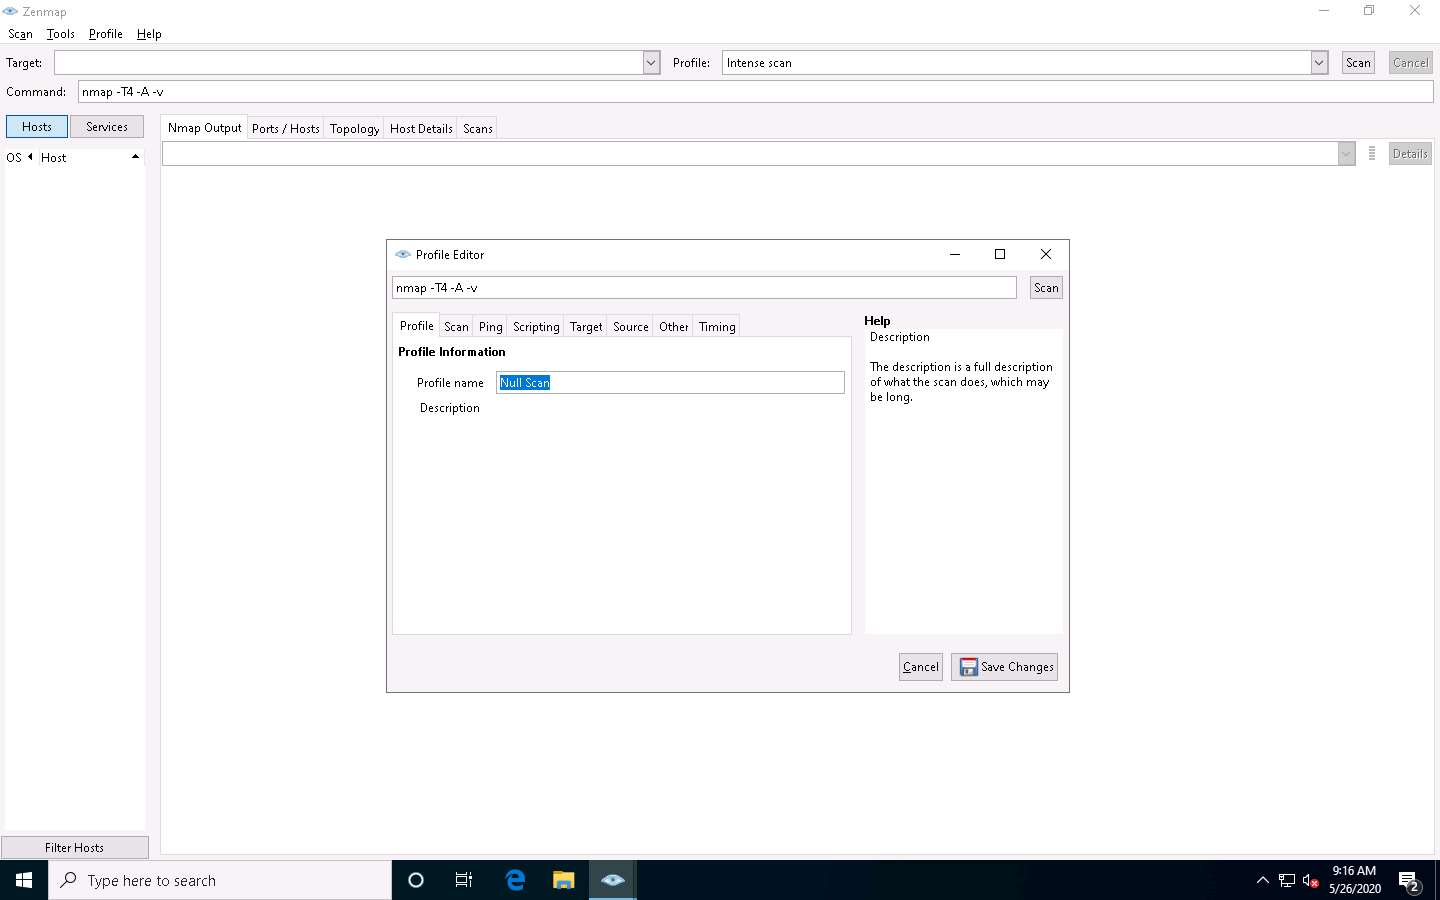
The Profile Editor window appears. In the Profile tab, under the Profile Information section, input a profile name (here, Null Scan) into the Profile name field.
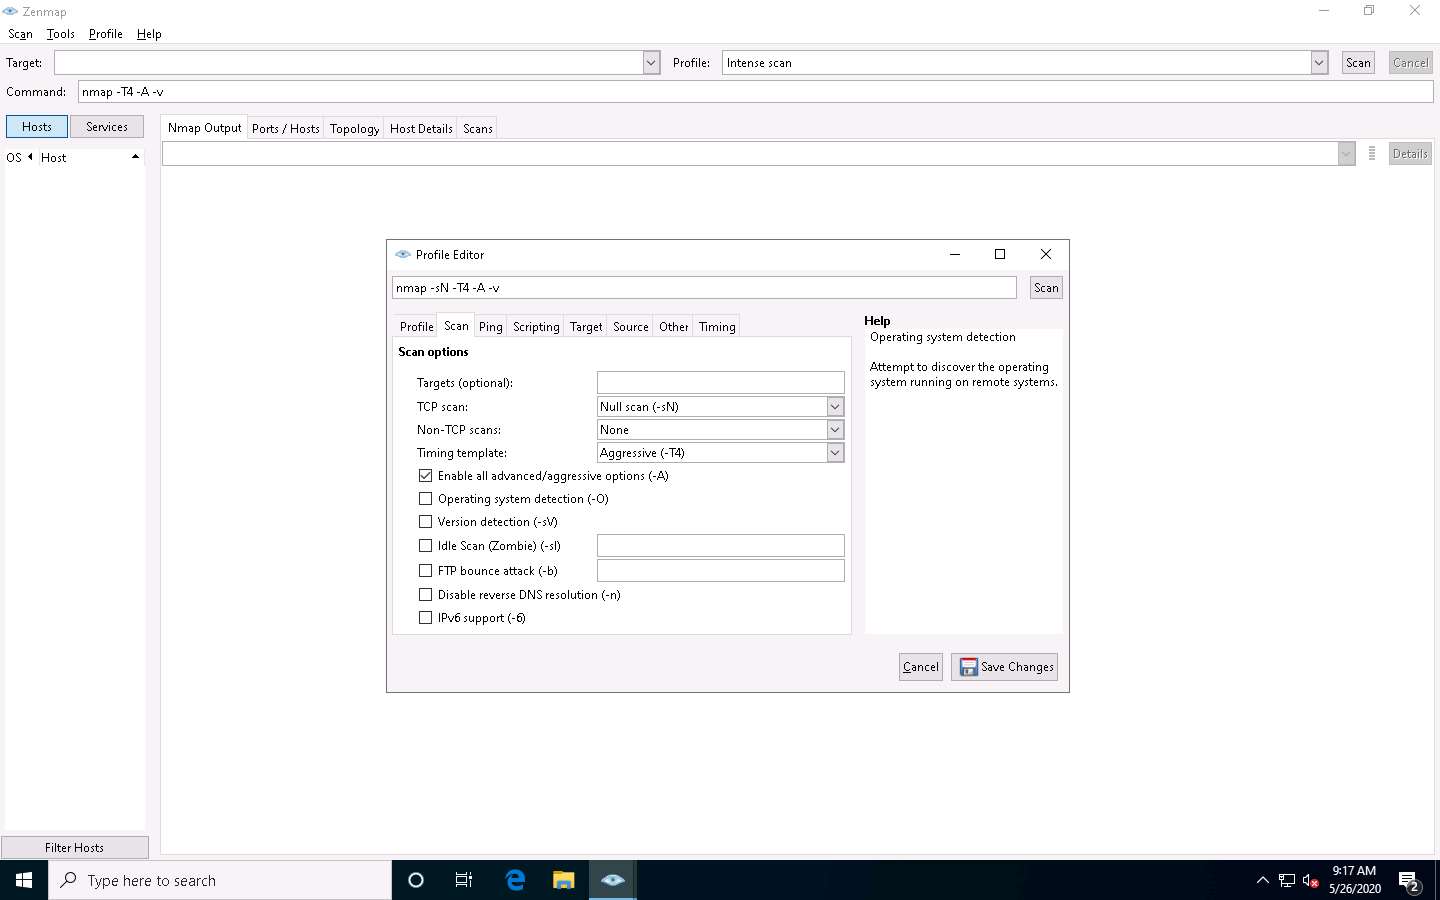
Now, click the Scan tab and select the scan option (here, Null scan (-sN)) from the TCP scan drop-down list.
Select None in the Non-TCP scans drop-down list and Aggressive (-T4) in the Timing template list. Ensure that the Enable all advanced/aggressive options (-A) checkbox is selected and click Save Changes, as shown in the screenshot.
Using this configuration, you are setting Nmap to perform a null scan with the time template as -T4 and all aggressive options enabled.
This will create a new profile, and will thus be added to the profile list.
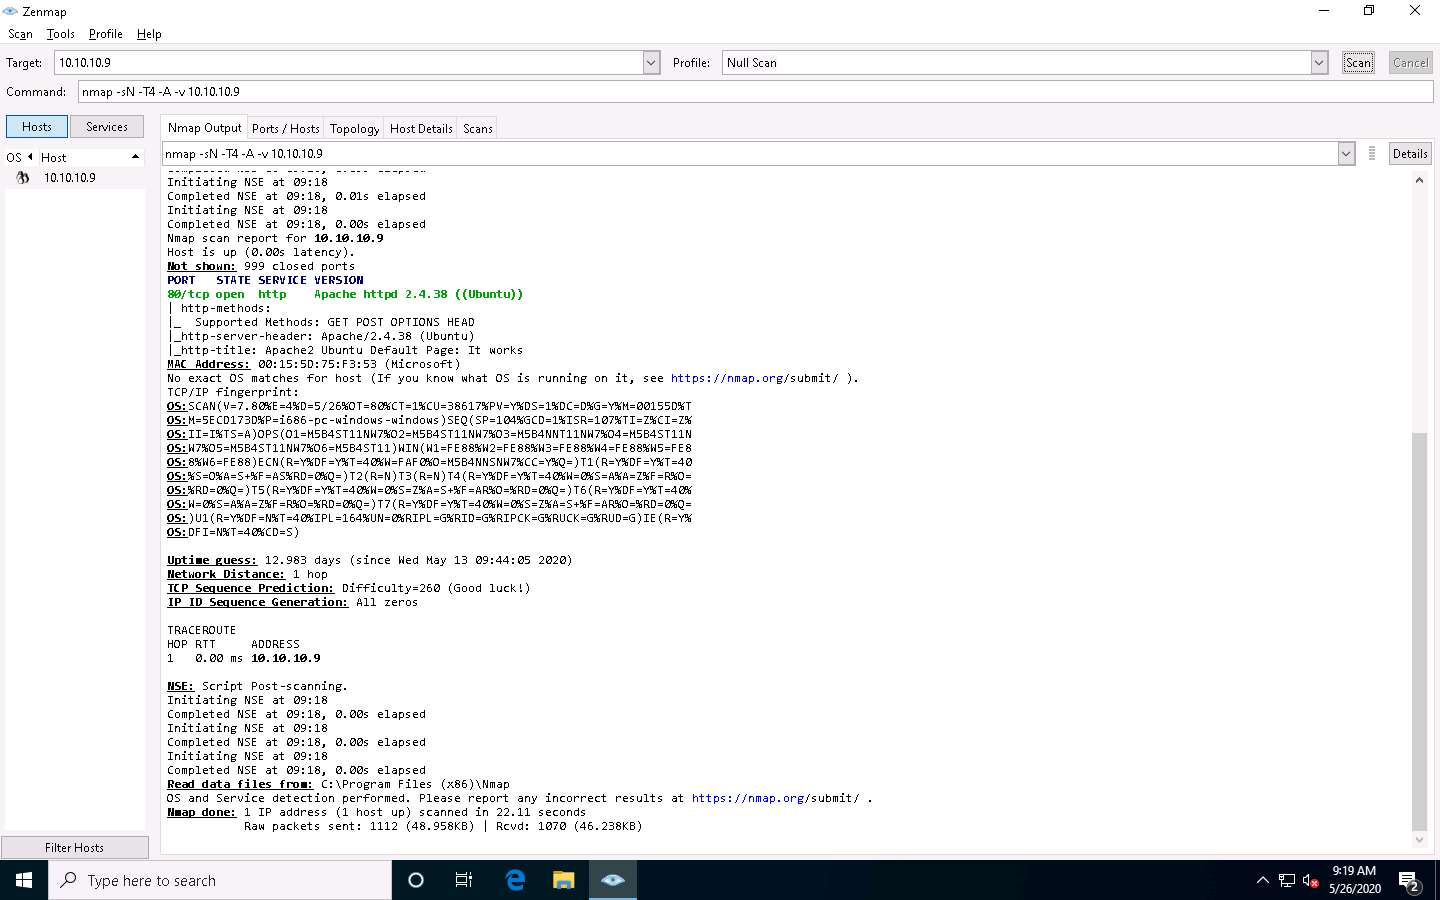
In this task, we will be targeting the Ubuntu machine (10.10.10.9).
In the main window of Zenmap, enter the target IP address (here, 10.10.10.9) in the Target field to scan. Select the Null Scan profile, which you created from the Profile drop-down list, and then click Scan.
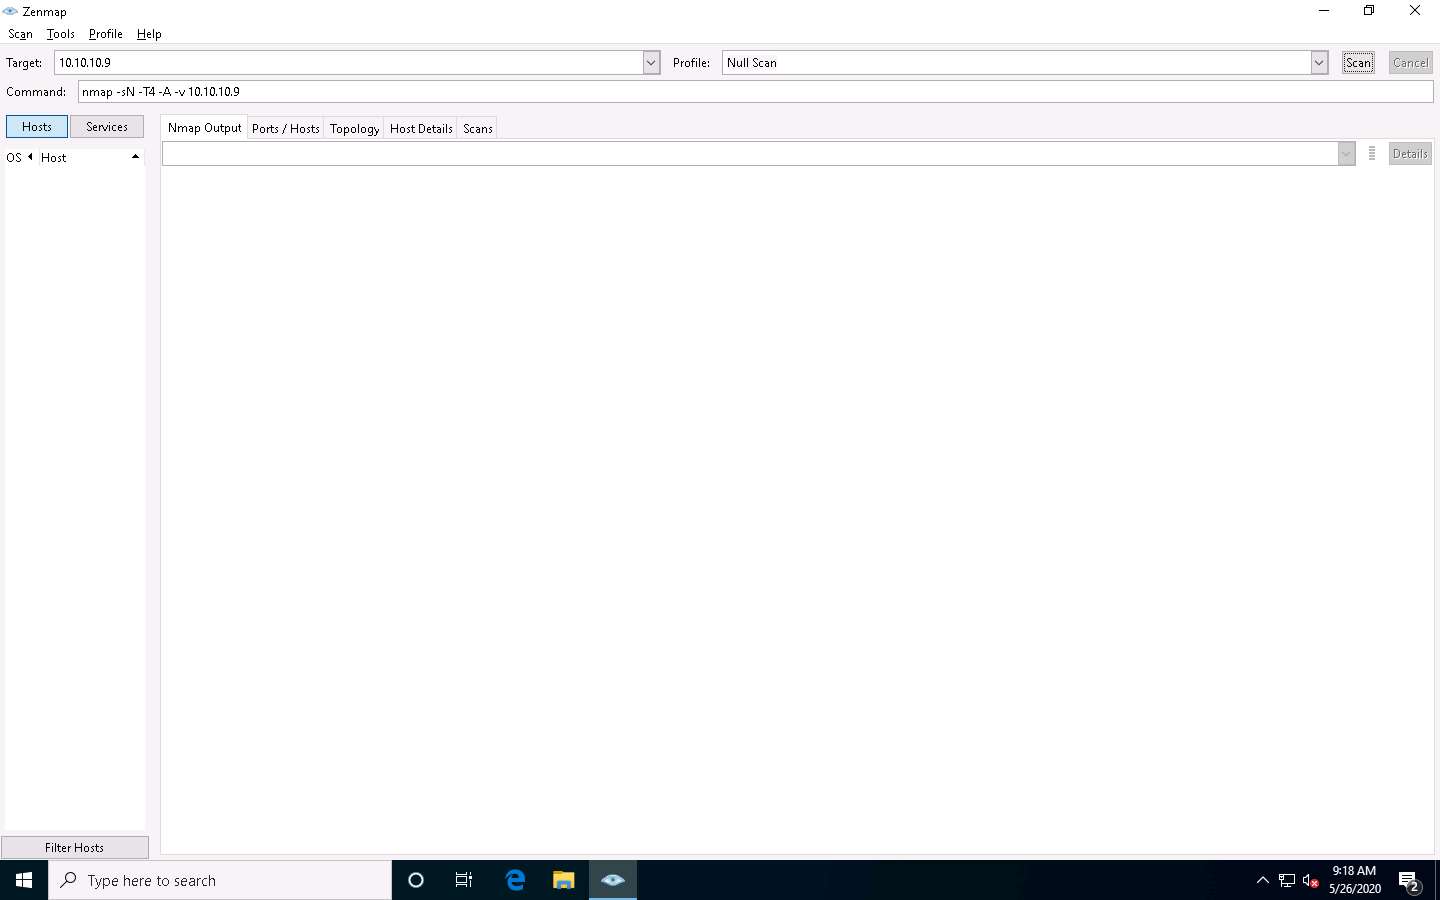
Nmap scans the target and displays results in the Nmap Output tab, as shown in the screenshot.
Apart from the aforementioned port scanning and service discovery techniques, you can also use the following scanning techniques to perform a port and service discovery on a target network using Nmap.
IDLE/IPID Header Scan: A TCP port scan method that can be used to send a spoofed source address to a computer to discover what services are available.
# nmap -sI -v [target IP address]
SCTP INIT Scan: An INIT chunk is sent to the target host; an INIT+ACK chunk response implies that the port is open, and an ABORT Chunk response means that the port is closed.
# nmap -sY -v [target IP address]
SCTP COOKIE ECHO Scan: A COOKIE ECHO chunk is sent to the target host; no response implies that the port is open and ABORT Chunk response means that the port is closed.
# nmap -sZ -v [target IP address]
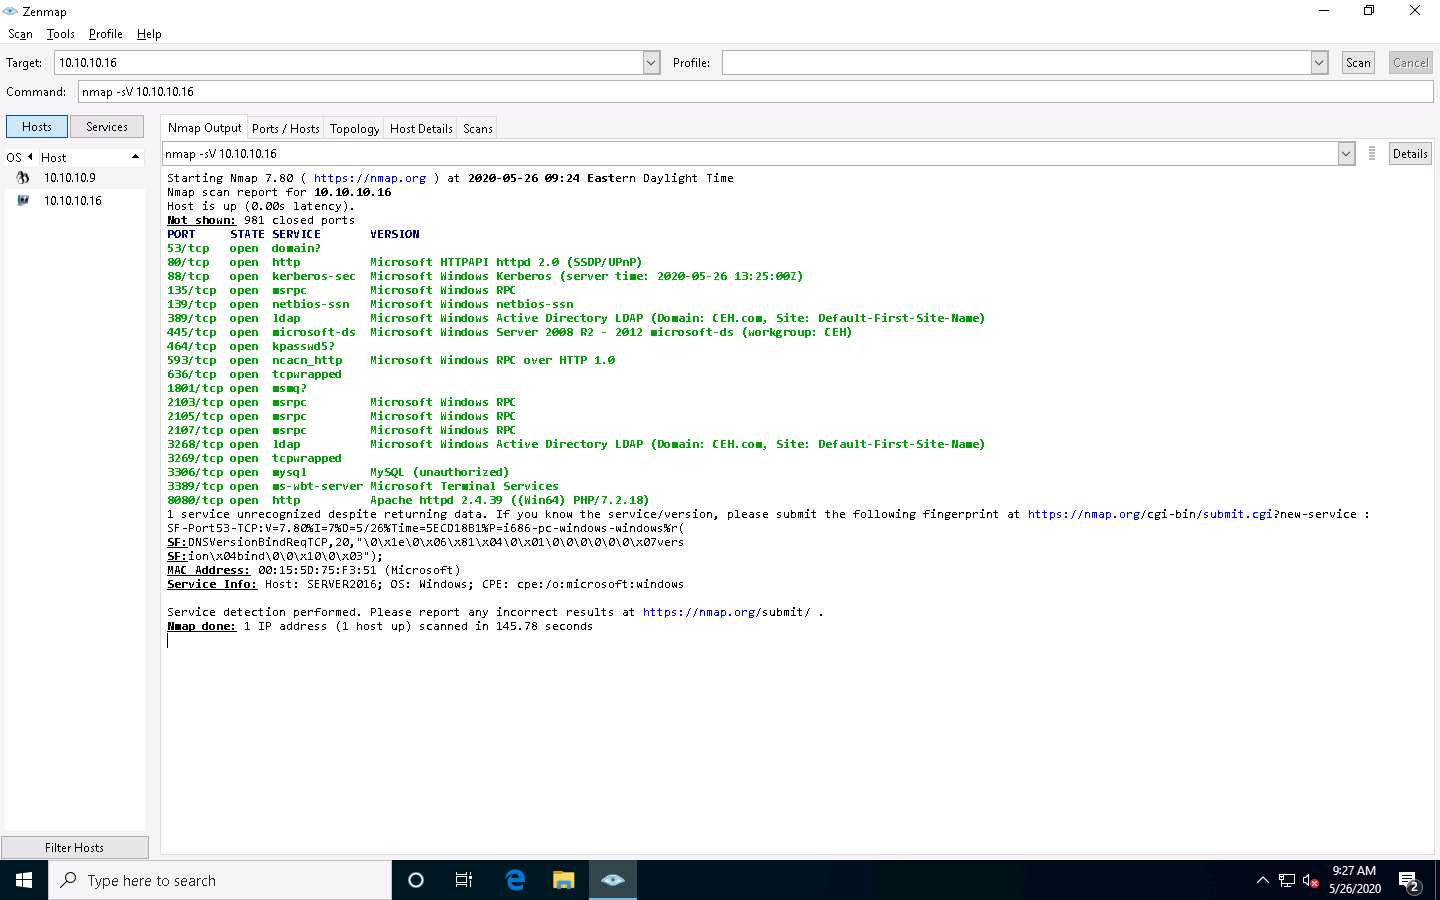
In the Command field, type the command nmap -sV [Target IP Address] (here, the target IP address is 10.10.10.16) and click Scan.
-sV: detects service versions.
The scan results appear, displaying that open ports and the version of services running on the ports, as shown in the screenshot.
Service version detection helps you to obtain information about the running services and their versions on a target system. Obtaining an accurate service version number allows you to determine which exploits the target system is vulnerable to.
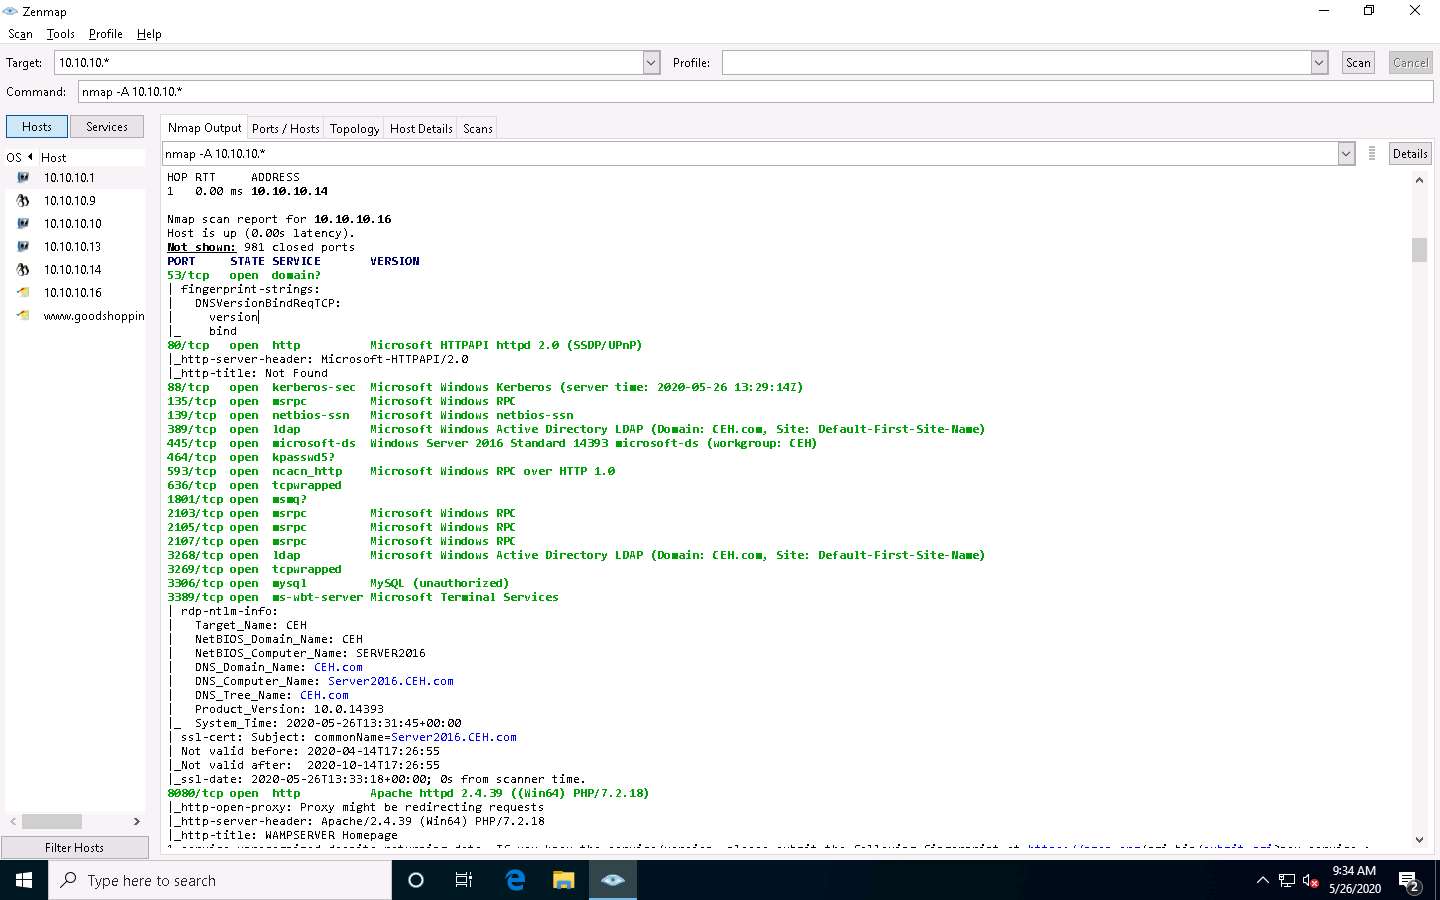
In the Command field, type the command nmap -A [Target Subnet] (here, target subnet is 10.10.10.* ) and click Scan. By providing the “*” (asterisk) wildcard, you can scan a whole subnet or IP range.
-A: enables aggressive scan. The aggressive scan option supports OS detection (-O), version scanning (-sV), script scanning (-sC), and traceroute (--traceroute). You should not use -A against target networks without permission.
Nmap scans the entire network and displays information for all the hosts that were scanned, along with the open ports and services, device type, details of OS, etc. as shown in the screenshot.
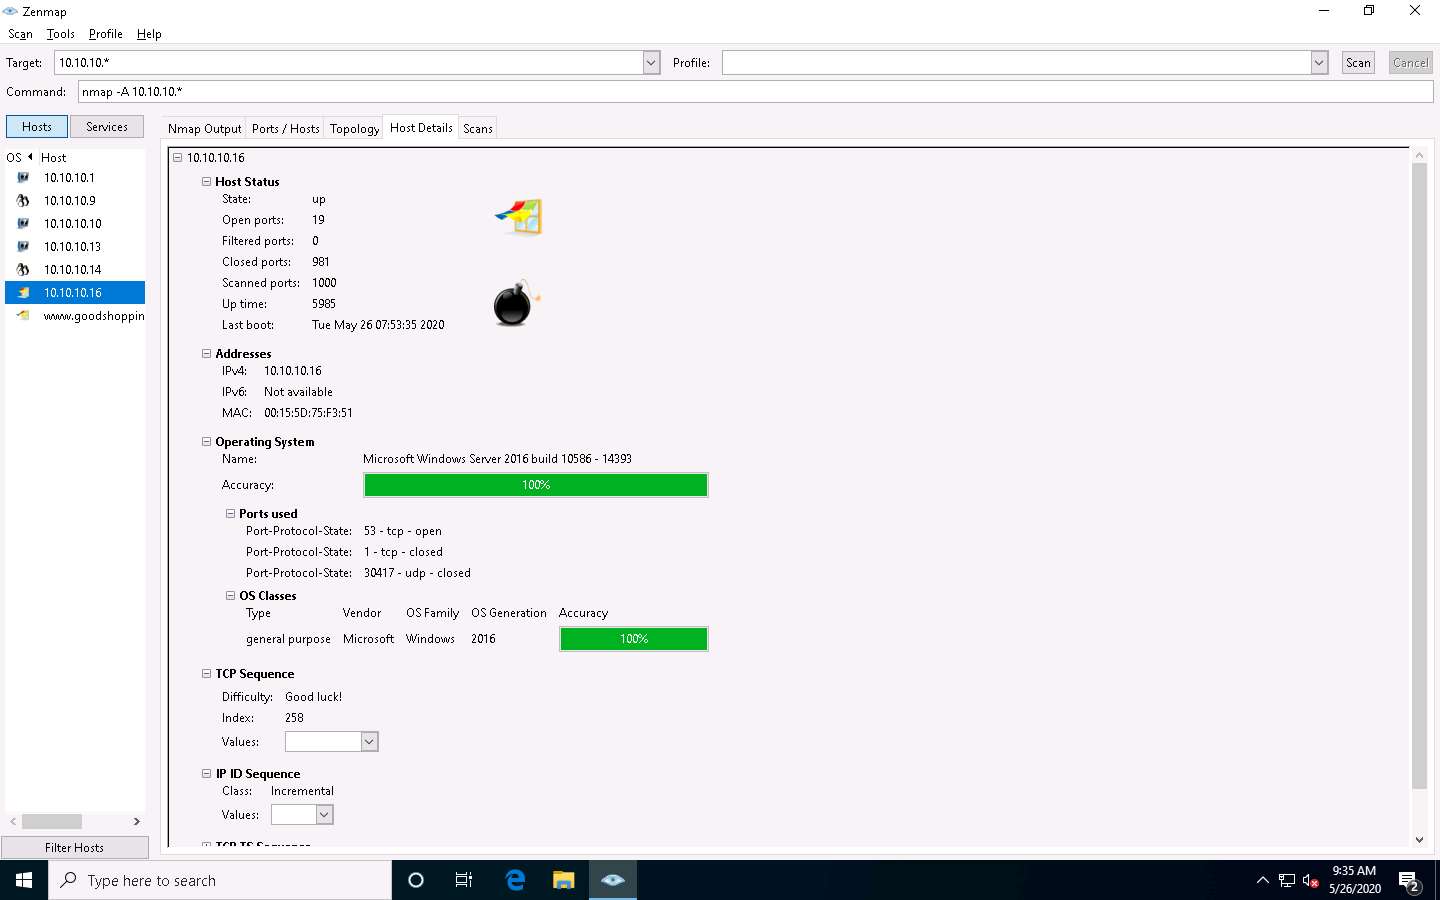
Choose an IP address 10.10.10.16 from the list of hosts in the left-pane and click the Host Details tab. This tab displays information such as Host Status, Addresses, Operating System, Ports used, OS Classes, etc. associated with the selected host.
This concludes the demonstration of discovering target open ports, services, services versions, device type, OS details, etc. of the active hosts in the target network using various scanning techniques of Nmap.
Close all open windows and document all the acquired information.


Comments
Post a Comment