Task 3: Create Custom UDP and TCP Packets using Hping3 to Scan beyond IDS/Firewall
Task 3: Create Custom UDP and TCP Packets using Hping3 to Scan beyond IDS/Firewall
Hping3 is a scriptable program that uses the TCL language, whereby packets can be received and sent via a binary or string representation describing the packets.
Here, we will use Hping3 to create custom UDP and TCP packets to evade the IDS/firewall in the target network.
Before beginning this task, ensure that the Windows Defender Firewall in the Windows 10 machine is enabled.
Click Windows 10 to switch to the Windows 10 machine.
Navigate to the Desktop, double-click Wireshark shortcut.

The Wireshark Network Analyzer window appears, double-click the available ethernet or interface (here, Ethernet2) to start the packet capture.
Click Parrot Security to switch to the Parrot Security machine.
Click the MATE Terminal icon in the top-left corner of the Desktop window to open a Terminal window.

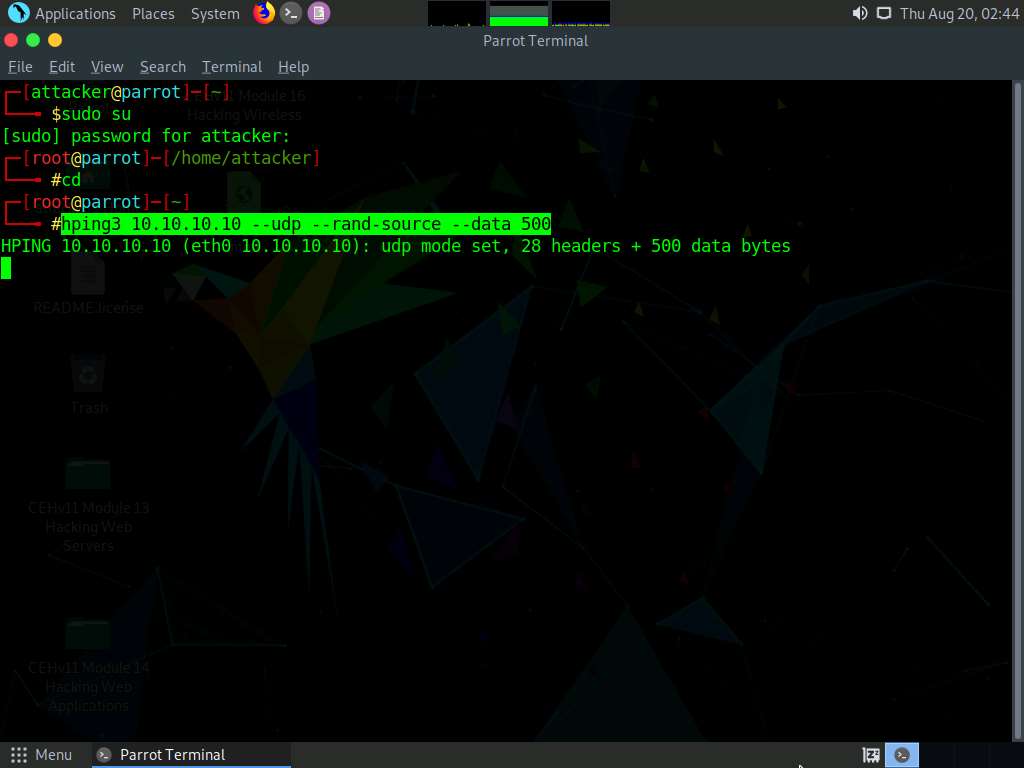
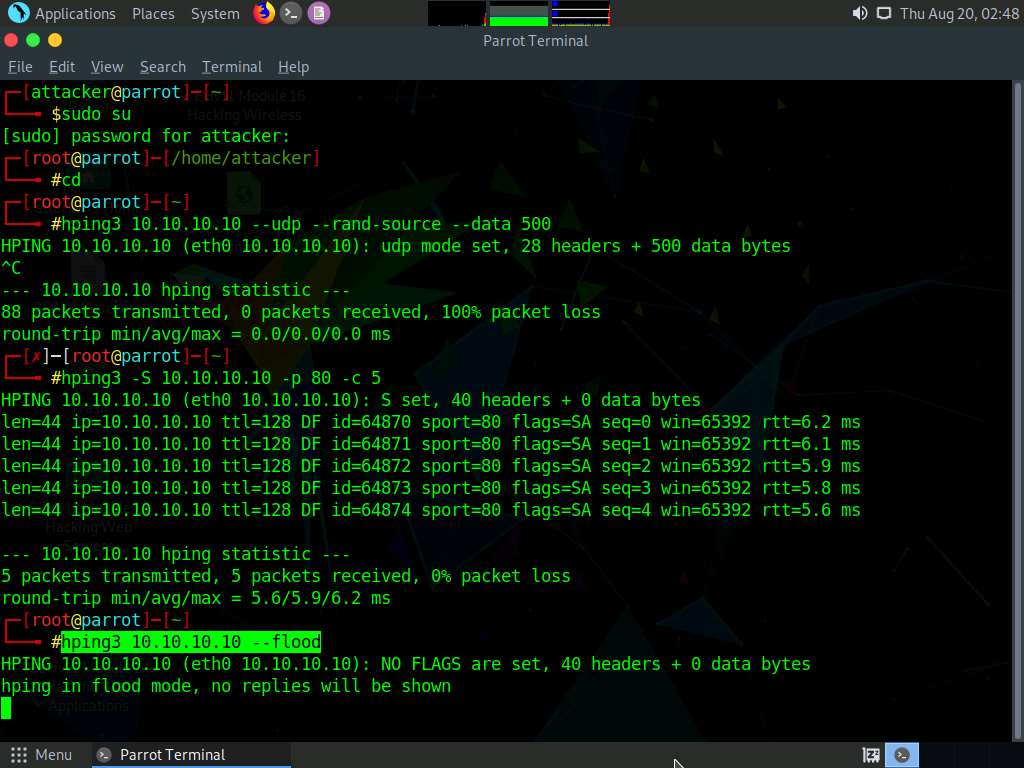
A Parrot Terminal window appears. In the terminal window, type sudo su and press Enter to run the programs as a root user.
In the [sudo] password for attacker field, type toor as a password and press Enter.
The password that you type will not be visible.
Now, type cd and press Enter to jump to the root directory.

A Parrot Terminal window appears, type hping3 [Target IP Address] --udp --rand-source --data 500 (here, the target machine is Windows 10 [10.10.10.10]) and press Enter.
Here, --udp specifies sending the UDP packets to the target host, --rand-source enables the random source mode and --data specifies the packet body size.
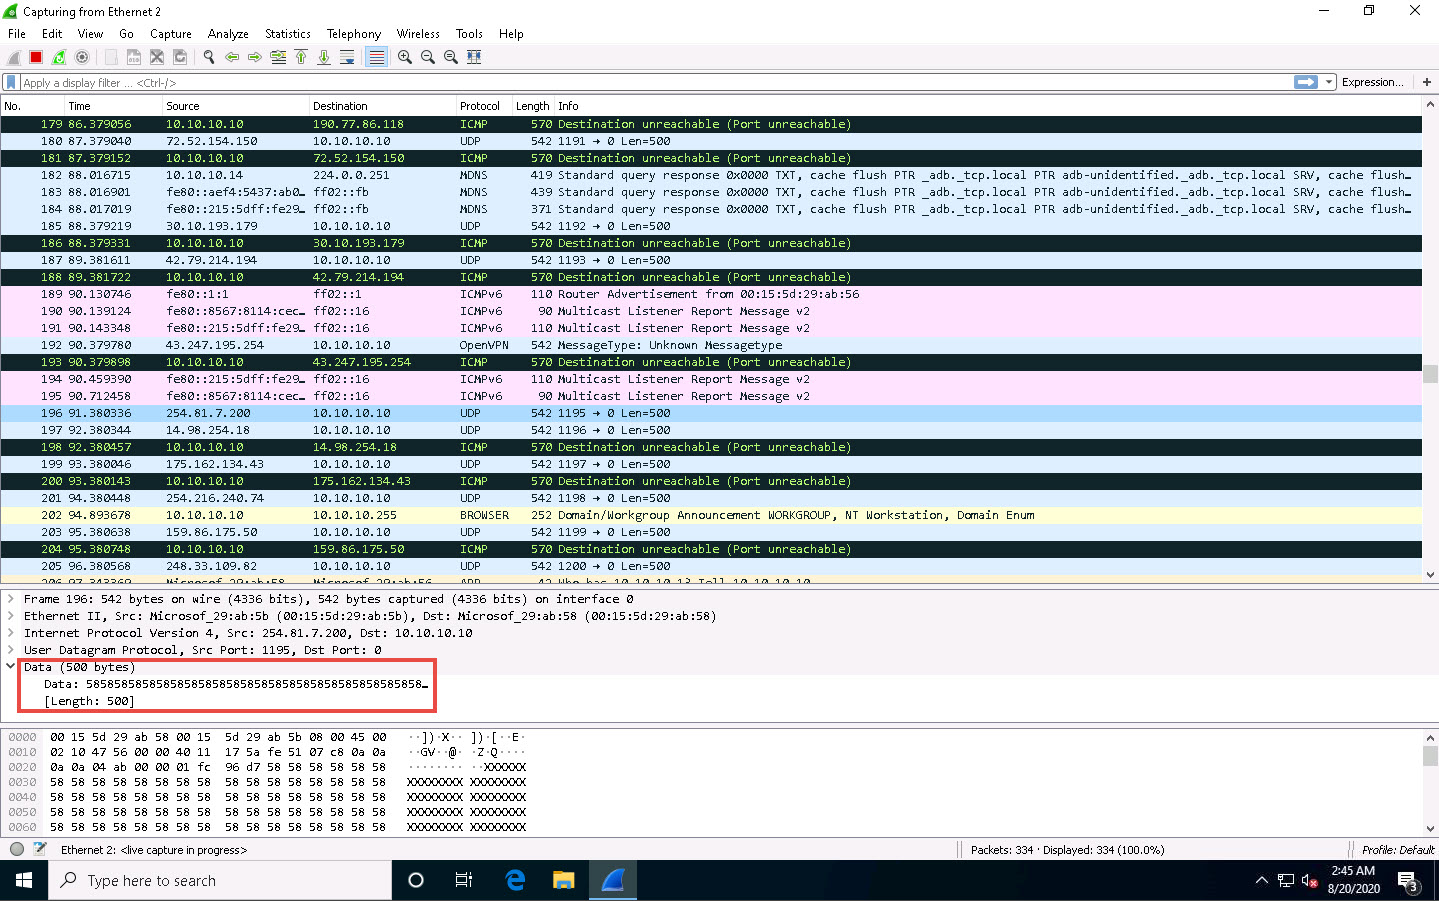
Now, click Windows 10 to switch to the Windows 10 machine and observe the random UDP packets captured by Wireshark.
You can double-click any UDP packet and observe the detail.
Expand the Data node in the Packet Details pane and observe the size of Data and its Length (the length is the same as the size of the packet body that we specified in Hping3 command, i.e., 500).
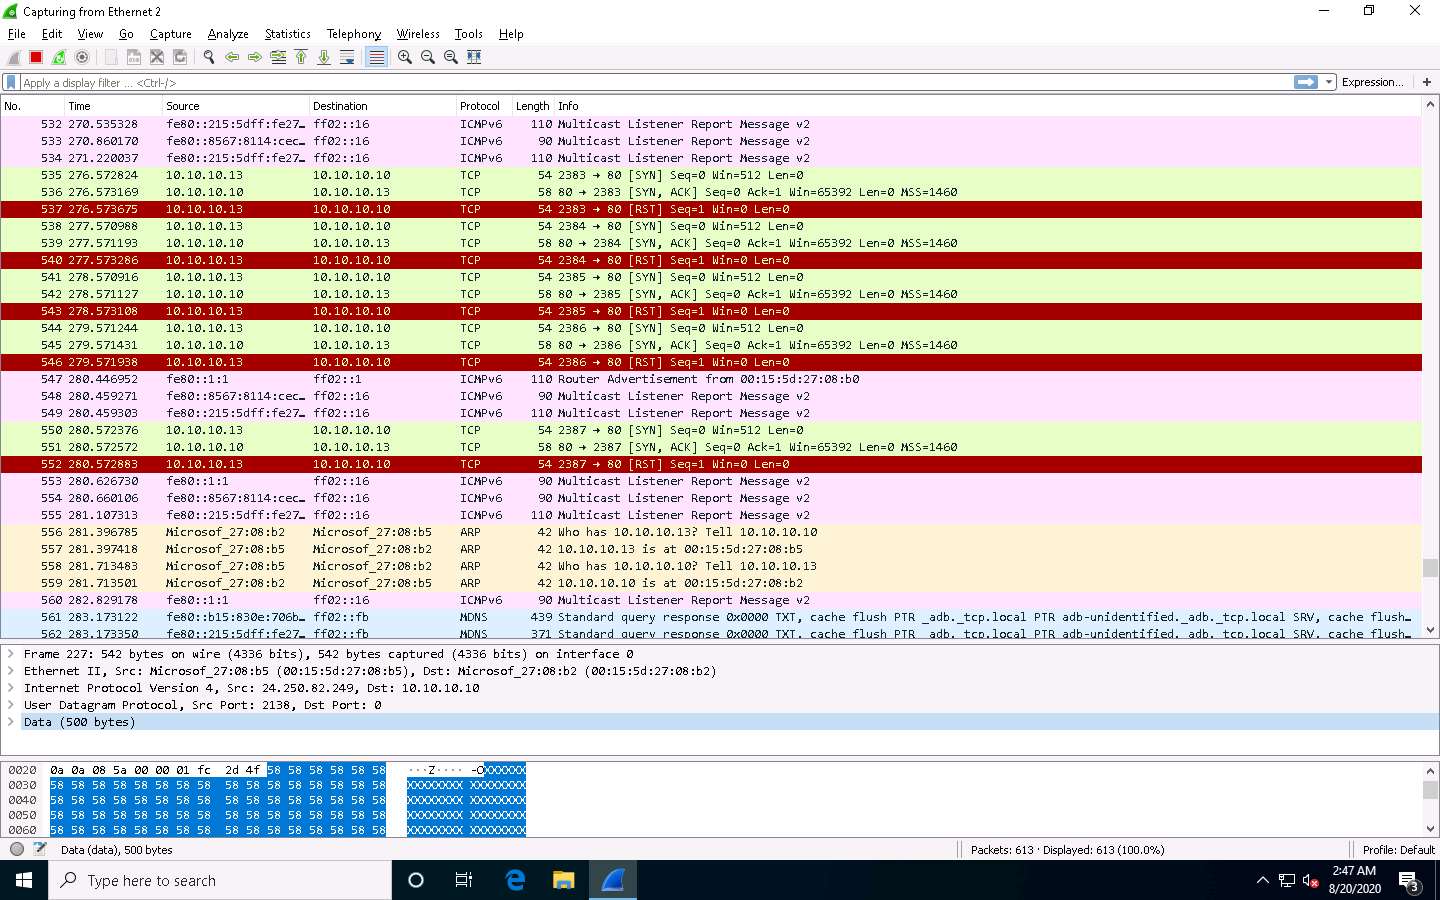
Click Parrot Security to switch to the Parrot Security machine. In the Parrot Terminal window, first press Control+C and type hping3 -S [Target IP Address] -p 80 -c 5 (here, target IP address is 10.10.10.10), and then press Enter.
Here, -S specifies the TCP SYN request on the target machine, -p specifies assigning the port to send the traffic, and -c is the count of the packets sent to the target machine.
In the result, it is indicated that five packets were sent and received through port 80.

Now, click Windows 10 to switch to the target machine (i.e., Windows 10) and observe the TCP packets captured via Wireshark.
Click Parrot Security to switch to the Parrot Security machine and try to flood the target machine (here, Windows 10) with TCP packets.
In the Parrot Terminal window, type hping3 [Target IP Address] --flood (here, target IP address is 10.10.10.10) and press Enter.
--flood: performs the TCP flooding.
Once you flood traffic to the target machine, it will respond in the hping3 terminal.
Click Windows 10 to switch to the Windows 10 (target machine) and stop the packet capture in the Wireshark window after a while by click Stop Capturing Packets icon in the toolbar.
Observe the Wireshark window, which displays the TCP packet flooding from the host machine.
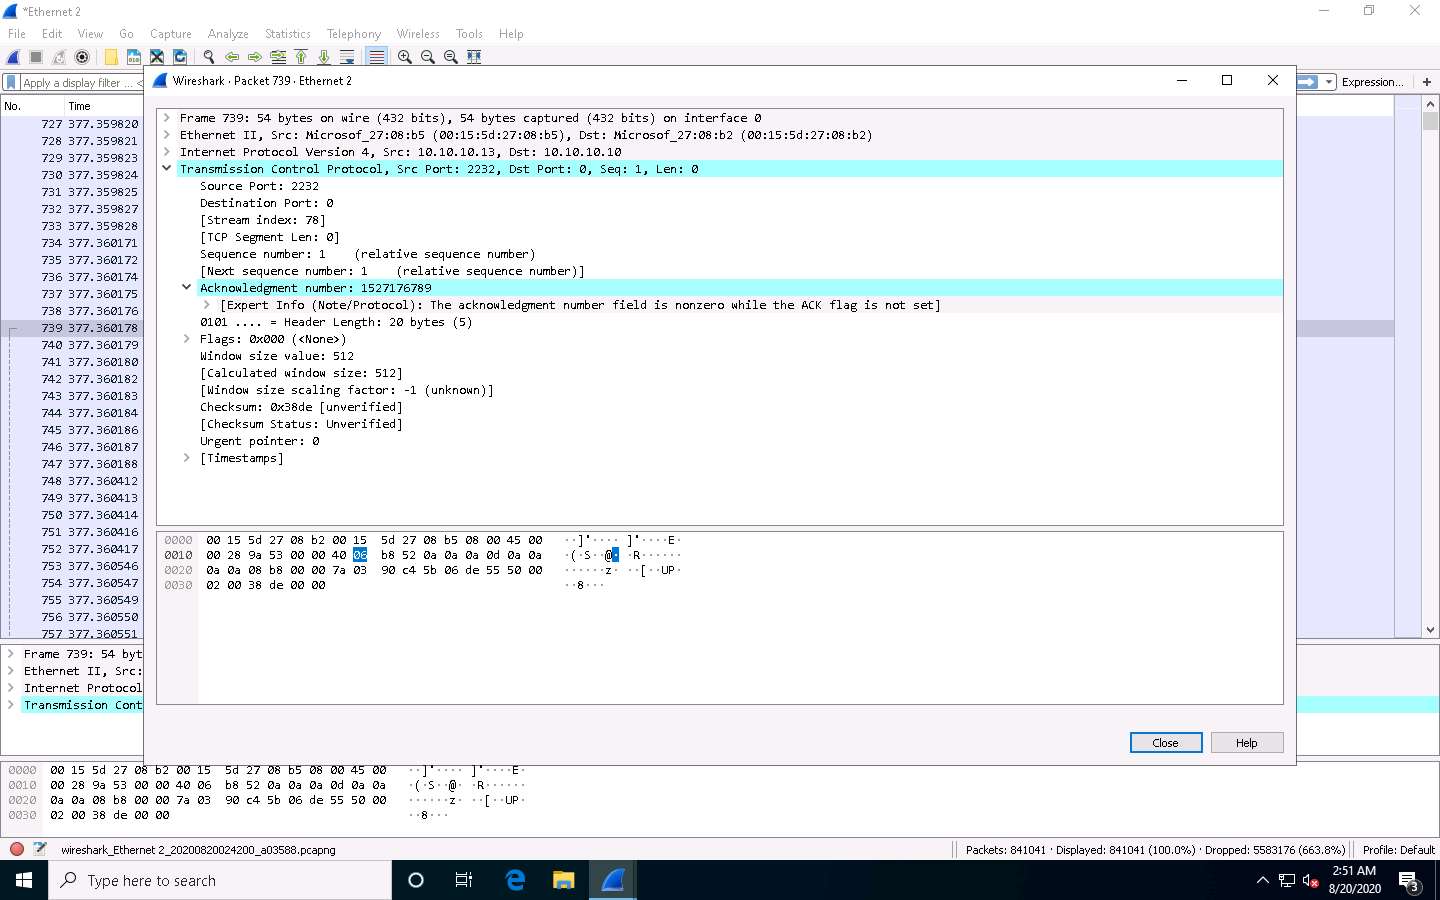
You can double-click the TCP packet stream to observe the TCP packet information.
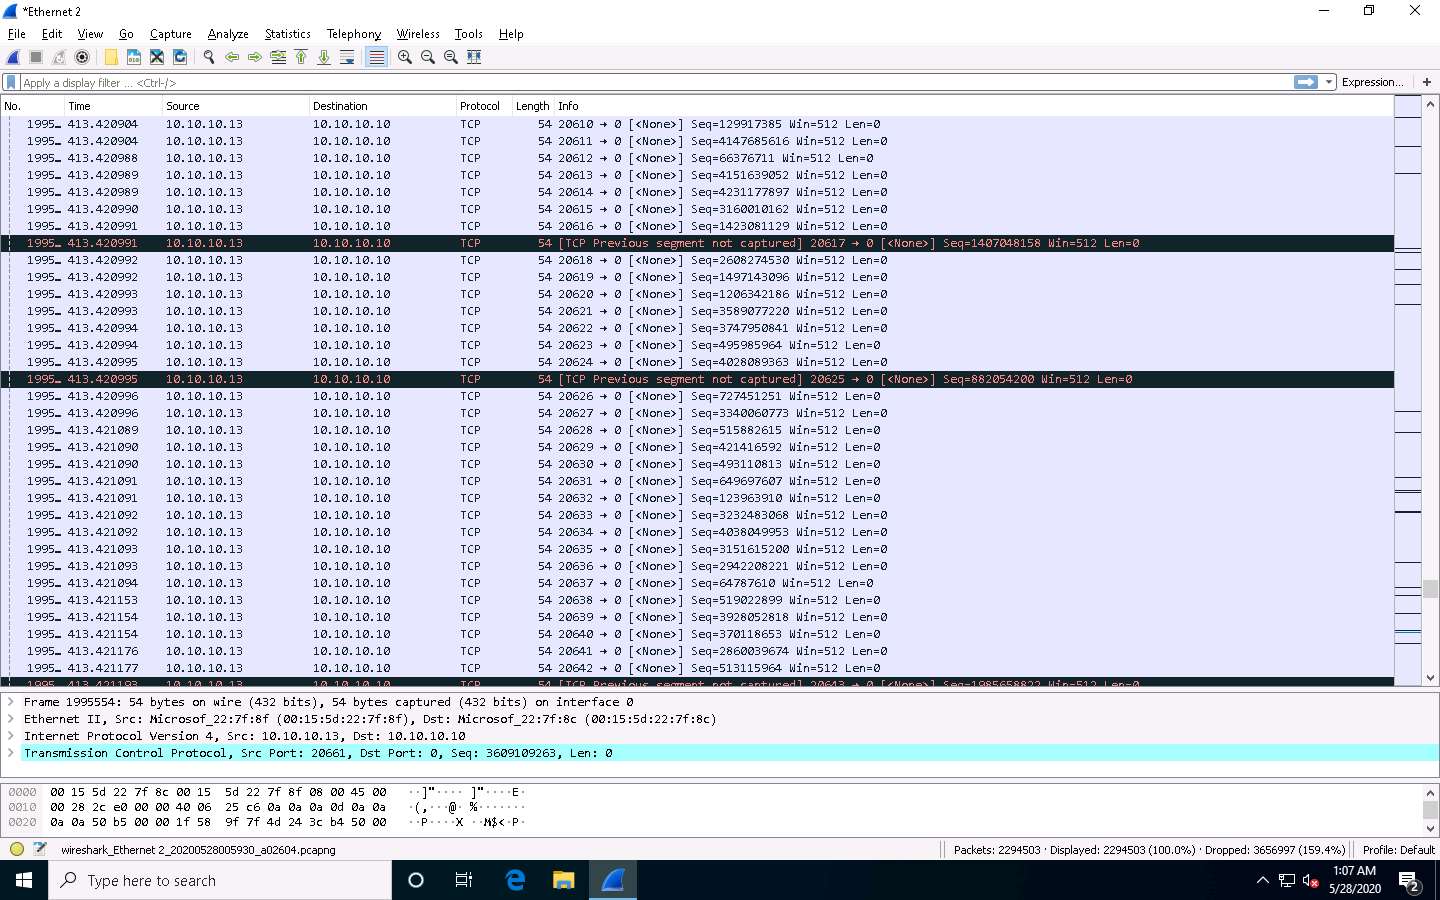
The TCP packet stream displays the complete information of TCP packets such as the source and destination of the captured packet, source port, destination port, etc.
This concludes the demonstration of evading the IDS and firewall using various evasion techniques in Hping3.
Close all open windows and document all the acquired information.


Comments
Post a Comment