Lab 7: Perform DNS Footprinting
Lab 7: Perform DNS Footprinting
Module 02: Footprinting and Reconnaissance
Lab 7: Perform DNS Footprinting
Task 1: Gather DNS Information using nslookup Command Line Utility and Online Tool
cmd
nslookup
enter
type set type=a
enter
put site in
enter
the first two lines will be This specifies that the result was directed to the default
server hosted on the local machine (Windows 10) that resolves your requested domain.
Thus, if the response is coming from your local machine’s server (Google), but not the server that legitimately hosts
the domain www.certifiedhacker.com; it is considered to be a non-authoritative answer.
www.certifiedhacker.com is 162.241.216.11. is the ip of the target domain
Since the result returned is non-authoritative, you need to obtain the domain's authoritative name server.
type
set type=cname
enter the site again
This returns the domain’s authoritative name server (ns1.bluehost.com), along with the mail server address (dnsadmin.box5331.bluehost.com),
Since you have obtained the authoritative name server, you will need to determine the IP address of the name server.
type
set type=a
enter
type ns1.bluehost.com or whatever came up equivilaent for lab
enter
The authoritative name server stores the records associated with the domain. So, if an attacker can
determine the authoritative name server (primary name server) and obtain its associated IP address,
he/she might attempt to exploit the server to perform attacks such as DoS, DDoS, URL Redirection, etc.
you can also do this all online at http://www.kloth.net/services/nslookup.php
---------------------------------------------------------------------------------------------------------------------------------------
Module 02: Footprinting and Reconnaissance
Lab 7: Perform DNS Footprinting
Task 2: Perform Reverse DNS Lookup using Reverse IP Domain Check and DNSRecon
reverse DNS operation is performed to obtain the domain name of a given IP address.
go to https://www.yougetsignal.com
click Reverse IP Domain Check.
enter in site www.certifiedhacker.com
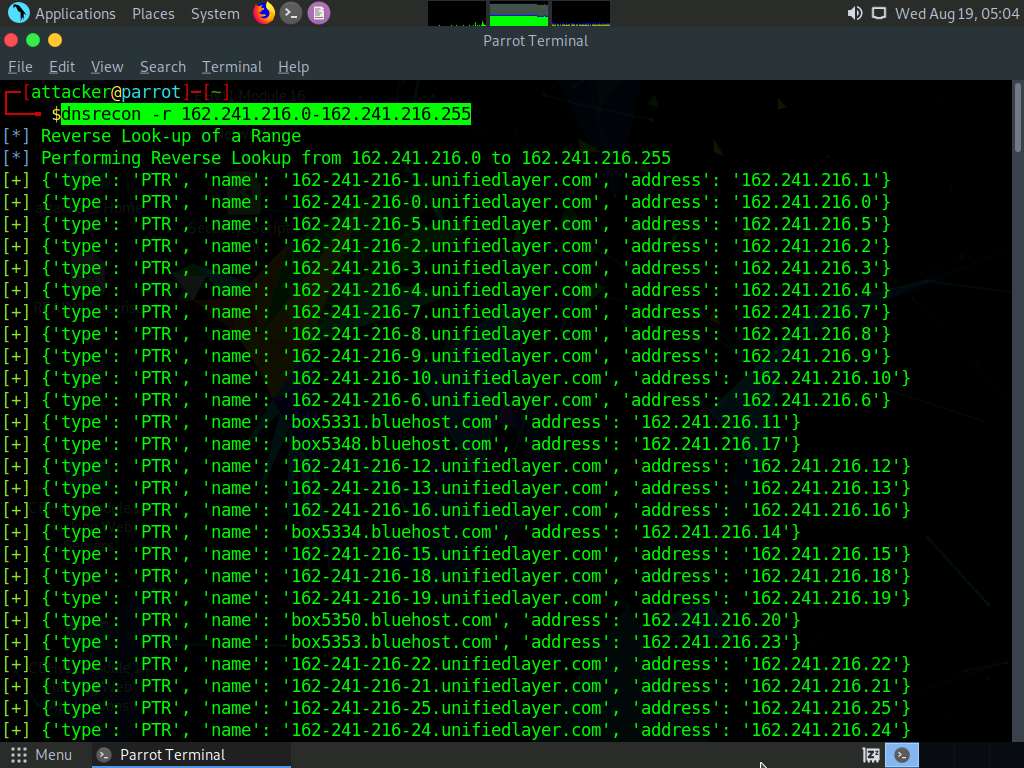
In the Parrot Terminal window, type dnsrecon -r 162.241.216.0-162.241.216.255 and press Enter
to locate a DNS PTR record for IP addresses between 162.241.216.0 - 162.241.216.255.
Lab Scenario
As a professional ethical hacker, you need to gather the DNS information of a target domain obtained during the previous steps. You need to perform DNS footprinting to gather information about DNS servers, DNS records, and types of servers used by the target organization. DNS zone data include DNS domain names, computer names, IP addresses, domain mail servers, service records, and much more about a target network.
Using this information, you can determine key hosts connected in the network and perform social engineering attacks to gather even more information.
Lab Objectives
- Gather DNS information using nslookup command line utility and online tool
- Perform reverse DNS lookup using reverse IP domain check and DNSRecon
Overview of DNS
DNS considered the intermediary source for any Internet communication. The primary function of DNS is to translate a domain name to IP address and vice-versa to enable human-machine-network-internet communications. Since each device has a unique IP address, it is hard for human beings to memorize all IP addresses of the required application. DNS helps in converting the IP address to a more easily understandable domain format, which eases the burden on human beings.
Task 1: Gather DNS Information using nslookup Command Line Utility and Online Tool
nslookup is a network administration command-line utility, generally used for querying the DNS to obtain a domain name or IP address mapping or for any other specific DNS record. This utility is available both as a command-line utility and web application.
Here, we will perform DNS information gathering about target organizations using the nslookup command-line utility and NSLOOKUP web application.
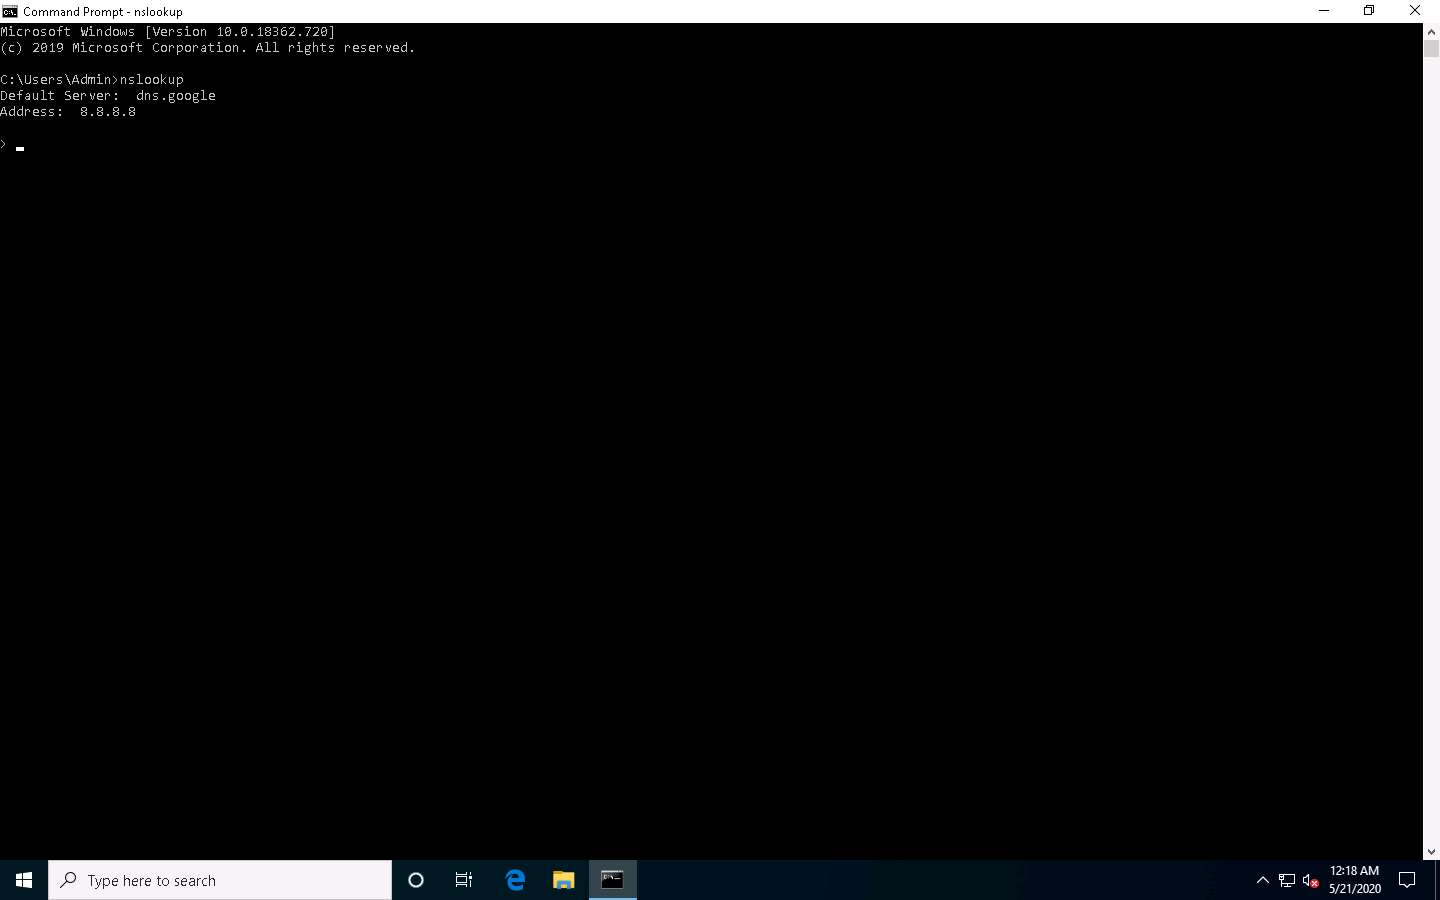
Click Windows 10 to switch to the Windows 10 machine, launch a Command Prompt, type nslookup and press Enter. This displays the default server and its address assigned to the Windows 10 machine.
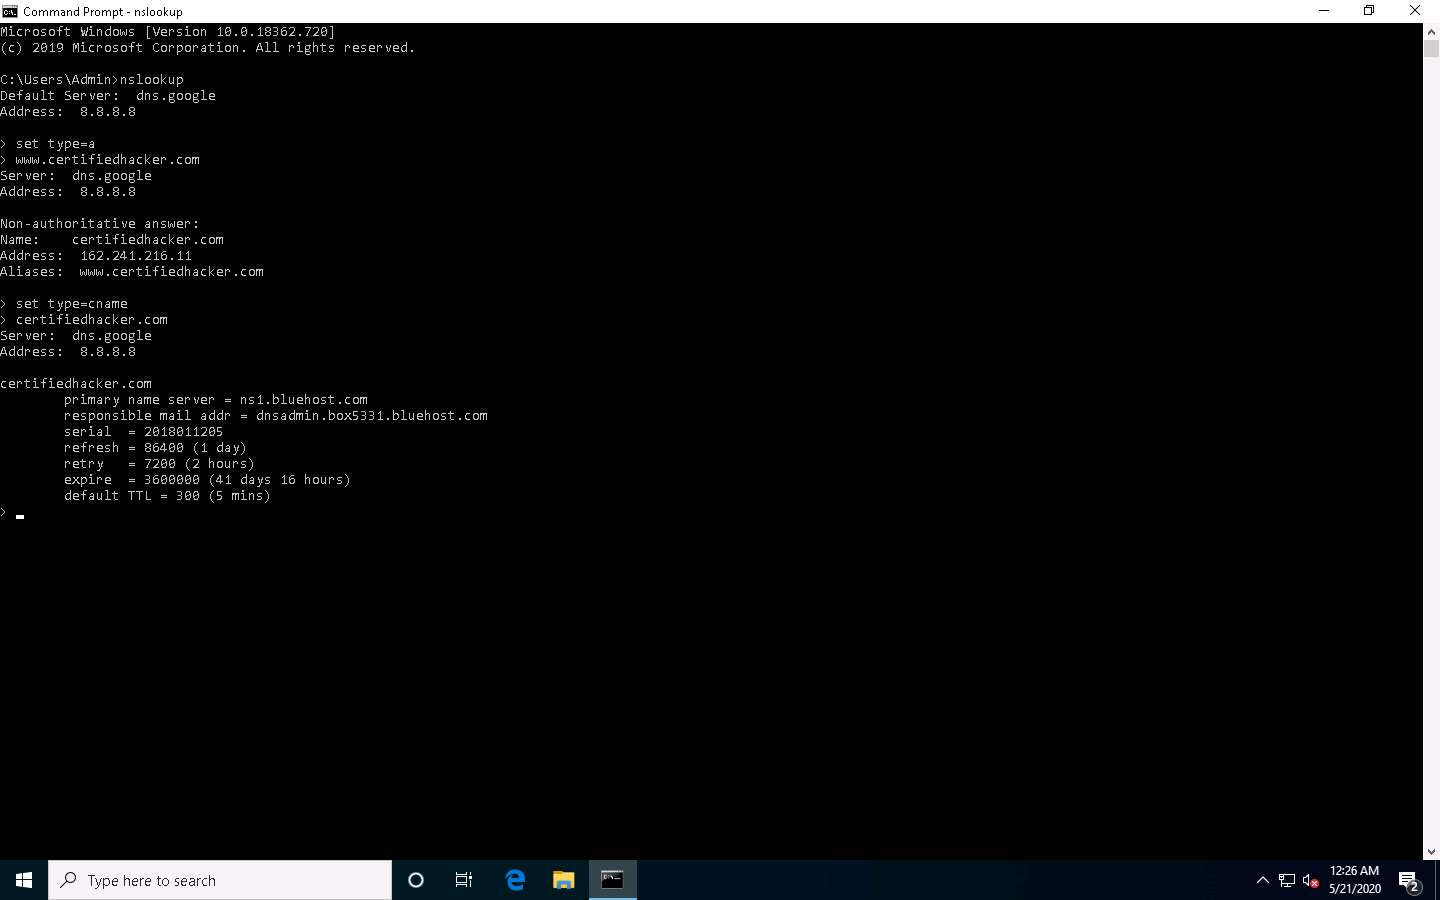
In the nslookup interactive mode, type set type=a and press Enter. Setting the type as “a” configures nslookup to query for the IP address of a given domain.
Type the target domain www.certifiedhacker.com and press Enter. This resolves the IP address and displays the result, as shown in the screenshot.

The first two lines in the result are:
Server: dns.google and Address: 8.8.8.8
This specifies that the result was directed to the default server hosted on the local machine (Windows 10) that resolves your requested domain.
Thus, if the response is coming from your local machine’s server (Google), but not the server that legitimately hosts the domain www.certifiedhacker.com; it is considered to be a non-authoritative answer. Here, the IP address of the target domain www.certifiedhacker.com is 162.241.216.11.
Since the result returned is non-authoritative, you need to obtain the domain's authoritative name server.
Type set type=cname and press Enter. The CNAME lookup is done directly against the domain's authoritative name server and lists the CNAME records for a domain.
Type certifiedhacker.com and press Enter.
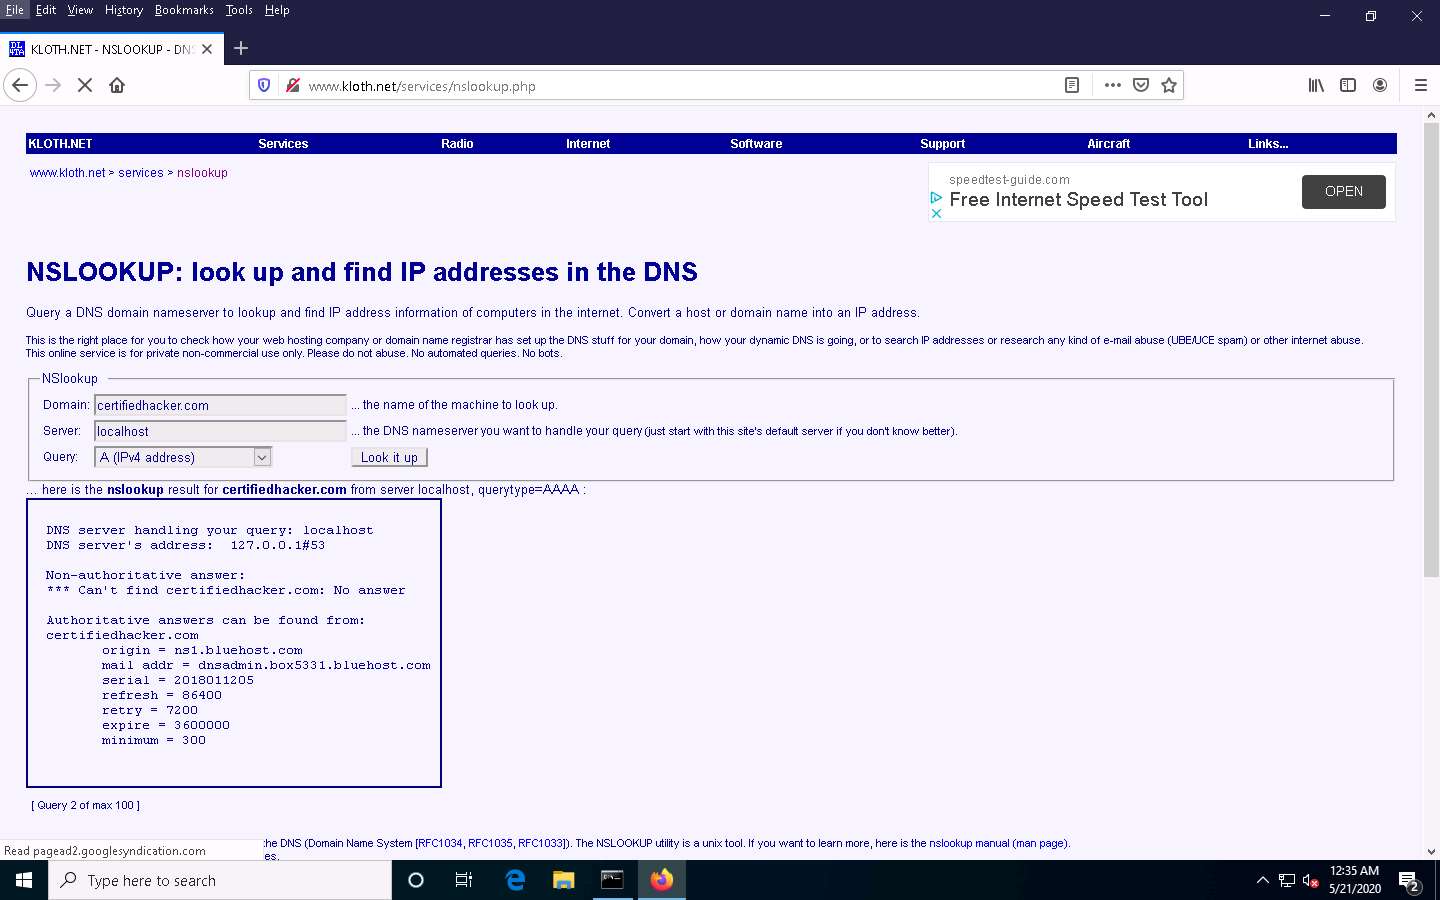
This returns the domain’s authoritative name server (ns1.bluehost.com), along with the mail server address (dnsadmin.box5331.bluehost.com), as shown in the screenshot.
Since you have obtained the authoritative name server, you will need to determine the IP address of the name server.
Issue the command set type=a and press Enter.
Type ns1.bluehost.com (or the primary name server that is displayed in your lab environment) and press Enter. This returns the IP address of the server, as shown in the screenshot.
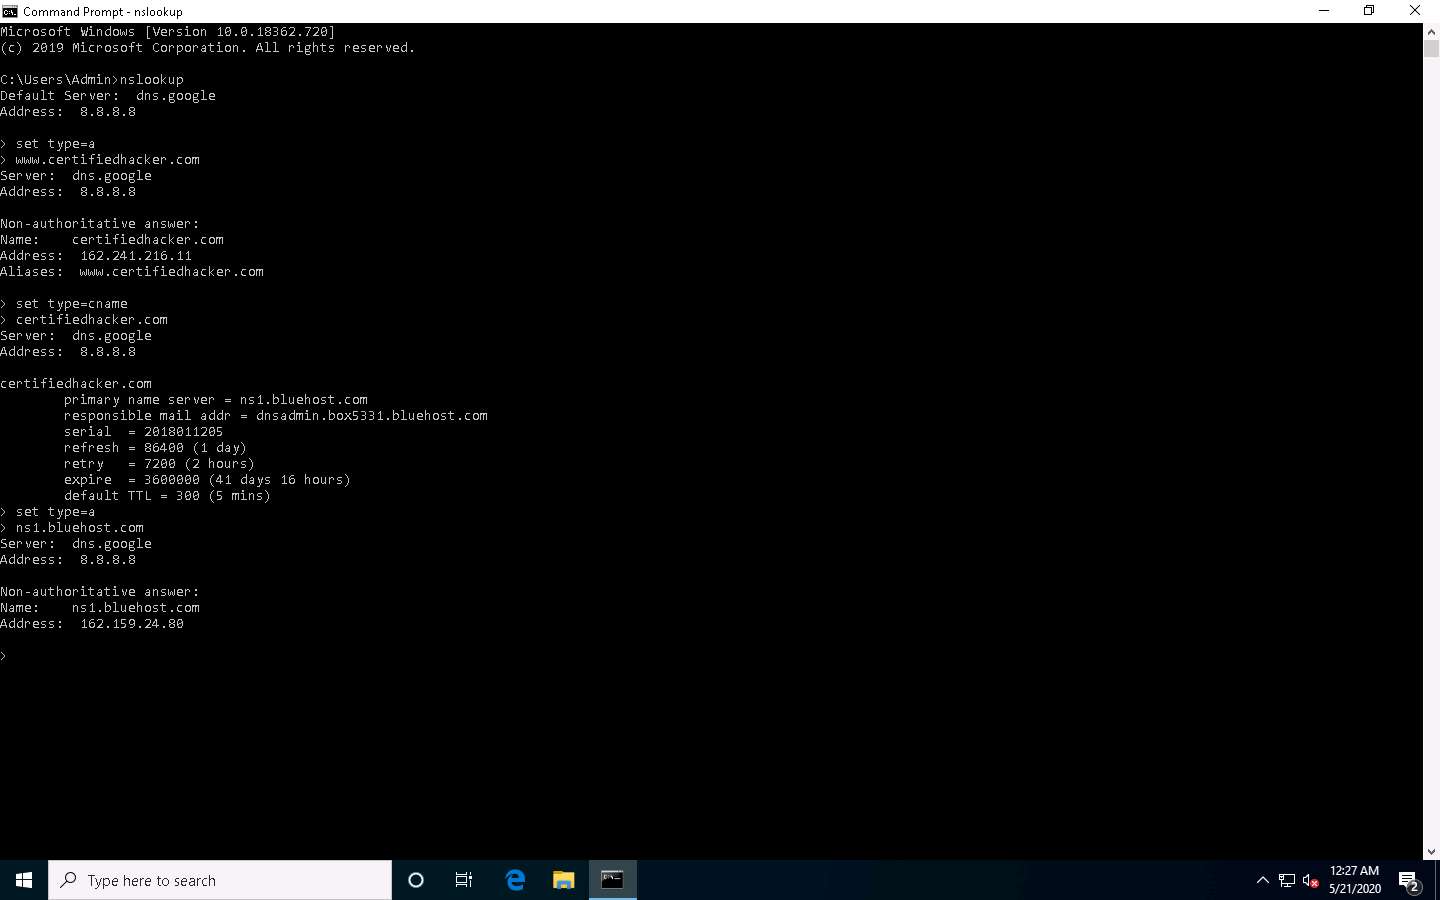
The authoritative name server stores the records associated with the domain. So, if an attacker can determine the authoritative name server (primary name server) and obtain its associated IP address, he/she might attempt to exploit the server to perform attacks such as DoS, DDoS, URL Redirection, etc.
You can also perform the same operations using the NSLOOKUP online tool. Conduct a series of queries and review the information to gain familiarity with the NSLOOKUP tool and gather information.
Now, we will use an online tool NSLOOKUP to gather DNS information about the target domain.
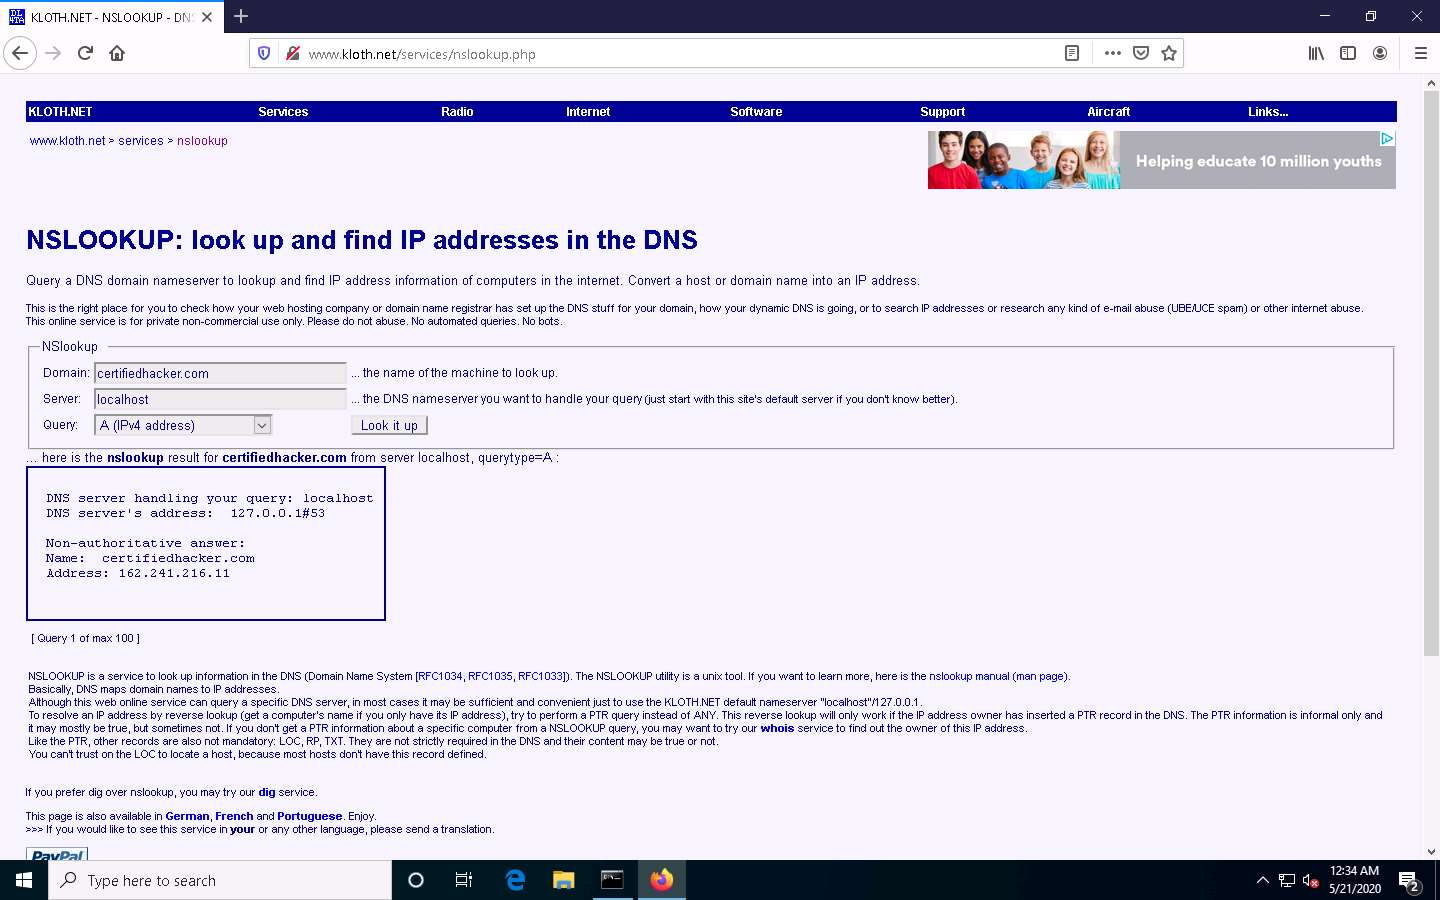
Open any web browser (here, Mozilla Firefox). In the address bar of the browser place your mouse cursor and click http://www.kloth.net/services/nslookup.php and press Enter.
NSLOOKUP website appears, as shown in the screenshot.

Once the site opens, in the Domain: field, enter certifiedhacker.com. Set the Query: field to default [A (IPv4 address)] and click the Look it up button to review the results that are displayed.
In the Query: field, click the drop-down arrow and check the different options that are available, as shown in the screenshot.
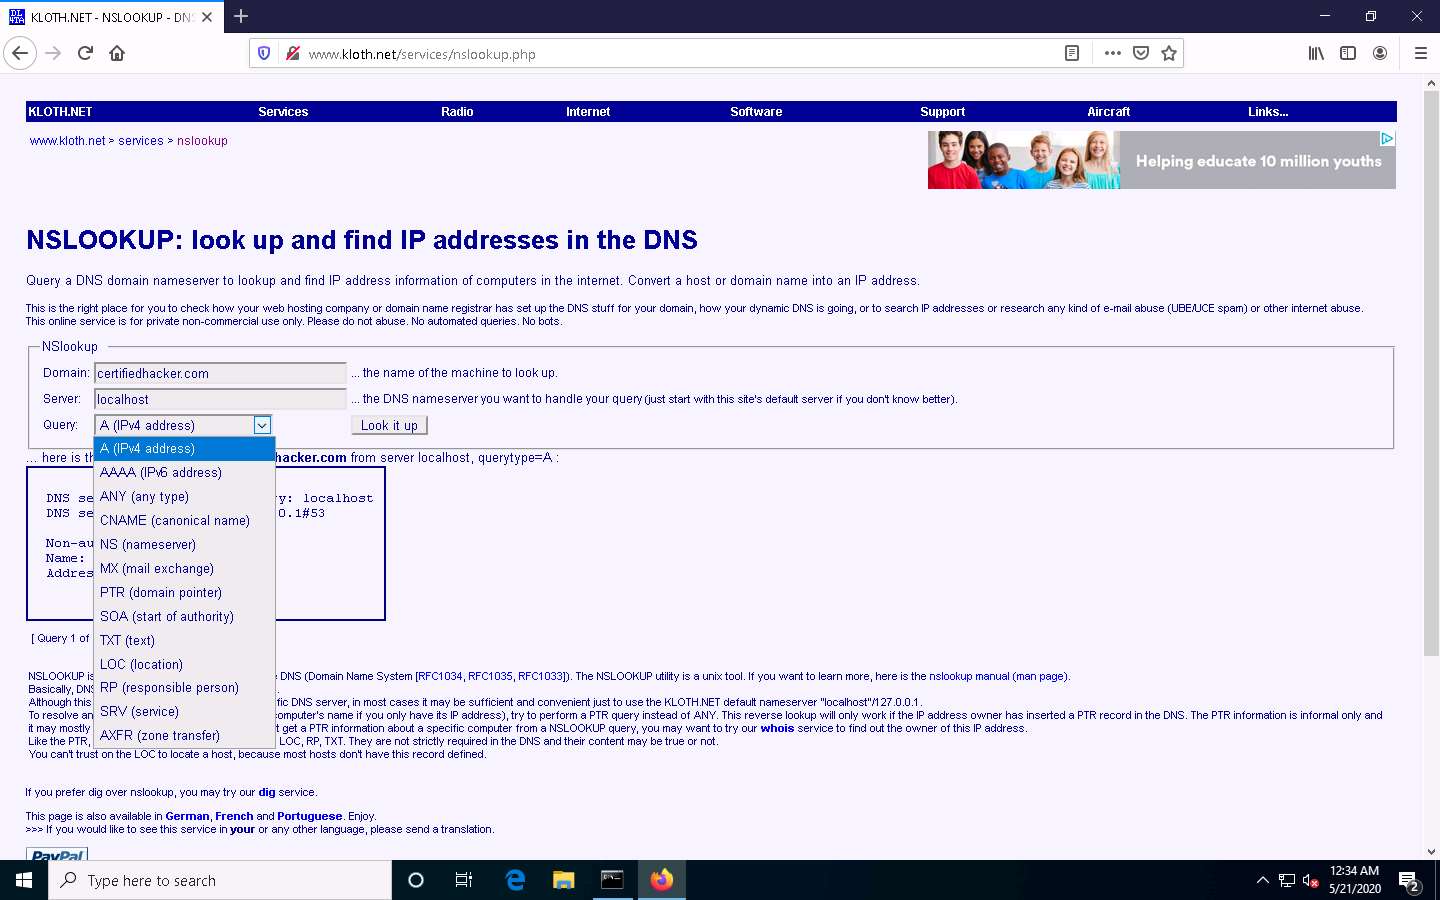
As you can see, there is an option for AAAA (IPv6 address); select that and click Look it up. Perform queries related to this, since there are attacks that are possible over IPv6 networks as well.
This concludes the demonstration of DNS information gathering using the nslookup command-line utility and NSLOOKUP online tool.
You can also use DNS lookup tools such as Professional Toolset (https://tools.dnsstuff.com), DNS Records (https://network-tools.com), etc. to extract additional target DNS information.
Close all open windows and document all the acquired information.
Task 2: Perform Reverse DNS Lookup using Reverse IP Domain Check and DNSRecon
DNS lookup is used for finding the IP addresses for a given domain name, and the reverse DNS operation is performed to obtain the domain name of a given IP address.
Here, we will perform reverse DNS lookup using you get signal’s Reverse IP Domain Check tool to find the other domains/sites that share the same web server as our target server.
Here, we will also perform a reverse DNS lookup using DNSRecon on IP range in an attempt to locate a DNS PTR record for those IP addresses.
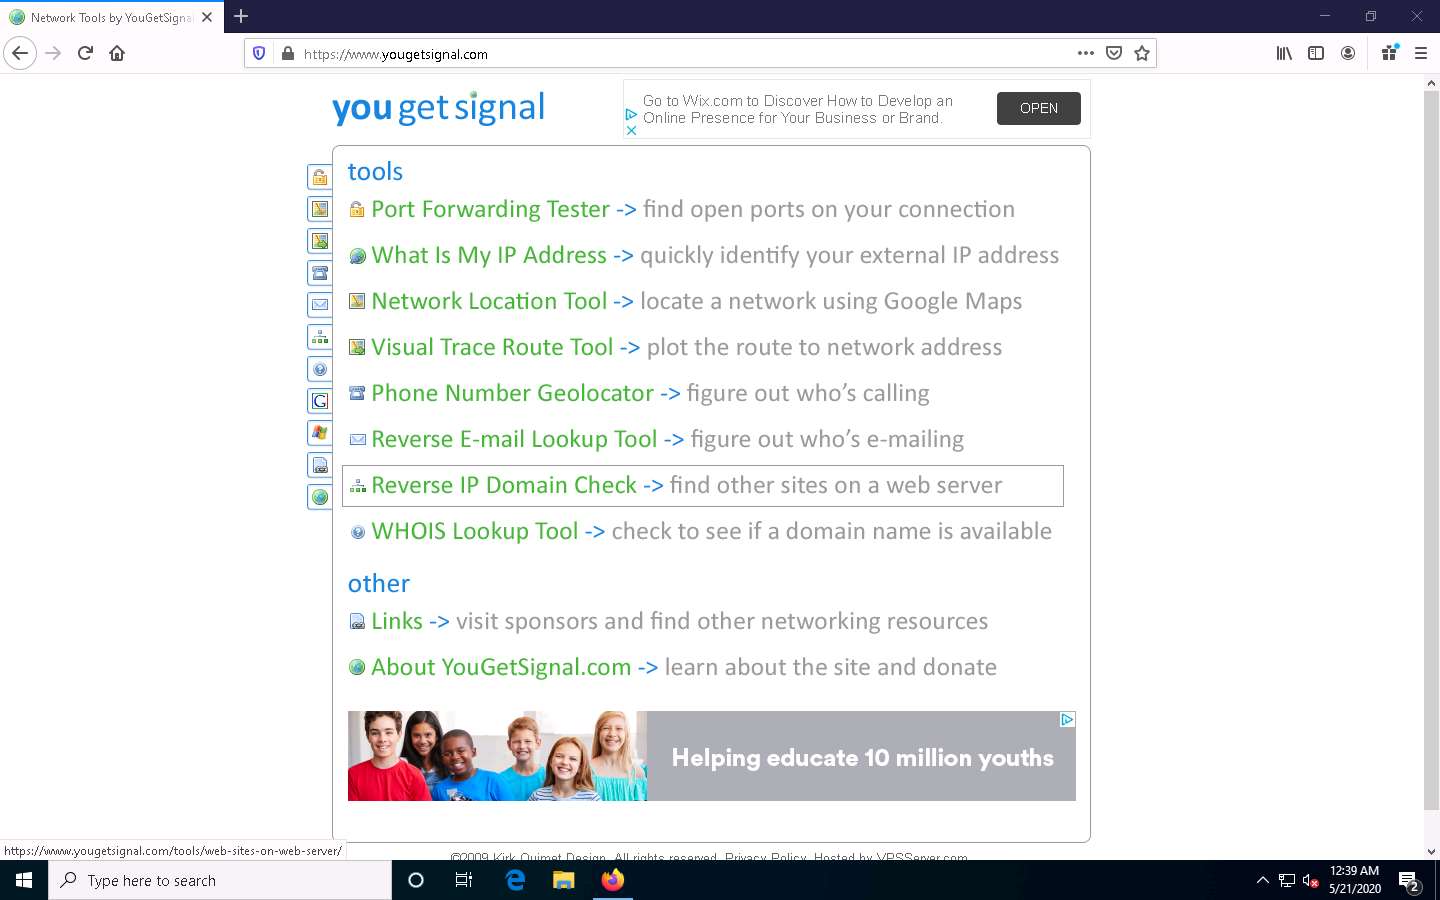
Open any web browser (here, Mozilla Firefox). In the address bar of the browser place your mouse cursor and click https://www.yougetsignal.com and press Enter.
you get signal website appears, click Reverse IP Domain Check.
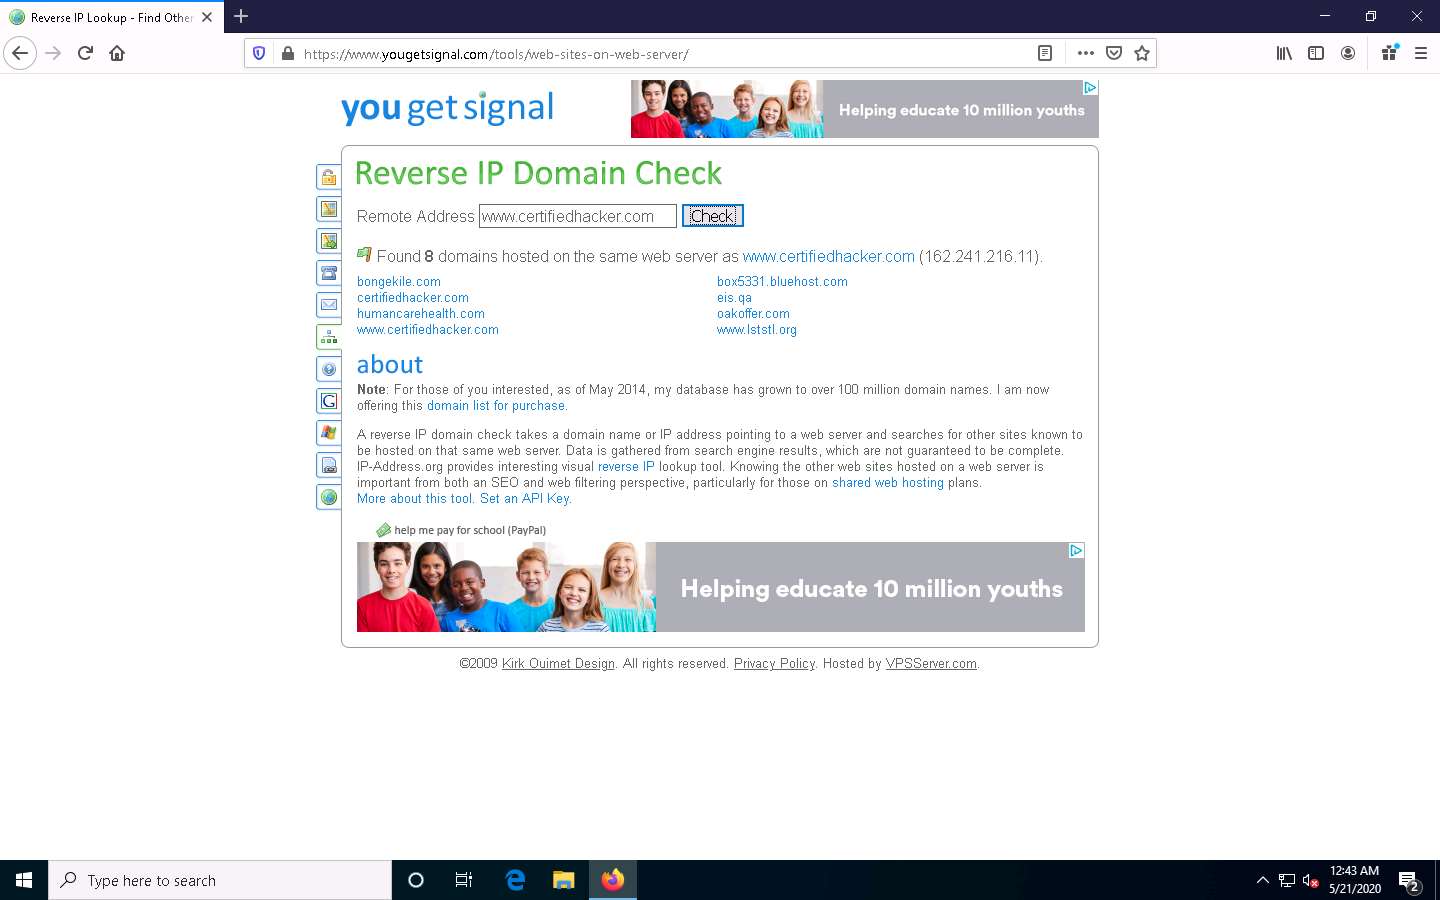
On the Reverse IP Domain Check page, enter www.certifiedhacker.com in the Remote Address field and click Check to find other domains/sites hosted on a certifiedhacker.com web server. You will get the list of domains/sites hosted on the same server as www.certifiedhacker.com, as shown in the screenshot.
Now, click Parrot Security to switch to the Parrot Security machine.
Click the MATE Terminal icon at the top-left corner of the Desktop window to open a Terminal window.

In the Parrot Terminal window, type dnsrecon -r 162.241.216.0-162.241.216.255 and press Enter to locate a DNS PTR record for IP addresses between 162.241.216.0 - 162.241.216.255.
Here, we will use the IP address range, which includes the IP address of our target, that is, the certifiedhacker.com domain (162.241.216.11), which we acquired in the previous steps.
-r option specifies the range of IP addresses (first-last) for reverse lookup brute force.
This concludes the demonstration of gathering information about a target organization by performing reverse DNS lookup using “you get signal’s” Reverse IP Domain Check and DNSRecon tool.
Close all open windows and document all the acquired information.


Comments
Post a Comment