Lab 2: Evade Firewalls using Various Evasion Techniques
Lab 2: Evade Firewalls using Various Evasion Techniques
Module 12: Evading IDS, Firewalls, and Honeypots
Lab 2: Evade Firewalls using Various Evasion Techniques
Task 1: Bypass Windows Firewall using Nmap Evasion Techniques
terminal
sudo su
cd
nmap 10.10.10.10
the output of the Nmap scan shows that all the 1,000 scanned ports on 10.10.10.10 are filtered.
if that shows then its good means the windows has firewall
nmap -sS 10.10.10.10
Observe that the results are the same as when the Windows 10 Firewall is turned on.
nmap -T4 -A 10.10.10.10
should show same thing
nmap -sP 10.10.10.0/24
this is to scan the whole network
per the scan result, you can observe that the Windows Server 2019 machine is Active (10.10.10.19)
do a zombie scan now
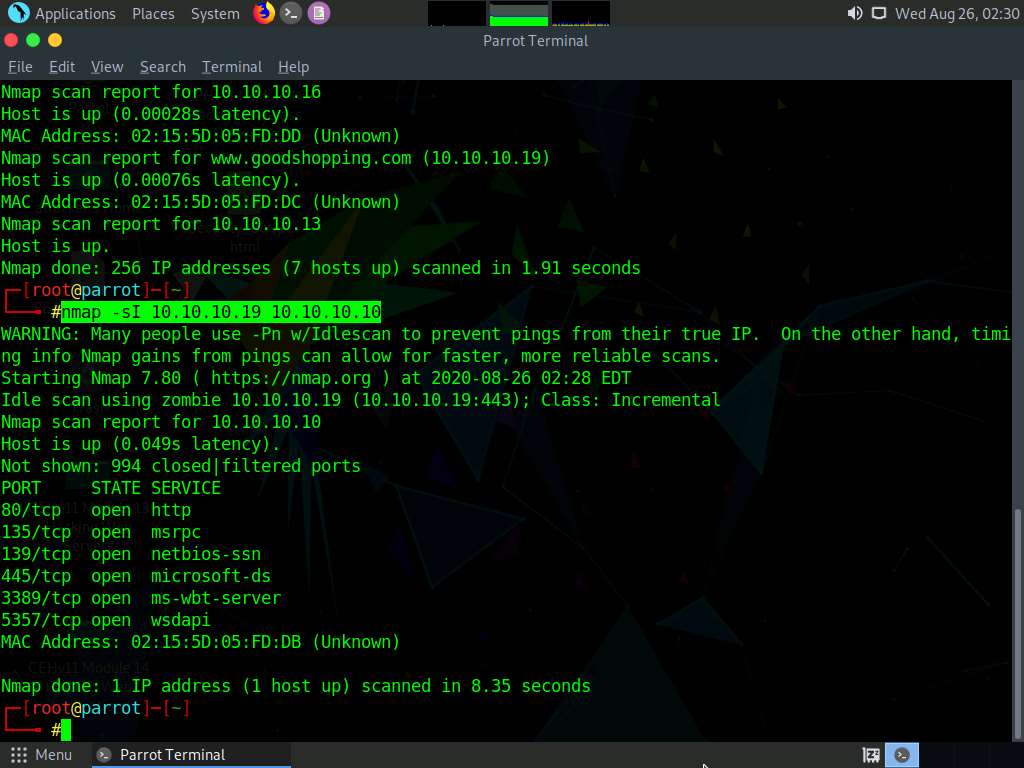
nmap -sI 10.10.10.19 10.10.10.10
this will show the open ports on the system beacuase it thinks your that server
---------------------------------------------------------------------------------------------------------------------------------------
Module 12: Evading IDS, Firewalls, and Honeypots
Lab 2: Evade Firewalls using Various Evasion Techniques
Task 2: Bypass Firewall Rules using HTTP/FTP Tunneling
HTTP tunneling technology allows attackers to perform various Internet tasks despite the restrictions imposed by firewalls.
This method can be implemented if the target company has a public web server with port 80 used for HTTP traffic that is
unfiltered by its firewall. This technology encapsulates data inside HTTP traffic (port 80). Many firewalls do not examine
the payload of an HTTP packet to confirm that it is legitimate, thus it is possible to tunnel traffic via TCP port 80.
HTTPort allows users to bypass the HTTP proxy, which blocks Internet access to e-mail, instant messengers, P2P file sharing,
ICQ, News, FTP, IRC, etc. Here, the Internet software is configured, so that it connects to a local PC as if it is the
required remote server; HTTPort then intercepts that connection and runs it via a tunnel through the proxy. HTTPort can
work on devices such as proxies or firewalls that allow HTTP traffic. Thus, HTTPort provides access to websites and Internet
apps. HTTPort performs tunneling using one of two modes: SSL/CONNECT mode and a remote host.
The remote host method is capable of tunneling through any proxy. HTTPort uses a special server software called HTTHost,
which is installed outside the proxy-blocked network. It is a web server, and thus when HTTPort is tunneling, it sends a
series of HTTP requests to the HTTHost. The proxy responds as if the user is surfing a website and thus allows the user to
do so. HTTHost, in turn, performs its half of the tunneling and communicates with the target servers. This mode is much
slower, but works in the majority of cases and features strong data encryption that makes proxy logging useless.
Here, we will learn how networks can be scanned, and how to use HTTPort and HTTHost to bypass firewall restrictions and
access files.
long lab refer to blog good luck
Lab Scenario
Firewalls and IDSs are intended to prevent port scanning tools such as Nmap, from receiving a precise measure of significant data of the frameworks that they are scanning. However, these prevention measures can be easily overcome: Nmap has numerous features that were created specifically to bypass these protections. It has the ability to issue a mapping of a system framework, through which you can view a substantial amount of information, from OS renditions to open ports. Firewalls and interruption recognition frameworks are made to keep Nmap and other applications from obtaining that data.
As an ethical hacker or penetration tester, you will come across systems behind firewalls that prevent you from attaining the information that you need. Therefore, you will need to know how to avoid the firewall rules and to glean information about a host. This step in a penetration test is called Firewall Evasion Rules.
Lab Objectives
- Bypass windows firewall using Nmap evasion techniques
- Bypass firewall rules using HTTP/FTP tunneling
Overview of Firewalls Evasion Techniques
A firewall operates on a predefined set of rules. Using extensive knowledge and skill, an attacker can bypass the firewall by employing various bypassing techniques. Using these techniques, the attacker tricks the firewall to not filter the malicious traffic that he/she generates.
The following are some firewall bypassing techniques
- Port Scanning
- Firewalking
- Banner Grabbing
- IP Address Spoofing
- Source Routing
- Tiny Fragments
- Using an IP Address in Place of URL
- Using Anonymous Website Surfing Sites
- Using a Proxy Server
- ICMP Tunneling
- ACK Tunneling
- HTTP Tunneling
- SSH Tunneling
- DNS Tunneling
- Through External Systems
- Through MITM Attack
- Through Content
- Through XSS Attack
Task 1: Bypass Windows Firewall using Nmap Evasion Techniques
Network/security administrators play a crucial role in creating security defenses within an organization. Though such defenses protect the machines in the network, there might still be an insider who may try to apply different evasion techniques to identify the services running on the target.
In this scenario, consider an admin has written certain Windows Firewall rules to block your system from reaching one of the machines in the network. You will be taught to use Nmap in such a way that you can perform recon on the target using other active machines on the network and identify the services running on the machine along with their open ports.
Click on Windows 10 to switch to the Windows 10 machine.
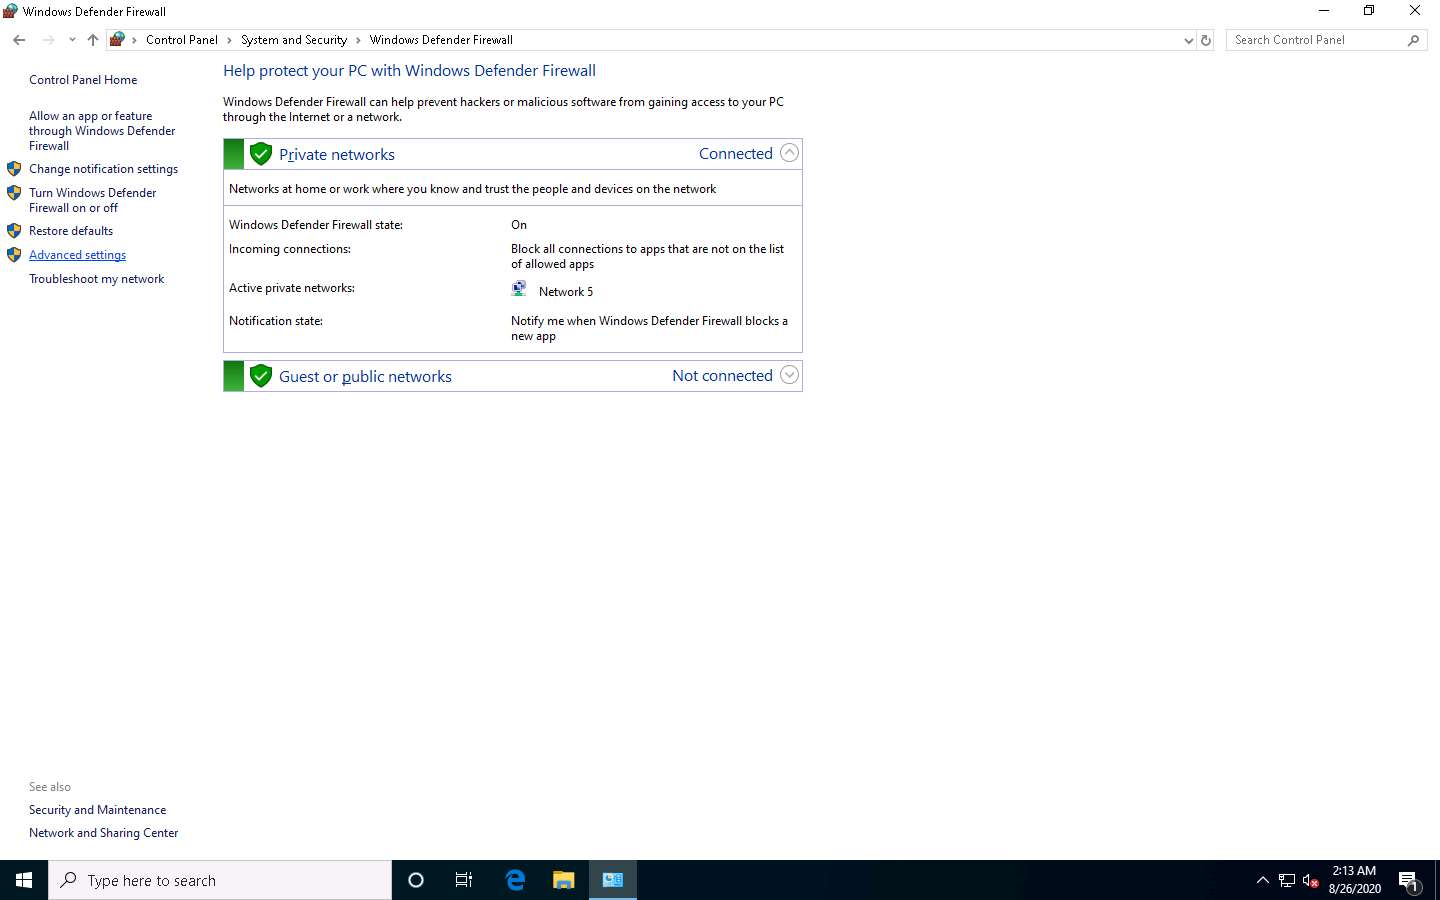
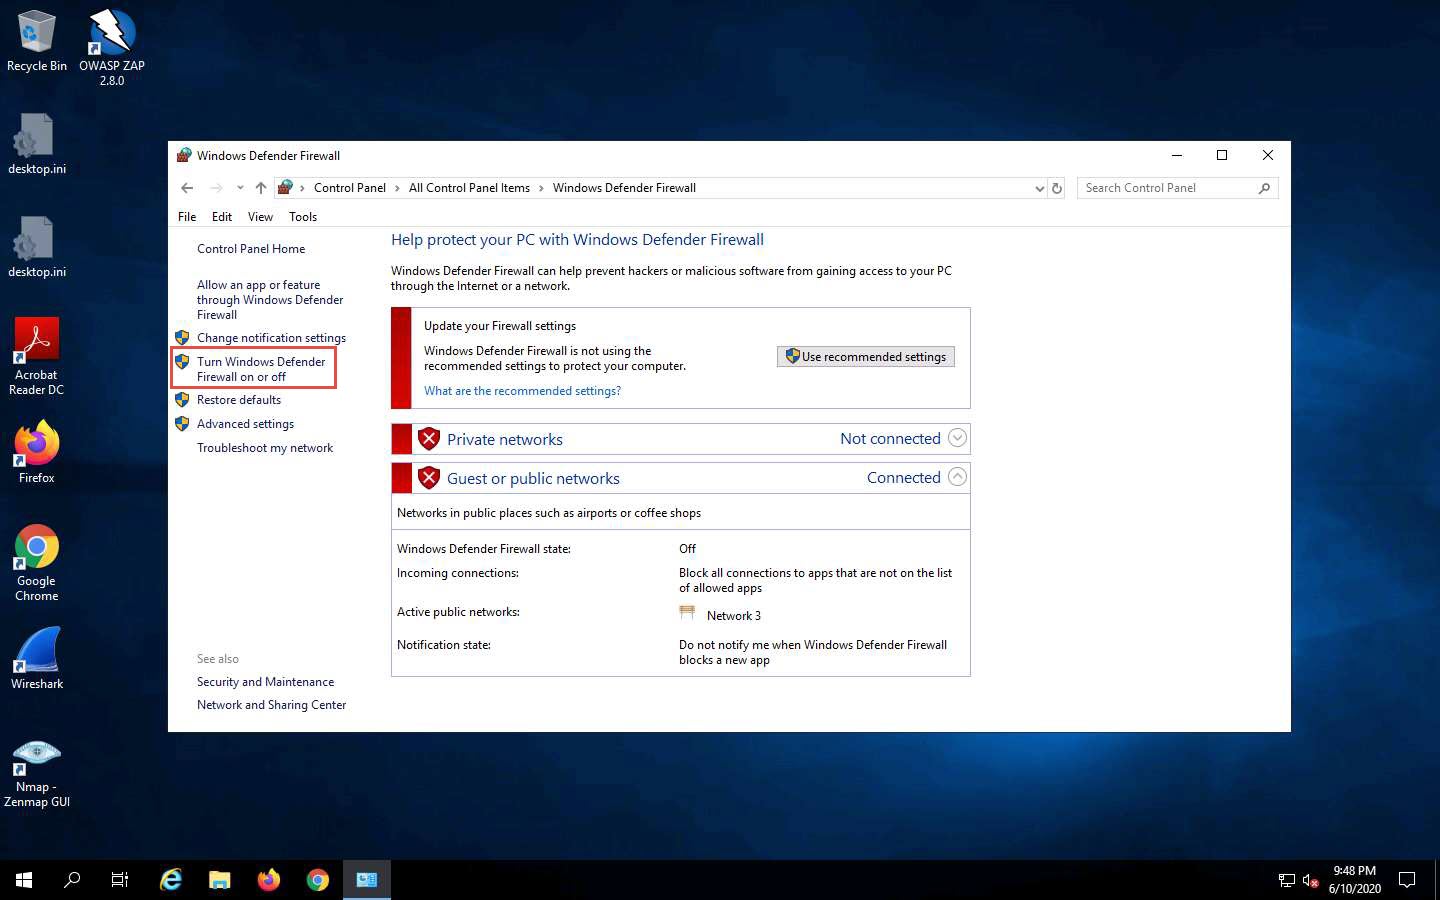
Open the Control Panel; navigate to System and Security --> Windows Defender Firewall and click Use recommended settings to turn on Firewall.

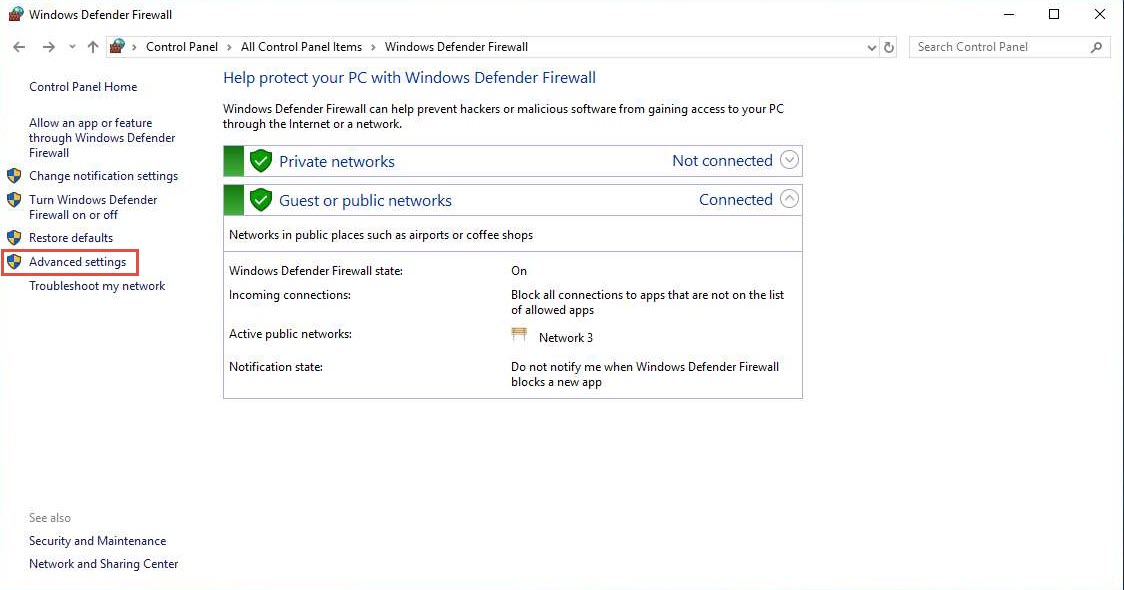
Now, you can see that the Firewall is enabled in the Windows 10 machine. Click the Advanced settings link in the left pane.
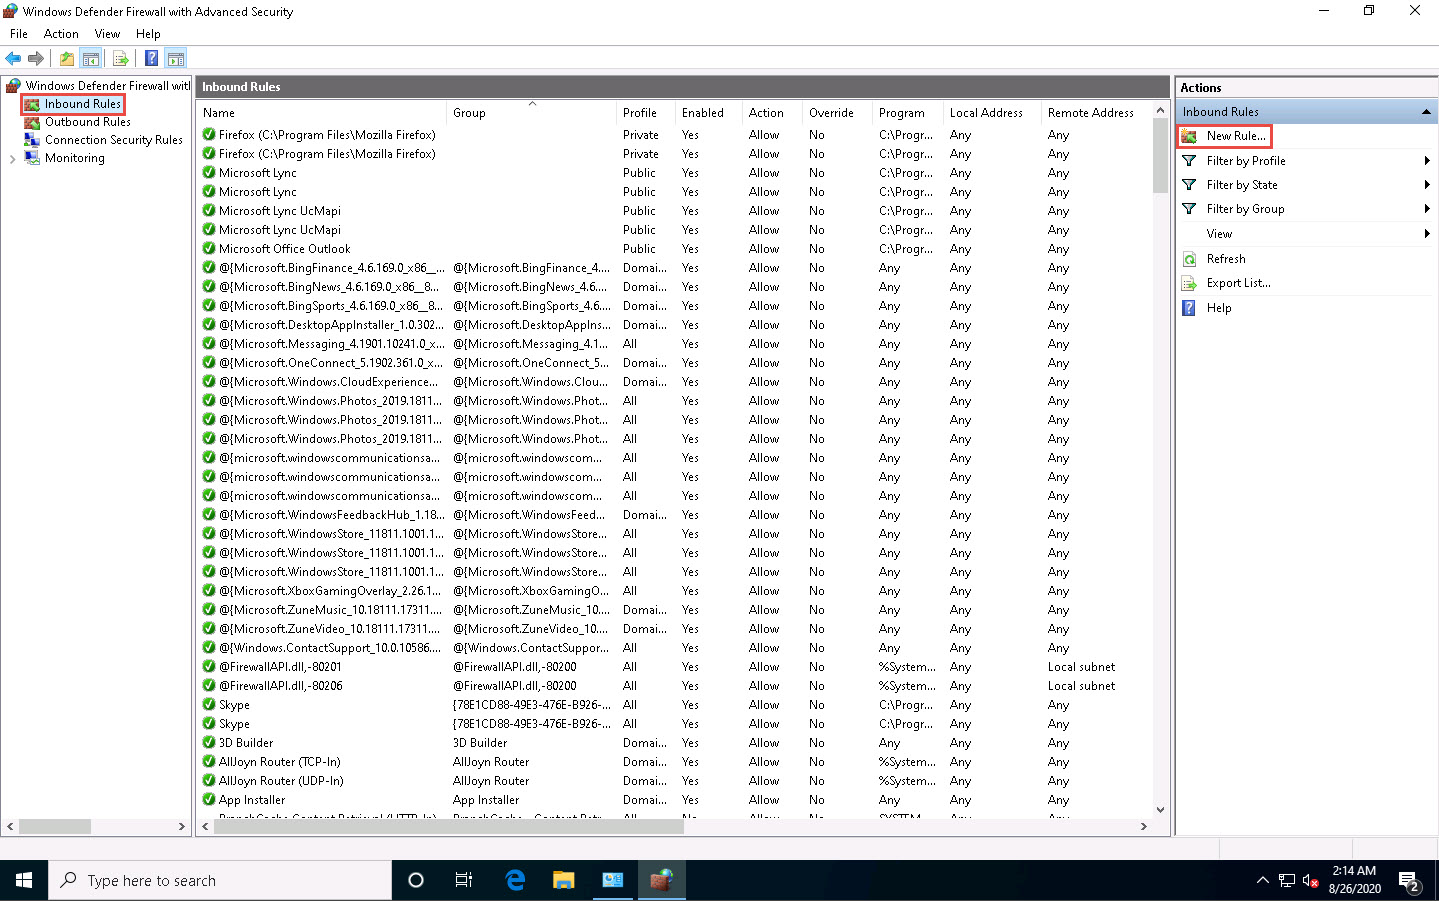
The Windows Defender Firewall with Advanced Security window appears; here, we are going to create an inbound rule. Select Inbound Rules in the left pane and click New Rule under Actions.
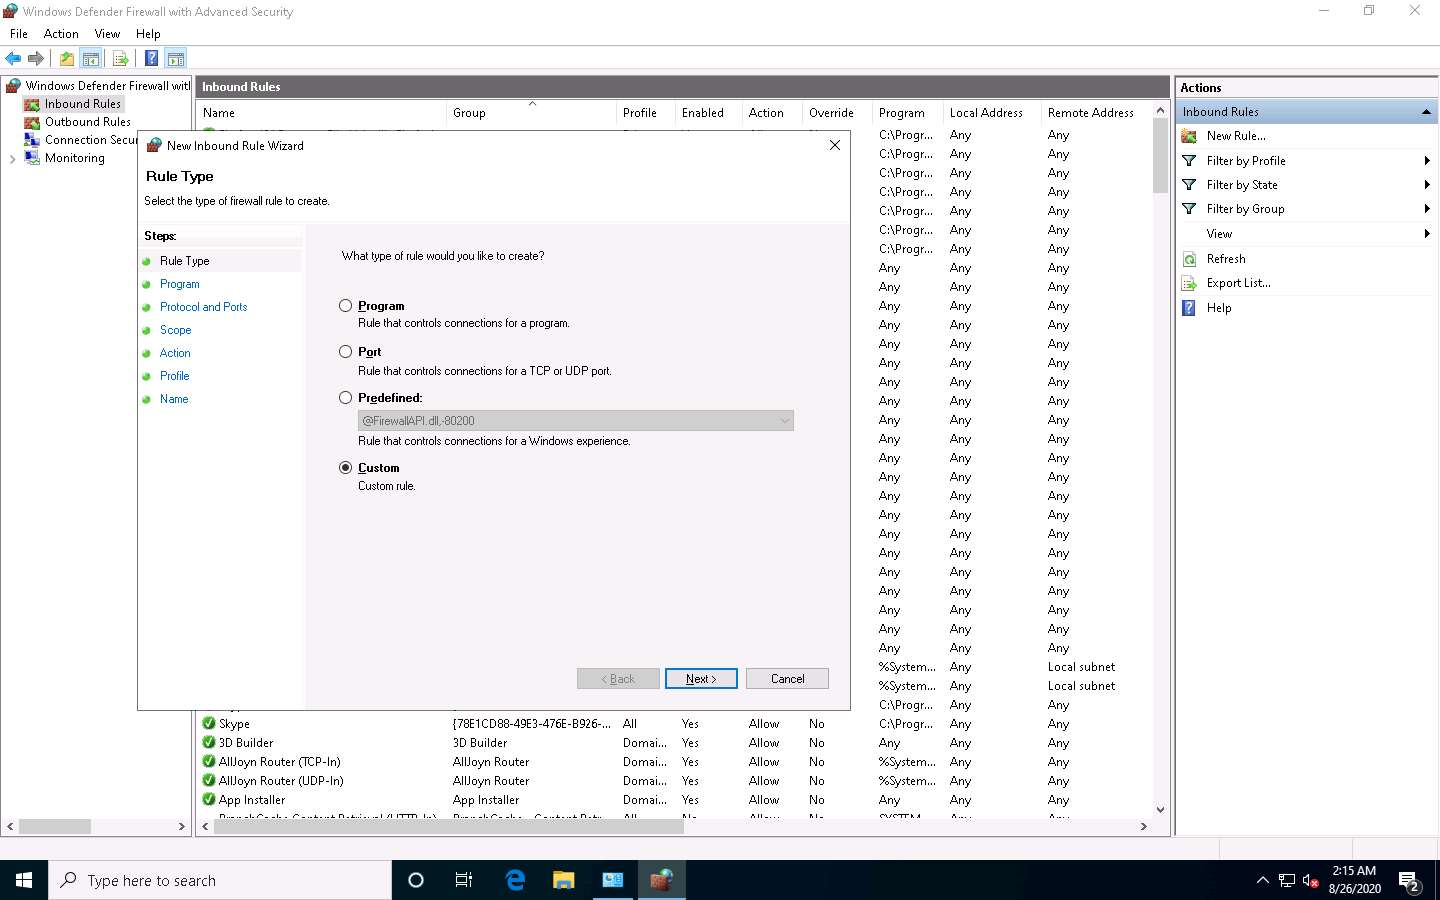
The New Inbound Rule Wizard appears. In the Rule Type section, choose the Custom radio button to create a custom inbound rule and click Next.
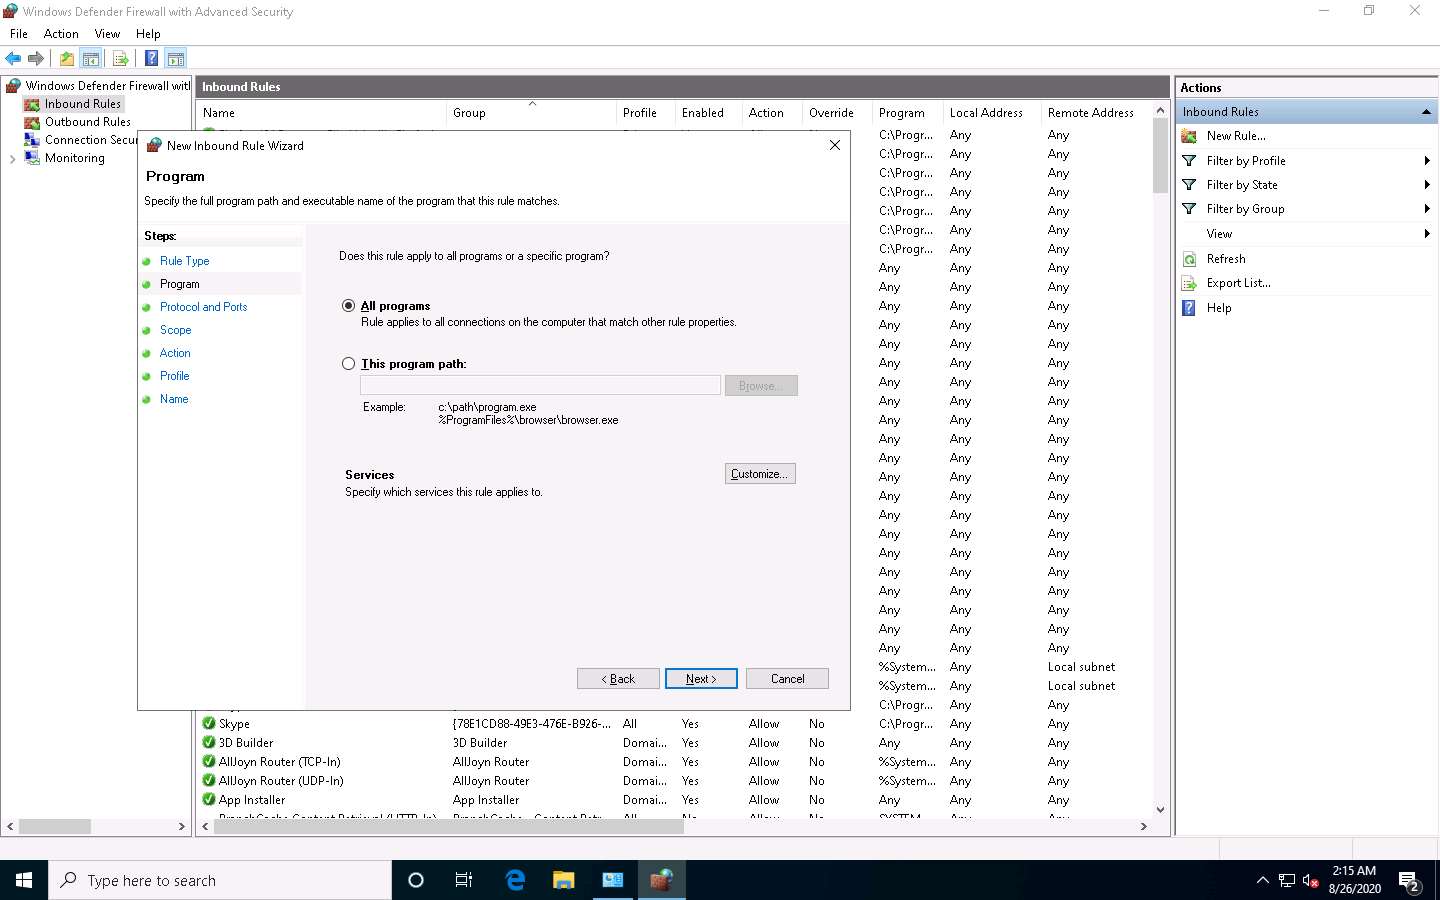
In the Program section, leave the settings to default and click Next.
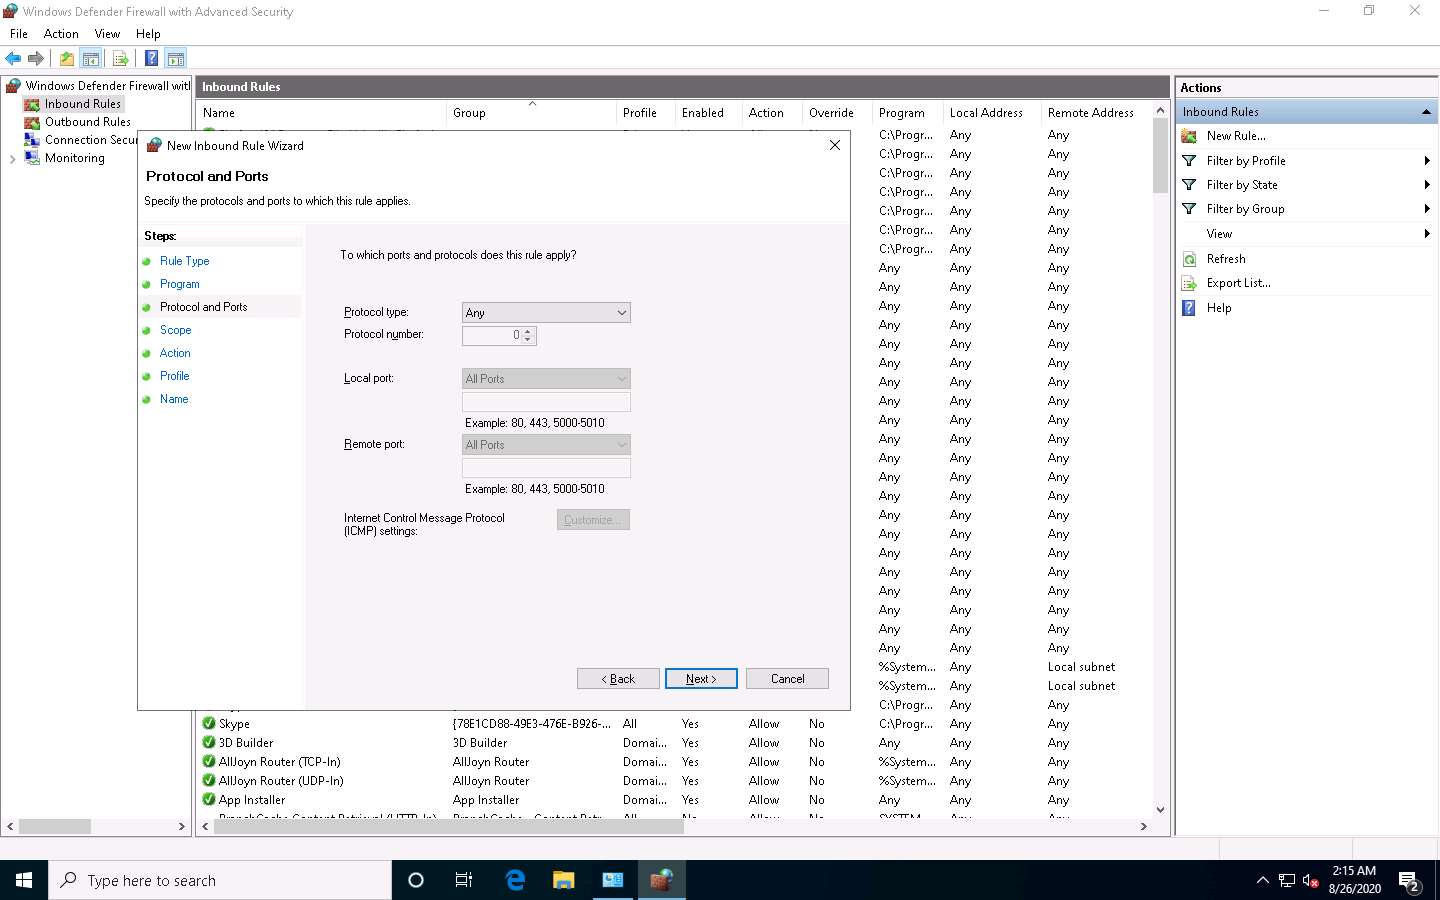
In the Protocol and Ports section, leave the settings to default and click Next.
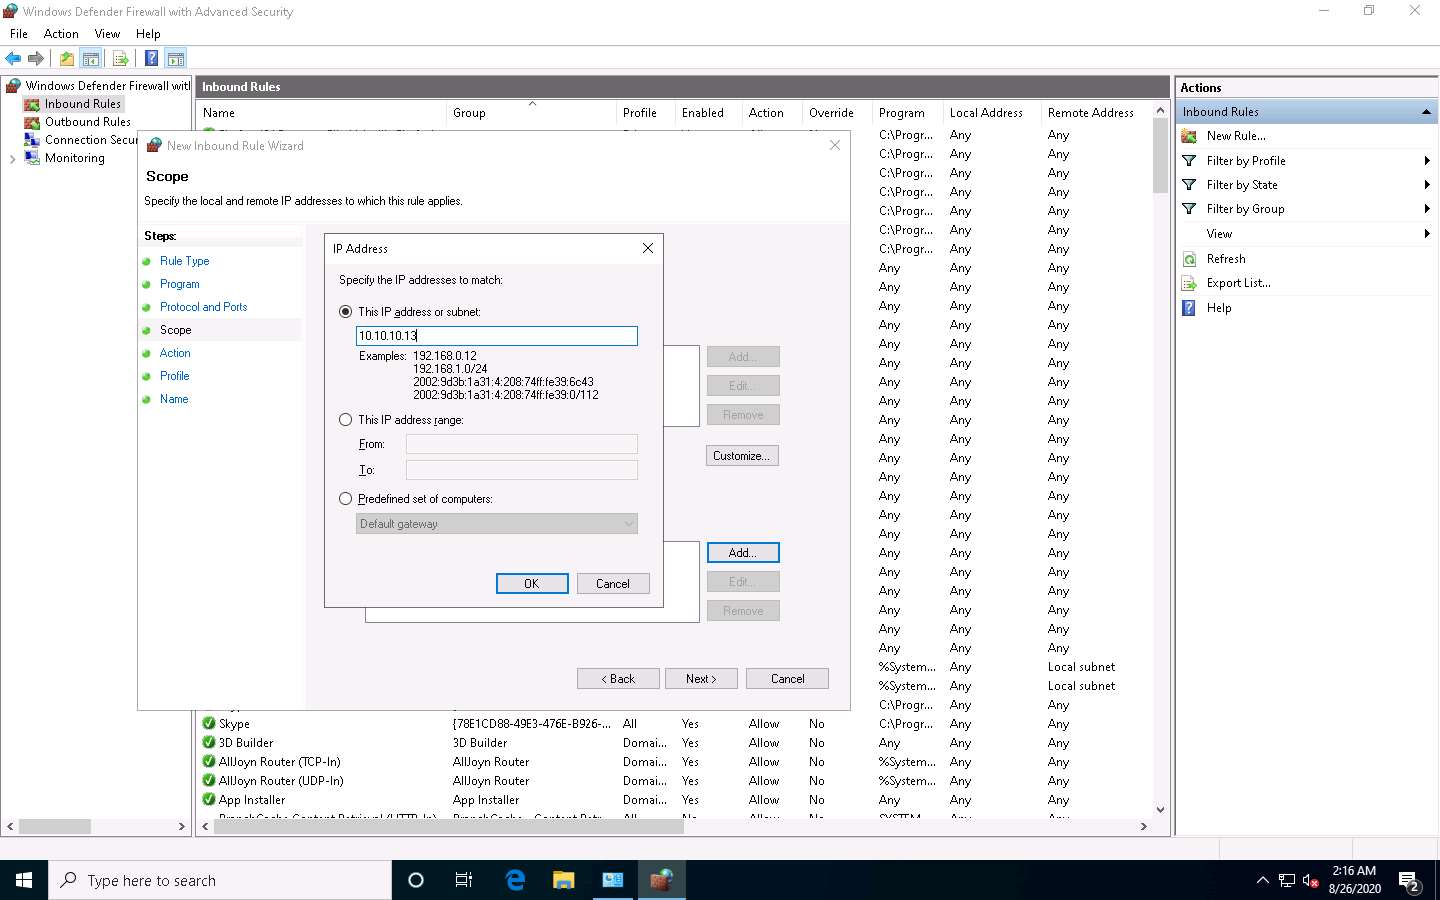
In the Scope section, choose the These IP addresses radio button under Which remote IP addresses does this rule apply to?, and then click Add.

The IP Address pop-up appears; type the IP address of the Parrot Security machine and click OK.
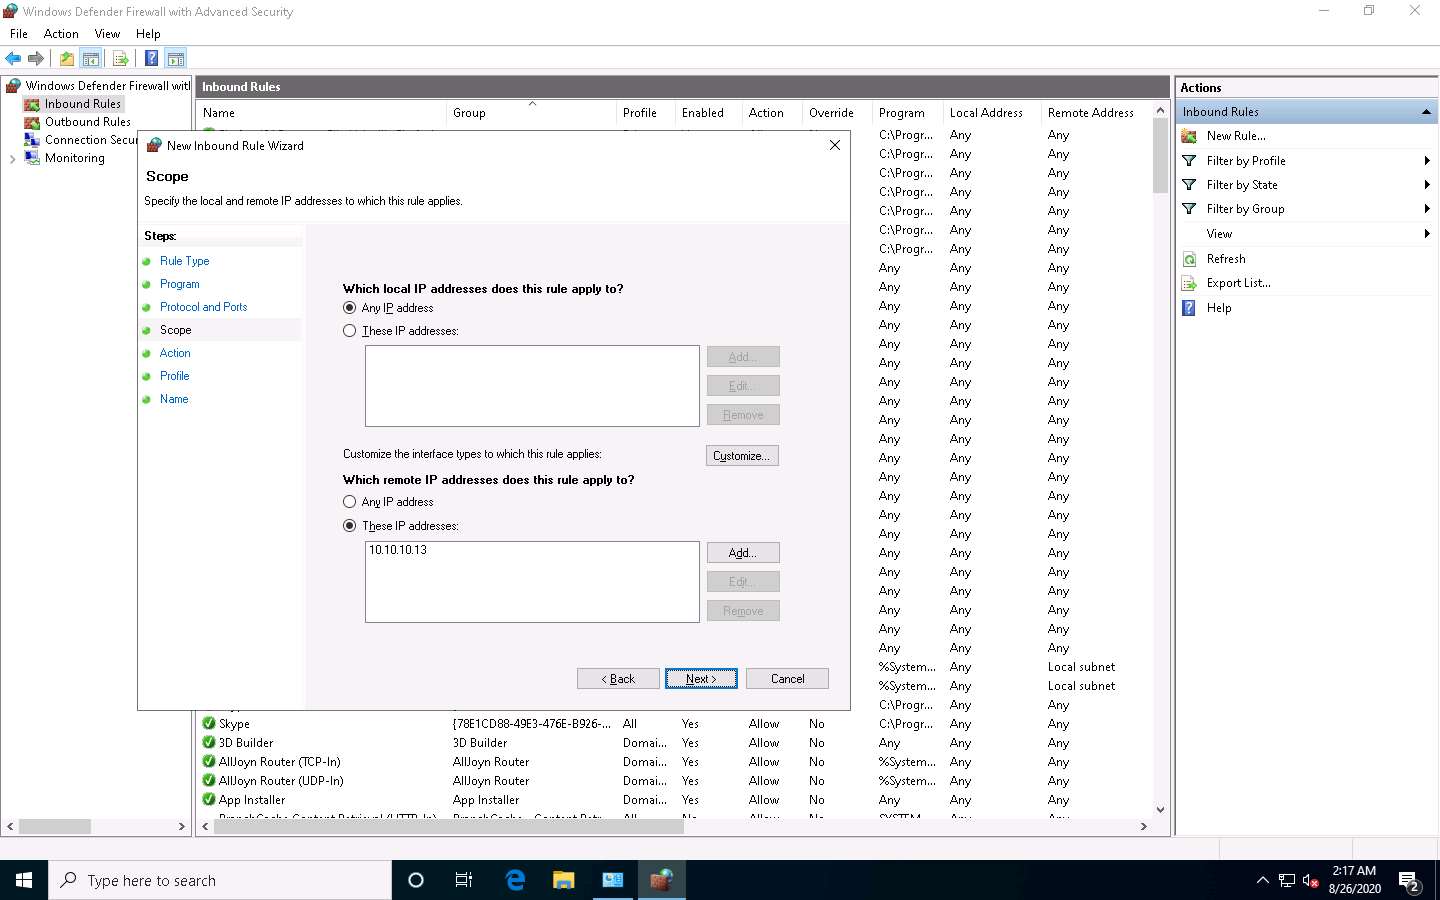
Click Next in the Scope section once the IP address has been added.
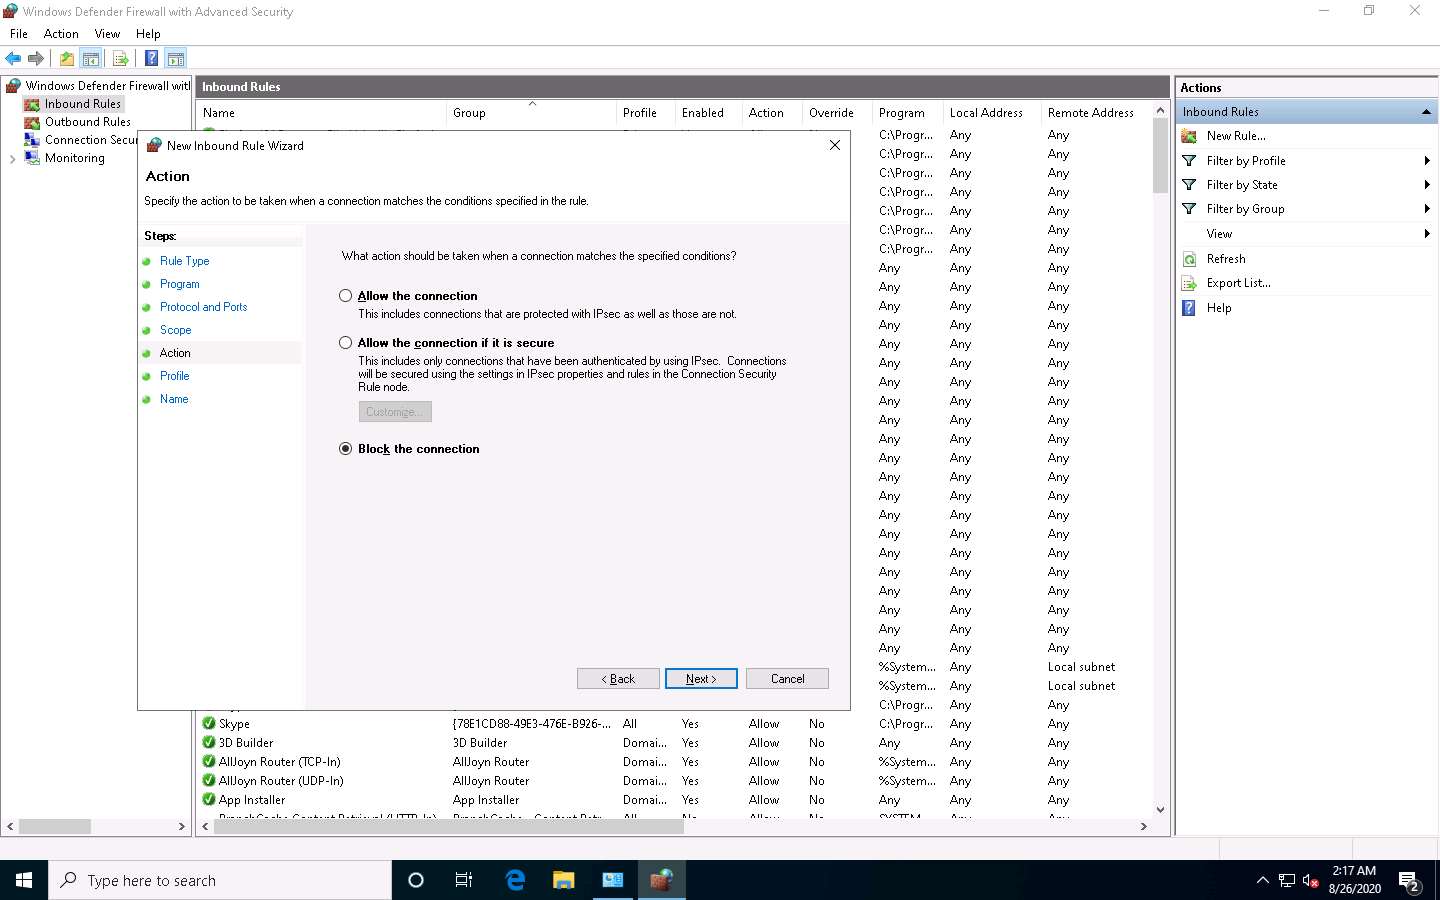
In the Action section, choose the Block the connection radio button and click Next.
By doing this, we are blocking all incoming traffic that comes through the Parrot Security machine.
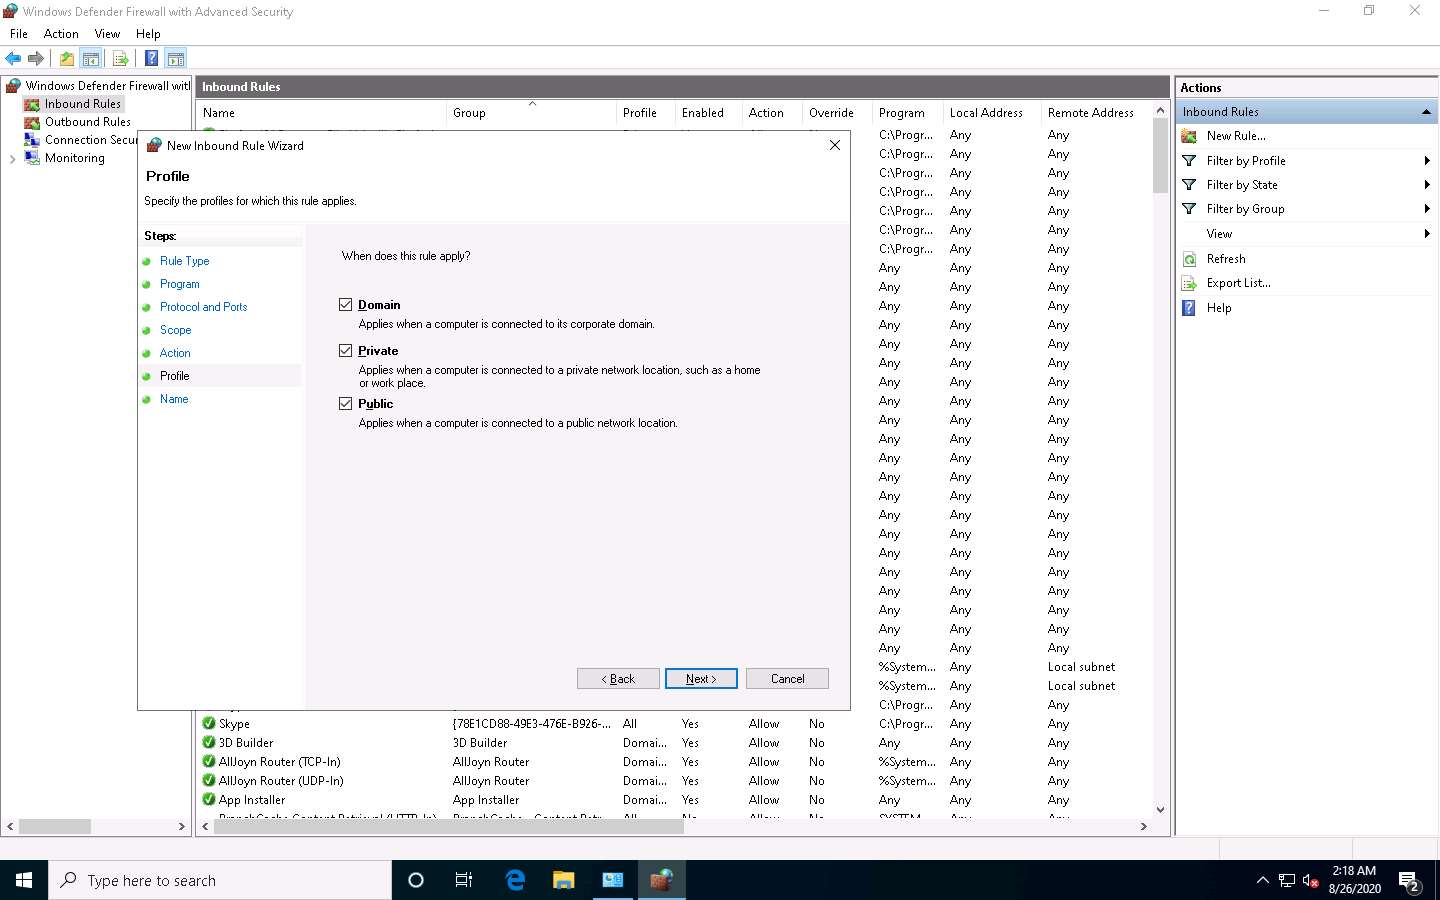
In the Profile section, leave the settings on default and click Next. By doing this, the newly created rule will apply to all profiles.
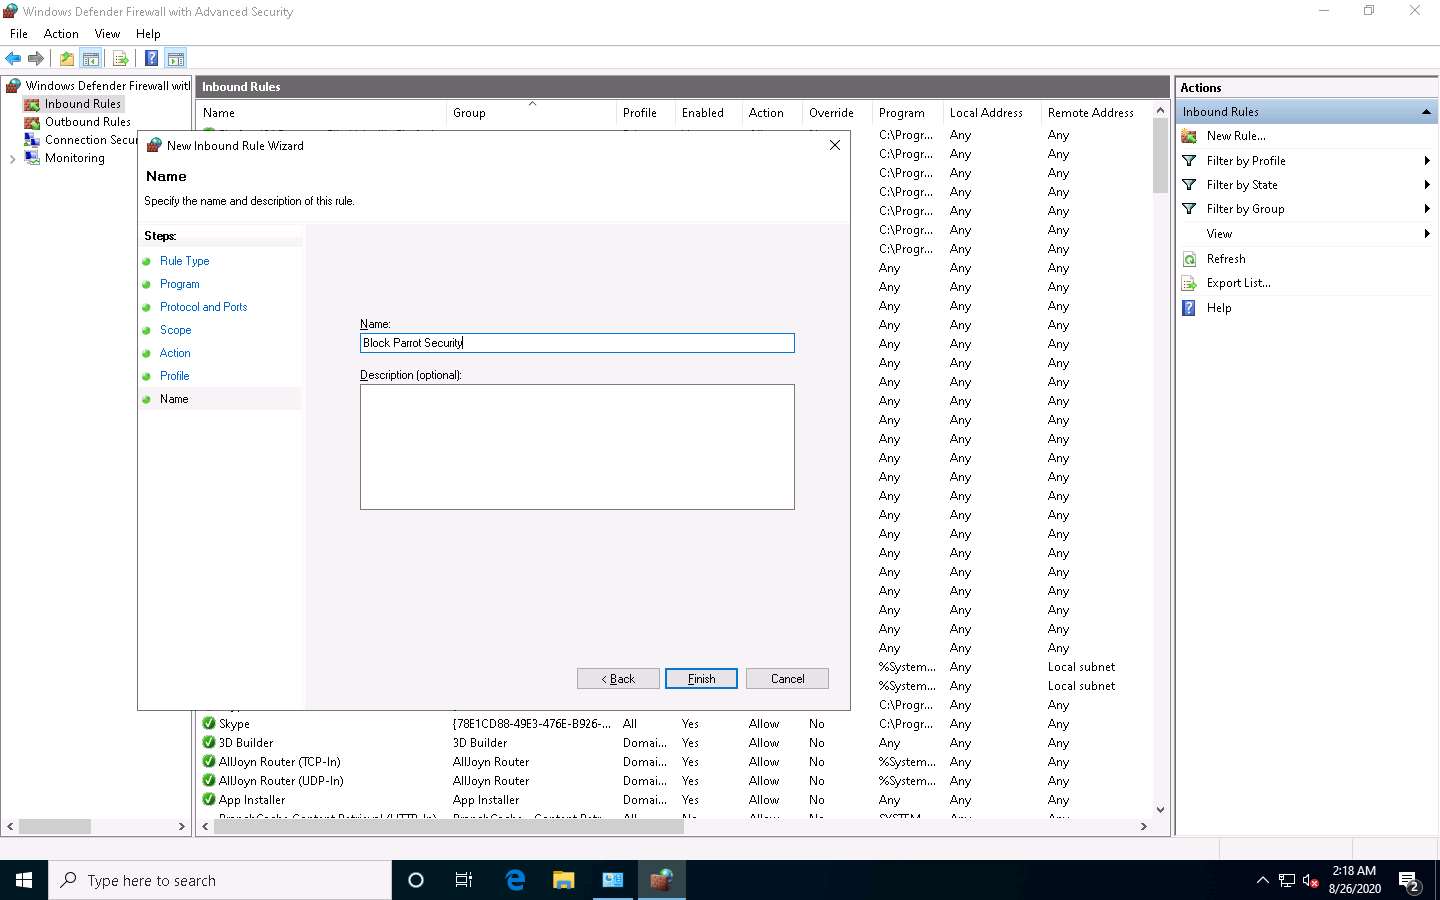
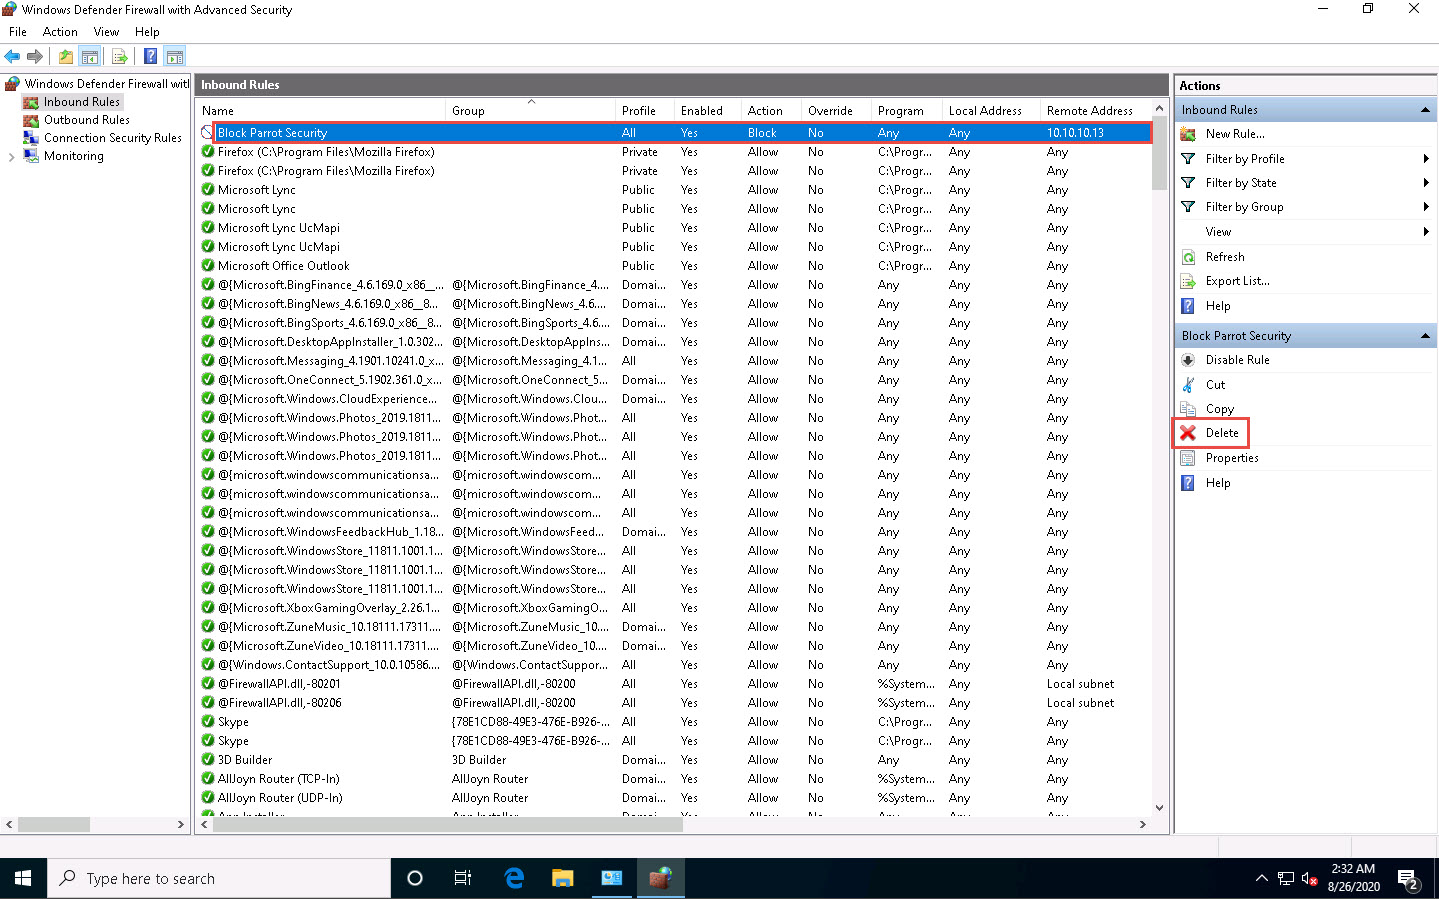
In the Name section, provide any name to the rule (here, Block Parrot Security) and click Finish.
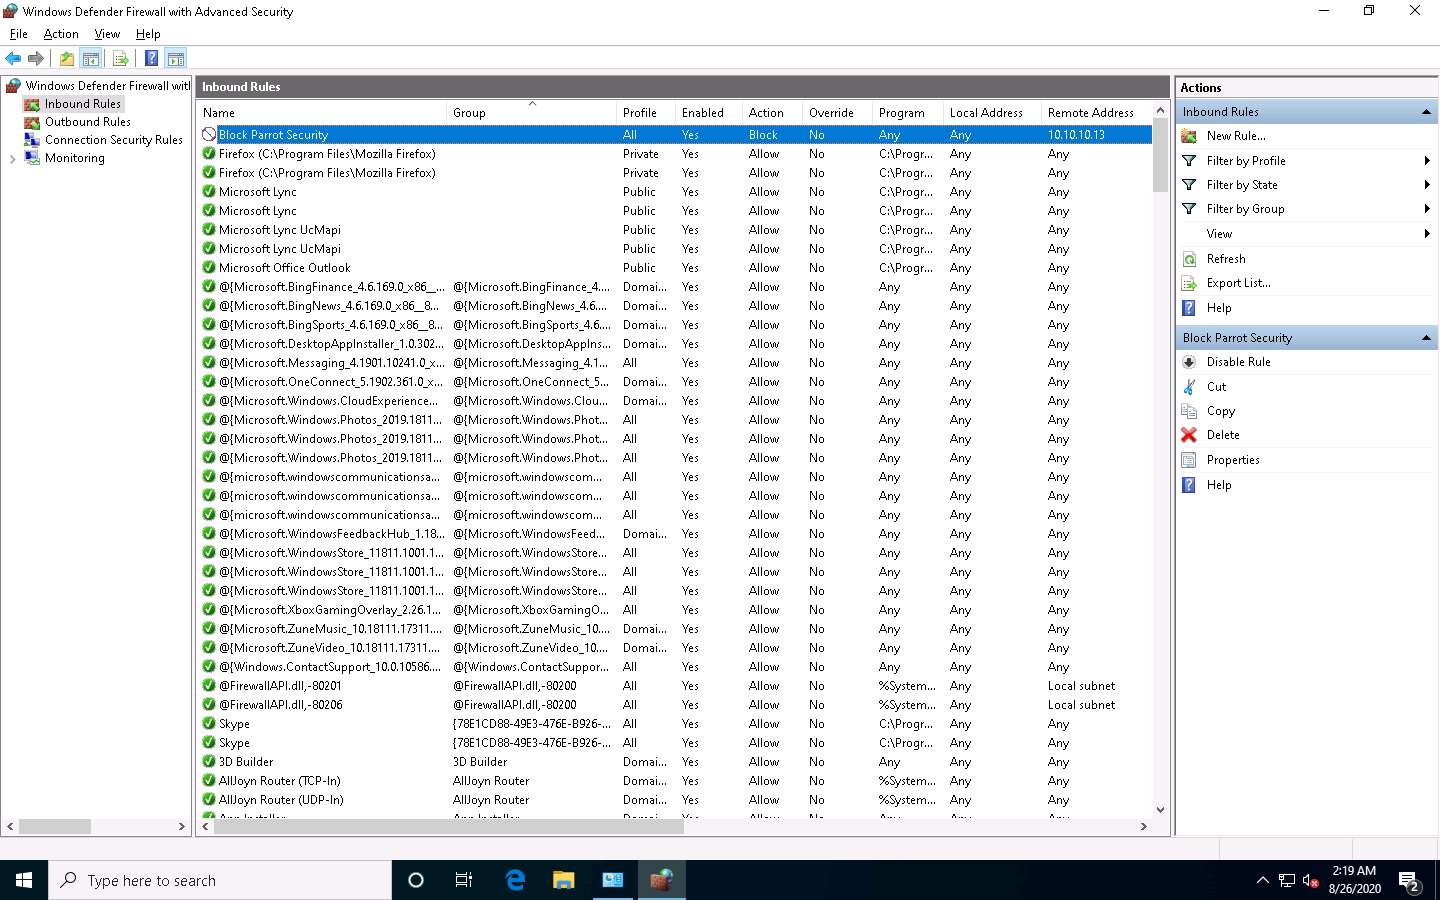
The newly created inbound rule has been configured to the Windows 10 Firewall. Now, any Incoming traffic coming through the Parrot Security machine will be blocked by the Windows 10 Firewall.
Close all open windows in the Windows 10 machine and click Parrot Security to switch to the Parrot Security machine.
Click the MATE Terminal icon at the top of the Desktop window to open a Terminal window.

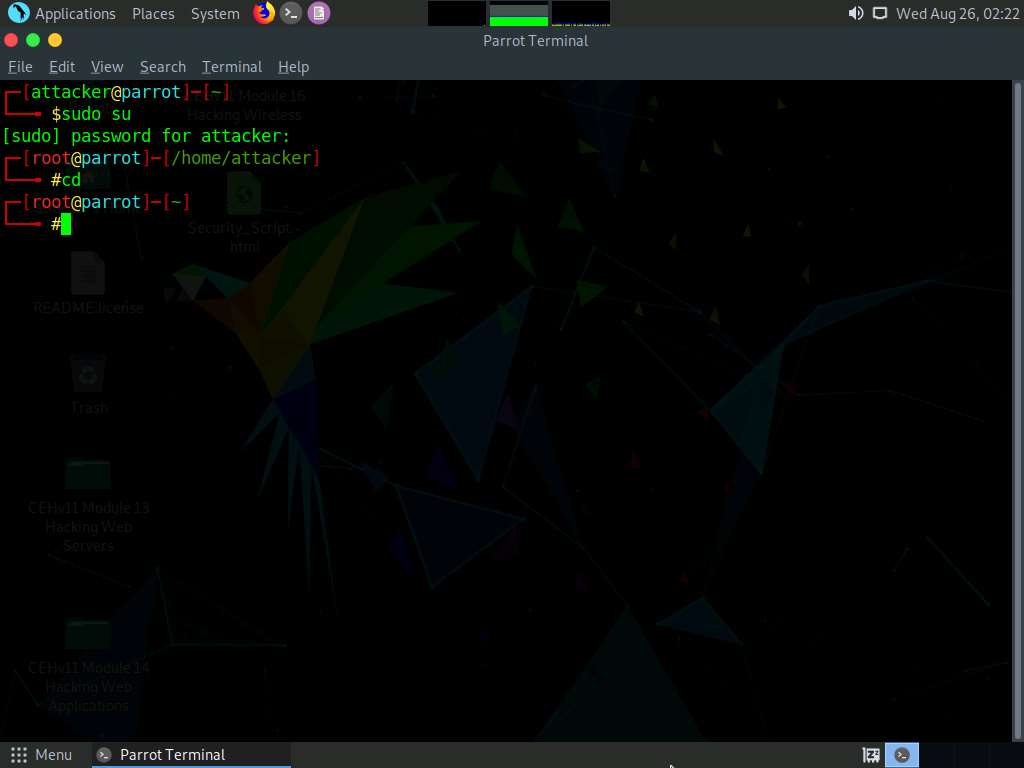
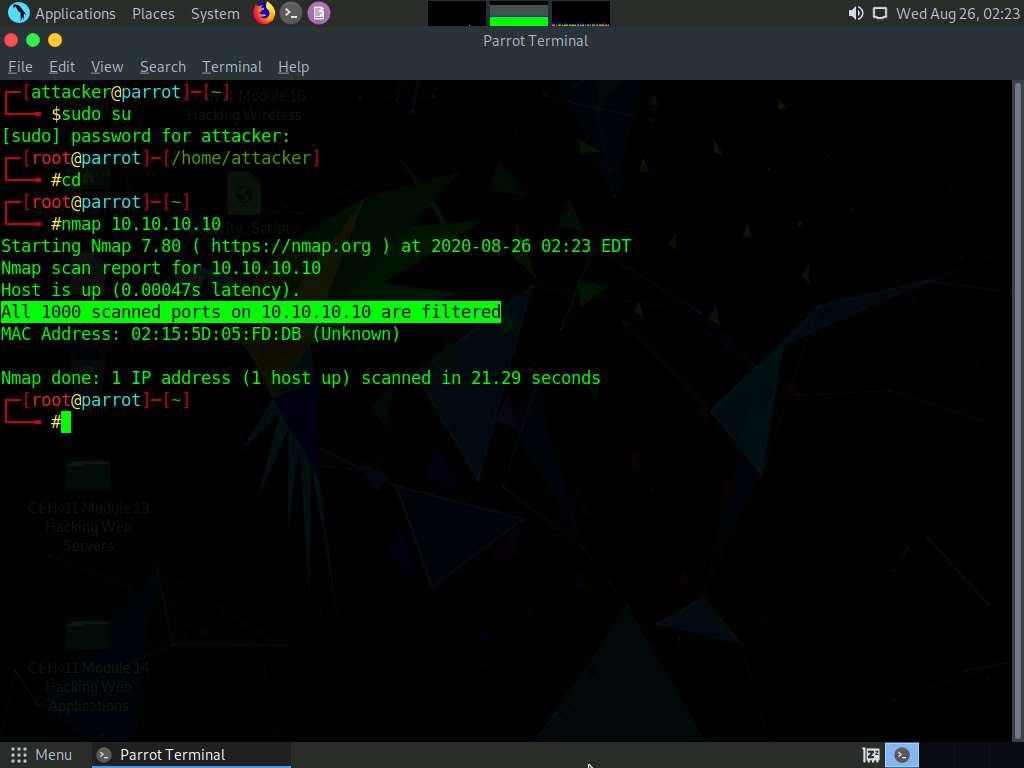
A Parrot Terminal window appears. In the terminal window, type sudo su and press Enter to run the programs as a root user.
In the [sudo] password for attacker field, type toor as a password and press Enter.
The password that you type will not be visible.
Now, type cd and press Enter to jump to the root directory.
We will now perform a basic Nmap scan on Windows 10 machine.
Type nmap 10.10.10.10 and press Enter. As the Firewall is turned on in the Windows 10 machine, the output of the Nmap scan shows that all the 1,000 scanned ports on 10.10.10.10 are filtered.
The IP address of the Windows 10 machine may differ in your lab environment.
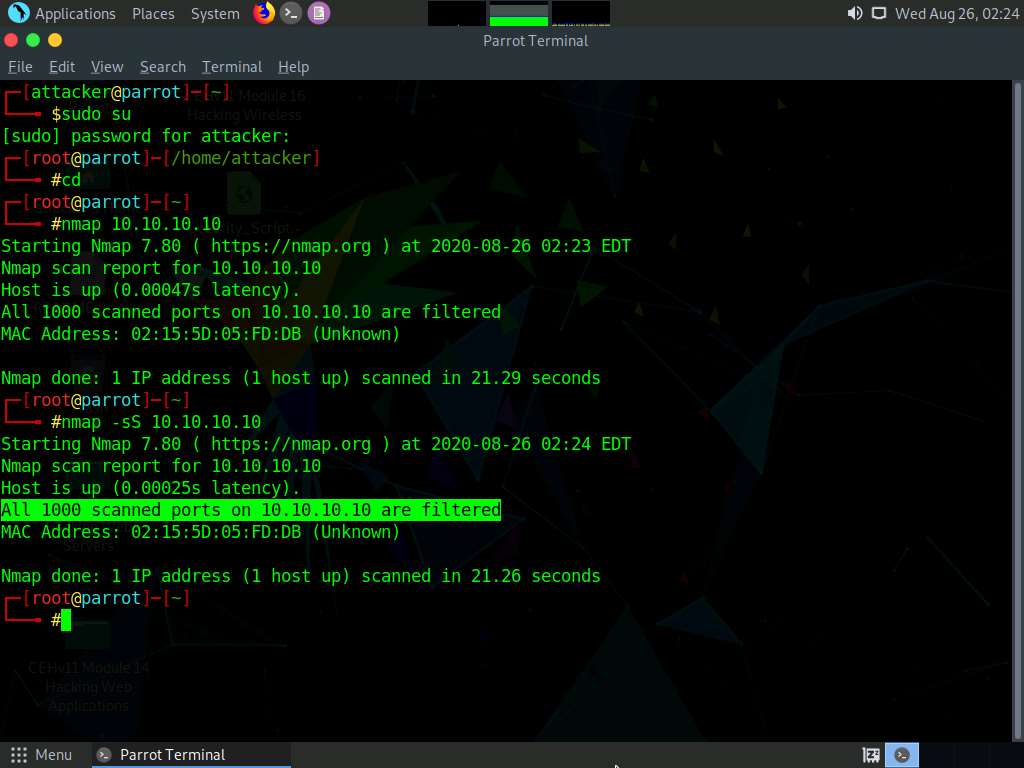
We will now perform TCP SYN Port Scan on the Windows 10 machine and observe the results.
Type nmap -sS 10.10.10.10 and press Enter. Observe that the results are the same as when the Windows 10 Firewall is turned on.
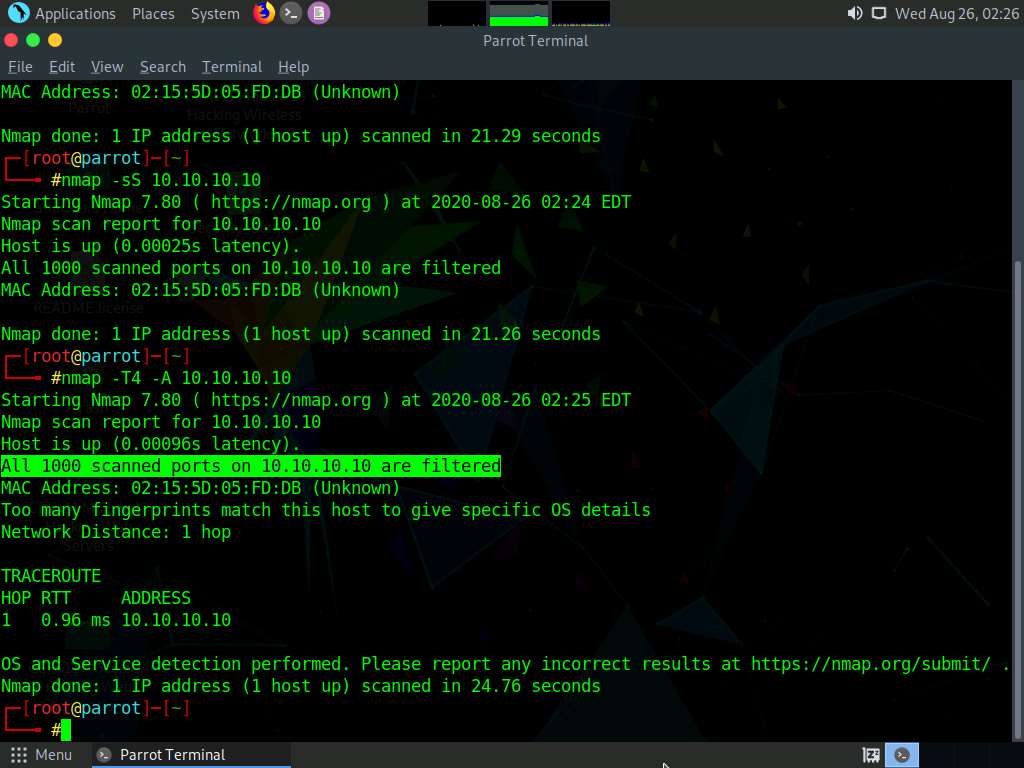
Now, perform INTENSE Scan. Type nmap -T4 -A 10.10.10.10 and press Enter. We still receive the same result as when the Firewall is turned on.
Here, -T4 switch refers to the Aggressive (4) speeds scans and -A switch enables OS detection, version detection, script scanning, and traceroute.
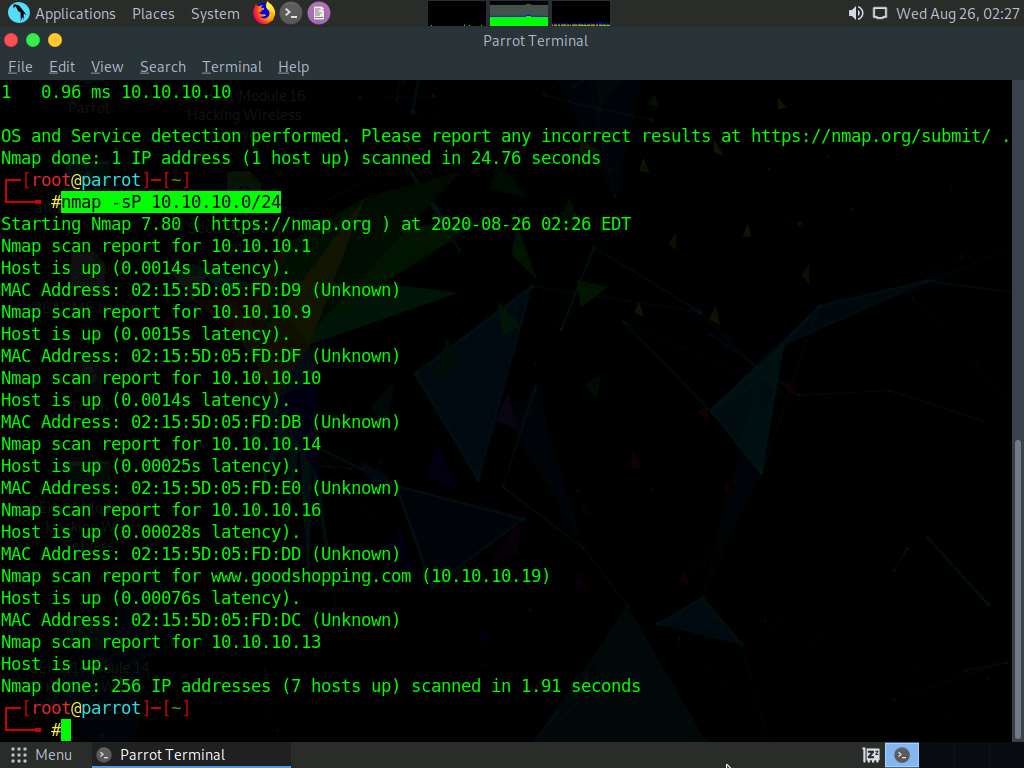
We will now perform a Ping Sweep scan on the subnet to discover the live machines in the network. Type nmap -sP 10.10.10.0/24 and press Enter. In the output of the Nmap, you will be able to find the live machines on the network, as shown in the screenshot.
As per the scan result, you can observe that the Windows Server 2019 machine is Active (10.10.10.19).
Now, perform a Zombie Scan. Type nmap -sI 10.10.10.19 10.10.10.10 and press Enter. You can see that various ports and services are open, as shown in the screenshot.
You can perform a Zombie scan by choosing any of the IPs that are obtained in the ping sweep scan. In this lab, we are choosing Windows Server 2019 as the Zombie.
Click Windows 10 to switch to the Windows 10 machine and delete the newly created rule in the Windows Defender Firewall with Advanced Security window.
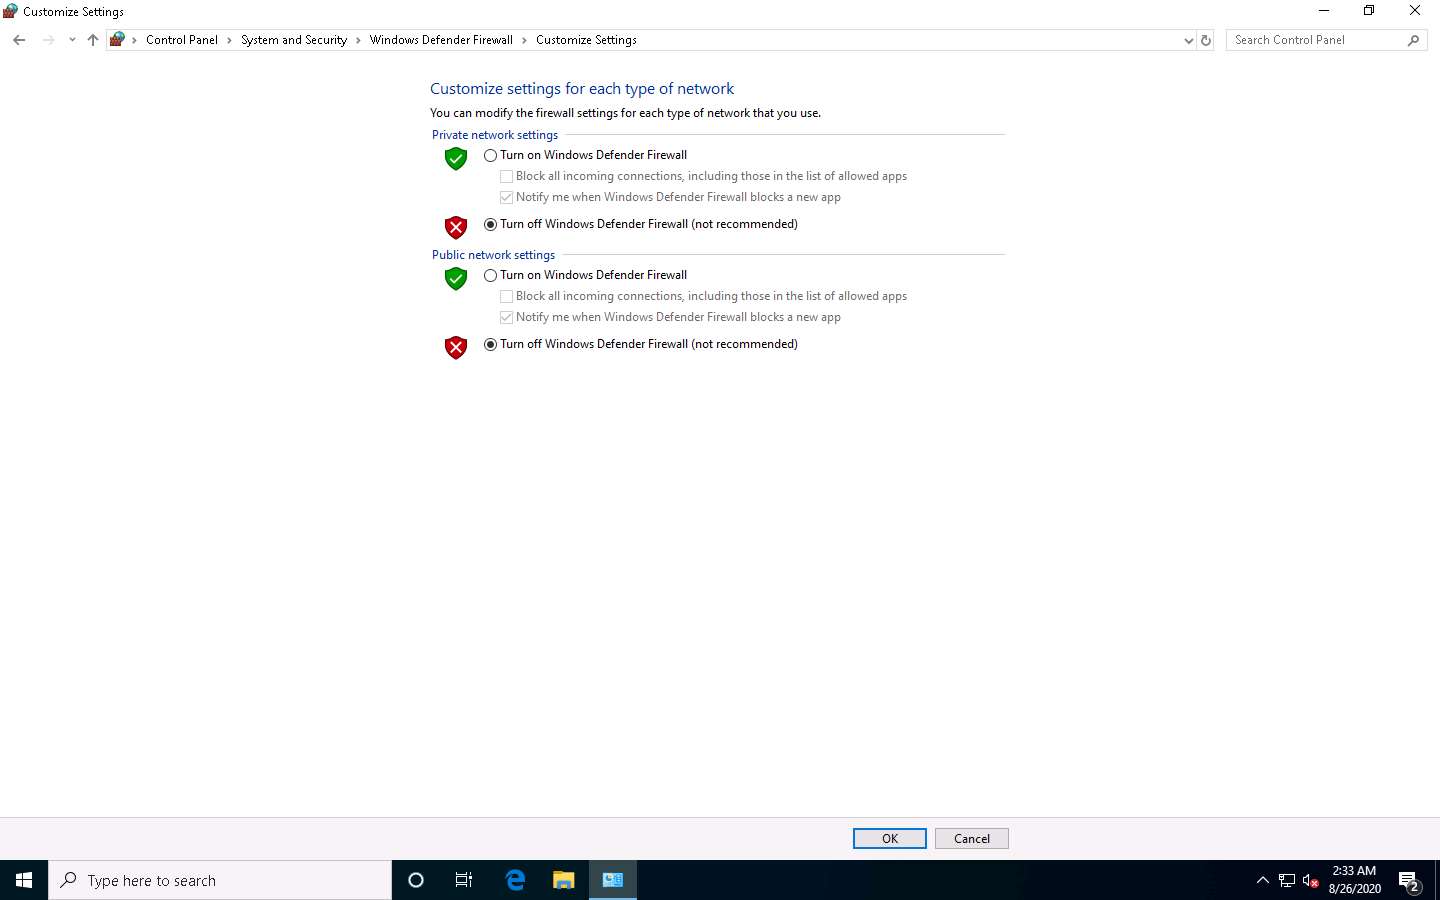
Turn off the Windows Defender Firewall for all Profiles in the Windows 10 machine.
Close all open windows in each machine.
Task 2: Bypass Firewall Rules using HTTP/FTP Tunneling
HTTP tunneling technology allows attackers to perform various Internet tasks despite the restrictions imposed by firewalls. This method can be implemented if the target company has a public web server with port 80 used for HTTP traffic that is unfiltered by its firewall. This technology encapsulates data inside HTTP traffic (port 80). Many firewalls do not examine the payload of an HTTP packet to confirm that it is legitimate, thus it is possible to tunnel traffic via TCP port 80.
HTTPort allows users to bypass the HTTP proxy, which blocks Internet access to e-mail, instant messengers, P2P file sharing, ICQ, News, FTP, IRC, etc. Here, the Internet software is configured, so that it connects to a local PC as if it is the required remote server; HTTPort then intercepts that connection and runs it via a tunnel through the proxy. HTTPort can work on devices such as proxies or firewalls that allow HTTP traffic. Thus, HTTPort provides access to websites and Internet apps. HTTPort performs tunneling using one of two modes: SSL/CONNECT mode and a remote host.
The remote host method is capable of tunneling through any proxy. HTTPort uses a special server software called HTTHost, which is installed outside the proxy-blocked network. It is a web server, and thus when HTTPort is tunneling, it sends a series of HTTP requests to the HTTHost. The proxy responds as if the user is surfing a website and thus allows the user to do so. HTTHost, in turn, performs its half of the tunneling and communicates with the target servers. This mode is much slower, but works in the majority of cases and features strong data encryption that makes proxy logging useless.
Here, we will learn how networks can be scanned, and how to use HTTPort and HTTHost to bypass firewall restrictions and access files.
Click Windows Server 2016 to switch to the Windows Server 2016 machine.
Now, you must ensure that IIS Admin Service and World Wide Web Publishing services are not running
Click Start and click the Windows Administrative Tools app. The Windows Administrative Tools window appears; double-click Services to launch.
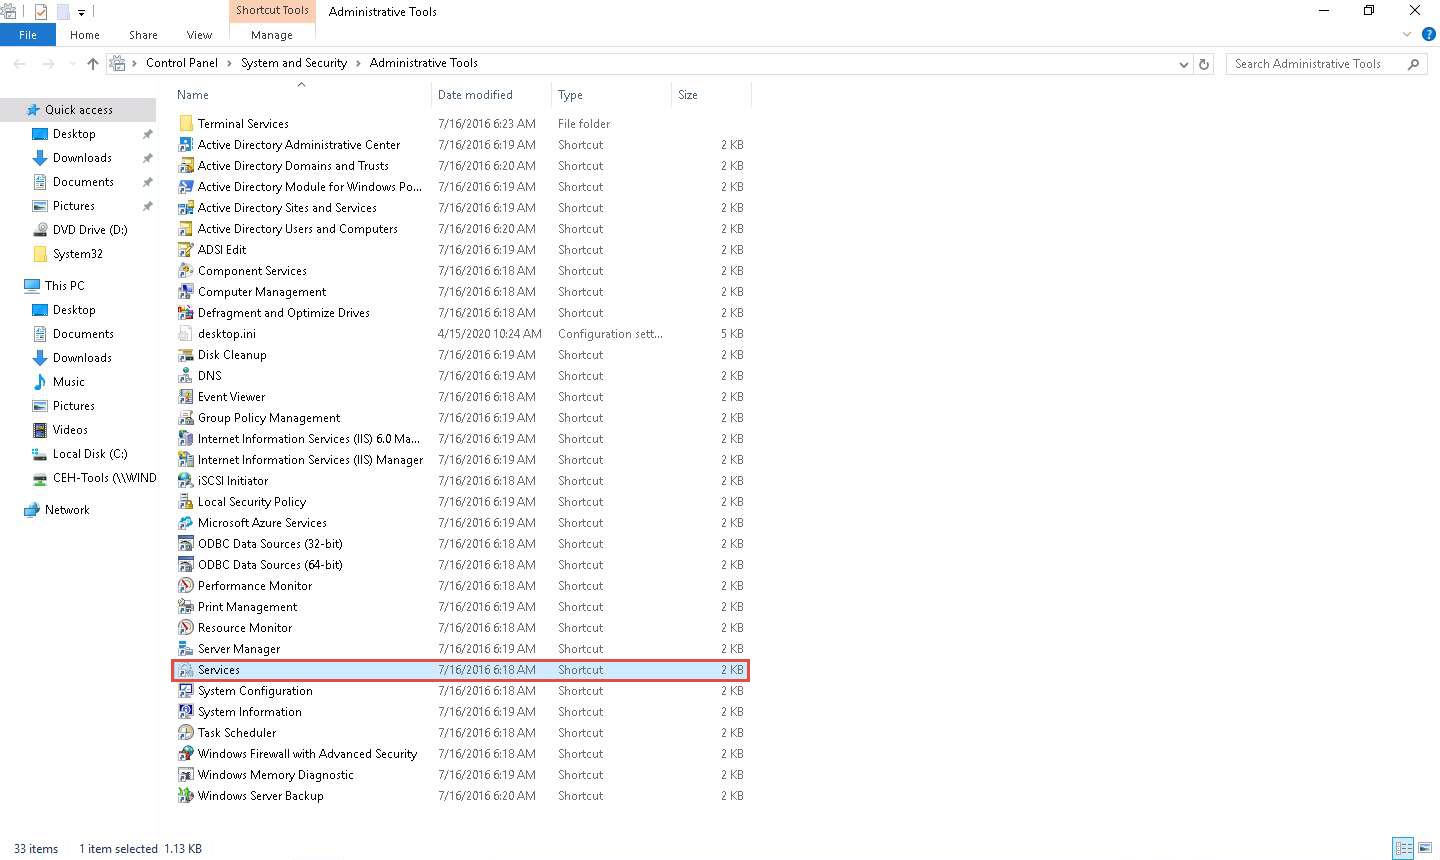
In the Services window, scroll down to World Wide Web Publishing Service and you can observe that the service is Disabled under the Startup Type column, as shown in the screenshot.
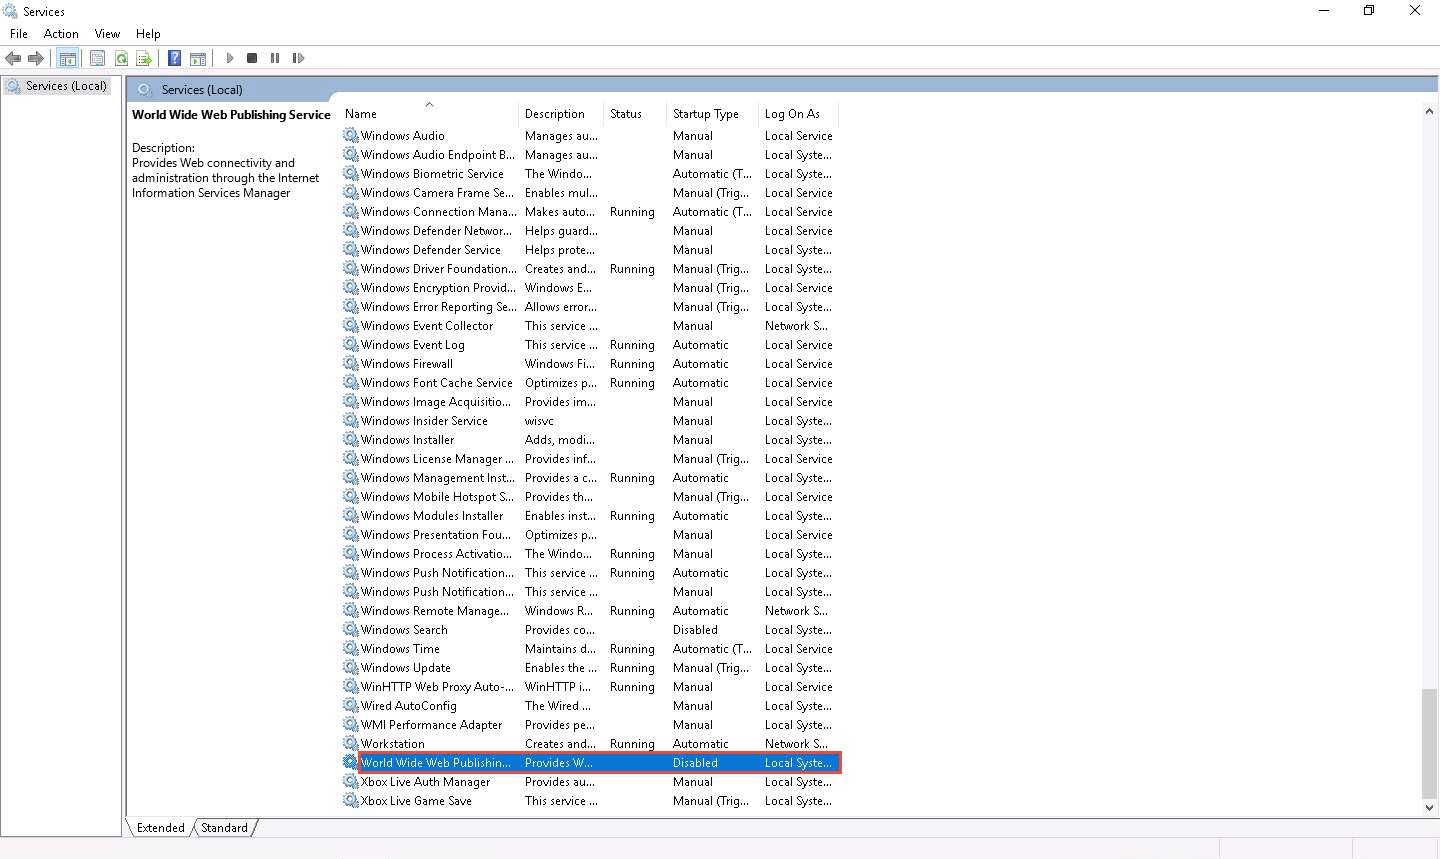
Similarly, check IIS Admin Service; stop the program if it is running.
Navigate to Z:\CEHv11 Module 12 Evading IDS, Firewalls, and Honeypots\HTTP Tunneling Tools\HTTHost and double-click htthost.exe.
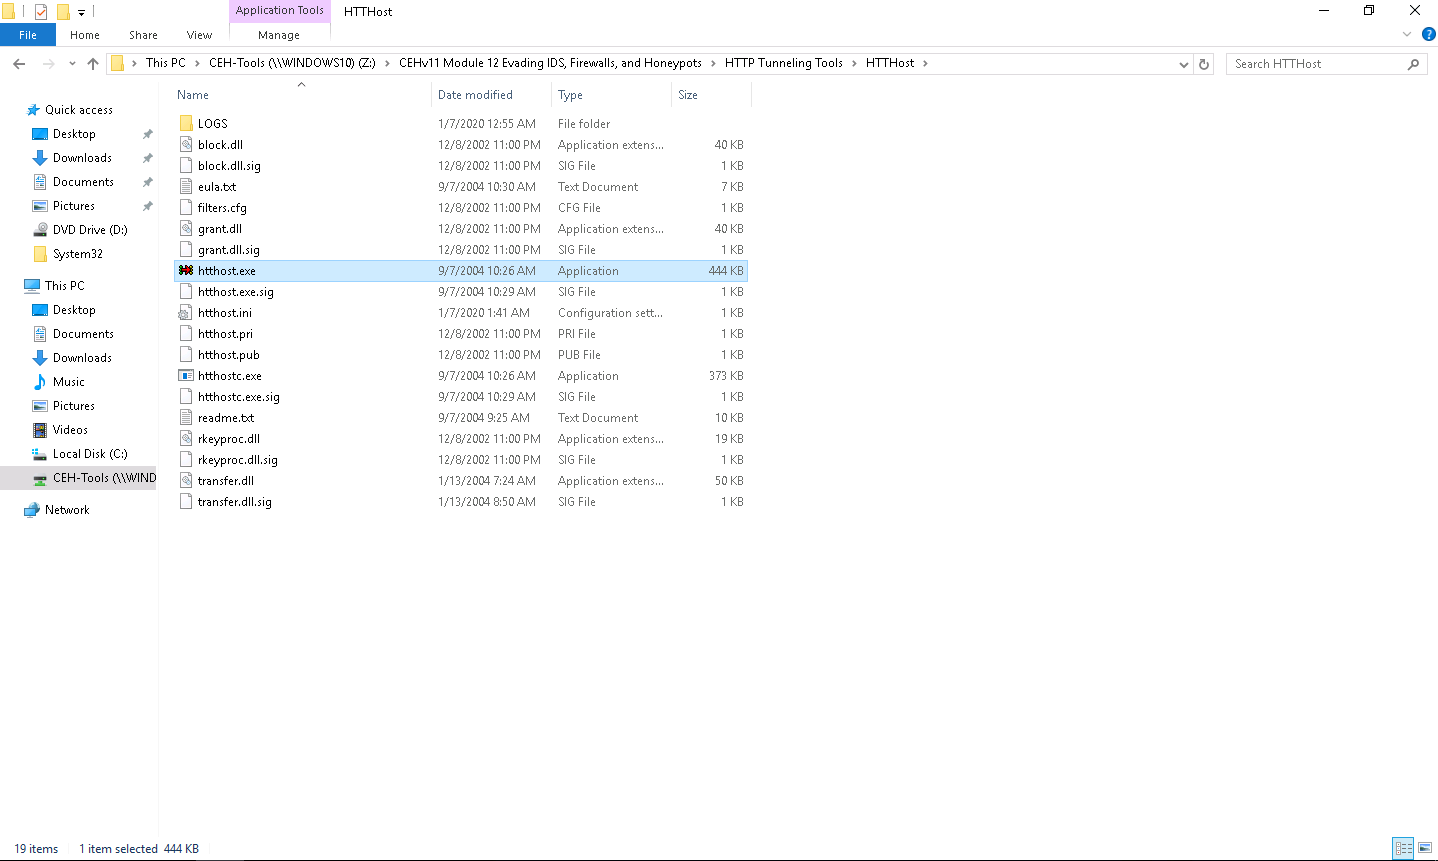
If the Open File - Security Warning pop-up appears, click Run.
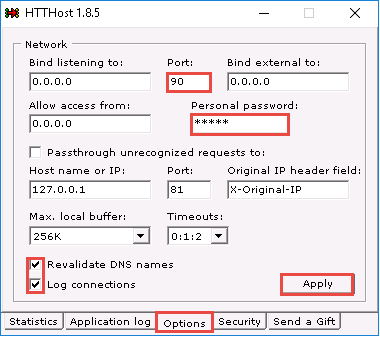
A HTTHost wizard appears; click the Options tab.
On the Options tab, leave 90 as the port number in the Port field under the Network section. Keep the other settings on default, except for Personal password, which should contain any other password. In this task, the Personal password is “magic.”
Typically, HTTP tunneling should be performed using port 80. Port 80 is being used to host the local websites, therefore we have used port 90 for this lab.
Ensure that Revalidate DNS names and Log connections are checked and click Apply.
Navigate to the Application log tab and check if the last line is Listener: listening at 0.0.0.0:90, which ensures that HTTHost is running properly and has begun to listen on port 90.
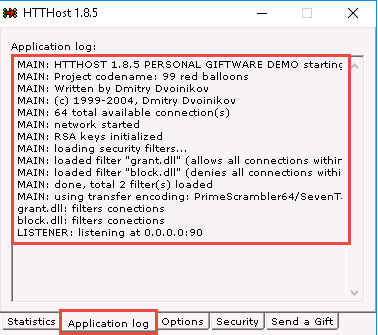
Now, leave HTTHost running, and do not turn off the Windows Server 2016 machine.
Now, click Windows Server 2019 to switch to the Windows Server 2019 machine and launch Control Panel, as shown in the screenshot.

The Control Panel window appears with all control panel items displayed. Select Windows Defender Firewall.

The Windows Defender Firewall control panel appears; click the Turn Windows Defender Firewall on or off link in the left pane.
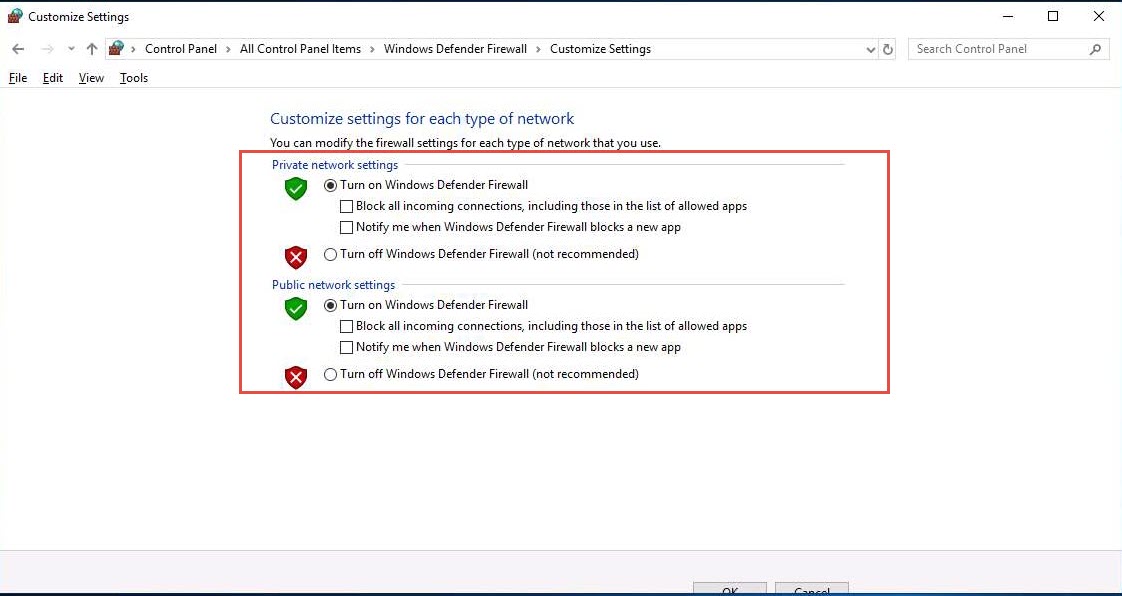
The Customize Settings window appears.
Select Turn on Windows Defender Firewall under Private network settings and Public network settings.
Click OK.
The firewall is successfully turned on. Now, click Advanced settings in the left pane.
The Windows Firewall with Advanced Security window appears.
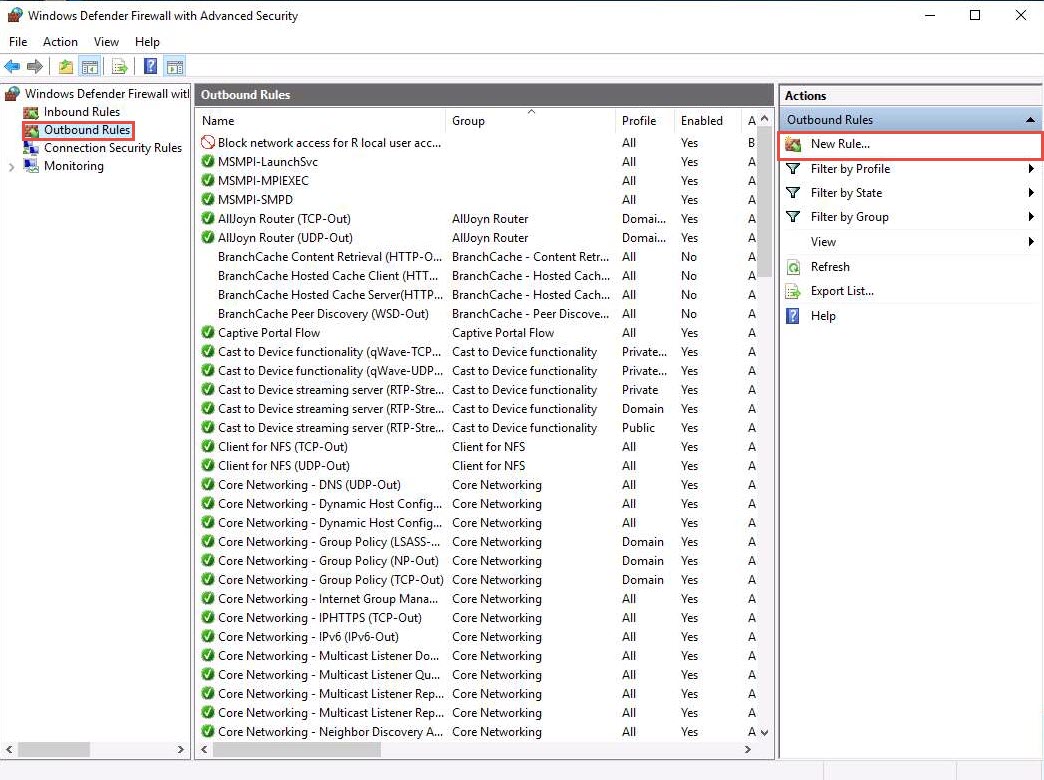
Select Outbound Rules in the left pane. A list of outbound rules is displayed. Click New Rule… in the right pane under Outbound Rules.
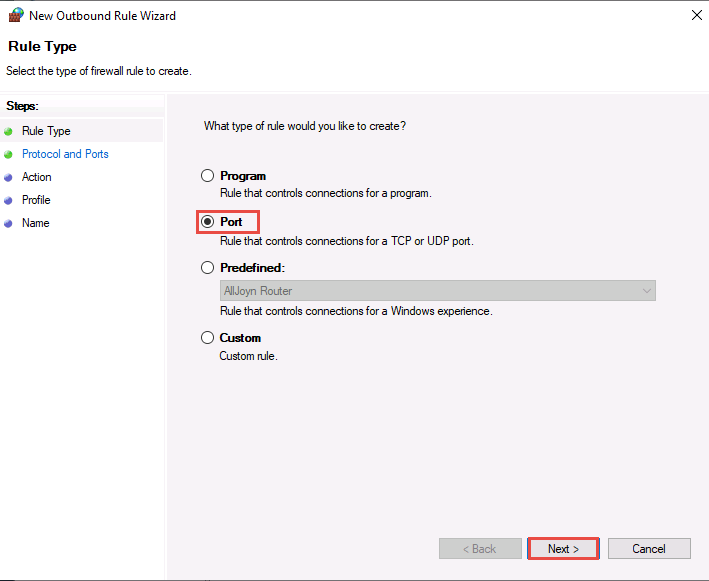
In New Outbound Rule Wizard, select Port as Rule Type and click Next.
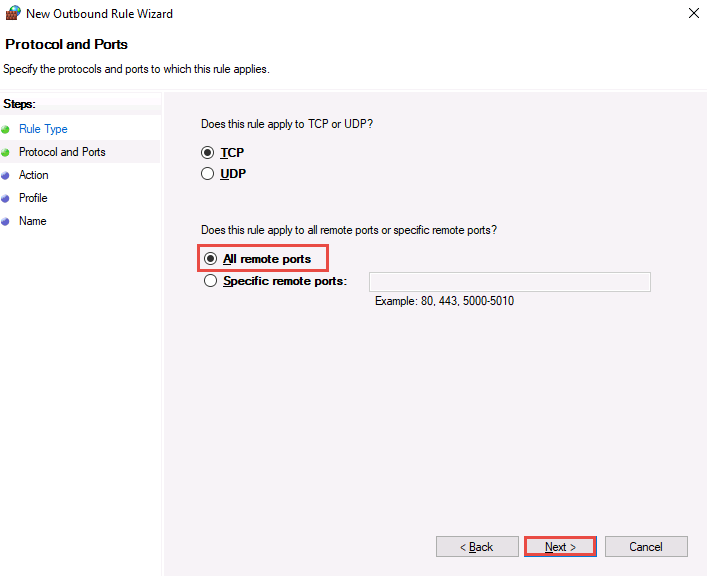
Select All remote ports in Protocol and Ports and click Next.
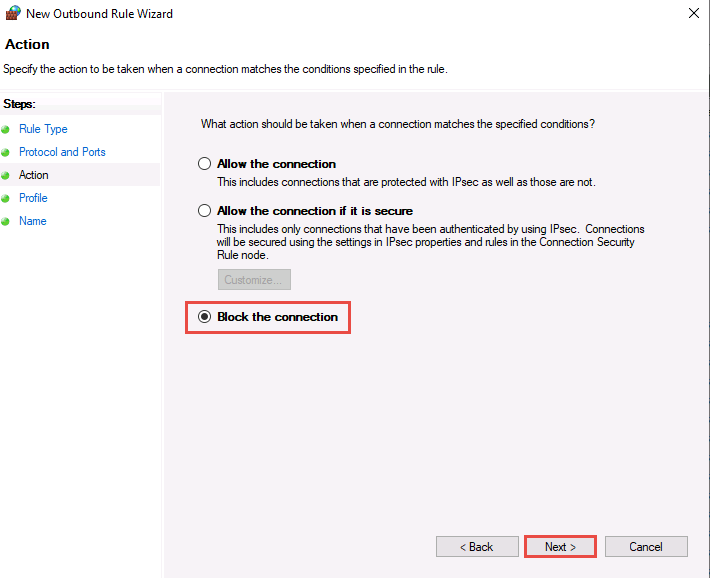
In Action, Block the connection is selected by default and click Next.
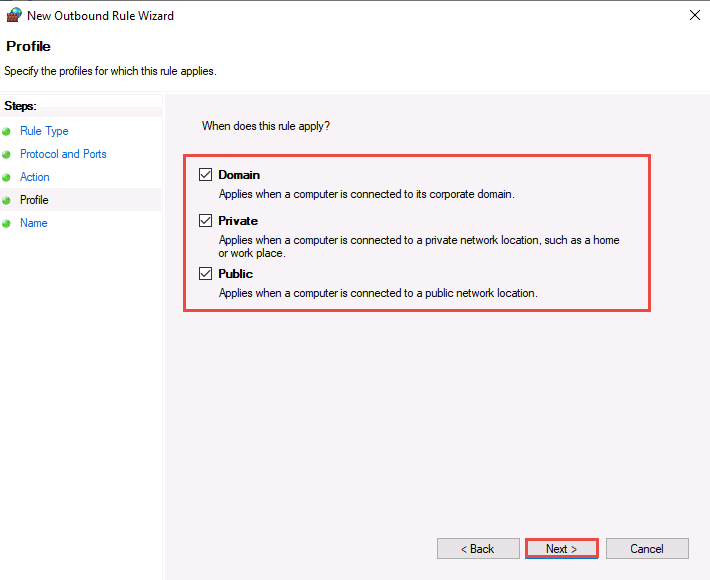
In the Profile section, ensure that all options (Domain, Private, and Public) are checked and click Next.
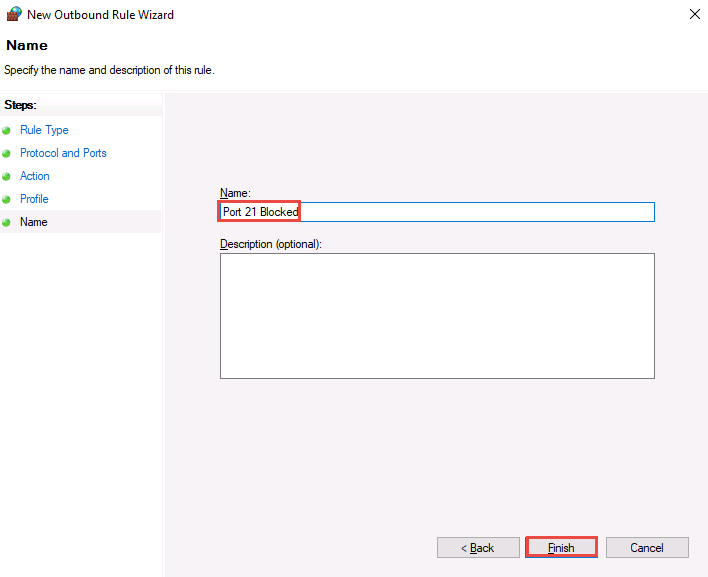
In Name, type Port 21 Blocked in the Name field and click Finish.
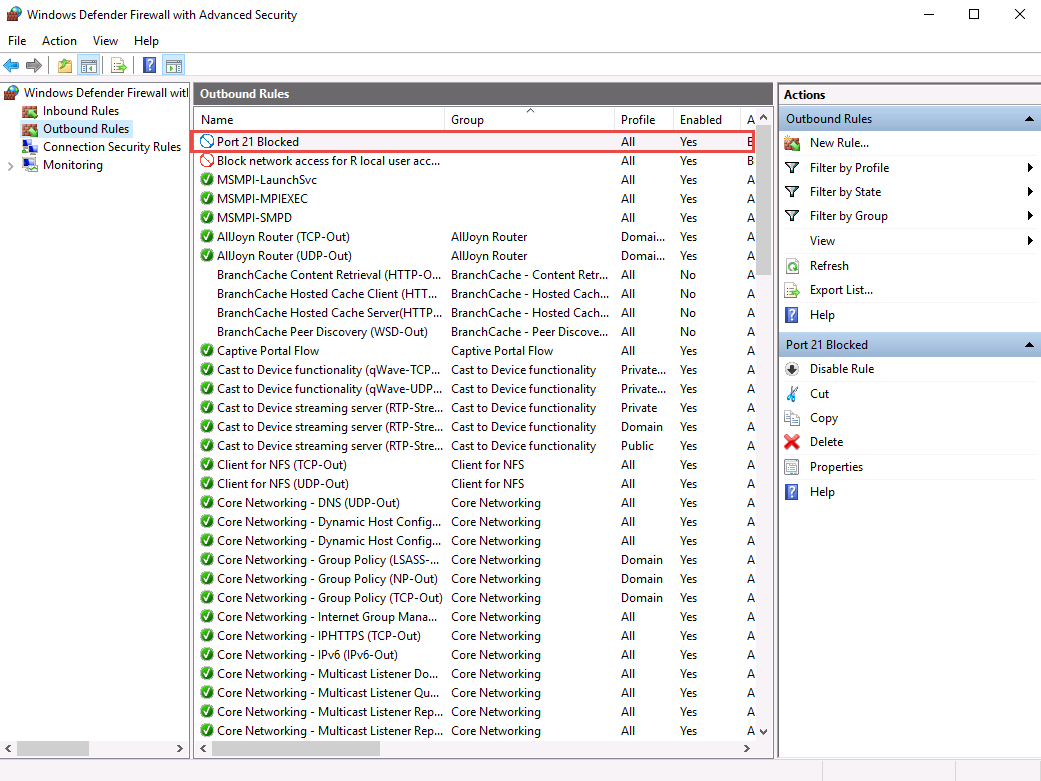
The new rule Port 21 Blocked is created, as shown in the screenshot.
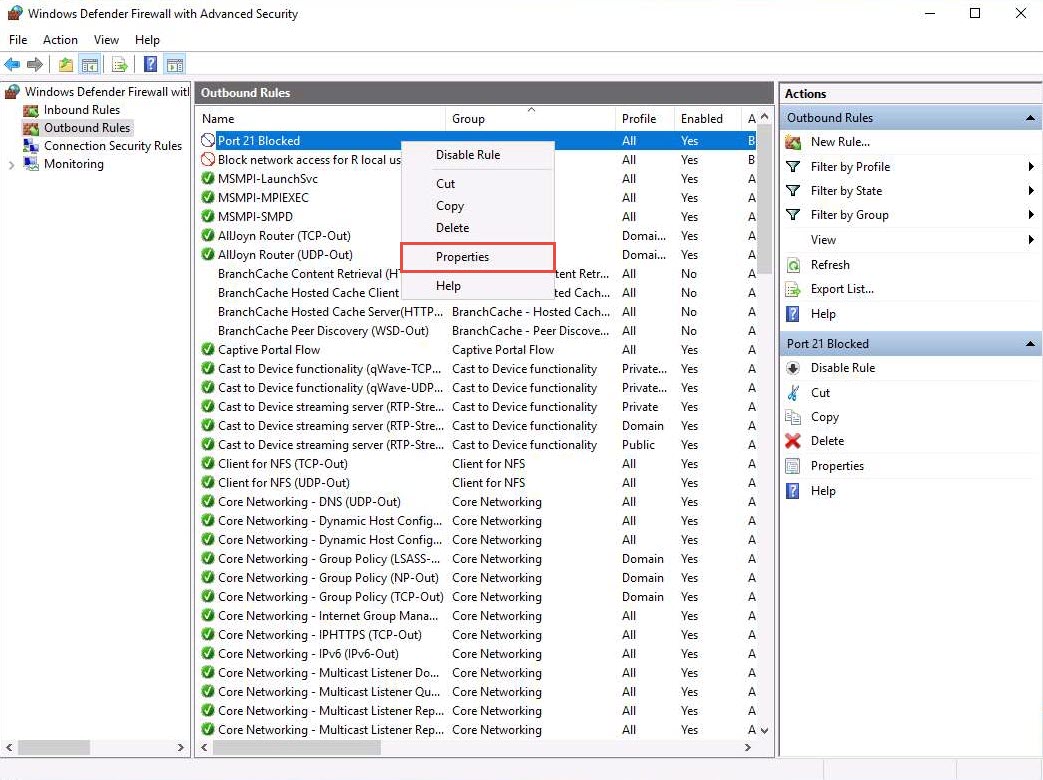
Right-click the newly created rule (Port 21 Blocked) and click Properties.
The Properties window for Port 21 Blocked rule appears.
Select the Protocols and Ports tab. In the Remote port: field, select the Specific Ports option from the drop-down list and enter the port number as 21.
Leave the other default settings, click Apply, and then click OK.
Disable the rule and confirm that you can connect to the ftp site.
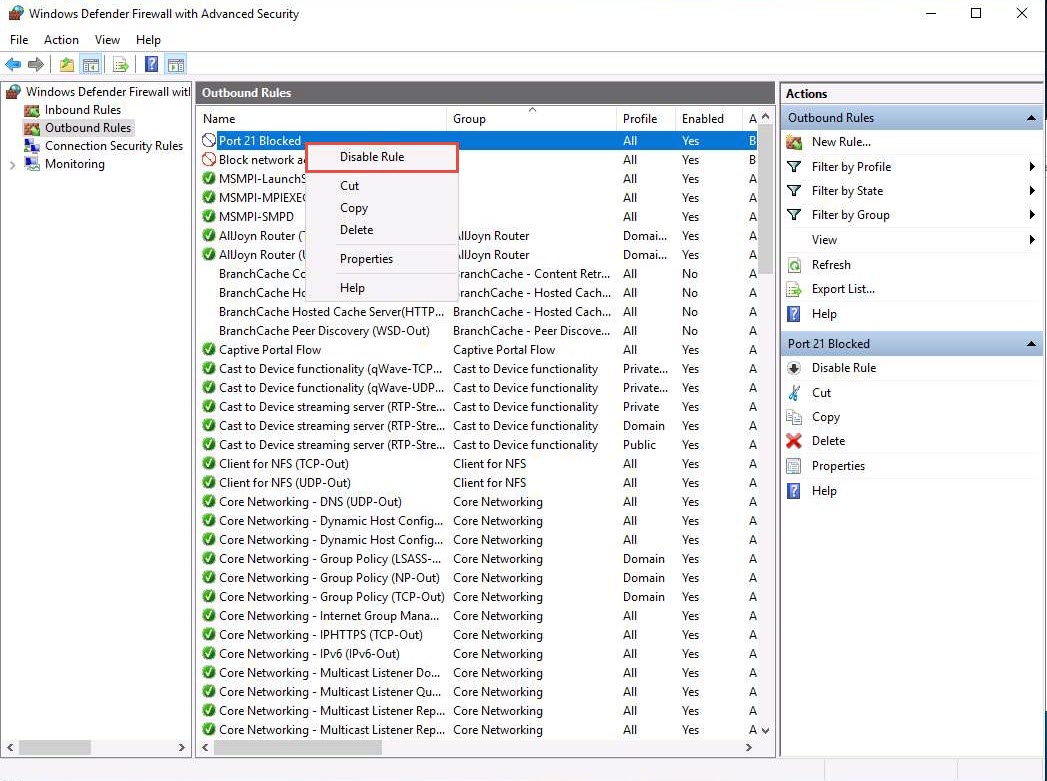
Right-click the newly added rule and click Disable Rule.
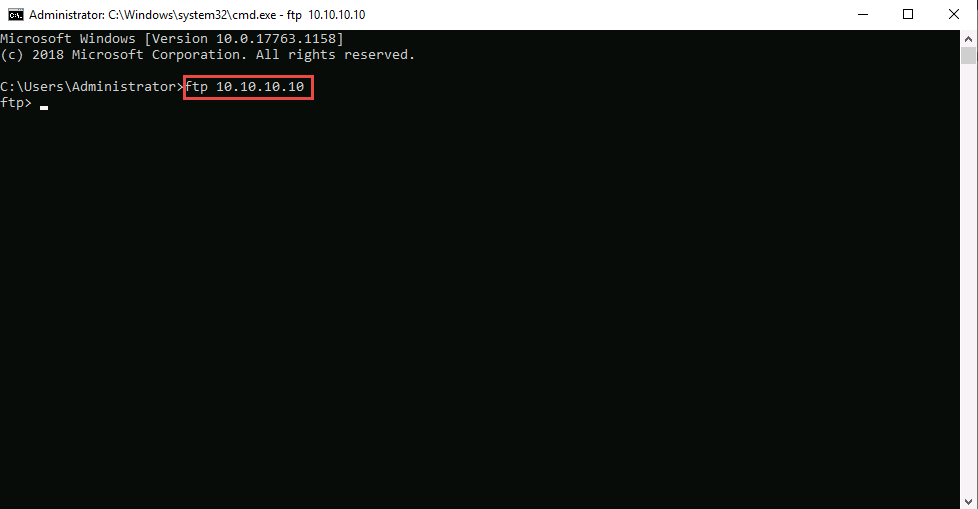
Launch the command prompt and issue ftp 10.10.10.10. You will be asked to enter the username.

In the above-mentioned command, 10.10.10.10 refers to the IP address of Windows 10 where the ftp site is located. Make sure that you issue the IP address of Windows 10 in your lab environment.
This means you can establish an FTP connection, and then close the command prompt window.
Now, enable the rule and check whether you can establish a connection.
Right-click the newly added rule and click Enable Rule.
Launch Command Prompt and check whether you can connect to the ftp site by issuing the command ftp 10.10.10.10.
The added outbound rule should block the connection, as shown in the screenshot.
In the above-mentioned command, 10.10.10.10 refers to the IP address of Windows 10, where the ftp site is located. Make sure that you issue the IP address of Windows 10 in your lab environment.
Now, we will perform tunneling using HTTPort to establish a connection with the FTP site located on Windows 10.
Navigate to Z:\CEHv11 Module 12 Evading IDS, Firewalls, and Honeypots\HTTP Tunneling Tools\HTTPort and double-click httport3snfm.exe.
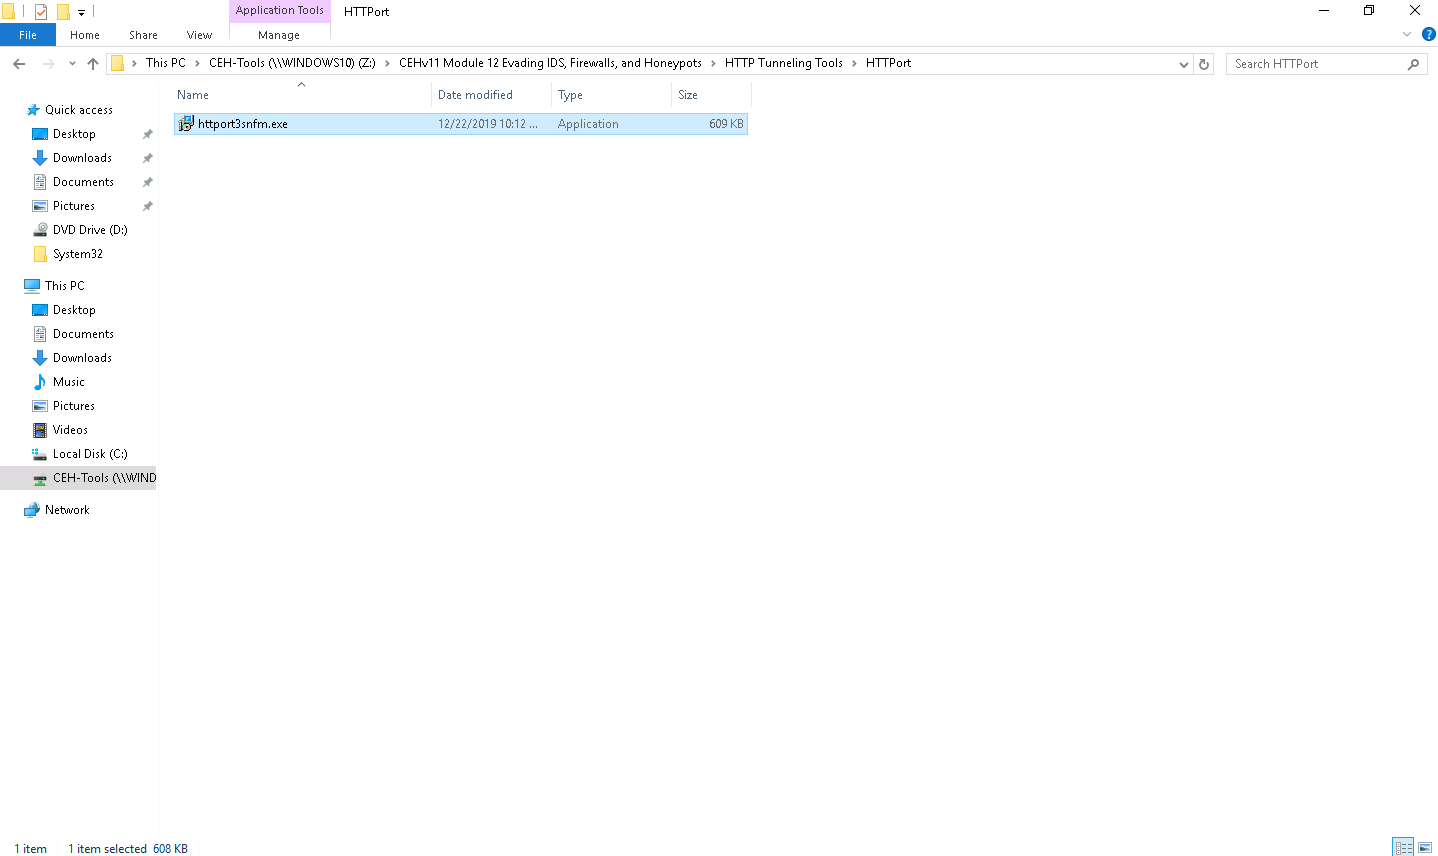
If a User Account Control pop-up appears, click Yes.
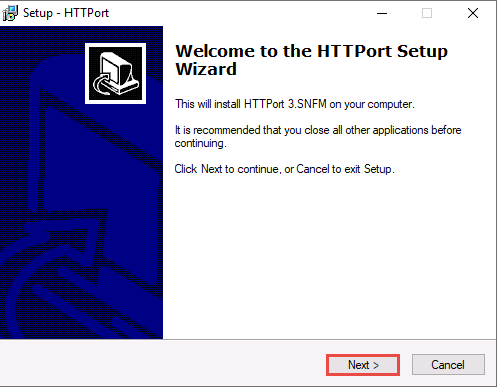
Follow the installation steps to install HTTPort.
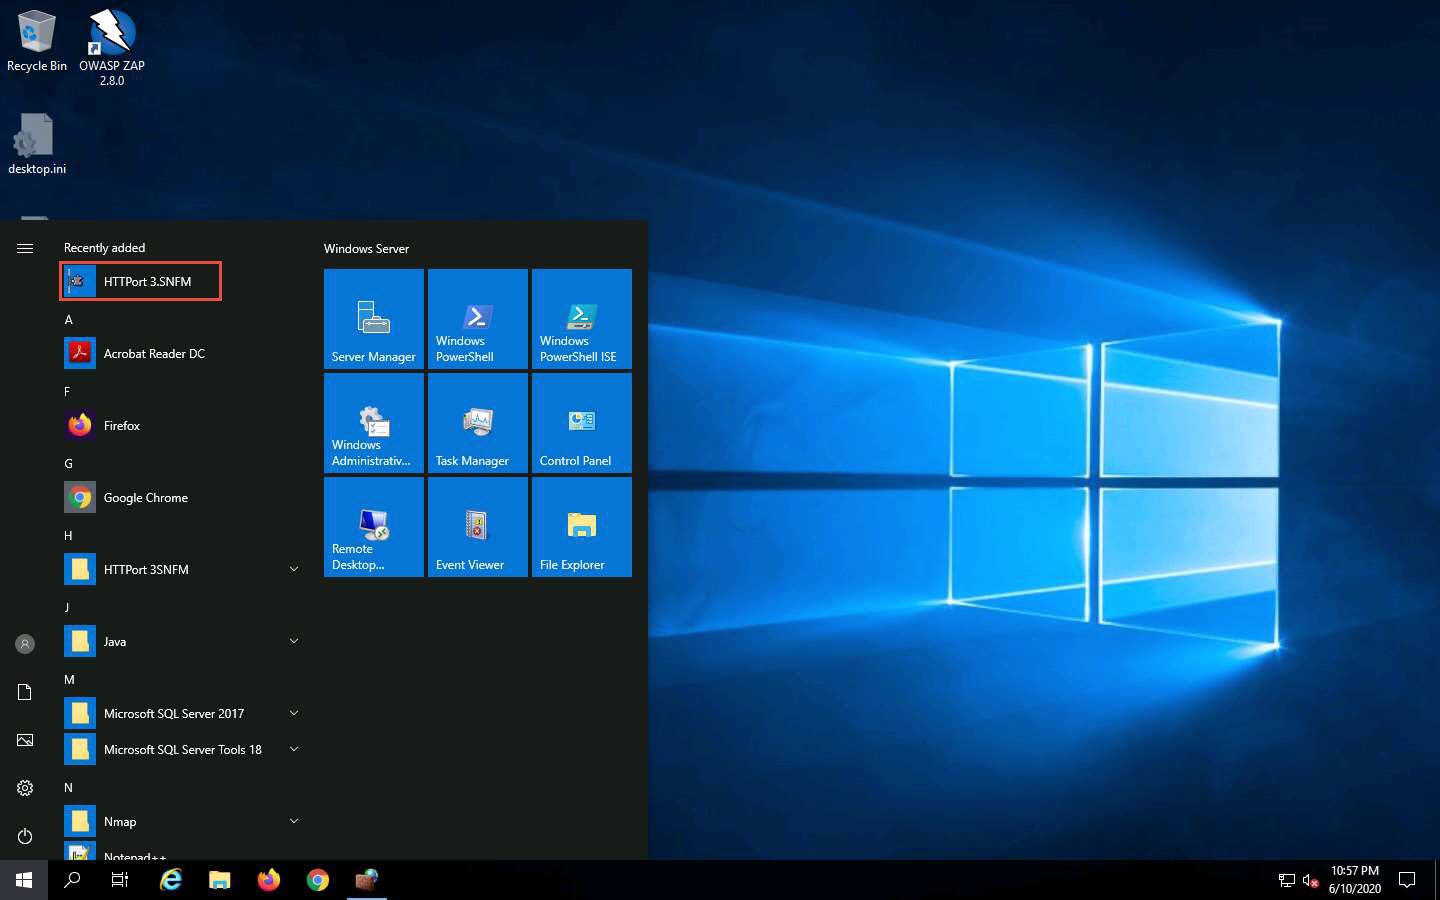
Launch HTTPort (Httport3SNFM) from the Start menu.
An Introduction to HTTPort wizard appears; click Next five times, until you come to the last wizard pane, and then click Close.
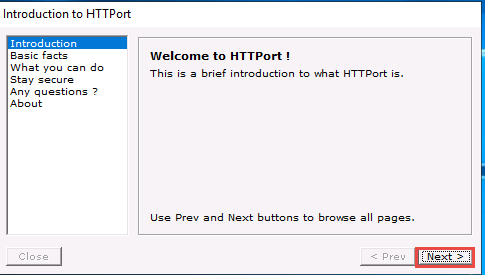
The HTTPort main window (HTTPort 3.SNFM) appears, as shown in the screenshot.
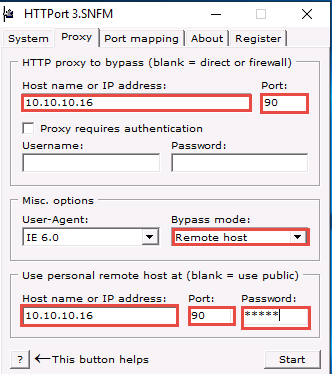
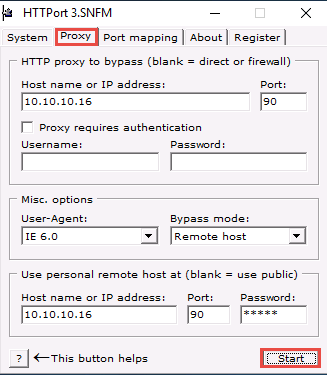
On the Proxy tab, enter the Host name or IP address (10.10.10.16) of the machine where HTTHost is running (Windows Server 2016).
The IP address of Windows Server 2016 may vary in your lab environment.
Enter the Port number 90.
In the Misc. options section, select Remote host from the Bypass mode drop-down list.
In the Use personal remote host at (blank = use public) section, re-enter the IP address of Windows Server 2016 (10.10.10.16) and port number 90.
Enter the password magic into the Password field.
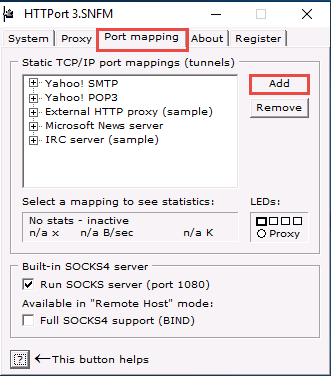
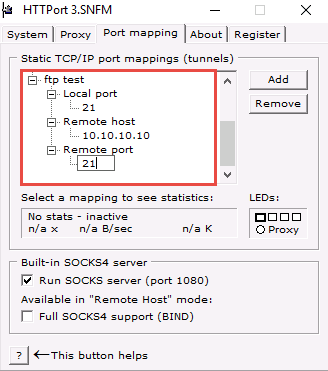
Select the Port mapping tab, and click Add to create a new mapping.
Right-click the New mapping node, and click Edit.
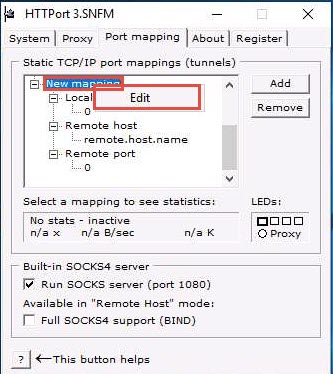
Rename this as ftp test (you can enter the name of your choice).
Right-click the node below Local port; then click Edit and enter the port value as 21.
Right-click the node below Remote host; click Edit and rename it as 10.10.10.10.
Right-click the node below Remote port; then click Edit and enter the port value as 21.
10.10.10.10 specifies in Remote host node is the IP address of the Windows 10 machine that is hosting the FTP site.
Switch to the Proxy tab and click Start to begin the HTTP tunneling.
If you get an error, ignore it.
HTTPort intercepts the ftp request to the localhost and tunnels through it. HTTHost is installed in the remote machine to connect you to 10.10.10.10.
This means you may not access the ftp site directly by issuing ftp 10.10.10.10 in the command prompt, but you will be able to access it through the localhost by issuing the command ftp 127.0.0.1.
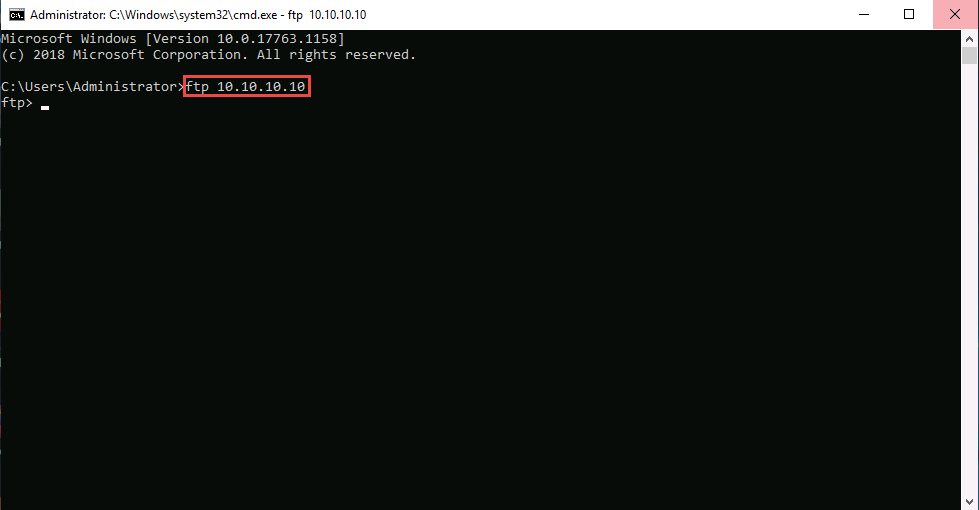
In Windows Server 2019; launch Command Prompt, type ftp 10.10.10.10, and press Enter. The ftp connection will be blocked by the outbound firewall rule.
Now, launch a new Command Prompt, type ftp 127.0.0.1, and press Enter. You should be able to connect to the site.
If you issue this command without starting HTTPort, the connection to the FTP site fails, stating that the FTP connection is refused.
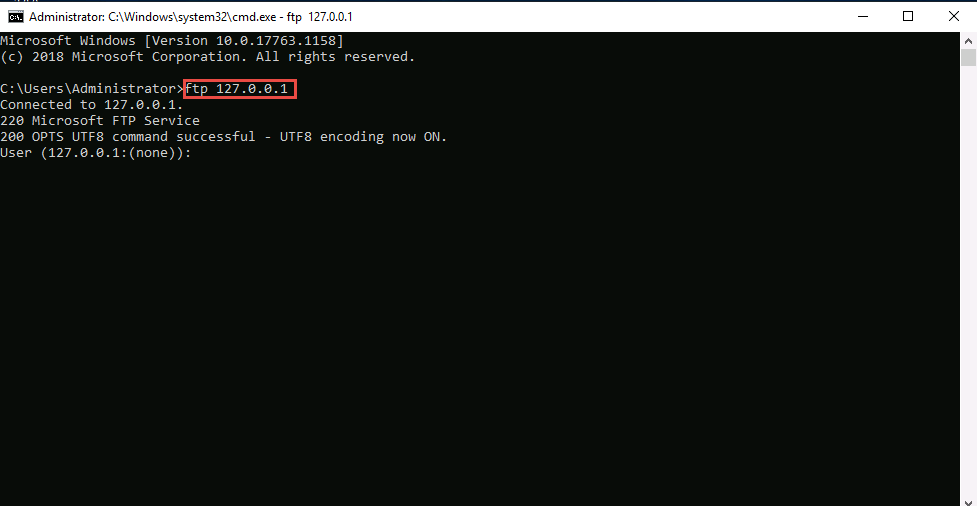
Enter the credentials of any user account on Windows 10. In this lab, we are using the credentials of the Jason account (username: Jason; Password: qwerty). Type the username and press Enter.
The password you enter will not be visible.

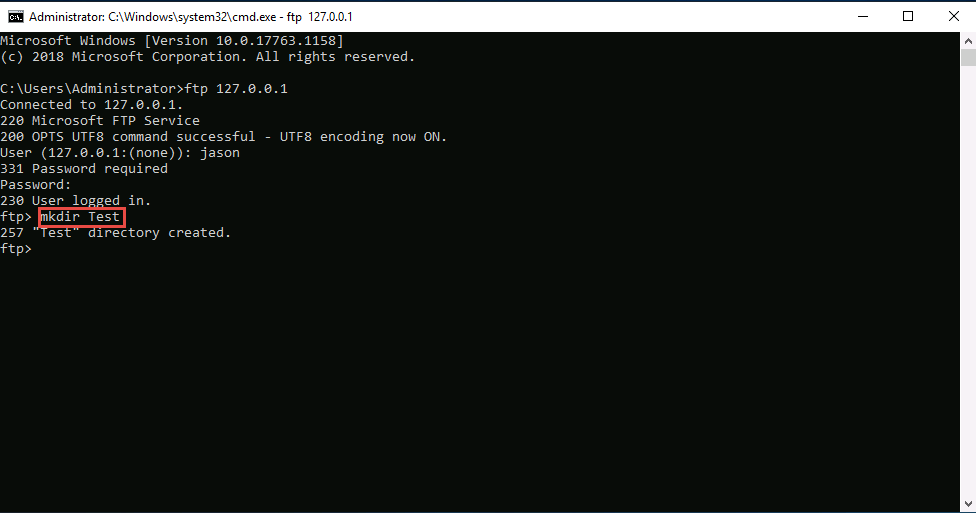
You are successfully logged in, even after adding a firewall outbound rule inferring that a tunnel has been established by HTTPort and HTTHost and therefore have bypassed the firewall.
Now you have the access and ability to add files in the ftp directory located in the Windows 10 machine.
Type mkdir Test and press Enter.
Now, Click Windows 10 to switch to the Windows 10 machine.
A directory named Test will be created in the FTP folder on the Windows 10 (location: C:\FTP) machine, as shown in the screenshot:
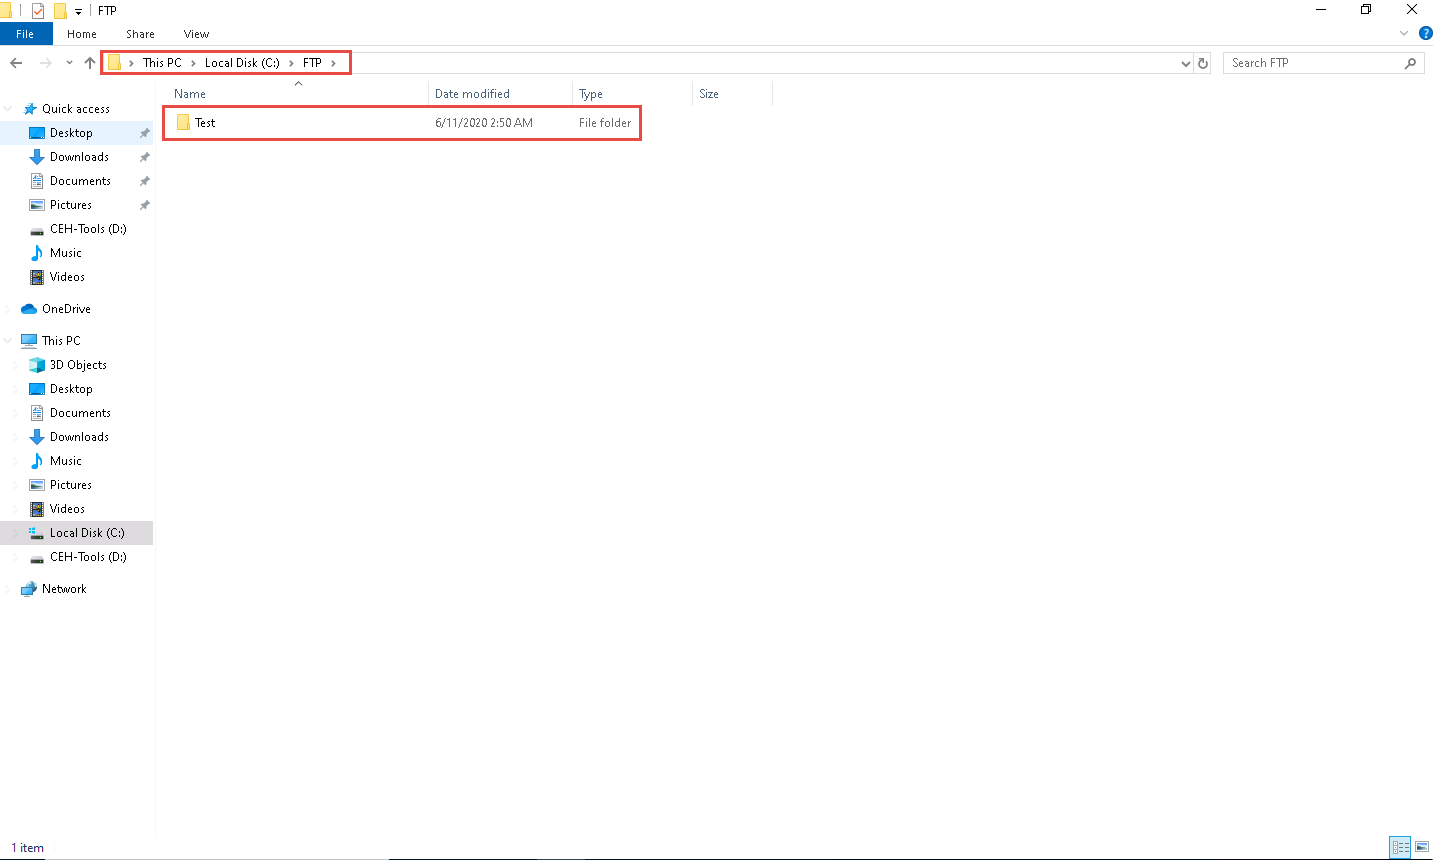
Thus, you are able to bypass HTTP proxies as well as firewalls, and thereby access files beyond them.
On completion of the lab, delete the created outbound rule, stop HTTHost and HTTPort and disable the firewall (which was enabled in the beginning of the lab) in the machine (i.e., Windows Server 2019), and start the World Wide Web Publishing and IIS Admin Services on the Windows Server 2016 machine.


Comments
Post a Comment