Lab 1: Perform Active Sniffing
Lab 1: Perform Active Sniffing
Module 08: Sniffing
Lab 1: Perform Active Sniffing
Task 1: Perform MAC Flooding using macof
MAC flooding is a technique used to compromise the security of network switches that connect network
segments or network devices. Attackers use the MAC flooding technique to force a switch to act as a hub, so they
can easily sniff the traffic.
macof is a Unix and Linux tool that is a part of the dsniff collection. It floods the local network with random MAC addresses
and IP addresses, causing some switches to fail and open in repeating mode, thereby facilitating sniffing. This tool floods the
switch’s CAM tables (131,000 per minute) by sending forged MAC entries. When the MAC table fills up, the switch converts to a hub-like
operation where an attacker can monitor the data being broadcast.
refer to blog
---------------------------------------------------------------------------------------------------------------------------------------
Module 08: Sniffing
Lab 1: Perform Active Sniffing
Task 2: Perform a DHCP Starvation Attack using Yersinia
In a DHCP starvation attack, an attacker floods the DHCP server by sending a large number of DHCP requests and uses
all available IP addresses that the DHCP server can issue. As a result, the server cannot issue any more IP addresses,
leading to a Denial-of-Service (DoS) attack. Because of this issue, valid users cannot obtain or renew their IP addresses,
and thus fail to access their network. This attack can be performed by using various tools such as Yersinia and Hyenae.
Yersinia is a network tool designed to take advantage of weaknesses in different network protocols such as DHCP. It pretends
to be a solid framework for analyzing and testing the deployed networks and systems.
refer to blog
---------------------------------------------------------------------------------------------------------------------------------------
Module 08: Sniffing
Lab 1: Perform Active Sniffing
Task 3: Perform ARP Poisoning using arpspoof
ARP spoofing is a method of attacking an Ethernet LAN. ARP spoofing succeeds by changing the IP address of the attacker’s
computer to the IP address of the target computer. A forged ARP request and reply packet find a place in the target ARP cache
in this process. As the ARP reply has been forged, the destination computer (target) sends the frames to the attacker’s computer,
where the attacker can modify them before sending them to the source machine (User A) in an MITM attack.
arpspoof redirects packets from a target host (or all hosts) on the LAN intended for another host on the LAN by forging ARP replies.
This is an extremely effective way of sniffing traffic on a switch.
Here, we will use the arpspoof tool to perform ARP poisoning.
refer to blog
---------------------------------------------------------------------------------------------------------------------------------------
Module 08: Sniffing
Lab 1: Perform Active Sniffing'
Task 4: Perform an Man-in-the-Middle (MITM) Attack using Cain & Abel
An attacker can obtain usernames and passwords using various techniques or by capturing data packets. By merely
capturing enough packets, attackers can extract a target’s username and password if the victim authenticates
themselves in public networks, especially on unsecured websites. Once a password is hacked, an attacker can use the
password to interfere with the victim’s accounts such as by logging into the victim’s email account, logging onto PayPal
and draining the victim’s bank account, or even change the password.
As a preventive measure, an organization’s administrator should advice employees not to provide sensitive information while
in public networks without HTTPS connections. VPN and SSH tunneling must be used to secure the network connection. An expert
ethical hacker and penetration tester (hereafter, pen tester) must have sound knowledge of sniffing, network protocols and their
topology, TCP and UDP services, routing tables, remote access (SSH or VPN), authentication mechanisms, and encryption techniques.
Another effective method for obtaining usernames and passwords is by using Cain & Abel to perform MITM attacks.
An MITM attack is used to intrude into an existing connection between systems and to intercept the messages being
exchanged. Using various techniques, attackers split the TCP connection into two connections—a client-to-attacker
connection and an attacker-to-server connection. After the successful interception of the TCP connection, the attacker
can read, modify, and insert fraudulent data into the intercepted communication.
MITM attacks are varied and can be carried out on a switched LAN. MITM attacks can be performed using various tools such
as Cain & Abel.
Cain & Abel is a password recovery tool that allows the recovery of passwords by sniffing the network and cracking encrypted
passwords. The ARP poisoning feature of the Cain & Abel tool involves sending free spoofed ARPs to the network’s host victims.
This spoofed ARP can make it easier to attack a middleman.
refer to blog
---------------------------------------------------------------------------------------------------------------------------------------
Module 08: Sniffing
Lab 1: Perform Active Sniffing'
Task 5: Spoof a MAC Address using TMAC and SMAC
A MAC duplicating or spoofing attack involves sniffing a network for the MAC addresses of legitimate clients connected to the
network. In this attack, the attacker first retrieves the MAC addresses of clients who are actively associated with the switch
port. Then, the attacker spoofs their own MAC address with the MAC address of the legitimate client. Once the spoofing is successful,
the attacker receives all traffic destined for the client. Thus, an attacker can gain access to the network and take over the
identity of a network user.
If an administrator does not have adequate packet-sniffing skills, it is hard to defend against such intrusions. So, an expert
ethical hacker and pen tester must know how to spoof MAC addresses, sniff network packets, and perform ARP poisoning, network
spoofing, and DNS poisoning. This lab demonstrates how to spoof a MAC address to remain unknown to an attacker.
refer to blog
---------------------------------------------------------------------------------------------------------------------------------------
Lab Scenario
As a professional ethical hacker or pen tester, the first step is to perform active sniffing on the target network using various active sniffing techniques such as MAC flooding, DHCP starvation, ARP poisoning, or MITM. In active sniffing, the switched Ethernet does not transmit information to all systems connected through the LAN as it does in a hub-based network.
In active sniffing, ARP traffic is actively injected into a LAN to sniff around a switched network and capture its traffic. A packet sniffer can obtain all the information visible on the network and records it for future review. A pen tester can see all the information in the packet, including data that should remain hidden.
An ethical hacker or pen tester needs to ensure that the organization’s network is secure from various active sniffing attacks by analyzing incoming and outgoing packets for any attacks.
Lab Objectives
- Perform MAC flooding using macof
- Perform a DHCP starvation attack using Yersinia
- Perform ARP poisoning using arpspoof
- Perform an Man-in-the-Middle (MITM) attack using Cain & Abel
- Spoof a MAC address using TMAC and SMAC
Overview of Active Sniffing
Active sniffing involves sending out multiple network probes to identify access points. The following is the list of different active sniffing techniques:
MAC Flooding: Involves flooding the CAM table with fake MAC address and IP pairs until it is full
DNS Poisoning: Involves tricking a DNS server into believing that it has received authentic information when, in reality, it has not
ARP Poisoning: Involves constructing a large number of forged ARP request and reply packets to overload a switch
DHCP Attacks: Involves performing a DHCP starvation attack and a rogue DHCP server attack
Spoofing Attack: Involves performing MAC spoofing, VLAN hopping, and STP attacks to steal sensitive information
Task 1: Perform MAC Flooding using macof
MAC flooding is a technique used to compromise the security of network switches that connect network segments or network devices. Attackers use the MAC flooding technique to force a switch to act as a hub, so they can easily sniff the traffic.
macof is a Unix and Linux tool that is a part of the dsniff collection. It floods the local network with random MAC addresses and IP addresses, causing some switches to fail and open in repeating mode, thereby facilitating sniffing. This tool floods the switch’s CAM tables (131,000 per minute) by sending forged MAC entries. When the MAC table fills up, the switch converts to a hub-like operation where an attacker can monitor the data being broadcast.
Here, we will use the macof tool to perform MAC flooding.
For demonstration purposes, we are using only one target machine (namely, Windows 10). However, you can use multiple machines connected to the same network. Macof will send the packets with random MAC addresses and IP addresses to all active machines in the local network.
Click Parrot Security to switch to the Parrot Security machine.

In the login page, the attacker username will be selected by default. Enter password as toor in the Password field and press Enter to log in to the machine.
If a Parrot Updater pop-up appears at the top-right corner of Desktop, ignore and close it.
If a Question pop-up window appears asking you to update the machine, click No to close the window.

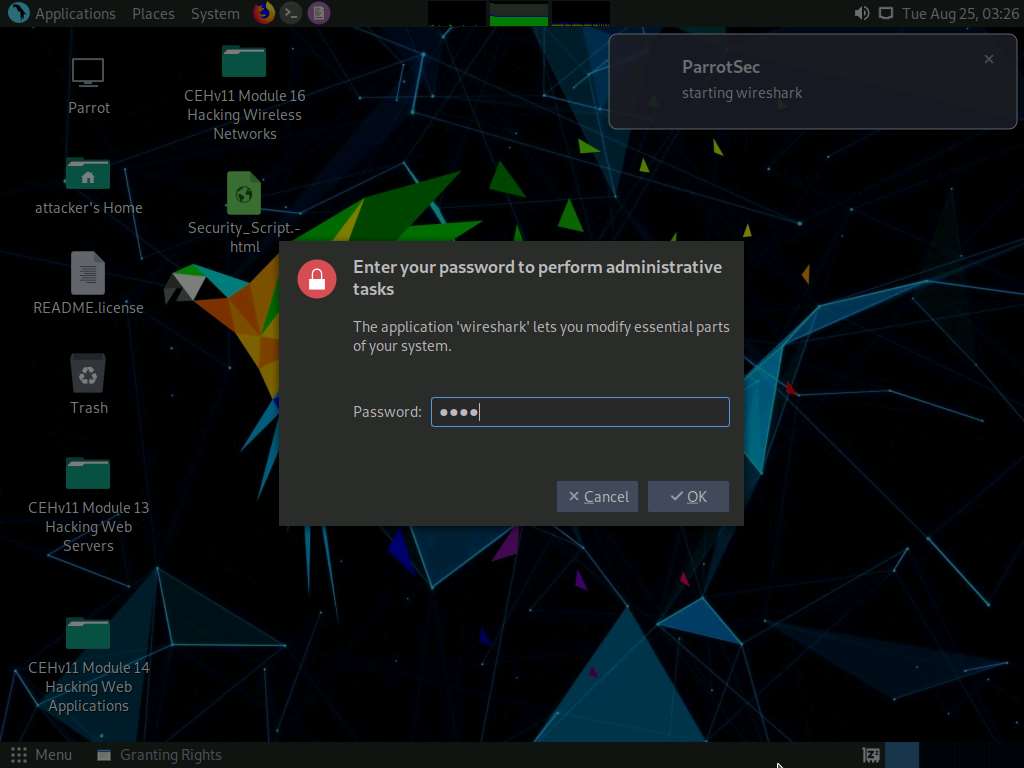
Click Applications in the top-left corner of Desktop and navigate to Pentesting --> Information Gathering --> wireshark.

A security pop-up appears, enter the password as toor in the Password field and click OK.

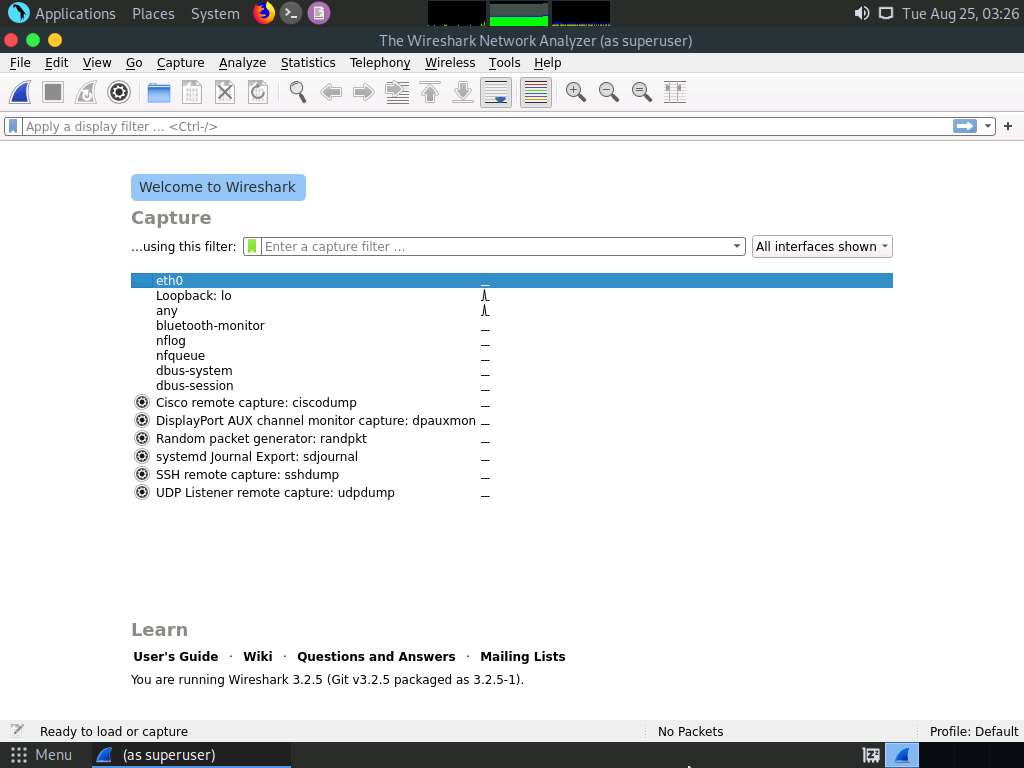
The Wireshark Network Analyzer window appears; double-click the available ethernet or interface (here, eth0) to start the packet capture, as shown in the screenshot.
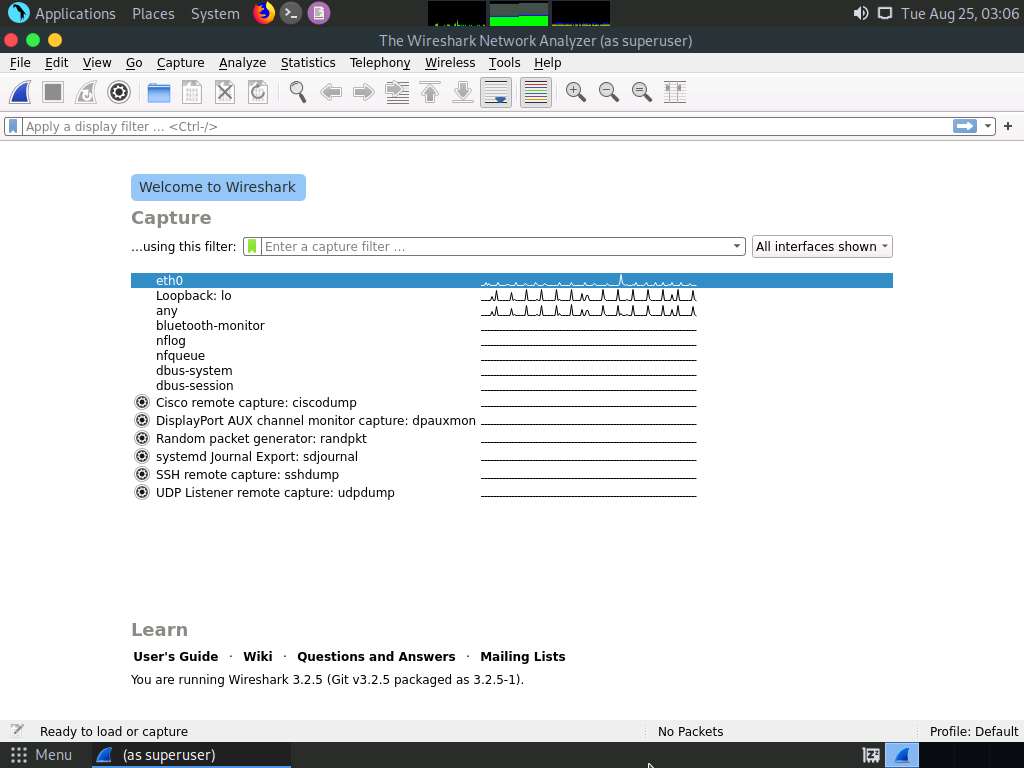
Leave the Wireshark application running.
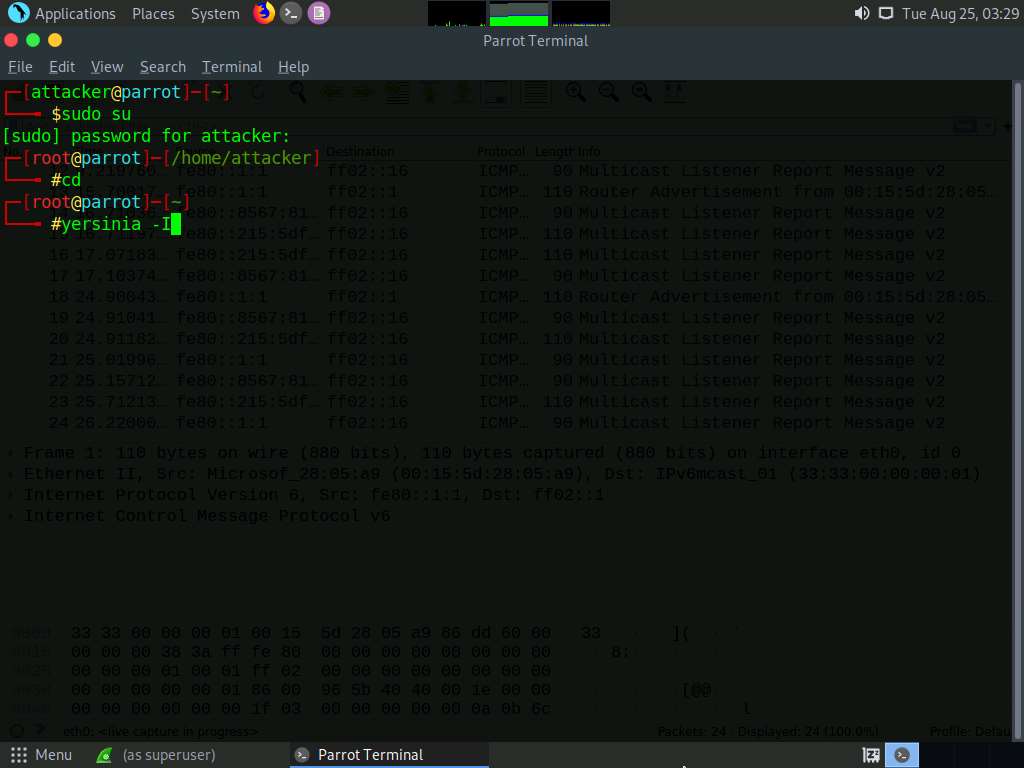
Click the MATE Terminal icon at the top of the Desktop window to open a Terminal window.
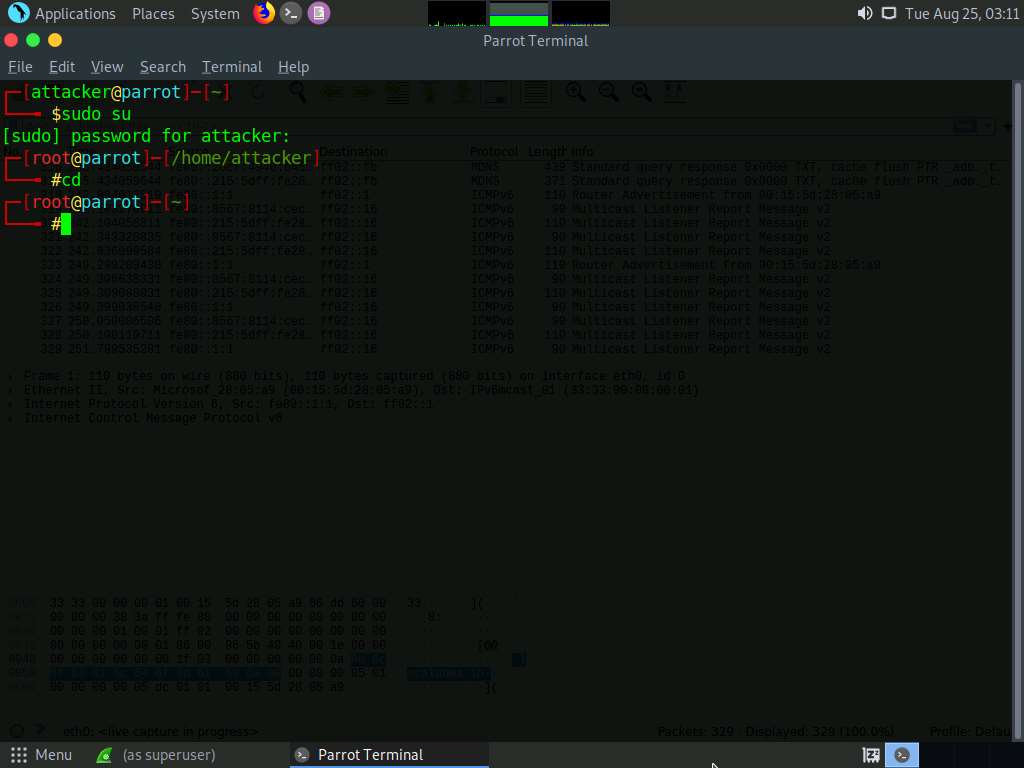
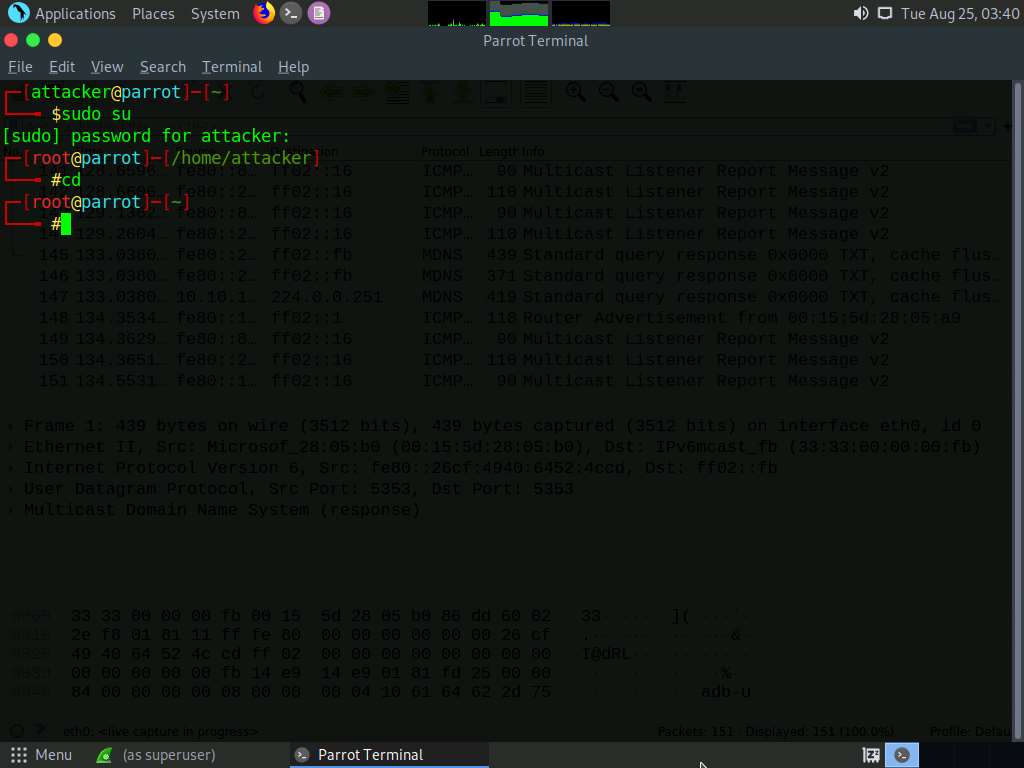
A Parrot Terminal window appears. In the terminal window, type sudo su and press Enter to run the programs as a root user.
In the [sudo] password for attacker field, type toor as a password and press Enter.
The password that you type will not be visible.
Now, type cd and press Enter to jump to the root directory.
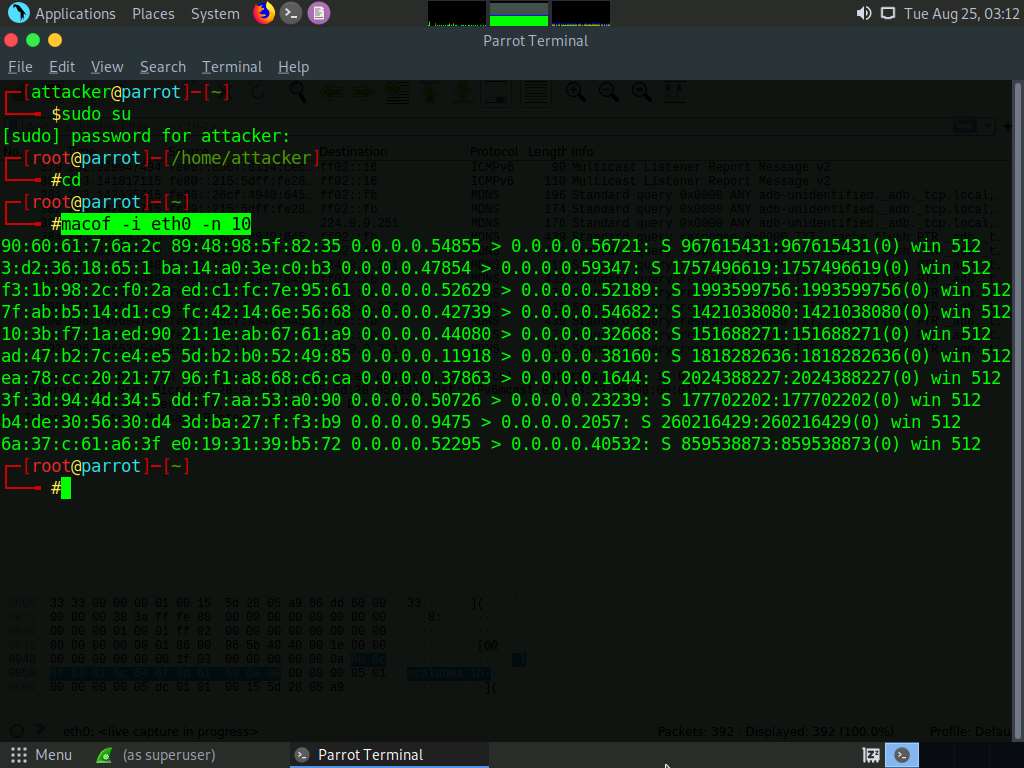
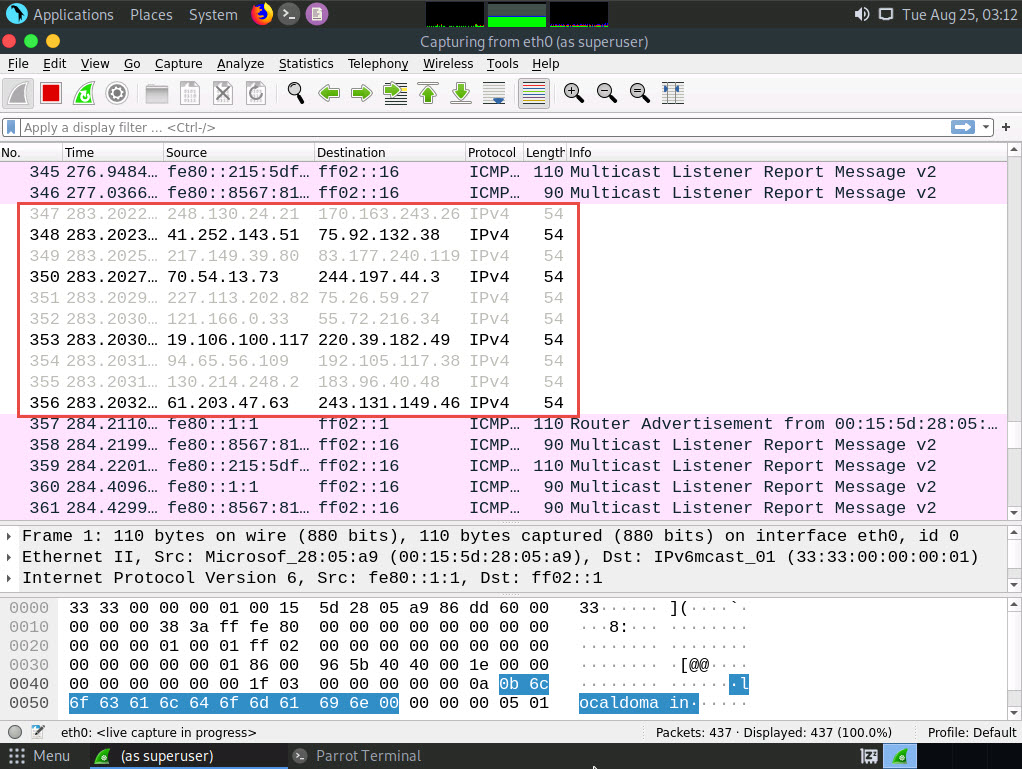
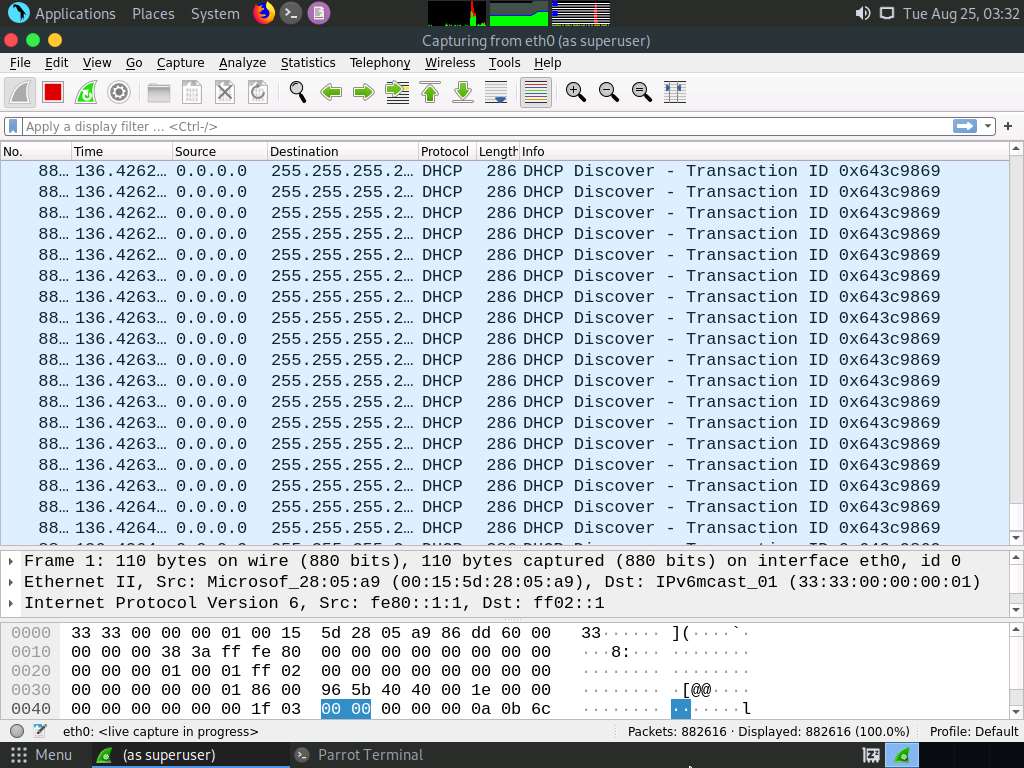
The Parrot Terminal window appears; type macof -i eth0 -n 10 and press Enter.
-i: specifies the interface and -n: specifies the number of packets to be sent (here, 10).
You can also target a single system by issuing the command macof -i eth0 -d [Target IP Address] (-d: Specifies the destination IP address).
This command will start flooding the CAM table with random MAC addresses, as shown in the screenshot.
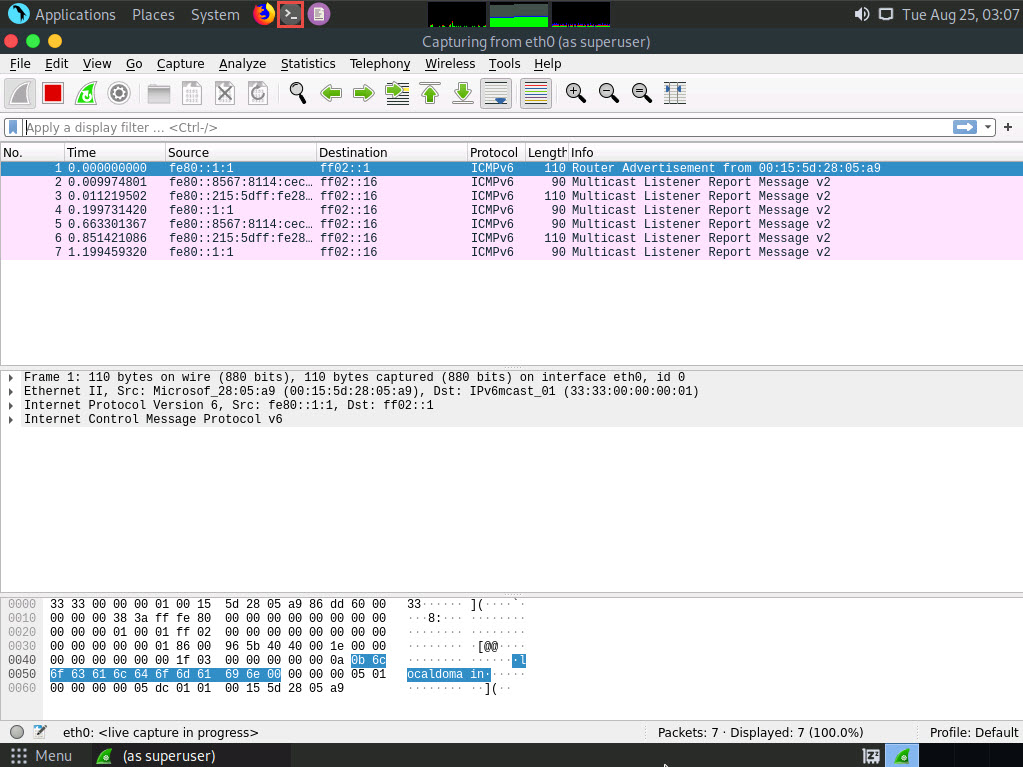
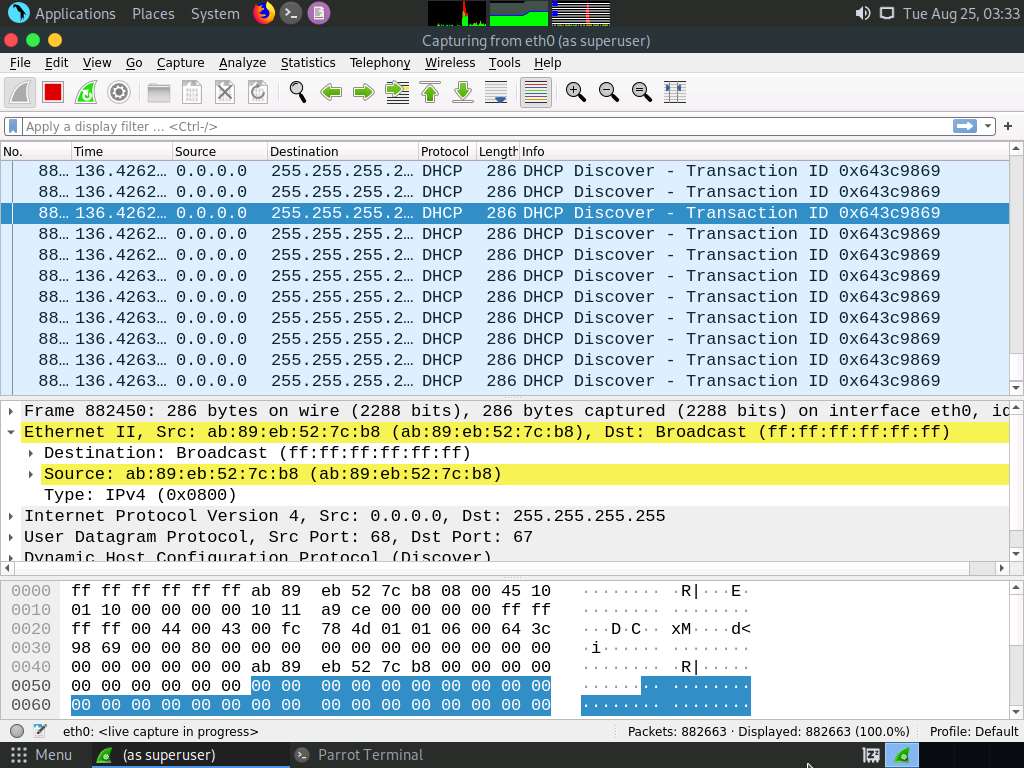
Switch to the Wireshark window and observe the IPv4 packets from random IP addresses, as shown in the screenshot.
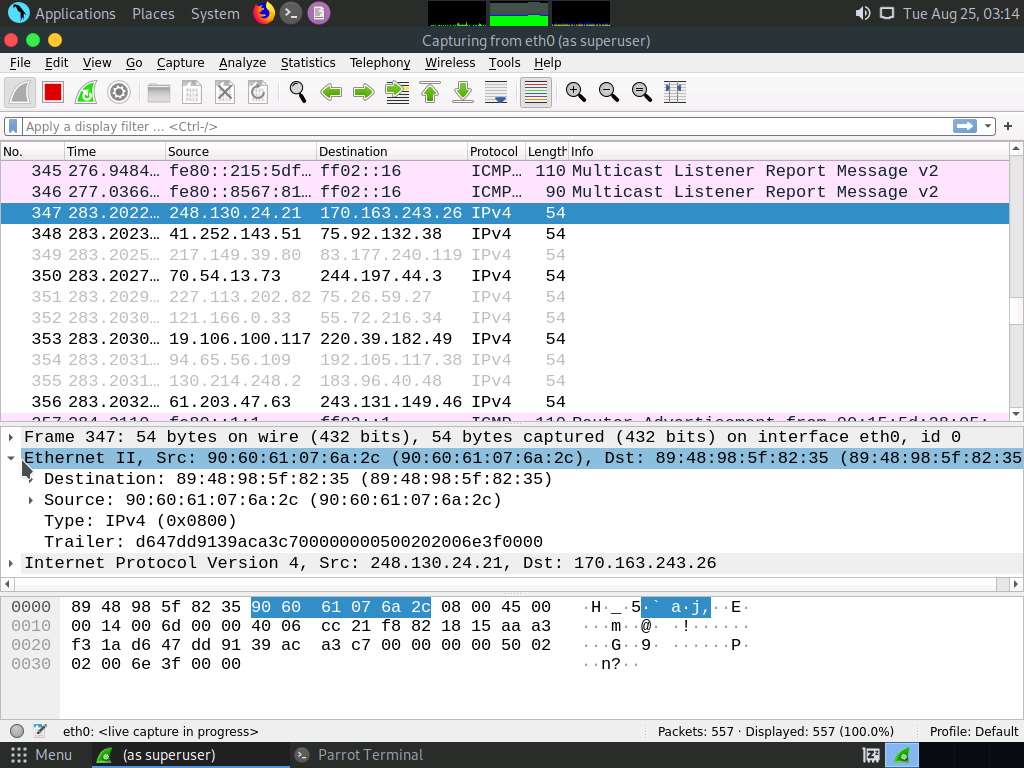
Click on any captured IPv4 packet and expand the Ethernet II node in the packet details section. Information regarding the source and destination MAC addresses is displayed, as shown in the screenshot.
Similarly, you can switch to a different machine to see the same packets that were captured by Wireshark in the Parrot Security machine.
Macof sends the packets with random MAC and IP addresses to all active machines in the local network. If you are using multiple targets, you will observe the same packets on all target machines.
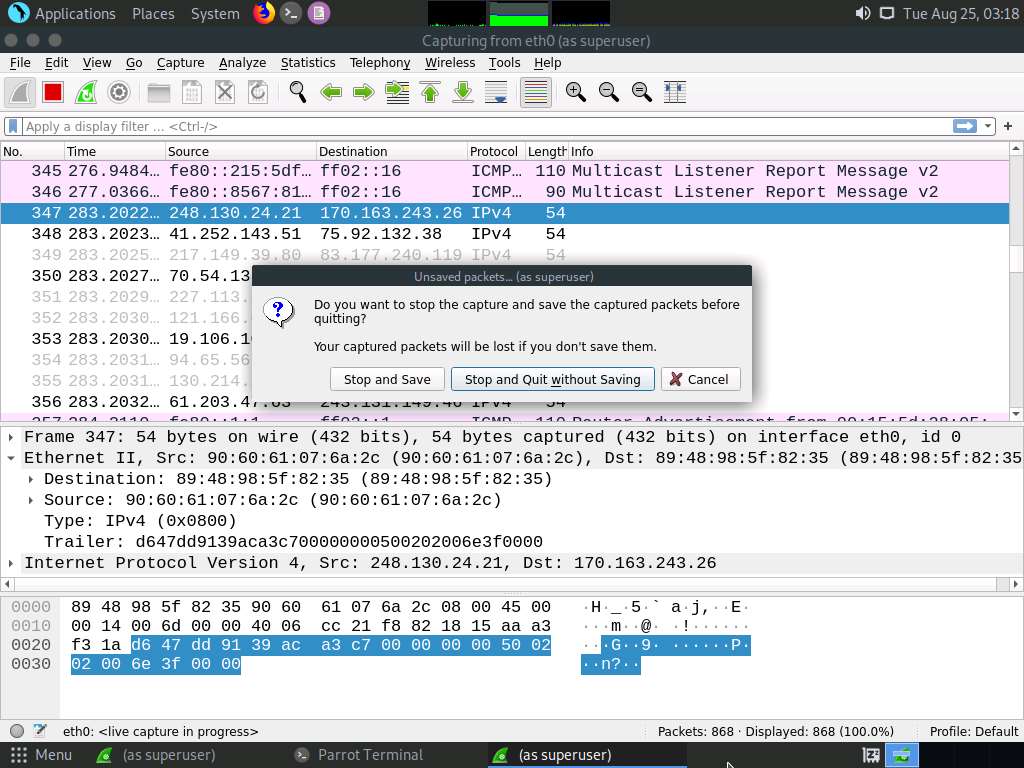
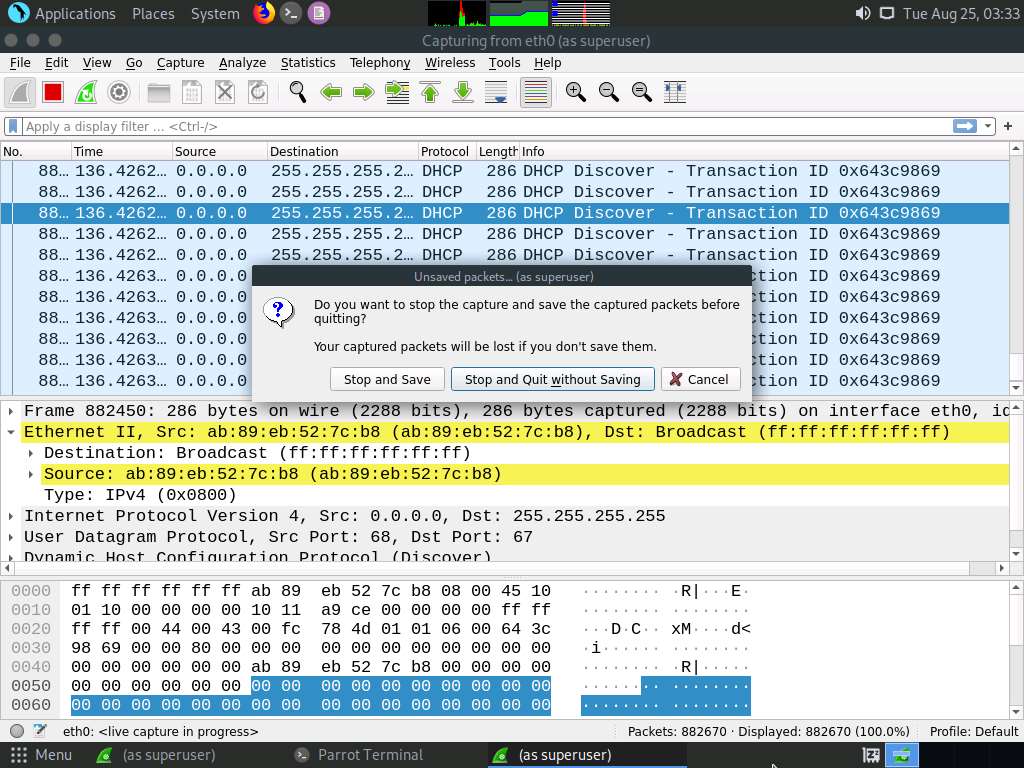
Close the Wireshark window. If an Unsaved packets… pop-up appears, click Quit without Saving to close the Wireshark application.
This concludes the demonstration of how to perform MAC flooding using macof.
Close all open windows and document all the acquired information.
Task 2: Perform a DHCP Starvation Attack using Yersinia
In a DHCP starvation attack, an attacker floods the DHCP server by sending a large number of DHCP requests and uses all available IP addresses that the DHCP server can issue. As a result, the server cannot issue any more IP addresses, leading to a Denial-of-Service (DoS) attack. Because of this issue, valid users cannot obtain or renew their IP addresses, and thus fail to access their network. This attack can be performed by using various tools such as Yersinia and Hyenae.
Yersinia is a network tool designed to take advantage of weaknesses in different network protocols such as DHCP. It pretends to be a solid framework for analyzing and testing the deployed networks and systems.
Here, we will use the Yersinia tool to perform a DHCP starvation attack on the target system.
On the Parrot Security machine; click Applications in the top-left corner of Desktop and navigate to Pentesting --> Information Gathering --> wireshark.

A security pop-up appears, enter the password as toor in the Password field and click OK.
The Wireshark Network Analyzer window appears; double-click the available ethernet or interface (here, eth0) to start the packet capture, as shown in the screenshot.
Leave the Wireshark application running.
Click the MATE Terminal icon at the top of the Desktop window to open a Terminal window.

A Parrot Terminal window appears. In the terminal window, type sudo su and press Enter to run the programs as a root user.
In the [sudo] password for attacker field, type toor as a password and press Enter.
The password that you type will not be visible.
Now, type cd and press Enter to jump to the root directory.
Click the Maximize Window icon to maximize the terminal window.
The interactive mode of the Yersinia application only works in a maximized terminal window.

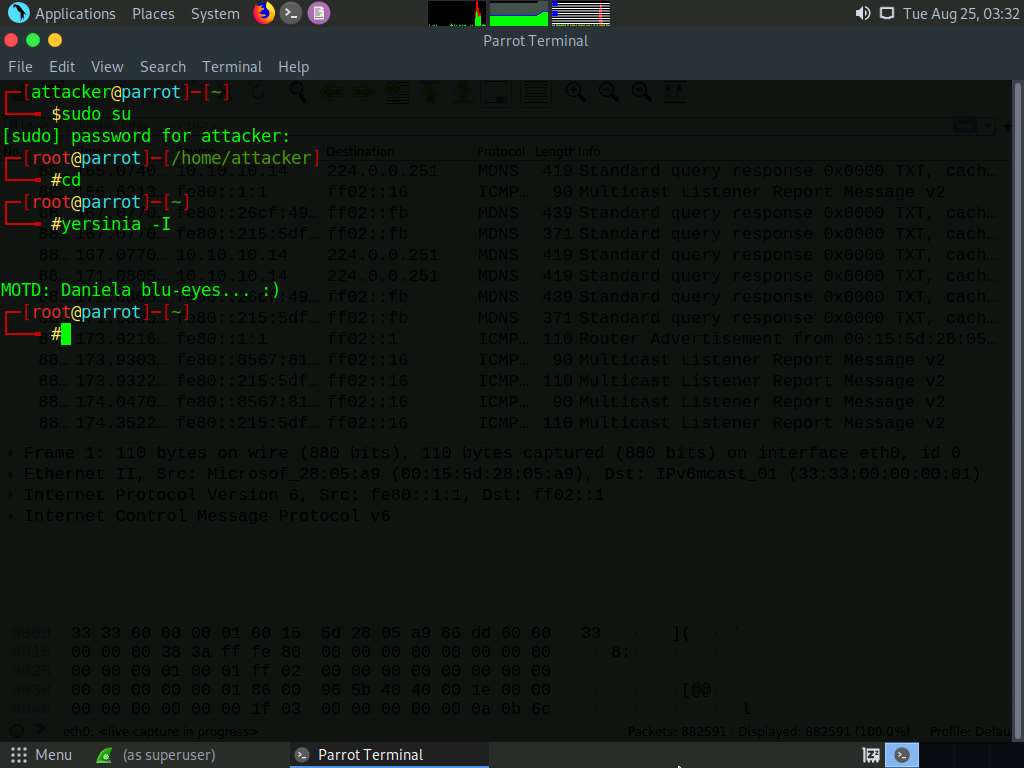
Type yersinia -I and press Enter to open Yersinia in interactive mode.
-I: Starts an interactive ncurses session.
Yersinia interactive mode appears in the terminal window.
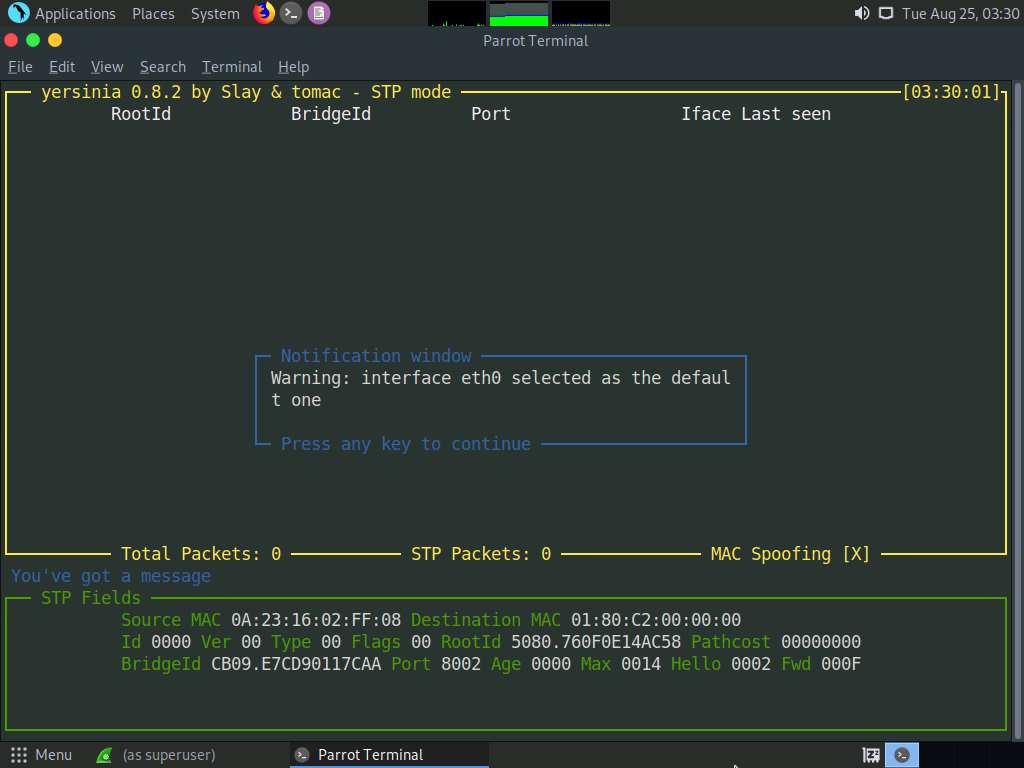
To remove the Notification window, press any key, and then press h for help.
The Available commands option appears, as shown in the screenshot.
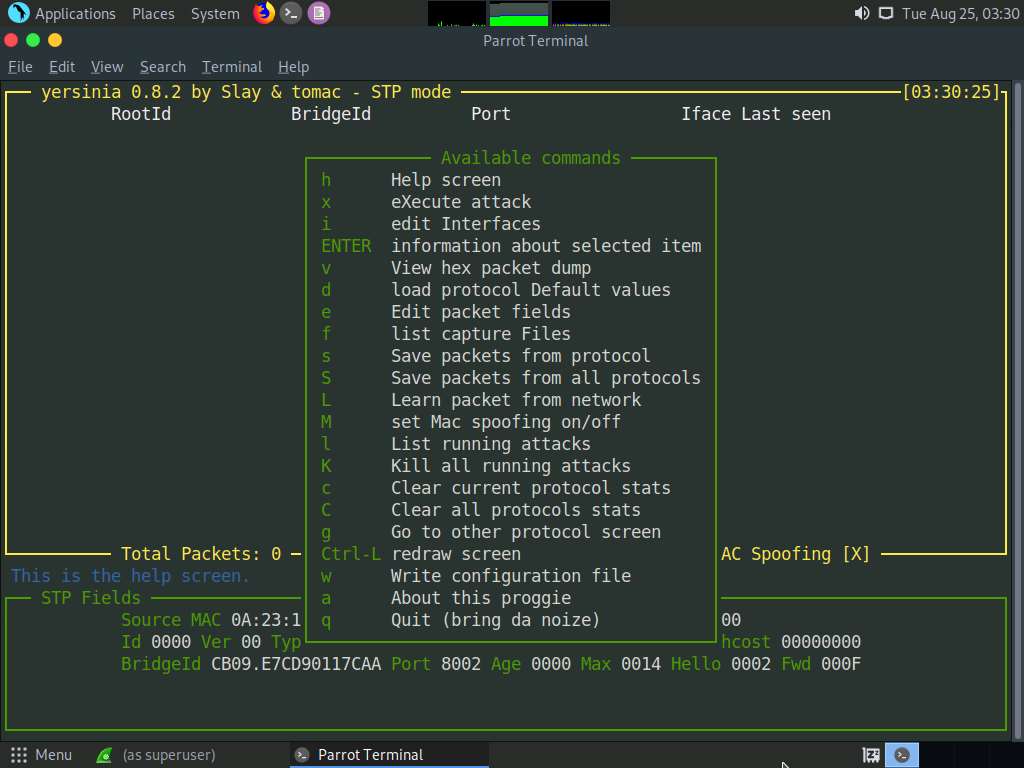
Press q to exit the help options.
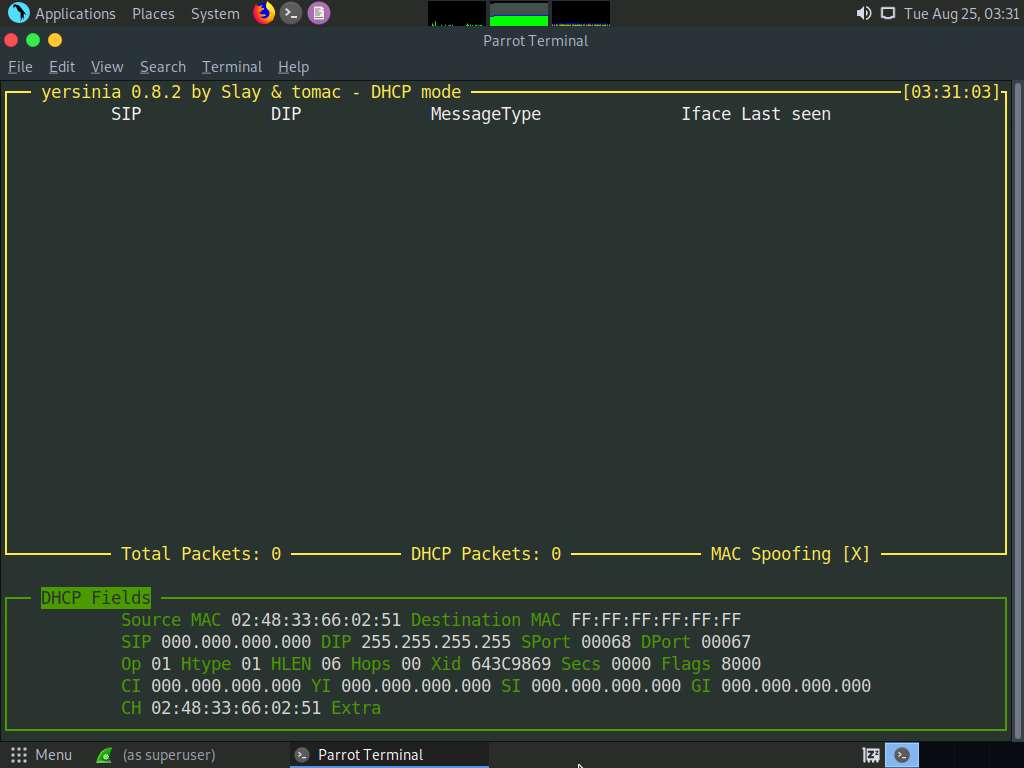
Press F2 to select DHCP mode. In DHCP mode, STP Fields in the lower section of the window change to DHCP Fields, as shown in the screenshot.
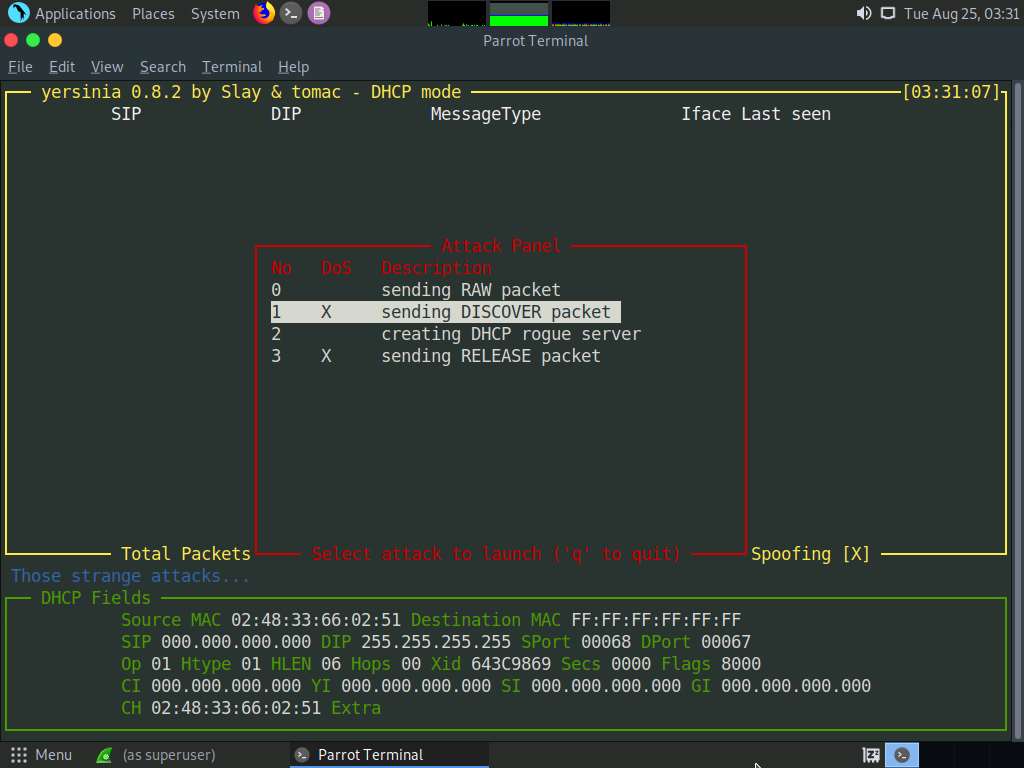
Press x to list available attack options.
The Attack Panel window appears; press 1 to start a DHCP starvation attack.
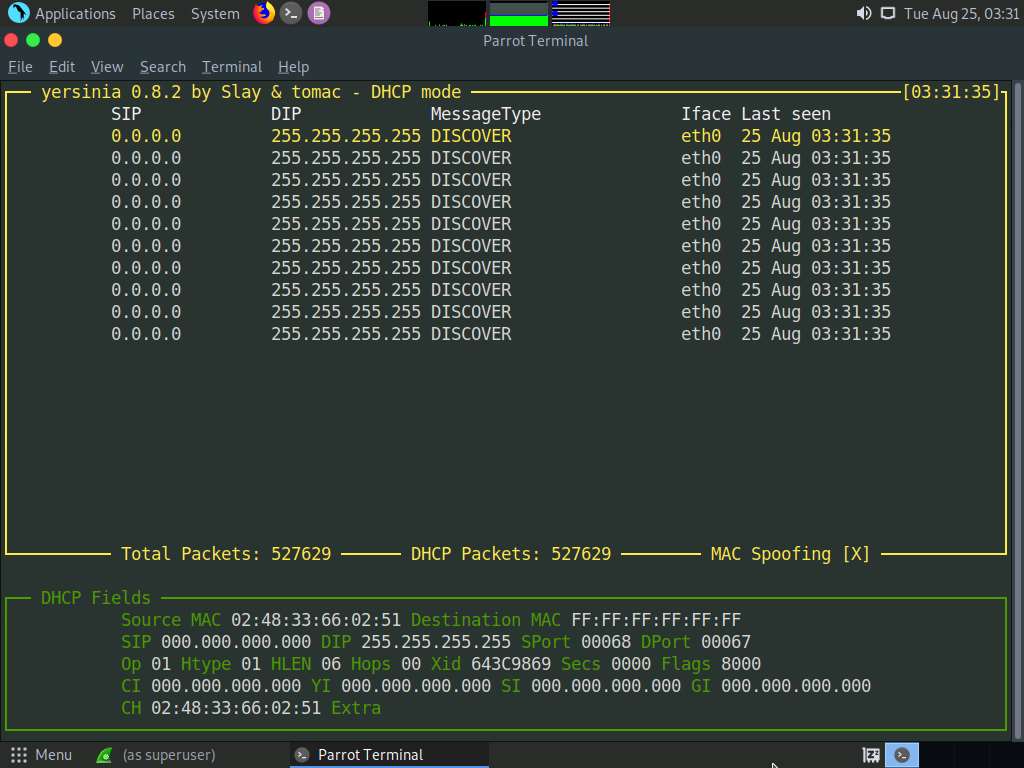
Yersinia starts sending DHCP packets to the network adapter and all active machines in the local network, as shown in the screenshot.
If you are using multiple targets, you will observe the same packets on all target machines.
After a few seconds, press q to stop the attack and terminate Yersinia, as shown in the screenshot.
Now, switch to the Wireshark window and observe the huge number of captured DHCP packets, as shown in the screenshot.
Click on any DHCP packet and expand the Ethernet II node in the packet details section. Information regarding the source and destination MAC addresses is displayed, as shown in the screenshot.
Close the Wireshark window. If an Unsaved packets… pop-up appears, click Stop and Quit without Saving.
This concludes the demonstration of how to perform a DHCP starvation attack using Yersinia.
Close all open windows and document all the acquired information.
Task 3: Perform ARP Poisoning using arpspoof
ARP spoofing is a method of attacking an Ethernet LAN. ARP spoofing succeeds by changing the IP address of the attacker’s computer to the IP address of the target computer. A forged ARP request and reply packet find a place in the target ARP cache in this process. As the ARP reply has been forged, the destination computer (target) sends the frames to the attacker’s computer, where the attacker can modify them before sending them to the source machine (User A) in an MITM attack.
arpspoof redirects packets from a target host (or all hosts) on the LAN intended for another host on the LAN by forging ARP replies. This is an extremely effective way of sniffing traffic on a switch.
Here, we will use the arpspoof tool to perform ARP poisoning.
In this lab, we will use the Parrot Security (10.10.10.13) machine as the host system and the Windows 10 (10.10.10.10) machine as the target system.
On the Parrot Security machine; click Applications in the top-left corner of Desktop and navigate to Pentesting --> Information Gathering --> wireshark.

A security pop-up appears, enter the password as toor in the Password field and click OK.

The Wireshark Network Analyzer window appears; double-click the available ethernet or interface (here, eth0) to start the packet capture, as shown in the screenshot.

Leave the Wireshark application running.
Now, click the MATE Terminal icon at the top of the Desktop window to open a Terminal window.
A Parrot Terminal window appears. In the terminal window, type sudo su and press Enter to run the programs as a root user.
In the [sudo] password for attacker field, type toor as a password and press Enter.
Now, type cd and press Enter to jump to the root directory.
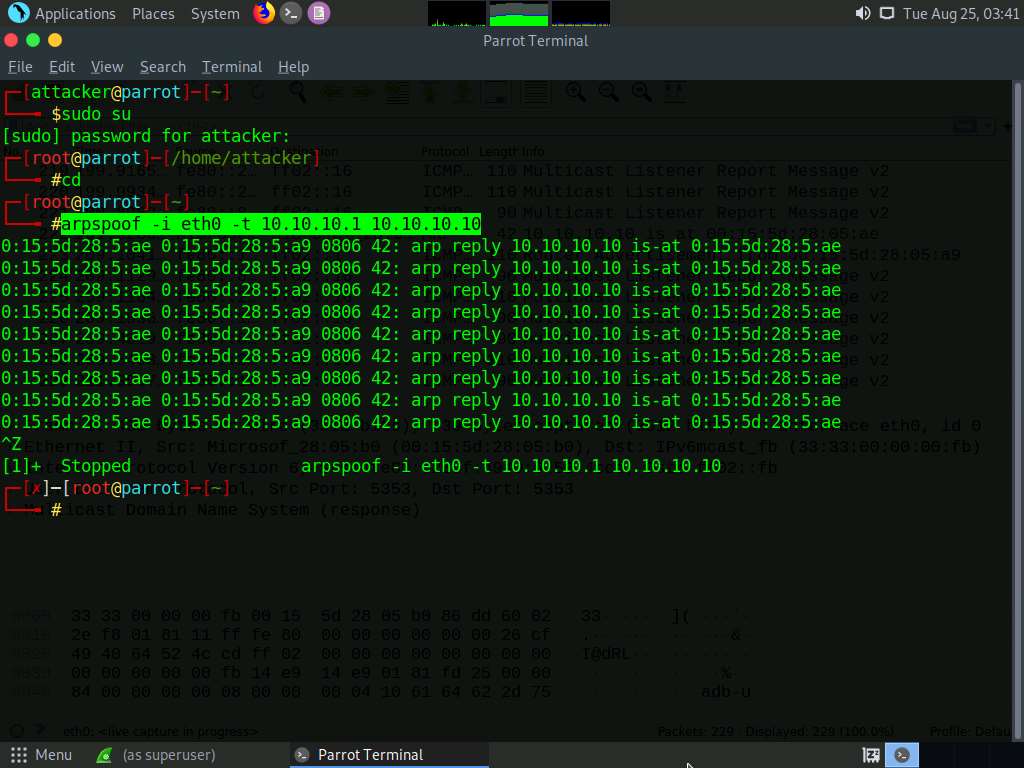
In the Parrot Terminal window, type arpspoof -i eth0 -t 10.10.10.1 10.10.10.10 and press Enter.
(Here, 10.10.10.10 is IP address of the target system [Windows 10], and 10.10.10.1 is IP address of the access point or gateway)
-i: specifies network interface and -t: specifies target IP address.
Issuing the above command informs the access point that the target system (10.10.10.10) has our MAC address (the MAC address of host machine (Parrot Security)). In other words, we are informing the access point that we are the target system.
After sending a few packets, press CTRL + z to stop sending the ARP packets.
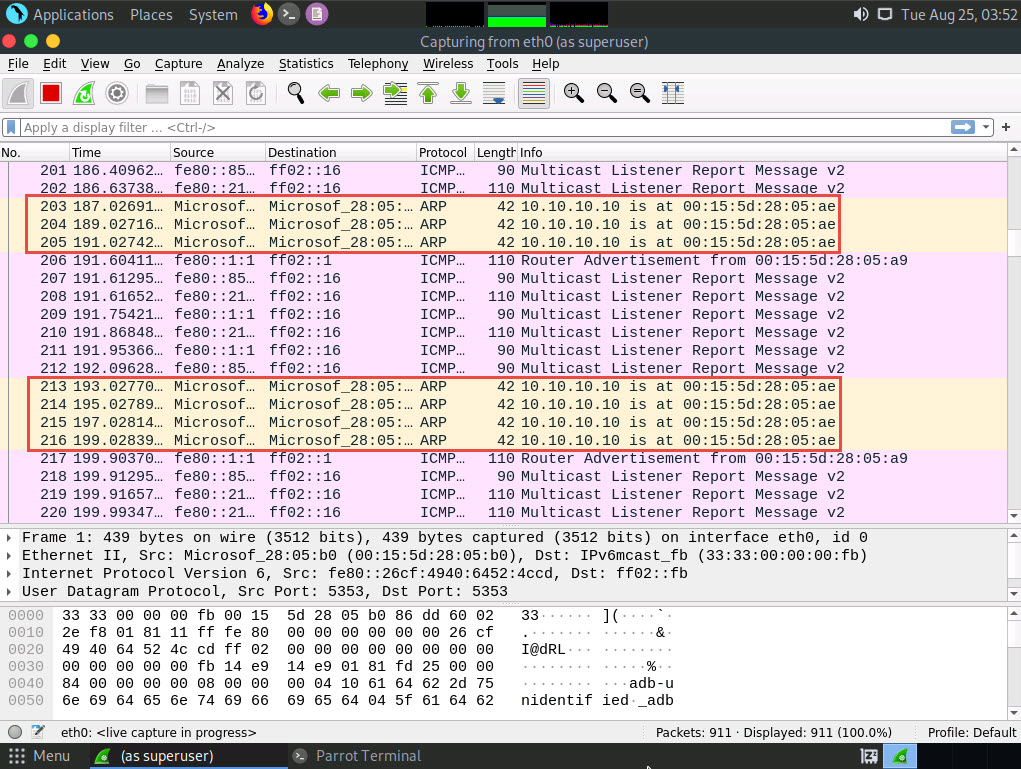
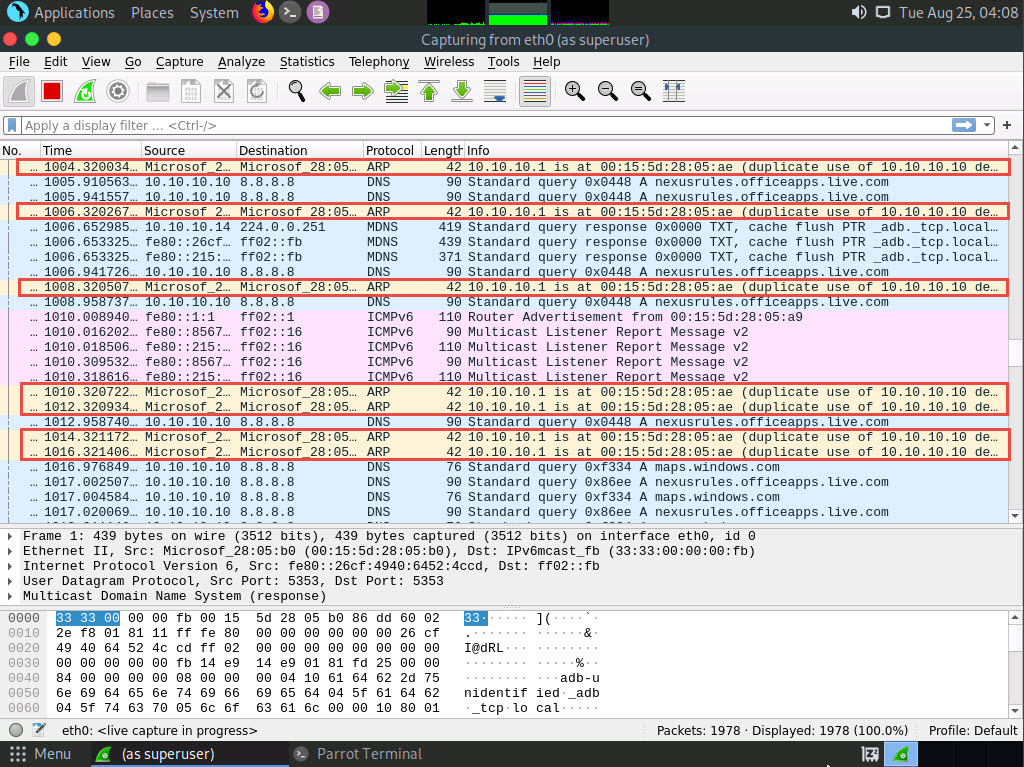
Switch to the Wireshark window and you can observe the captured ARP packets, as shown in the screenshot.
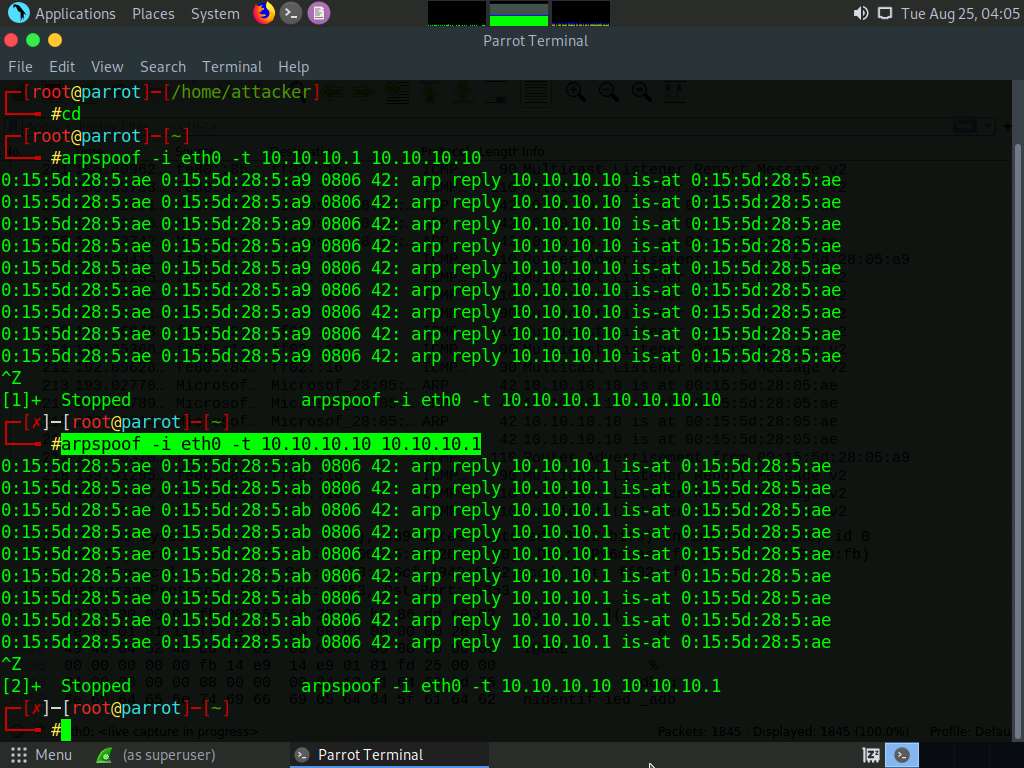
Switch back to the terminal window where arpspoof was running. Type arpspoof -i eth0 -t 10.10.10.10 10.10.10.1 and press Enter.
Through the above command, the host system informs the target system (10.10.10.10) that it is the access point (10.10.10.1).
After sending a few packets, press CTRL + z to stop sending the ARP packets.
In Wireshark, you can observe the ARP packets with an alert warning “duplicate use of 10.10.10.10 detected!”
Click on any ARP packet and expand the Ethernet II node in the packet details section. As shown in the screenshot, you can observe the MAC addresses of IP addresses 10.10.10.1 and 10.10.10.10.
Here, the MAC address of the host system (Parrot Security) is 02:15:5d:12:2d:d9.
Using arpspoof, we assigned the MAC address of the host system to the target system (Windows 10) and access point. Therefore, the alert warning of a duplicate use of 10.10.10.10 is displayed.
You can navigate to the Windows 10 machine and see the IP addresses and their corresponding MAC addresses. You will observe that the MAC addresses of IP addresses 10.10.10.1 and 10.10.10.13 are the same, indicating the occurrence of an ARP poisoning attack, where 10.10.10.13 is the Parrot Security machine and 10.10.10.1 is the access point.
This concludes the demonstration of how to perform ARP poisoning using arpspoof.
Close all open windows and document all the acquired information.
Task 4: Perform an Man-in-the-Middle (MITM) Attack using Cain & Abel
An attacker can obtain usernames and passwords using various techniques or by capturing data packets. By merely capturing enough packets, attackers can extract a target’s username and password if the victim authenticates themselves in public networks, especially on unsecured websites. Once a password is hacked, an attacker can use the password to interfere with the victim’s accounts such as by logging into the victim’s email account, logging onto PayPal and draining the victim’s bank account, or even change the password.
As a preventive measure, an organization’s administrator should advice employees not to provide sensitive information while in public networks without HTTPS connections. VPN and SSH tunneling must be used to secure the network connection. An expert ethical hacker and penetration tester (hereafter, pen tester) must have sound knowledge of sniffing, network protocols and their topology, TCP and UDP services, routing tables, remote access (SSH or VPN), authentication mechanisms, and encryption techniques.
Another effective method for obtaining usernames and passwords is by using Cain & Abel to perform MITM attacks.
An MITM attack is used to intrude into an existing connection between systems and to intercept the messages being exchanged. Using various techniques, attackers split the TCP connection into two connections—a client-to-attacker connection and an attacker-to-server connection. After the successful interception of the TCP connection, the attacker can read, modify, and insert fraudulent data into the intercepted communication.
MITM attacks are varied and can be carried out on a switched LAN. MITM attacks can be performed using various tools such as Cain & Abel.
Cain & Abel is a password recovery tool that allows the recovery of passwords by sniffing the network and cracking encrypted passwords. The ARP poisoning feature of the Cain & Abel tool involves sending free spoofed ARPs to the network’s host victims. This spoofed ARP can make it easier to attack a middleman.
Here, we will use the Cain & Abel tool to perform an MITM attack.
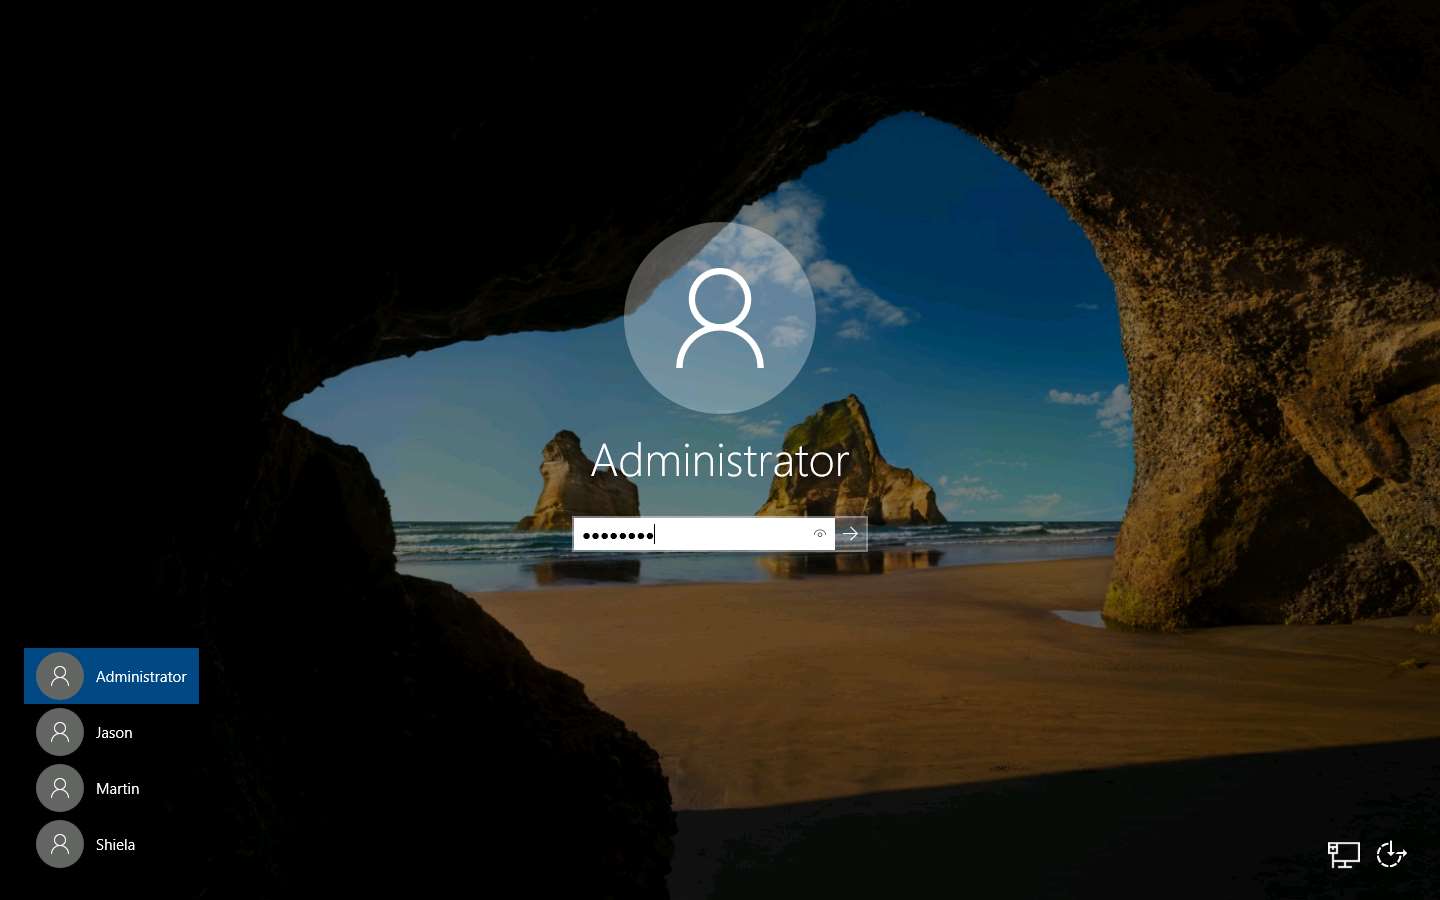
Click Windows Server 2019 to switch to the Windows Server 2019 machine.
Click Ctrl+Alt+Delete to activate the machine. By default, Administration user profile is selected, click Pa$$w0rd to paste the password in the Password field and press Enter to login.
Alternatively, you can also click Pa$$w0rd under Windows Server 2019 machine thumbnail in the Resources pane or Click Type Text | Type Password button under Commands (thunder icon) menu.
Networks screen appears, click Yes to allow your PC to be discoverable by other PCs and devices on the network.
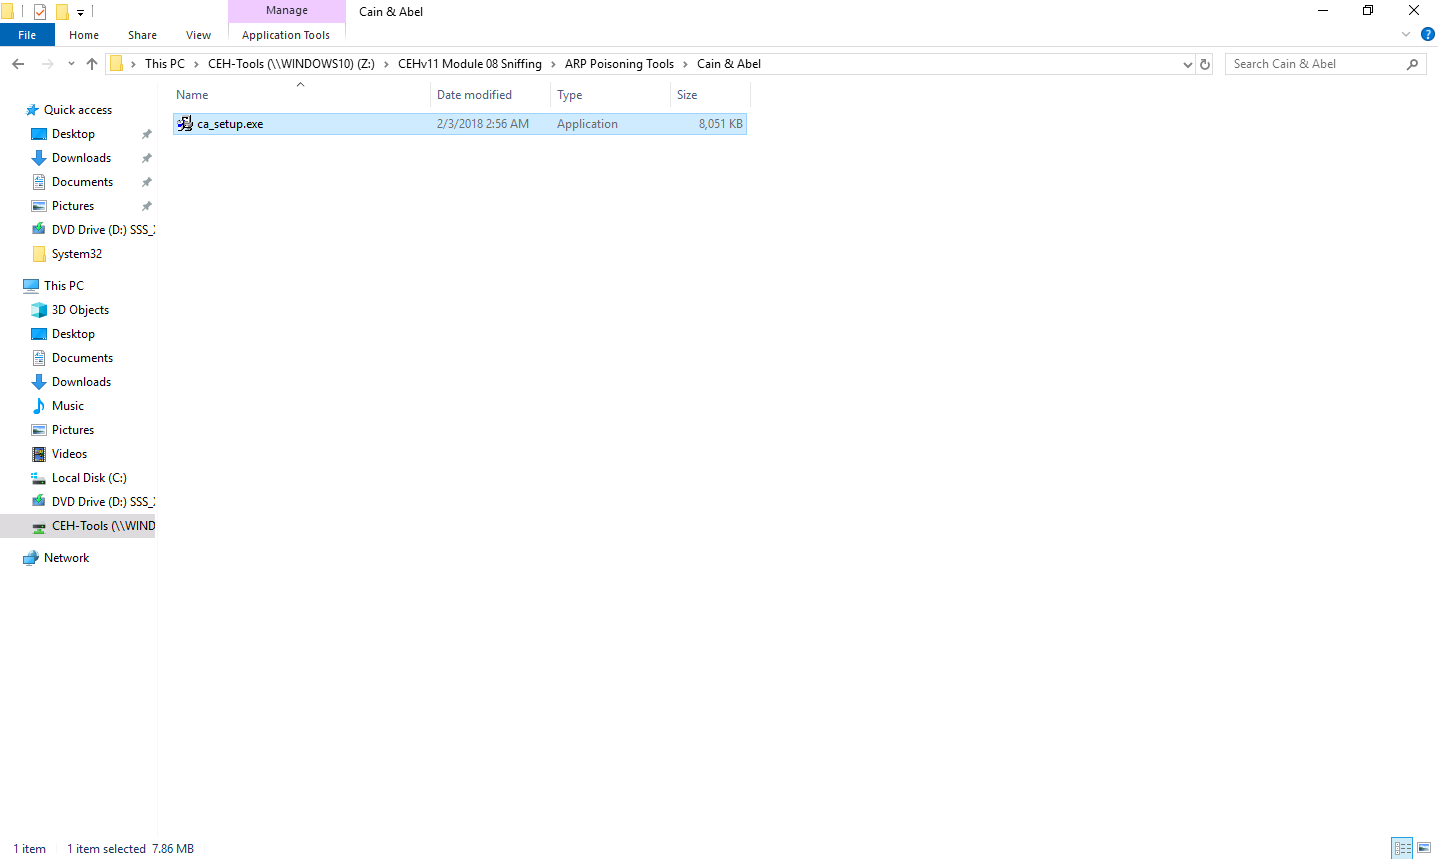
Navigate to Z:\CEHv11 Module 08 Sniffing\ARP Poisoning Tools\Cain & Abel and double-click ca_setup.exe.
Cain & Abel initializes, and the Cain & Abel Installation window appears; click the Next button.
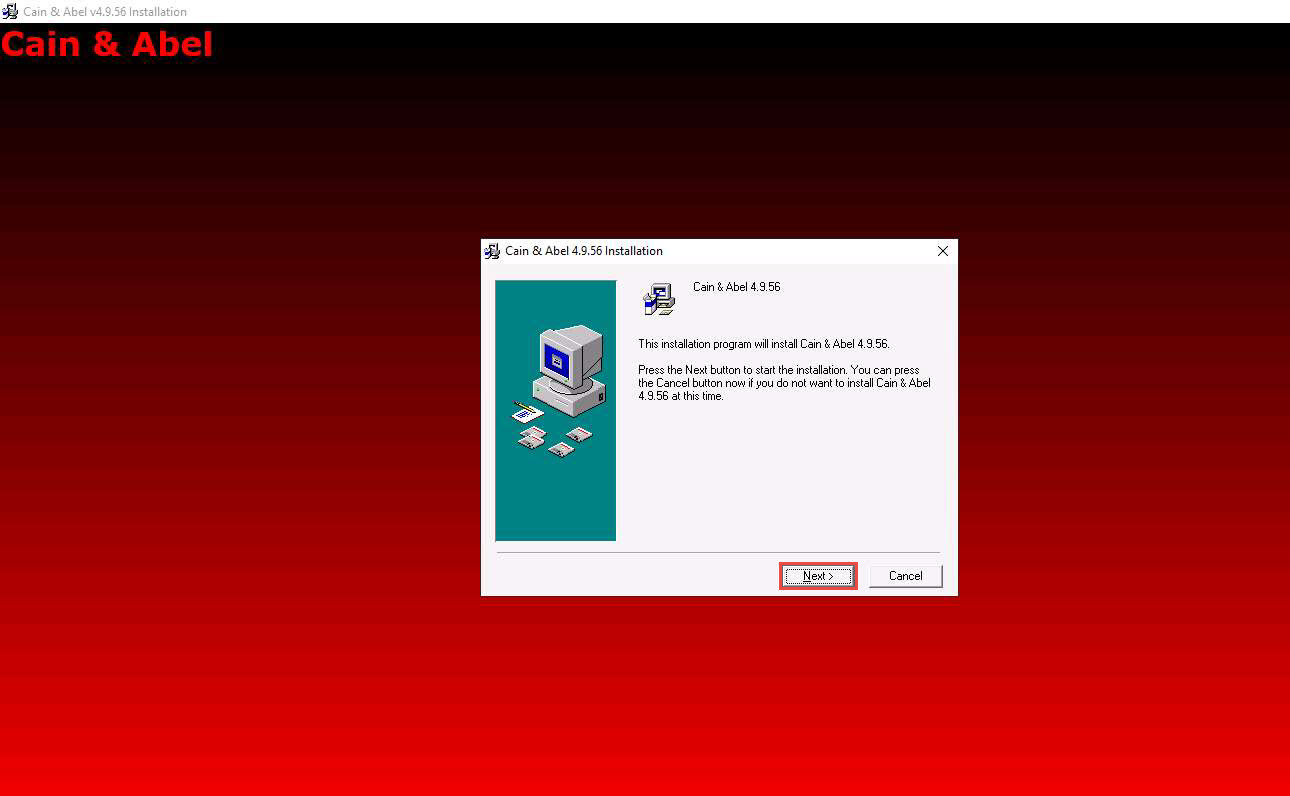
Follow the wizard-driven installation steps to install Cain & Abel.
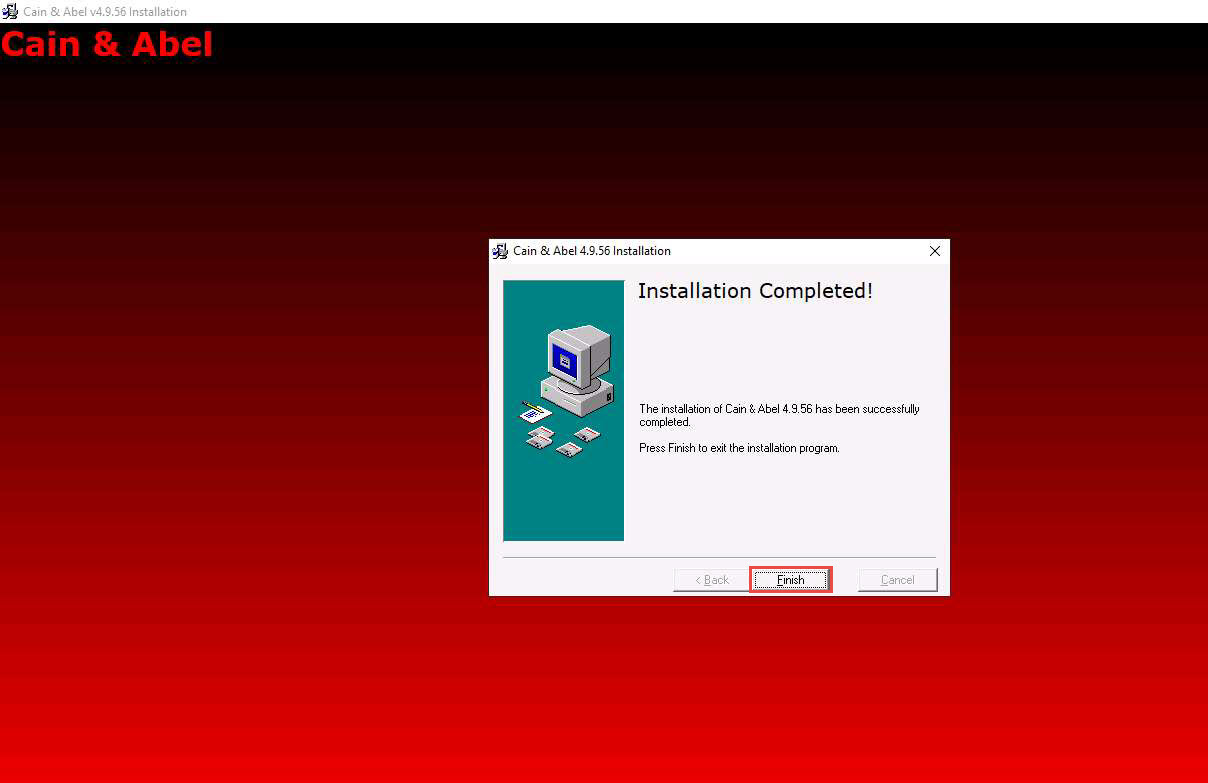
After completing the installation, the Installation Completed! message appears; click Finish.
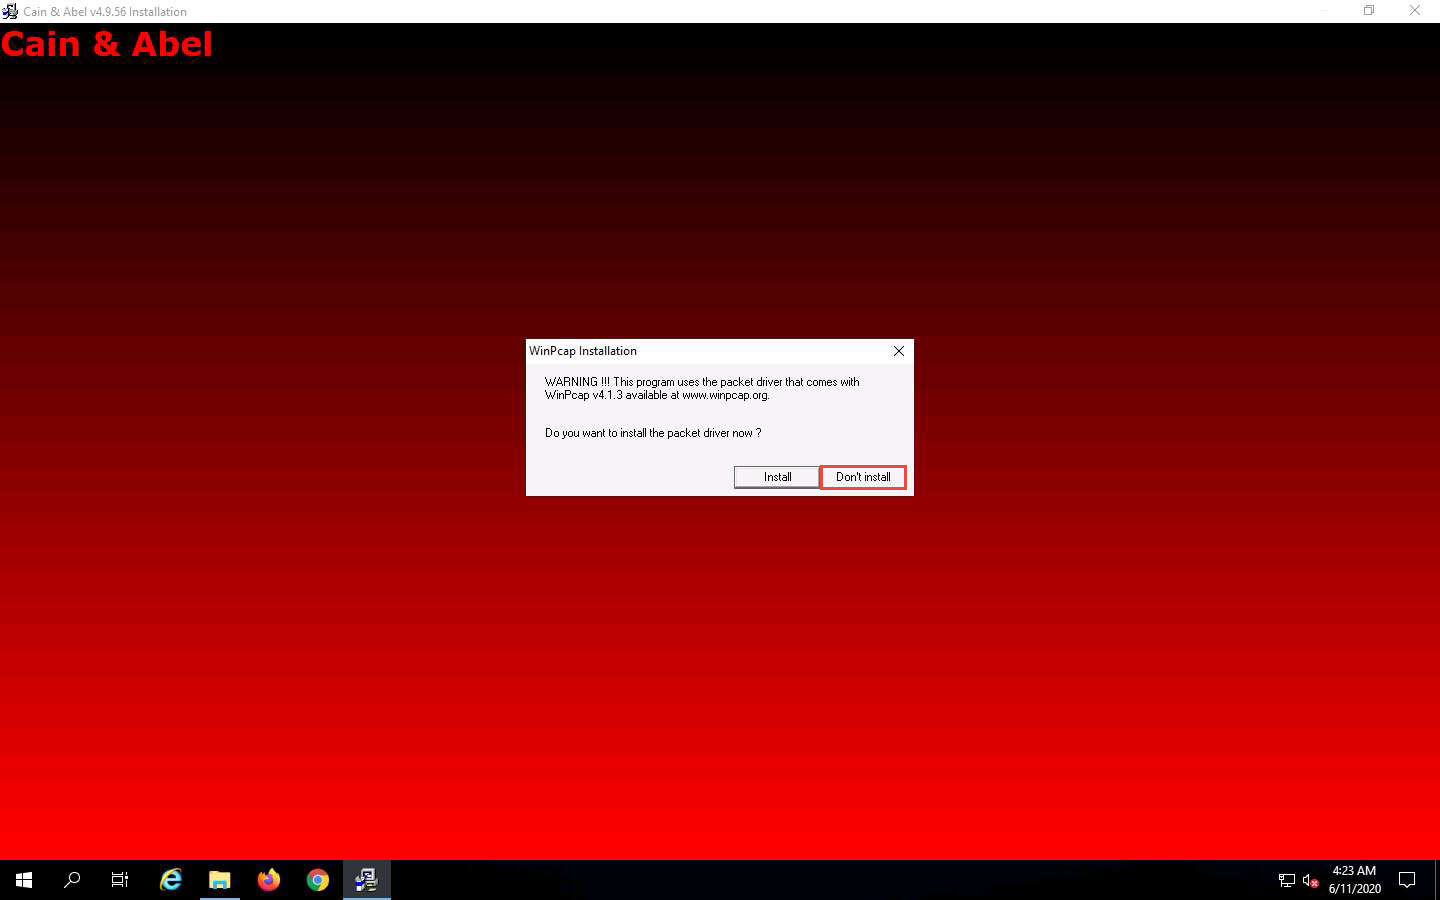
The WinPcap Installation pop-up appears; click Don’t install, as you already installed it during the lab setup.
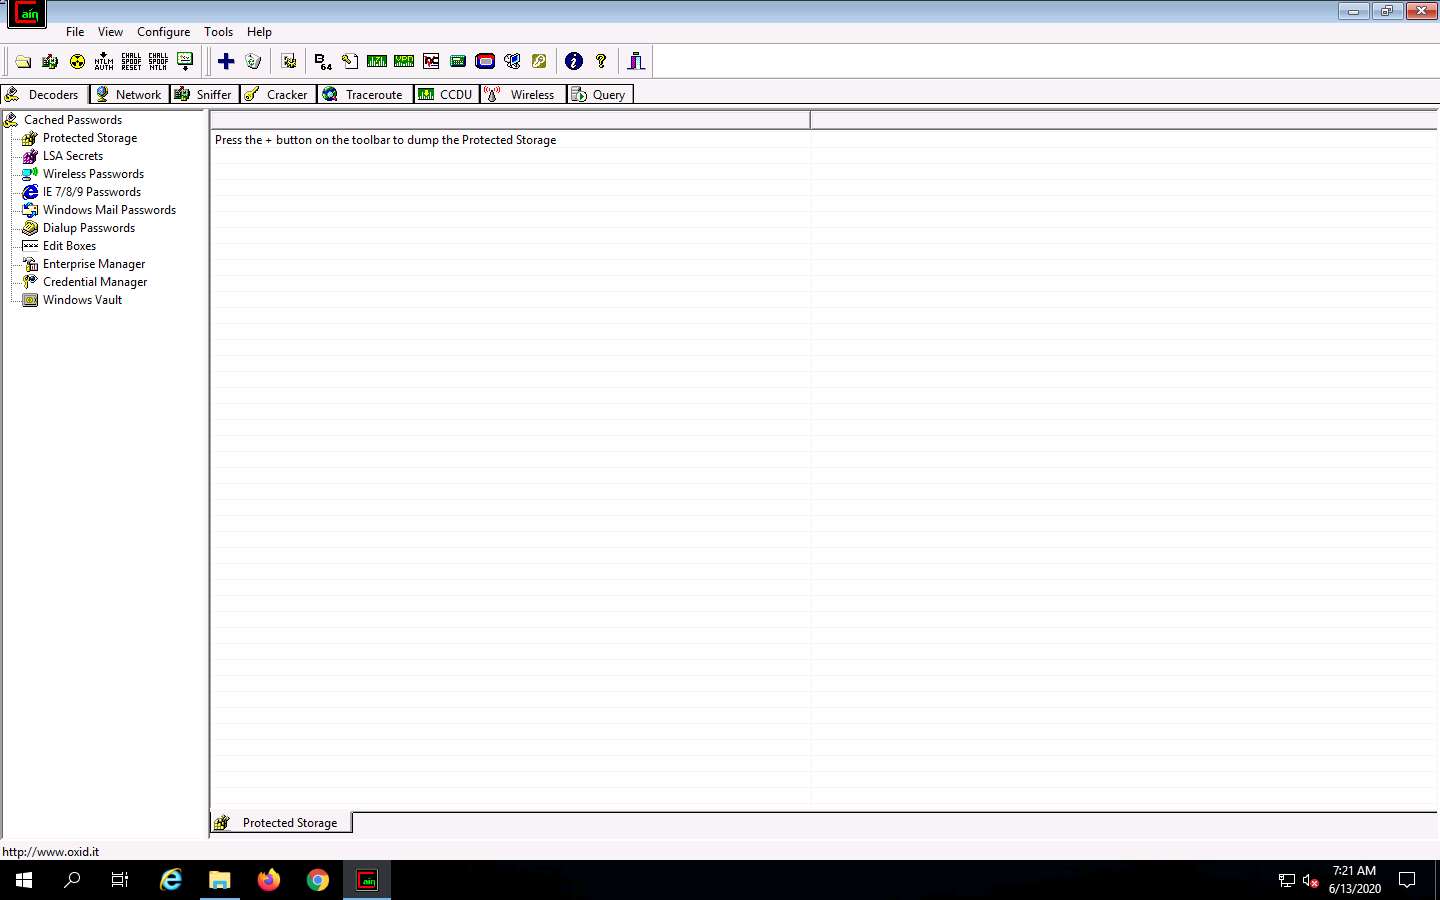
Now, double-click the Cain shortcut on Desktop to launch Cain & Abel.
The Cain & Abel main window appears, as shown in the screenshot.
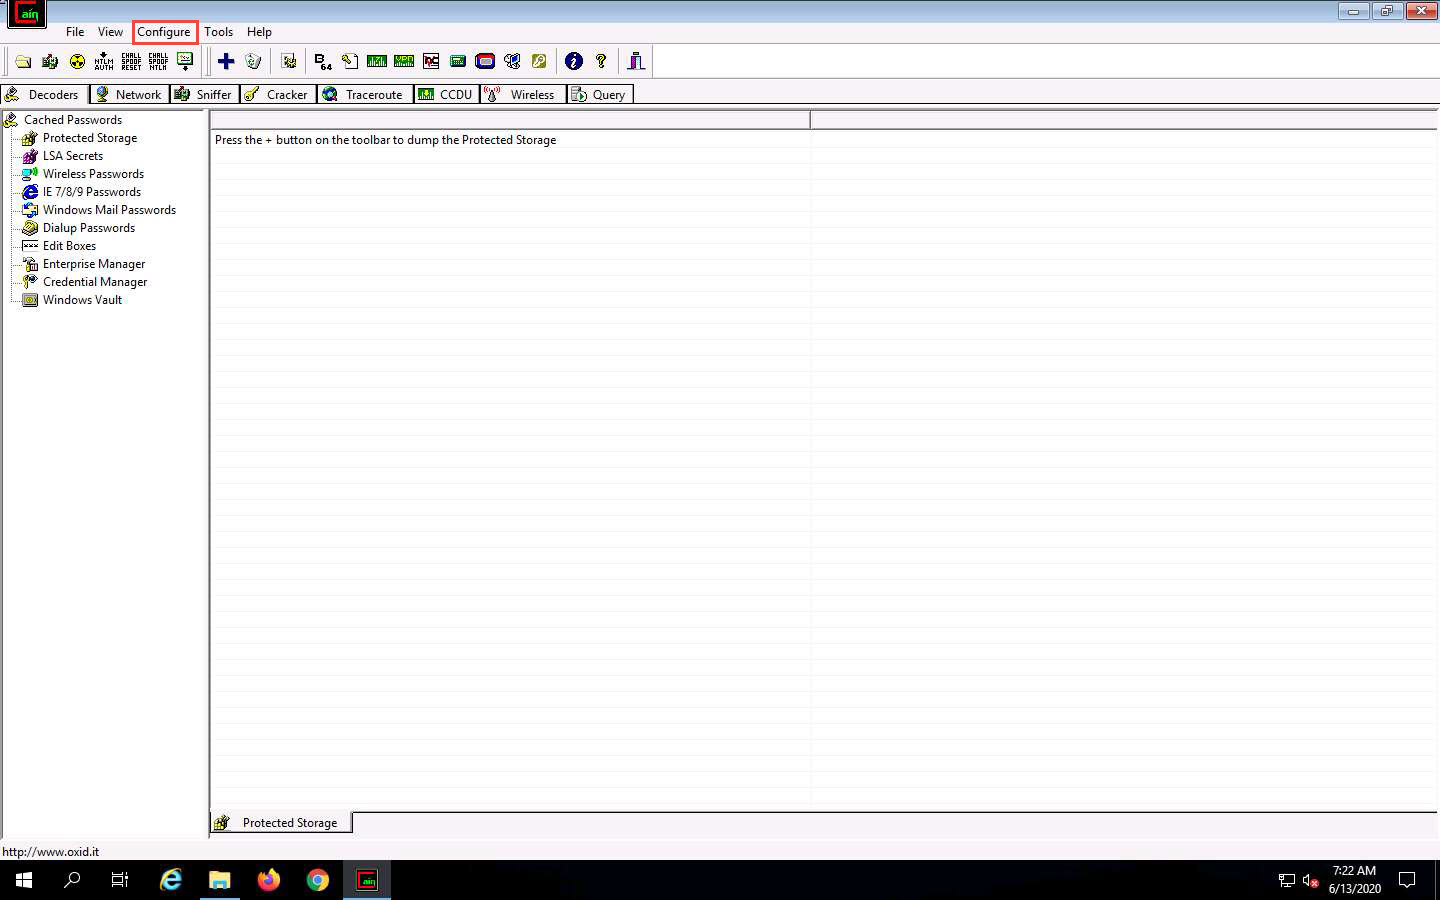
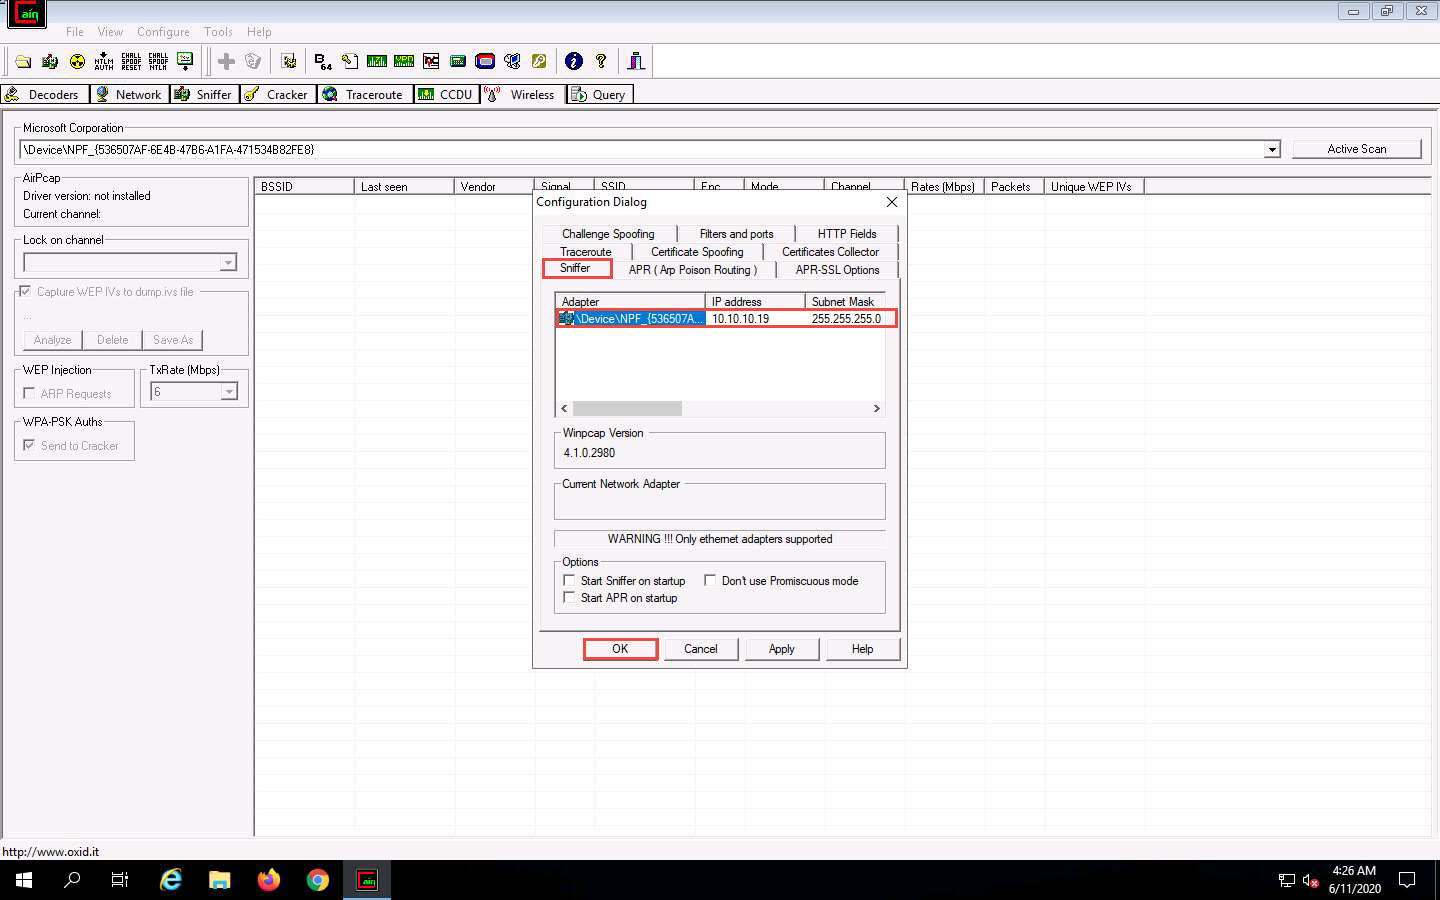
Click Configure from the menu bar to configure an ethernet card.
The Configuration Dialog window appears. By default, the Sniffer tab is selected. Ensure that the Adapter associated with the IP address of the machine is selected; then, click OK.
Click the Start/Stop Sniffer icon on the toolbar to begin sniffing.
A Cain pop-up appears and displays a Warning message; click OK.
Now, click the Sniffer tab.

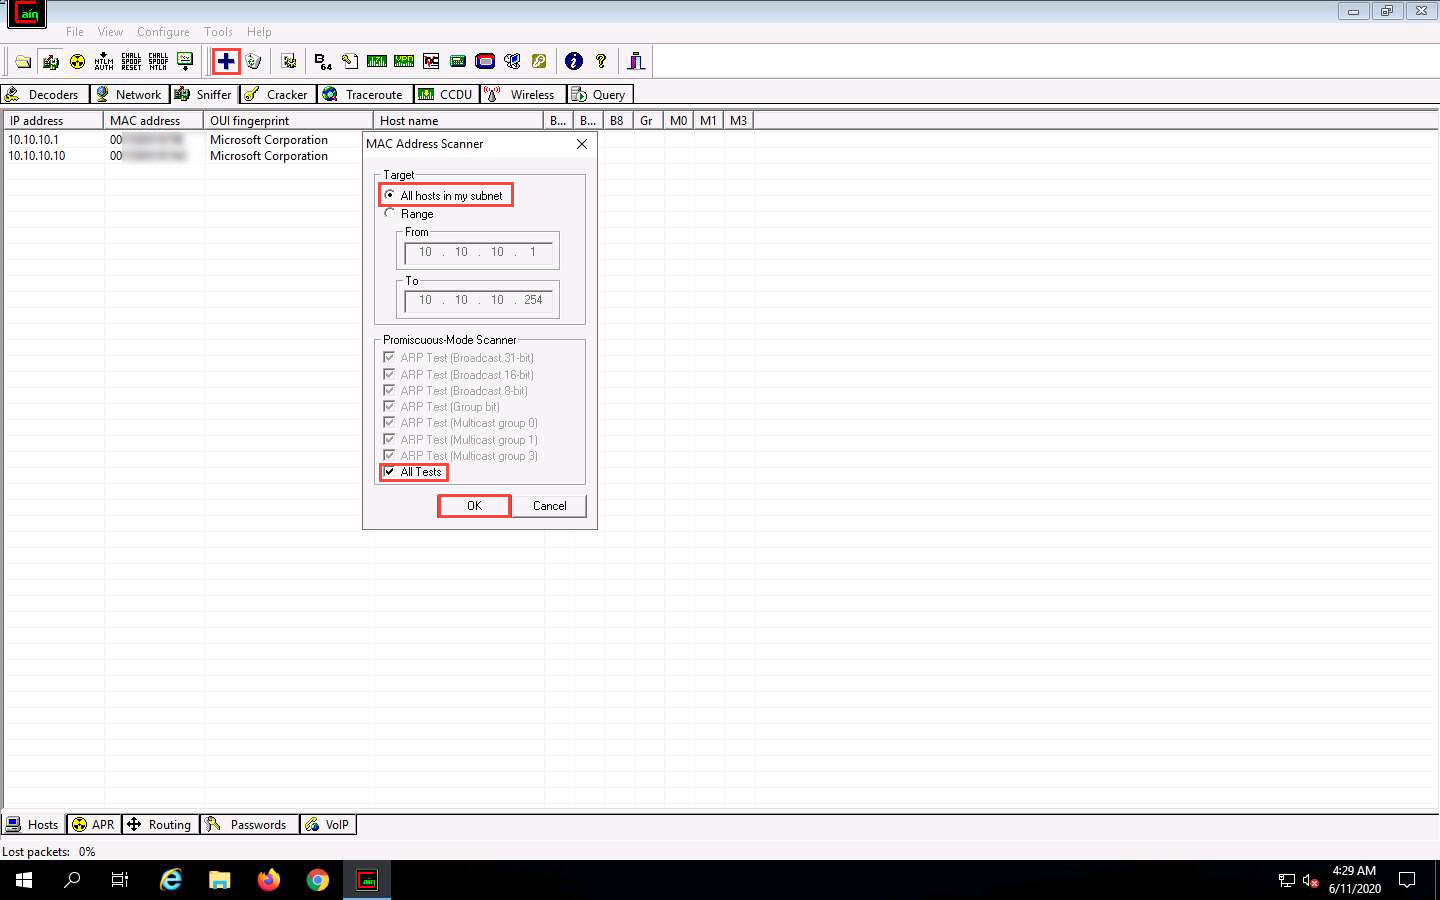
Click the plus (+) icon or right-click in the window and select Scan MAC Addresses to scan the network for hosts.
The MAC Address Scanner window appears. Check the All hosts in my subnet radio button and select the All Tests checkbox; then, click OK.
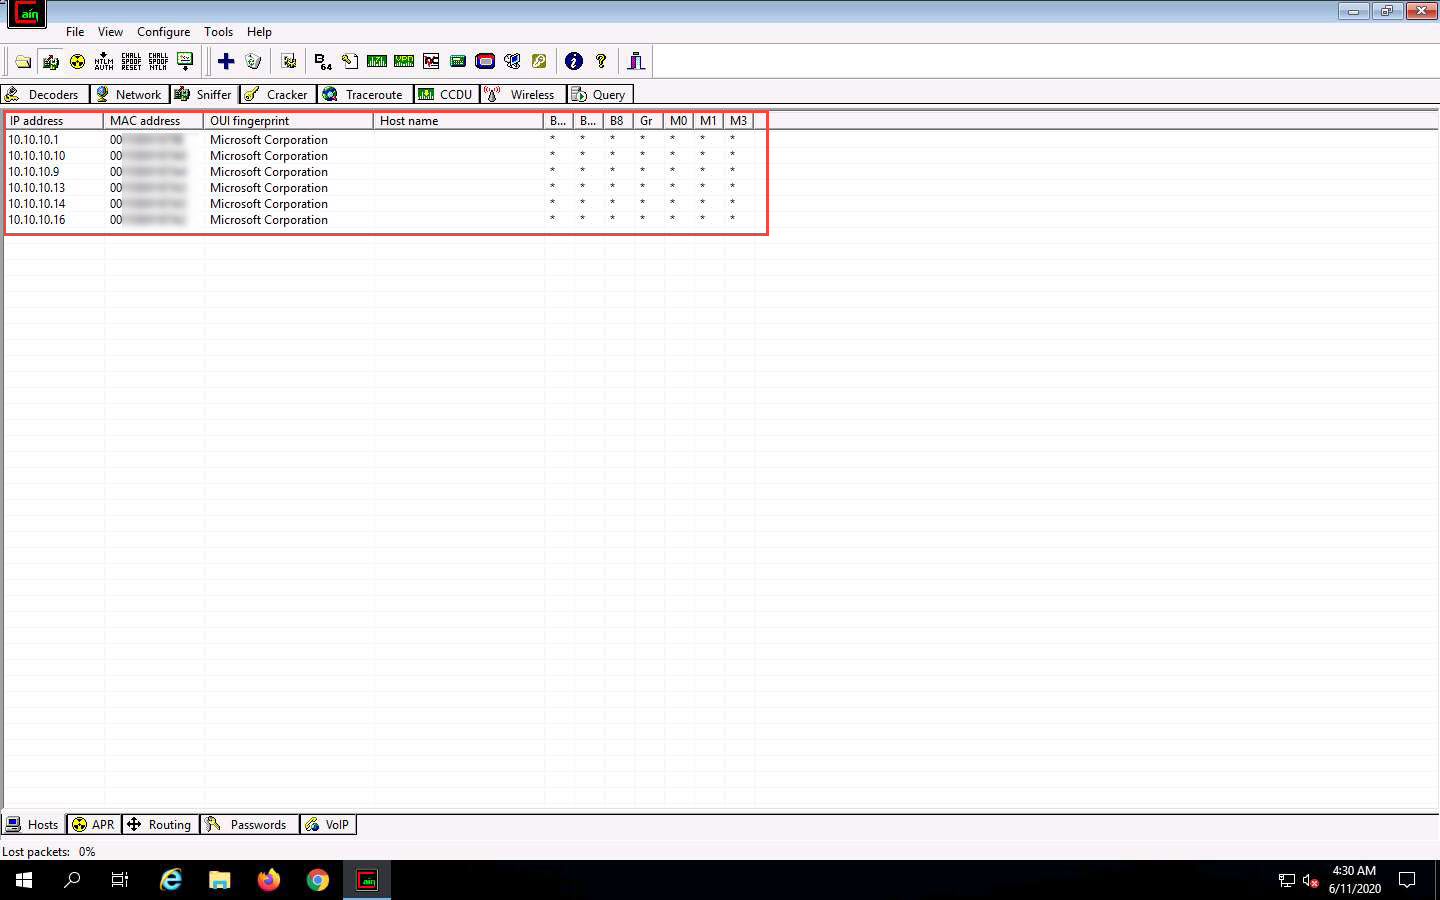
Cain & Abel starts scanning for MAC addresses and lists all those found.
After completing the scan, a list of all active IP addresses along with their corresponding MAC addresses is displayed, as shown in the screenshot.
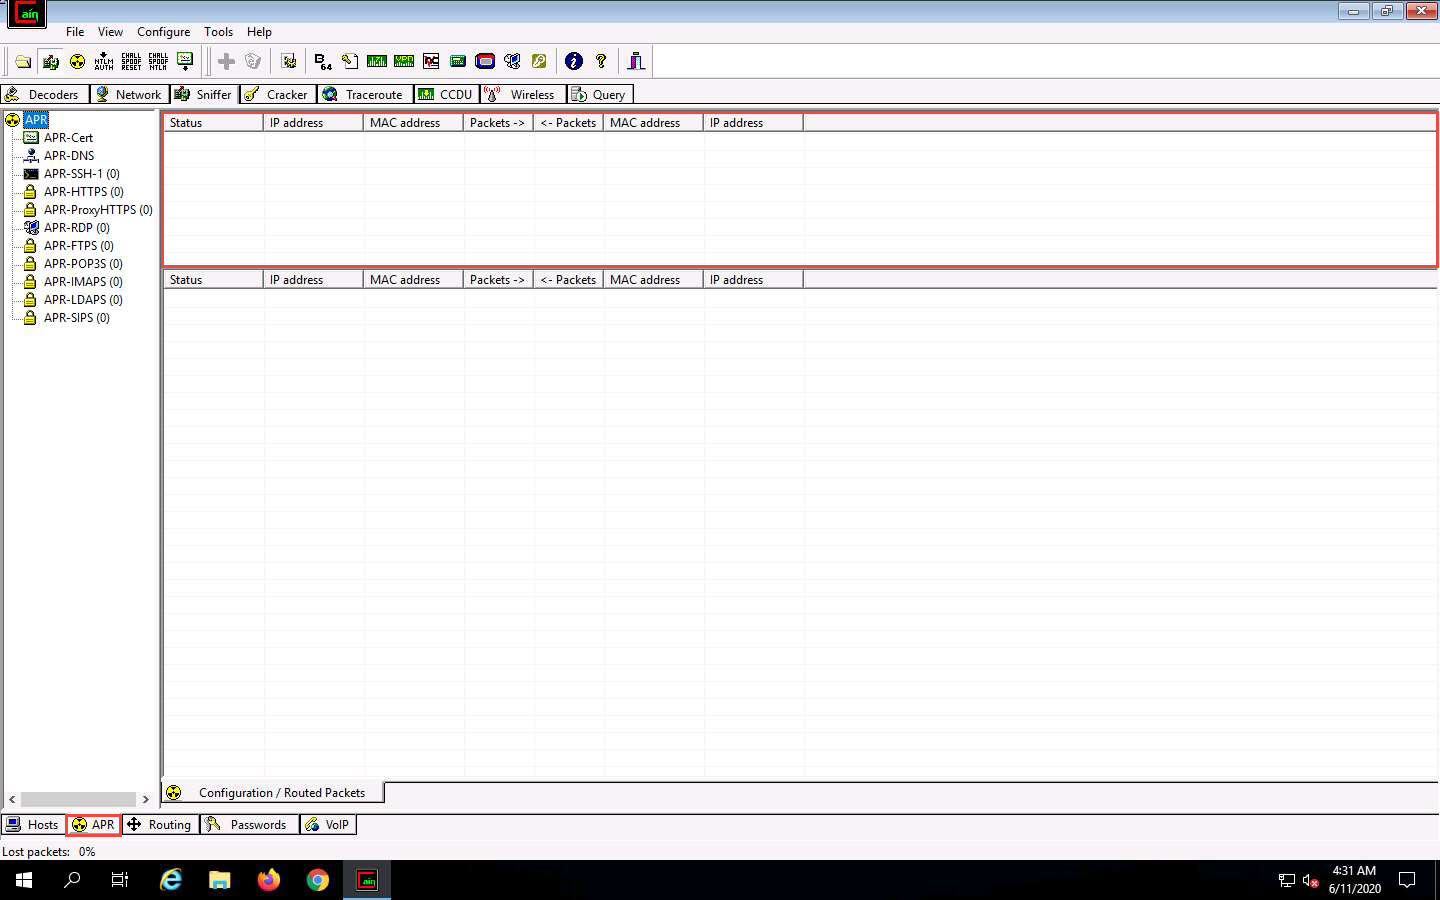
Now, click the APR tab at the bottom of the window.
APR options appear in the left-hand pane. Click anywhere on the topmost section in the right-hand pane to activate the plus (+) icon.
Click the plus (+) icon, a New ARP Poison Routing window appears, from which we can add IPs to listen to traffic.
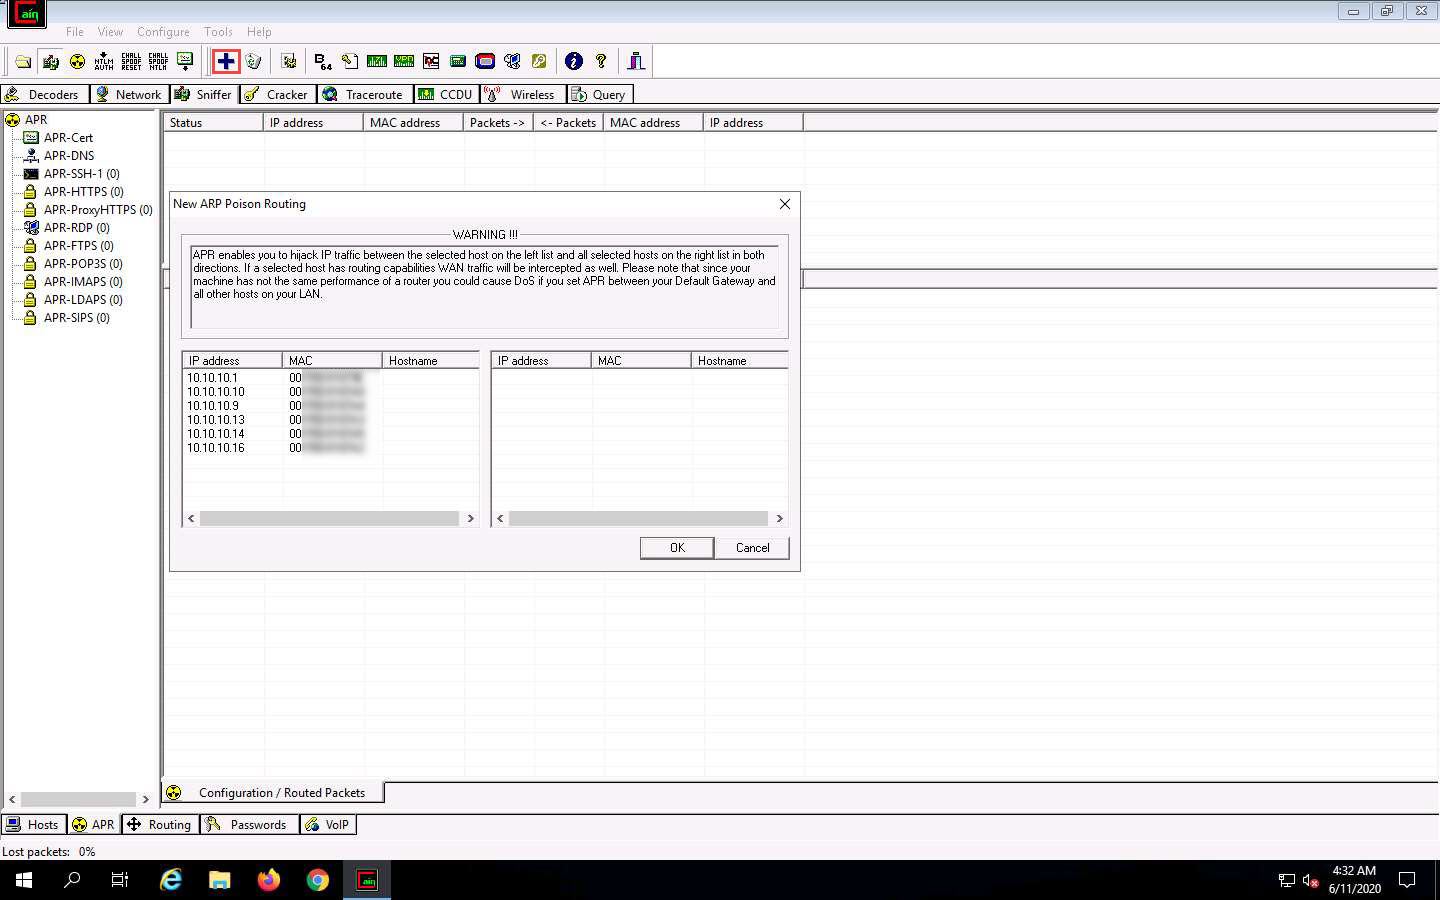
To monitor the traffic between two systems (here, Windows 10 and Windows Server 2016), click to select 10.10.10.10 (Windows 10) from the left-hand pane and 10.10.10.16 (Windows Server 2016) from the right-hand pane; click OK.

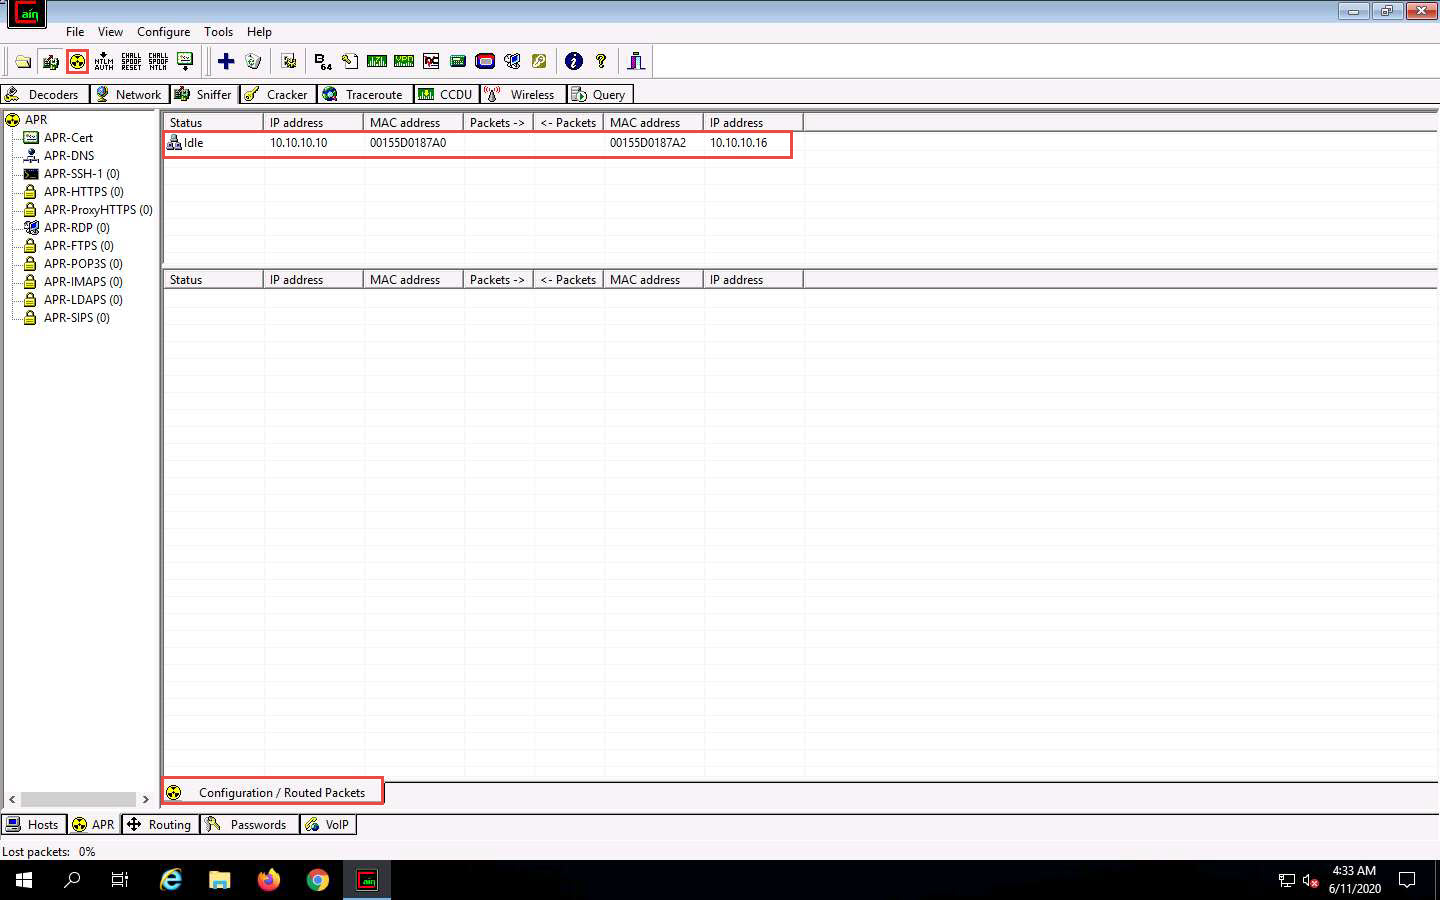
Click to select the created target IP address scan displayed in the Configuration / Routes Packets tab.
Click on the Start/Stop APR icon to start capturing ARP packets.
Click Windows Server 2016 to switch to the Windows Server 2016 machine, click Ctrl+Alt+Delete. By default, CEH\Administration user profile is selected, click Pa$$w0rd to paste the password in the Password field and press Enter to login.
Right-click on the Start icon in the bottom-left corner of Desktop to launch Command Prompt.

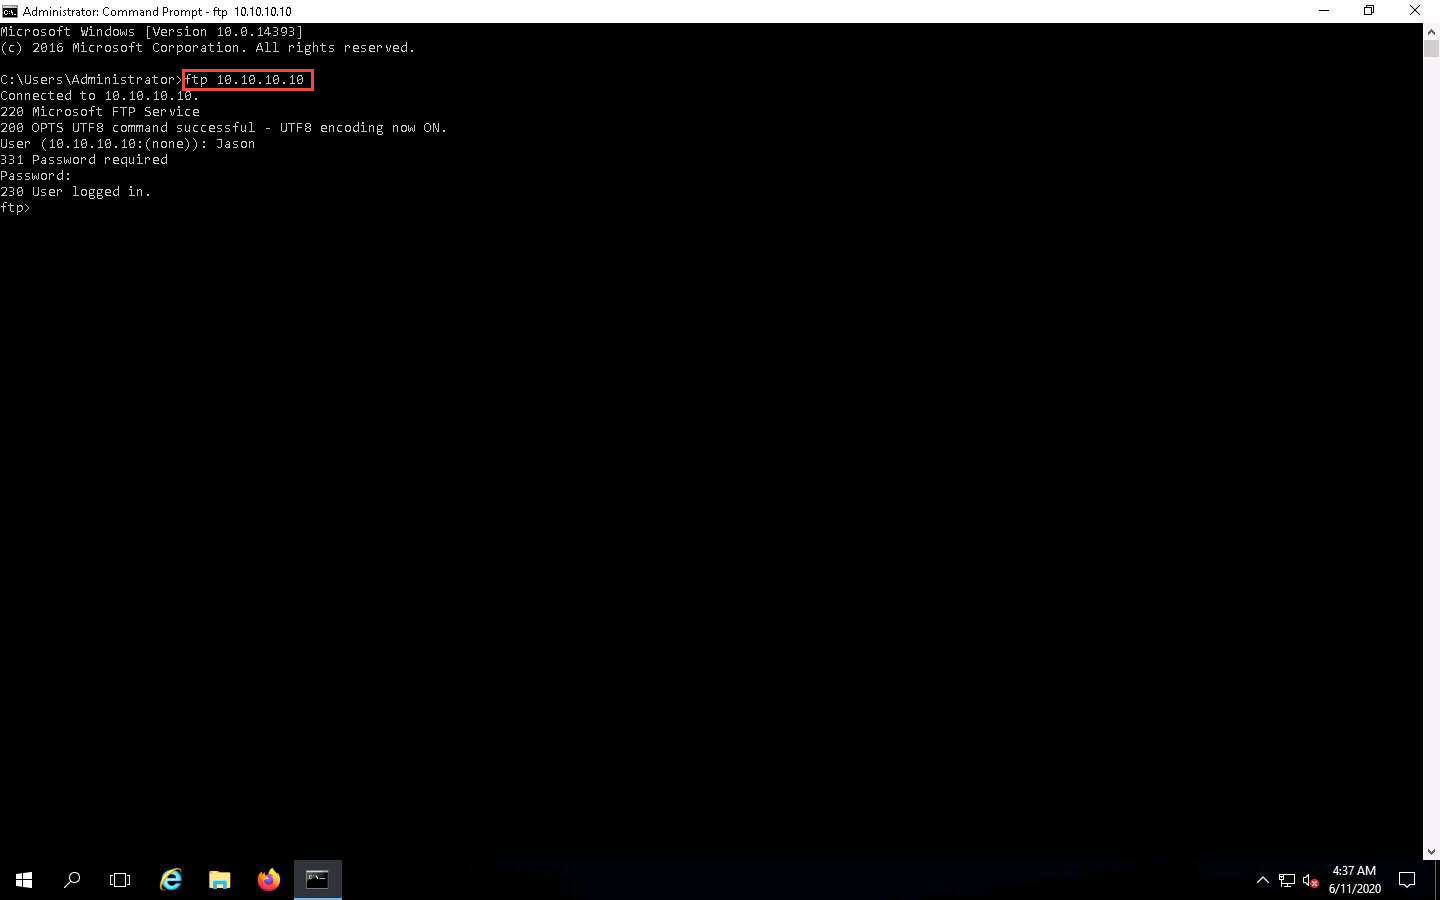
The Command Prompt window appears; type ftp 10.10.10.10 (the IP address of Windows 10) and press Enter.
When prompted for a User, type “Jason” and press Enter; for a Password, type “qwerty” and press Enter.
Irrespective of a successful login, Cain & Abel captures the password entered during login.
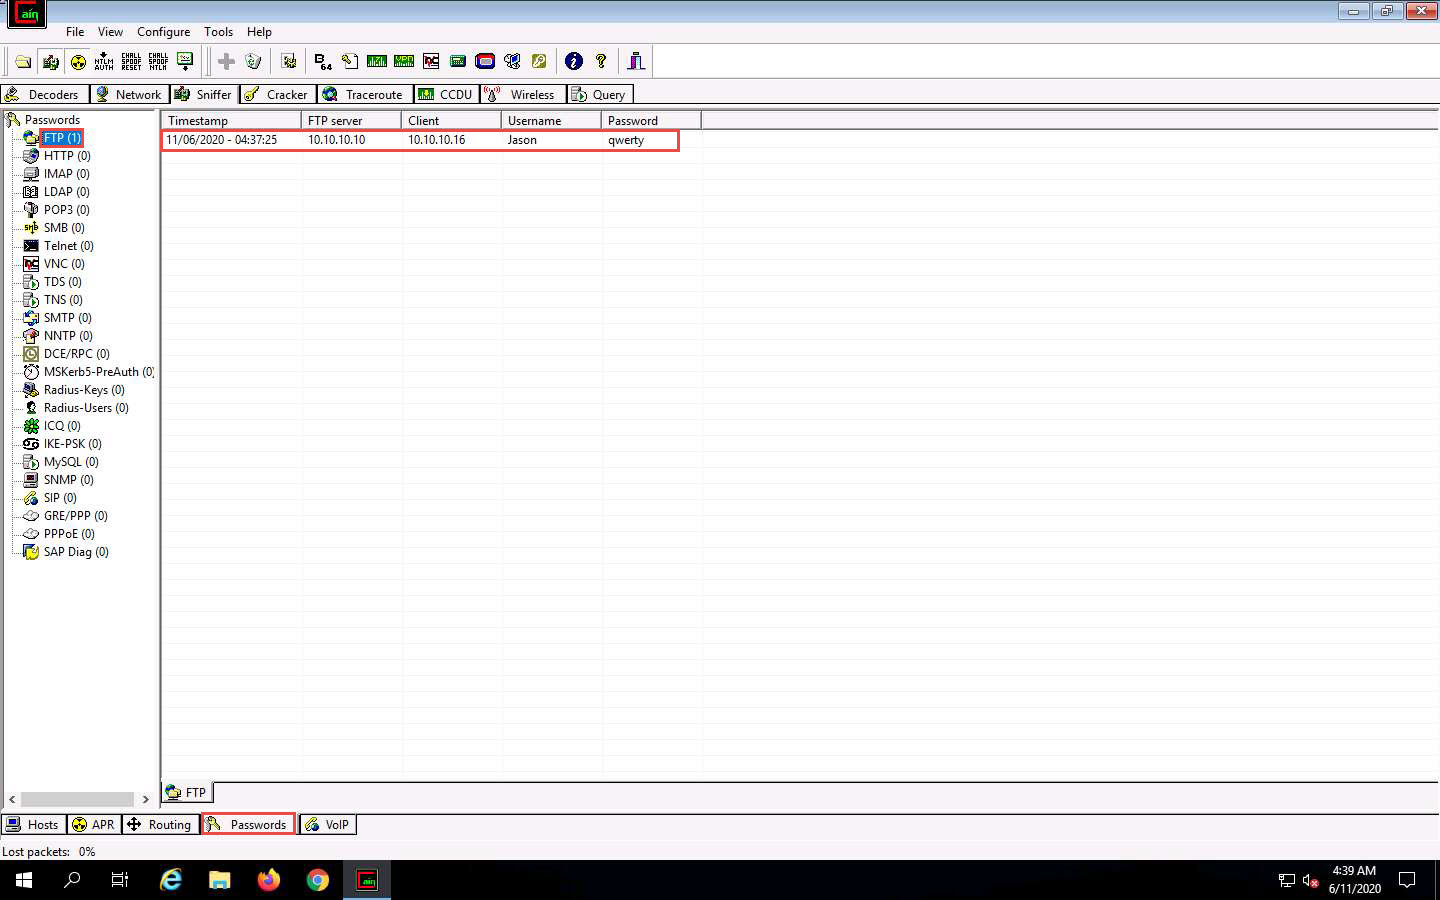
Click Windows Server 2019 to switch back to the Windows Server 2019 machine; observe that the tool lists packet exchange.

Click the Passwords tab from the bottom of the window. Click FTP from the left-hand pane to view the sniffed password for ftp 10.10.10.10, as shown in the screenshot.
In real-time, attackers use the ARP poisoning technique to perform sniffing on the target network. Using this method, attackers can steal sensitive information, prevent network and web access, and perform DoS and MITM attacks.
This concludes the demonstration of how to perform an MITM attack using Cain & Abel.
Close all open windows and document all the acquired information.
Task 5: Spoof a MAC Address using TMAC and SMAC
A MAC duplicating or spoofing attack involves sniffing a network for the MAC addresses of legitimate clients connected to the network. In this attack, the attacker first retrieves the MAC addresses of clients who are actively associated with the switch port. Then, the attacker spoofs their own MAC address with the MAC address of the legitimate client. Once the spoofing is successful, the attacker receives all traffic destined for the client. Thus, an attacker can gain access to the network and take over the identity of a network user.
If an administrator does not have adequate packet-sniffing skills, it is hard to defend against such intrusions. So, an expert ethical hacker and pen tester must know how to spoof MAC addresses, sniff network packets, and perform ARP poisoning, network spoofing, and DNS poisoning. This lab demonstrates how to spoof a MAC address to remain unknown to an attacker.
Here, we will use TMAC and SMAC tools to perform MAC spoofing.
Click Windows 10 to switch to the Windows 10 machine; navigate to D:\CEH-Tools\CEHv11 Module 08 Sniffing\MAC Spoofing Tools\Technitium MAC Address Changer (TMAC) and double-click TMACv6.0.7_Setup.exe.
If a User Account Control pop-up appears, click Yes.
The Technitium MAC Address Changer installation window appears; click Next.

Follow the wizard-driven installation steps and install TMAC with default settings.
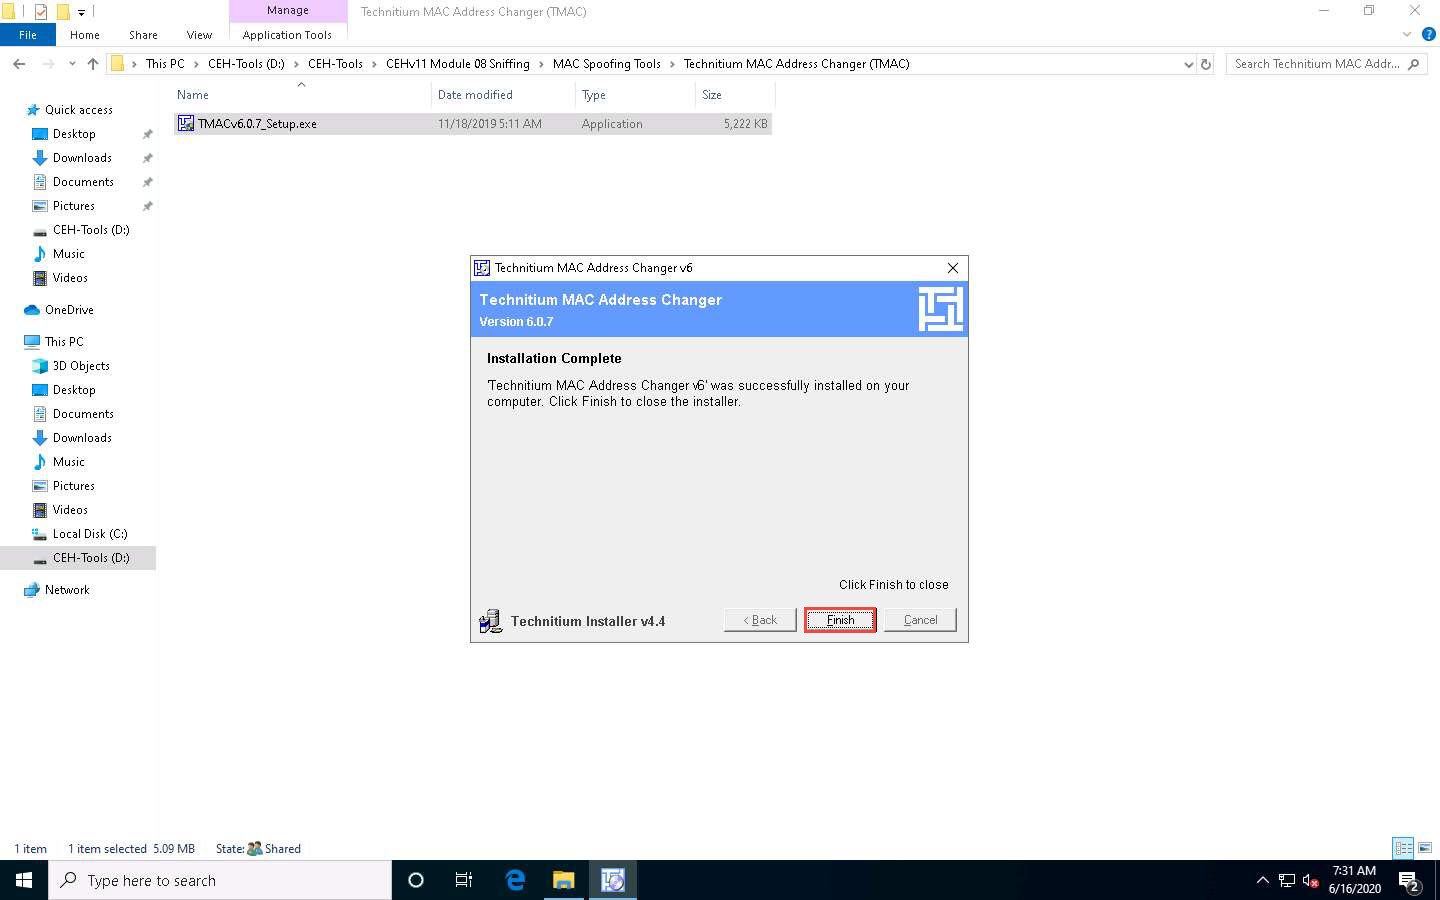
After completing the installation, the Installation Complete window appears in the wizard; click Finish.
Double-click the TMAC shortcut on Desktop to launch the TMAC application.
If a User Account Control pop-up appears, click Yes.
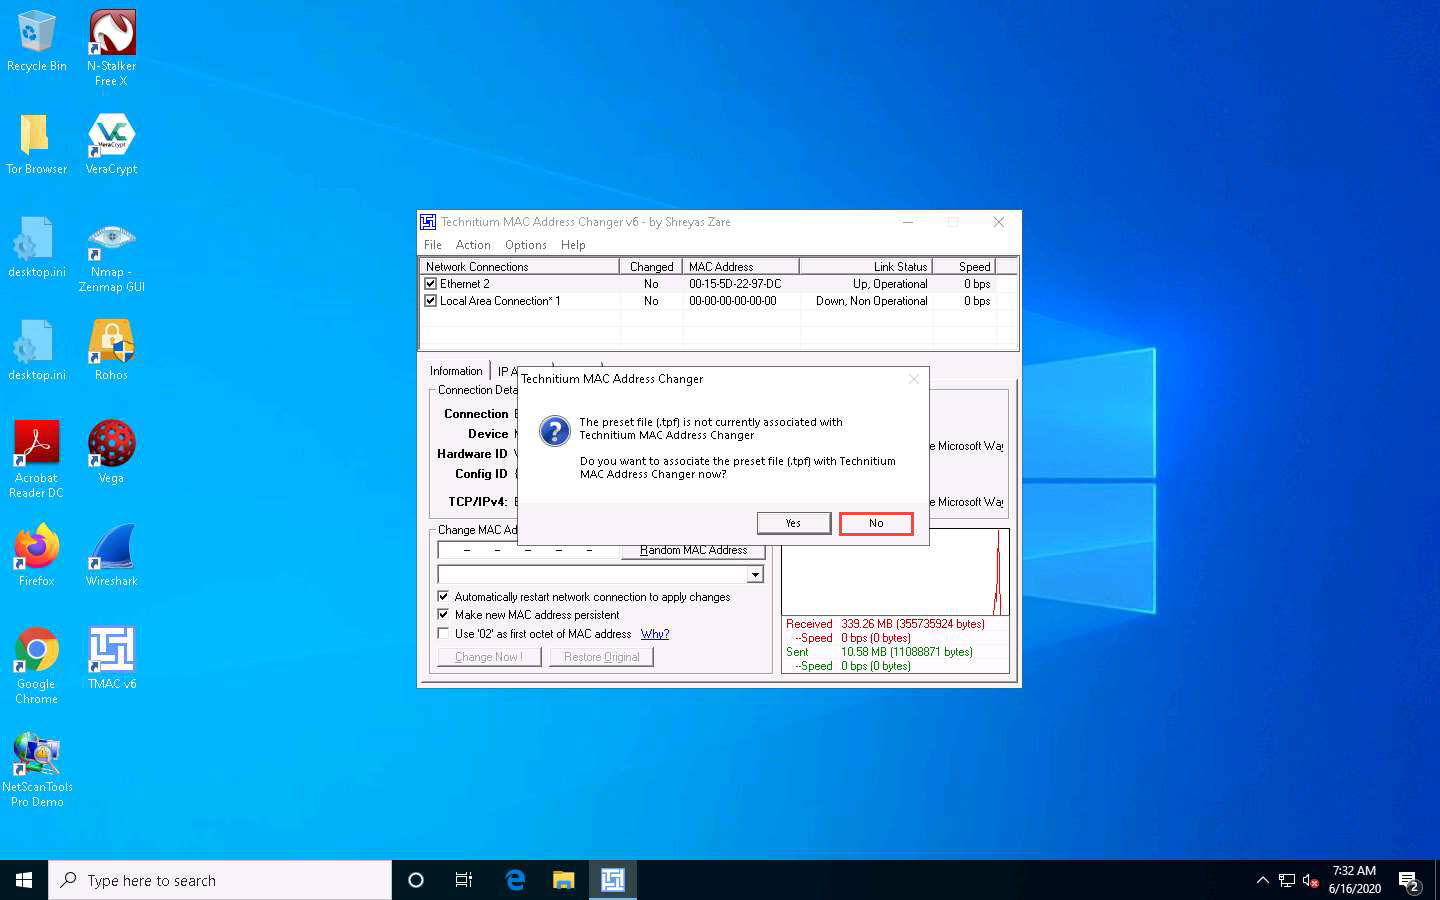
The Technitium MAC Address Changer main window appears. In the Technitium MAC Address Changer pop-up, click No.
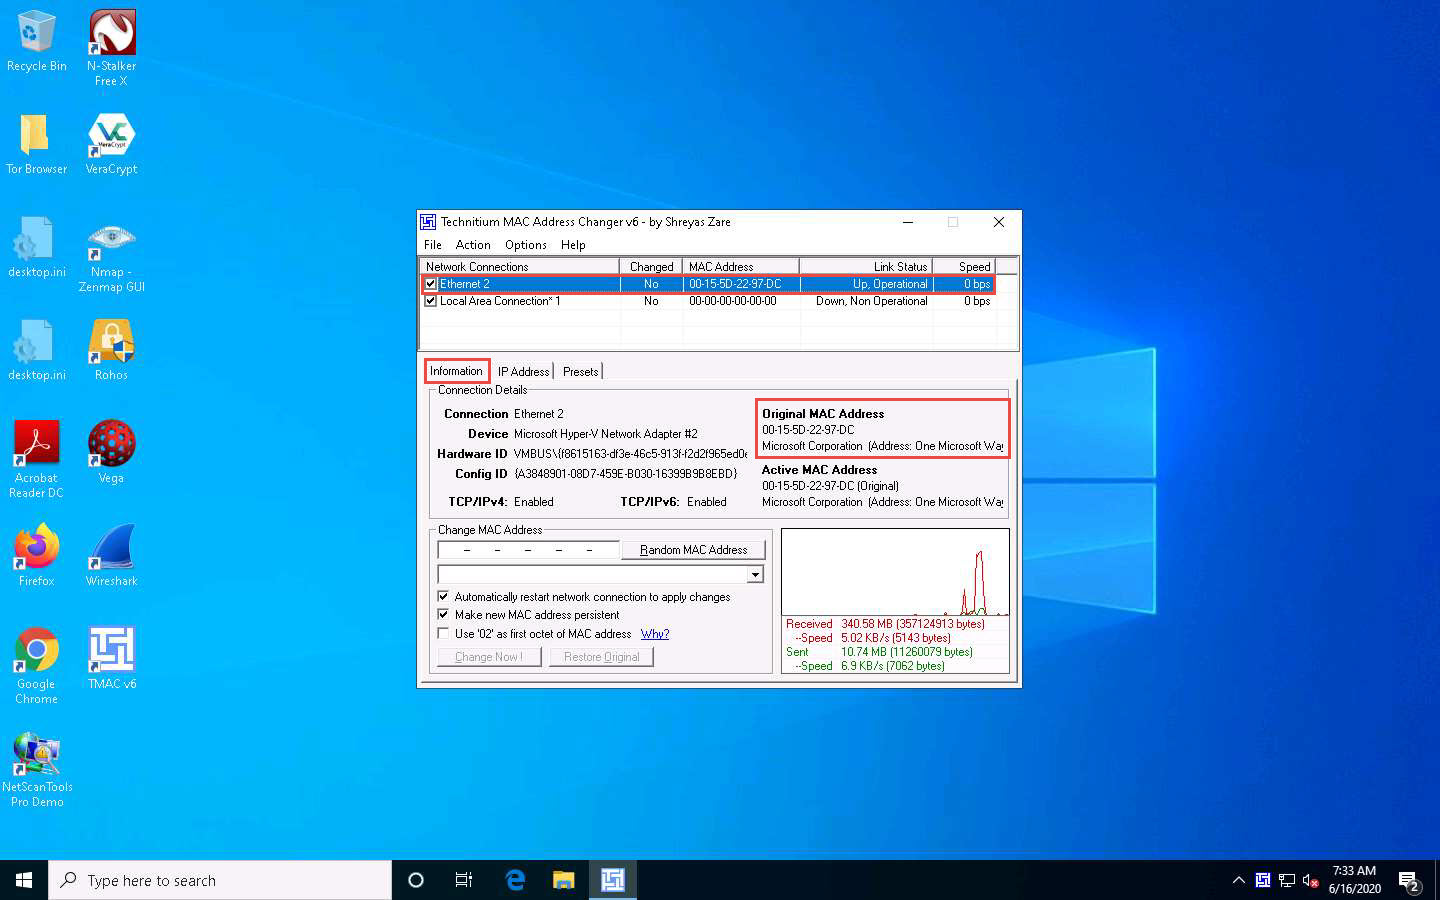
In the TMAC main window, choose the network adapter of the target machine, whose MAC address is to be spoofed (here, Ethernet2).
Under the Information tab, note the Original MAC Address of the network adapter, as shown in the screenshot.
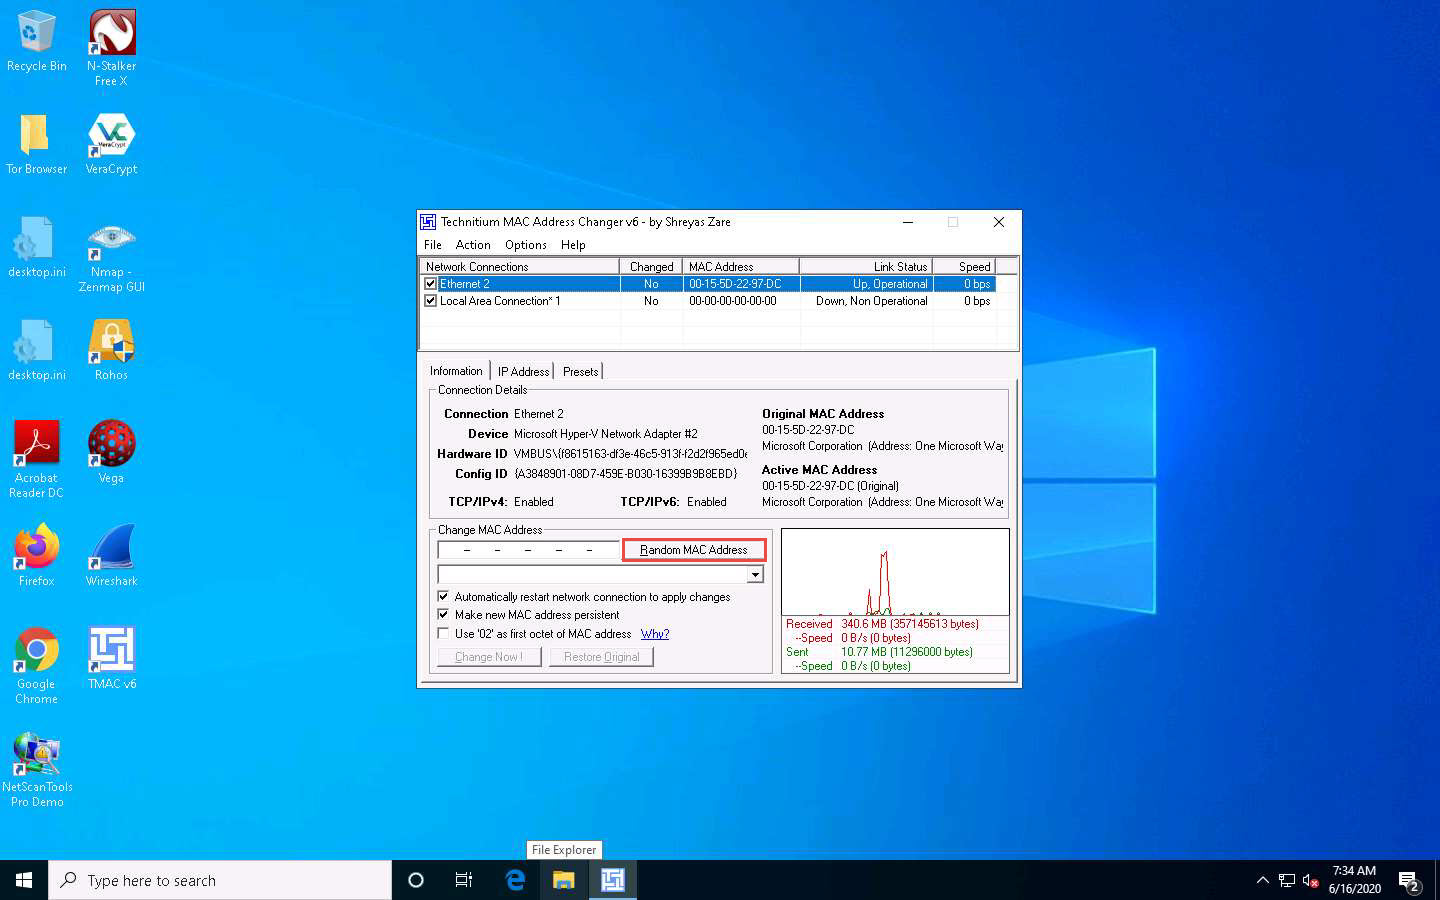
Click the Random MAC Address button under the Change MAC Address option to generate a random MAC address for the network adapter.
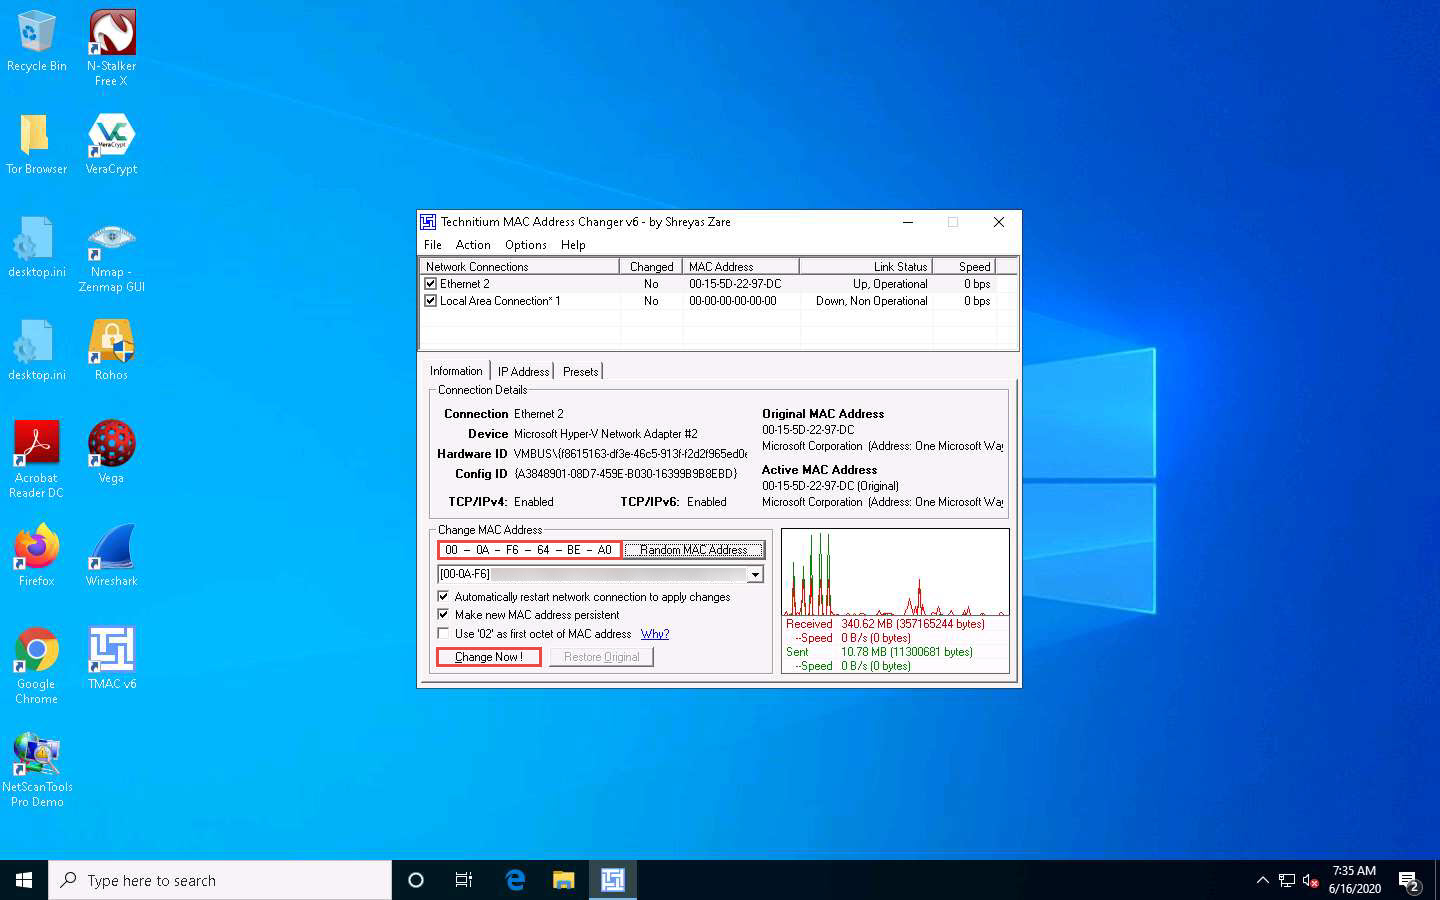
A Random MAC Address is generated and appears under the Change MAC Address field. Click the Change Now ! button to change the MAC address.
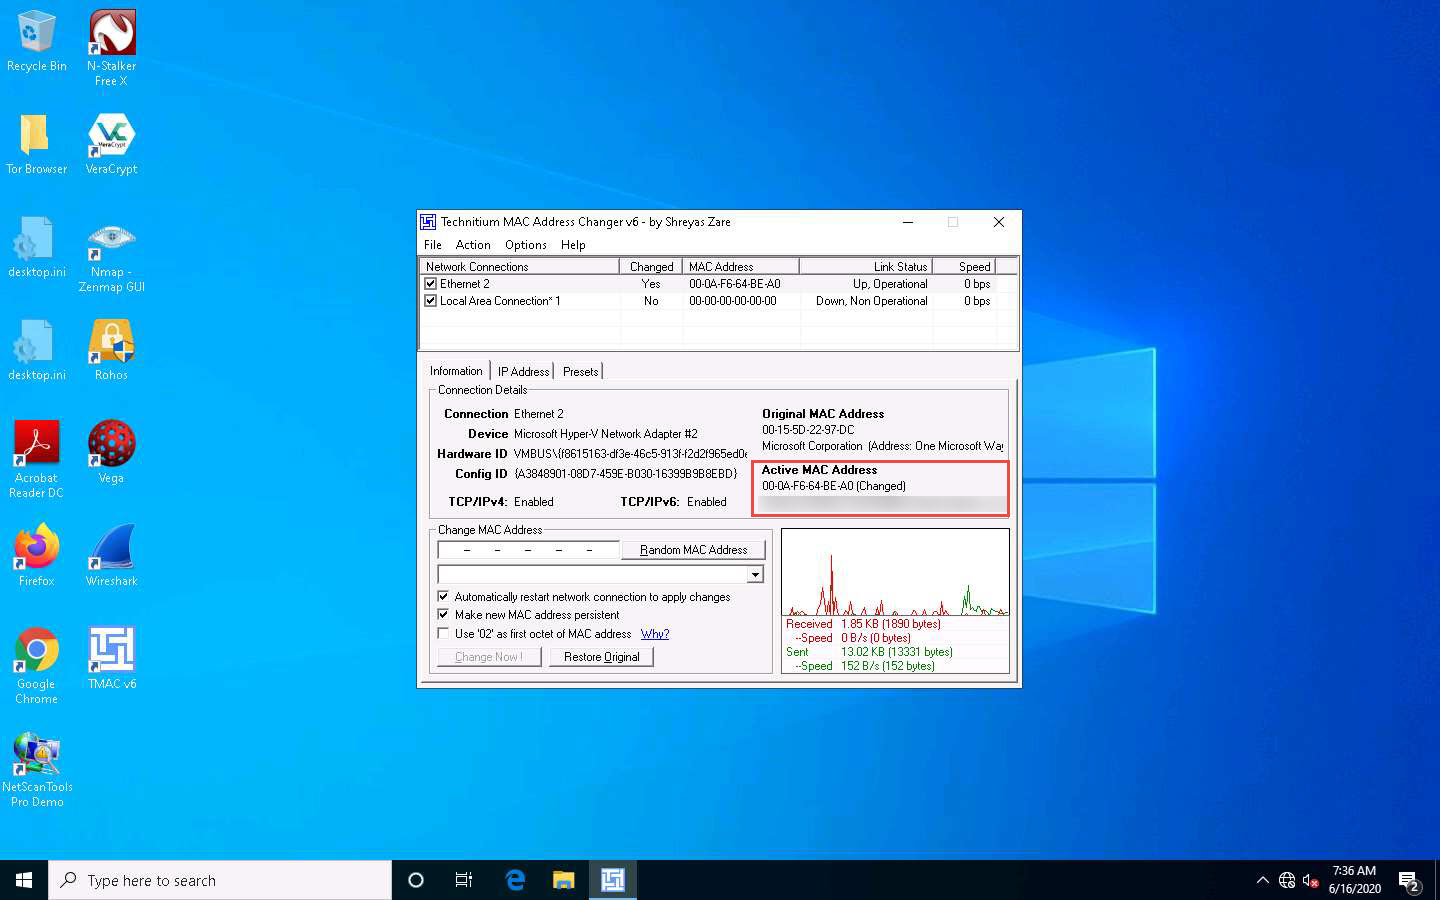
The MAC Address Changed Successfully pop-up appears; click Ok.
Observe that the newly generated random MAC address appears under the Active MAC Address section, as shown in the screenshot.
To restore the original MAC address, you can click on the Restore Original button present at the bottom of the TMAC window.
The MAC Address Restored Successfully pop-up appears; click OK.
Close the TMAC main window.
Now, we shall perform MAC spoofing using the SMAC tool.
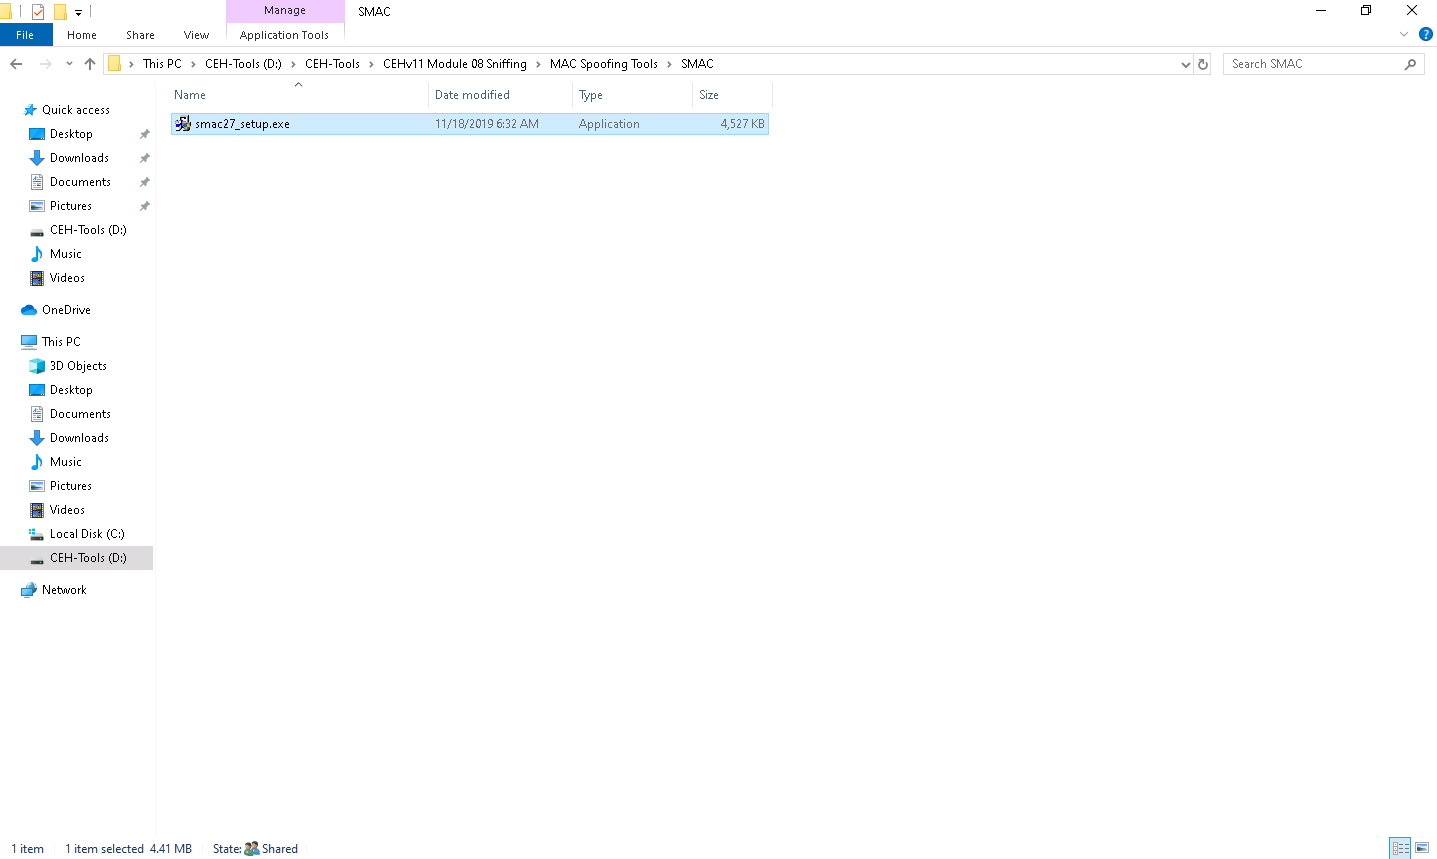
Navigate to D:\CEH-Tools\CEHv11 Module 08 Sniffing\MAC Spoofing Tools\SMAC and double-click smac27_setup.exe.
If a User Account Control pop-up appears, click Yes.
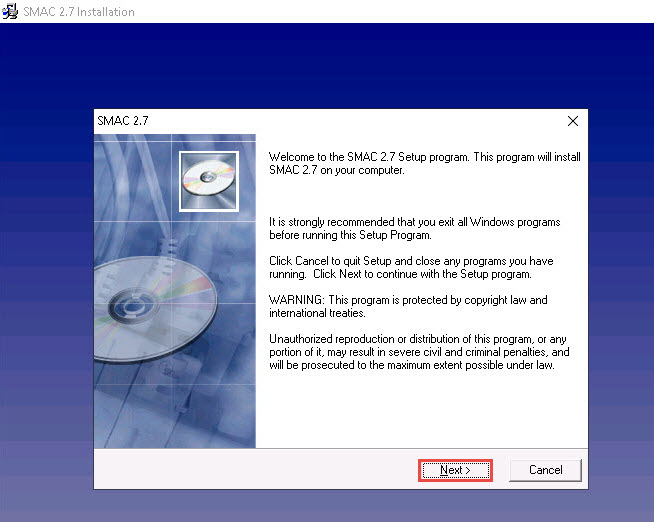
SMAC installation window appears, click Next and follow the wizard-driven installation steps to install SMAC.
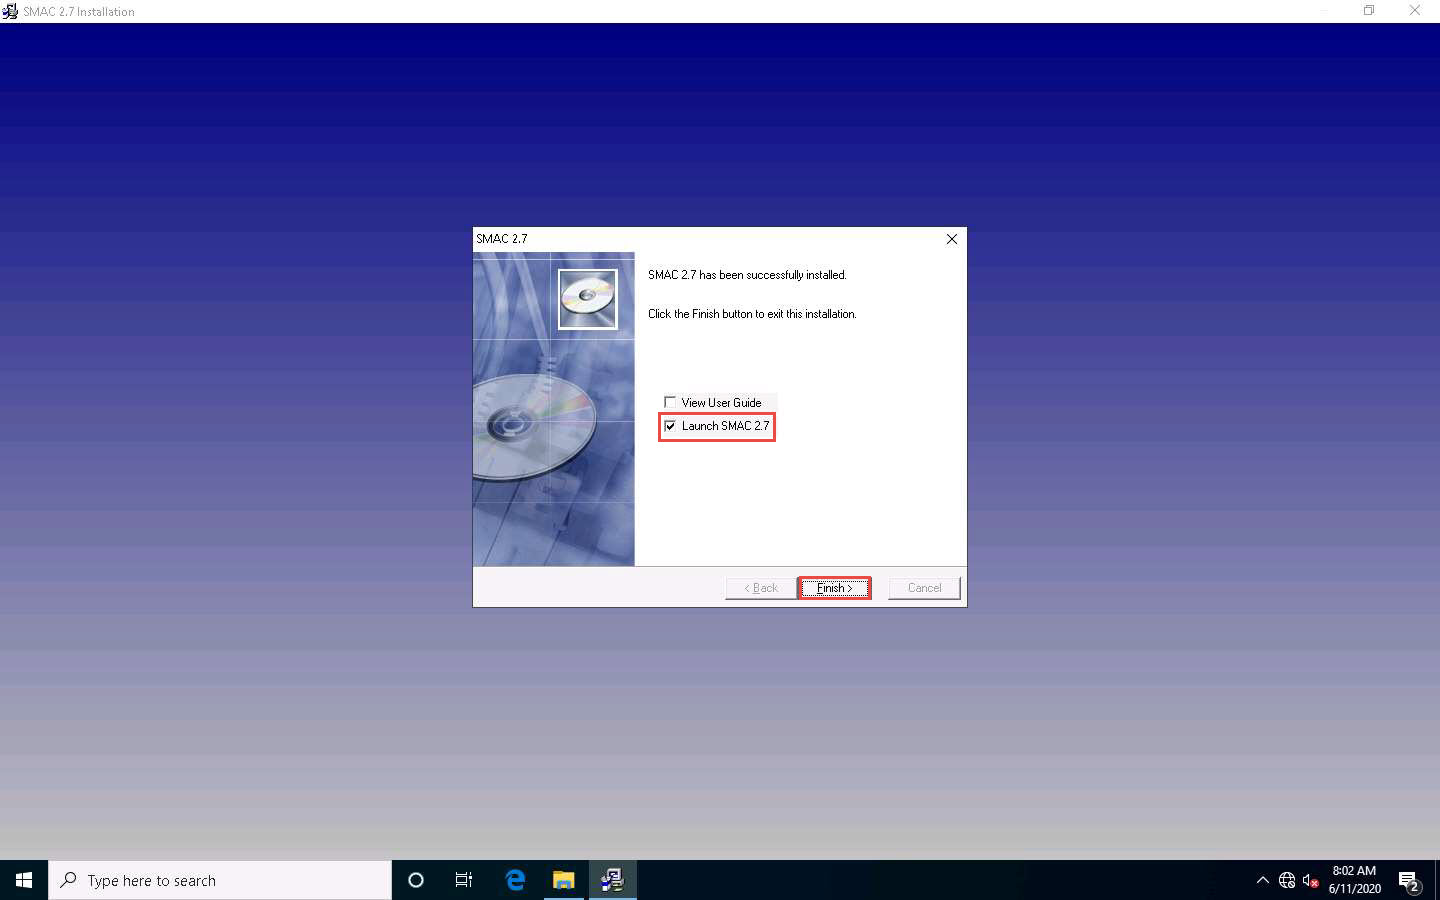
After the completion of the installation, the SMAC has been successfully installed message appears. Ensure that the Launch SMAC checkbox is selected; click Finish.
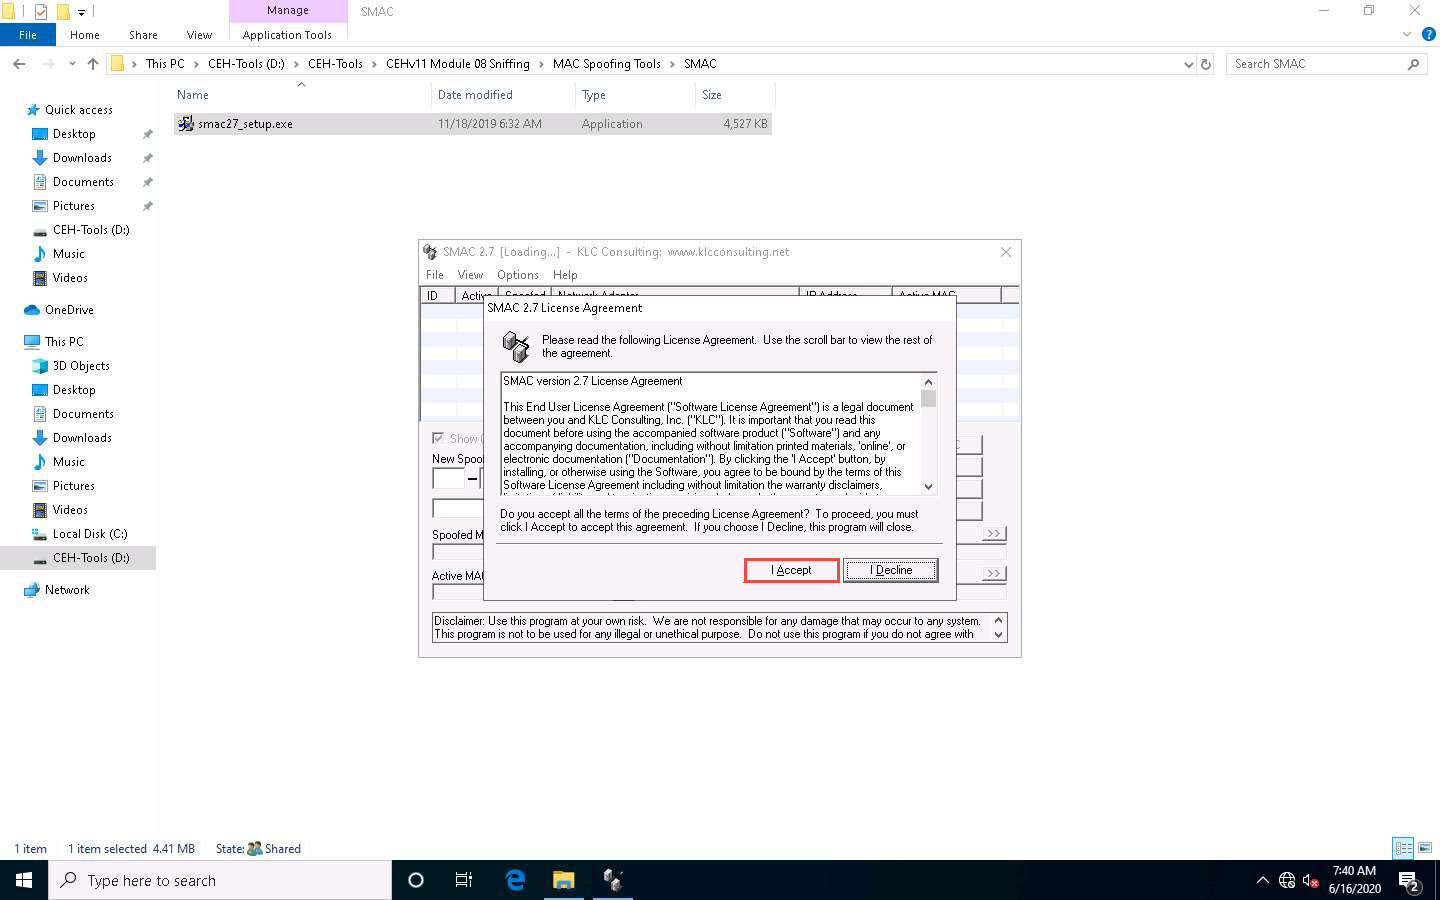
The SMAC main window appears, along with the SMAC License Agreement. Click I Accept to continue.
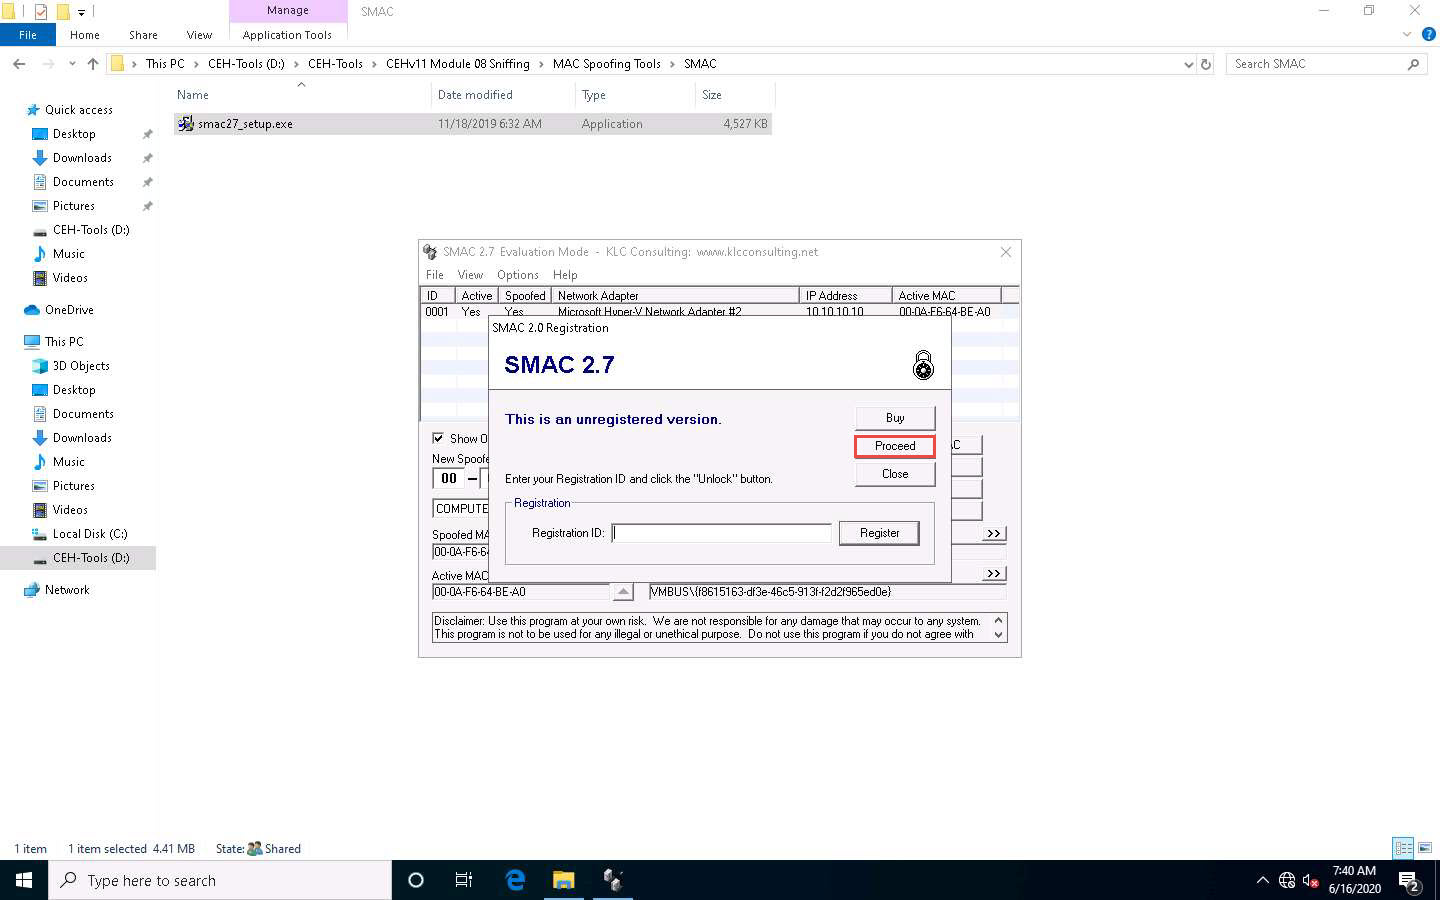
The SMAC Registration window appears; click Proceed to continue with the unregistered version of SMAC.
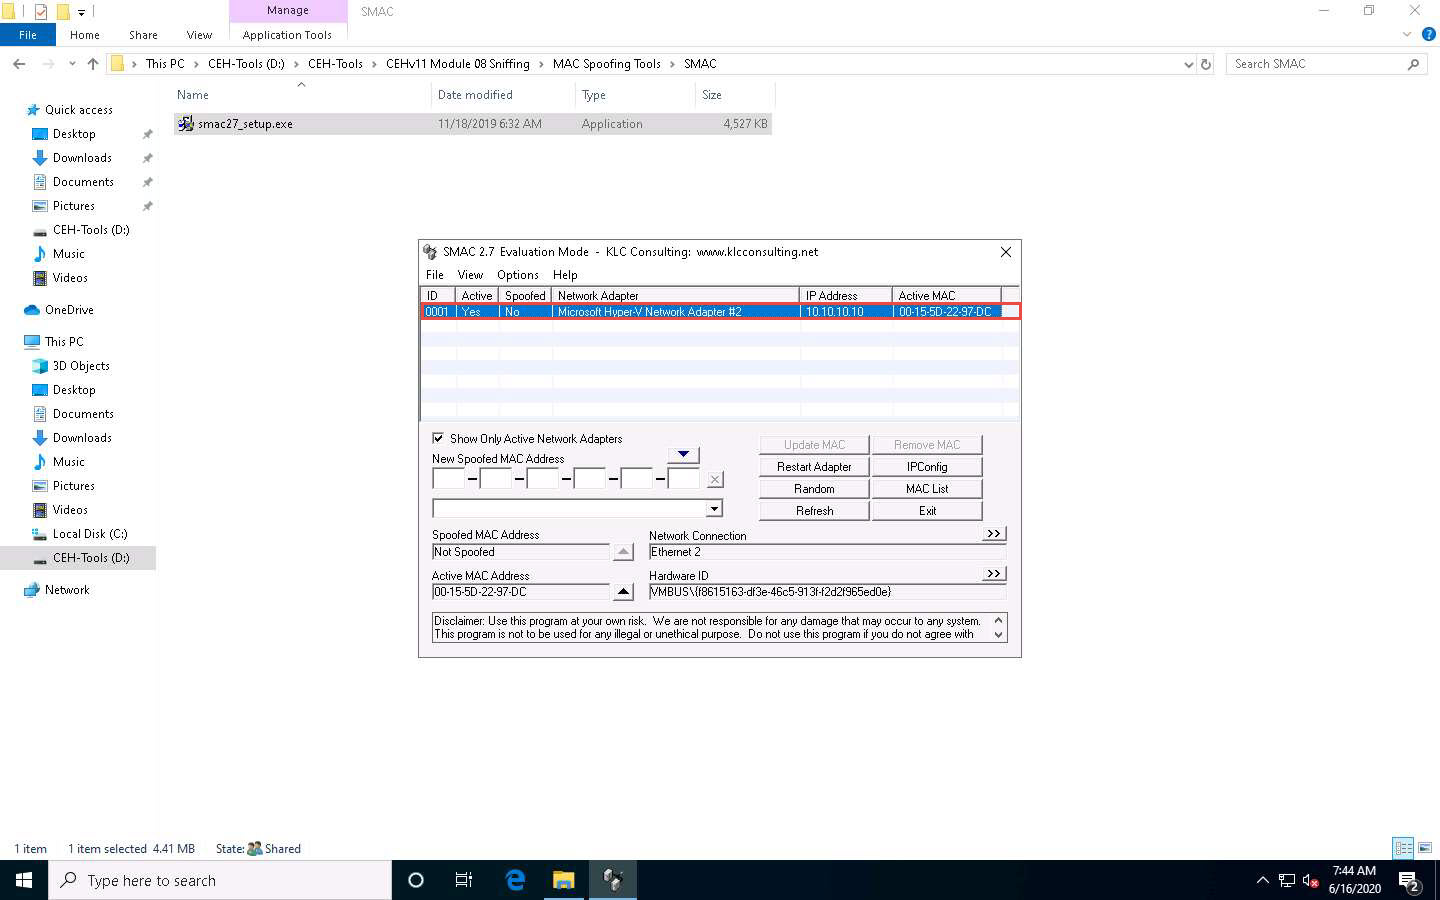
The SMAC main window appears. Choose the network adapter of the target machine whose MAC address is to be spoofed.
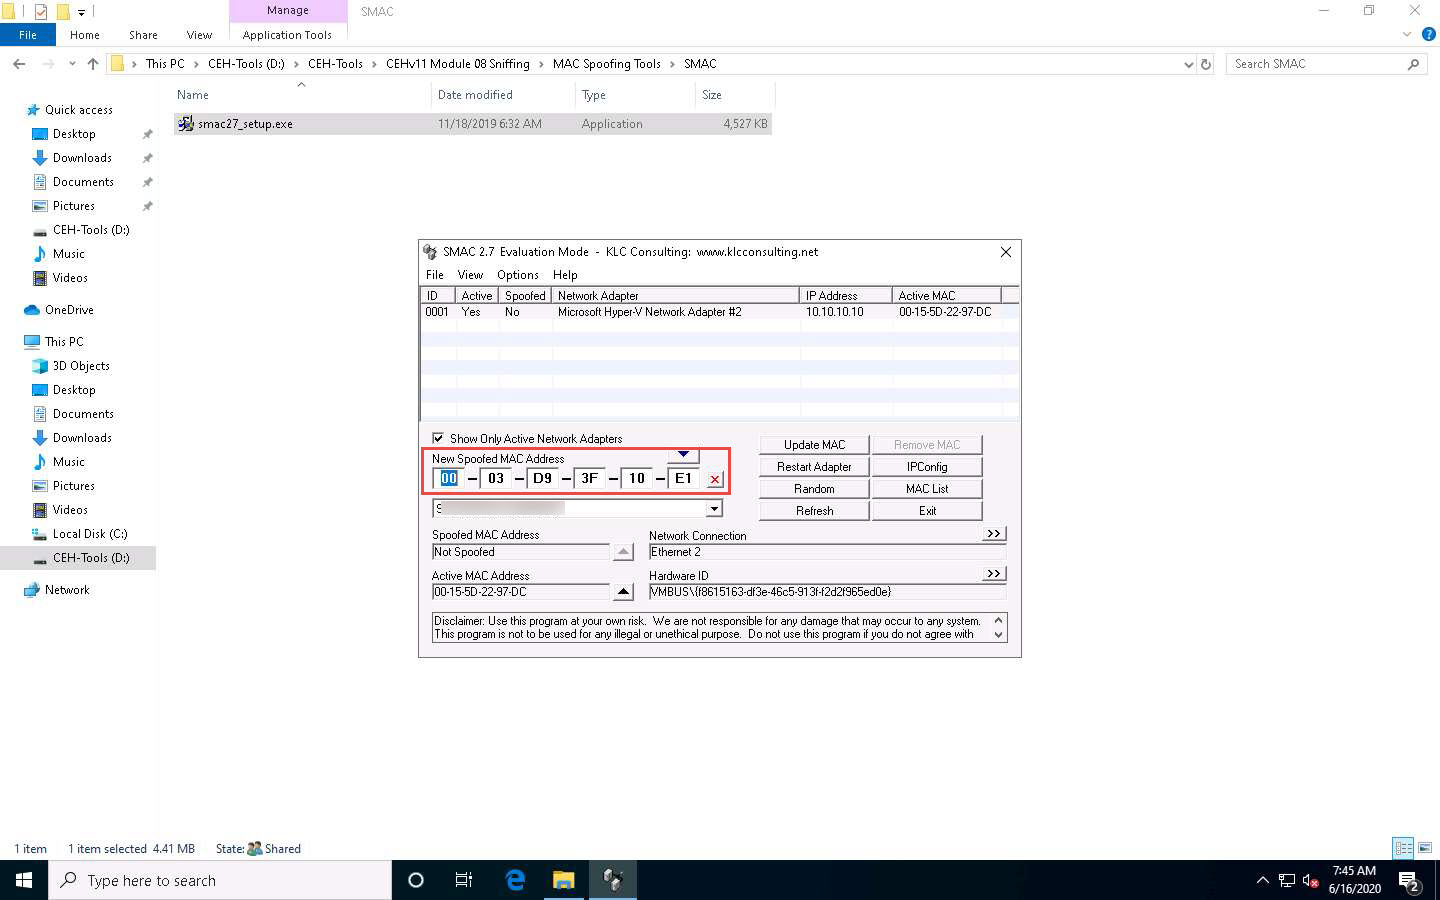
Click the Random button to generate a random MAC address.
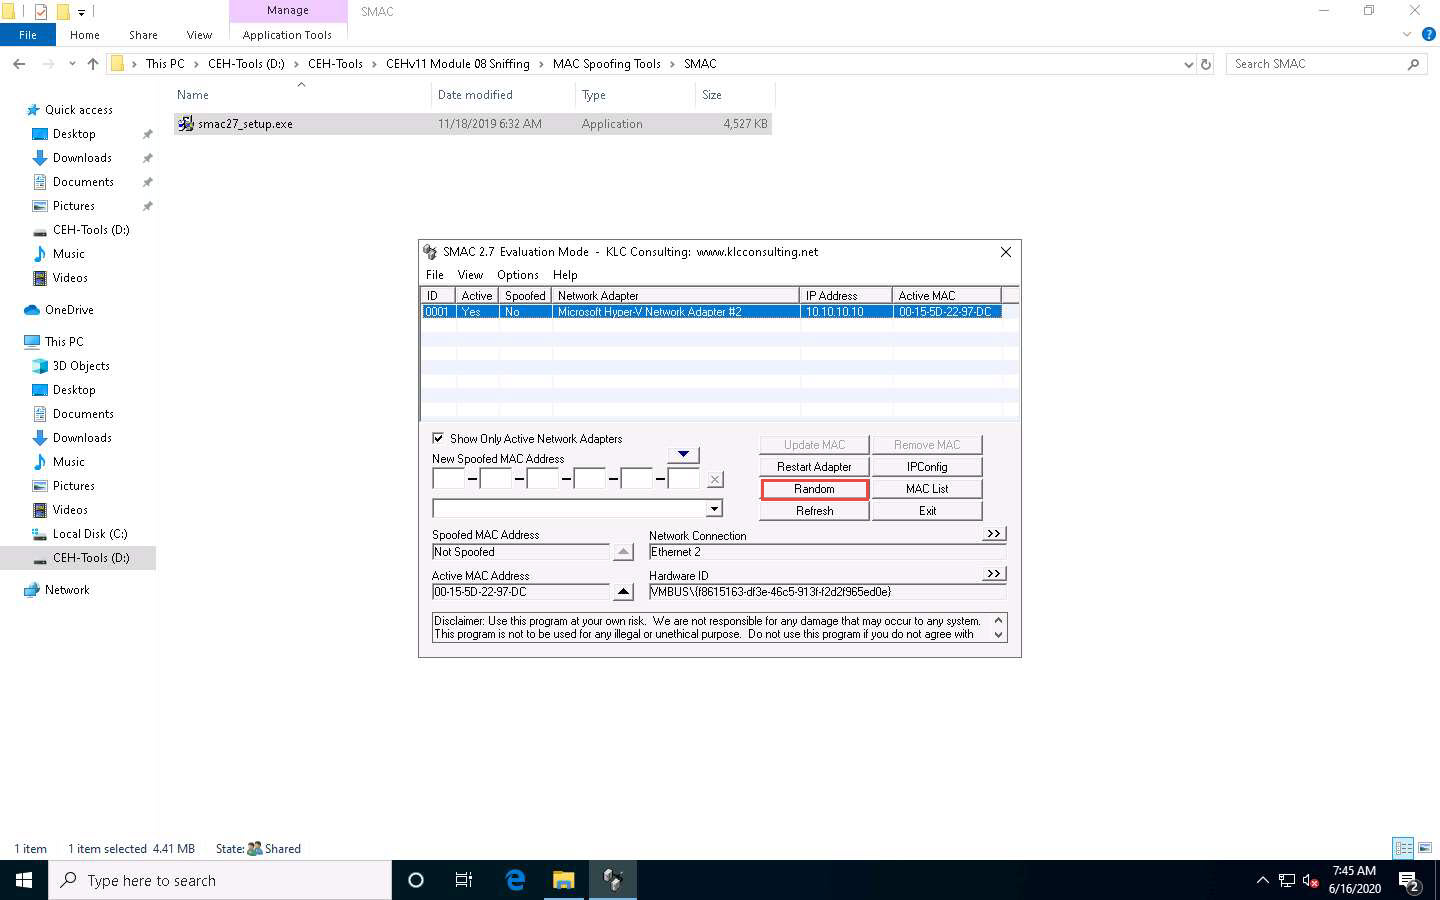
A randomly generated MAC appears in the New Spoofed MAC Address field, as shown in the screenshot.
Click the forward arrow button (>>) under Network Connection to view the Network Adapter information.
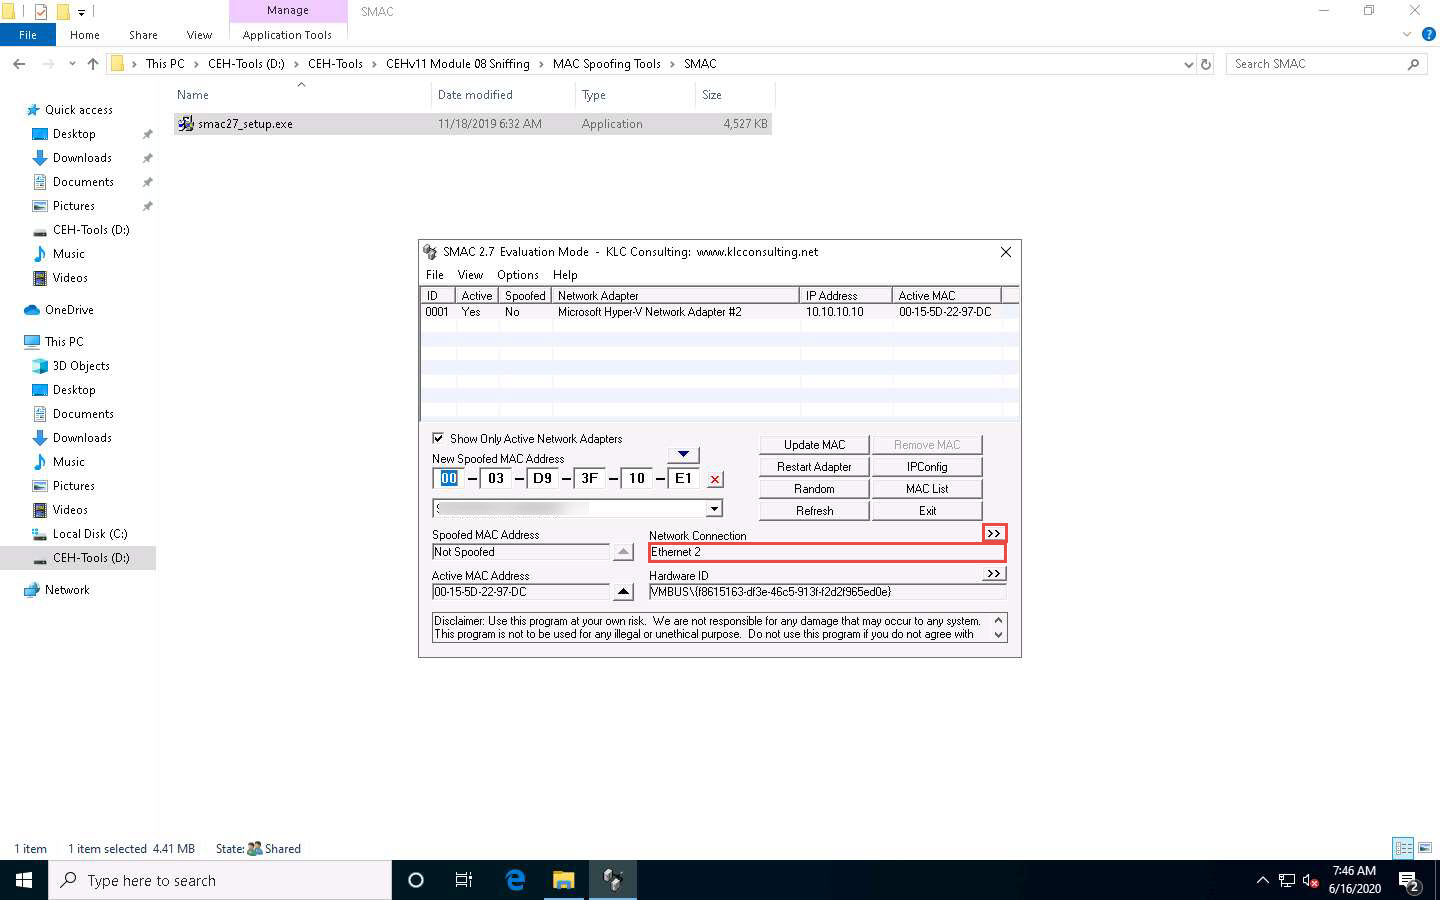
Clicking the back arrow (<<) button under Network Adapter will again display the Network Connection information. These buttons allow toggling between the network connection and network adapter.
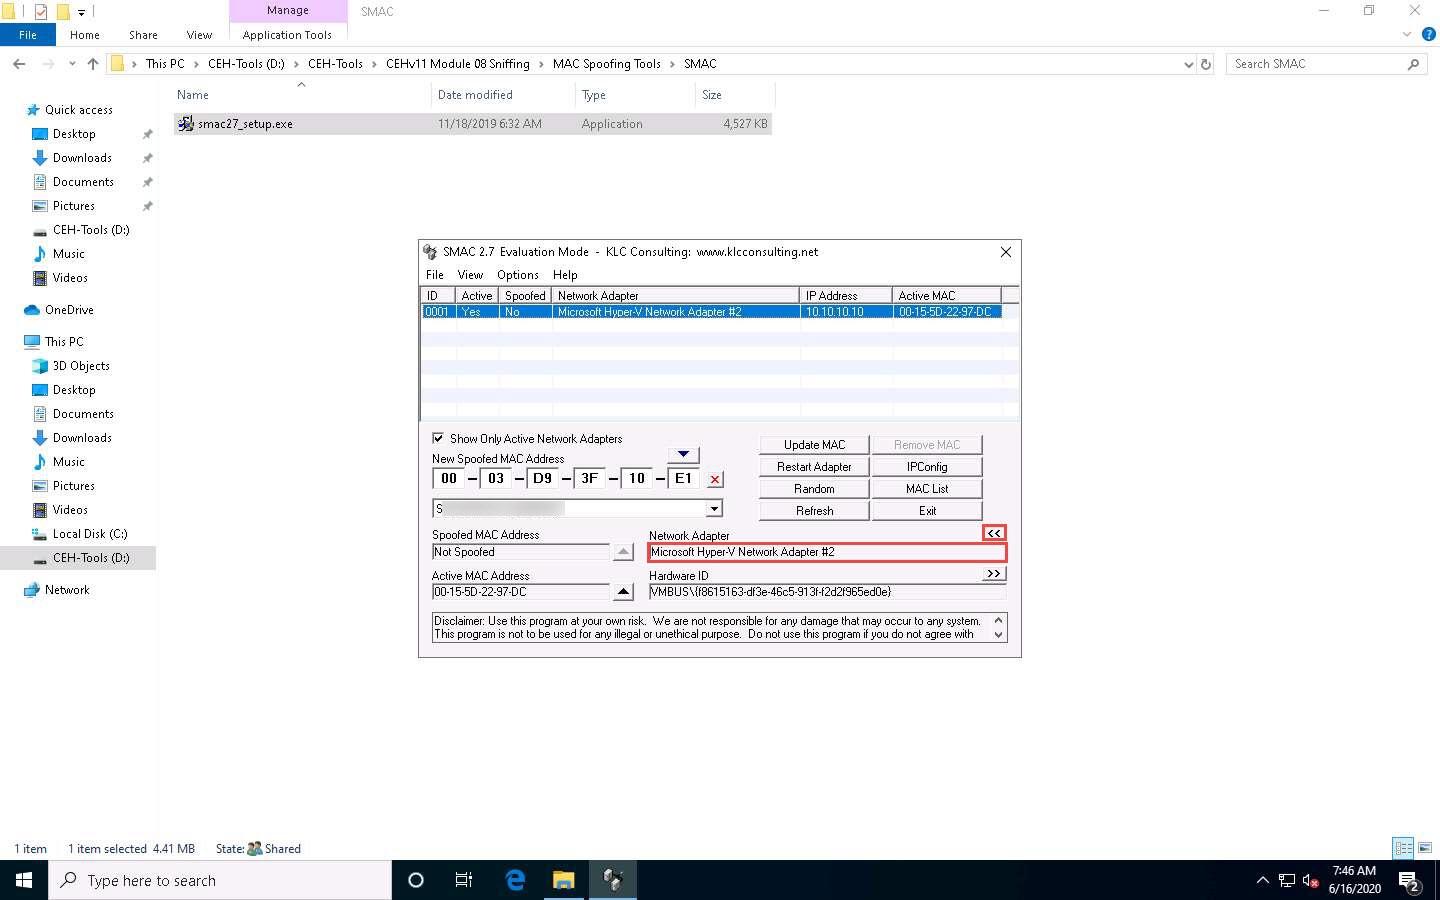
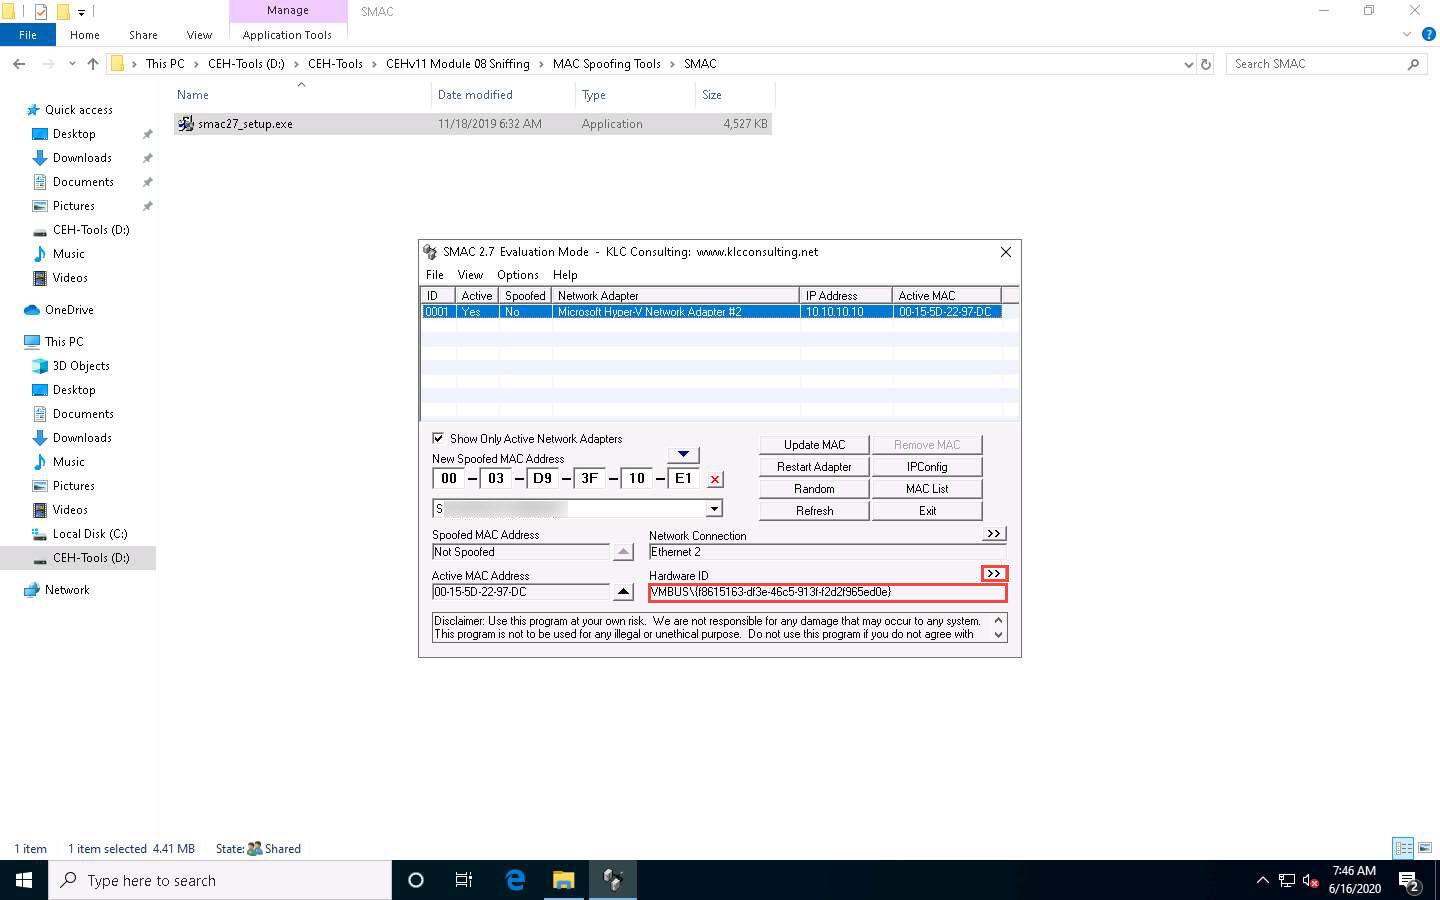
Similarly, you can click the forward arrow button (>>) under Hardware ID to view Configuration ID information and click the back arrow button (<<) to toggle back to Hardware ID information.
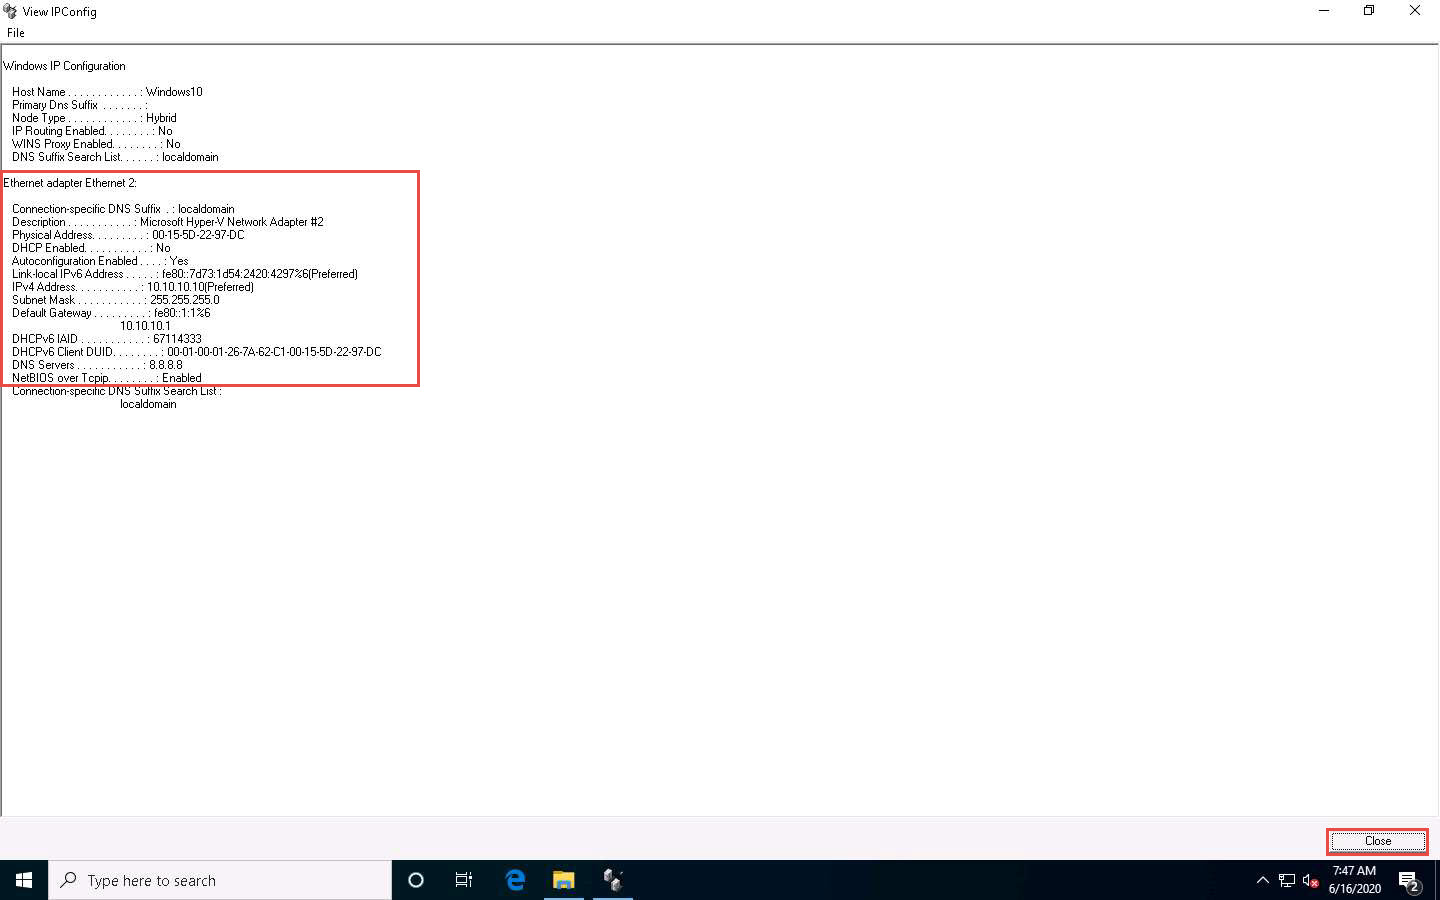
Click the IPConfig button to view the ipconfig information.
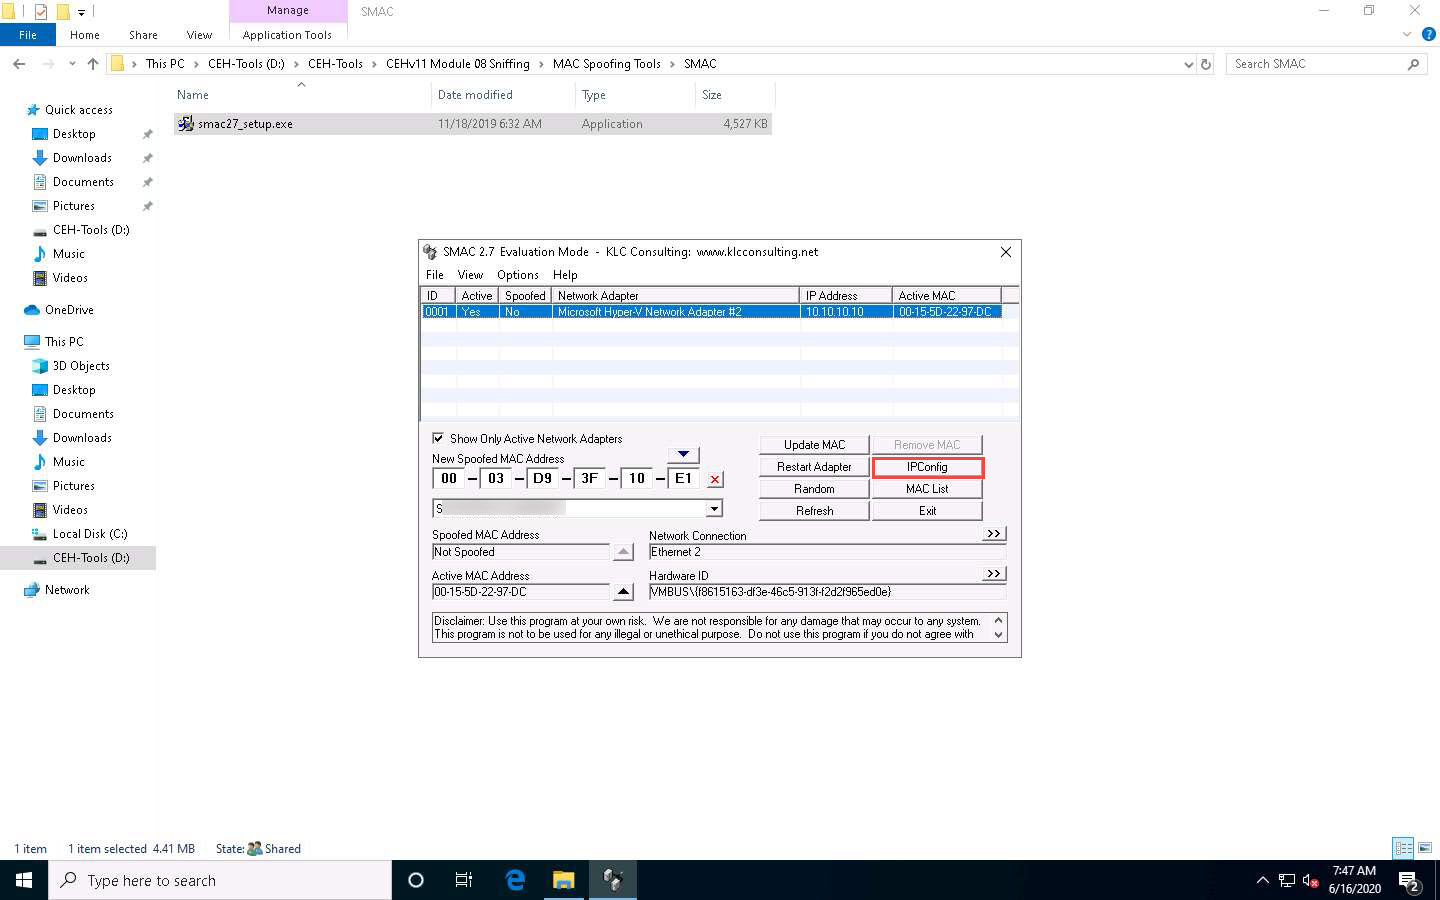
The View IPConfig window appears and displays the IP configuration details of the available network adapters. Click Close after analyzing the information.
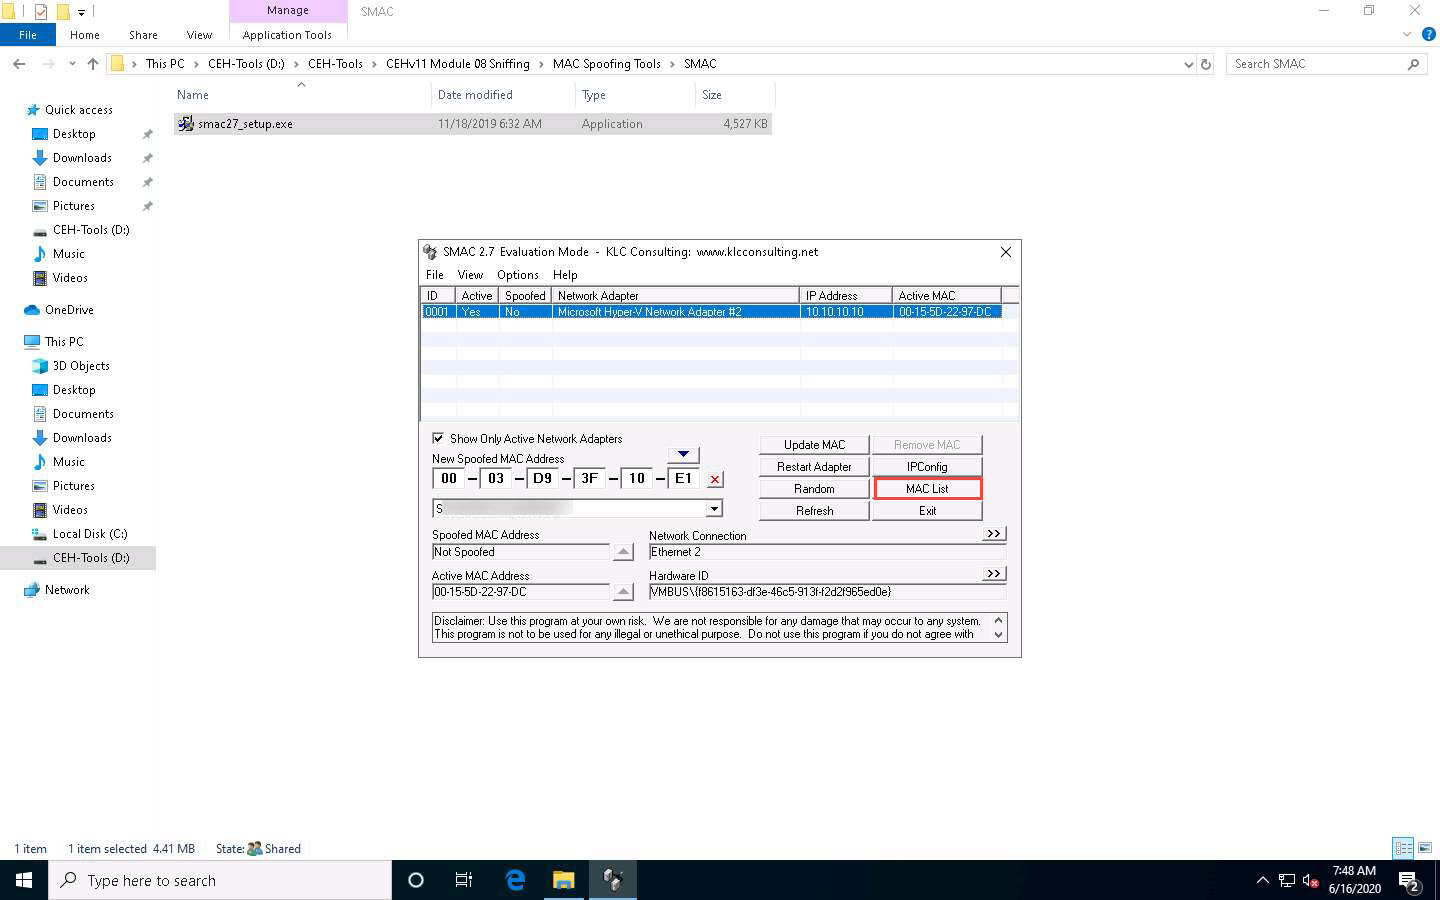
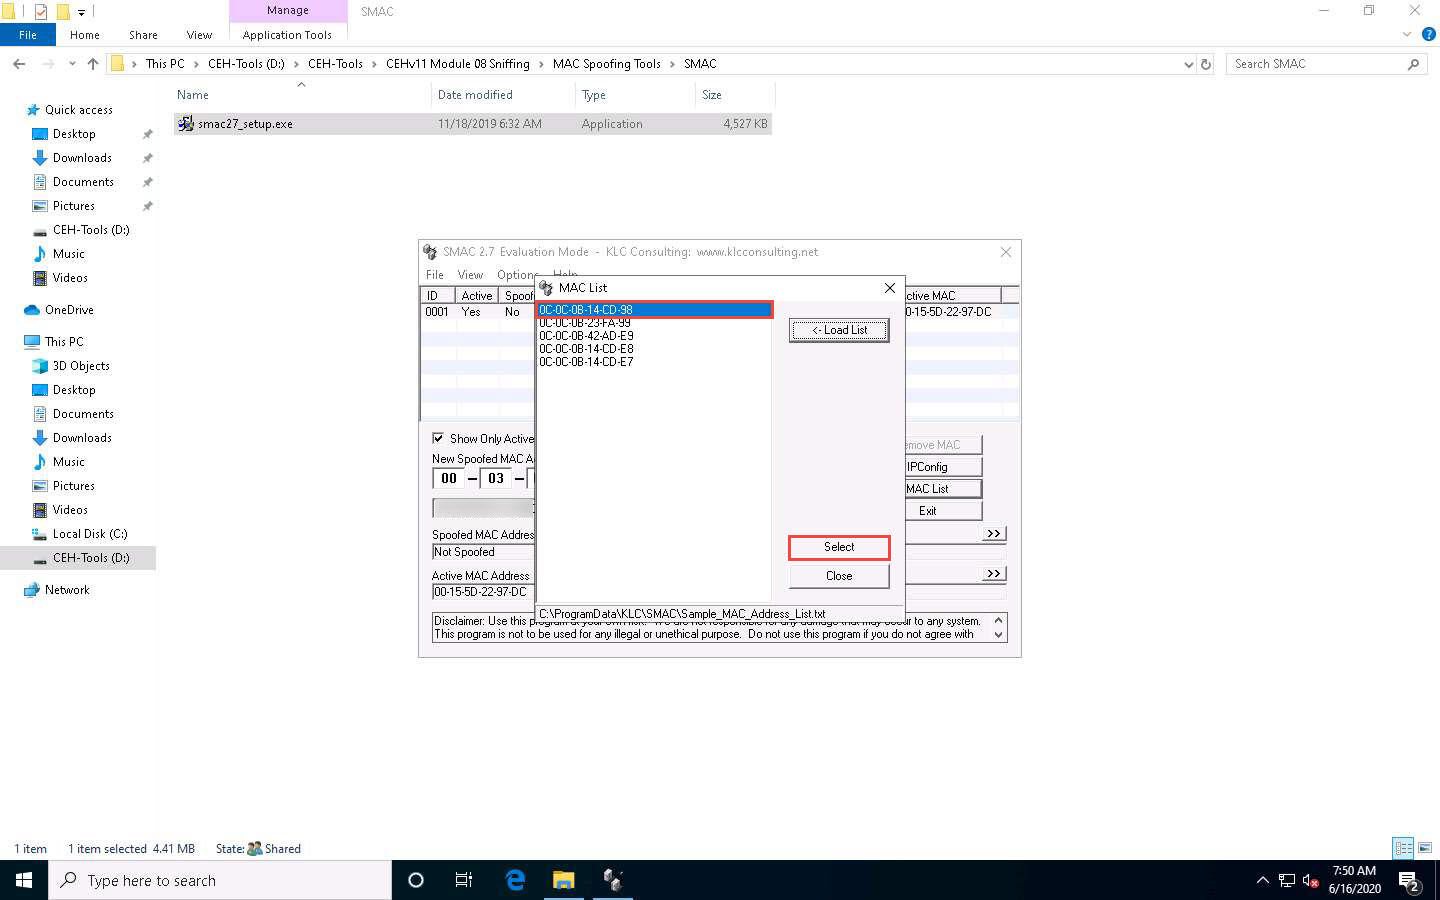
Click the MAC List button to import the MAC address list into SMAC.
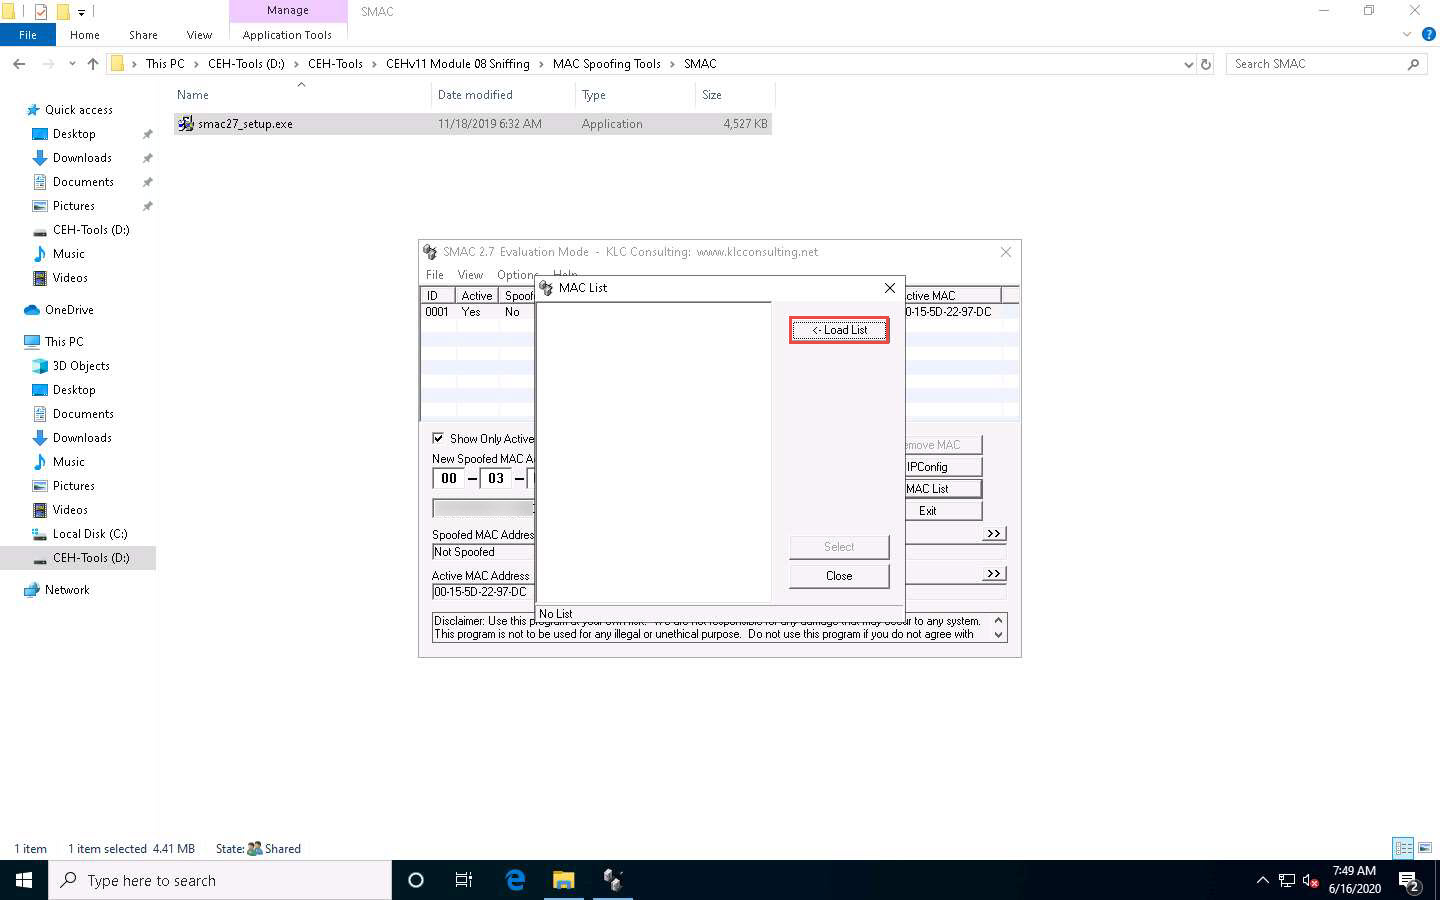
The MAC List window appears; click the Load List button.
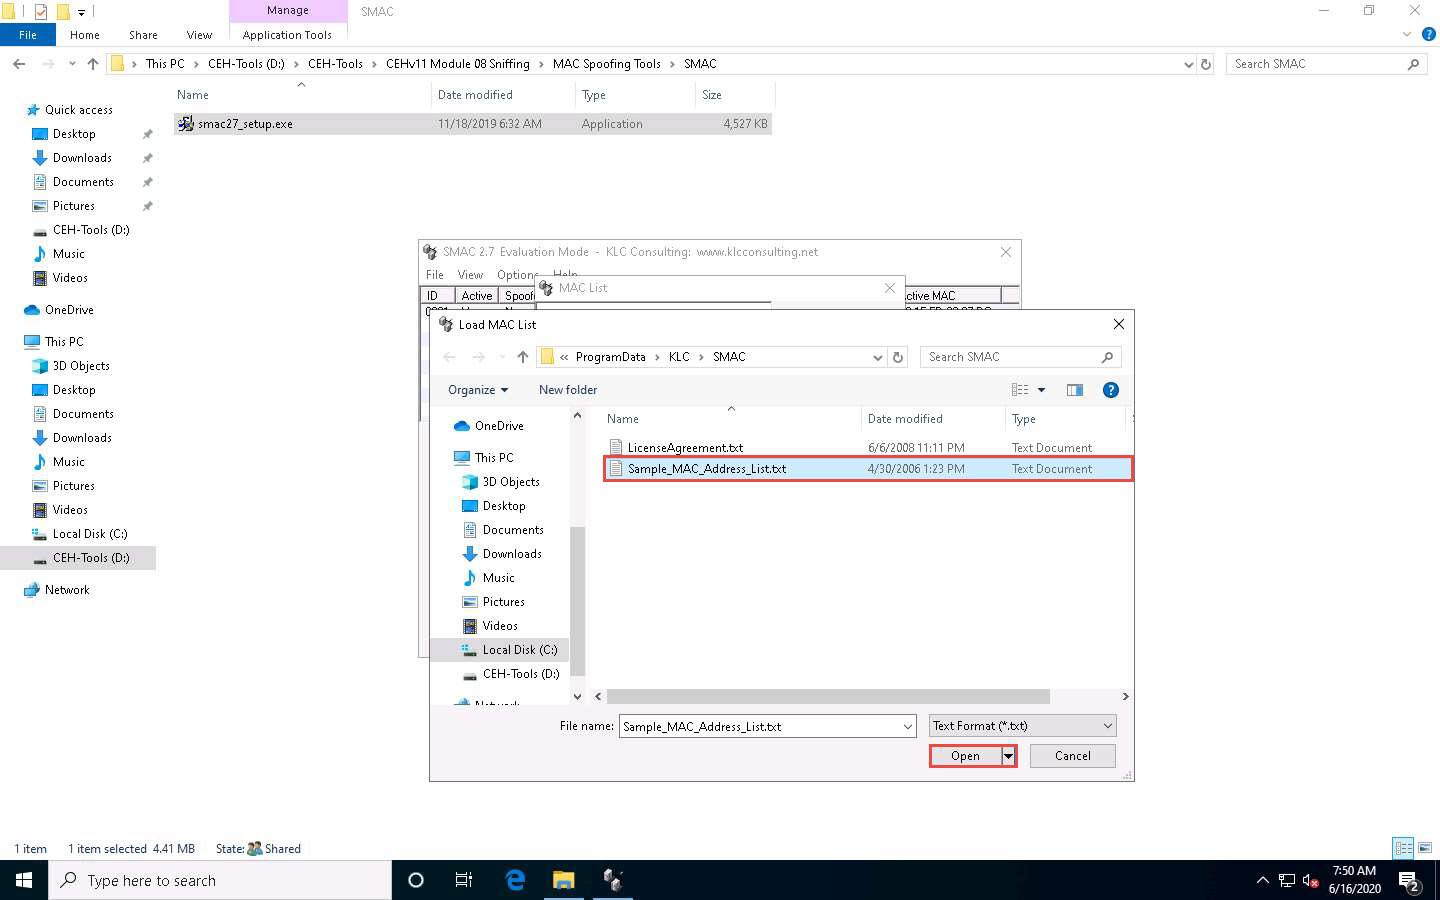
The Load MAC List window appears; select the Sample_MAC_Address_List.txt file and click Open.
A list of MAC addresses will be added to the MAC List in SMAC. Choose any MAC Address and click the Select button.
The selected MAC address appears under the New Spoofed MAC Address field.
Click the Update MAC button to update the machine’s MAC address information.
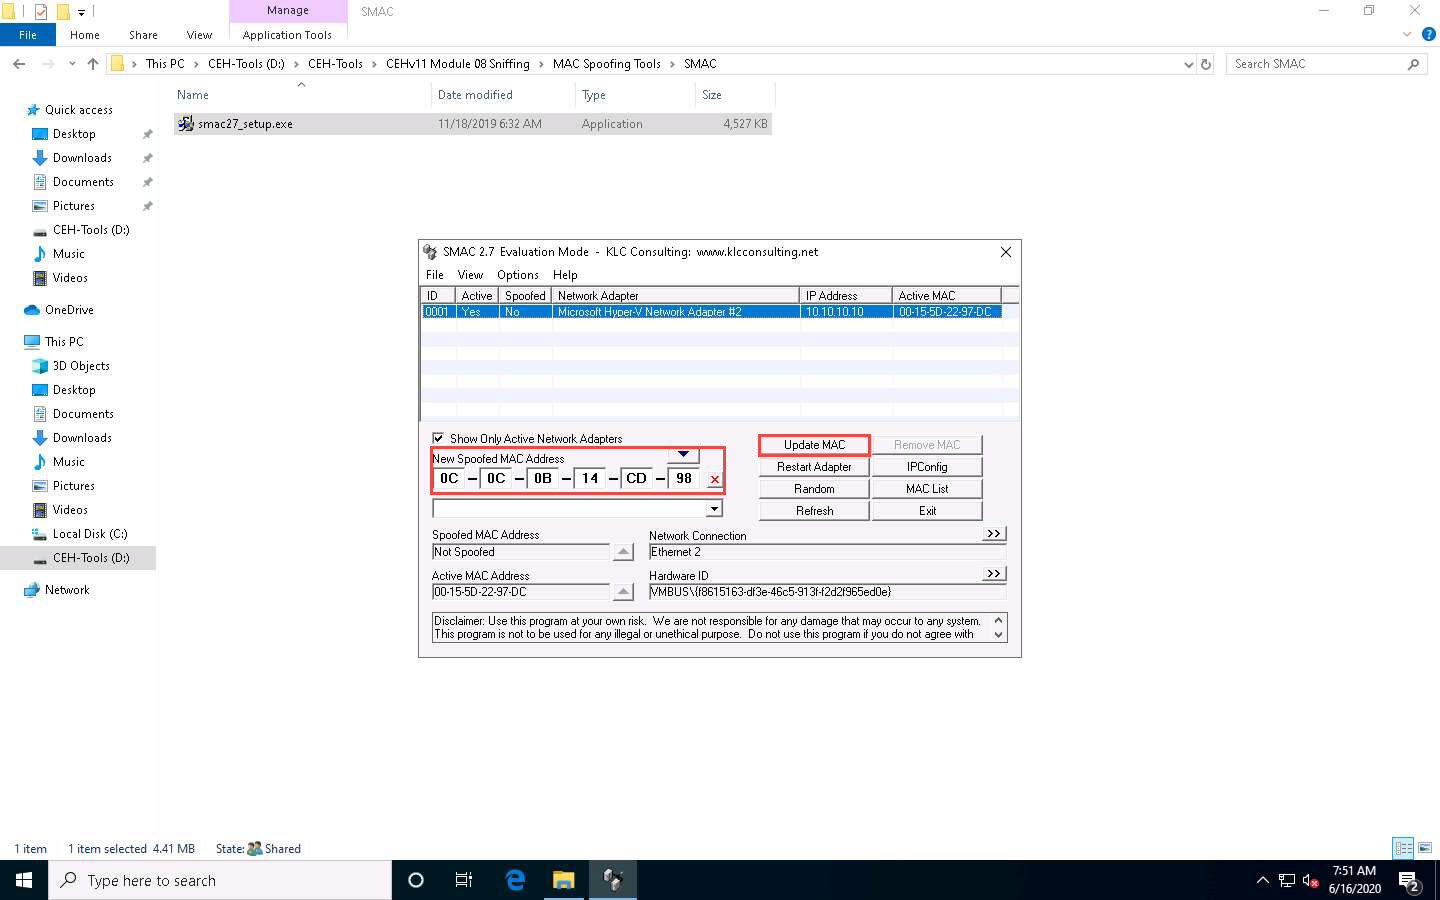
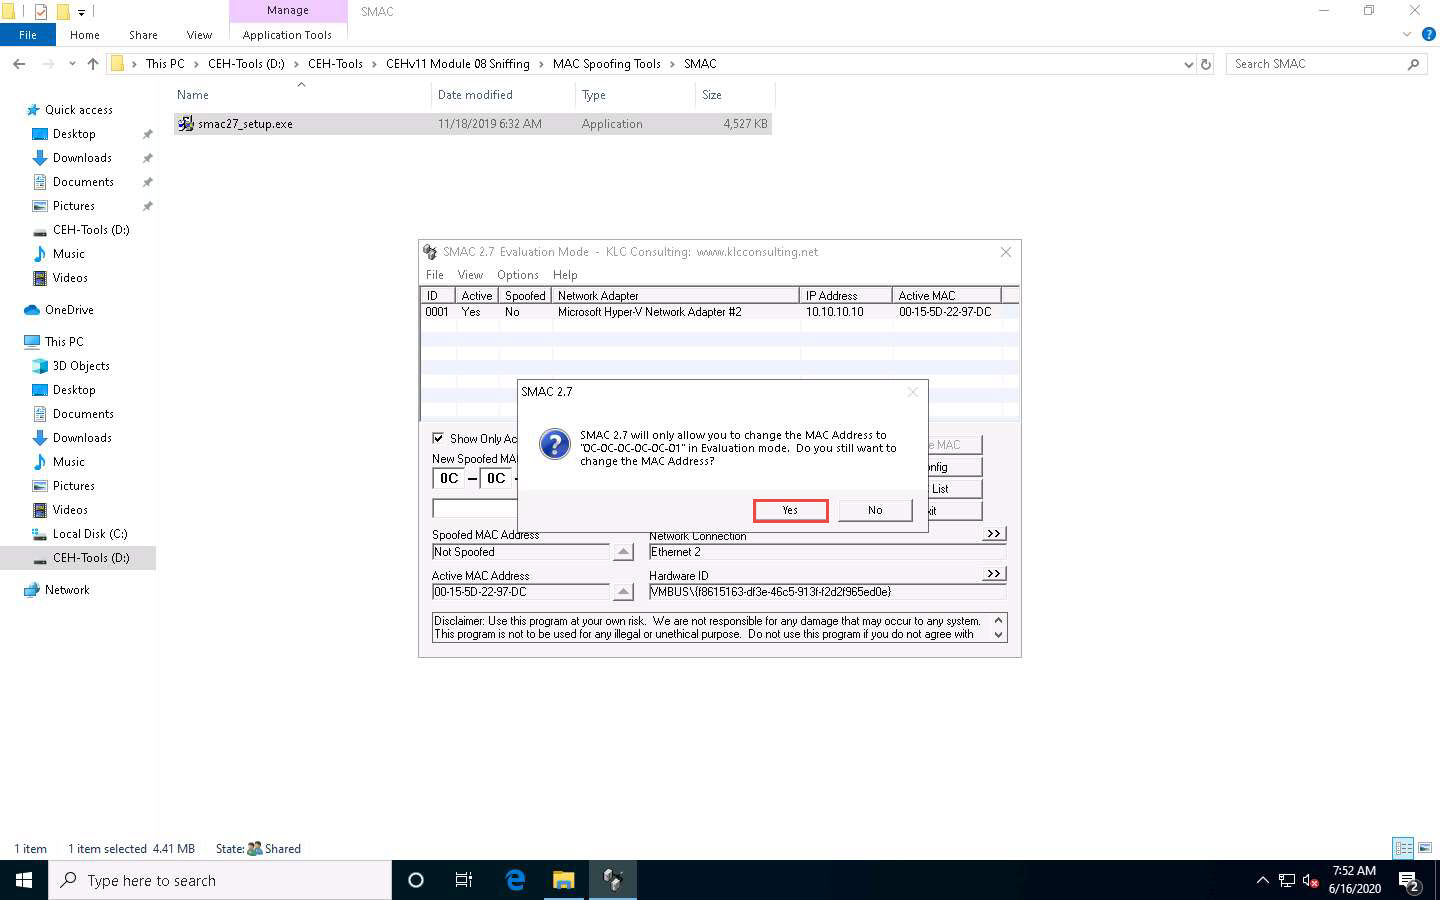
The SMAC pop-up appears; click Yes. It will cause a temporary disconnection in your network adapter.
This dialog box only appears in the evaluation or trial version.
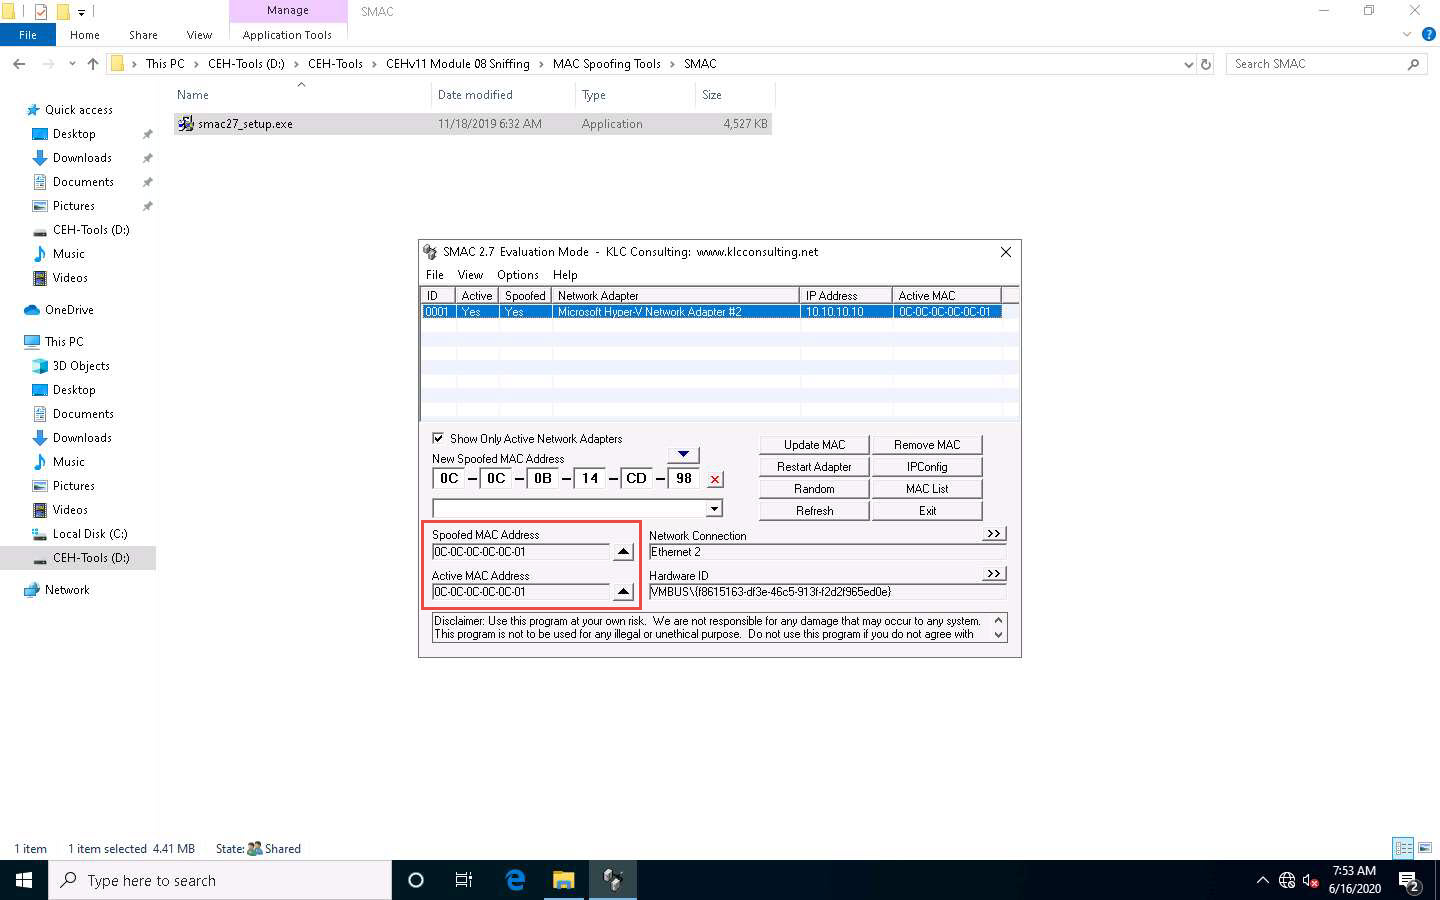
In evaluation mode, you can change the MAC address to 0C-0C-0C-0C-0C-01. If you purchase SMAC, you can change the MAC address as you like.
After successfully spoofing the MAC address, a SMAC pop-up appears, stating “Adapter Restart Complete”; click OK.
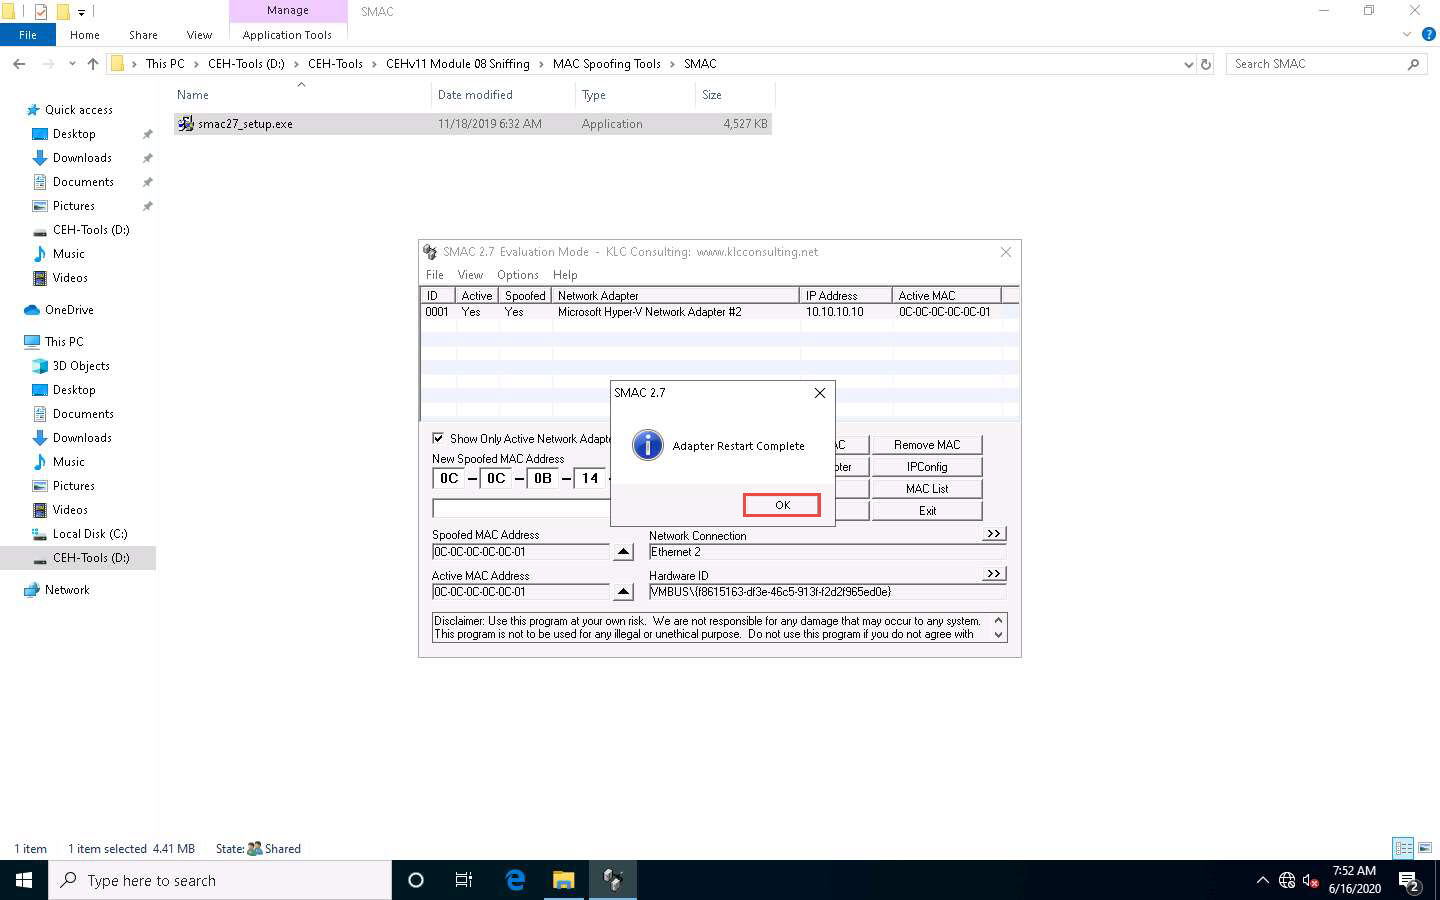
Once the adapter is restarted, a random MAC address is assigned to your machine. You can see the newly generated MAC address under Spoofed MAC Address and Active MAC Address.
By spoofing the MAC address, an attacker can simulate attacks such as ARP poisoning and MAC flooding without revealing their own actual MAC address.
To restore the MAC address back to its original setting, click the Remove MAC button.
This concludes the demonstration of spoofing MAC addresses using TMAC and SMAC.
Close all open windows and document all the acquired information.


Comments
Post a Comment