Lab 1: Footprint the Web Server
Lab 1: Footprint the Web Server
Module 13: Hacking Web Servers
Lab 1: Footprint the Web Server
Task 1: Information Gathering using Ghost Eye
Ghost Eye is an information-gathering tool written in Python 3. To run, Ghost Eye only needs a domain or IP. Ghost Eye
can work with any Linux distros if they support Python 3.
Ghost Eye gathers information such as Whois lookup, DNS lookup, EtherApe, Nmap port scan, HTTP header grabber,
Clickjacking test, Robots.txt scanner, Link grabber, IP location finder, and traceroute.
refer to blog
---------------------------------------------------------------------------------------------------------------------------------------
Module 13: Hacking Web Servers
Lab 1: Footprint the Web Server
Task 2: Perform Web Server Reconnaissance using Skipfish
Skipfish is an active web application (deployed on a webserver) security reconnaissance tool. It prepares an interactive
sitemap for the targeted site by carrying out a recursive crawl and dictionary-based probes. The resulting map is then
annotated with the output from a number of active (but hopefully non-disruptive) security checks. The final report generated
by the tool is meant to serve as a foundation for professional web application security assessments.
refer to blog
---------------------------------------------------------------------------------------------------------------------------------------
Module 13: Hacking Web Servers
Lab 1: Footprint the Web Server
Task 3: Footprint a Web Server using the httprecon Tool
Web applications can publish information, interact with Internet users, and establish an e-commerce or e-government presence.
However, if an organization is not rigorous in configuring and operating its public website, it may be vulnerable to a
variety of security threats. Although the threats in cyberspace remain largely the same as in the physical world (fraud,
theft, vandalism, and terrorism), they are far more dangerous. Organizations can face monetary losses, damage to reputation,
and legal action if an intruder successfully violates the confidentiality of their data.
httprecon is a tool for advanced web server fingerprinting. This tool performs banner-grabbing attacks, status
code enumeration, and header ordering analysis on its target web server.
D:\CEH-Tools\CEHv11 Module 13 Hacking Web Servers\Web Server Footprinting Tools\httprecon
httprecon.exe
url: www.certifiedhacker.com
port number 80
click analyze
Get existing tab, and observe the server (Apache) and the server-side application (ASP.NET) used to develop the webpages.
GET long request tab, which lists all GET requests. Next, click the Fingerprint Details tab.
The details displayed in the screenshot above include the name of the protocol the website is using and its version.
---------------------------------------------------------------------------------------------------------------------------------------
Module 13: Hacking Web Servers
Lab 1: Footprint the Web Server
Task 4: Footprint a Web Server using ID Serve
Pen testers must be familiar with banner grabbing techniques to monitor servers and ensure compliance and appropriate
security updates. This technique also helps in locating rogue servers or determining the role of servers within a network.
This lab manual helps understand and learn the banner grabbing technique using ID Serve, which allows an attacker to
determine a remote target system.
short one
refer to blog
---------------------------------------------------------------------------------------------------------------------------------------
Module 13: Hacking Web Servers
Lab 1: Footprint the Web Server
Task 5: Footprint a Web Server using Netcat and Telnet
Netcat
Netcat is a networking utility that reads and writes data across network connections, using the TCP/IP protocol.
It is a reliable “back-end” tool used directly or driven by other programs and scripts. It is also a network debugging
and exploration tool.
Telnet
Telnet is a client-server network protocol. It is widely used on the Internet or LANs. It provides the login session
for a user on the Internet. The single terminal attached to another computer emulates with Telnet. The primary security
problems with Telnet are the following:
It does not encrypt any data sent through the connection.
It lacks an authentication scheme.
refer to blog short one
---------------------------------------------------------------------------------------------------------------------------------------
Module 13: Hacking Web Servers
Lab 1: Footprint the Web Server
Task 6: Enumerate Web Server Information using Nmap Scripting Engine (NSE)
The web applications that are available on the Internet may have vulnerabilities. Some hackers’ attack strategies may
need the Administrator role on your server, but sometimes they simply need sensitive information about the server. Utilizing
Nmap and http-enum.nse content returns a diagram of those applications, registries, and records uncovered. This way, it is
possible to check for vulnerabilities or abuses in databases. Through this technique, it is possible to discover genuine
(and extremely dumb) security imperfections on a site such as some sites (like WordPress and PrestaShop) that maintain
accessibility to envelopes that ought to be erased once the task has been settled. Once you have identified a vulnerability,
you can discover a fix for it.
Nmap, along with Nmap Scripting Engine, can extract a lot of valuable information from the target web server. In
addition to Nmap commands, Nmap Scripting Engine (NSE)provides scripts that reveal various useful information about
the target web server to an attacker
in parrot
nmap -sV --script=http-enum [target website]
In this scan, we are enumerating the www.goodshopping.com website.
nmap --script hostmap-bfk -script-args hostmap-bfk.prefix=hostmap- www.goodshopping.com
nmap --script http-trace -d www.goodshopping.com
This script will detect a vulnerable server that uses the TRACE method by sending an HTTP TRACE request that shows if the method is enabled or not.
nmap -p80 --script http-waf-detect www.goodshopping.com
This command will scan the host and attempt to determine whether a web server is being monitored by an IPS, IDS, or WAF.
refer to blog short one
---------------------------------------------------------------------------------------------------------------------------------------
Module 13: Hacking Web Servers
Lab 1: Footprint the Web Server
Task 7: Uniscan Web Server Fingerprinting in Parrot Security
Uniscan is a versatile server fingerprinting tool that not only performs simple commands like ping, traceroute,
and nslookup, but also does static, dynamic, and stress checks on a web server. Apart from scanning websites, uniscan
also performs automated Bing and Google searches on provided IPs. Uniscan takes all of this data and combines them into
a comprehensive report file for the user.
gather information about the target web server using Uniscan.
refer to blog short one
---------------------------------------------------------------------------------------------------------------------------------------
Lab Scenario
The first step of hacking web servers for a professional ethical hacker or pen tester is to collect as much information as possible about the target web server and analyze the collected information in order to find lapses in its current security mechanisms. The main purpose is to learn about the web server’s remote access capabilities, its ports and services, and other aspects of its security.
The information obtained in this step helps in assessing the security posture of the web server. Footprinting may involve searching the Internet, newsgroups, bulletin boards, etc. for gathering information about the target organization’s web server. There are also tools such as Whois.net and Whois Lookup that extract information such as the target’s domain name, IP address, and autonomous system number.
Web server fingerprinting is an essential task for any penetration tester. Before proceeding to hack or exploit a webserver, the penetration tester must know the type and version of the webserver as most of the attacks and exploits are specific to the type and version of the server being used by the target. These methods help any penetration tester to gain information and analyze their target so that they can perform a thorough test and can deploy appropriate methods to mitigate such attacks on the server.
An ethical hacker or penetration tester must perform footprinting to detect the loopholes in the web server of the target organization. This will help in predicting the effectiveness of additional security measures for strengthening and protecting the web server of the target organization.
The labs in this exercise demonstrate how to footprint a web server using various footprinting tools and techniques.
Lab Objectives
- Information gathering using Ghost Eye
- Perform web server reconnaissance using Skipfish
- Footprint a web server using the httprecon Tool
- Footprint a web server using ID Serve
- Footprint a web server using Netcat and Telnet
- Enumerate web server information using Nmap Scripting Engine (NSE)
- Uniscan web server fingerprinting in Parrot Security
Overview of Web Server Footprinting
By performing web server footprinting, it is possible to gather valuable system-level data such as account details, OS, software versions, server names, and database schema details. Use Telnet utility to footprint a web server and gather information such as server name, server type, OSes, and applications running. Use footprinting tools such as Netcraft, ID Serve, and httprecon to perform web server footprinting. Web server footprinting tools such as Netcraft, ID Serve, and httprecon can extract information from the target server. Let us look at the features and the types of information these tools can collect from the target server.
Task 1: Information Gathering using Ghost Eye
Ghost Eye is an information-gathering tool written in Python 3. To run, Ghost Eye only needs a domain or IP. Ghost Eye can work with any Linux distros if they support Python 3.
Ghost Eye gathers information such as Whois lookup, DNS lookup, EtherApe, Nmap port scan, HTTP header grabber, Clickjacking test, Robots.txt scanner, Link grabber, IP location finder, and traceroute.
Click Parrot Security to switch to the Parrot Security machine.
In the login page, the attacker username will be selected by default. Enter password as toor in the Password field and press Enter to log in to the machine.
Click the MATE Terminal icon at the top of the Desktop window to open a Terminal window.
If a Question pop-up window appears asking for you to update the machine, click No to close the window.

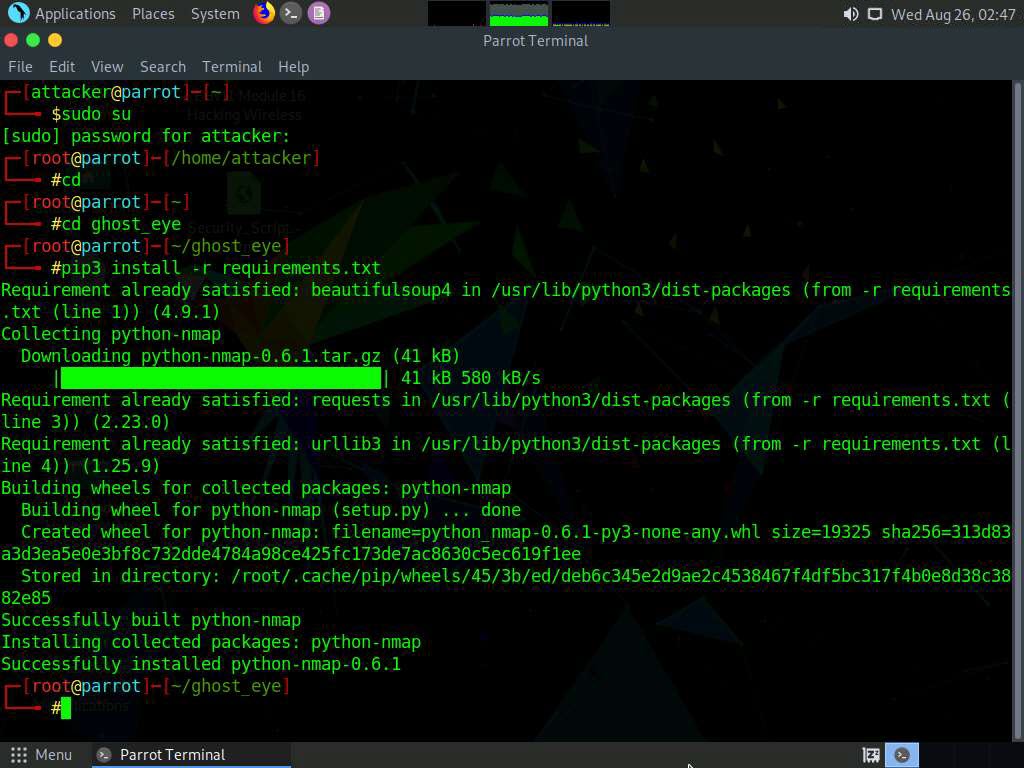
A Parrot Terminal window appears. In the terminal window, type sudo su and press Enter to run the programs as a root user.
In the [sudo] password for attacker field, type toor as a password and press Enter.
The password that you type will not be visible.
Now, type cd and press Enter to jump to the root directory.

Now, navigate to the Ghost Eye directory. Type cd ghost_eye and press Enter.
In the terminal window, type pip3 install -r requirements.txt and press Enter.
To launch Ghost Eye, type python3 ghost_eye.py and press Enter.
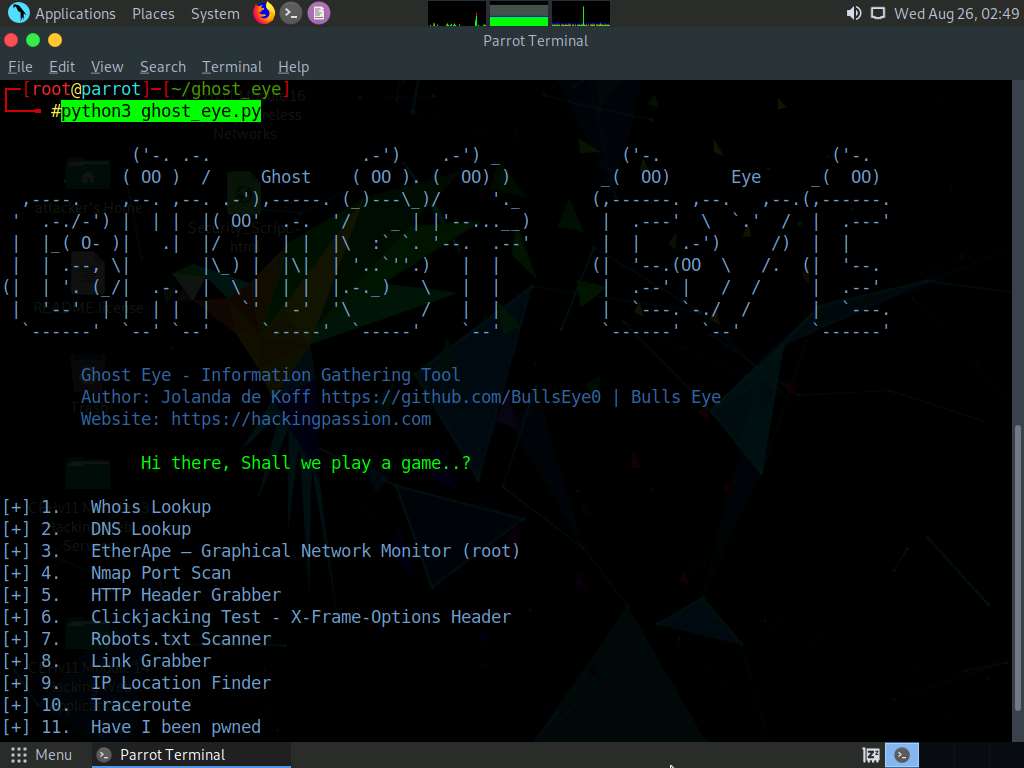
The Ghost Eye - Information Gathering Tool options appear, as shown in the screenshot.
Let us perform a Whois Lookup. Type 1 for the Enter your choice: option and press Enter.
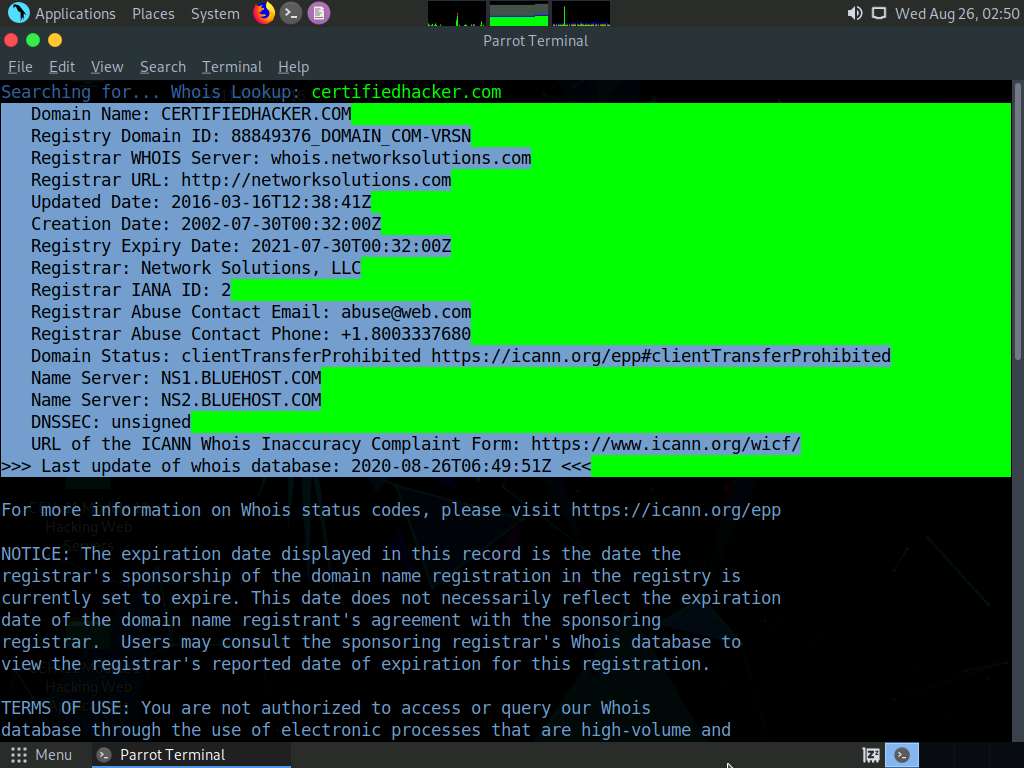
Type certifiedhacker.com in the Enter Domain or IP Address: field and press Enter

Scroll up to see the certifiedhacker.com result. In the result, observe the complete information of the certifiedhacker.com domain such as Domain Name, Registry Domain ID, Registrar WHOIS Server, Registrar URL, and Updated Date.
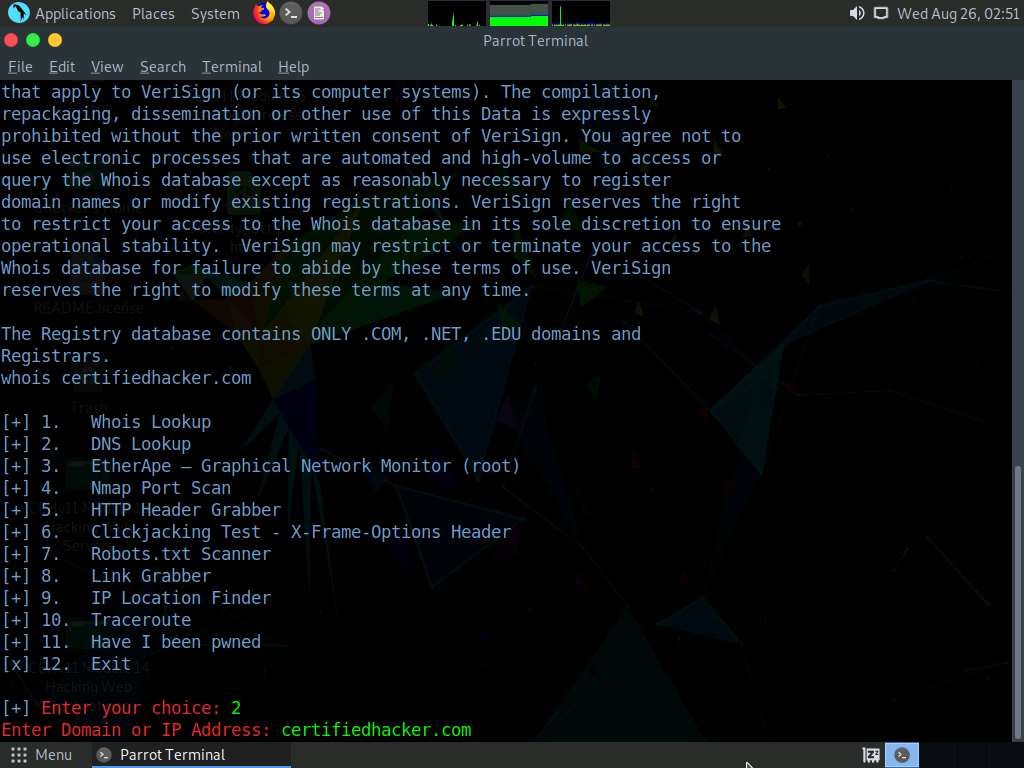
Let us perform a DNS Lookup on certifiedhacker.com. In the Enter your choice field, type 2 and press Enter to perform DNS Lookup.
The Enter Domain or IP Address field appears; type certifiedhacker.com, and press Enter.
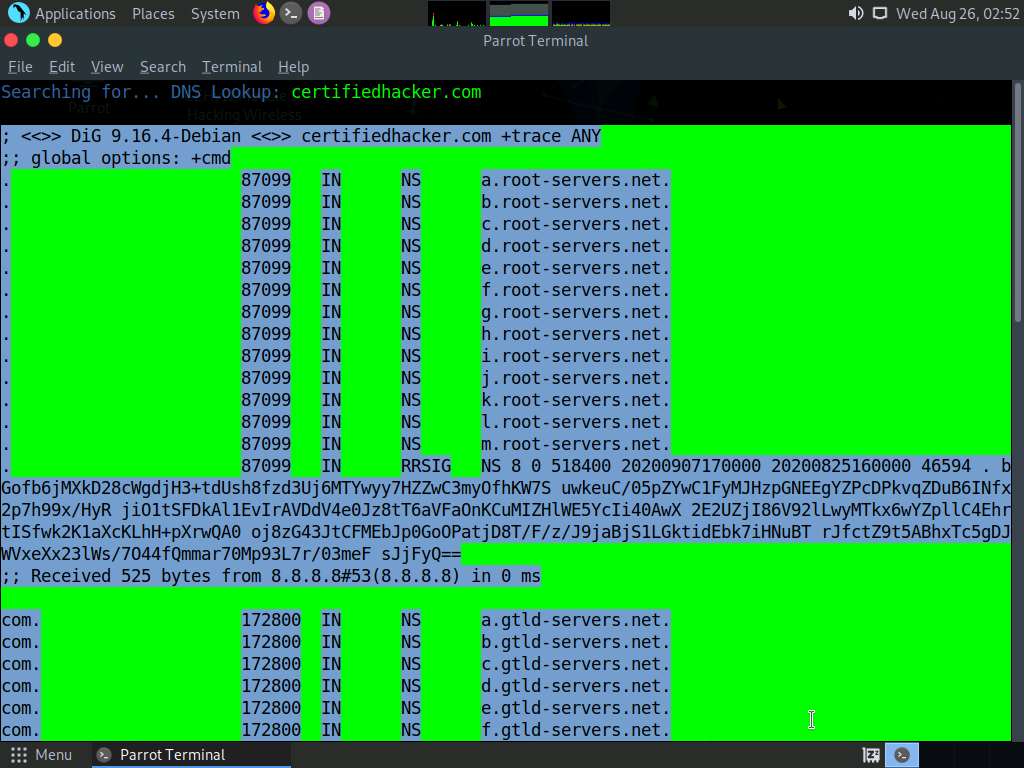
As soon as you hit Enter, Ghost Eye starts performing a DNS Lookup on the targeted domain (here, certifiedhacker.com).
Scroll up to view the DNS Lookup result.
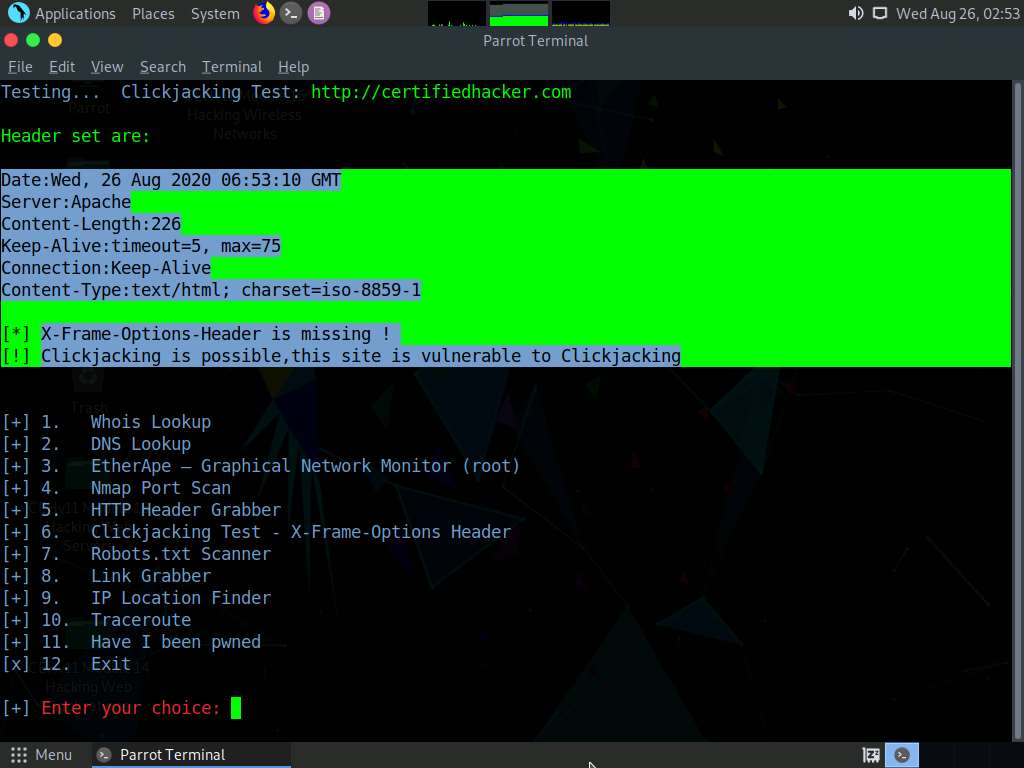
Now, perform the Clickjacking Test. Type 6 in the Enter your choice field and press Enter.
In the Enter the Domain to test field, type certifiedhacker.com and press Enter.
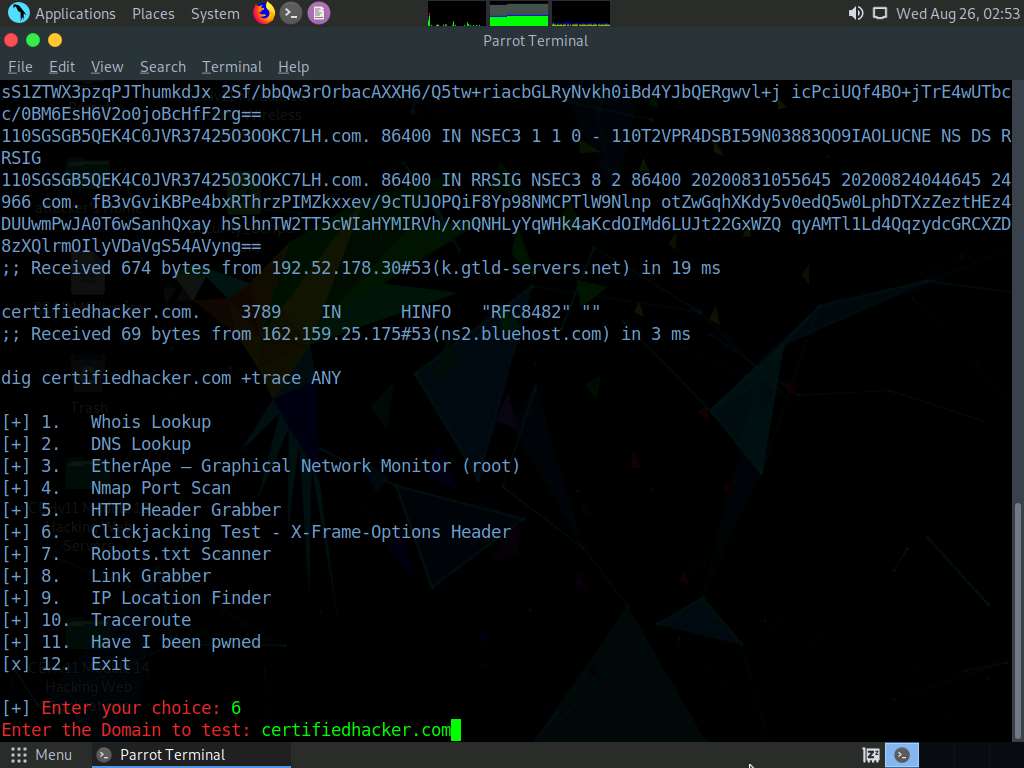
By performing this test, Ghost Eye will provide the complete architecture of the web server, and also reveal whether the domain is vulnerable to Clickjacking attacks or not.
Similarly, you can use the other tools available with Ghost Eye such as Nmap port scan, HTTP header grabber, link grabber, and Robots.txt scanner to gather information about the target web server.
This concludes the demonstration of how to gather information about a target web server using Ghost Eye.
Close all open windows on the Parrot Security machine.
Task 2: Perform Web Server Reconnaissance using Skipfish
Skipfish is an active web application (deployed on a webserver) security reconnaissance tool. It prepares an interactive sitemap for the targeted site by carrying out a recursive crawl and dictionary-based probes. The resulting map is then annotated with the output from a number of active (but hopefully non-disruptive) security checks. The final report generated by the tool is meant to serve as a foundation for professional web application security assessments.
Click Windows Server 2016 to switch to the Windows Server 2016 machine.

Click Ctrl+Alt+Delete to activate the machine. By default, CEH\Administration user profile is selected, click Pa$$w0rd to paste the password in the Password field and press Enter to login.
Alternatively, you can also click Pa$$w0rd under Windows Server 2016 machine thumbnail in the Resources pane or Click Type Text | Type Password button under Commands (thunder icon) menu.
Double-click the WAMP Server shortcut icon from Desktop to start WAMP Server services. Alternatively, you can also launch the WAMP Server services from the Start menu apps

Wait until the WAMP Server icon turns Green in the Notification area. Leave the Windows Server 2016 machine running.

Click Parrot Security to switch to the Parrot Security machine.
Click the MATE Terminal icon at the top of the Desktop window to open a Terminal window.

A Parrot Terminal window appears. In the terminal window, type sudo su and press Enter to run the programs as a root user.
In the [sudo] password for attacker field, type toor as a password and press Enter.
The password that you type will not be visible.
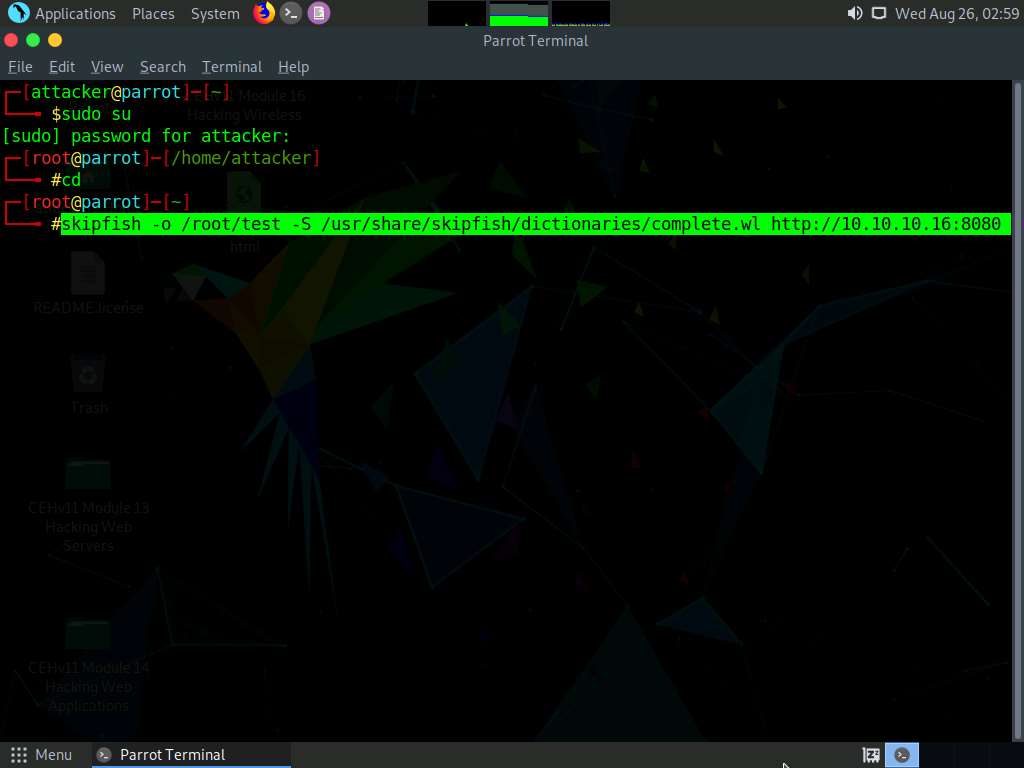
Now, type cd and press Enter to jump to the root directory.

Now, perform security reconnaissance on a web server using Skipfish. The target is the WordPress website http://[IP Address of Windows Server 2016].
Specify the output directory and load a dictionary file based on the web server’s requirement. In this lab, we are naming the output directory test.
In the terminal window, type skipfish -o /root/test -S /usr/share/skipfish/dictionaries/complete.wl http://[IP Address of Windows Server 2016]:8080 and press Enter.
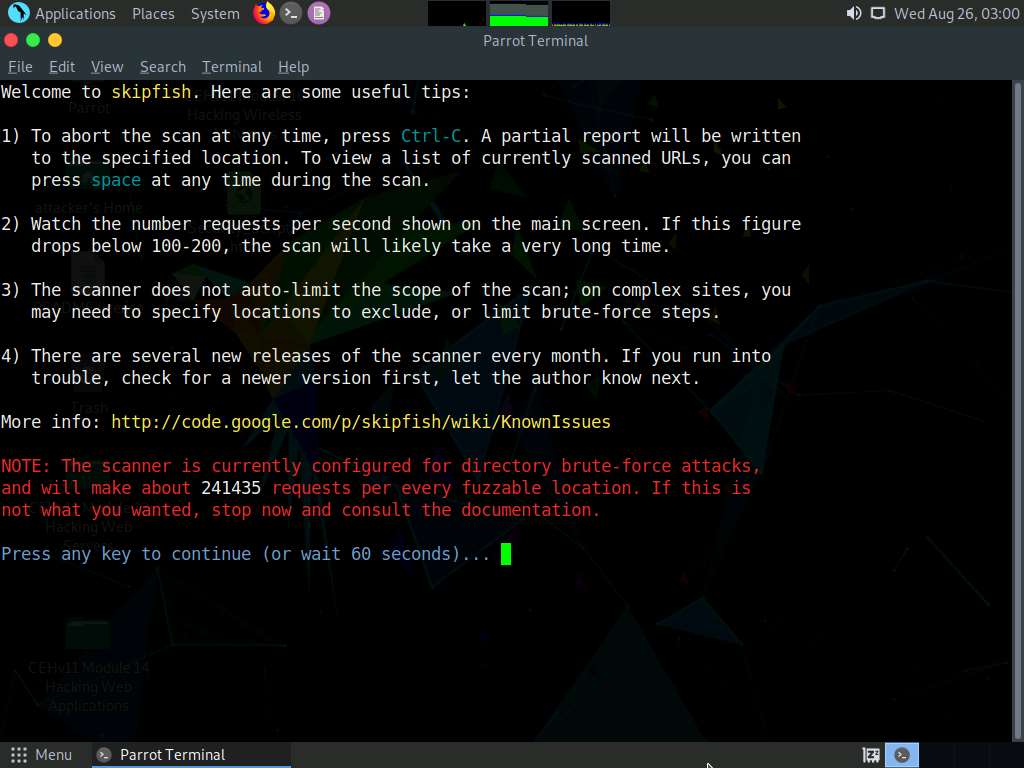
On receiving this command, Skipfish performs a heavy brute-force attack on the web server by using the complete.wl dictionary file, creates a directory named test in the root location, and stores the result in index.html inside this location.
Before beginning a scan, Skipfish displays some tips. Press Enter to start the security reconnaissance.
Skipfish scans the web server, as shown in the screenshot.
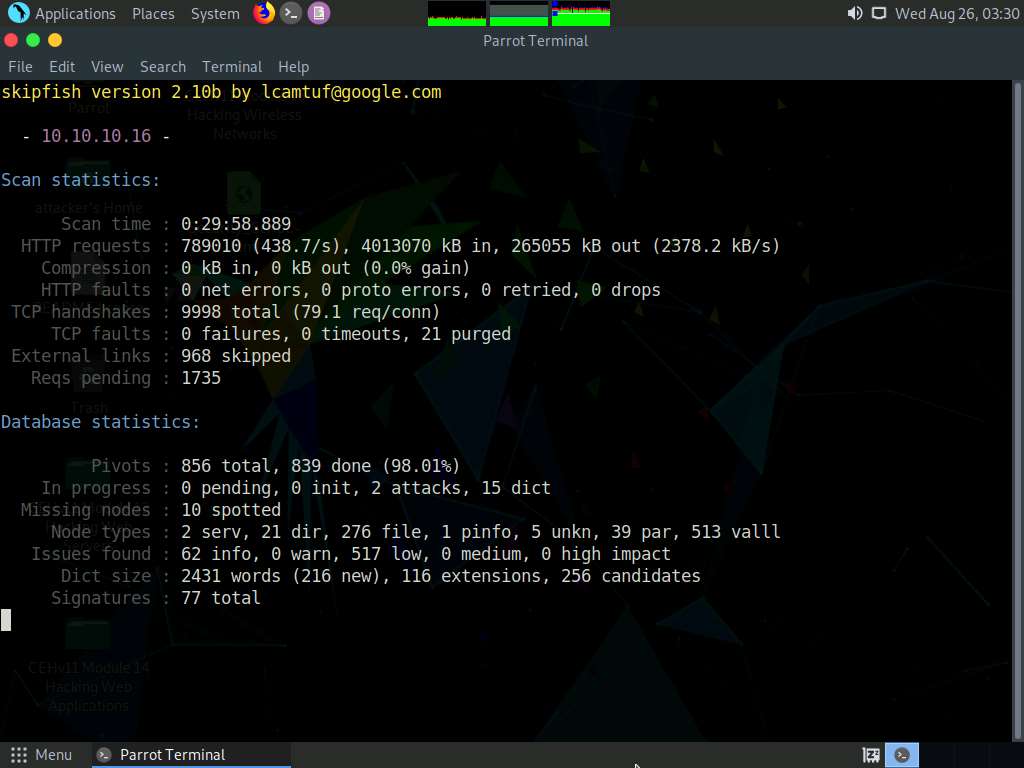
Note that Skipfish takes some time (approximately 20 minutes) to complete its scan.
You can press Ctrl+C to terminate the scan if it is taking longer.
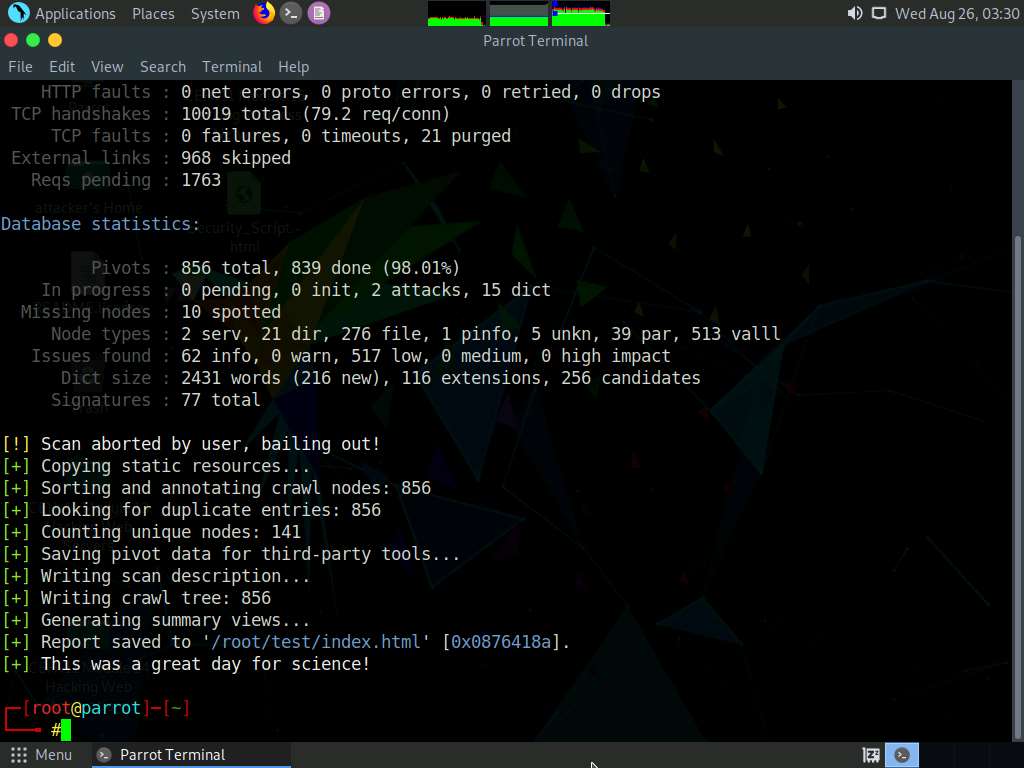
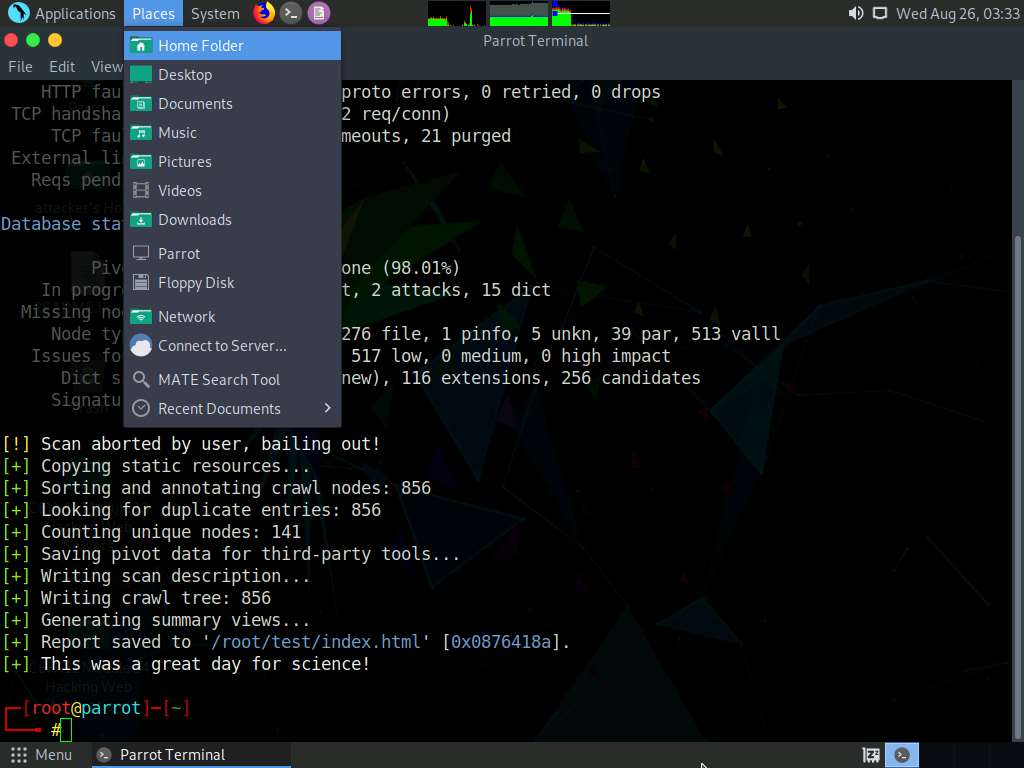
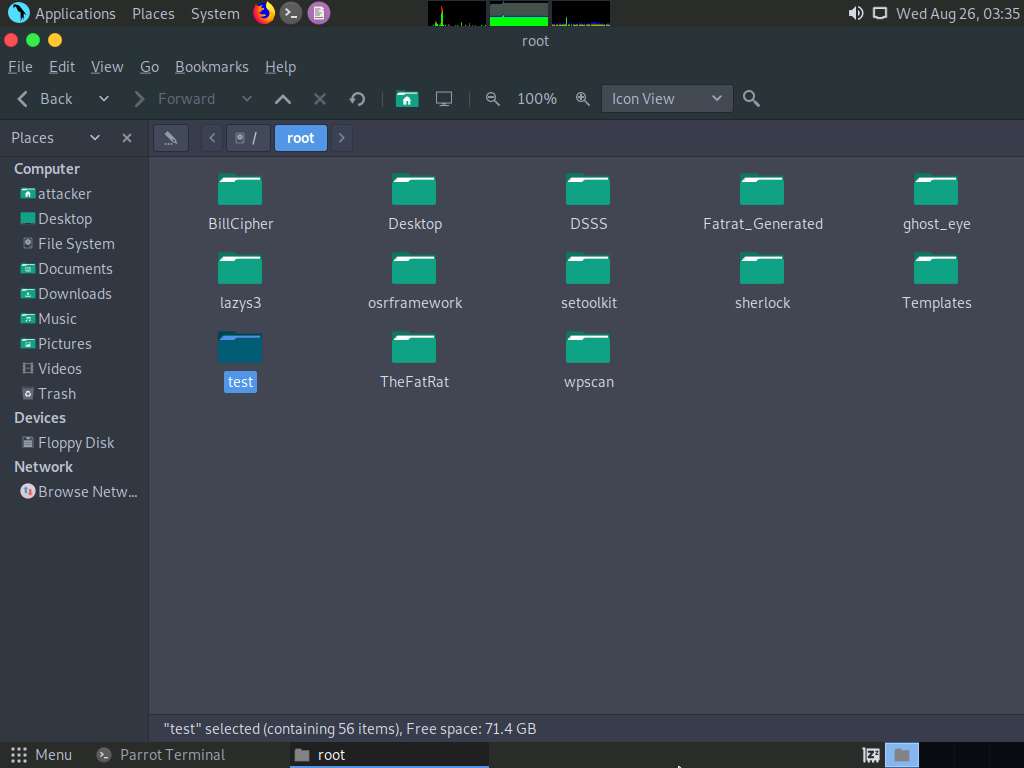
On completion of the scan, Skipfish generates a report and stores it in the test directory (in the root location). Click Place from the top-section of the Desktop and click Home Folder from the drop-down options.
Click File System from the left-pane and click root from the right-pane.
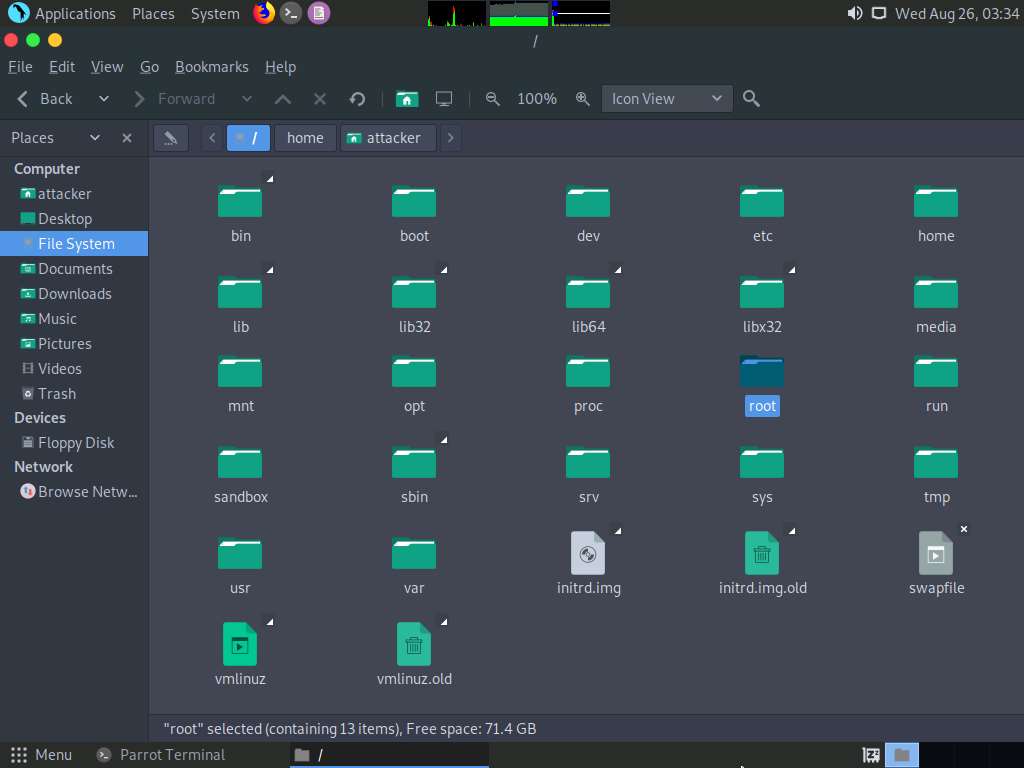
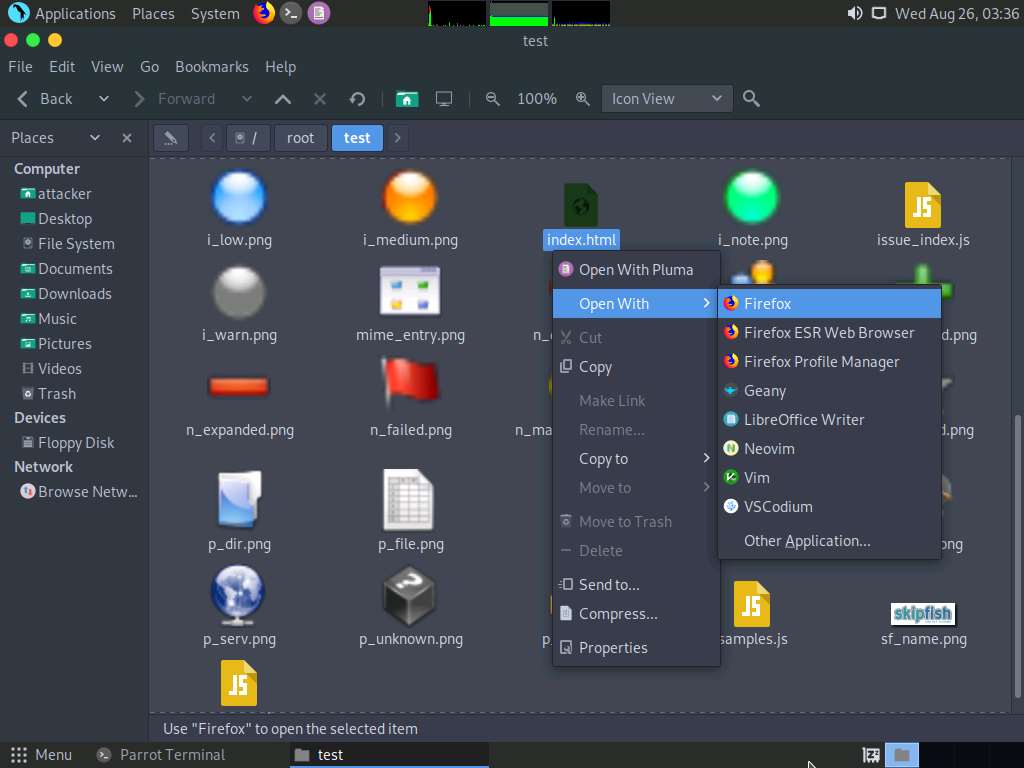
The root window appears, double-click test folder.
Right-click index.html, hover your mouse cursor on Open With, and click Firefox to view the scan result.
The Skipfish crawl result appears in the web browser, displaying a summary overview of document and issue types found, as shown in the screenshot.
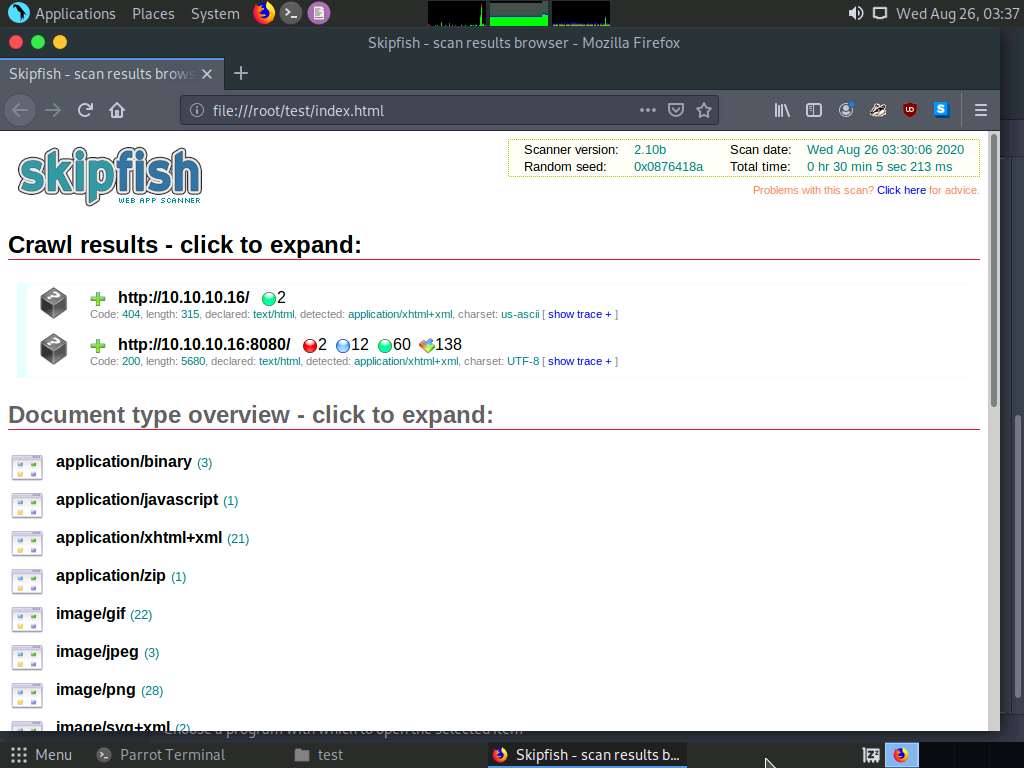
Expand each node to view detailed information regarding the result.
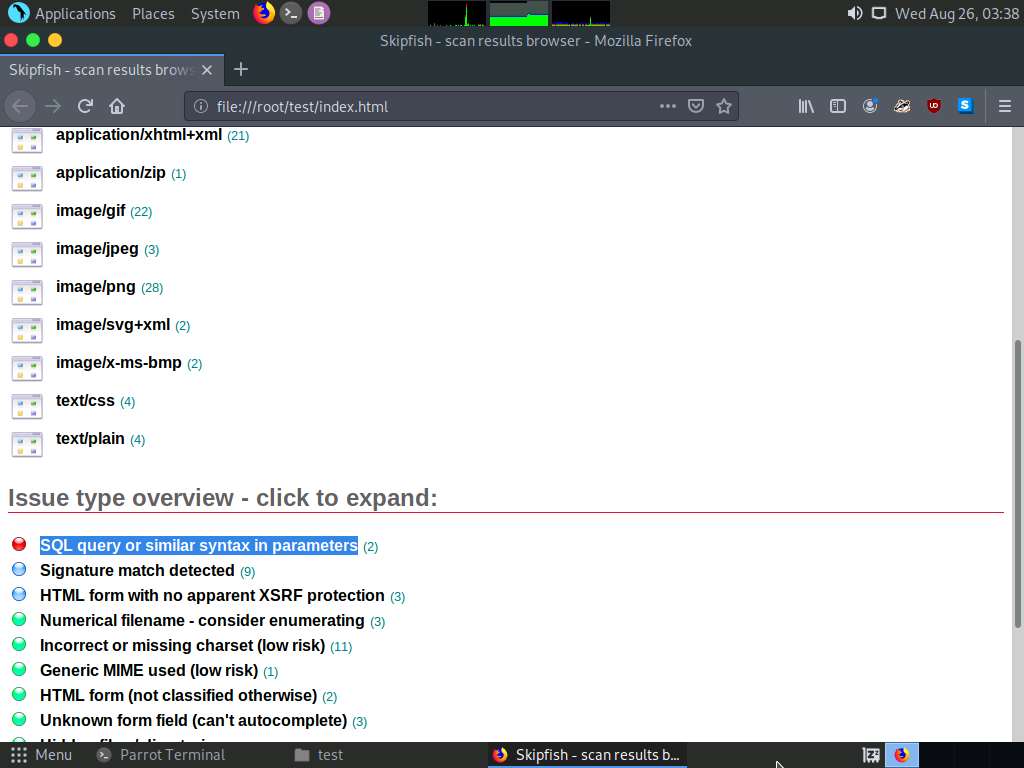
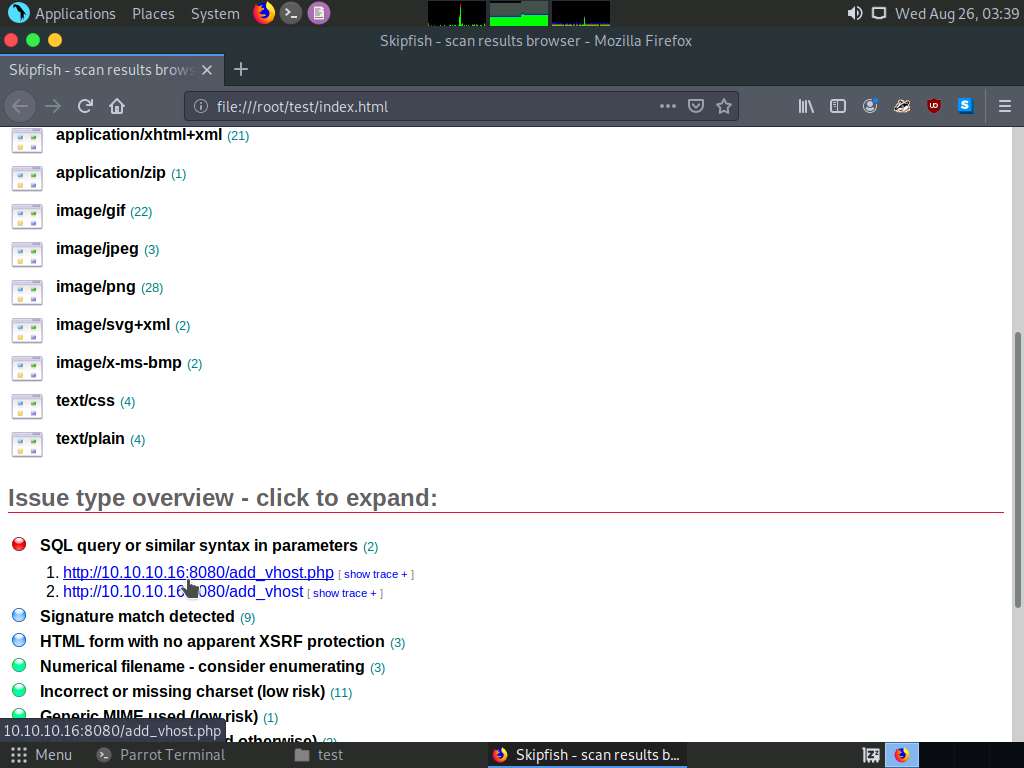
Analyze an issue found in the web server. To do this, click a node under the Issue type overview section to expand it.
Analyze the SQL query or similar syntax in parameters issue.
Observe the URL of the webpage associated with the vulnerability. Click the URL.
The webpage appears, as shown in the screenshot.
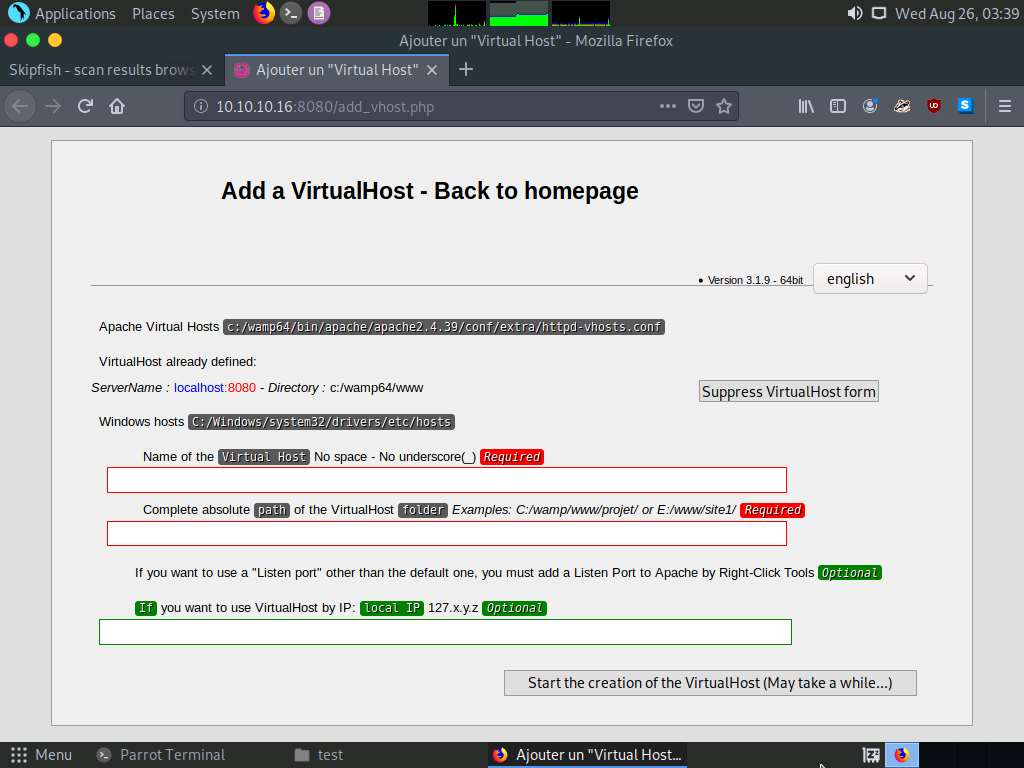
The PHP version webpage appears, displaying details related to the machine, as well as the other resources associated with the web server infrastructure and PHP configuration.
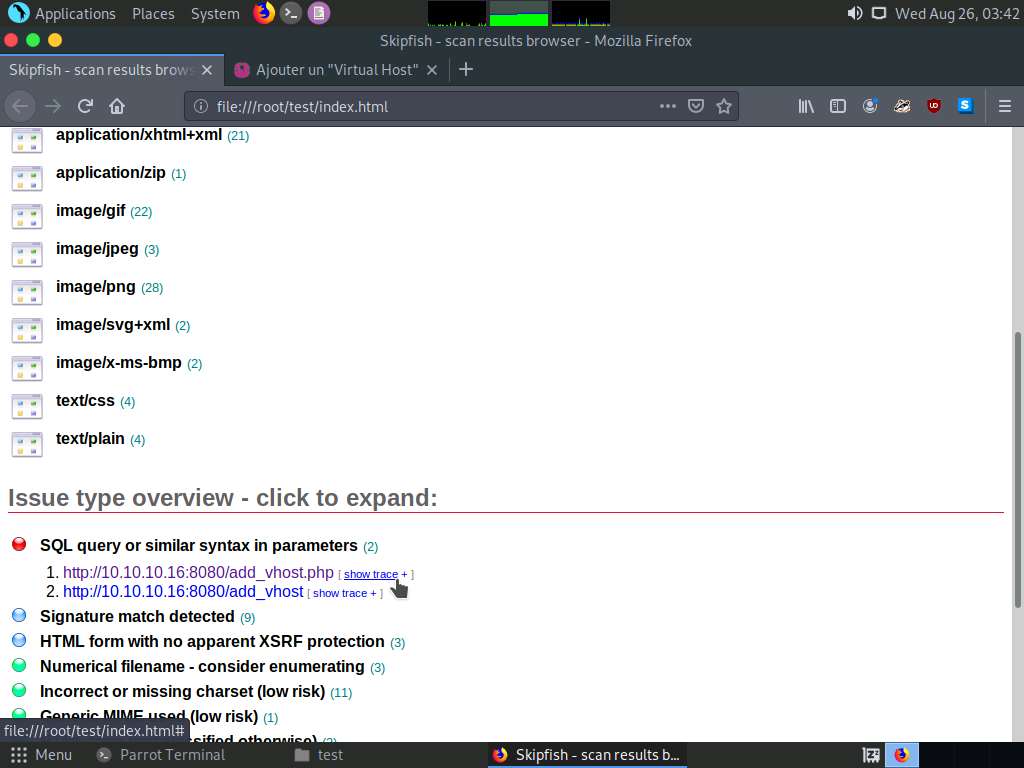
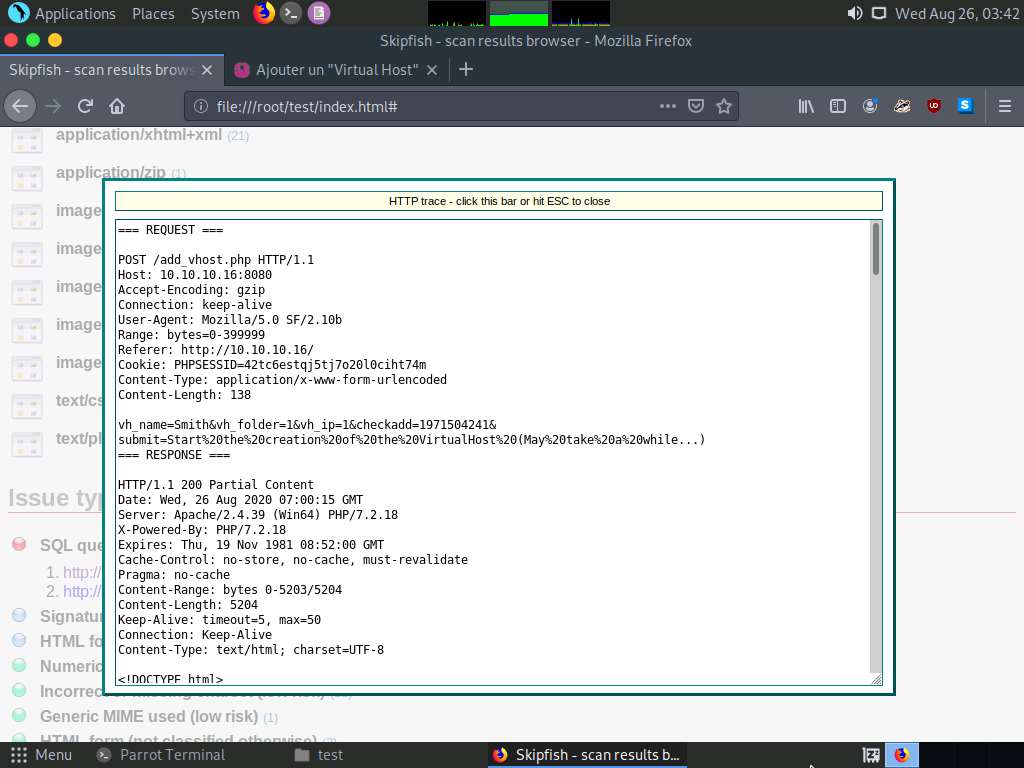
Click show trace next to the URL to examine the vulnerability in detail.
An HTTP trace window appears on the webpage, displaying the complete HTML session, as shown in the screenshot.
If the window does not properly appear, hold down the Ctrl key and click the link.
Examine other vulnerabilities and patch them to secure the web server.
This concludes the demonstration of how to gather information about a target web server using Skipfish.
Close all open windows on both the Parrot Security and Windows Server 2016 machines.
Task 3: Footprint a Web Server using the httprecon Tool
Web applications can publish information, interact with Internet users, and establish an e-commerce or e-government presence. However, if an organization is not rigorous in configuring and operating its public website, it may be vulnerable to a variety of security threats. Although the threats in cyberspace remain largely the same as in the physical world (fraud, theft, vandalism, and terrorism), they are far more dangerous. Organizations can face monetary losses, damage to reputation, and legal action if an intruder successfully violates the confidentiality of their data.
httprecon is a tool for advanced web server fingerprinting. This tool performs banner-grabbing attacks, status code enumeration, and header ordering analysis on its target web server.
Here, we will use the httprecon tool to gather information about a target web server.
Click Windows 10 to switch to the Windows 10, click Ctrl+Alt+Delete.
Alternatively, you can also click Ctrl+Alt+Delete button under Windows 10 machine thumbnail in the Resources pane or Click Ctrl+Alt+Delete button under Commands (thunder icon) menu.
By default, Admin user profile is selected, click Pa$$w0rd to paste the password in the Password field and press Enter to login.
Alternatively, you can also click Pa$$w0rd under Windows 10 machine thumbnail in the Resources pane or Click Type Text | Type Password button under Commands (thunder icon) menu.
Networks screen appears, click Yes to allow your PC to be discoverable by other PCs and devices on the network.
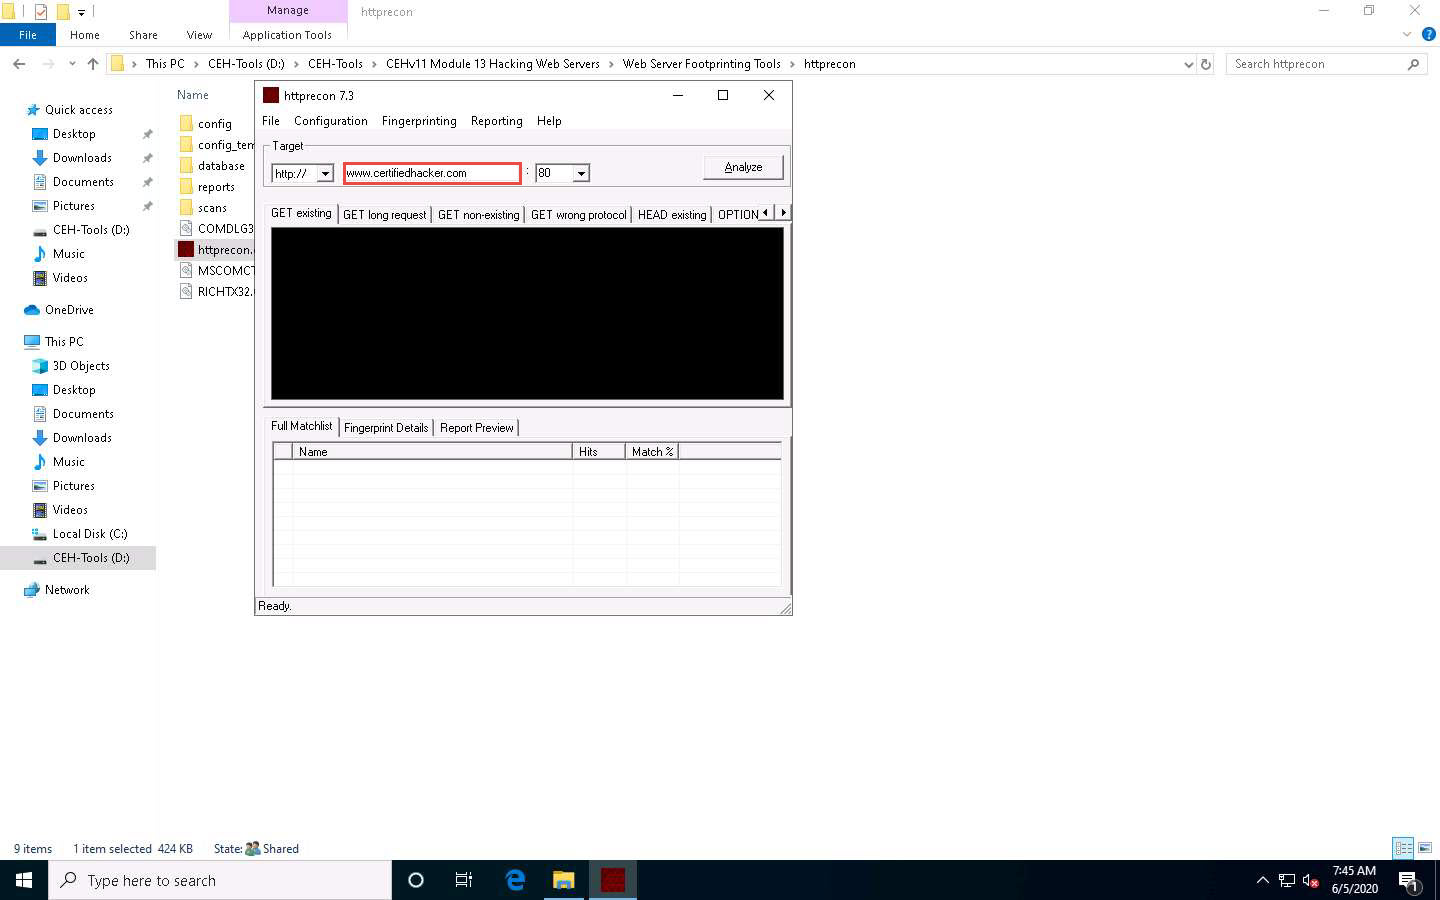
Navigate to D:\CEH-Tools\CEHv11 Module 13 Hacking Web Servers\Web Server Footprinting Tools\httprecon, right-click httprecon.exe, and, from the context menu, click Run as administrator double-click to launch the application.
If a User Account Control pop-up appears, click Yes.
Main window of httprecon appears, enter the website URL (here, www.certifiedhacker.com) that you want to footprint and select port number (80) in the Target section.
Click Analyze to start analyzing the designated website.
A footprint of the website appears, as shown in the screenshot.
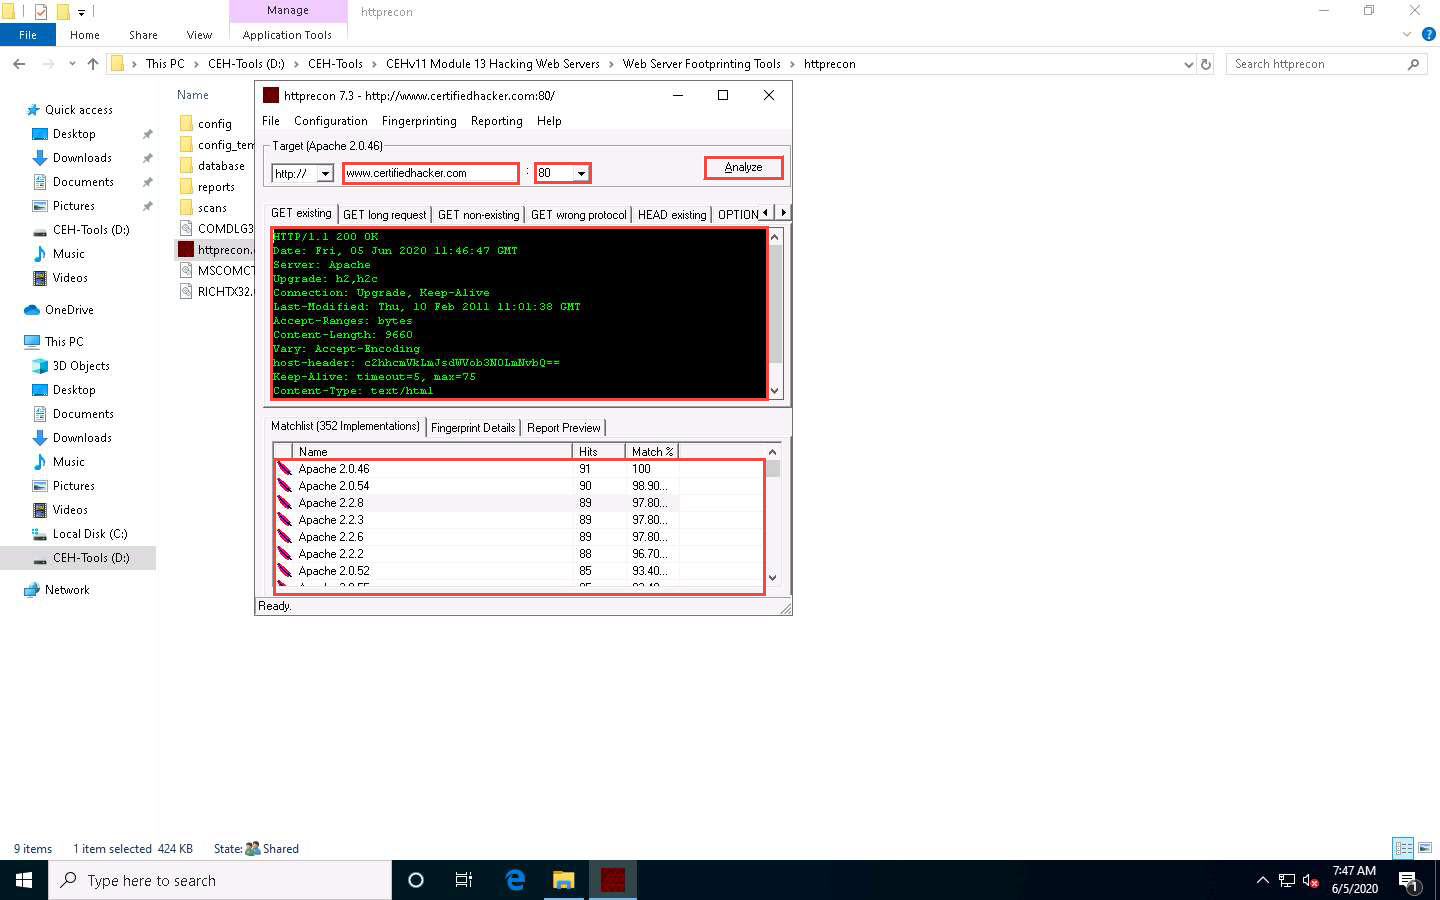
Look at the Get existing tab, and observe the server (Apache) and the server-side application (ASP.NET) used to develop the webpages.
When attackers obtain this information, they research the vulnerabilities present in ASP.NET and Apache and try to exploit them, which results in either full or partial control over the web application.
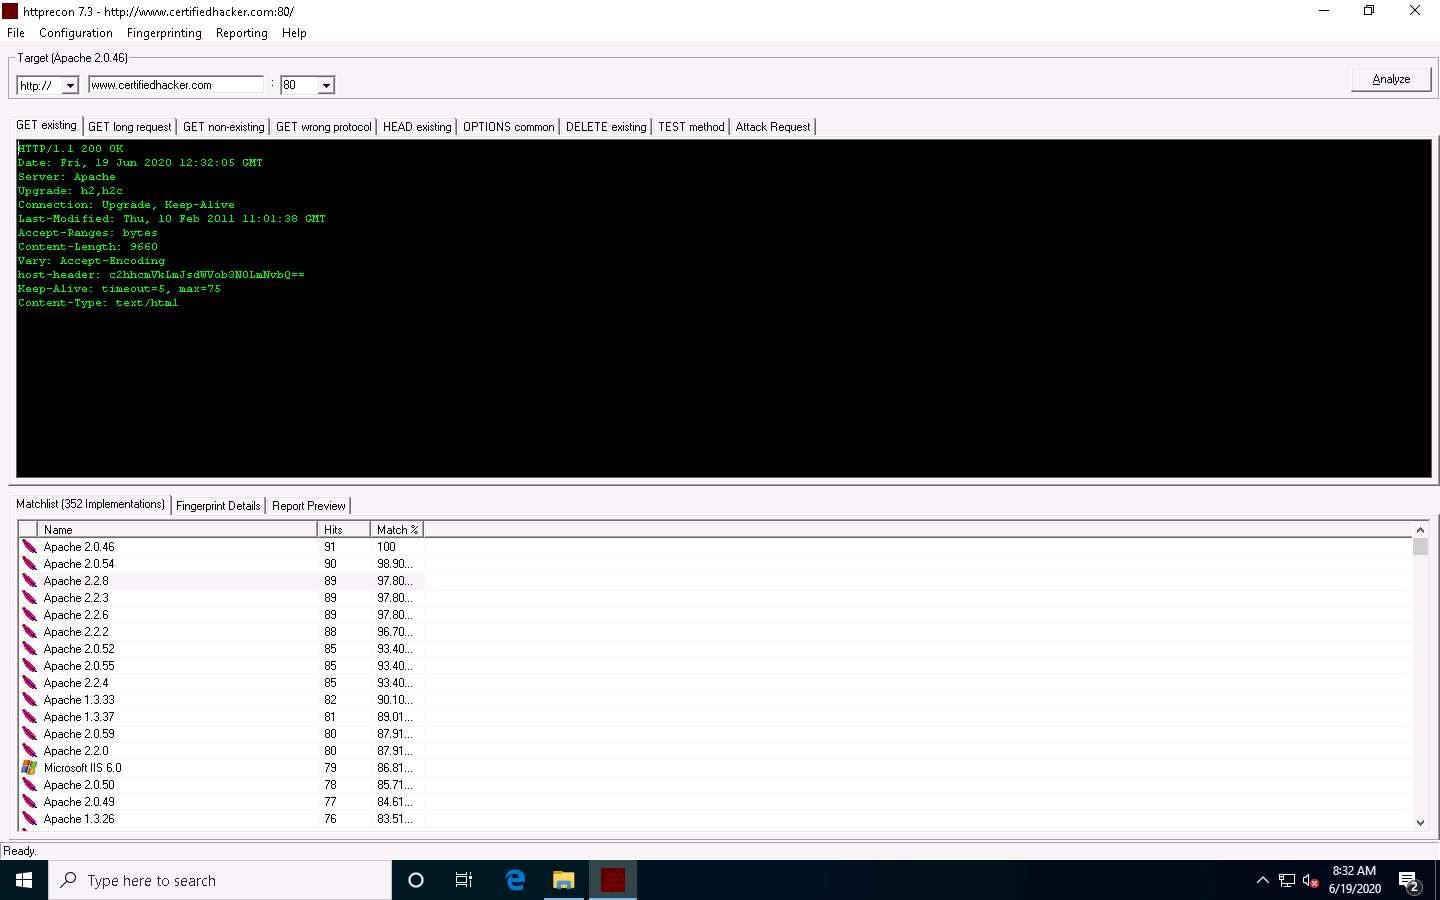
Click the GET long request tab, which lists all GET requests. Next, click the Fingerprint Details tab.
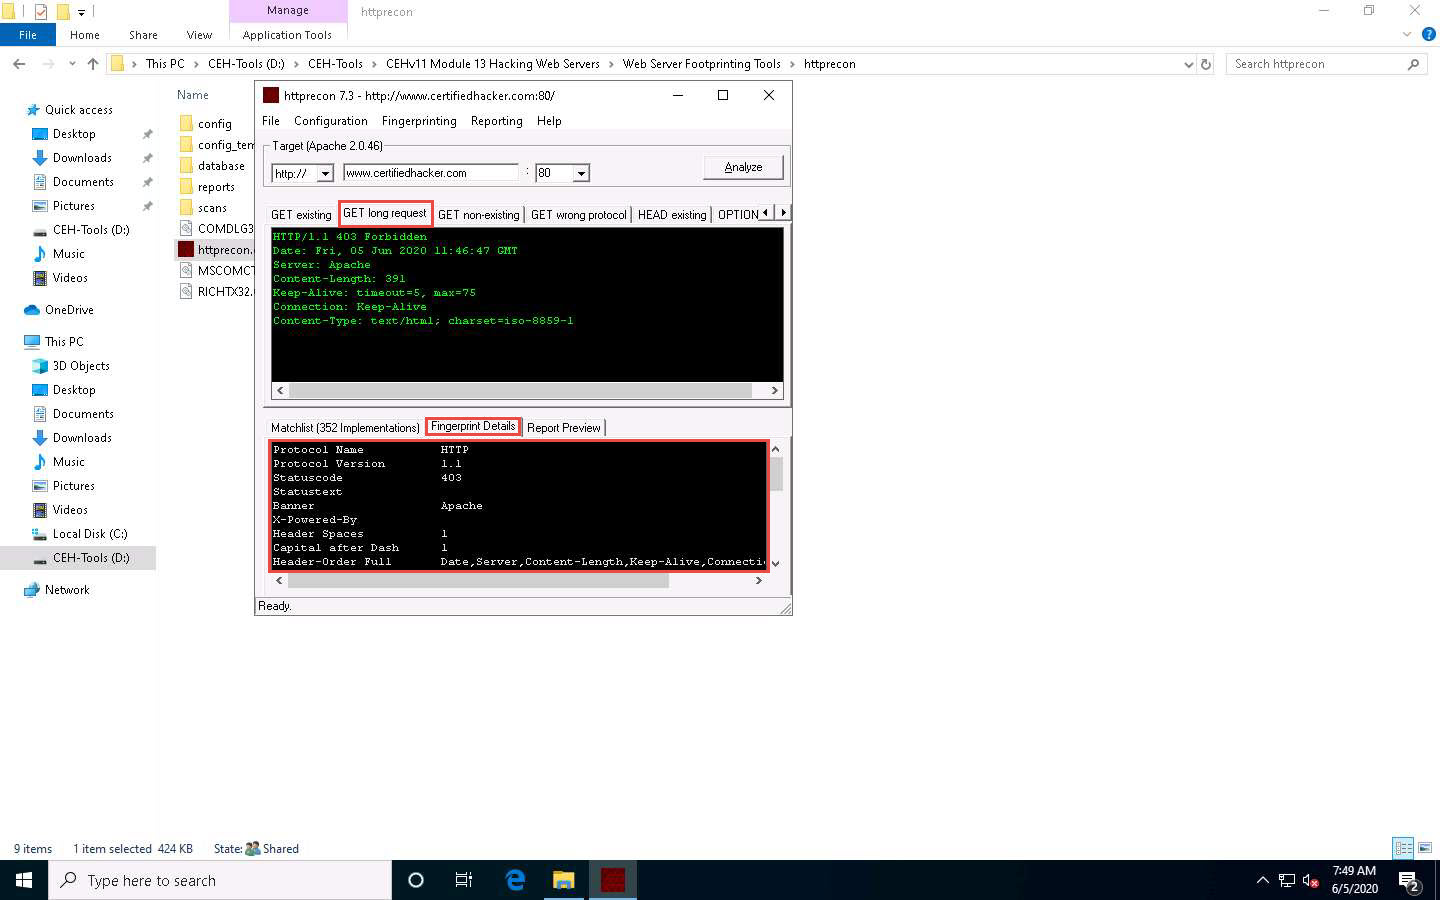
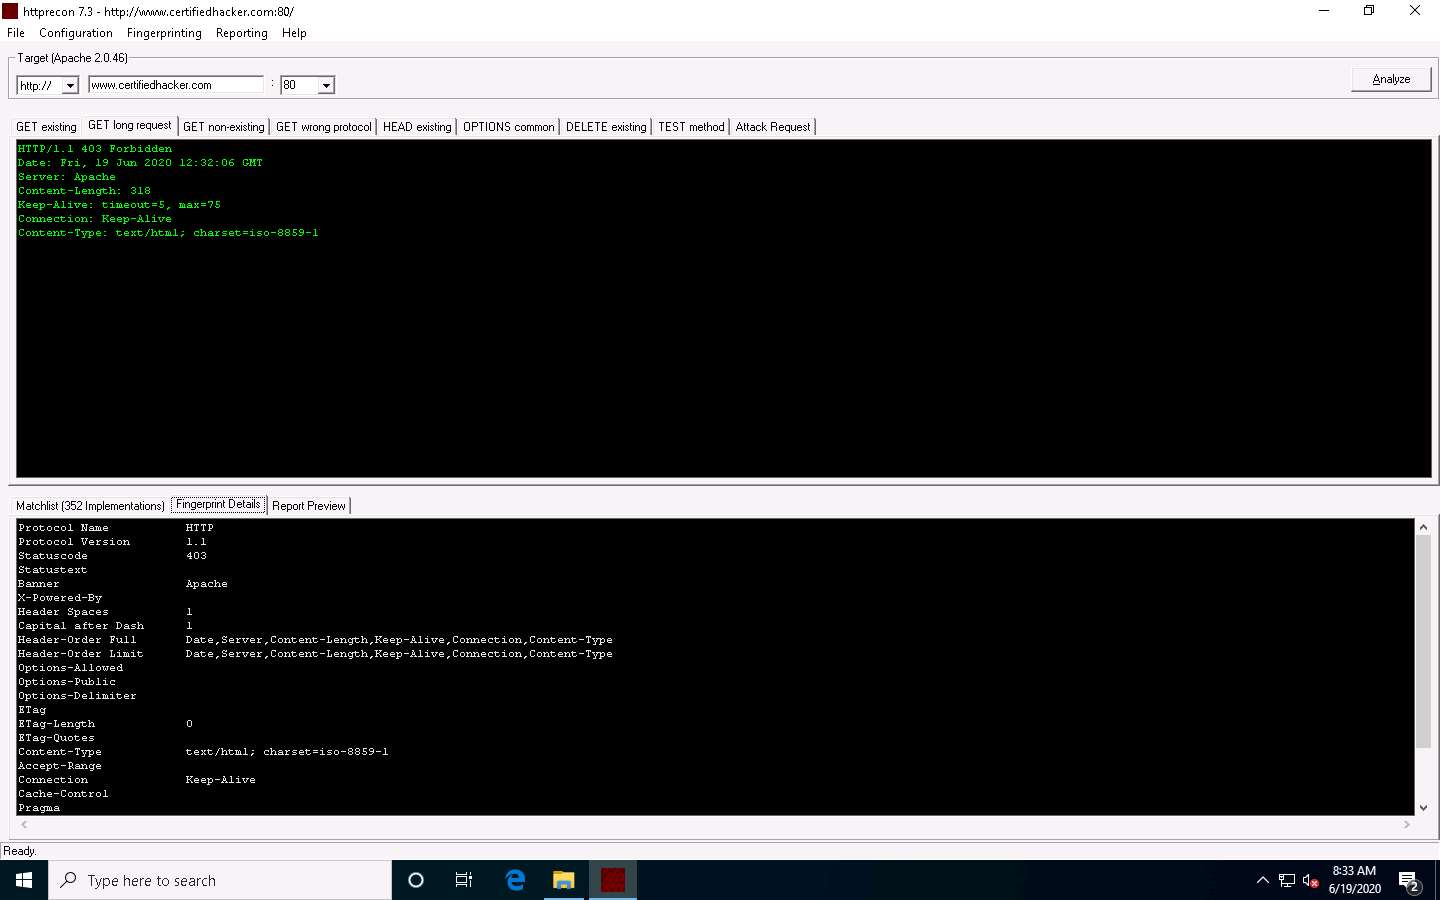
The details displayed in the screenshot above include the name of the protocol the website is using and its version.
By obtaining this information, attackers can manipulate HTTP vulnerabilities in order to perform malicious activities such as sniffing over the HTTP channel, which might result in revealing sensitive data such as user credentials.
This concludes the demonstration of how to gather information about the target web server using httprecon.
Close all open windows on the Windows 10 machine.
Task 4: Footprint a Web Server using ID Serve
Pen testers must be familiar with banner grabbing techniques to monitor servers and ensure compliance and appropriate security updates. This technique also helps in locating rogue servers or determining the role of servers within a network. This lab manual helps understand and learn the banner grabbing technique using ID Serve, which allows an attacker to determine a remote target system.
ID Serve is a simple Internet server identification utility. Following is a list of its capabilities:
HTTP server identification
Non-HTTP server identification
Reverse DNS lookup
Click Windows 10 to switch to the Windows 10 machine, navigate to D:\CEH-Tools\CEHv11 Module 13 Hacking Web Servers\Web Server Footprinting Tools\ID Serve and double-click idserve.exe.
The main window of ID Serve appears. Click the Server Query tab.
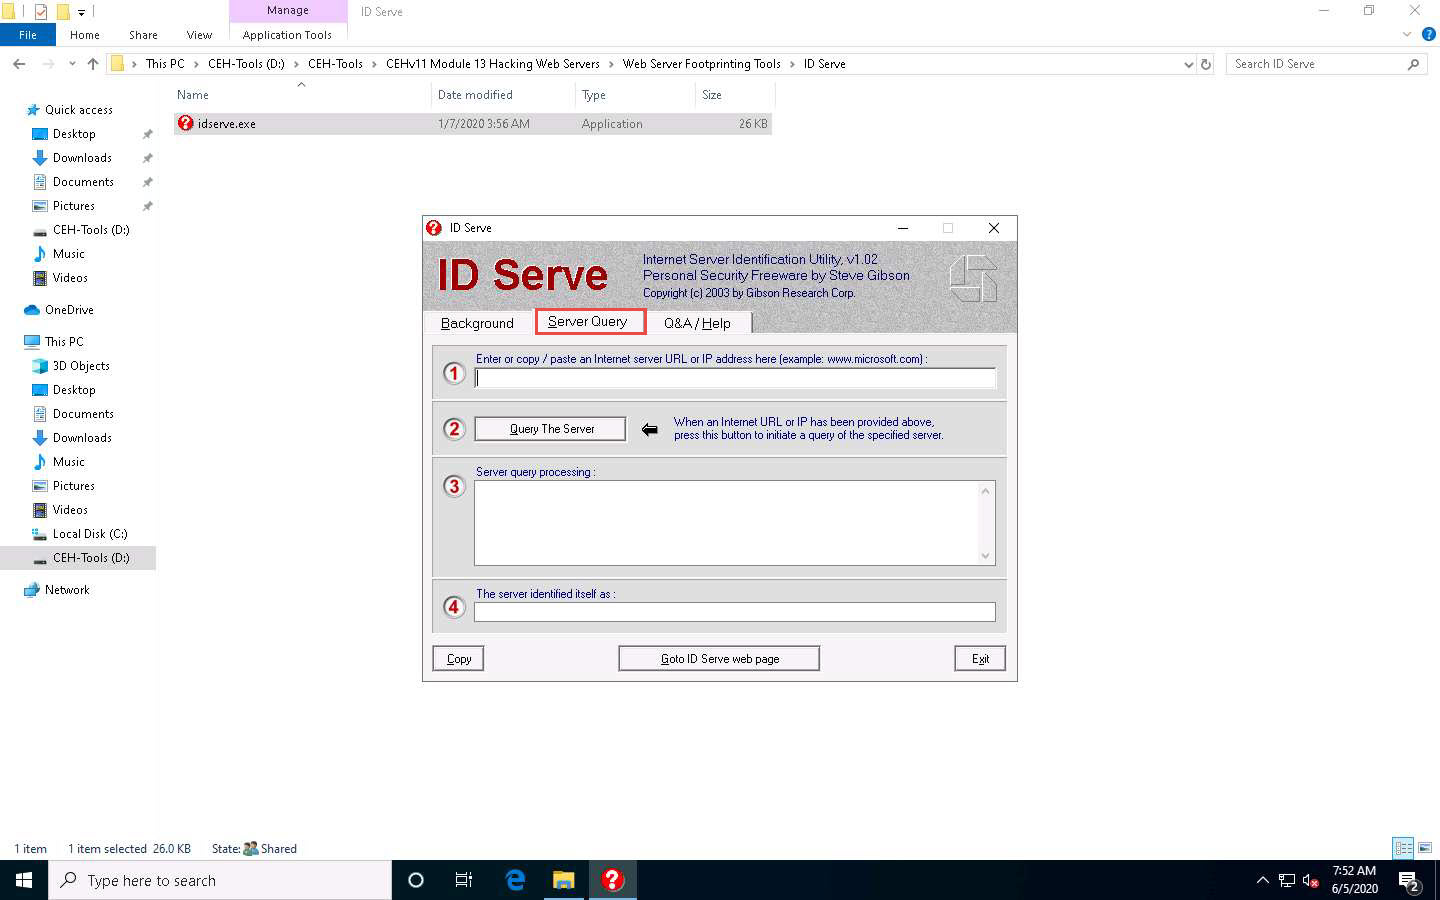
For option 1, in the Enter or copy/paste an Internet server URL or IP address section, enter the URL (http://www.certifiedhacker.com) you want to footprint.
Click Query the Server to start querying the website.
After the completion of the query, ID Serve displays the results of the entered website, as shown in the screenshot.
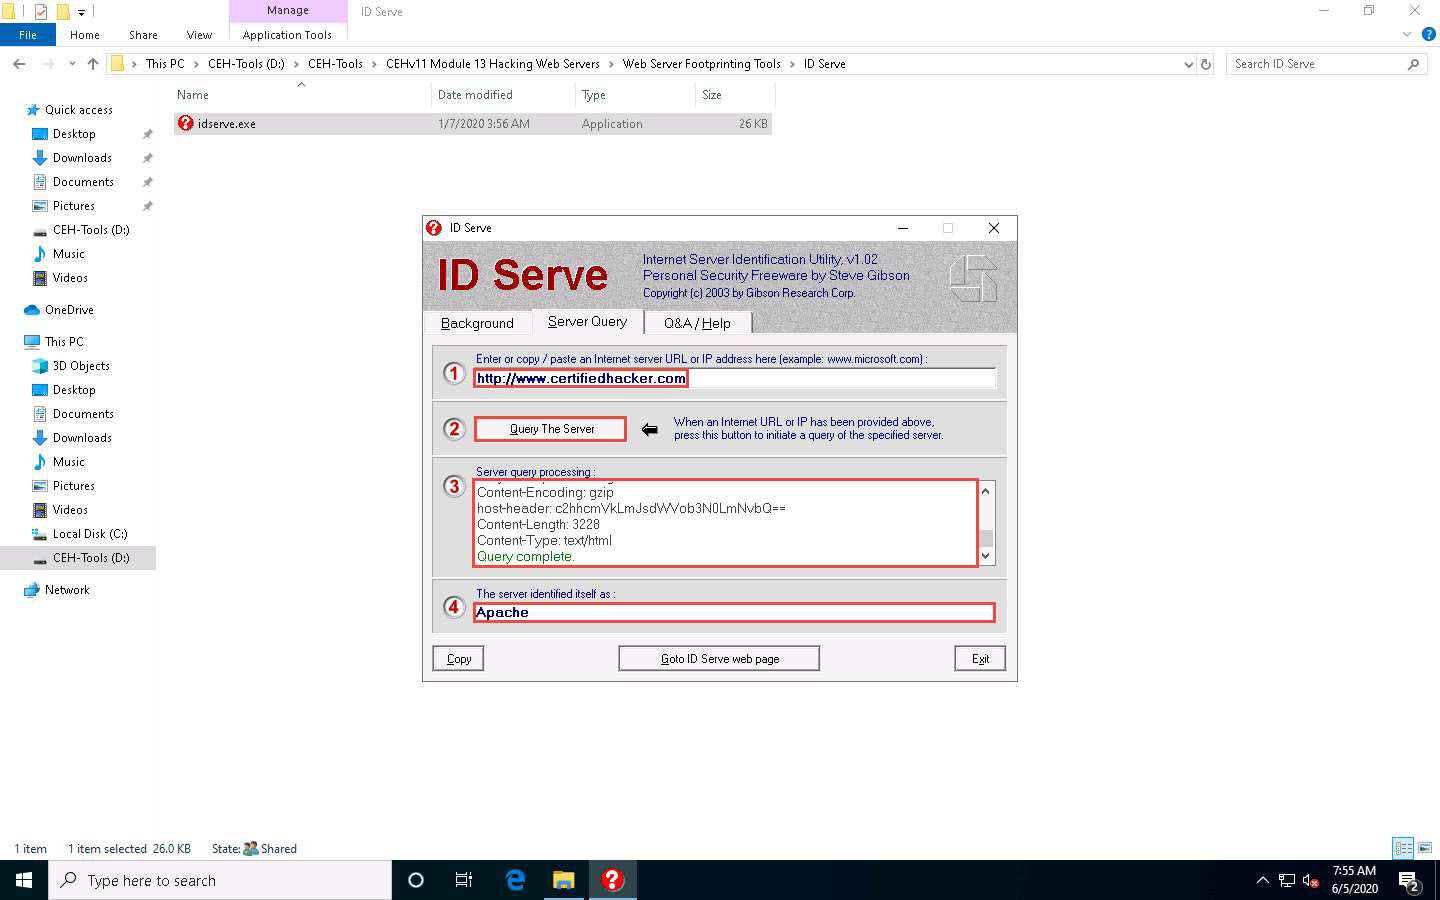
After obtaining this information, the attacker may perform a vulnerability analysis on that particular version of the web server and implement various techniques to perform exploitation.
Click Exit to close the application. Close all open windows.
Task 5: Footprint a Web Server using Netcat and Telnet
Netcat
Netcat is a networking utility that reads and writes data across network connections, using the TCP/IP protocol. It is a reliable “back-end” tool used directly or driven by other programs and scripts. It is also a network debugging and exploration tool.
Telnet
Telnet is a client-server network protocol. It is widely used on the Internet or LANs. It provides the login session for a user on the Internet. The single terminal attached to another computer emulates with Telnet. The primary security problems with Telnet are the following:
It does not encrypt any data sent through the connection.
It lacks an authentication scheme.
Telnet helps users perform banner-grabbing attacks. It probes HTTP servers to determine the Server field in the HTTP response header.
Click Parrot Security to switch to the Parrot Security machine.
Click the MATE Terminal icon from the menu bar to launch the terminal.

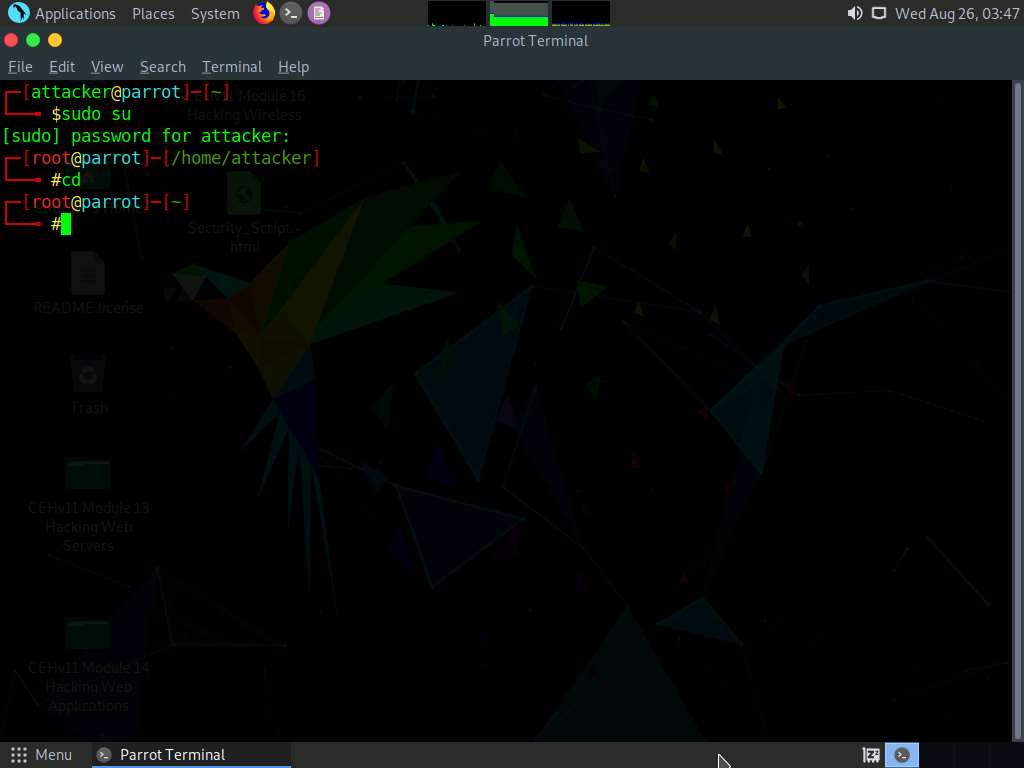
A Parrot Terminal window appears. In the terminal window, type sudo su and press Enter to run the programs as a root user.
In the [sudo] password for attacker field, type toor as a password and press Enter.
The password that you type will not be visible.
Now, type cd and press Enter to jump to the root directory.
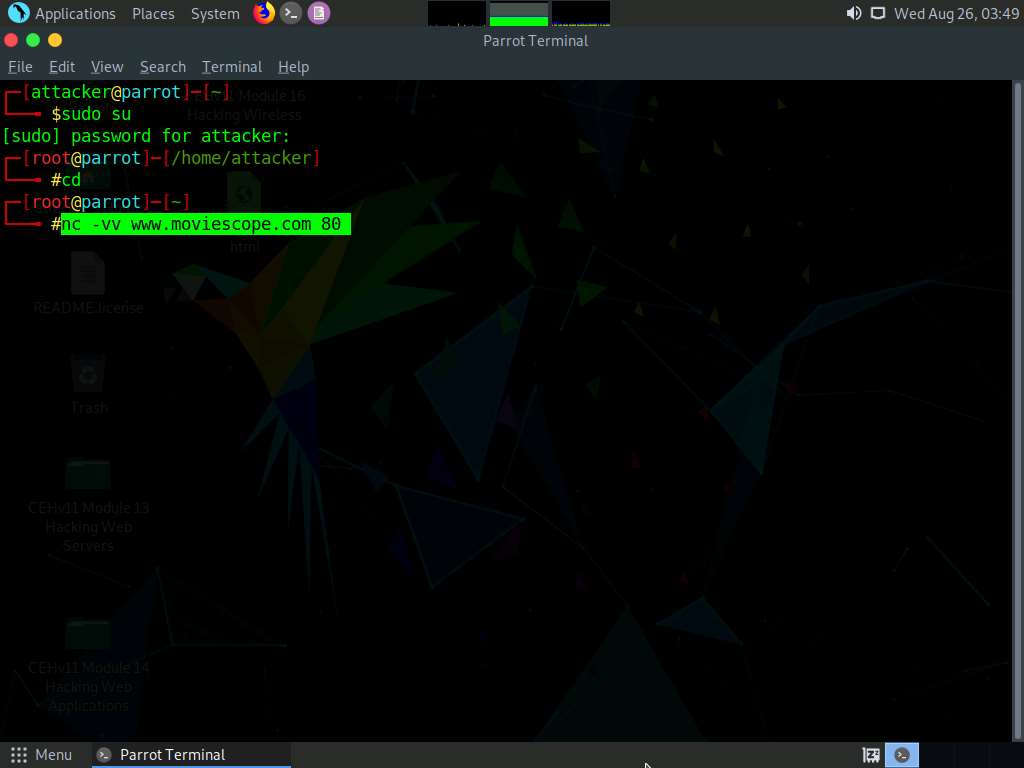
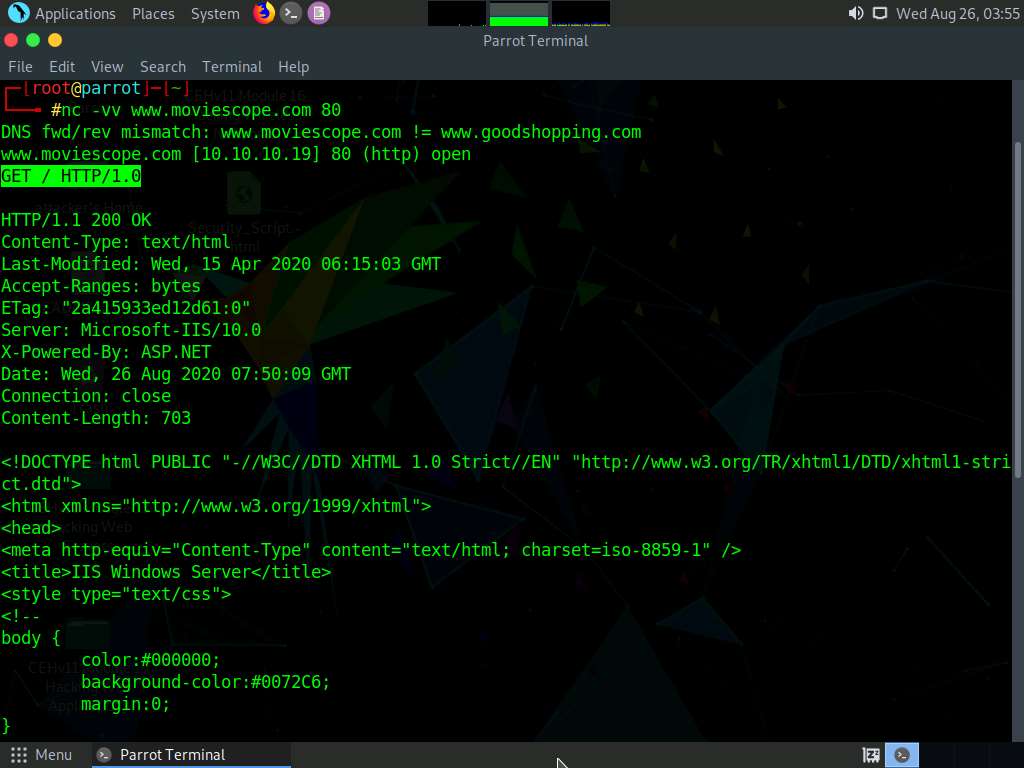
In the terminal window, type nc -vv www.moviescope.com 80 and press Enter.
Once you hit Enter, the netcat will display the hosting information of the provided domain, as shown in the screenshot.
Now, type GET / HTTP/1.0 and press Enter twice.
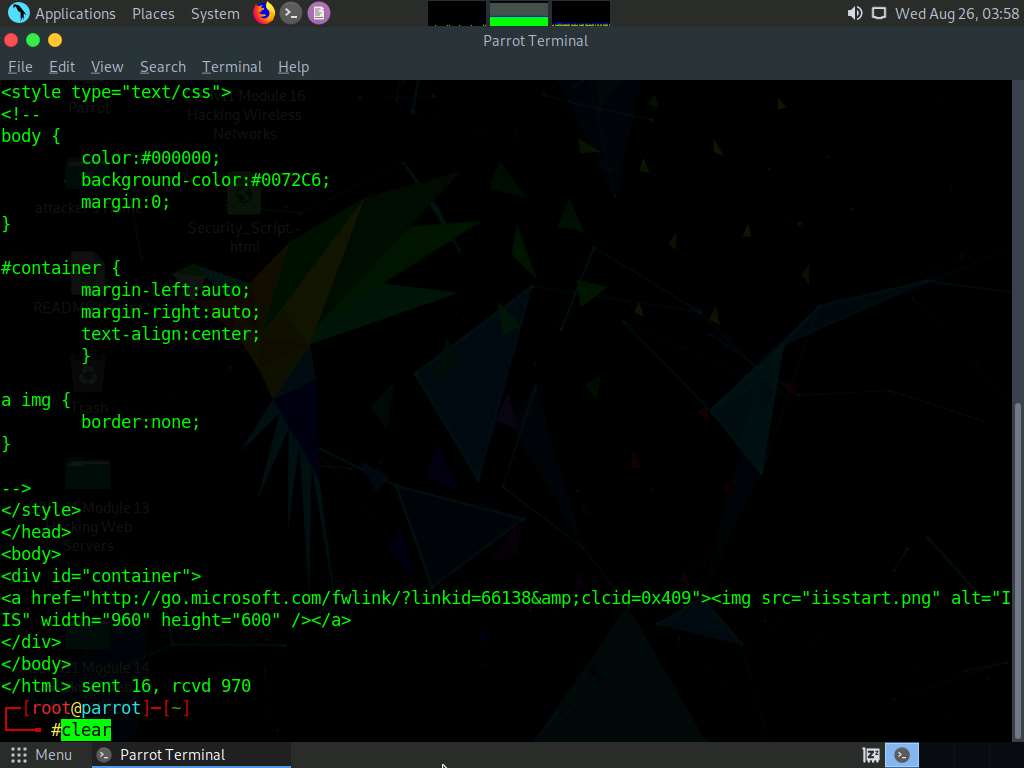
Netcat will perform the banner grabbing and gather information such as content type, last modified date, accept ranges, ETag, and server information.
In the terminal windows, type clear and press Enter to clear the netcat result in the terminal window.
Now, perform banner grabbing using telnet. In the terminal window, type telnet www.moviescope.com 80 and press Enter.
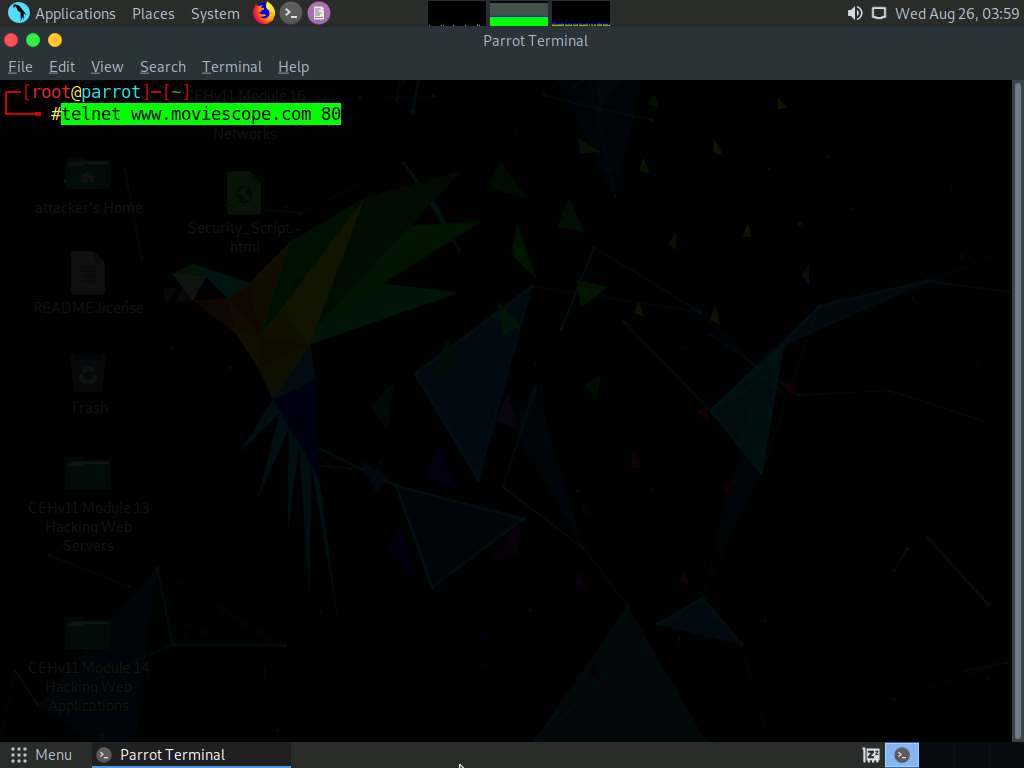
Telnet will connect to the domain, as shown in the screenshot.
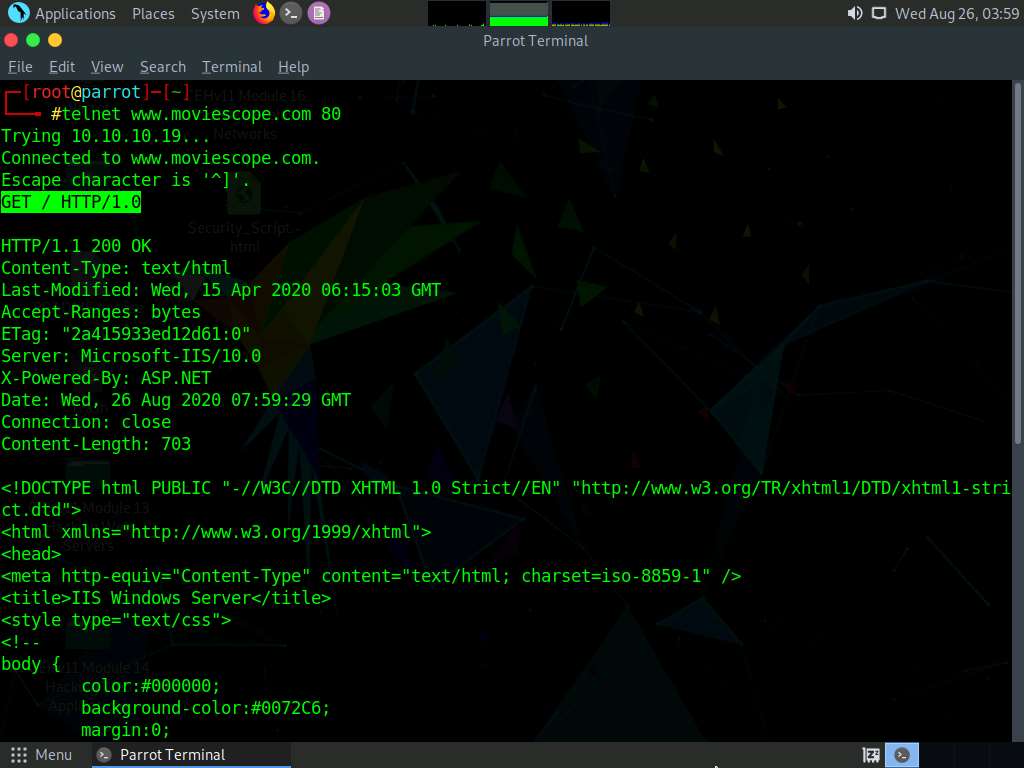
Now, type GET / HTTP/1.0 and press Enter twice. Telnet will perform the banner grabbing and gather information such as content type, last modified date, accept ranges, ETag, and server information.
This concludes the demonstration of how to gather information about the target web server using the Netcat and Telnet utilities.
Close the terminal window on the Parrot Security machine.
Task 6: Enumerate Web Server Information using Nmap Scripting Engine (NSE)
The web applications that are available on the Internet may have vulnerabilities. Some hackers’ attack strategies may need the Administrator role on your server, but sometimes they simply need sensitive information about the server. Utilizing Nmap and http-enum.nse content returns a diagram of those applications, registries, and records uncovered. This way, it is possible to check for vulnerabilities or abuses in databases. Through this technique, it is possible to discover genuine (and extremely dumb) security imperfections on a site such as some sites (like WordPress and PrestaShop) that maintain accessibility to envelopes that ought to be erased once the task has been settled. Once you have identified a vulnerability, you can discover a fix for it.
Nmap, along with Nmap Scripting Engine, can extract a lot of valuable information from the target web server. In addition to Nmap commands, Nmap Scripting Engine (NSE)provides scripts that reveal various useful information about the target web server to an attacker.
On to the Parrot Security machine, click the MATE Terminal icon from the menu bar to launch the terminal.

A Parrot Terminal window appears. In the terminal window, type sudo su and press Enter to run the programs as a root user.
In the [sudo] password for attacker field, type toor as a password and press Enter.
The password that you type will not be visible.
Now, type cd and press Enter to jump to the root directory.

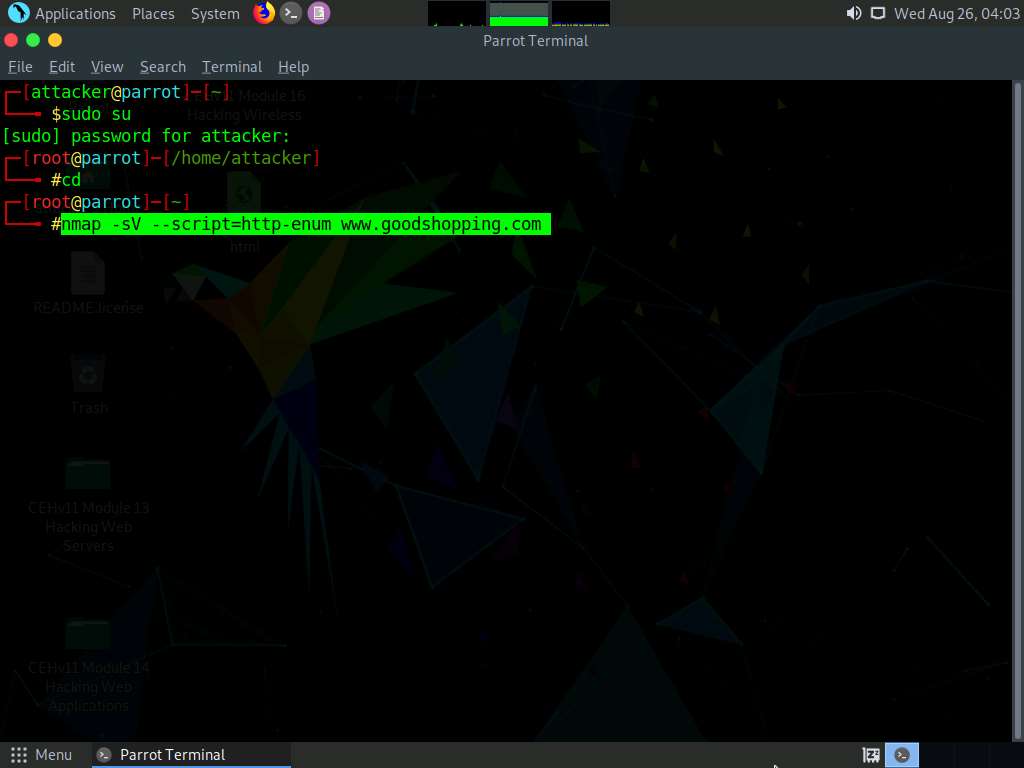
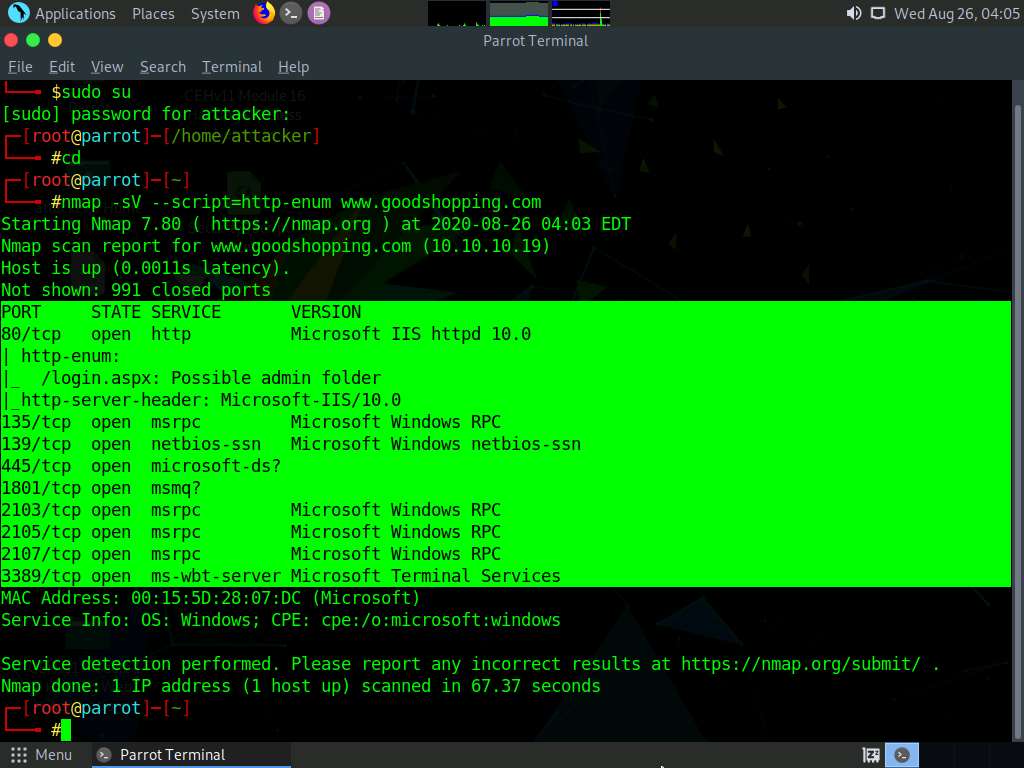
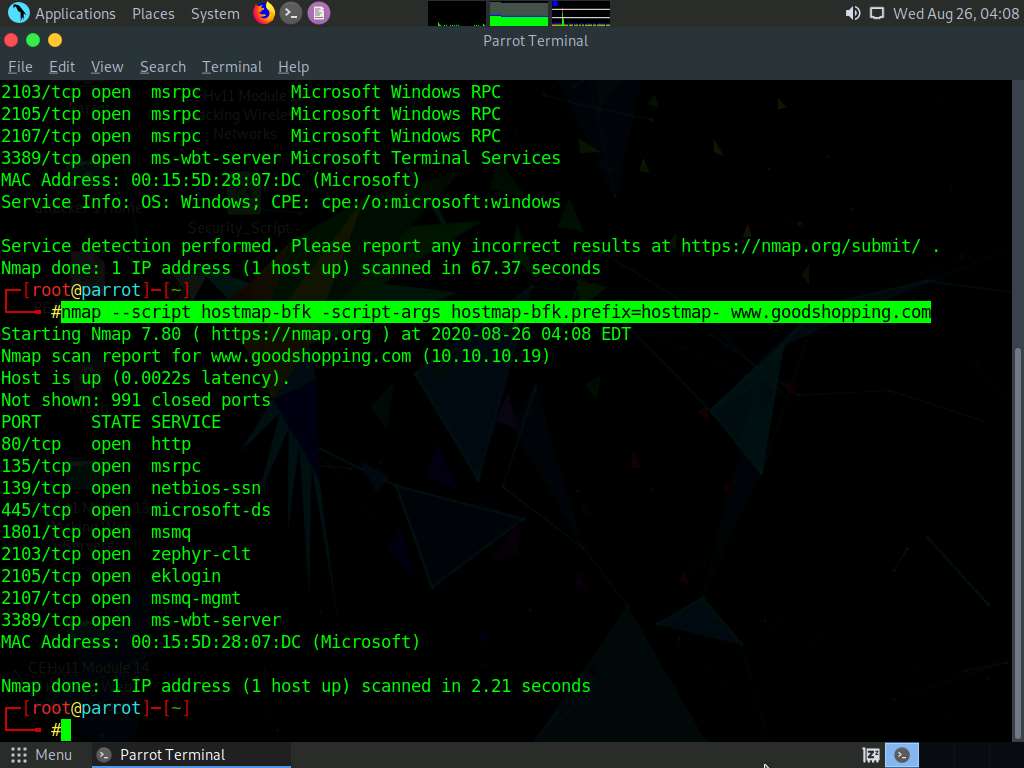
Enumerate the directories used by web servers and web applications, in the terminal window. Type nmap -sV --script=http-enum [target website] and press Enter.
In this scan, we are enumerating the www.goodshopping.com website.
This script enumerates and provides you with the output details, as shown in the screenshot.
The next step is to discover the hostnames that resolve the targeted domain.
In the terminal window, type nmap --script hostmap-bfk -script-args hostmap-bfk.prefix=hostmap- www.goodshopping.com and press Enter.
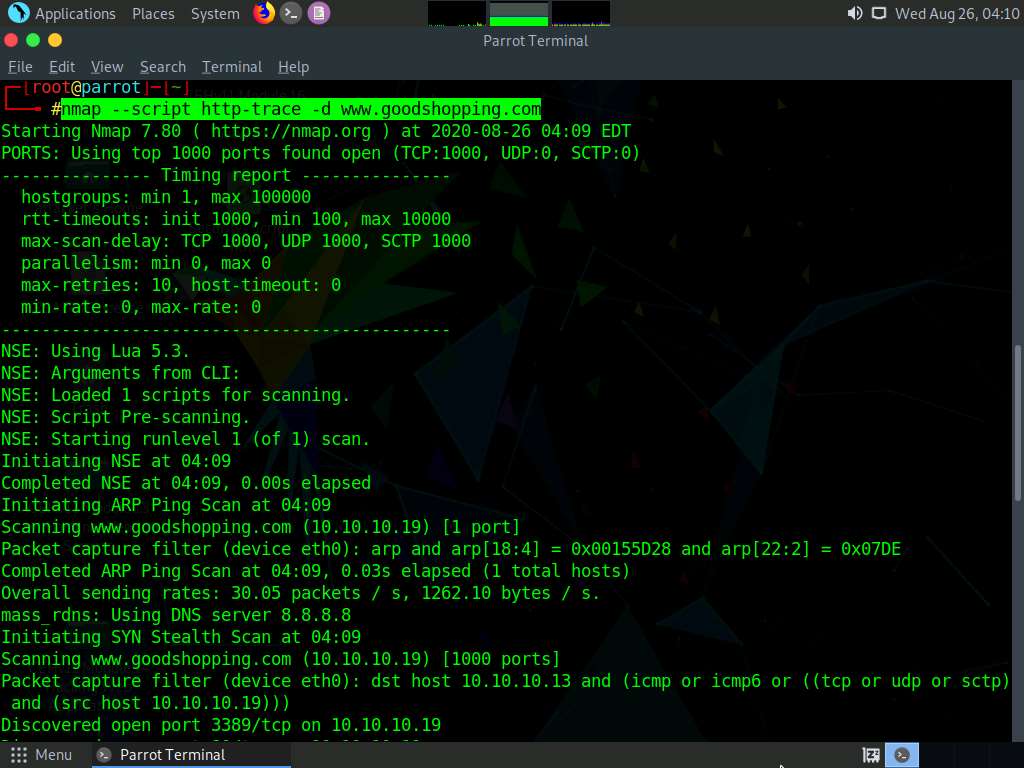
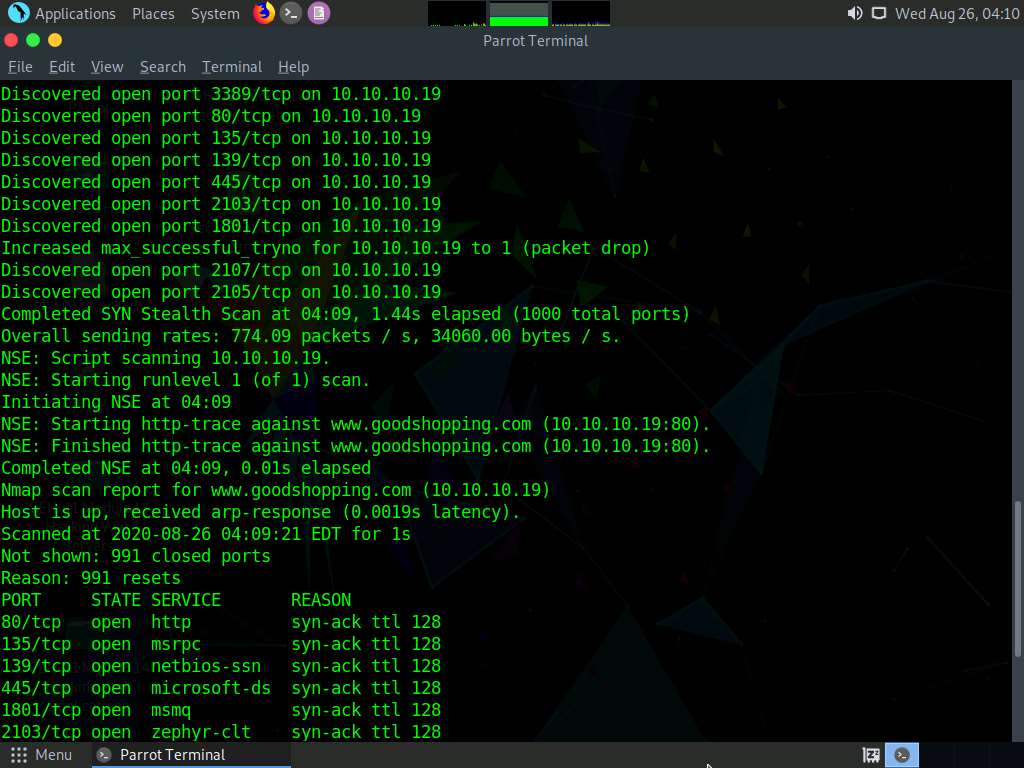
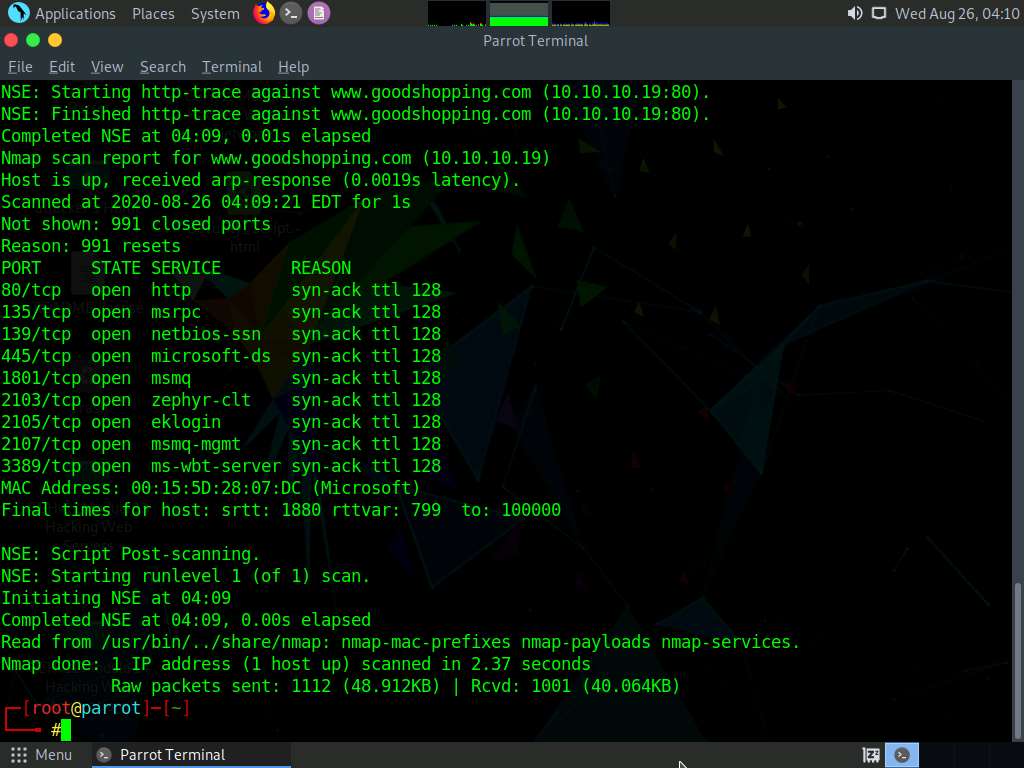
Perform an HTTP trace on the targeted domain. In the terminal window, type nmap --script http-trace -d www.goodshopping.com and press Enter.
This script will detect a vulnerable server that uses the TRACE method by sending an HTTP TRACE request that shows if the method is enabled or not.
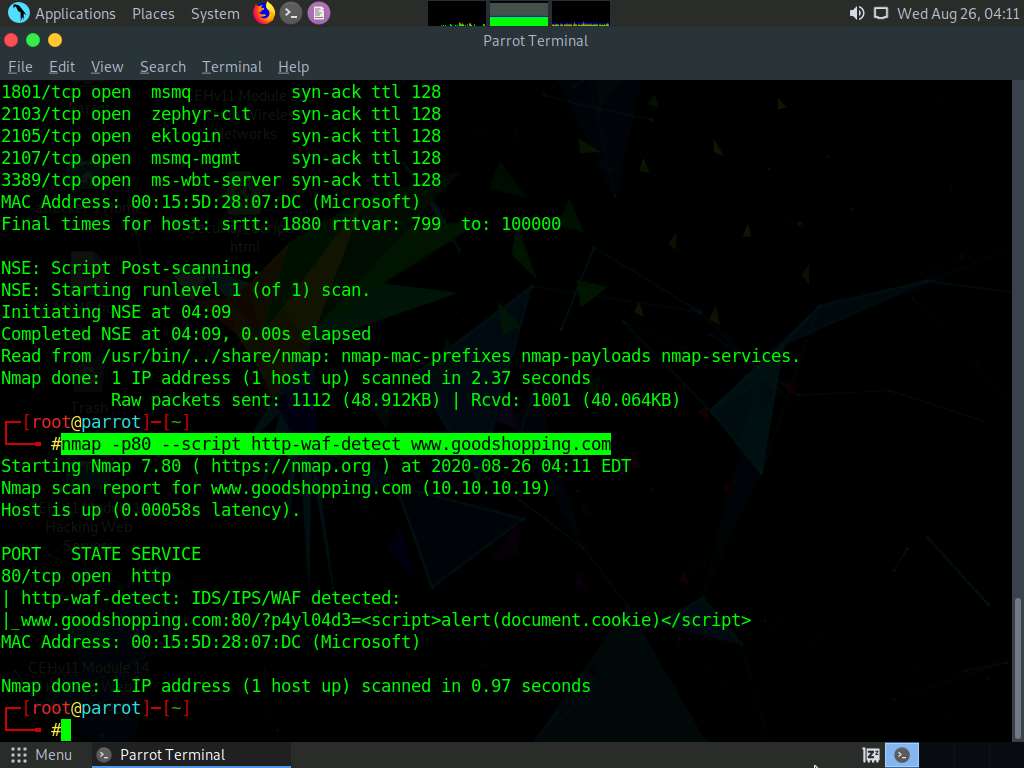
Now, check whether Web Application Firewall is configured on the target host or domain. In the terminal window, type nmap -p80 --script http-waf-detect www.goodshopping.com and press Enter.
This command will scan the host and attempt to determine whether a web server is being monitored by an IPS, IDS, or WAF.
This command will probe the target host with malicious payloads and detect the changes in the response code.
This concludes the demonstration of how to enumerate web server information using the Nmap Scripting Engine (NSE).
Close the terminal windows on the Parrot Security machine.
Task 7: Uniscan Web Server Fingerprinting in Parrot Security
Uniscan is a versatile server fingerprinting tool that not only performs simple commands like ping, traceroute, and nslookup, but also does static, dynamic, and stress checks on a web server. Apart from scanning websites, uniscan also performs automated Bing and Google searches on provided IPs. Uniscan takes all of this data and combines them into a comprehensive report file for the user.
Click Windows Server 2016 to switch to the Windows Server 2016 machine.

Click Ctrl+Alt+Delete to activate the machine. By default, CEH\Administration user profile is selected, click Pa$$w0rd to paste the password in the Password field and press Enter to login.
Alternatively, you can also click Pa$$w0rd under Windows Server 2016 machine thumbnail in the Resources pane or Click Type Text | Type Password button under Commands (thunder icon) menu.
Double-click the WAMP Server shortcut icon from Desktop to start WAMP Server services. Alternatively, you can also launch the WAMP Server services from the Start menu apps

Wait until the WAMP Server icon turns Green in the Notification area. Leave the Windows Server 2016 machine running.

Leave the Windows Server 2016 machine running and switch to the Parrot Security machine.
Now, click Parrot Security to switch to the Parrot Security machine, click the MATE Terminal icon from the menu bar to launch the terminal.
In the [sudo] password for attacker field, type toor as a password and press Enter.
The password that you type will not be visible.
Now, type cd and press Enter to jump to the root directory.

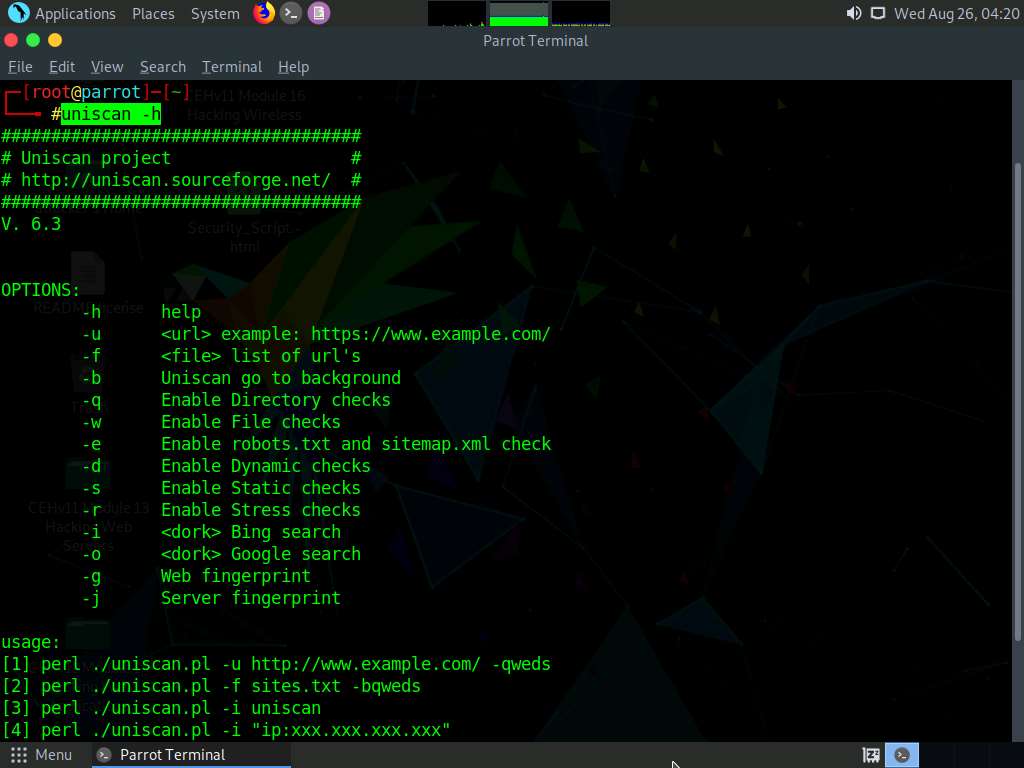
In the terminal window, type uniscan -h and hit Enter to display the uniscan help options.
The help menu appears, as shown in the screenshot. First, use the -q command to search for the directories of the web server.
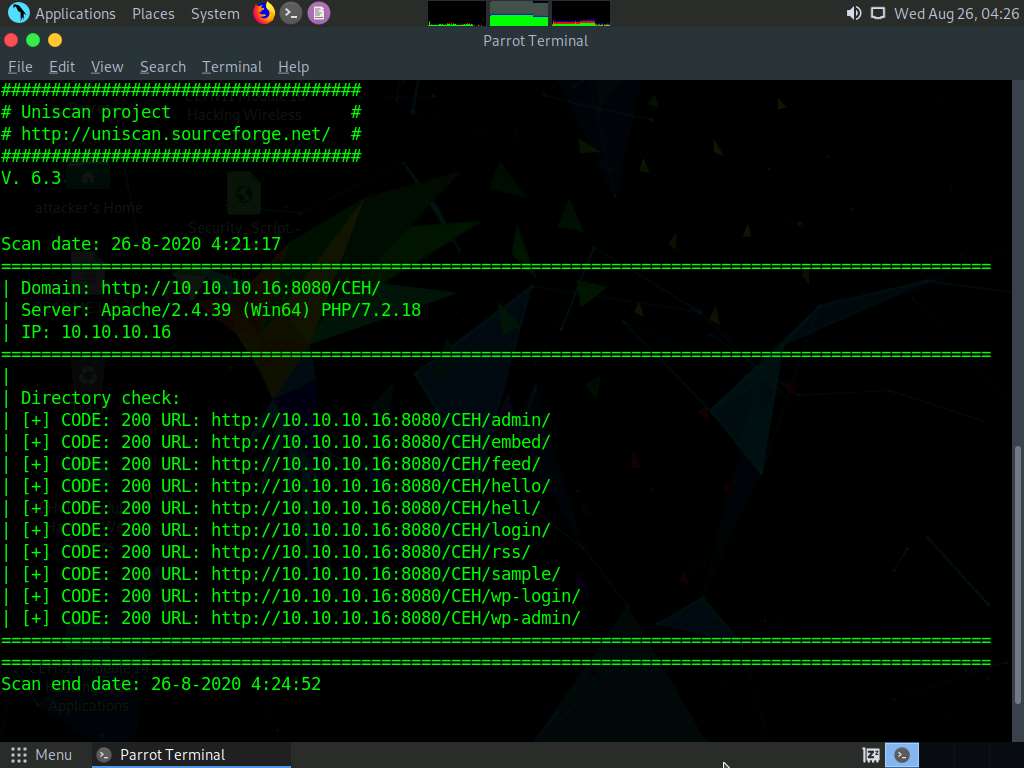
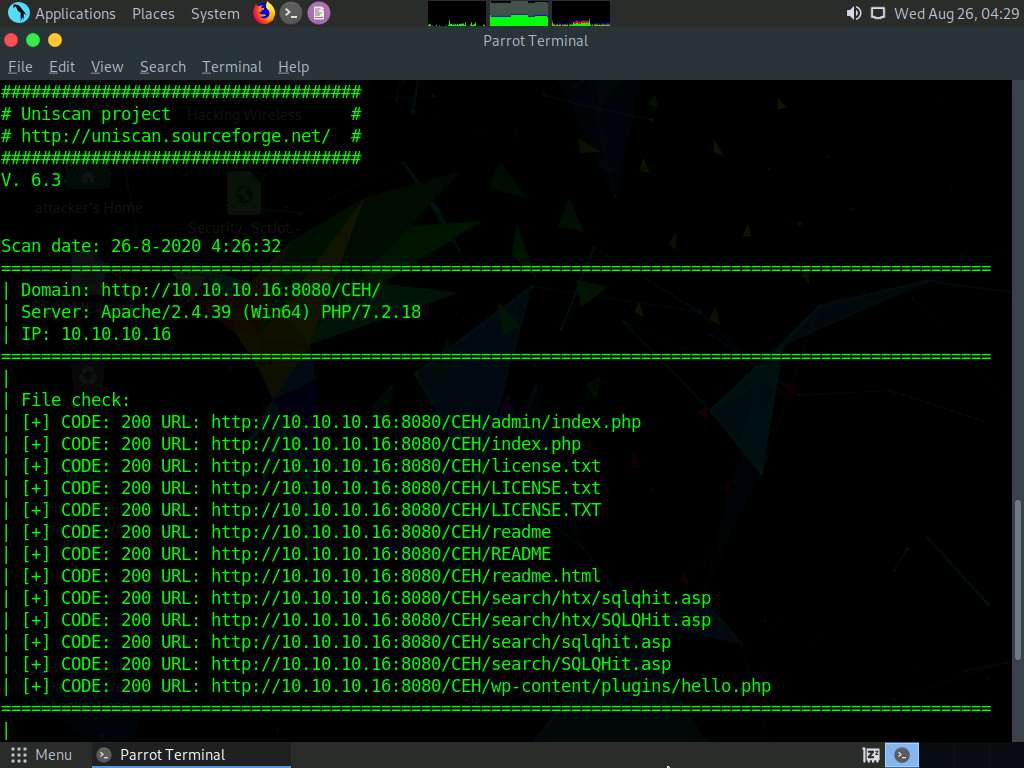
In the terminal window, type uniscan -u http://10.10.10.16:8080/CEH -q and hit Enter to start scanning for directories.
Here, 10.10.10.16 is the IP address of the Windows Server 2016 machine. This may vary in your lab environment.
In the above command, the -u switch is used to provide the target URL, and the -q switch is used to scan the directories in the web server.
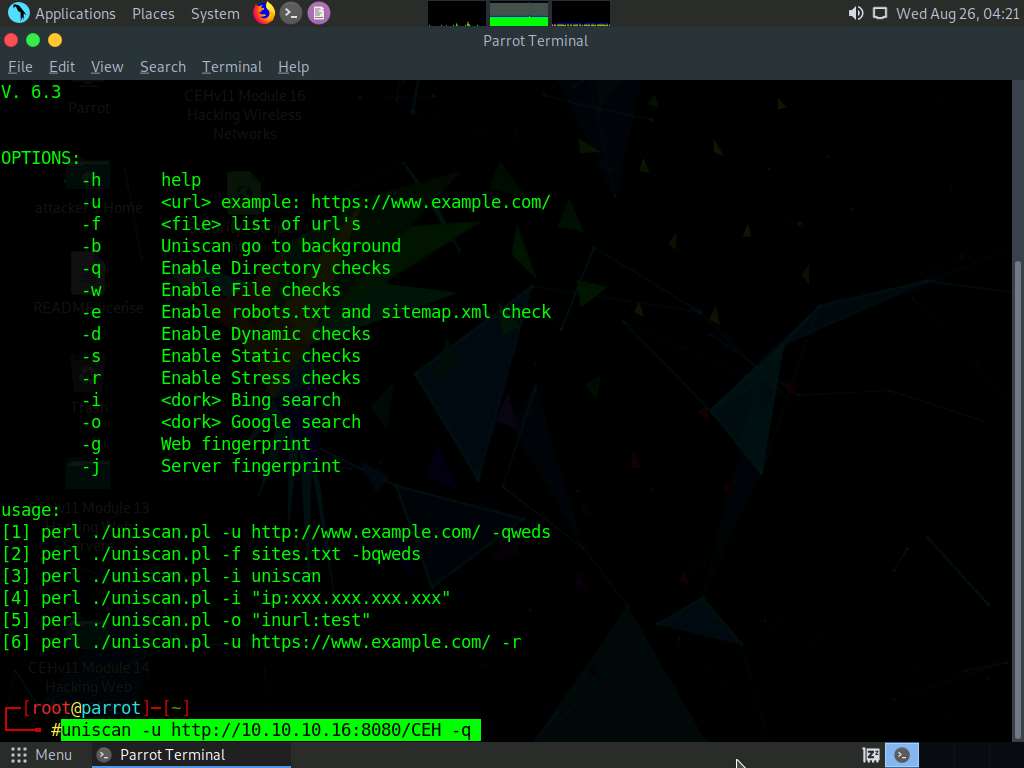
Uniscan starts performing different tests on the webserver and discovering web directories, as shown in the screenshot.
Scroll to analyze the complete output of the scan. It should take approximately 10 minutes for the scan to finish.
Now, run uniscan using two options together. Here -w and -e are used together to enable the file check (robots.txt and sitemap.xml file). In the terminal window, type uniscan -u http://10.10.10.16:8080/CEH -we and hit Enter to start the scan.
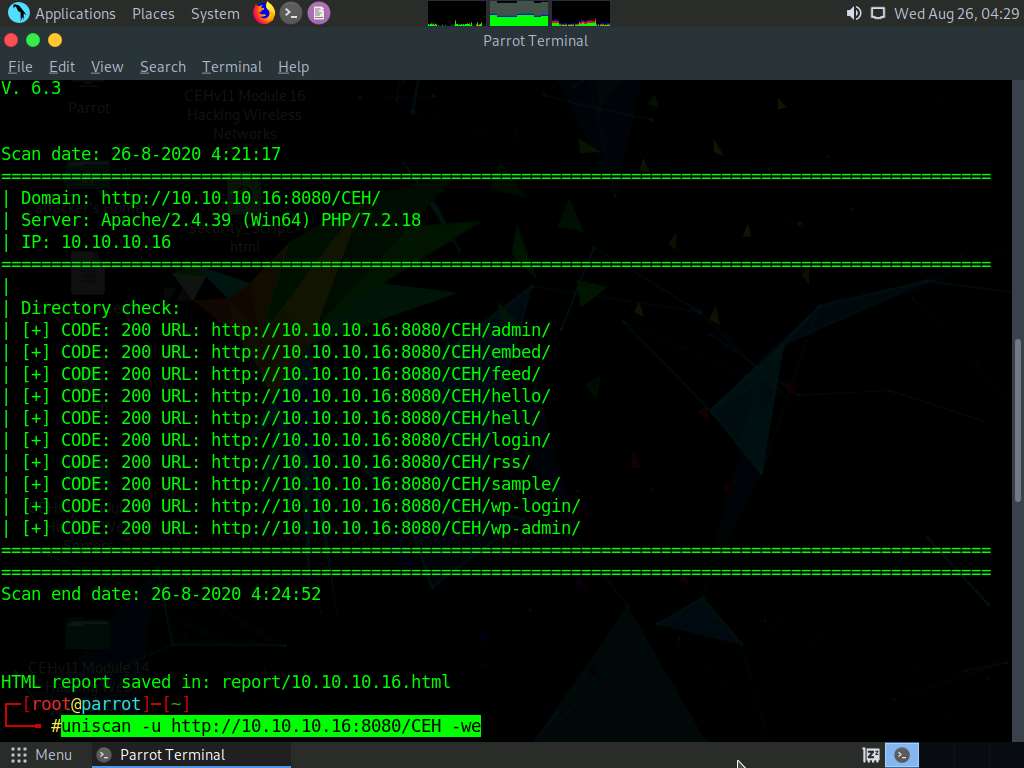
Uniscan starts the file check and displays the results, as shown in the screenshot.
Scroll to analyze the complete scan result. It should take approximately 10 minutes for the scan to finish.
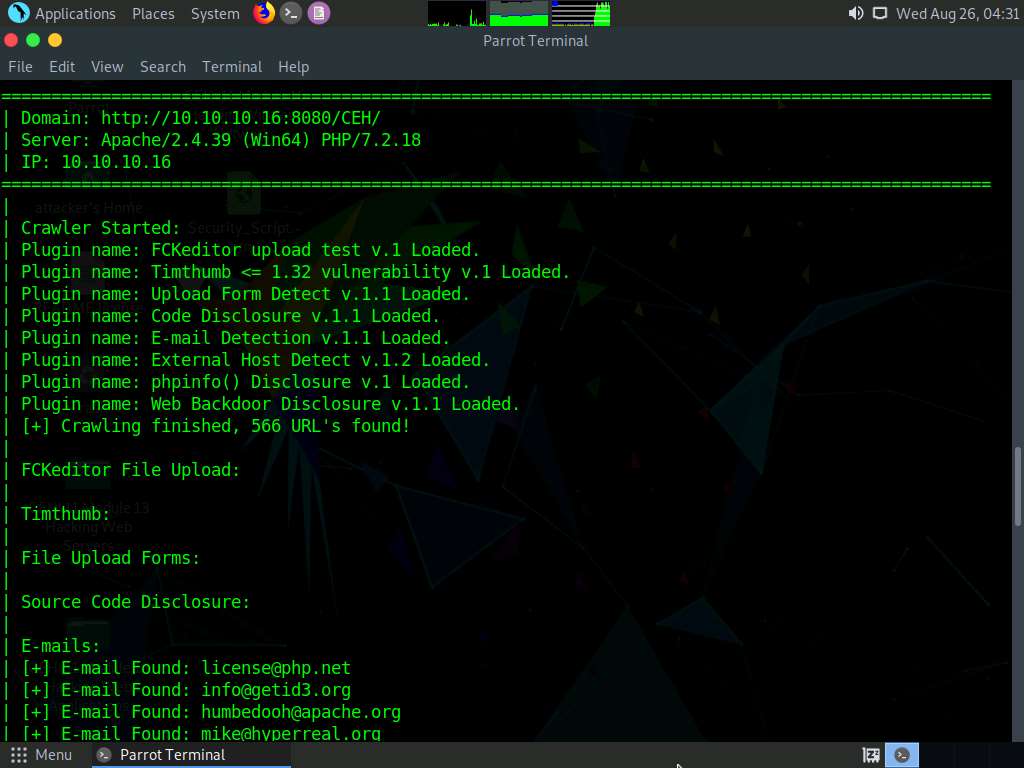
Now, use the dynamic testing option by giving the command -d. Type uniscan -u http://10.10.10.16:8080/CEH -d and hit Enter to start a dynamic scan on the web server.
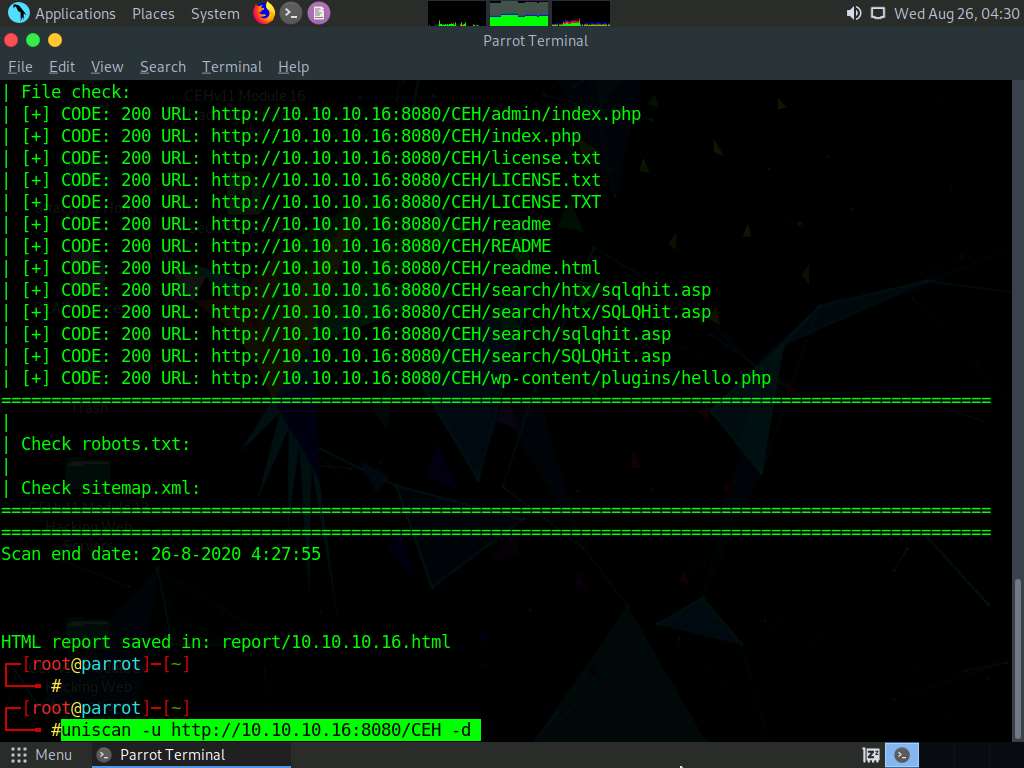
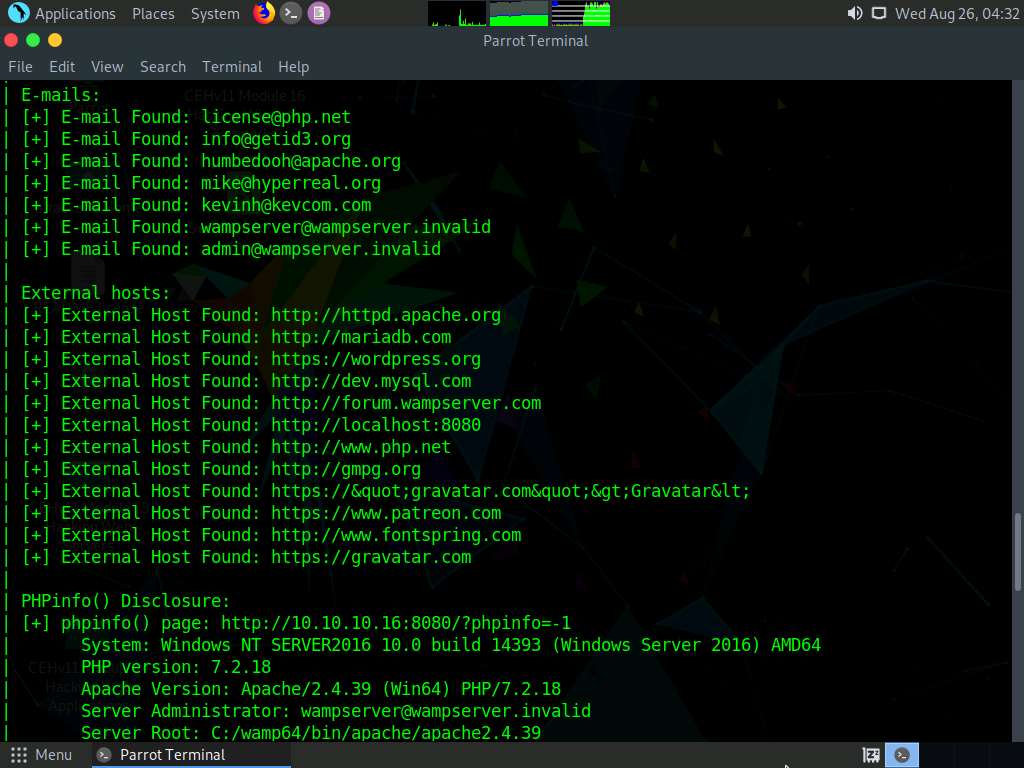
Uniscan starts performing dynamic tests, obtaining more information about email-IDs, Source code disclosures, and external hosts.
Scroll to analyze the complete output of the scan. It should take approximately 10 minutes for the scan to finish.
Uniscan displays the PHP info, as shown in the screenshot below. Close the terminal window.

Click Place from the top-section of the Desktop and click Home Folder from the drop-down options.

Click File System from the left-pane and click usr --> share --> uniscan --> report.
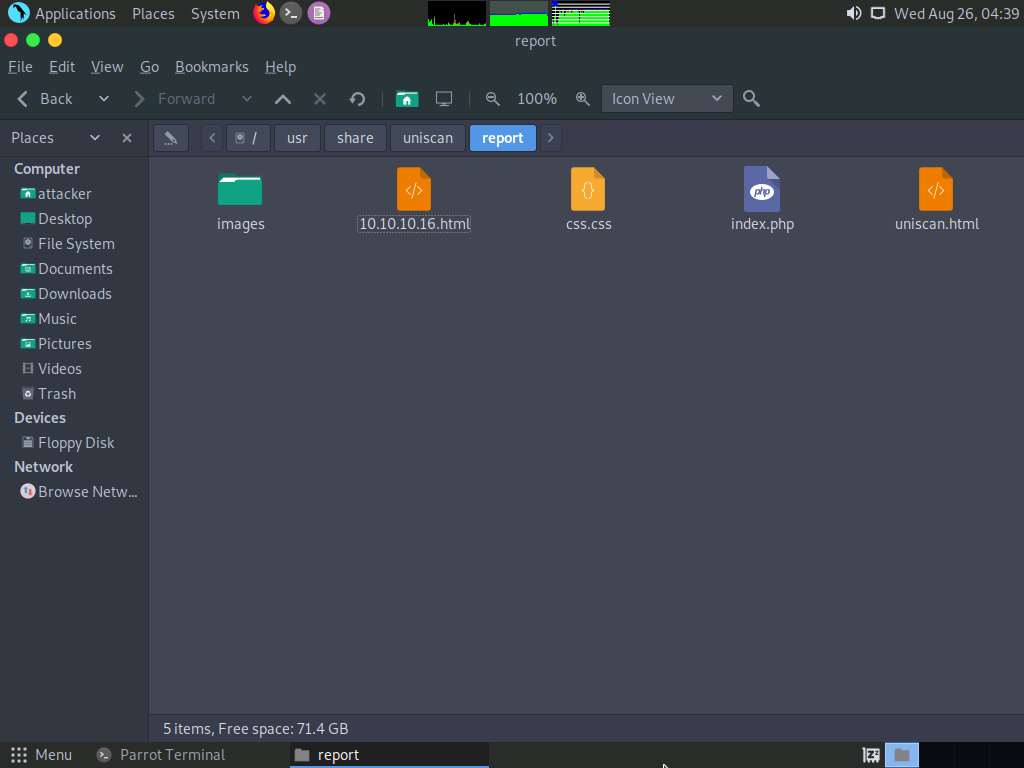
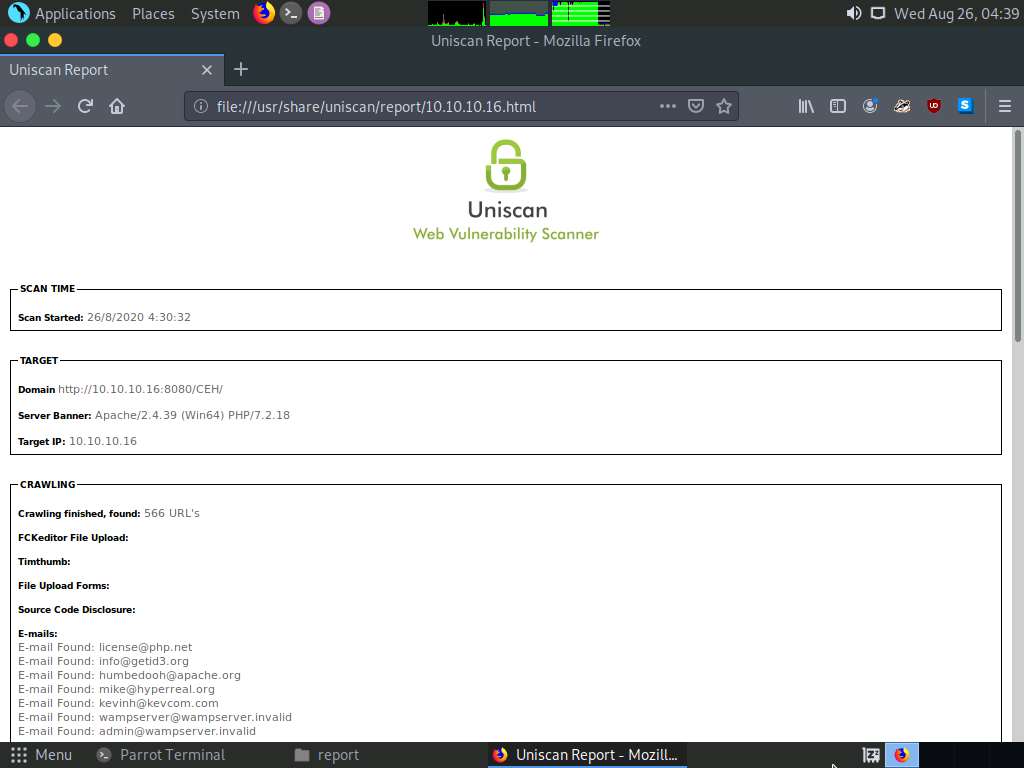
Right-click on 10.10.10.16.html. Hover your mouse cursor on Open With and click Firefox from the menu to view the scan report.
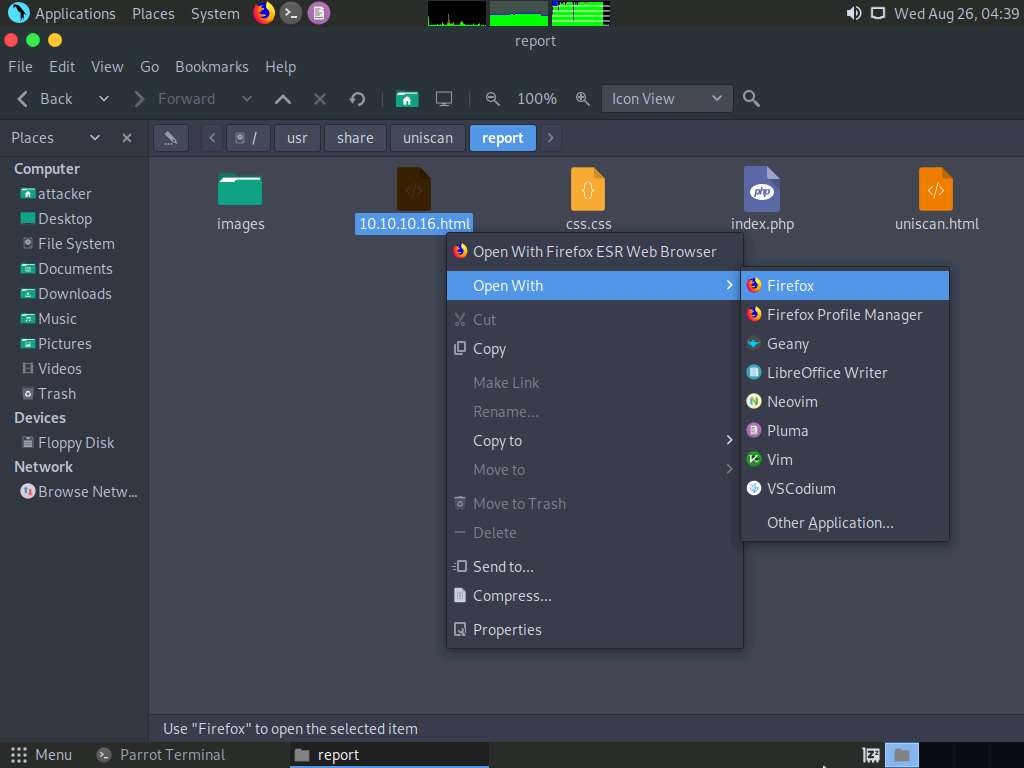
The report opens in the browser, giving you all scan details in a more comprehensive manner.
This concludes the demonstration of how to gather information about the target web server using Uniscan.
Close all terminal windows on the Parrot Security machine.


Comments
Post a Comment