Lab :3 Audit Organization's Security for Phishing Attacks
Lab :3 Audit Organization's Security for Phishing Attacks
Module 09: Social Engineering
Lab :3 Audit Organization's Security for Phishing Attacks
Task :1 Audit Organization's Security for Phishing Attacks using OhPhish
this just allows you to send your company a phishing email to see how many click
refer to blog for rest of steps
Lab Scenario
Social engineers exploit human behavior (manners, enthusiasm toward work, laziness, innocence, etc.) to gain access to the information resources of the target company. This information is difficult to be guarded against social engineering attacks, as the victim may not be aware that he or she has been deceived. The attacks performed are similar to those used to extract a company’s valuable data. To guard against social engineering attacks, a company must evaluate the risk of different types of attacks, estimate the possible losses, and spread awareness among its employees.
As a professional ethical hacker or pen tester, you must perform phishing attacks in the organization to assess the awareness of its employees.
As an administrator or penetration tester, you may have implemented highly sophisticated and expensive technology solutions; however, all these techniques can be bypassed if the employees fall prey to simple social engineering scams. Thus, employees must be educated about the best practices for protecting the organization’s systems and information.
In this lab, you will learn how to audit an organization’s security for phishing attacks within the organization.
Lab Objectives
- Audit organization's security for phishing attacks using OhPhish
Overview
In phishing attacks, attackers implement social engineering techniques to trick employees into revealing confidential information of their organization. They use social engineering to commit fraud, identity theft, industrial espionage, and so on. To guard against social engineering attacks, organizations must develop effective policies and procedures; however, merely developing them is not enough.
To be truly effective in combating social engineering attacks, an organization should do the following:
- Disseminate policies among its employees and provide proper education and training.
- Provide specialized training benefits to employees who are at a high risk of social engineering attacks.
- Obtain signatures of employees on a statement acknowledging that they understand the policies.
- Define the consequences of policy violations.
Task :1 Audit Organization's Security for Phishing Attacks using OhPhish
OhPhish is a web-based portal for testing employees’ susceptibility to social engineering attacks. It is a phishing simulation tool that provides an organization with a platform to launch phishing simulation campaigns on its employees. The platform captures the responses and provides MIS reports and trends (on a real-time basis) that can be tracked according to the user, department, or designation.
Here, we will audit the organization’s security infrastructure for phishing attacks using OhPhish.
Before starting this task, you must activate your OhPhish account.
Open any web browser (here, Mozilla Firefox). Log in to your ASPEN account and navigate to Certified Ethical Hacker v11 in the My Courses section.
Click on Click here hyperlink in the OhPhish notification above My Courses section.

You will be redirected to the OhPhish Sign Up page. Enter the remaining personal details, check I’m not a robot checkbox and click Complete Signup button.

Account creation Alert! appears, click OK.
Now, open your email account given during registration process. Open an email from OhPhish and in the email, click CLICK HERE TO LOGIN button.

OhPhish login page appears, log in using the credentials received in the email.
If Would you like Firefox to save this login for ohphish.com? notification appears, click Don’t Save.

You will be redirected to Reset Password page, enter the new password in both the fields and click Reset Password button to reset the password.

Your account password is changed successfully.
Now, you can login to your OhPhish account either by clicking on the LOGIN TO OHPHISH PORTAL button in your ASPEN account under My Courses section or you can navigate to the OhPhish website (https://portal.ohphish.com/login) and login using your credentials.
Once you login to your OhPhish account you will be redirected to the OhPhish Dashboard.
In the OhPhish Dashboard, click on the Entice to Click option.
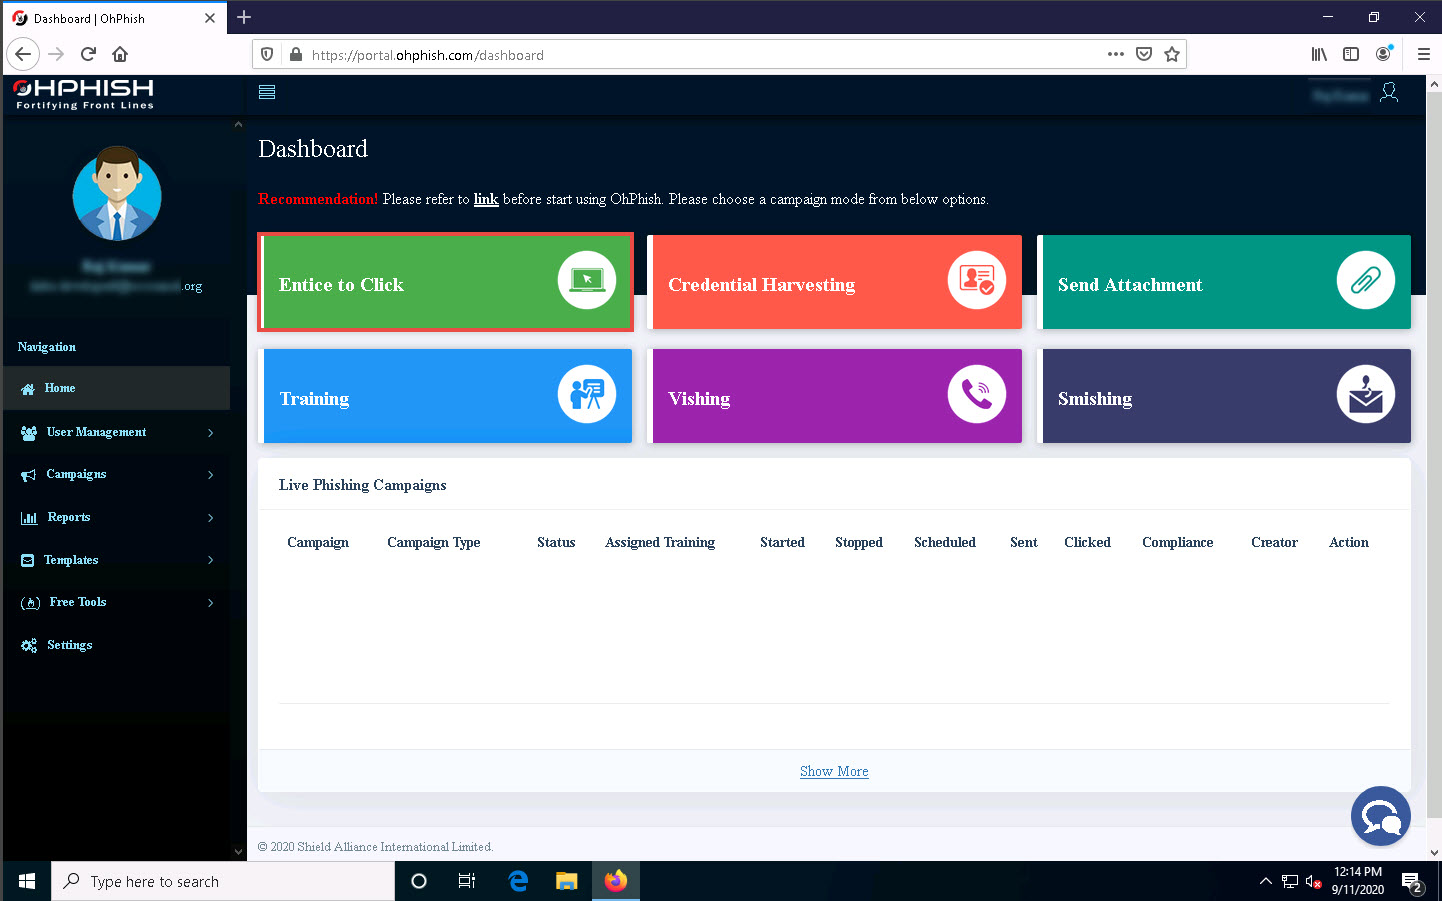
The Create New Email Phishing Campaign form appears.
If the OhPhish Helpdesk notification appears in the right corner of the dashboard, close it.
In the Campaign Name field, enter any name (here, Test - Entice to Click). In the Select Template Category field, select Coronavirus/COVID-19 from the drop-down list.
Ensure that the Existing Template is selected in the Email Template option.
In the Select Country field, leave the default option selected (All).
In the Select Template field, click the Select Template button and select Corona Virus Advisory from the drop-down list.
Click the Select button in the Select Template field to select the template.
The template selected notification appears below the Select Template field.
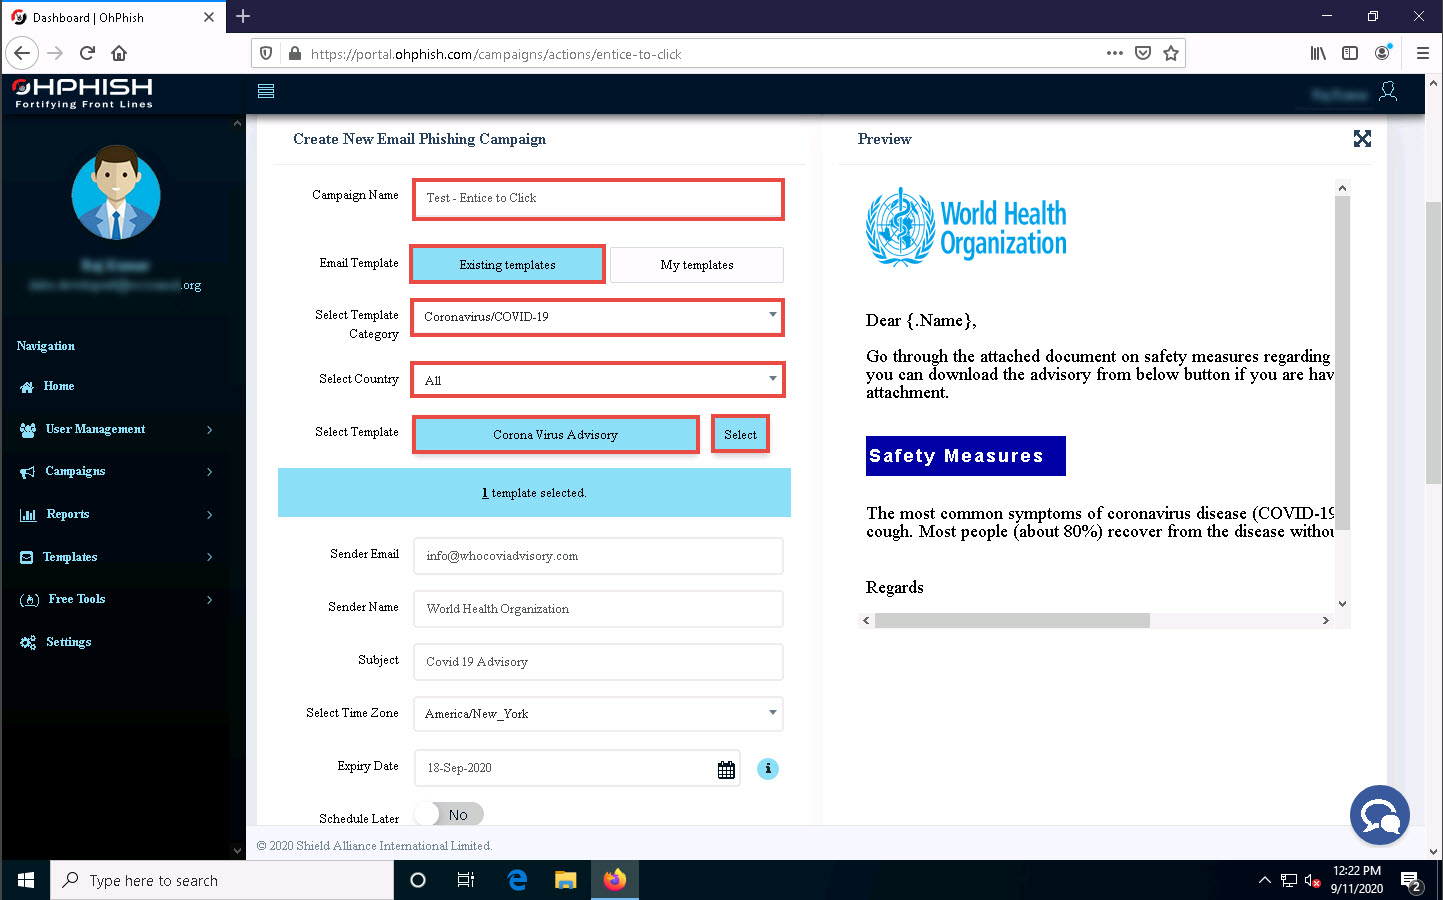
Leave fields such as Sender Email, Sender Name, Subject, Select Time Zone, Expiry Date, and Schedule Later set to their default values, as shown in the screenshot.
You can change the above-mentioned options if you want to.
In the Import users field, click Select Source.
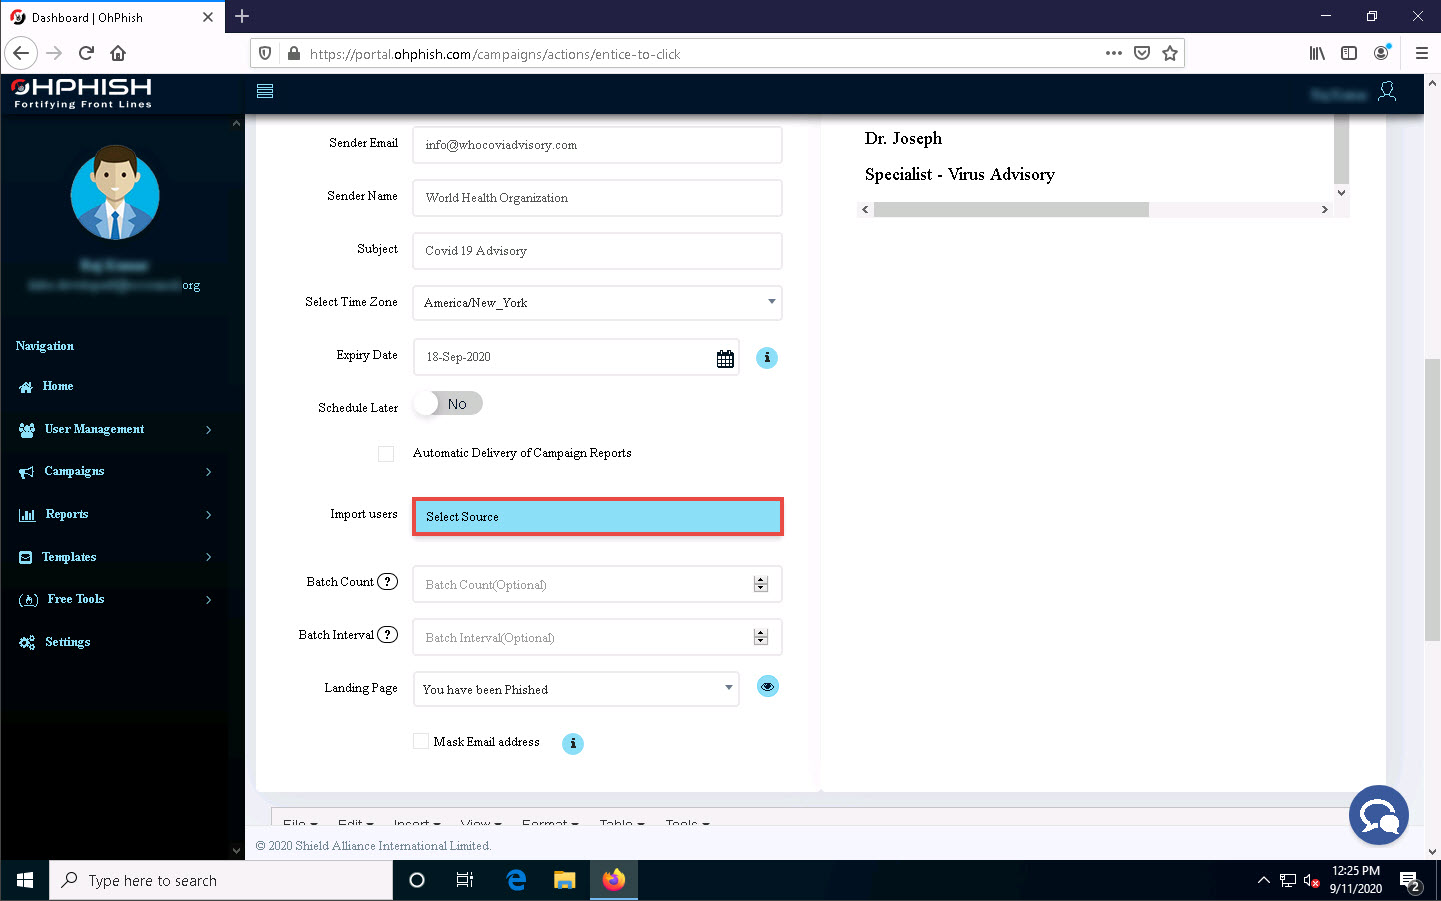
Import Users pop-up appears, click to select Quick Add option from the list of options.
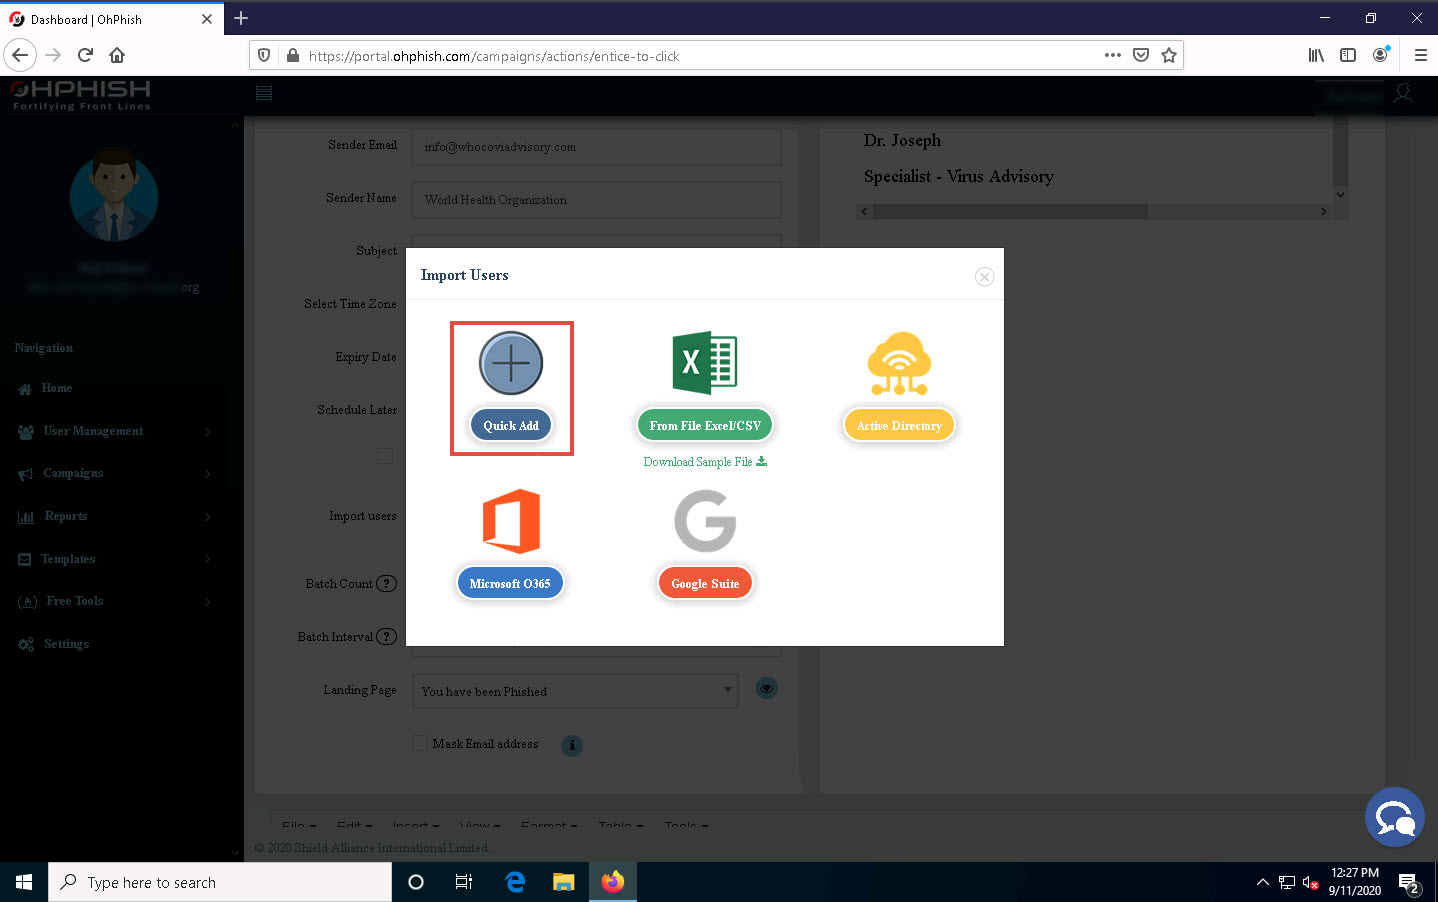
The Import Users Info pop-up appears; enter the details of the employee and click Add.
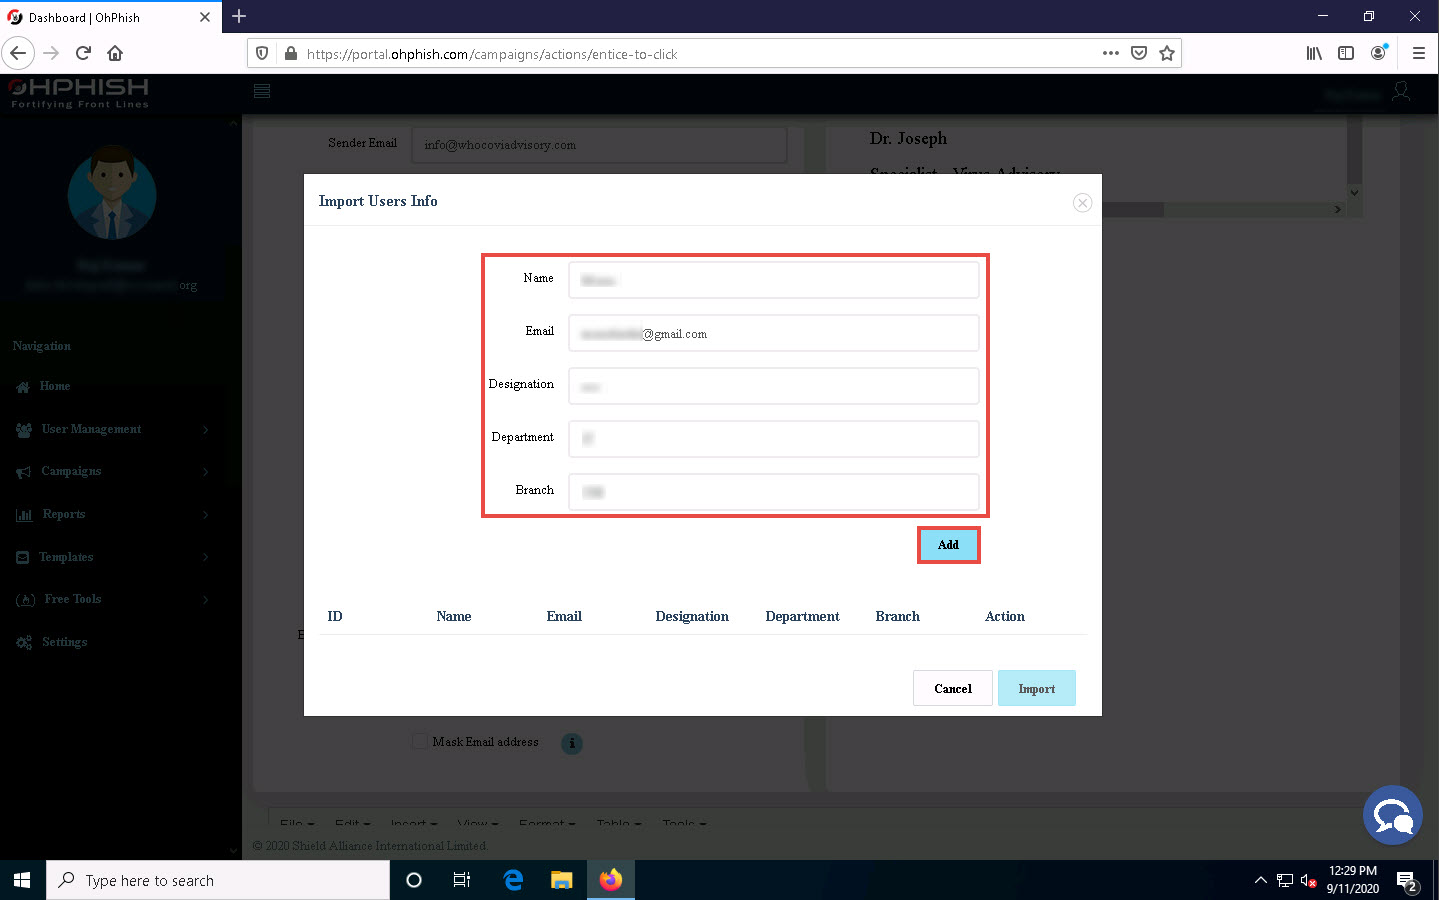
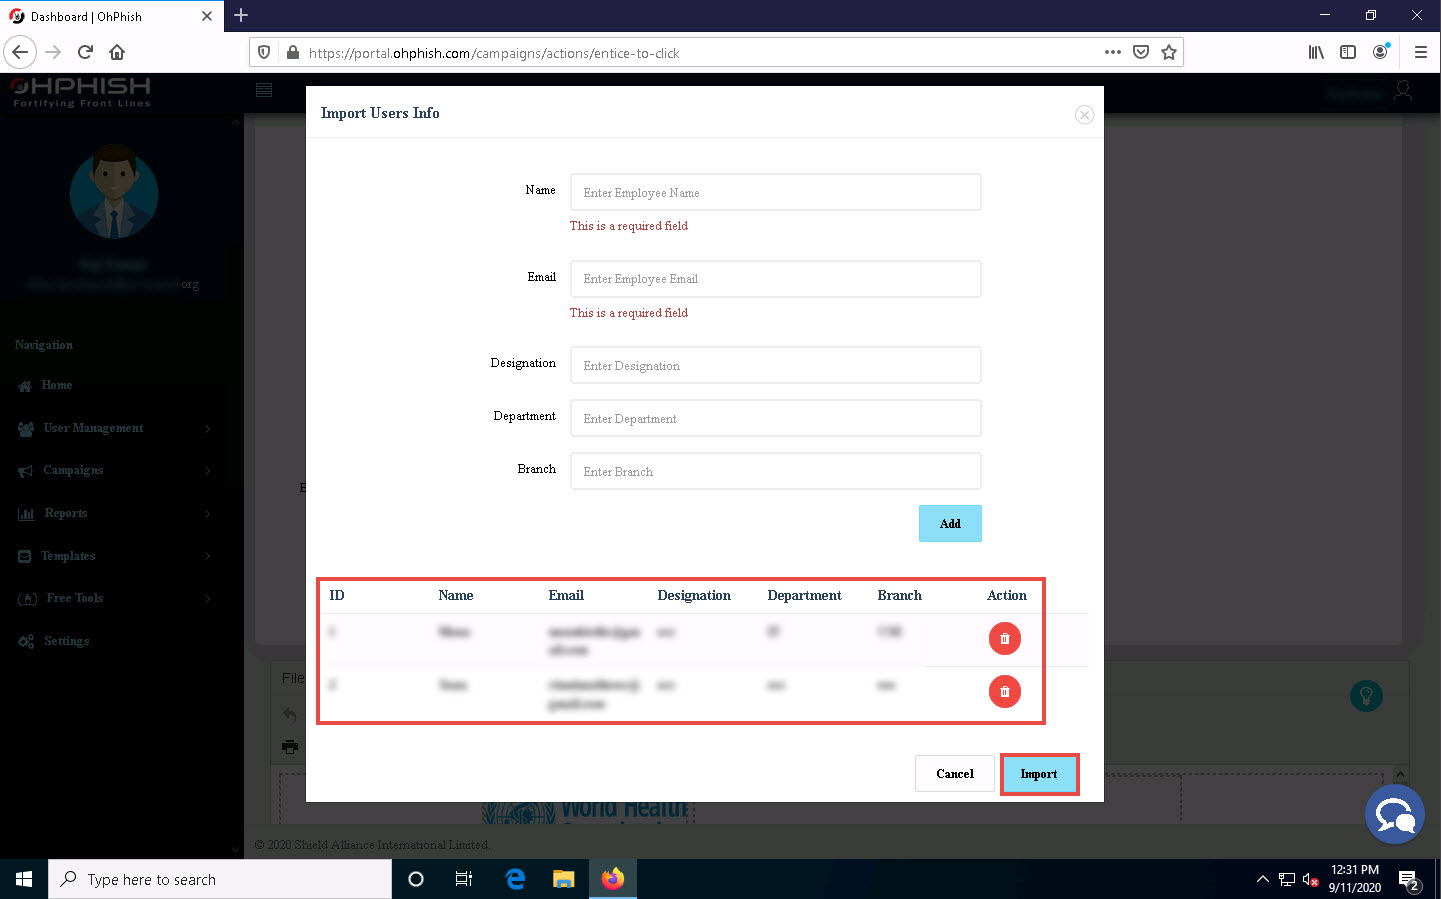
Similarly, you can add the details of multiple users. Here, we added two users.
After adding the users’ details, click Import.
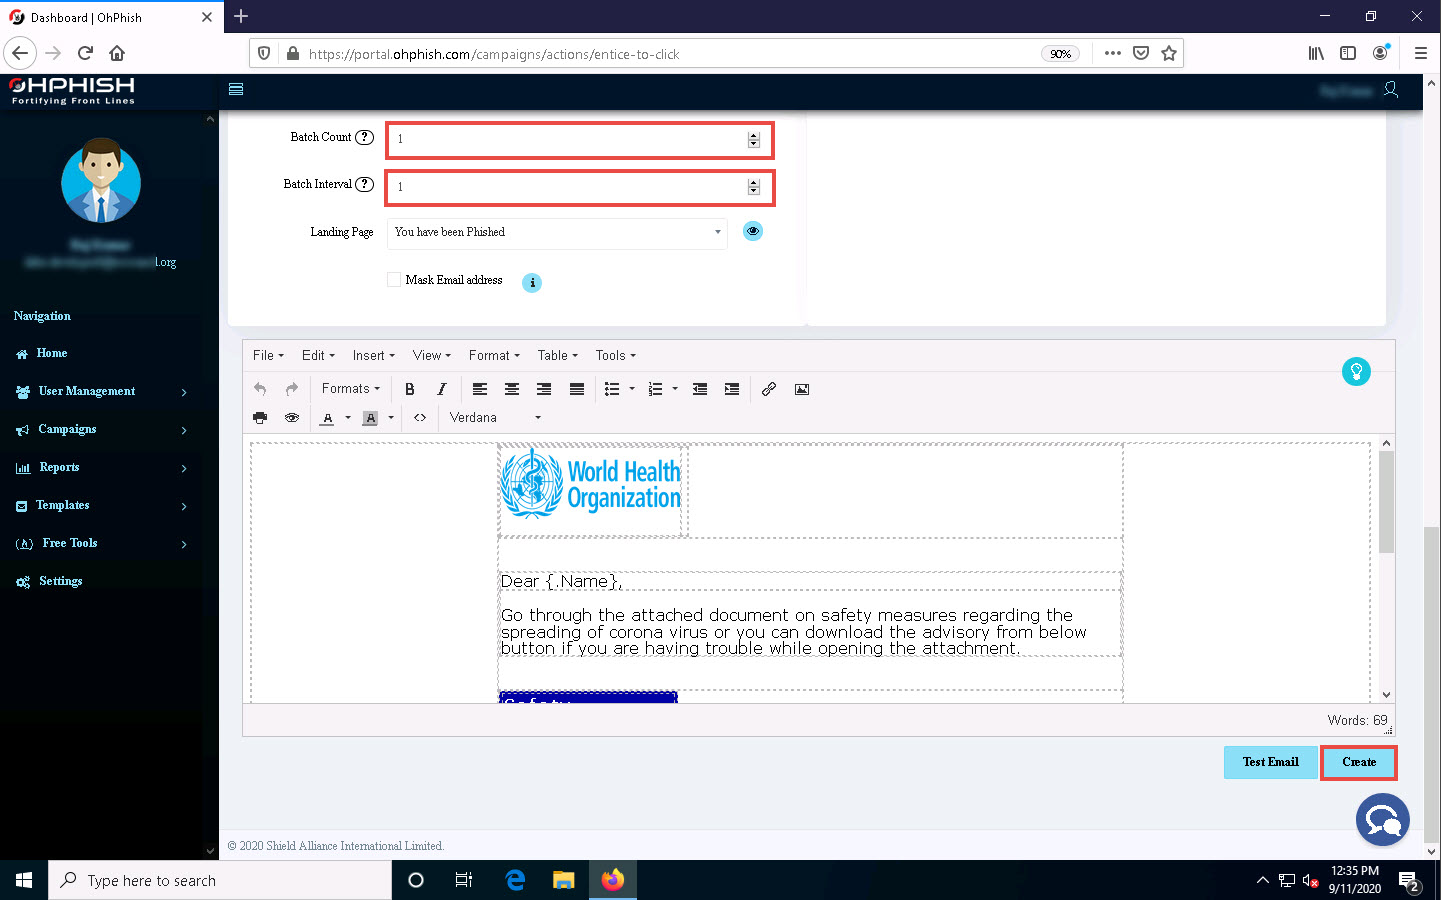
In the Batch Count and Batch Interval fields, set the values to 1.
Batch Count: indicates how many you want to send emails to at one time; Batch Interval: indicates at what interval (in minutes) you want to send emails to a batch of users.
The values of Batch Count and Batch Interval might differ depending on the number of users you are sending phishing emails to.
Leave the Landing Page field set to its default value.
Now, scroll down to the end of the page and click Create to create the phishing campaign.
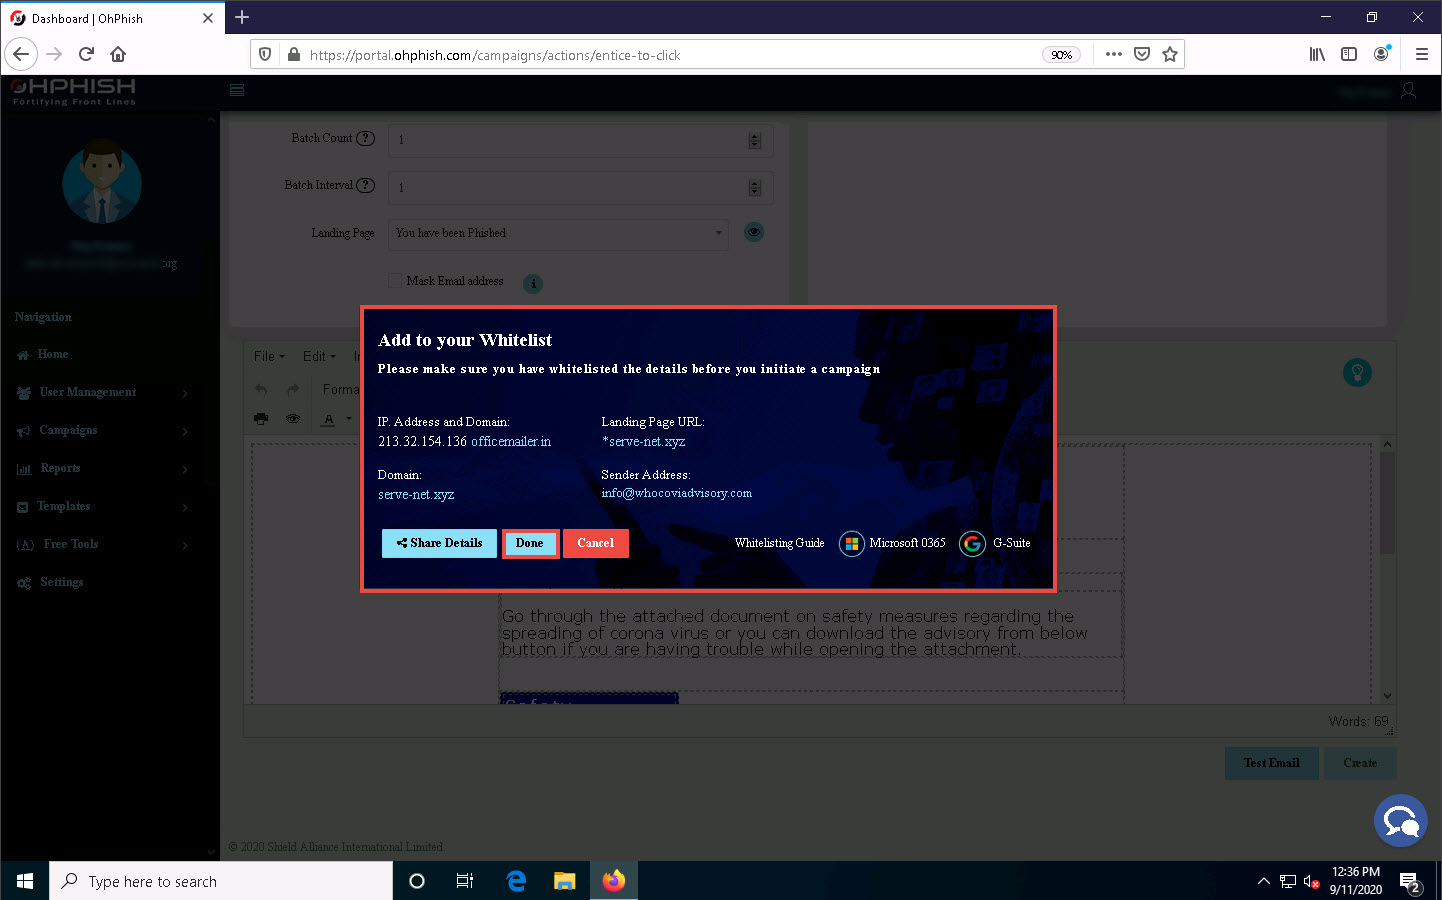
Add to your Whitelist pop-up appears, click Done.
You must ensure that messages received from specific IP addresses do not get marked as spam. Do this by adding the addresses to an email whitelist in your Google Admin console. To do that, you can refer the whitelisting guide available for Microsoft O365 and G-Suite user accounts.
The Confirm? pop-up appears; click SURE.
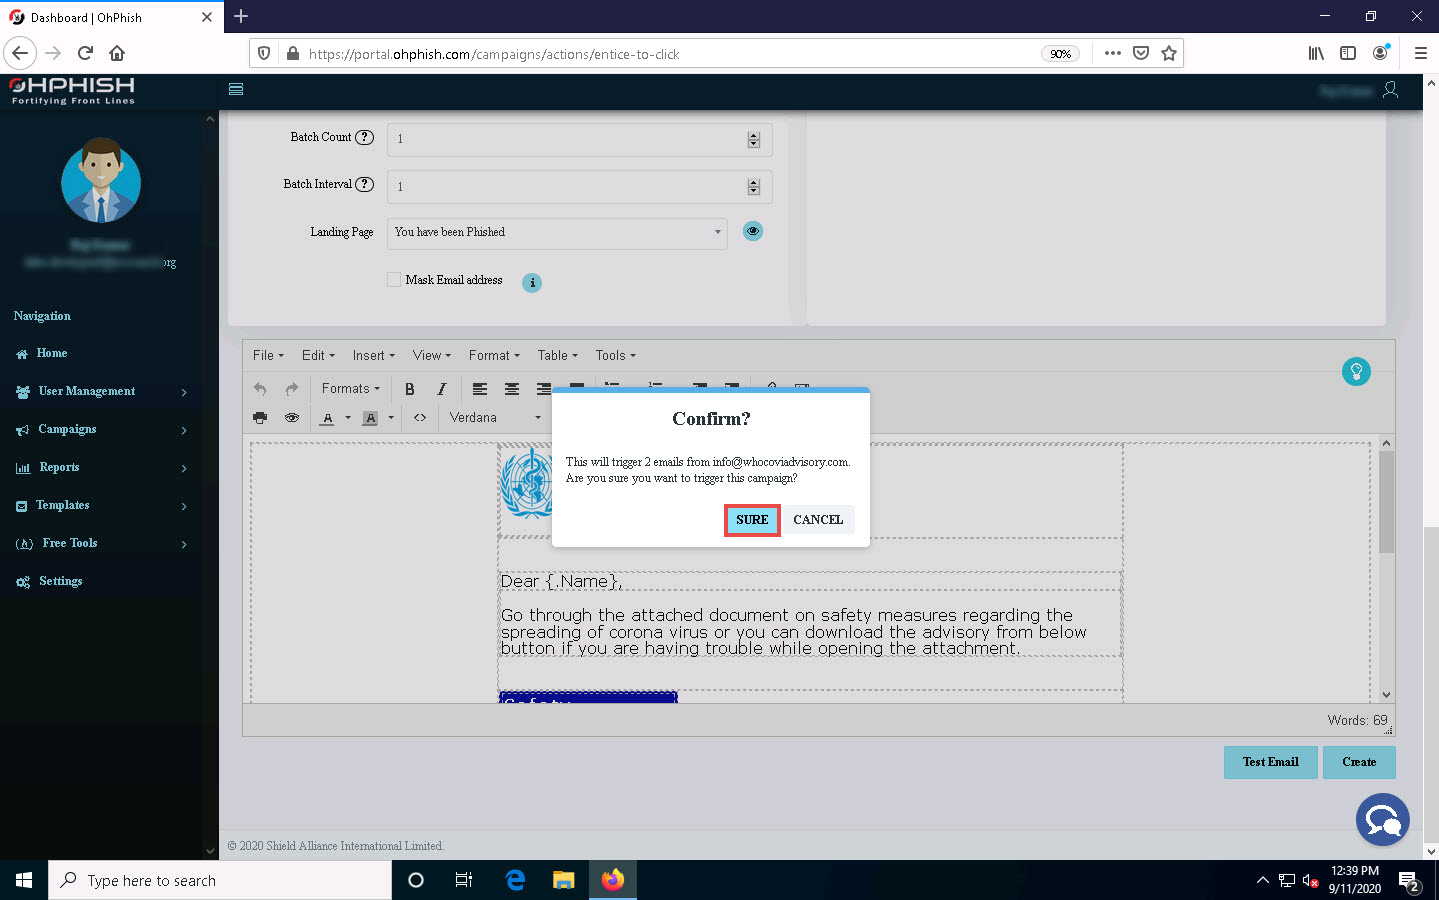
A count down timer appears and phishing campaign initiates in ten seconds.
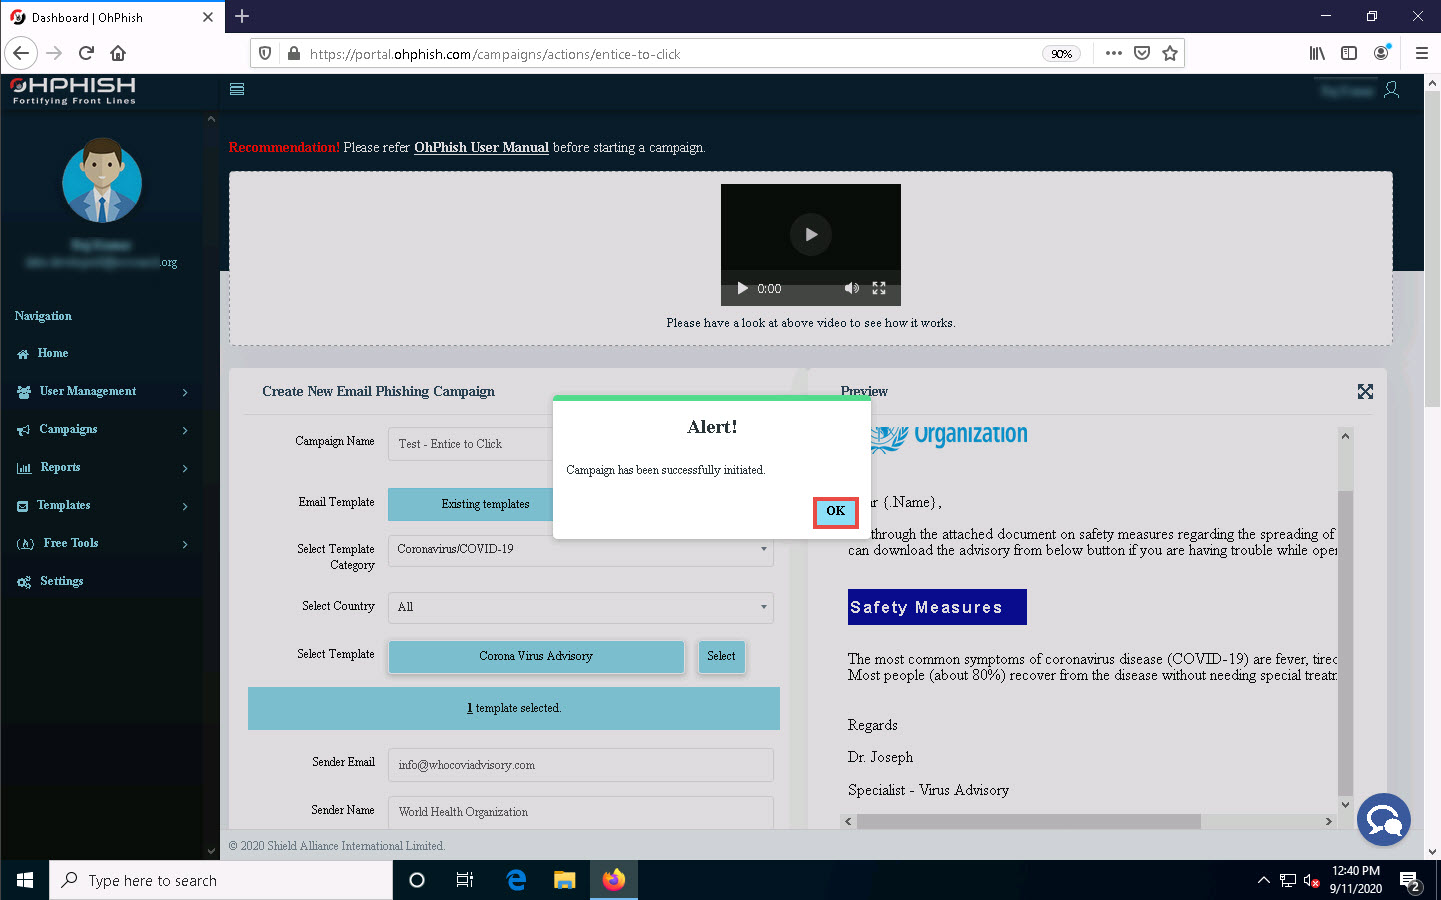
The Alert! pop-up appears, indicating successful initiation of a phishing campaign; click OK.
Now, we must open the phishing email as a victim (here, an employee of the organization). To do so, click Windows Server 2019 to switch to the Windows Server 2019 machine.

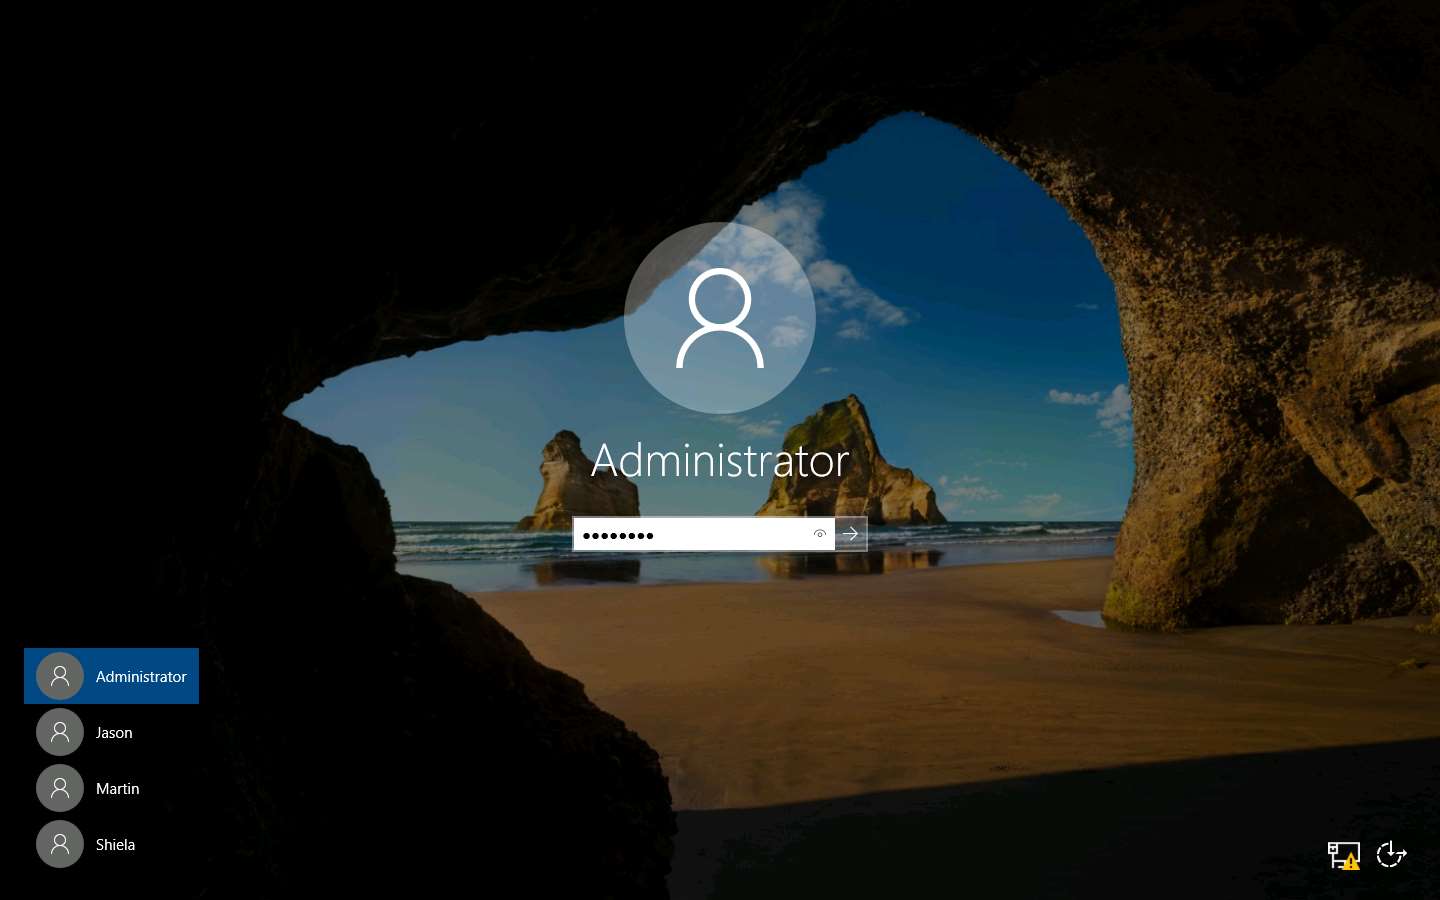
Click on Ctrl+Alt+Delete to activate it, by default, Administrator profile is selected click Pa$$w0rd to enter password in to the machine and press Enter to login.
Open any web browser (here, Mozilla Firefox) and then open the email client provided while creating the phishing campaign (here, Gmail).
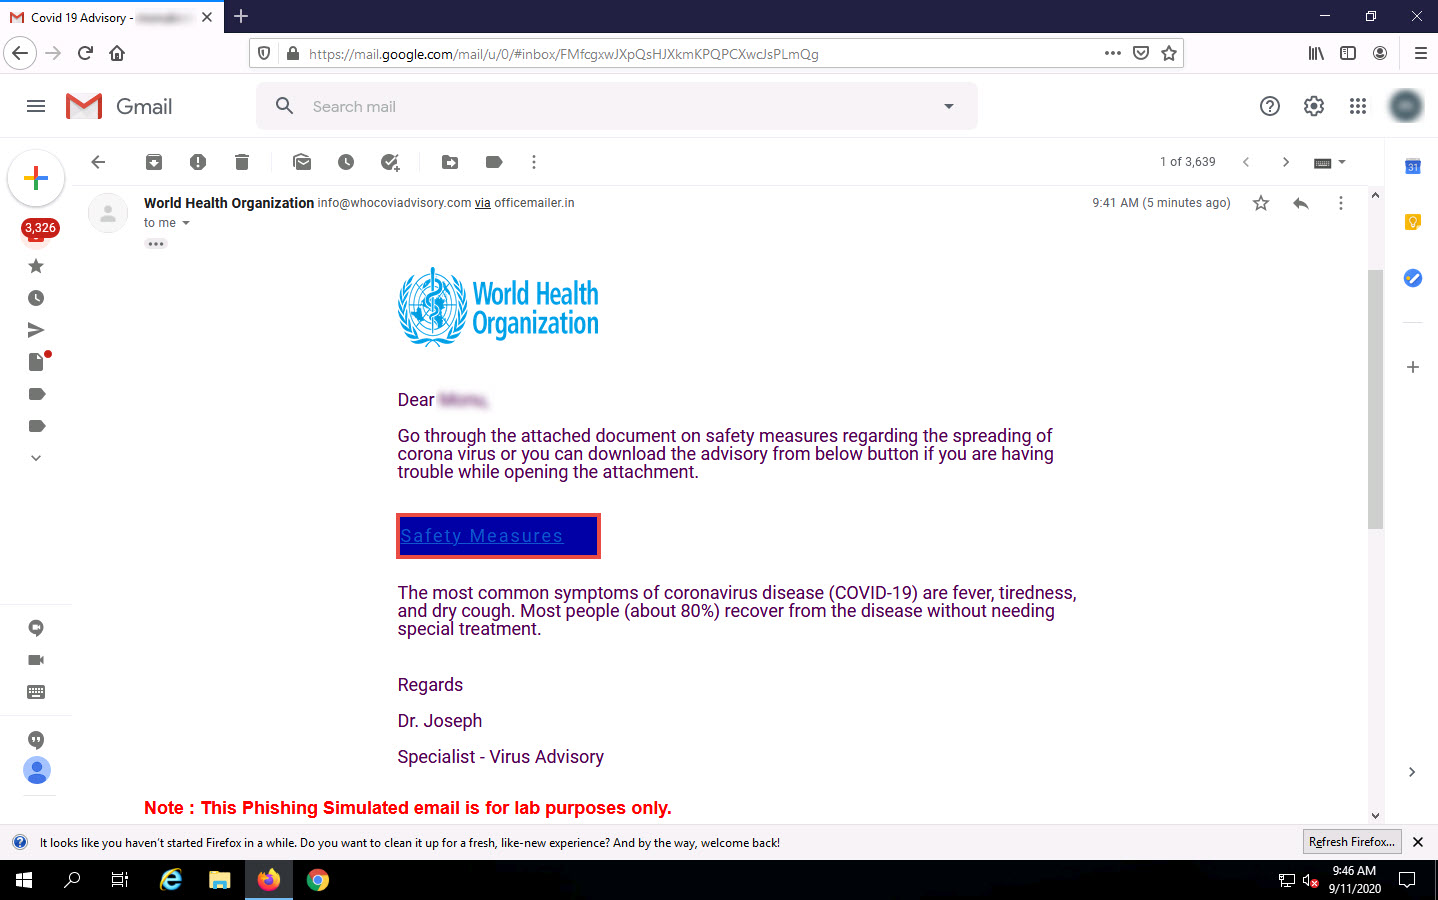
After you login to your Gmail account, search for an email with the subject COVID 19 Advisory in the Inbox.
Depending on the security implementations of your organization, for example, if proper spam filters are enabled, this phishing email will end up in the Spam folder.
If the email is not present in the Inbox folder, then check your Spam folder.
Click on the Safety Measures link in the email.
If a Suspicious link pop-up appears, click Proceed.
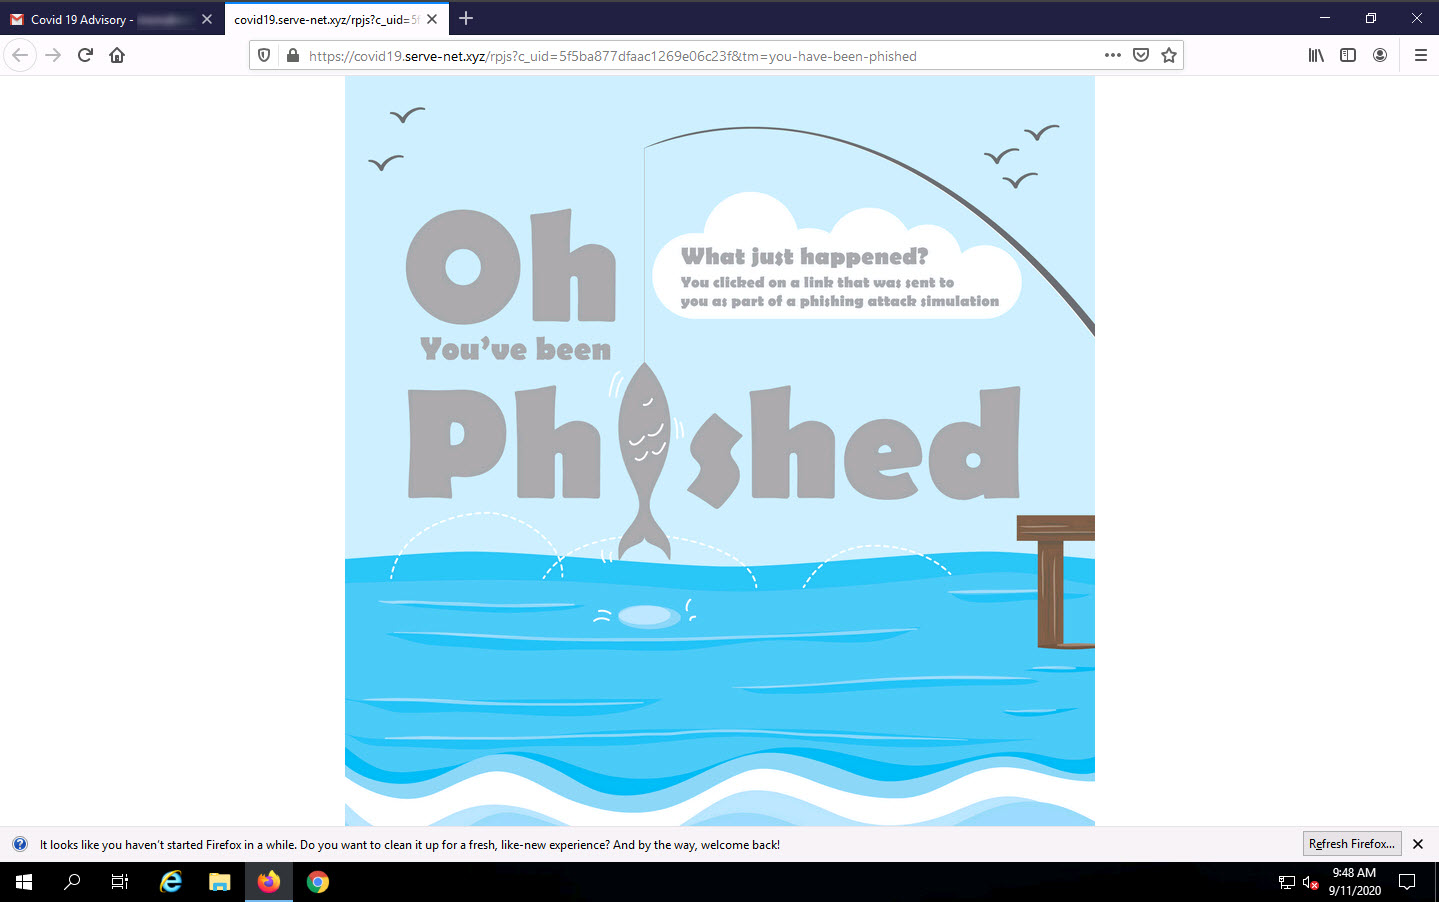
The landing page Oh You’ve been Phished appears; as shown in the screenshot.
Close the current tab.
Now, click Windows 10 to switch back to the Windows 10 machine.
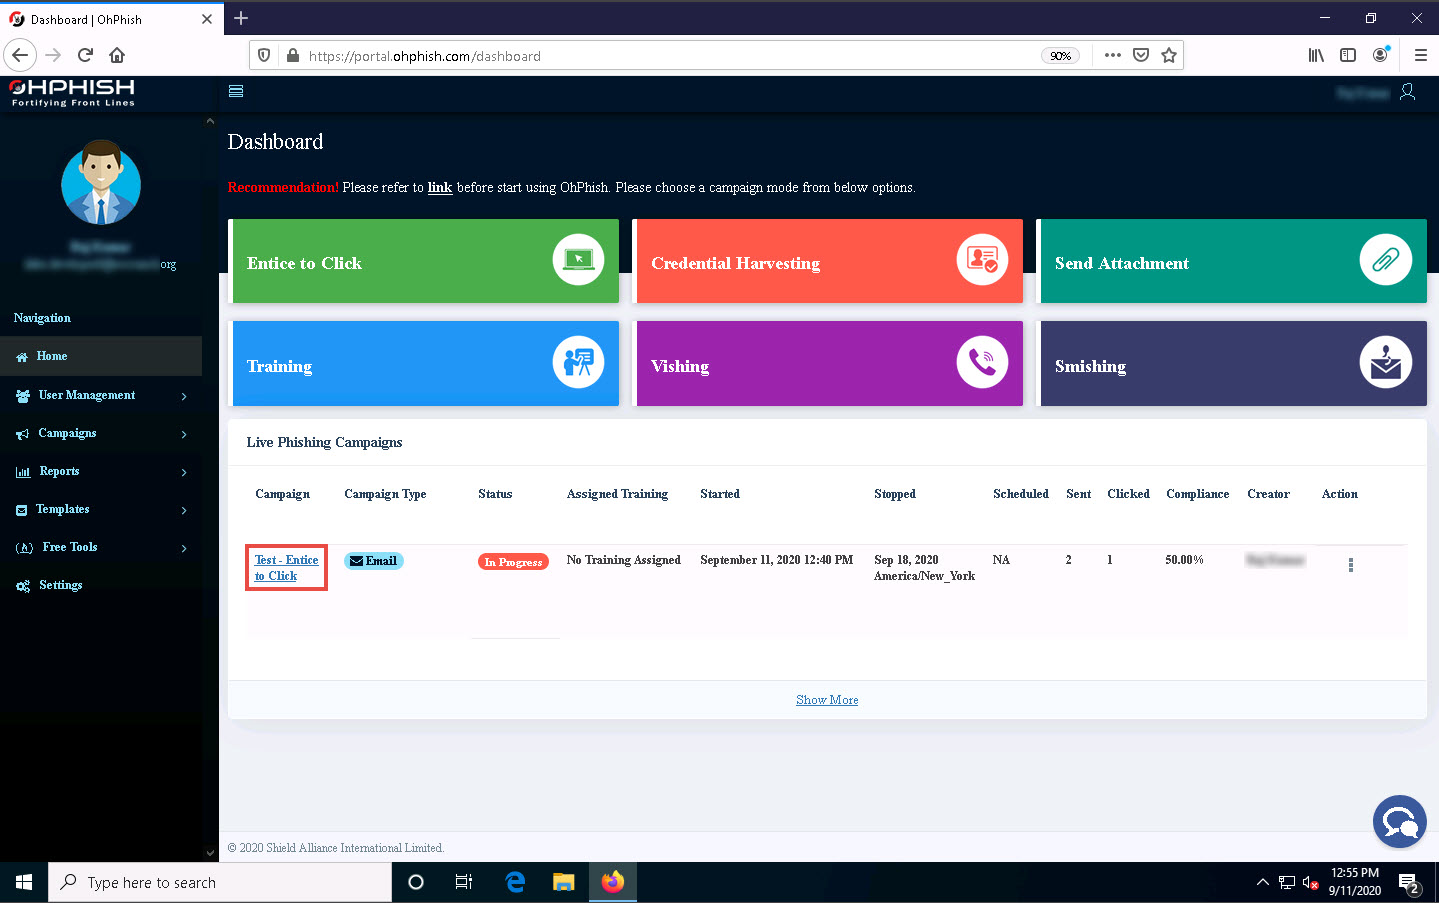
Click on the Test – Entice to Click campaign present on the OhPhish Dashboard.
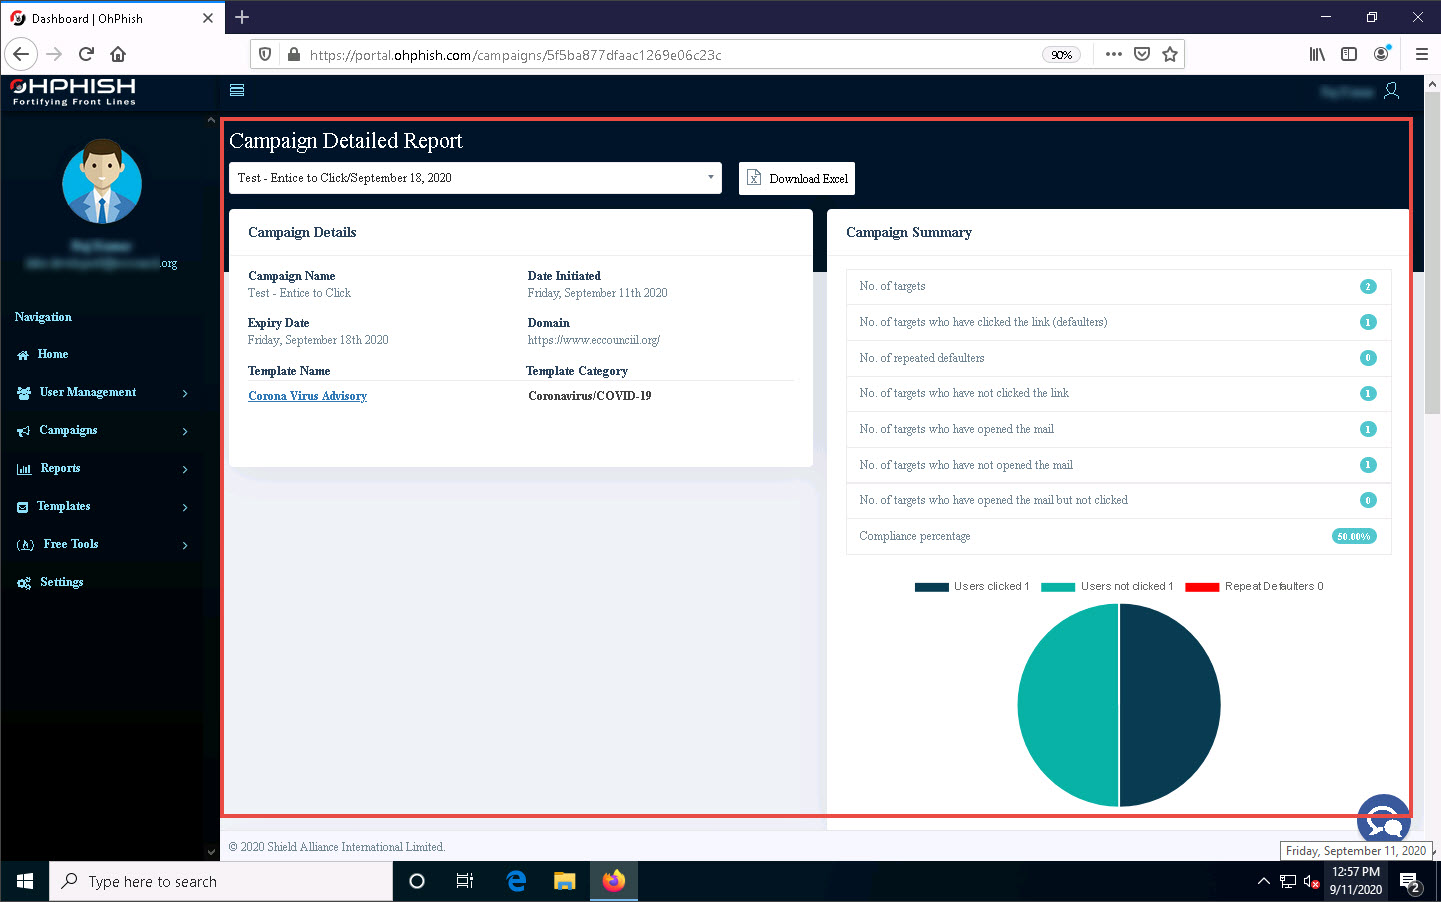
The Campaign Detailed Report page appears, displaying the Campaign Details and Campaign Summary sections.
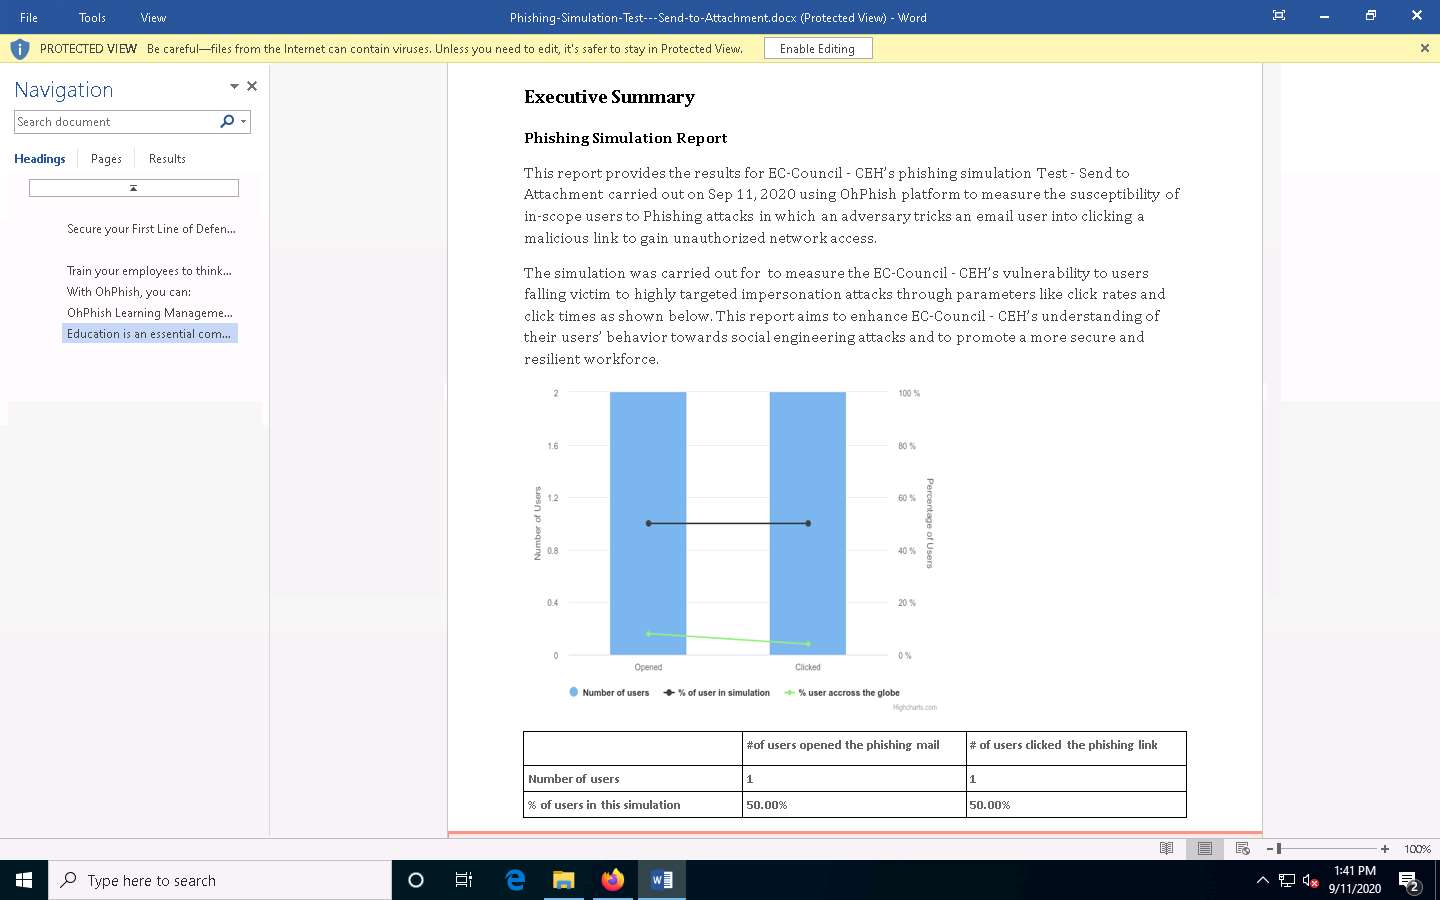
In the Campaign Summary section, you can observe that the values of No. of targets who have clicked the link (defaulters) and No. of Targets who have opened the mail are both 1 (here, we have opened only one email account).
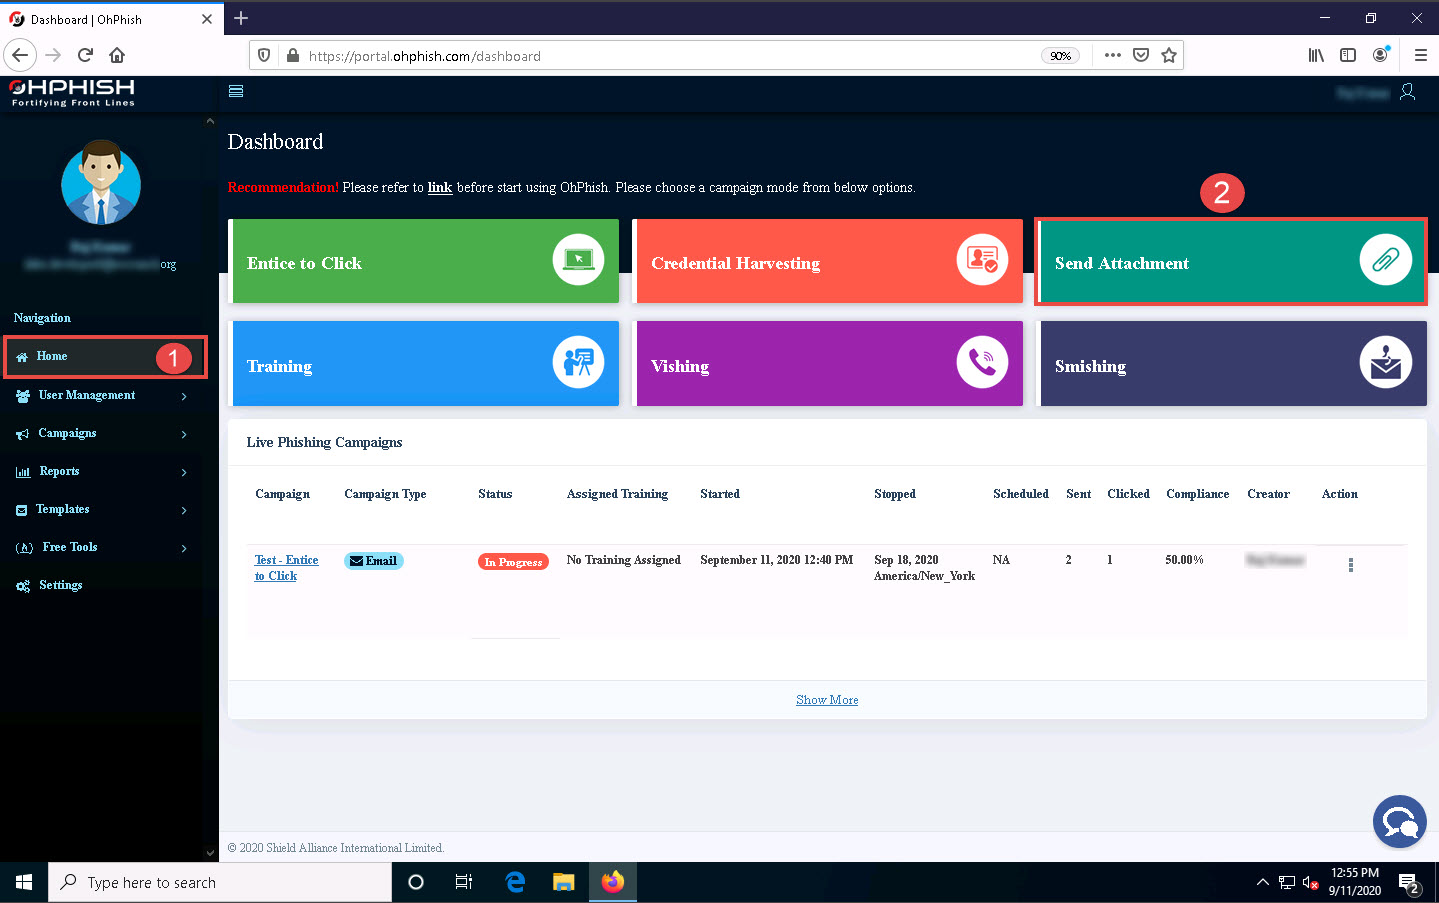
Now, click Home in the left pane to navigate back to the OhPhish Dashboard.
In the OhPhish Dashboard, click on the Send Attachment option.
The Create New Email Phishing Campaign form appears.
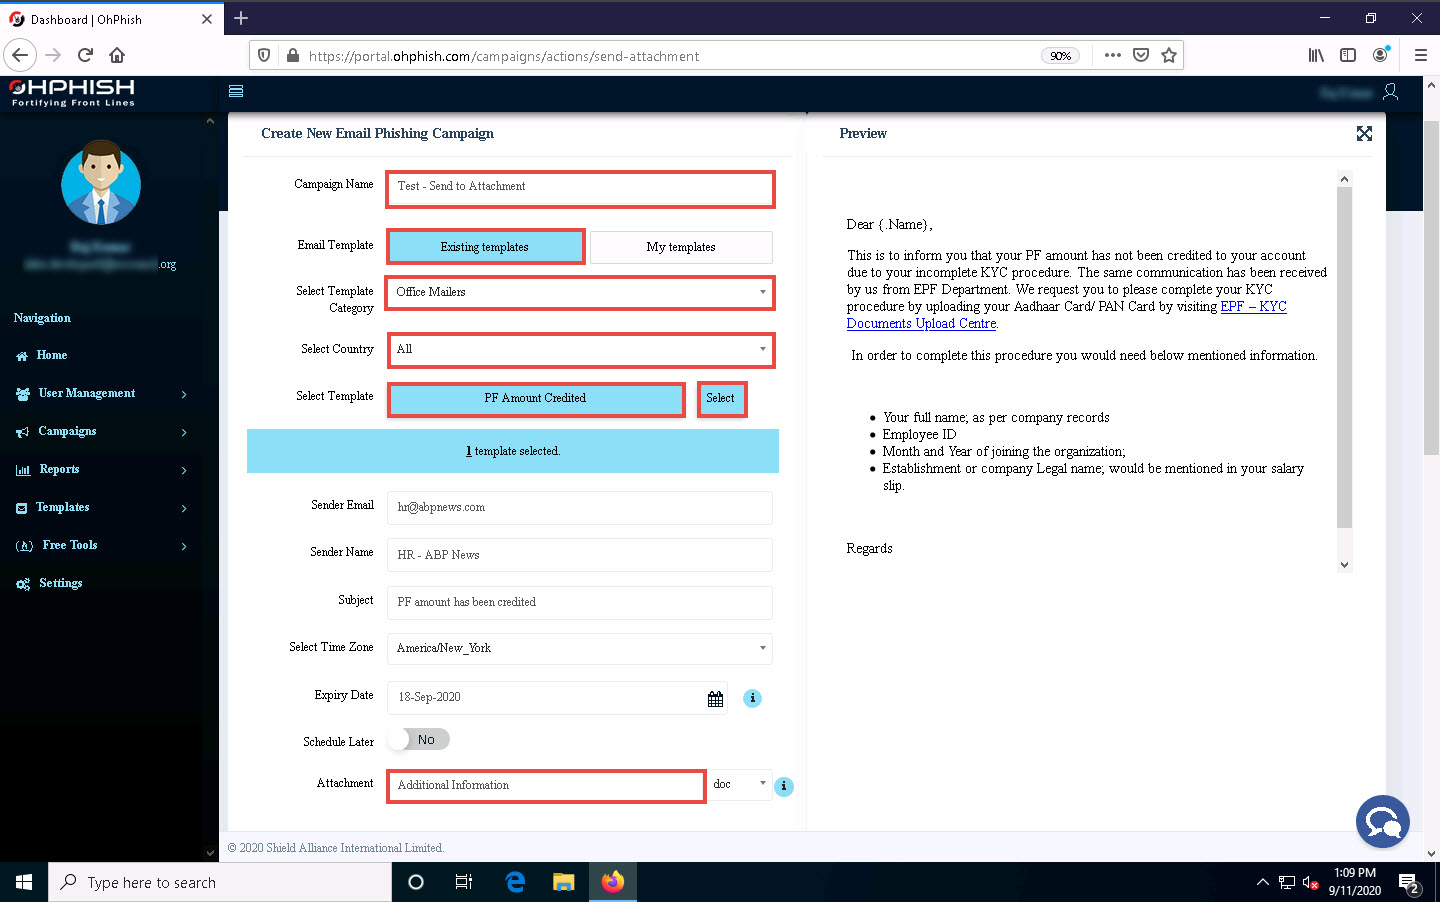
In the Campaign Name field, enter any name (here, Test – Send to Attachment). In the Select Template Category field, select Office Mailers from the drop-down list.
Ensure that the Existing templates button is selected in the Email Template field.
In the Select Country field, leave the default option selected (All).
In the Select Template field, select the PF Amount Credited option from the drop-down list and then click the Select button.
Leave fields such as Sender Email, Sender Name, Subject, Select Time Zone, Expiry Date, and Schedule Later set to their default values, as shown in the screenshot.
You can change the above-mentioned options if you want to.
In the Attachment field, enter any name (here, Additional Information).
Ensure that the Enable Macro checkbox is not selected.
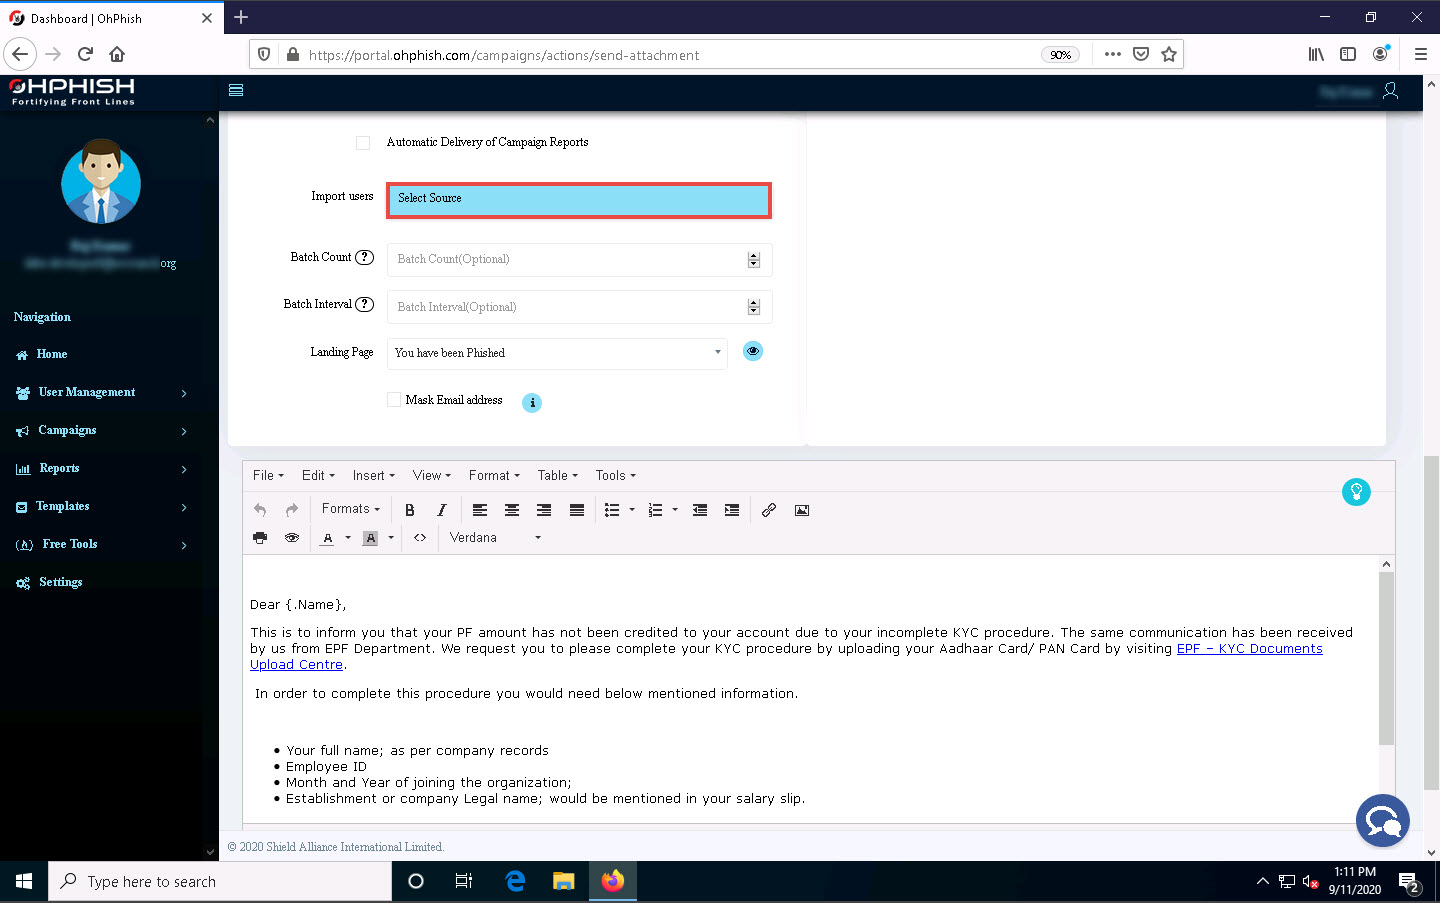
Click Select Source button under Import users field.
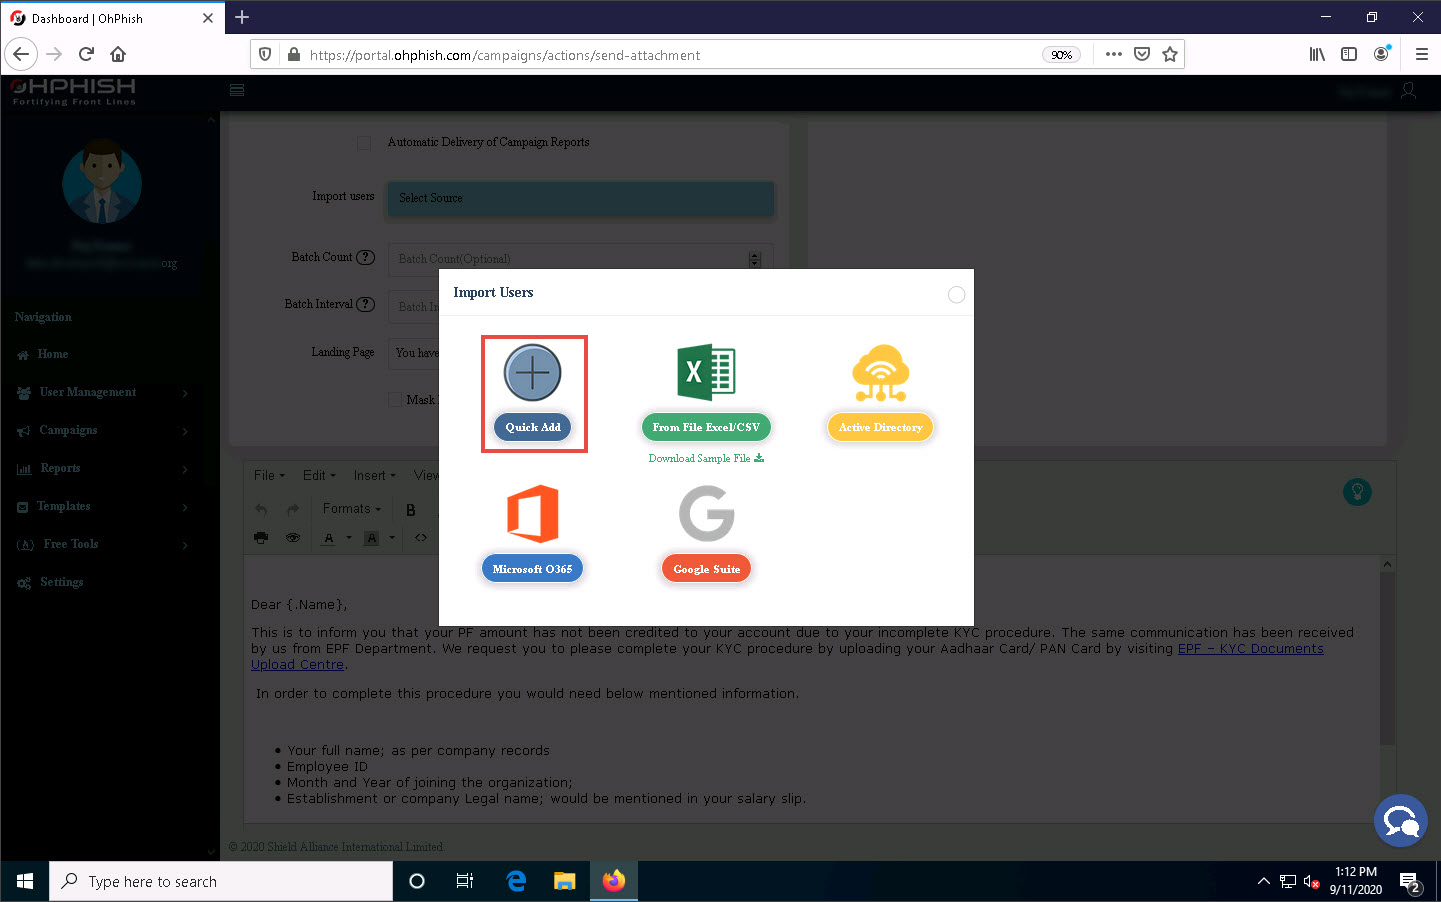
Import Users pop-up appears, click to select the Quick Add option from the list of options.
The Import Users Info pop-up appears; enter the details of the employee and click Add.
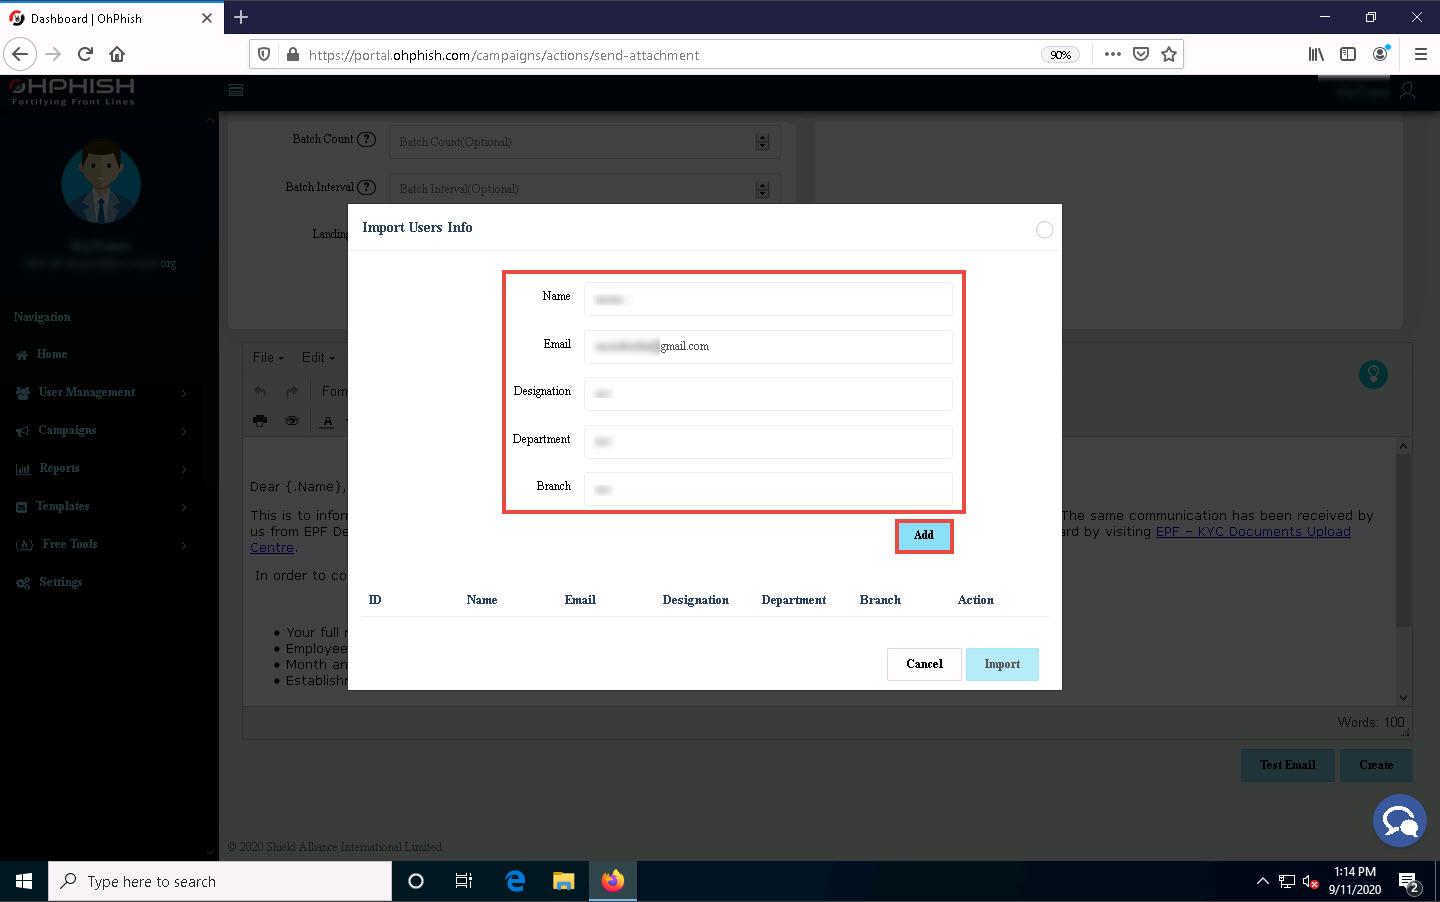
Similarly, you can add the details of multiple users. Here, we added two users.
After adding the users’ details, click Import.
In the Batch Count and Batch Interval fields, set the values to 1.
The values of Batch Count and Batch Interval might differ depending on the number of users you are sending phishing emails to.
Leave the Landing Page field set to its default value.
Scroll down to the end of the page and click Create to create the phishing campaign.
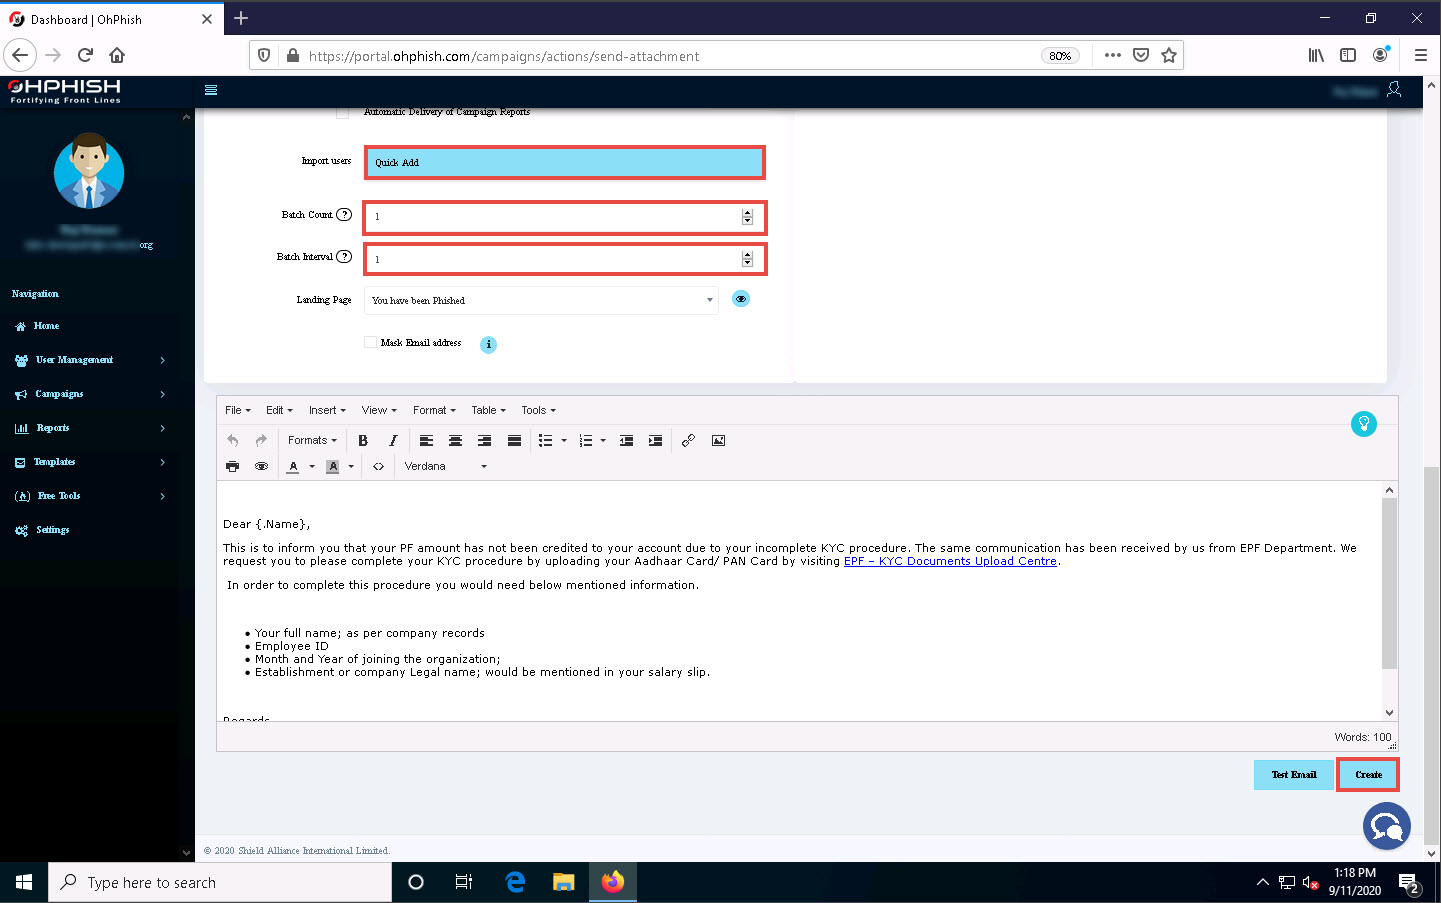
Add to your Whitelist pop-up appears, click Done.
You must ensure that messages received from specific IP addresses do not get marked as spam. Do this by adding the addresses to an email whitelist in your Google Admin console. To do that, you can refer the whitelisting guide available for Microsoft O365 and G-Suite user accounts.
The Confirm? pop-up appears; click SURE.
A count down timer appears and phishing campaign initiates in ten seconds.
The Alert! pop-up appears, indicating successful initiation of a phishing campaign; click OK.
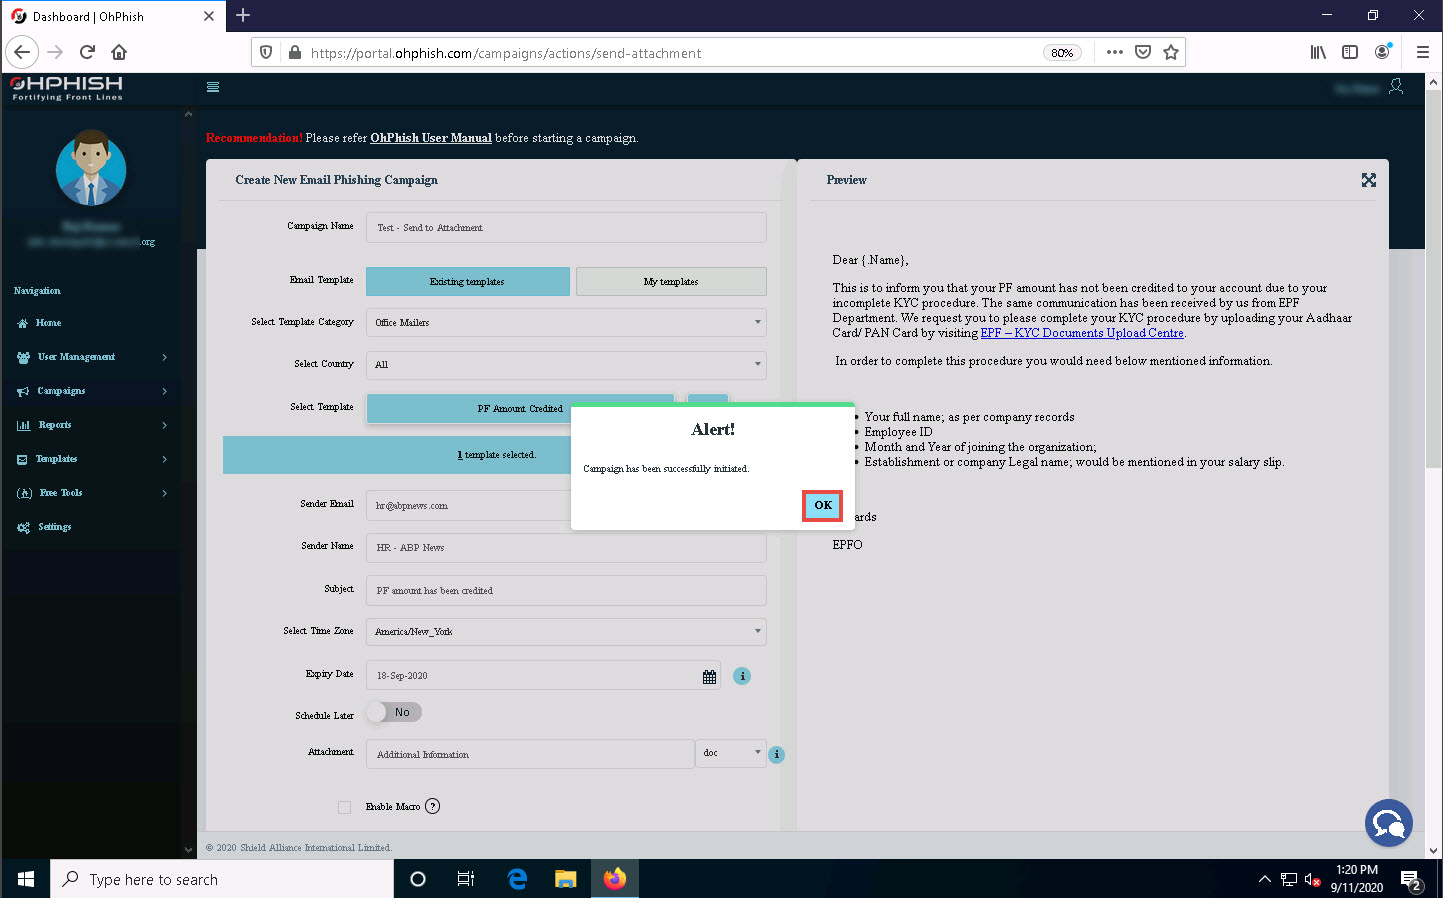
Now, click Windows Server 2019 to switch to the Windows Server 2019 machine.
In the Gmail account opened previously, navigate to the Inbox folder.
You will find an email from HR – ABP News, as shown in the screenshot.
Click on the EPF – KYC Documents Upload Centre hyperlink present in the email.
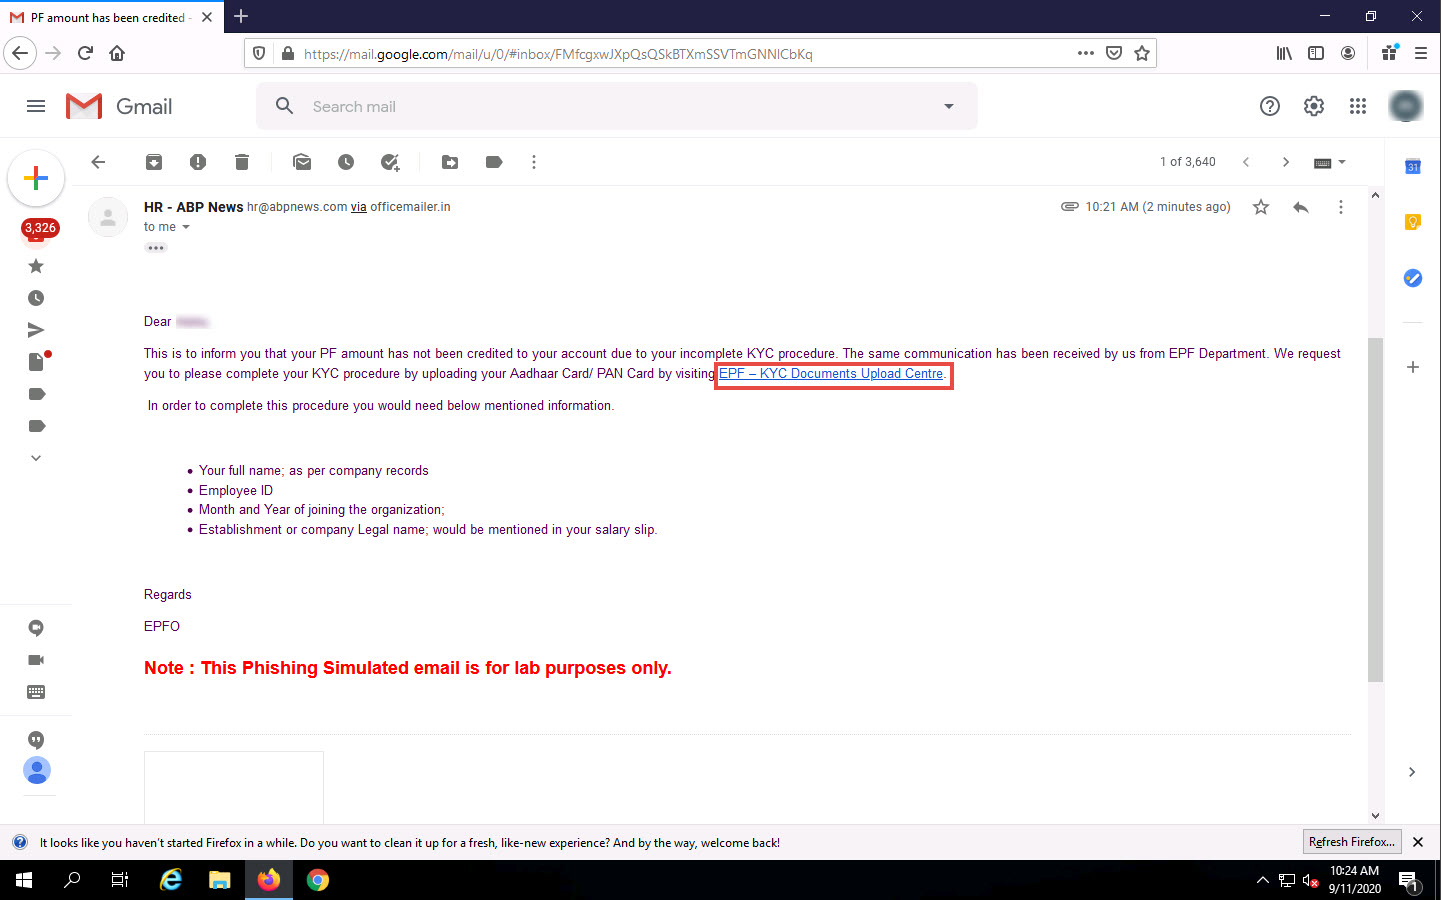
If a Suspicious link pop-up appears, click Proceed.
You will be re-directed to the Oh You’ve been Phished landing page, as shown in the screenshot.
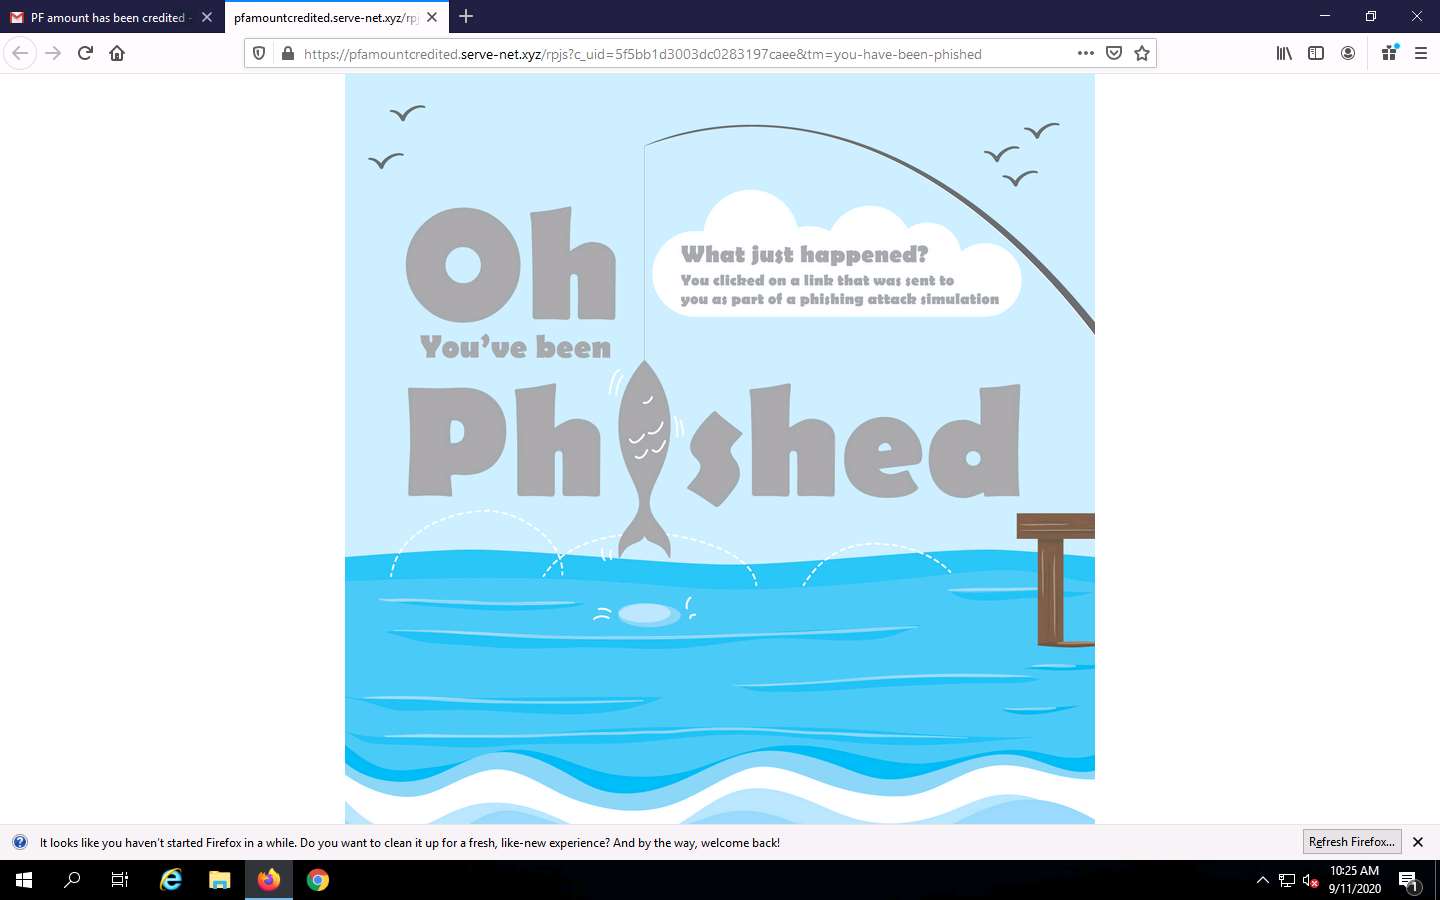
Now, click Windows 10 to switch back to the Windows 10 machine.
Click on the Test – Send to Attachment campaign present on the OhPhish Dashboard.
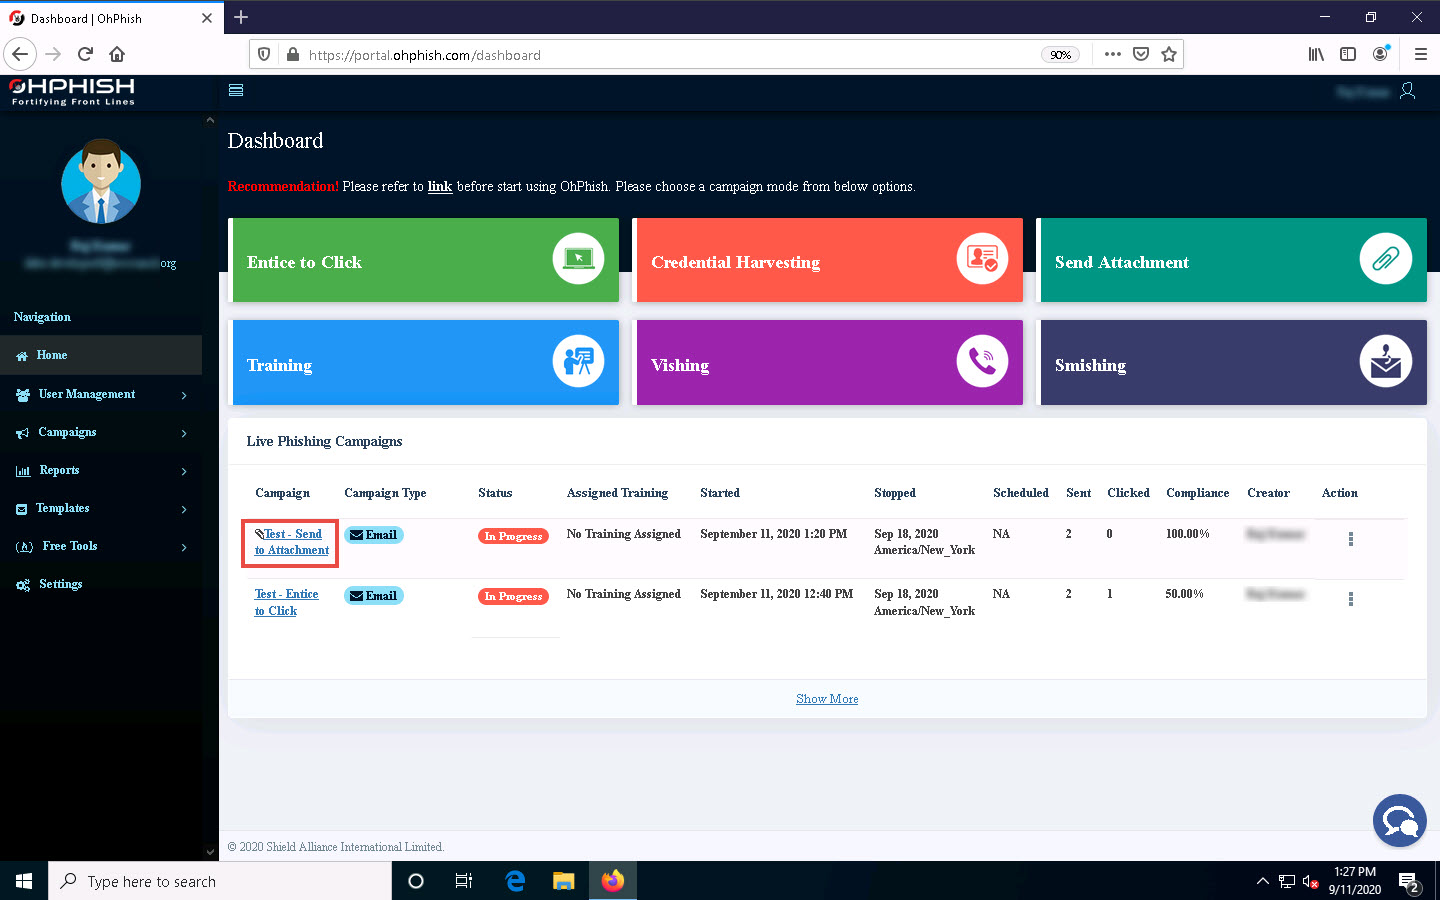
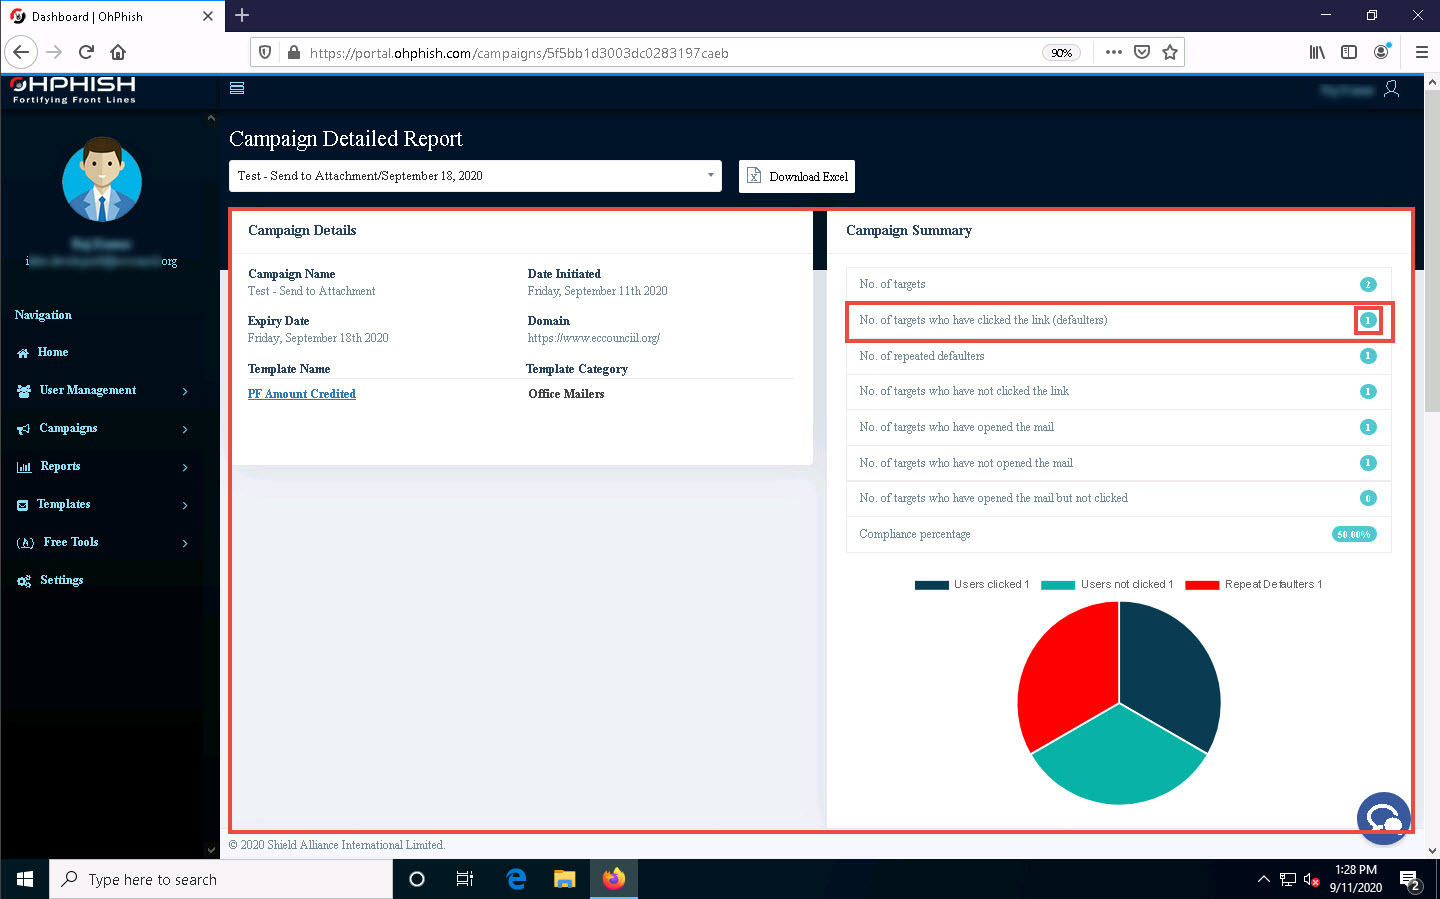
The Campaign Detailed Report page appears, displaying the Campaign Details and Campaign Summary sections.
In the Campaign Summary section, you can observe that the value of No. of targets who have clicked the link (defaulters) is 1. Click on 1 icon to see the defaulter.
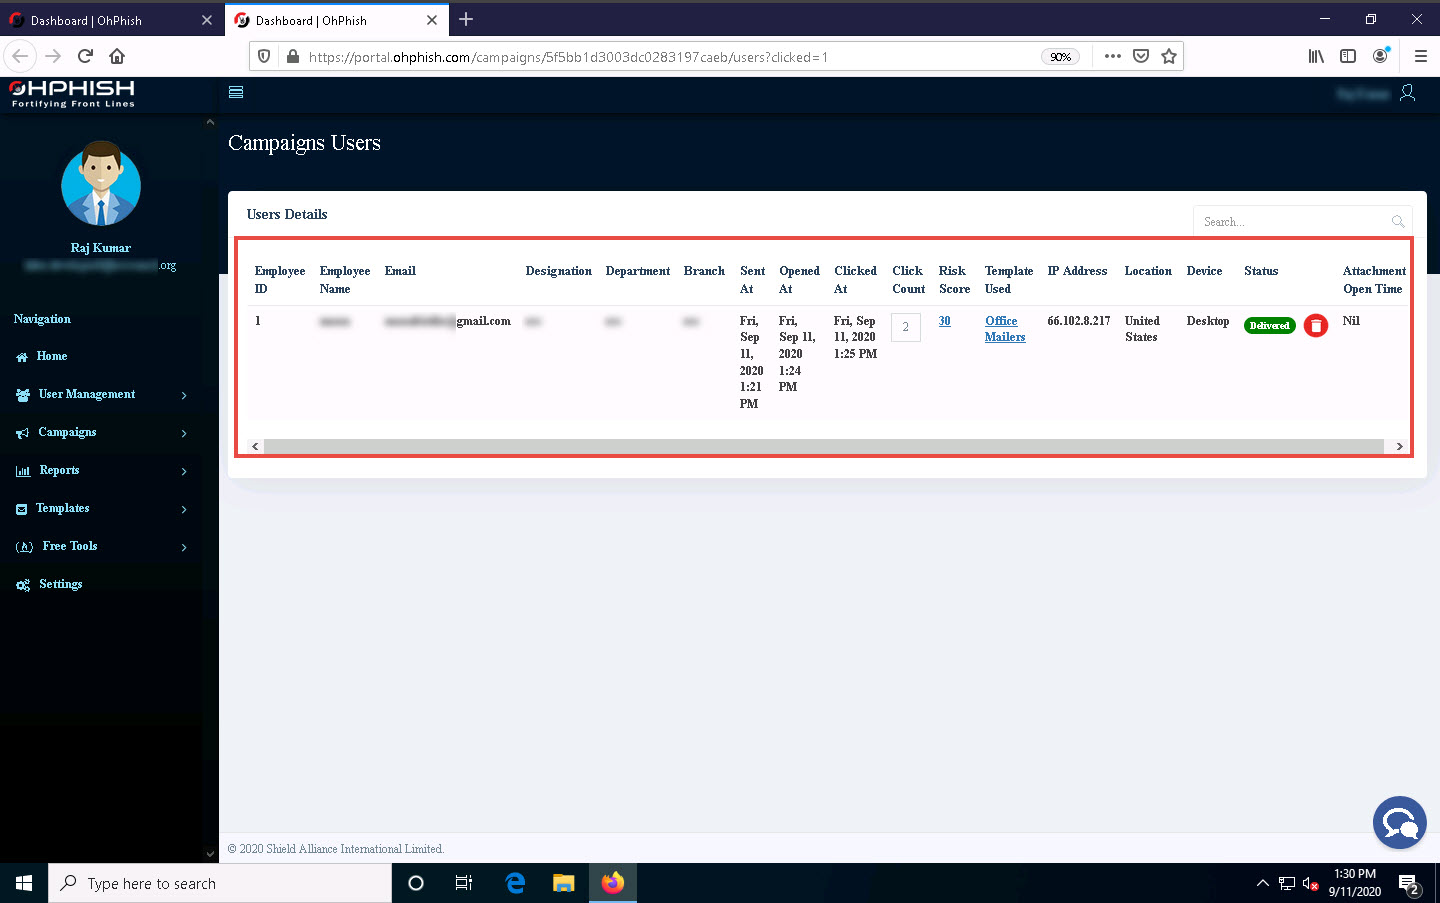
The Campaigns Users page appears, displaying the details of the defaulter, such as Risk Score, Credentials, IP Address, Location, etc., as shown in the screenshot.
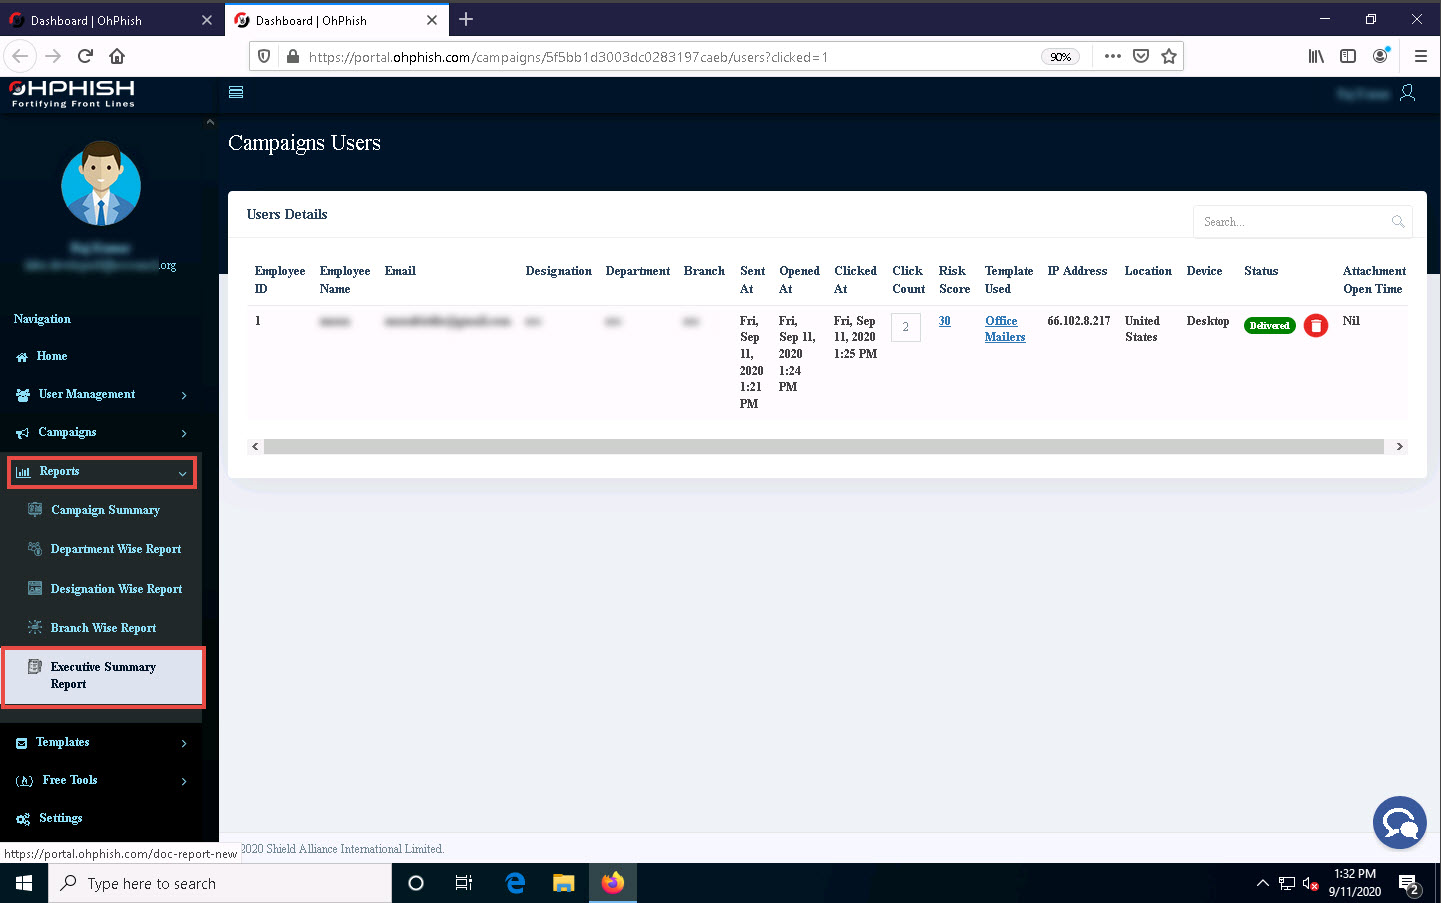
Now, click to expand the Reports section in the left pane and select the Executive Summary Report option.
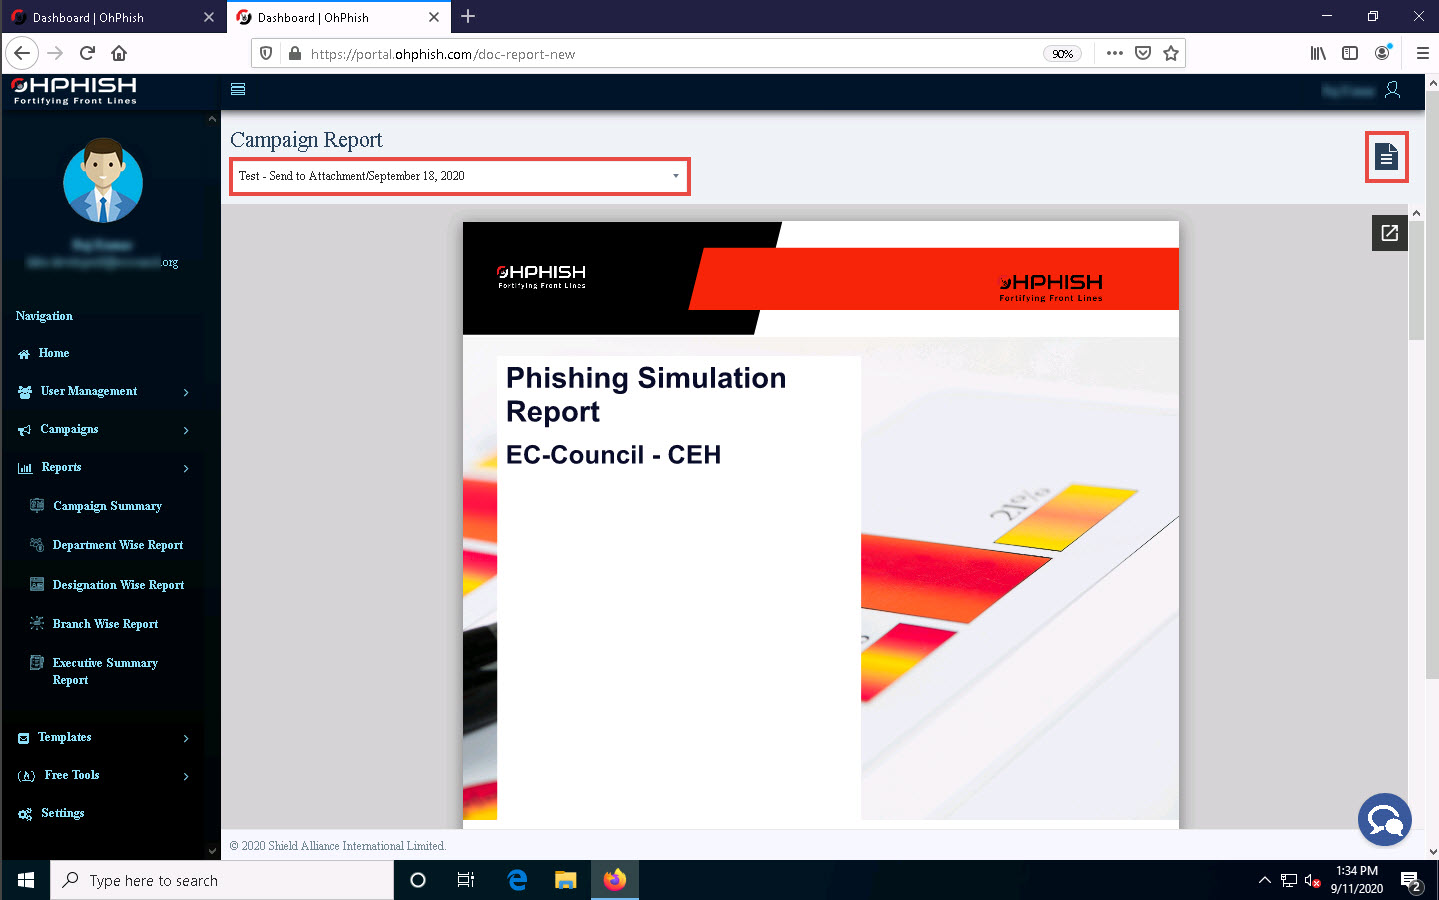
The Campaign Report page appears; select any phishing campaign from the drop-down list (here, Test – Send to Attachment) and click on the Export icon to export the report.
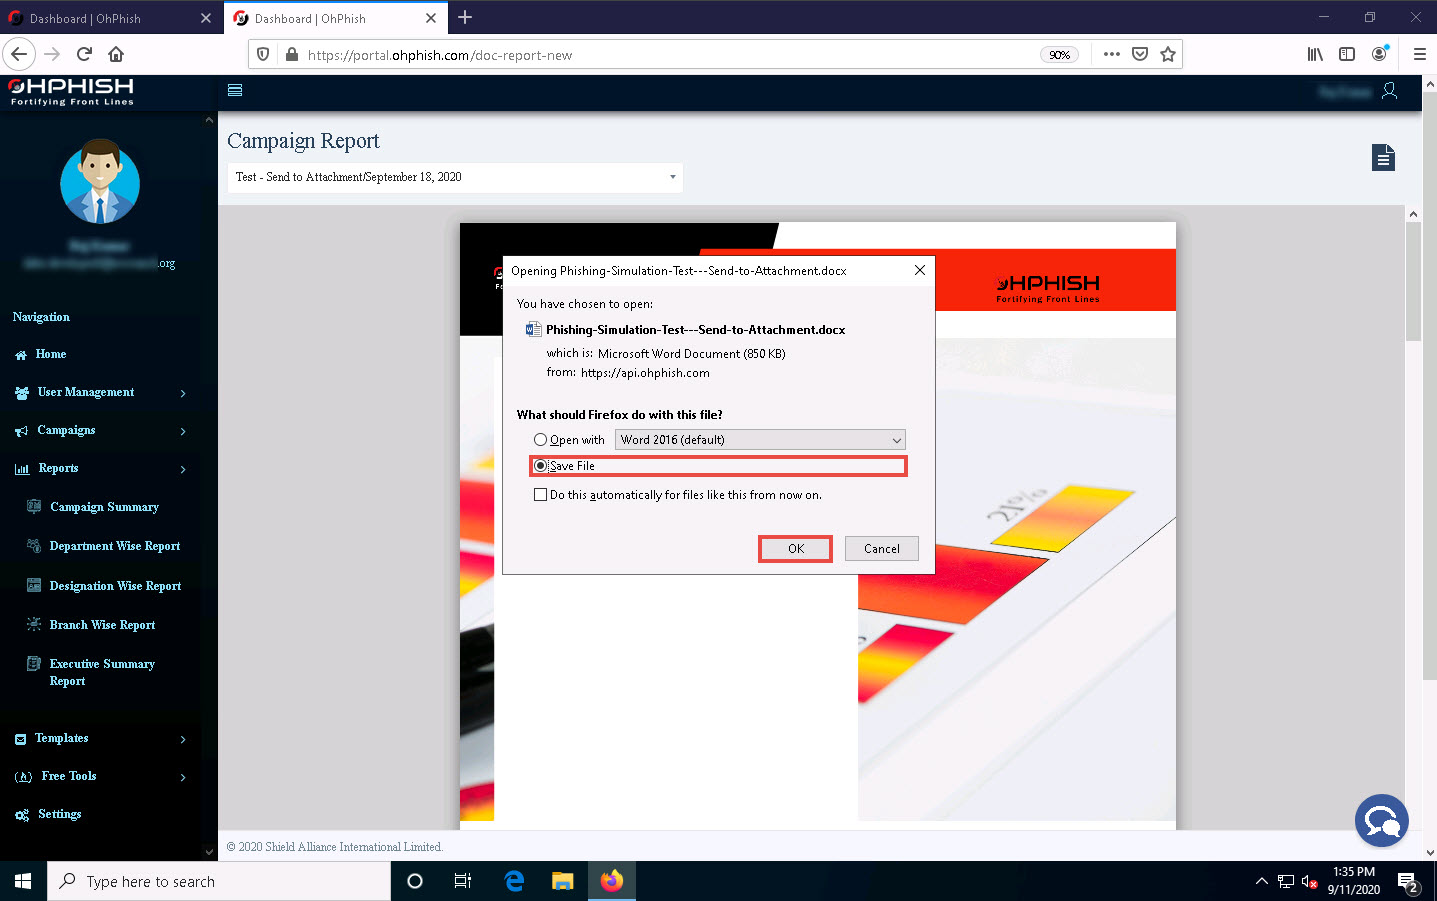
The Opening Phishing-Simulation-Test window appears; select the Save File radio button and click OK.
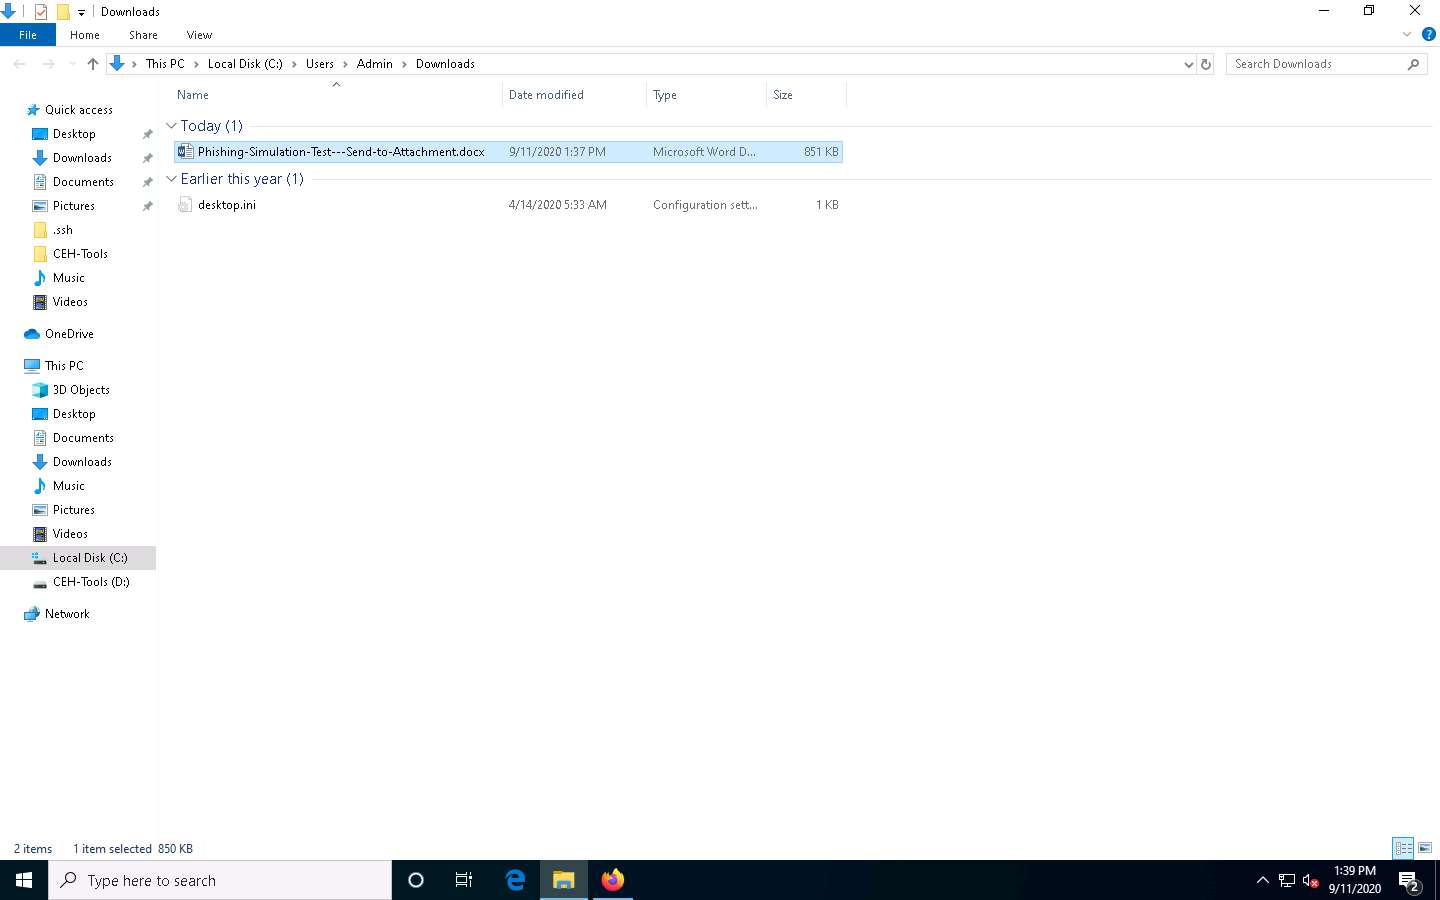
The file is downloaded to the default location (here, Downloads). Navigate to the download location and double-click the Phishing-Simulation-Test---Send-Attachment file to open it.
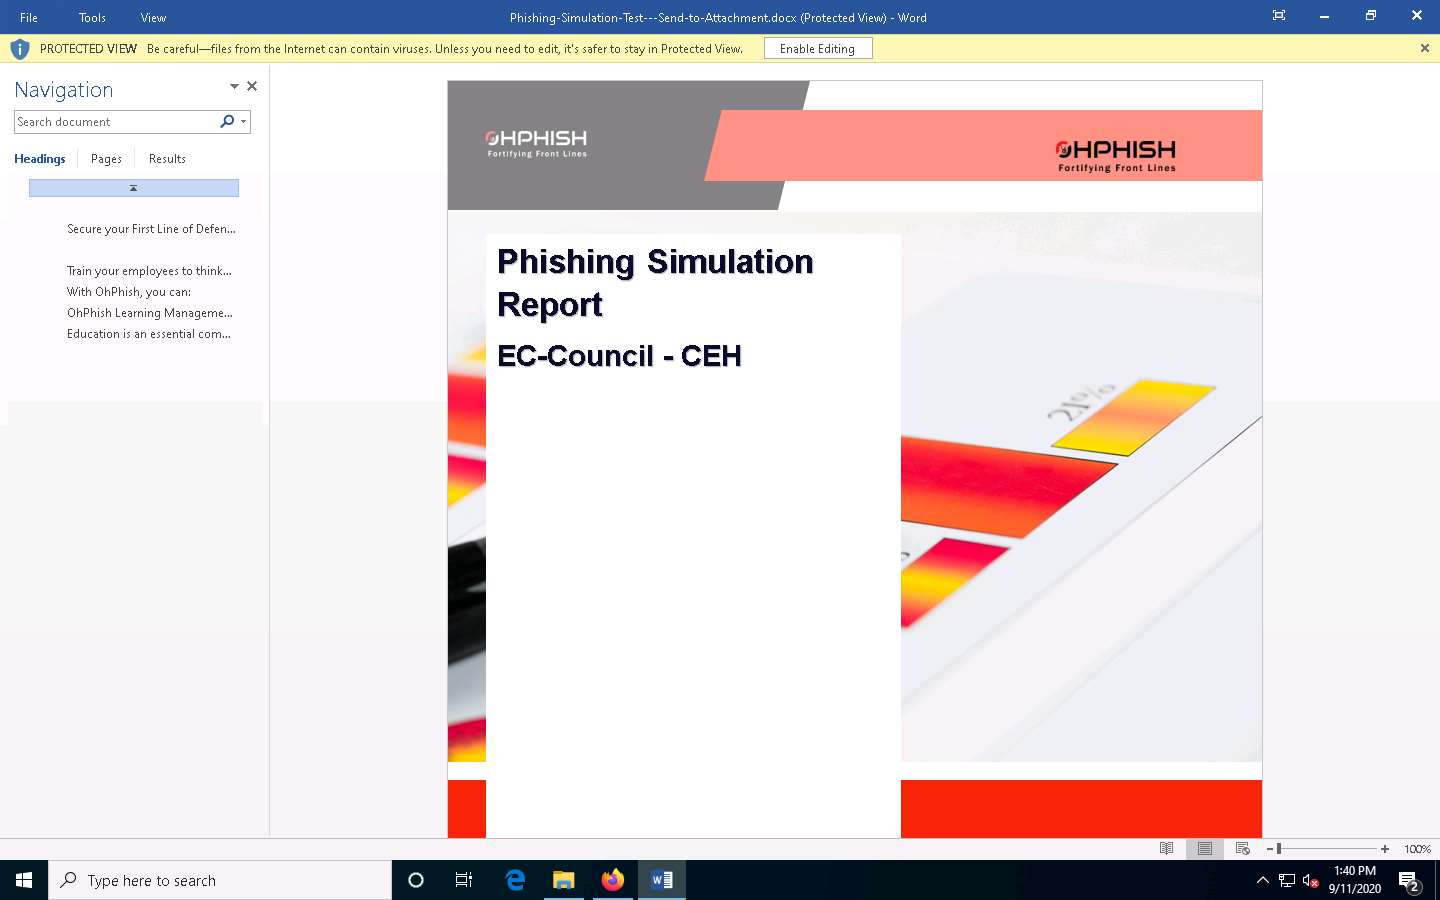
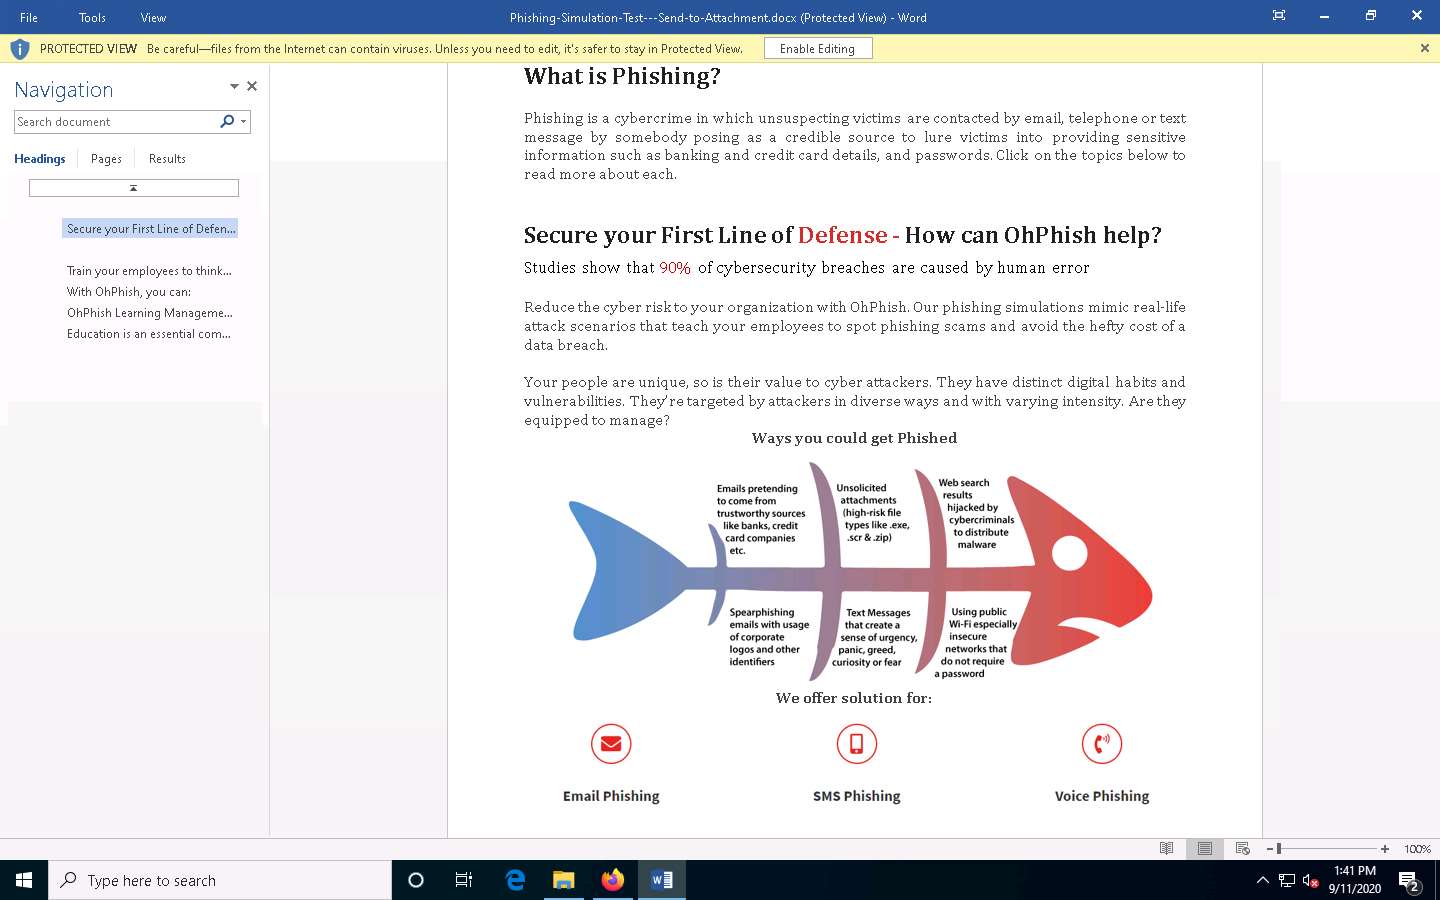
The executive phishing report appears in the document, as shown in the screenshot.
If Microsoft Word pop-up appears, click OK. In the second Microsoft Word pop-up, click Yes.
You can also explore other report options such as Department Wise Report, Designation Wise Report, and Branch Wise Report.
If you have an upgraded OhPhish account you can also explore other phishing methods such as Credential Harvesting, Training, Vishing and Smishing.
This concludes the demonstration of auditing an organization's security for phishing attacks using OhPhish.
Close all the open windows and document all the acquired information.
Comments
Post a Comment